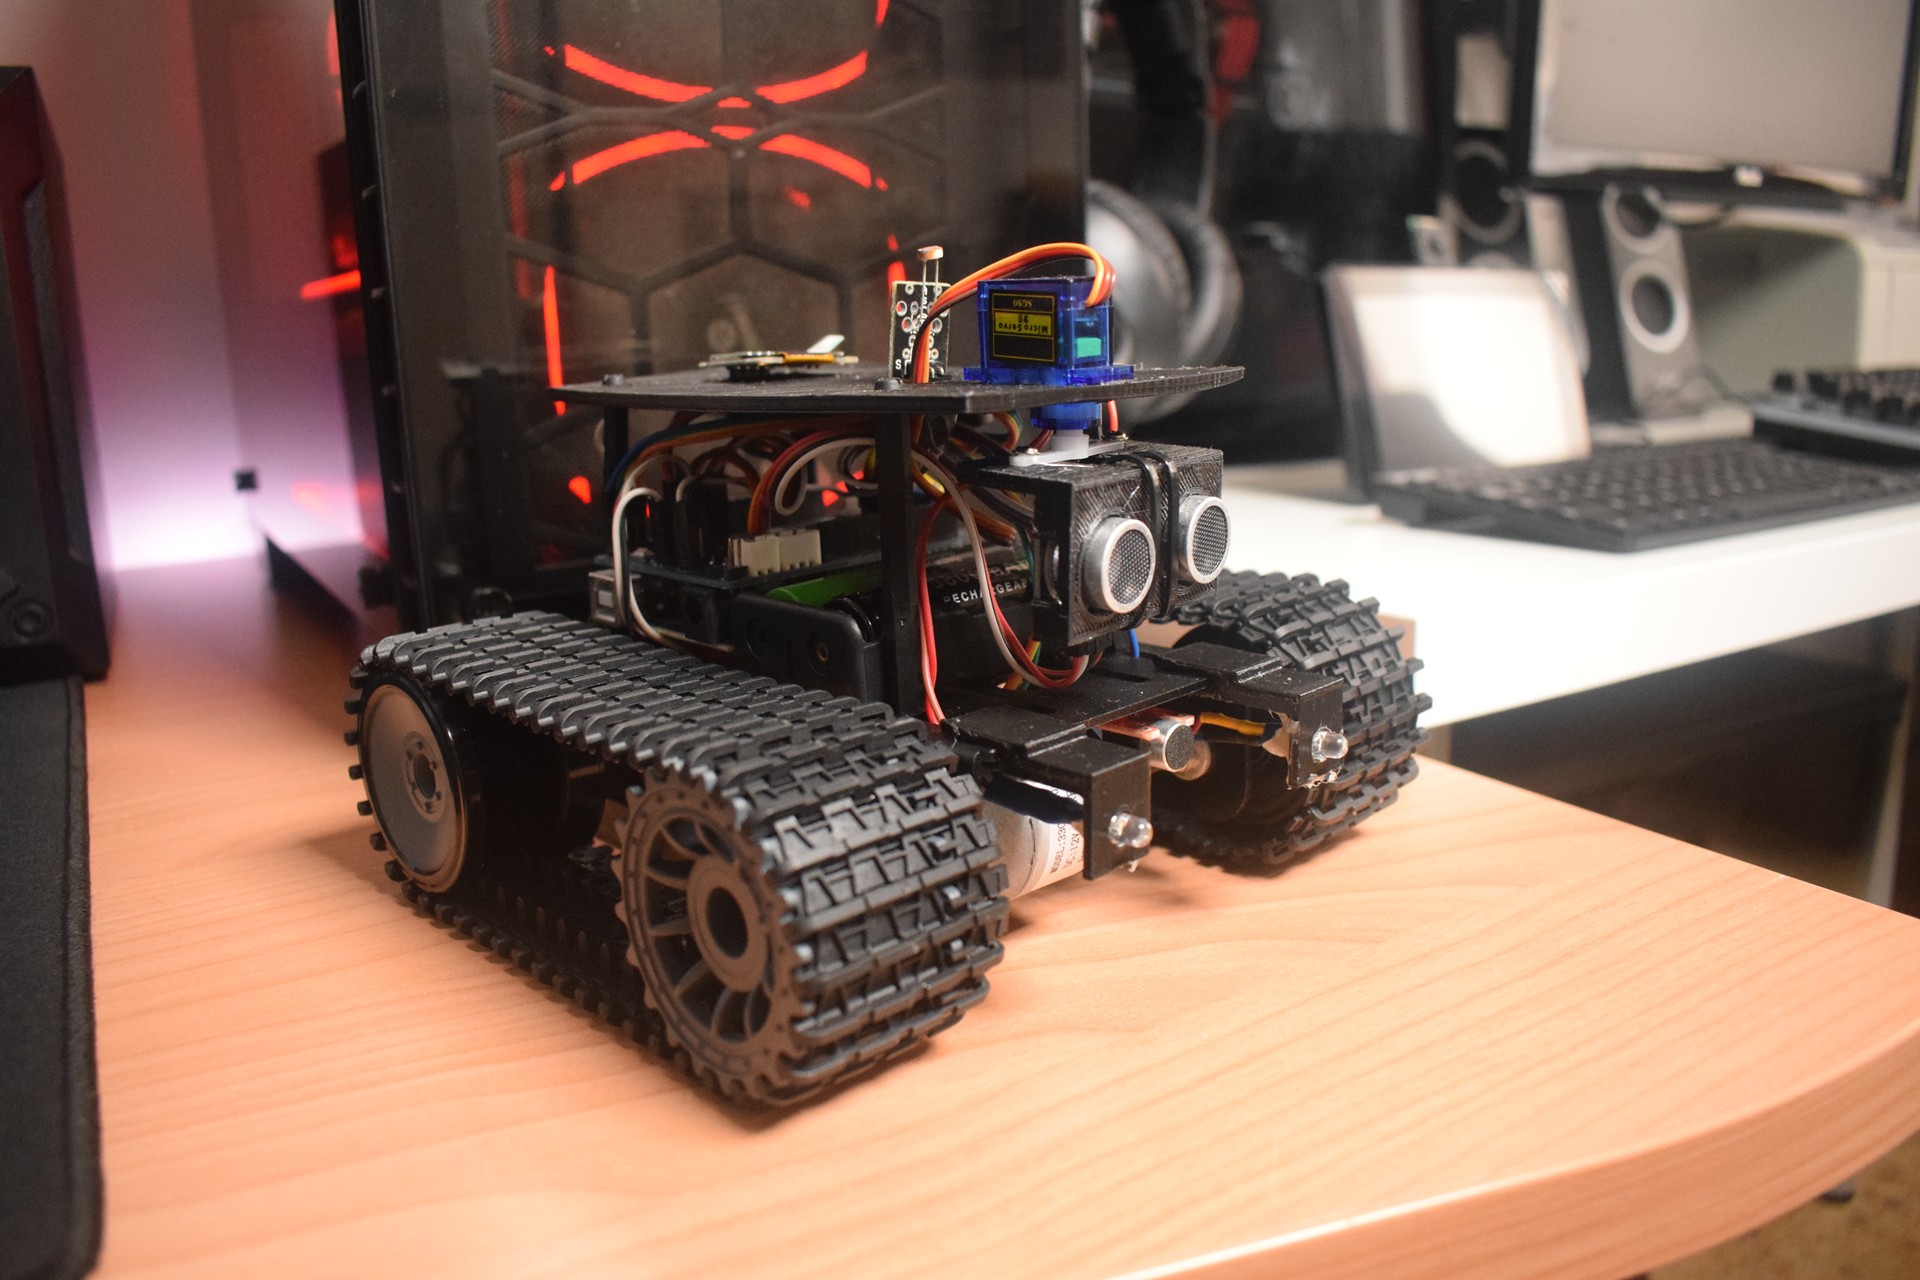
Concept:
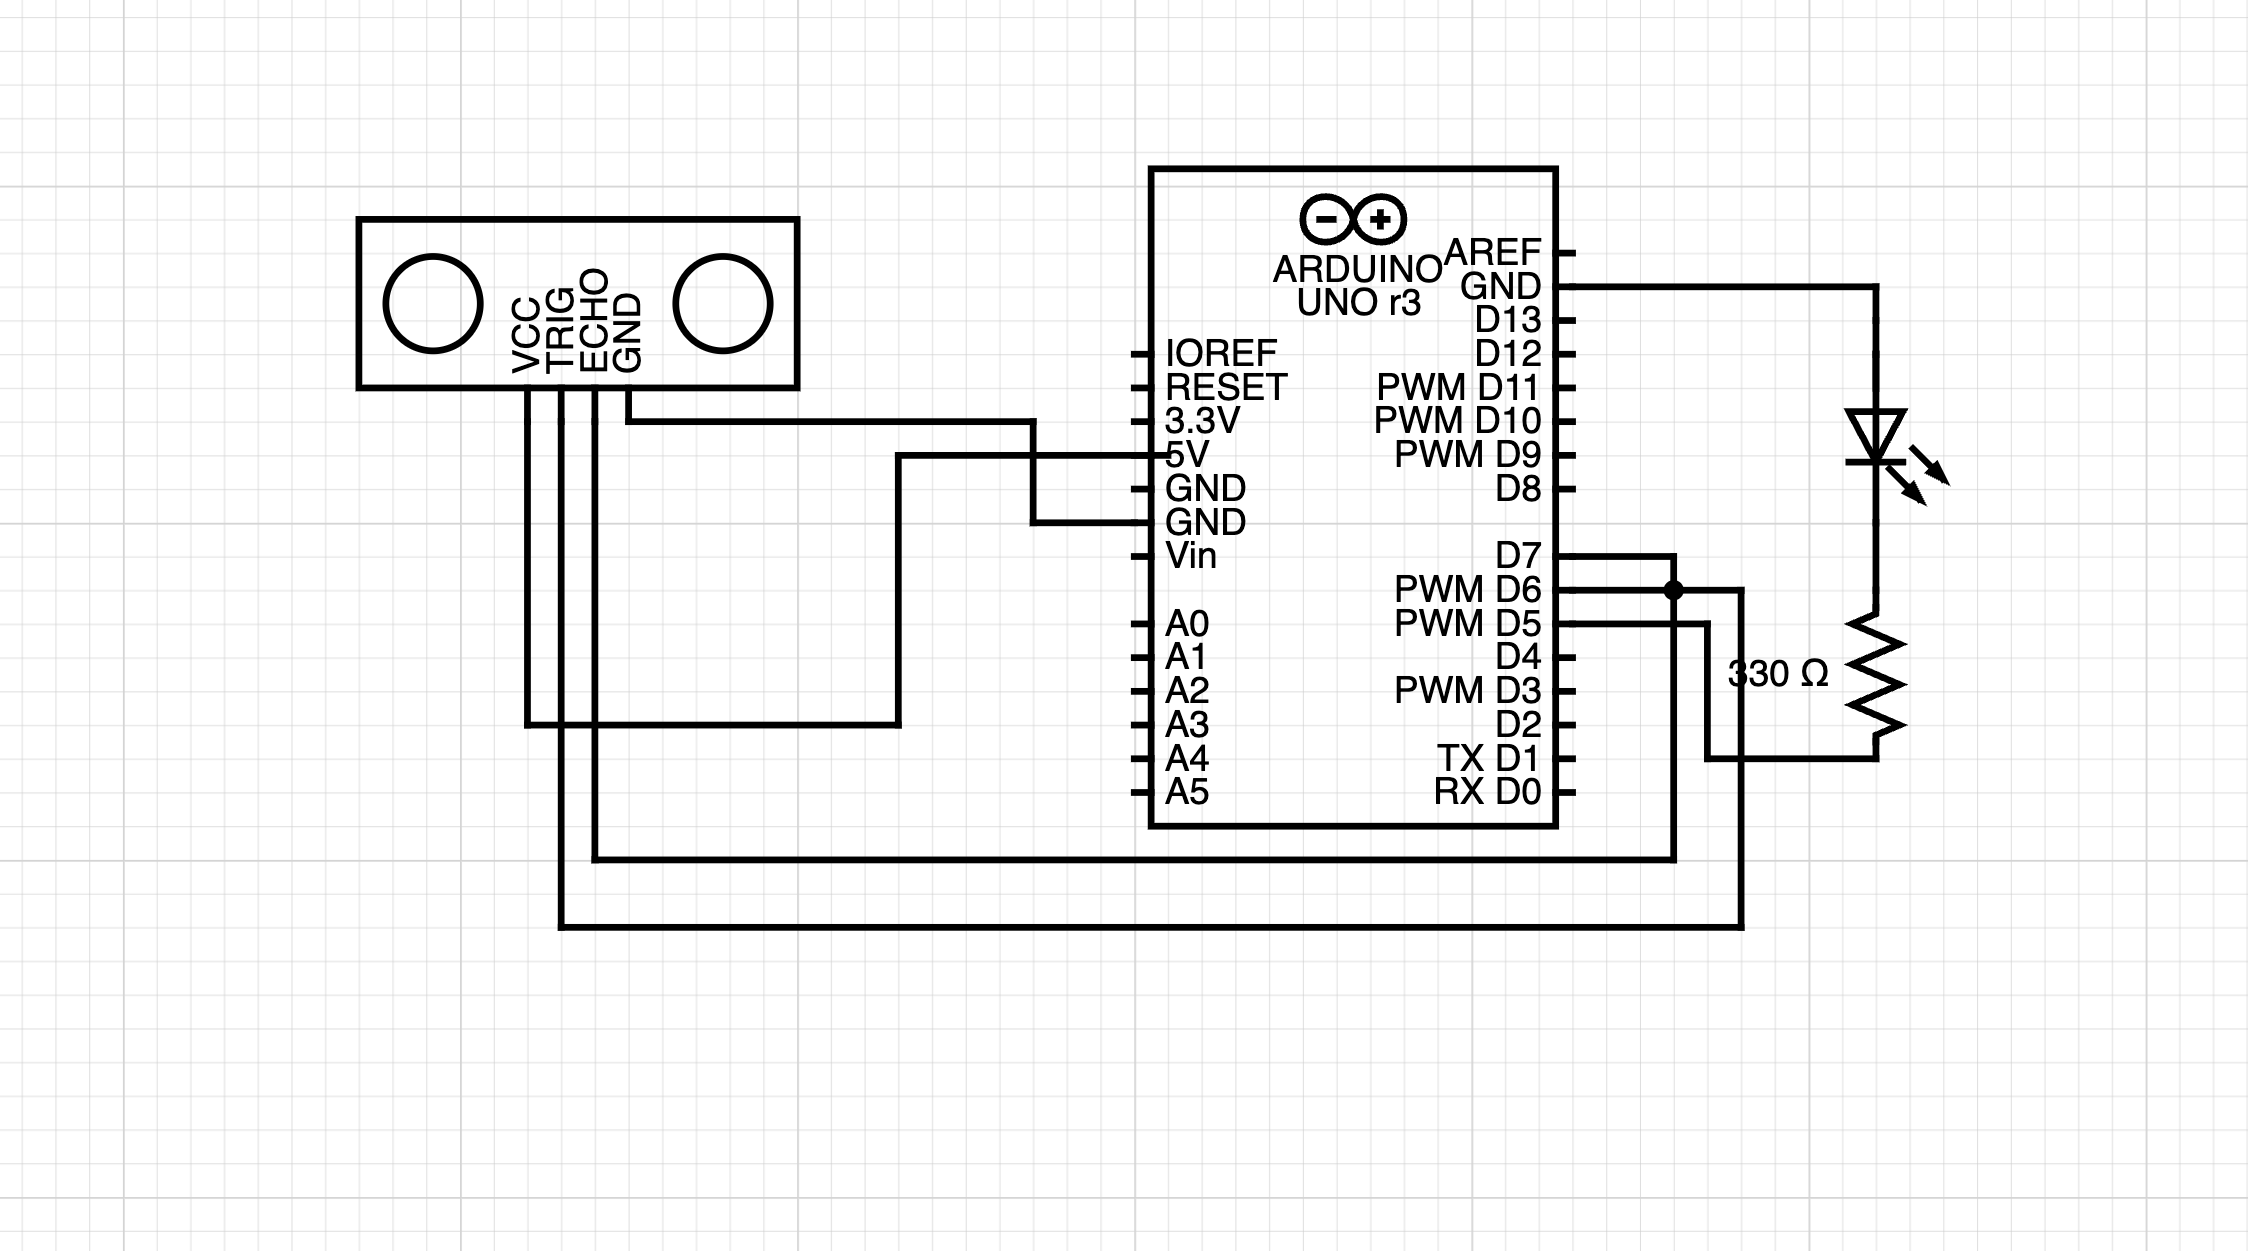
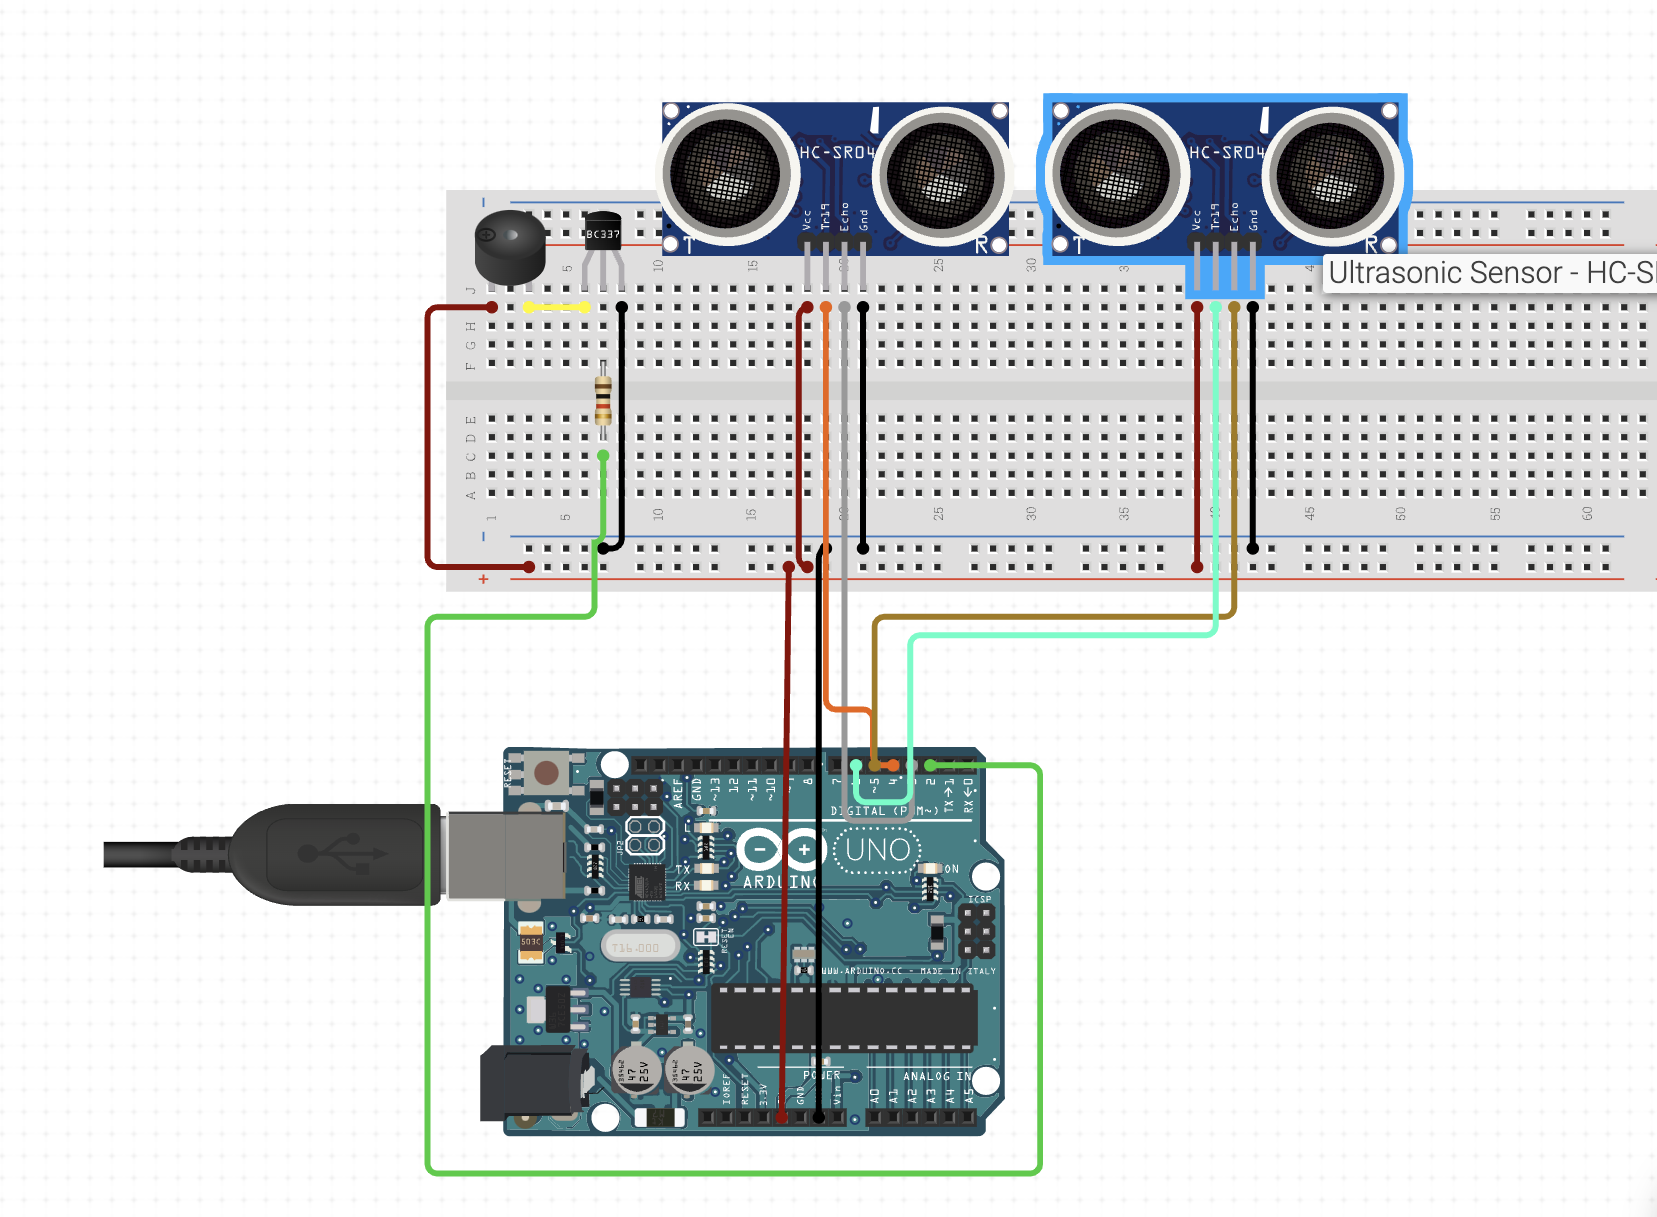
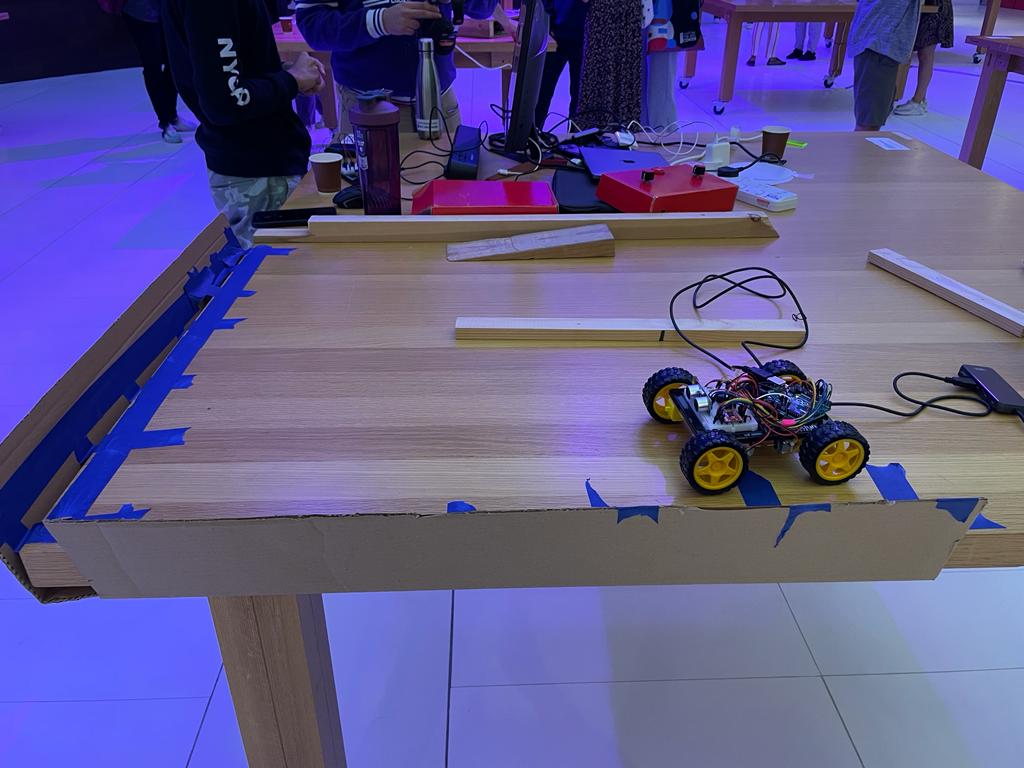
The concept was to use AI to control an arduino robot. Using the machine learning module handsfree.js, I mapped different hand gestures and finger positions to control an arduino robot I created. The arduino robot had 4 DC motors for movement, 1 ultrasonic sensor to measure the distance of nearest obstacles, 1 buzzer and two LED lights.
Interaction Design:
A video webcam feed in p5js maps your fingers and palms, calculates the positions of the two hands and sends the data to arduino. Based on the palm positions, arduino decides whether to move forward, backward, left or right. Arduino calculates the distance between the robot and the nearest obstacle ahead of it and sends the data to p5js, which then displays the distance to you.
Also, by pinching your index fingers in p5js, you’re able to increase and decrease the speed of the DC motors. Anytime your start the webcam in p5js, this sends data to arduino and it plays a sound using the buzzer to signal readiness to receive the data.
Arduino Code:
The arduino code uses two libraries: “NewPing.h” and “TimerFreeTone.h”. The NewPing library makesre using the ultrasonic sensor easy and convenient. The TimerFreeTone also simplifies the use of the tone function and makes working with the buzzer seamless.
The additional header file labeled “pitches.h” contains sounds that are played when arduino is ready to receive data from p5js.
#include "pitches.h"
#include <NewPing.h>
#include <TimerFreeTone.h>

//left_wheels
const int left_ain1Pin = 3;
const int left_ain2Pin = 4;
const int left_pwmAPin = 5;

//left wheels speed
int leftspeedA=200;


//right wheels
const int right_bin1Pin = 8;
const int right_bin2Pin = 7;
const int right_pwmBPin = 6;

//right wheels speed
int rightspeedB=200;


//ditance sensor
const int trig = 9;
const int echo = 10;
const int max = 100;
//distance
NewPing dist(trig, echo, max);
int direct;


//leds
int greenlight = 2;
int redlight = 12;


//state machine for timer
unsigned long previousMillis;
long interval = 1000;

//foward motion function
void forward(){
  analogWrite(left_pwmAPin, leftspeedA);
  analogWrite(right_pwmBPin, rightspeedB);

  digitalWrite(left_ain1Pin, LOW);
  digitalWrite(left_ain2Pin, HIGH);

  digitalWrite(right_bin1Pin, HIGH);
  digitalWrite(right_bin2Pin, LOW);
}

//backward motion function
void backward(){
  analogWrite(left_pwmAPin, leftspeedA);
  analogWrite(right_pwmBPin, rightspeedB);

  digitalWrite(left_ain1Pin, HIGH);
  digitalWrite(left_ain2Pin, LOW);

  digitalWrite(right_bin1Pin, LOW);
  digitalWrite(right_bin2Pin, HIGH);
}

//left motion function
void left(){
  analogWrite(left_pwmAPin, leftspeedA);
  analogWrite(right_pwmBPin, rightspeedB+50);

  digitalWrite(left_ain1Pin, LOW);
  digitalWrite(left_ain2Pin, LOW);

  digitalWrite(right_bin1Pin, HIGH);
  digitalWrite(right_bin2Pin, LOW);
}

//right motion function
void right(){
  analogWrite(left_pwmAPin, leftspeedA+50);
  analogWrite(right_pwmBPin, rightspeedB);

  digitalWrite(left_ain1Pin, LOW);
  digitalWrite(left_ain2Pin, HIGH);

  digitalWrite(right_bin1Pin, LOW);
  digitalWrite(right_bin2Pin, LOW);
}

//stop all movements
void stop(){
  analogWrite(left_pwmAPin, leftspeedA);
  analogWrite(right_pwmBPin, rightspeedB);

  digitalWrite(left_ain1Pin, LOW);
  digitalWrite(left_ain2Pin, LOW);

  digitalWrite(right_bin1Pin, LOW);
  digitalWrite(right_bin2Pin, LOW);
}

//playing christmas themed songs as the car moves
void play(){
  int tempo = 180;
  int notes = sizeof(melody) / sizeof(melody[0]) / 2;

  // this calculates the duration of a whole note in ms
  int wholenote = (60000 * 4) / tempo;

  int divider = 0, noteDuration = 0;
  // iterate over the notes of the melody.
  // Remember, the array is twice the number of notes (notes + durations)
  for (int thisNote = 0; thisNote < notes * 2; thisNote = thisNote + 2) {
    // calculates the duration of each note
    divider = melody[thisNote + 1];
    if (divider > 0) {
      // regular note, just proceed
      noteDuration = (wholenote) / divider;
    } else if (divider < 0) {
      // dotted notes are represented with negative durations!!
      noteDuration = (wholenote) / abs(divider);
      noteDuration *= 1.5; // increases the duration in half for dotted notes
    }
      // we only play the note for 90% of the duration, leaving 10% as a pause
    TimerFreeTone(11, melody[thisNote], noteDuration * 0.9, 10);
  }
}

void setup() {
  Serial.begin(9600);

  pinMode(left_ain1Pin, OUTPUT);
  pinMode(left_ain2Pin, OUTPUT);
  pinMode(left_pwmAPin, OUTPUT); // not needed really

  pinMode(right_bin1Pin, OUTPUT);
  pinMode(right_bin2Pin, OUTPUT);
  pinMode(right_pwmBPin, OUTPUT);

  //leds
  pinMode(greenlight, OUTPUT);
  pinMode(redlight, OUTPUT);

  play();
}


void loop() {
  direct = dist.ping_cm();
  if(direct == 0){
    direct = 100;
  }

  Serial.println(direct);

  //reading values for p5js
  //toggles between 1 and 0 to specify which movement
  int fo = Serial.parseInt(); //controls forward movement
  int ba = Serial.parseInt(); //controls back movement
  int le = Serial.parseInt(); //controls left movement
  int ri = Serial.parseInt(); //controls right movement
  int sp = Serial.parseInt(); //controls speed

  //read the speed from p5js and assign it to the speed of the wheels
  leftspeedA = sp;
  rightspeedB = sp;

  //checking to see which direction to move as per the command from p5js

  if(fo != 0 || ba != 0 || le != 0 || ri != 0){
    //set a time stamp here
    unsigned long currentMillis = millis();

    //calculate interval between and current stamp and previous stamp
    //compare to the set duration (interval)
    long itr = currentMillis - previousMillis;
    if(fo == 1 && itr > interval){
      previousMillis = currentMillis;

      //turn green light on when moving forward
      digitalWrite(greenlight, HIGH);
      forward();
    }
    else if (ba == 1 && itr > interval){
      previousMillis = currentMillis;
      digitalWrite(redlight, HIGH);
      backward();
    }
    else if (le == 1 && itr > interval){
      previousMillis = currentMillis;
      //turn green light on when moving left
      digitalWrite(greenlight, HIGH);
      left();
    }
    else if (ri == 1 && itr > interval){
      previousMillis = currentMillis;
      //turn green light on when moving right
      digitalWrite(greenlight, HIGH);
      right();
    }
  }else{
      stop();
      digitalWrite(greenlight, LOW);
      digitalWrite(redlight, LOW);
  }
}
The pitches header file:
#define NOTE_B0 31
#define NOTE_C1 33
#define NOTE_CS1 35
#define NOTE_D1 37
#define NOTE_DS1 39
#define NOTE_E1 41
#define NOTE_F1 44
#define NOTE_FS1 46
#define NOTE_G1 49
#define NOTE_GS1 52
#define NOTE_A1 55
#define NOTE_AS1 58
#define NOTE_B1 62
#define NOTE_C2 65
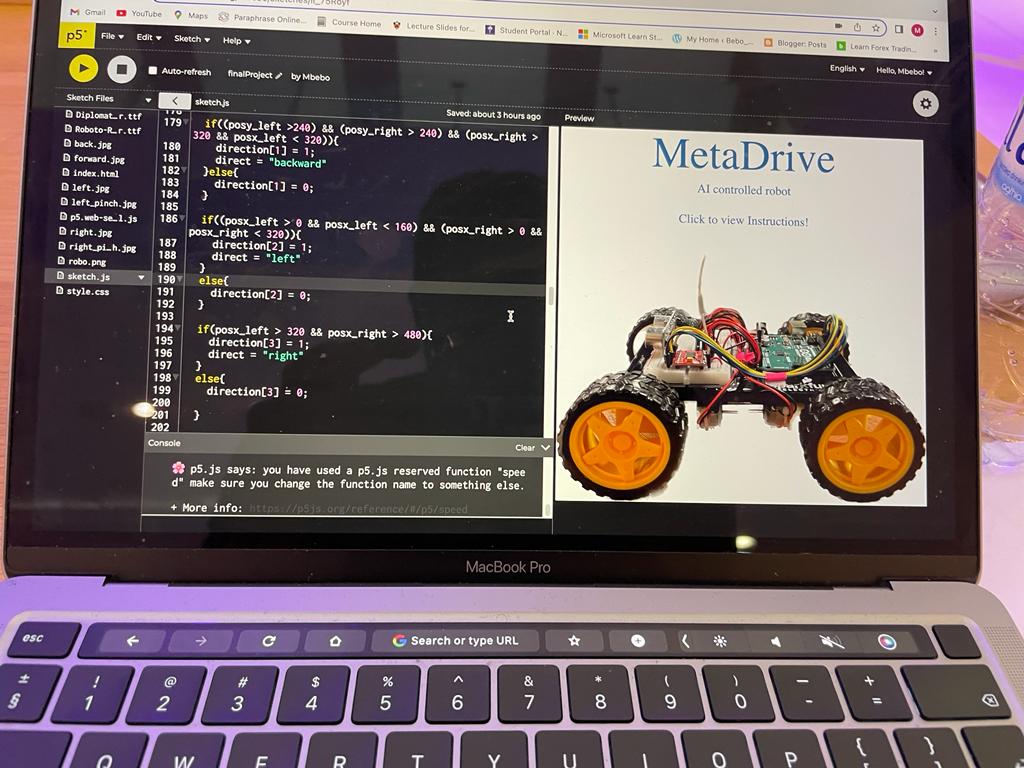
#define NOTE_CS2 69
#define NOTE_D2 73
#define NOTE_DS2 78
#define NOTE_E2 82
#define NOTE_F2 87
#define NOTE_FS2 93
#define NOTE_G2 98
#define NOTE_GS2 104
#define NOTE_A2 110
#define NOTE_AS2 117
#define NOTE_B2 123
#define NOTE_C3 131
#define NOTE_CS3 139
#define NOTE_D3 147
#define NOTE_DS3 156
#define NOTE_E3 165
#define NOTE_F3 175
#define NOTE_FS3 185
#define NOTE_G3 196
#define NOTE_GS3 208
#define NOTE_A3 220
#define NOTE_AS3 233
#define NOTE_B3 247
#define NOTE_C4 262
#define NOTE_CS4 277
#define NOTE_D4 294
#define NOTE_DS4 311
#define NOTE_E4 330
#define NOTE_F4 349
#define NOTE_FS4 370
#define NOTE_G4 392
#define NOTE_GS4 415
#define NOTE_A4 440
#define NOTE_AS4 466
#define NOTE_B4 494
#define NOTE_C5 523
#define NOTE_CS5 554
#define NOTE_D5 587
#define NOTE_DS5 622
#define NOTE_E5 659
#define NOTE_F5 698
#define NOTE_FS5 740
#define NOTE_G5 784
#define NOTE_GS5 831
#define NOTE_A5 880
#define NOTE_AS5 932
#define NOTE_B5 988
#define NOTE_C6 1047
#define NOTE_CS6 1109
#define NOTE_D6 1175
#define NOTE_DS6 1245
#define NOTE_E6 1319
#define NOTE_F6 1397
#define NOTE_FS6 1480
#define NOTE_G6 1568
#define NOTE_GS6 1661
#define NOTE_A6 1760
#define NOTE_AS6 1865
#define NOTE_B6 1976
#define NOTE_C7 2093
#define NOTE_CS7 2217
#define NOTE_D7 2349
#define NOTE_DS7 2489
#define NOTE_E7 2637
#define NOTE_F7 2794
#define NOTE_FS7 2960
#define NOTE_G7 3136
#define NOTE_GS7 3322
#define NOTE_A7 3520
#define NOTE_AS7 3729
#define NOTE_B7 3951
#define NOTE_C8 4186
#define NOTE_CS8 4435
#define NOTE_D8 4699
#define NOTE_DS8 4978
#define REST 0
int melody[] = {
// We Wish You a Merry Christmas
// Score available at https://musescore.com/user/6208766/scores/1497501
/*NOTE_C5,4, //1
NOTE_F5,4, NOTE_F5,8, NOTE_G5,8, NOTE_F5,8, NOTE_E5,8,
NOTE_D5,4, NOTE_D5,4, NOTE_D5,4,
NOTE_G5,4, NOTE_G5,8, NOTE_A5,8, NOTE_G5,8, NOTE_F5,8,
NOTE_E5,4, NOTE_C5,4, NOTE_C5,4,
NOTE_A5,4, NOTE_A5,8, NOTE_AS5,8, NOTE_A5,8, NOTE_G5,8,
NOTE_F5,4, NOTE_D5,4, NOTE_C5,8, NOTE_C5,8,
NOTE_D5,4, NOTE_G5,4, NOTE_E5,4,
NOTE_F5,2, NOTE_C5,4, //8
NOTE_F5,4, NOTE_F5,8, NOTE_G5,8, NOTE_F5,8, NOTE_E5,8,
NOTE_D5,4, NOTE_D5,4, NOTE_D5,4,
NOTE_G5,4, NOTE_G5,8, NOTE_A5,8, NOTE_G5,8, NOTE_F5,8,
NOTE_E5,4, NOTE_C5,4, NOTE_C5,4,
NOTE_A5,4, NOTE_A5,8, NOTE_AS5,8, NOTE_A5,8, NOTE_G5,8,
NOTE_F5,4, NOTE_D5,4, NOTE_C5,8, NOTE_C5,8,
NOTE_D5,4, NOTE_G5,4, NOTE_E5,4,
NOTE_F5,2, NOTE_C5,4,
NOTE_F5,4, NOTE_F5,4, NOTE_F5,4,//17
NOTE_E5,2, NOTE_E5,4,
NOTE_F5,4, NOTE_E5,4, NOTE_D5,4,
NOTE_C5,2, NOTE_A5,4,
NOTE_AS5,4, NOTE_A5,4, NOTE_G5,4,
NOTE_C6,4, NOTE_C5,4, NOTE_C5,8, NOTE_C5,8,
NOTE_D5,4, NOTE_G5,4, NOTE_E5,4,
NOTE_F5,2, NOTE_C5,4,
NOTE_F5,4, NOTE_F5,8, NOTE_G5,8, NOTE_F5,8, NOTE_E5,8,
NOTE_D5,4, NOTE_D5,4, NOTE_D5,4,
NOTE_G5,4, NOTE_G5,8, NOTE_A5,8, NOTE_G5,8, NOTE_F5,8, //27
NOTE_E5,4, NOTE_C5,4, NOTE_C5,4,
NOTE_A5,4, NOTE_A5,8, NOTE_AS5,8, NOTE_A5,8, NOTE_G5,8,
NOTE_F5,4, NOTE_D5,4, NOTE_C5,8, NOTE_C5,8,
NOTE_D5,4, NOTE_G5,4, NOTE_E5,4,
NOTE_F5,2, NOTE_C5,4,
NOTE_F5,4, NOTE_F5,4, NOTE_F5,4,
NOTE_E5,2, NOTE_E5,4,
NOTE_F5,4, NOTE_E5,4, NOTE_D5,4
*/
// Silent Night, Original Version
// Score available at https://musescore.com/marcsabatella/scores/3123436
/*NOTE_G4,-4, NOTE_A4,8, NOTE_G4,4,
NOTE_E4,-2,
NOTE_G4,-4, NOTE_A4,8, NOTE_G4,4,
NOTE_E4,-2,
NOTE_D5,2, NOTE_D5,4,
NOTE_B4,-2,
NOTE_C5,2, NOTE_C5,4,
NOTE_G4,-2,
NOTE_A4,2, NOTE_A4,4,
NOTE_C5,-4, NOTE_B4,8, NOTE_A4,4,
NOTE_G4,-4, NOTE_A4,8, NOTE_G4,4,
NOTE_E4,-2,
NOTE_A4,2, NOTE_A4,4,
NOTE_C5,-4, NOTE_B4,8, NOTE_A4,4,
NOTE_G4,-4, NOTE_A4,8, NOTE_G4,4,
NOTE_E4,-2,
NOTE_D5,2, NOTE_D5,4,
NOTE_F5,-4, NOTE_D5,8, NOTE_B4,4,
NOTE_C5,-2,
NOTE_E5,-2,
NOTE_C5,4, NOTE_G4,4, NOTE_E4,4,
NOTE_G4,-4, NOTE_F4,8, NOTE_D4,4,
NOTE_C4,-2,
NOTE_C4,-1,*/
//jingle bells
NOTE_E5,4, NOTE_E5,4, NOTE_E5,2,
NOTE_E5,4, NOTE_E5,4, NOTE_E5,2,
NOTE_E5,4, NOTE_G5,4, NOTE_C5,4, NOTE_D5,4,
NOTE_E5,-2, REST,8,
NOTE_F5,4, NOTE_F5,4, NOTE_F5,-4, NOTE_F5,8,
NOTE_F5,4, NOTE_E5,4, NOTE_E5,4, NOTE_E5,8, NOTE_E5,8,
NOTE_E5,4, NOTE_D5,4, NOTE_D5,4, NOTE_E5,4,
NOTE_D5,2, NOTE_G5,2,
/*NOTE_E5,4, NOTE_E5,4, NOTE_E5,2,
NOTE_E5,4, NOTE_E5,4, NOTE_E5,2,
NOTE_E5,4, NOTE_G5,4, NOTE_C5,4, NOTE_D5,4,
NOTE_E5,-2, REST,8,
NOTE_F5,4, NOTE_F5,4, NOTE_F5,4, NOTE_F5,4,
NOTE_F5,4, NOTE_E5,4, NOTE_E5,4, NOTE_E5,8, NOTE_E5,8,
NOTE_G5,4, NOTE_G5,4, NOTE_F5,4, NOTE_D5,4,
NOTE_C5,-2*/
/*//joy to the world
NOTE_F5,2, NOTE_E5,-4, NOTE_D5,8, NOTE_C5,-2, NOTE_AS4,4, NOTE_A4,2, NOTE_G4,2, NOTE_F4,-2,
NOTE_C5,4, NOTE_D5,-2, NOTE_D5,4, NOTE_E5,-2, NOTE_E5,4, NOTE_F5,1,
NOTE_F5,4, NOTE_F5,4, NOTE_E5,4, NOTE_D5,4, NOTE_C5,4, NOTE_C5,-4, NOTE_AS4,8, NOTE_A4,4, NOTE_F5,4, NOTE_F5,4, NOTE_E5,4, NOTE_D5,4,
NOTE_C5,4, NOTE_C5,-4, NOTE_AS4,8, NOTE_A4,4, NOTE_A4,4, NOTE_A4,4, NOTE_A4,4, NOTE_A4,4, NOTE_A4,8, NOTE_AS4,8, NOTE_C5,-2,
NOTE_AS4,8, NOTE_A4,8, NOTE_G4,4, NOTE_G4,4, NOTE_G4,4, NOTE_G4,8, NOTE_A4,8, NOTE_AS4,-2,
NOTE_A4,8, NOTE_G4,8, NOTE_F4,4, NOTE_F5,2, NOTE_D5,4, NOTE_C5,-4, NOTE_AS4,8, NOTE_A4,4, NOTE_C5,4, NOTE_E4,2, NOTE_D4,2, NOTE_C4,1,
//santaclaus is coming to
[ NOTE_G4,8,
NOTE_E4,8, NOTE_F4,8, NOTE_G4,4, NOTE_G4,4, NOTE_G4,4,
NOTE_A4,8, NOTE_B4,8, NOTE_C5,4, NOTE_C5,4, NOTE_C5,4,
NOTE_E4,8, NOTE_F4,8, NOTE_G4,4, NOTE_G4,4, NOTE_G4,4,
NOTE_A4,8, NOTE_G4,8, NOTE_F4,4, NOTE_F4,2,
NOTE_E4,4, NOTE_G4,4, NOTE_C4,4, NOTE_E4,4,
NOTE_D4,4, NOTE_F4,2, NOTE_B3,4,
NOTE_C4,-2, REST,4,
NOTE_G4,8,
NOTE_E4,8, NOTE_F4,8, NOTE_G4,4, NOTE_G4,4, NOTE_G4,4,
NOTE_A4,8, NOTE_B4,8, NOTE_C5,4, NOTE_C5,4, NOTE_C5,4,
NOTE_E4,8, NOTE_F4,8, NOTE_G4,4, NOTE_G4,4, NOTE_G4,4,
NOTE_A4,8, NOTE_G4,8, NOTE_F4,4, NOTE_F4,2,
NOTE_E4,4, NOTE_G4,4, NOTE_C4,4, NOTE_E4,4,
NOTE_D4,4, NOTE_F4,2, NOTE_D5,4,
NOTE_C5,1,
//the first noel
NOTE_FS4,8, NOTE_E4,8, NOTE_D4,-4, NOTE_E4,8, NOTE_FS4,8, NOTE_G4,8, NOTE_A4,2, NOTE_B4,8, NOTE_CS5,8, NOTE_D5,4, NOTE_CS5,4, NOTE_B4,4,
NOTE_A4,2, NOTE_B4,8, NOTE_CS5,8, NOTE_D5,4, NOTE_CS5,4, NOTE_B4,4, NOTE_A4,4, NOTE_B4,4, NOTE_CS5,4, NOTE_D5,4, NOTE_A4,4, NOTE_G4,4,
NOTE_FS4,2, NOTE_FS4,8, NOTE_E4,8, NOTE_D4,-4, NOTE_E4,8, NOTE_FS4,8, NOTE_G4,8, NOTE_A4,2, NOTE_B4,8, NOTE_CS5,8, NOTE_D5,4, NOTE_CS5,4, NOTE_B4,4,
NOTE_A4,2, NOTE_B4,8, NOTE_CS5,8, NOTE_D5,4, NOTE_CS5,4, NOTE_B4,4, NOTE_A4,4, NOTE_B4,4, NOTE_CS5,4, NOTE_D5,4, NOTE_A4,4, NOTE_G4,4,
NOTE_FS4,2, NOTE_FS4,8, NOTE_E4,8, NOTE_D4,-4, NOTE_E4,8, NOTE_FS4,8, NOTE_G4,8, NOTE_A4,2, NOTE_D5,8, NOTE_CS5,8, NOTE_B4,2, NOTE_B4,4,
NOTE_A4,-2, NOTE_D5,4, NOTE_CS5,4, NOTE_B4,4, NOTE_A4,4, NOTE_B4,4, NOTE_CS5,4, NOTE_D5,4, NOTE_A4,4, NOTE_G4,4, NOTE_FS4,-2
*/
};
p5js code:
p5js uses two additional libraries: handsfree.js library and the webserial library. The handsfree.js is a machine learning module that enables detection of the hands, postures and hand movement. The webserial library enables serial communication between arduino and p5js.
let speed = 50;
let distance;
//handsfree module
let running = false;
let once = false;
//forward, back, left, right
let direction = [0, 0, 0, 0];
let direct;
//image
let robo;
let right;
let left;
let back;
//fonts
let rboto;
let header;
//states
let start_state = true;
let instruct_state = false;
let command_state = false;
// This is like pmouseX and pmouseY...but for every finger [pointer, middle, ring, pinky]
let prevPointer = [
// Left hand
[{x: 0, y: 0}, {x: 0, y: 0}, {x: 0, y: 0}, {x: 0, y: 0}],
// Right hand
[{x: 0, y: 0}, {x: 0, y: 0}, {x: 0, y: 0}, {x: 0, y: 0}]
]
// Landmark indexes for fingertips [pointer, middle, ring, pinky]...these are the same for both hands
let fingertips = [8, 12, 16, 20]
//preload function
function preload(){
robo = loadImage("robo.png");
header = loadFont("DiplomataSC-Regular.ttf");
rboto = loadFont("Roboto-Regular.ttf");
left = loadImage("left.jpg");
right = loadImage("right.jpg");
forward = loadImage("forward.jpg");
back = loadImage("back.jpg");
pinch_r = loadImage("right_pinch.jpg");
pinch_l = loadImage("left_pinch.jpg");
}
function setup() {
sketch = createCanvas(windowWidth, 200)
// Colors for each fingertip
colorMap = [
// Left fingertips
[color(0, 0, 0), color(255, 0, 255), color(0, 0, 255), color(255, 255, 255)],
// Right fingertips
[color(255, 0, 0), color(0, 255, 0), color(0, 0, 255), color(255, 255, 0)]
]
// #1 Turn on some models (hand tracking) and the show debugger
// @see https://handsfree.js.org/#quickstart-workflow
handsfree = new Handsfree({
showDebug:true,
hands: true,
})
handsfree.enablePlugins('browser')
handsfree.plugin.pinchScroll.disable()
handsfree.update({
setup:{
canvas:{
hands: {
$el: true,
width: 400,
height: 400
},
wrap: {
$el: true,
width: 400,
height: 400
},
video: {
$el: true,
width: 400,
height: 400
}
}
}
})
}
function draw() {
start();
instruct();
command();
}
function keyPressed()
{
if(keyCode === ENTER){
setUpSerial();
command_state = true;
}
}
function fingerPosition () {
// Check for pinches and create dots if something is pinched
const hands = handsfree.data?.hands
if (hands?.pinchState) {
// Loop through each hand
hands.pinchState.forEach((hand, handIndex) => {
// Loop through each finger
hand.forEach((state, finger) => {
if (hands.landmarks?.[handIndex]?.[fingertips[finger]]) {
// Landmarks are in percentage, so lets scale up
let x = 640 - hands.landmarks[handIndex][fingertips[finger]].x * 640
let y = hands.landmarks[handIndex][fingertips[finger]].y * 480
// Set the position of each finger
prevPointer[handIndex][finger] = {x, y}
}
})
})
}
//pinch right left index finger to decrease volume
if (hands?.pinchState && hands.pinchState[0][0] === 'released') {
if(speed > 50){
speed-=10;
}
}
//pinch right index finger to increase volume
if (hands?.pinchState && hands.pinchState[1][0] === 'released') {
if(speed < 200){
speed +=10;
}
}
//pinch right middle finger to play christmas songs
if (hands?.pinchState && hands.pinchState[1][1] === 'held') {
christmas = 1;
}else{
christmas = 0;
}
let posx_right= int(prevPointer[1][1].x);
let posy_right = int(prevPointer[1][1].y);
let posx_left= int(prevPointer[0][1].x);
let posy_left = int(prevPointer[0][1].y);
if( (posy_right < 150) && (posy_left < 150) && (posx_right > 320 && posx_left < 320) ){
direction[0] = 1;
direct = "foward";
}
else{
direction[0] = 0;
direct = "";
}
if((posy_left >240) && (posy_right > 240) && (posx_right > 320 && posx_left < 320)){
direction[1] = 1;
direct = "backward"
}else{
direction[1] = 0;
}
if((posx_left > 0 && posx_left < 160) && (posx_right > 0 && posx_right < 320)){
direction[2] = 1;
direct = "left"
}
else{
direction[2] = 0;
}
if(posx_left > 320 && posx_right > 480){
direction[3] = 1;
direct = "right"
}
else{
direction[3] = 0;
}
}
function readSerial(data) {
if(data != null){
distance = int(data);
}
let sendToArduino = direction[0] +"," + direction[1]+"," + direction[2]+","+direction[3]+","+ speed + "\n";
writeSerial(sendToArduino);
}
function windowResized() {
resizeCanvas(windowWidth, 200);
}
function sethandsfree(){
if(running == false){
buttonStart = createButton('START Webcam')
buttonStart.size(100, 100);
let scol = color(76, 187, 23);
buttonStart.style('background-color', scol);
buttonStart.class('handsfree-show-when-stopped')
buttonStart.class('handsfree-hide-when-loading')
buttonStart.mousePressed(() => handsfree.start())
// Create a "loading..." button
buttonLoading = createButton('...loading...')
buttonLoading.size(windowWidth);
buttonLoading.class('handsfree-show-when-loading')
running = true;
}
if(running == true){
// Create a stop button
buttonStop = createButton('STOP Webcam')
buttonStop.size(100, 100);
let stcol = color(128,0,0);
//buttonStop.position(windowWidth-100);
buttonStop.style('background-color', stcol);
buttonStop.class('handsfree-show-when-started')
buttonStop.mousePressed(() => handsfree.stop())
running = false;
}
}
function start(){
if(start_state == true){
createCanvas(600, 600);
background(255, 255, 255);
image(robo, 0, 200, 600, 400);
//header
textSize(70);
fill(0, 102, 153);
textAlign(CENTER)
textFont("header");
text("MetaDrive", 300, 60);
//click for instructions
textSize(20);
fill(0, 102, 153);
textAlign(CENTER)
textFont("rboto")
text("AI controlled robot", 300, 100);
text("Click to view Instructions!", 300, 150);
}
}
function instruct(){
if (instruct_state == true){
createCanvas(600, 600);
background(255, 255, 255);
textSize(40);
fill(0, 102, 153);
textFont("header");
text("INSTRUCTIONS", 300, 30);
textAlign(LEFT);
textSize(20);
textWrap(WORD);
textFont("rboto")
fill(0);
//movement
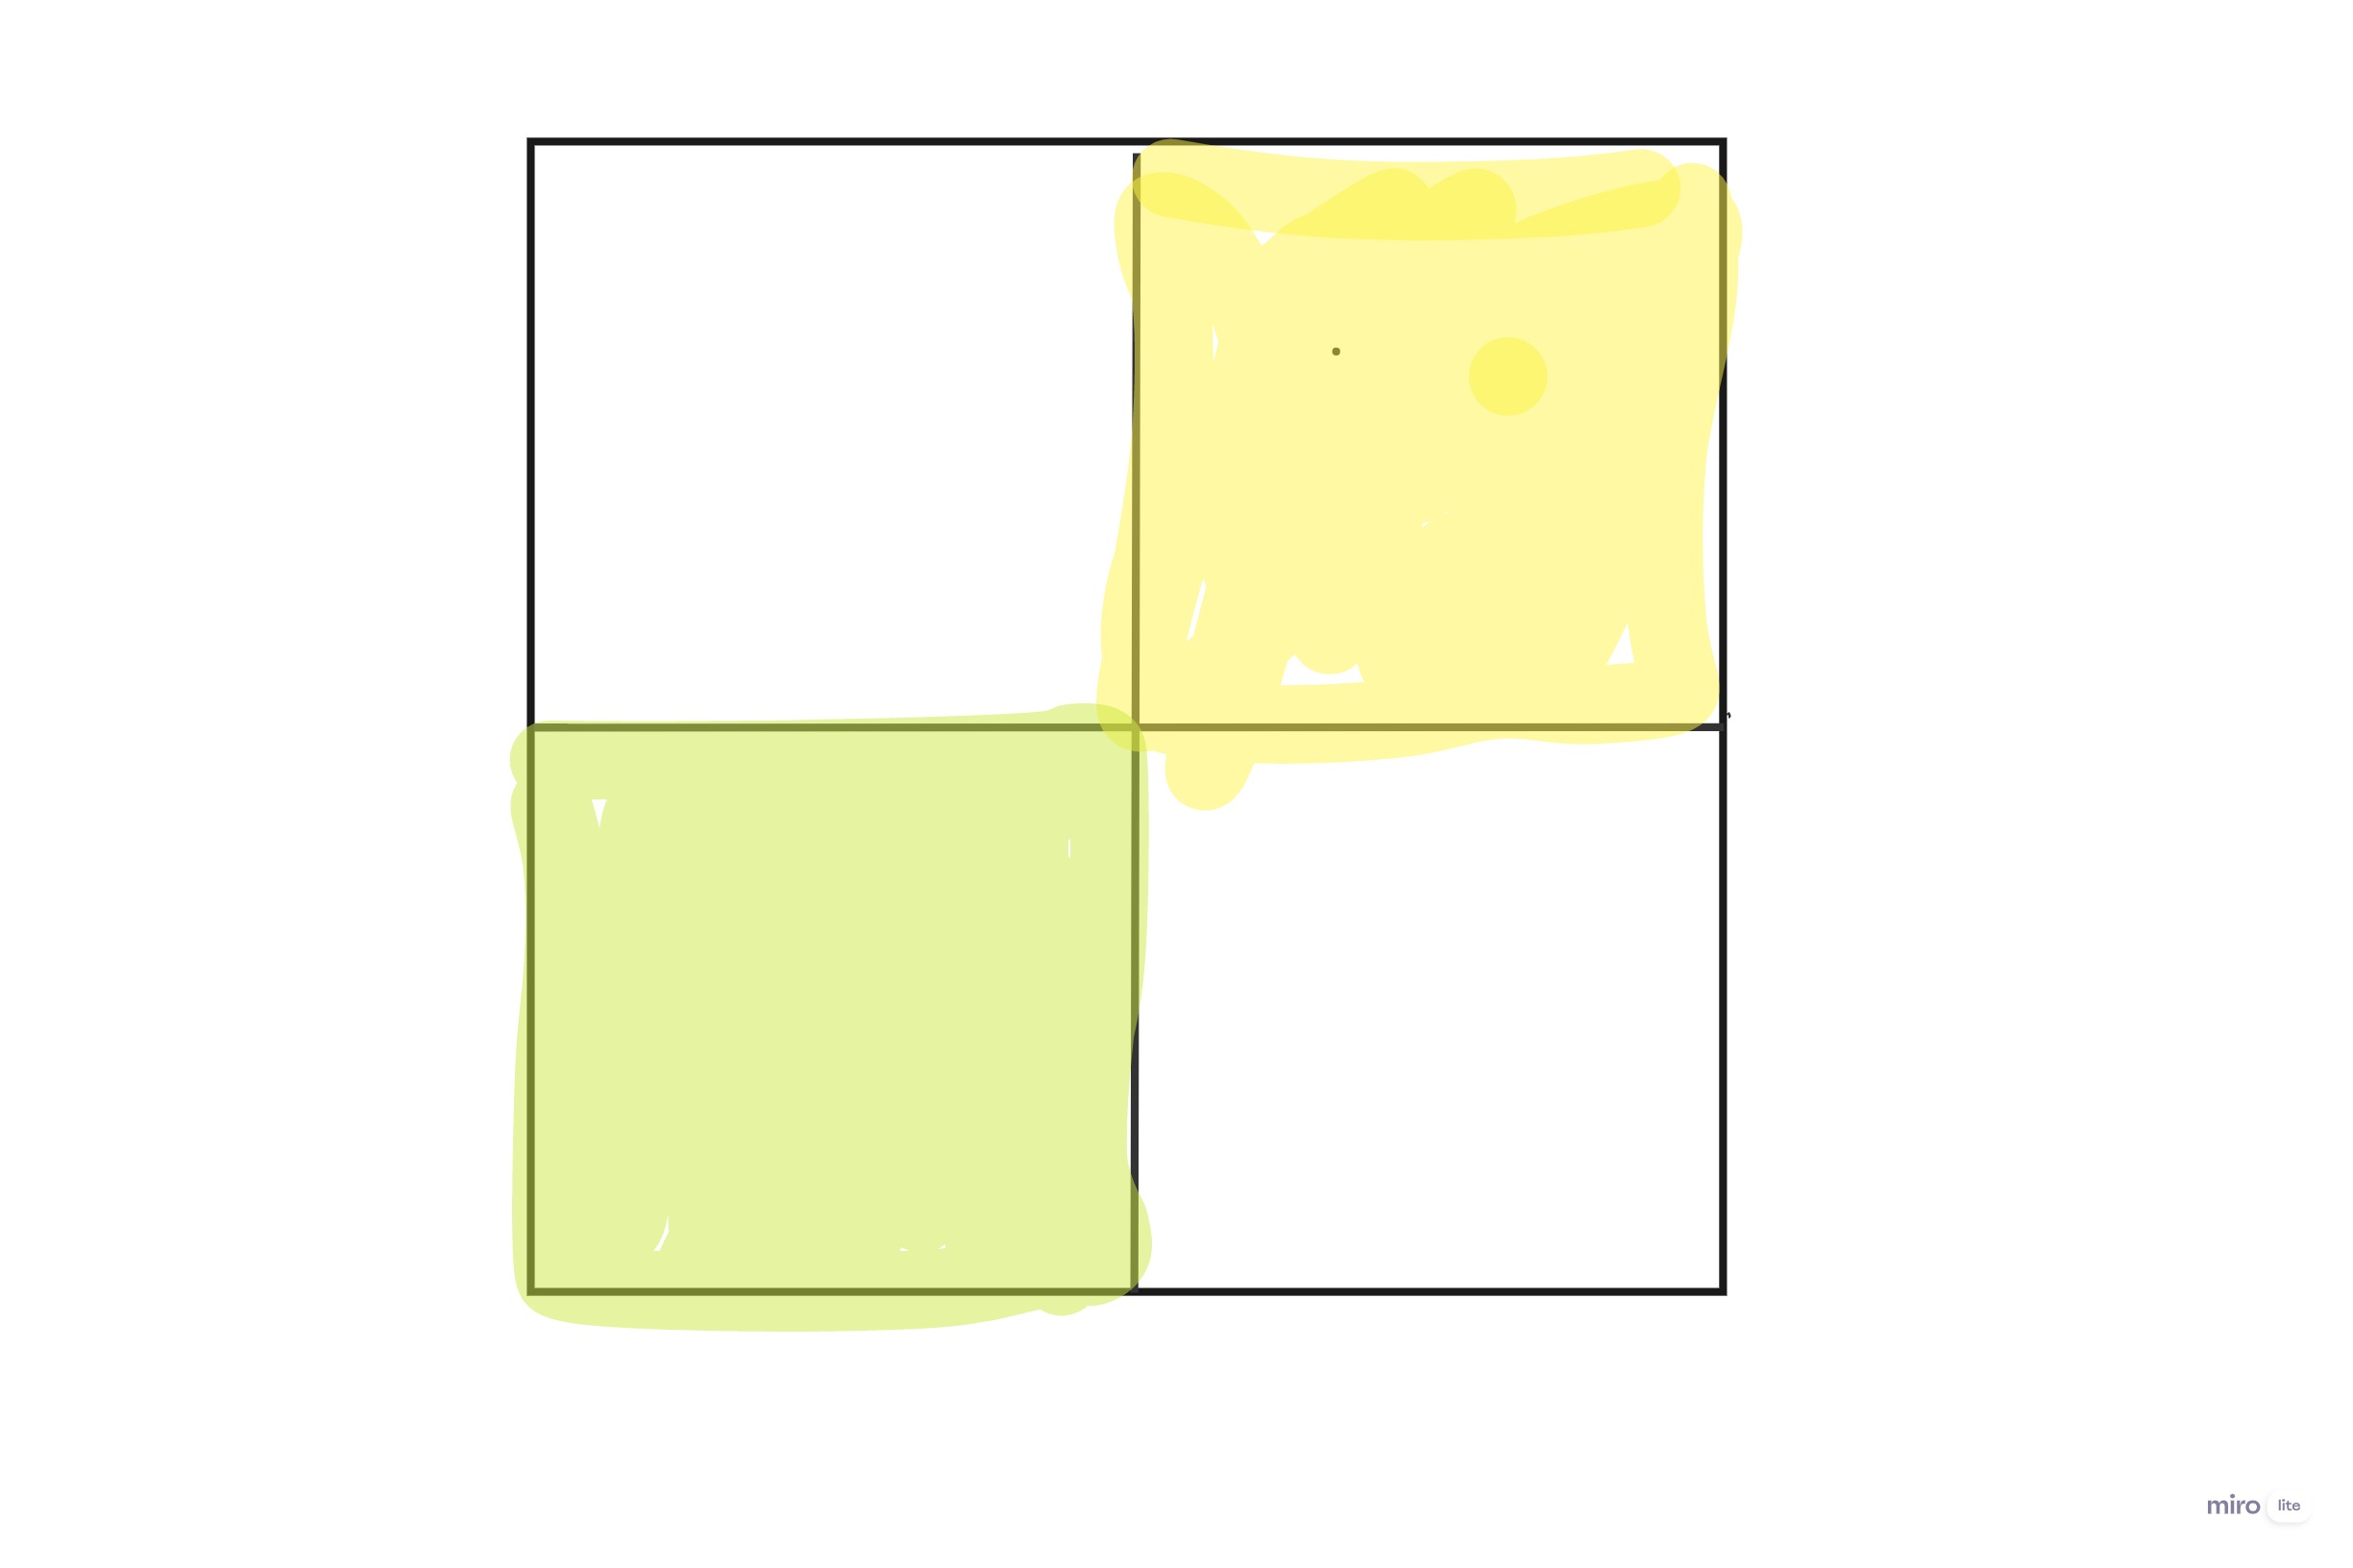
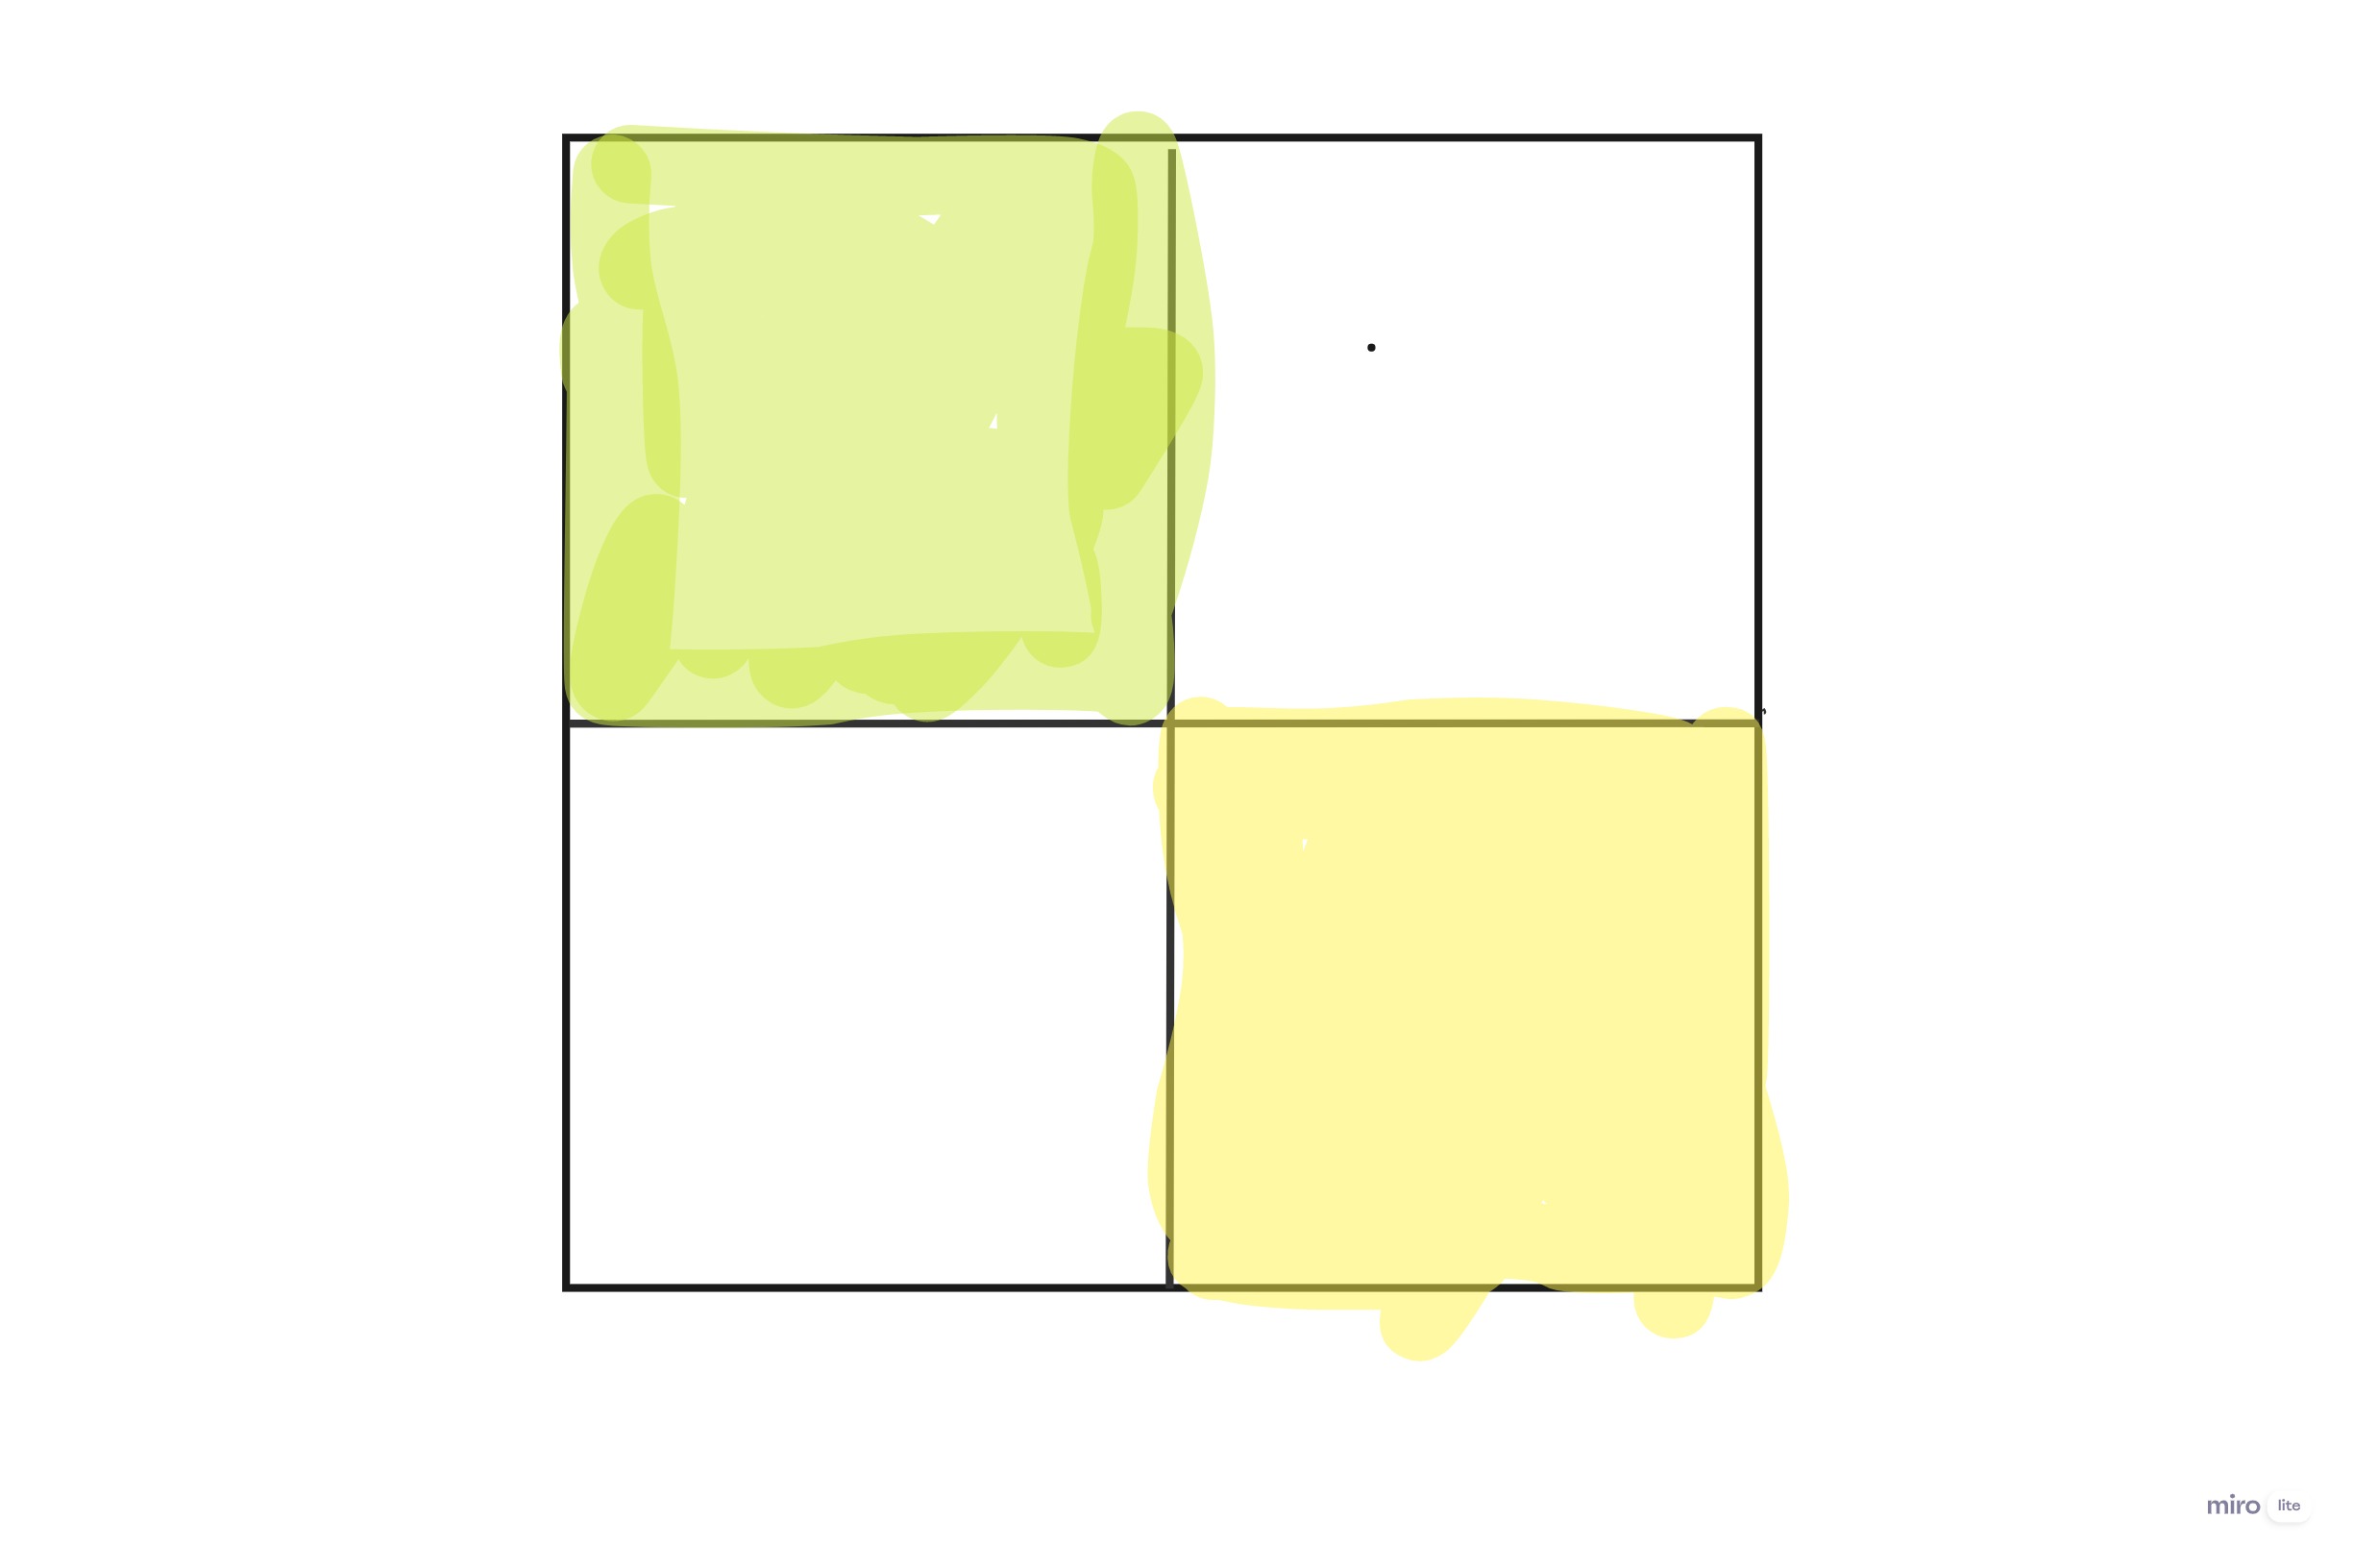
text("The Robot moves based on your hand gestures.Make sure to stand in the center of the video feed window: ", 20, 50, 550, 50);
text("Forward movement, raise both hands slightly above the mid section of the video window: ", 40, 120, 420, 50);
text("Right movement, move both hands to the right half of the video window: ",40, 190, 420, 50);
text("Left movement, move both hands to the left half of the video window: ", 40, 260, 420, 50);
text("Backward movement, invert both hands as shown: ", 40, 330, 420, 50);
//speed
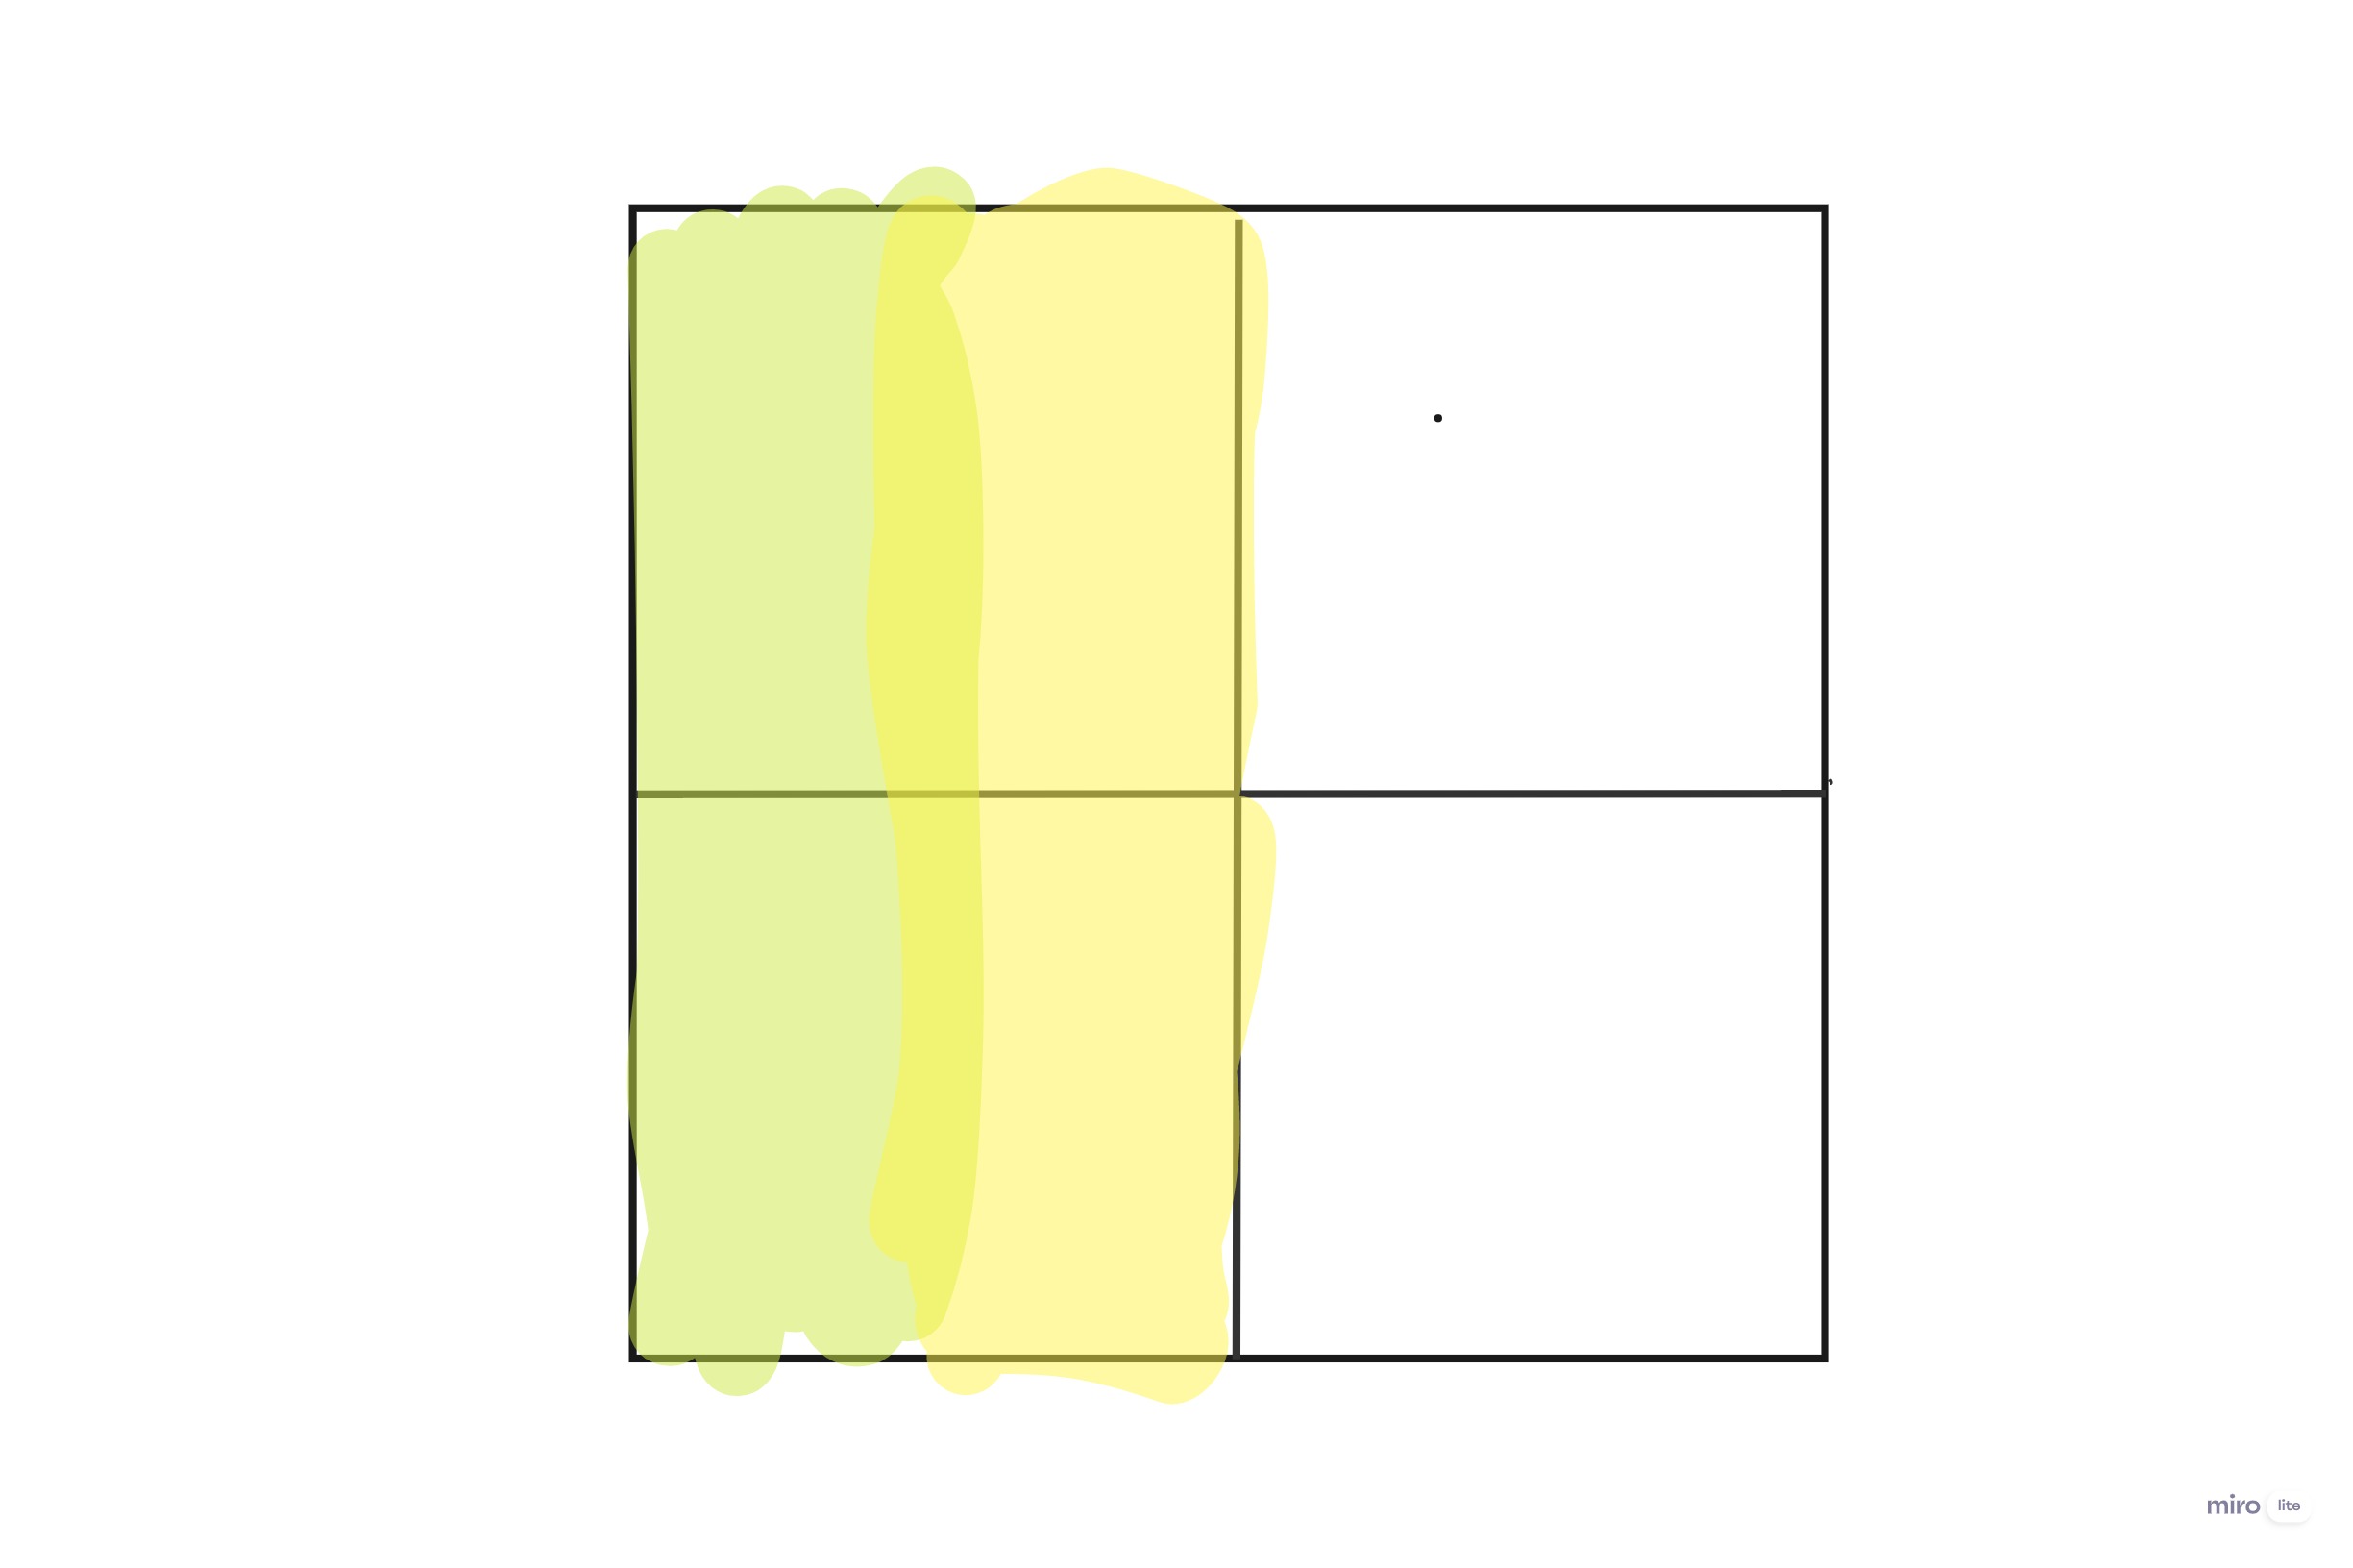
text("Increasing and Decreasing Speed: ", 20, 370, 420, 50);
text("Increase - Pinch Right Index Finger: ", 40, 410, 420, 50);
text("Decrease - Pinch Left Index Finger: ", 40, 450, 420, 50);
fill(0, 102, 153);
text("Press Enter to Begin controlling the robot. Select 'Generic CDC usbmoderm' as Serial port ", 20, 500, 550, 50);
//instruction images
image(forward, 480, 120, 40, 40);
image(right, 480, 190, 40, 40);
image(back, 480, 330, 40, 40);
image(left, 480, 260, 40, 40);
image(pinch_r, 480, 410, 40, 40);
image(pinch_l, 480, 450, 40, 40);
instruct_state = false;
}
}
function command(){
if(command_state == true){
createCanvas(windowWidth, 200);
if(serialActive){
background(255);
textSize(30);
fill(0, 102, 153);
textAlign(CENTER)
text("MetaDrive", windowWidth/2, 30);
textSize(20);
fill(0);
textAlign(LEFT);
text("Speed: "+ speed, 30, 100);
text("Direction: "+ direct, 300, 100);
if(distance < 10){
fill(255, 0, 0);
}
text("Object Distance: "+ distance, 30, 150);
fingerPosition()
if(once == false){
sethandsfree()
once = true;
}
}
}
}
function mousePressed(){
if(start_state == true){
start_state = false;
instruct_state = true;
}
}
The p5js code has three pages: the start page, instruction page and command page. The three pages move in order based on the events that the user executes. The command page is where the interaction happens between p5js and arduino.
The start page:
The instruction page:
The control page:
Communication between p5js and arduino:
p5js sends 5 integer controls for forward, back, left, right and speed in arduino. Arduino sends the distance measured by the ultrasonic sensor to p5js.
Video Demo:
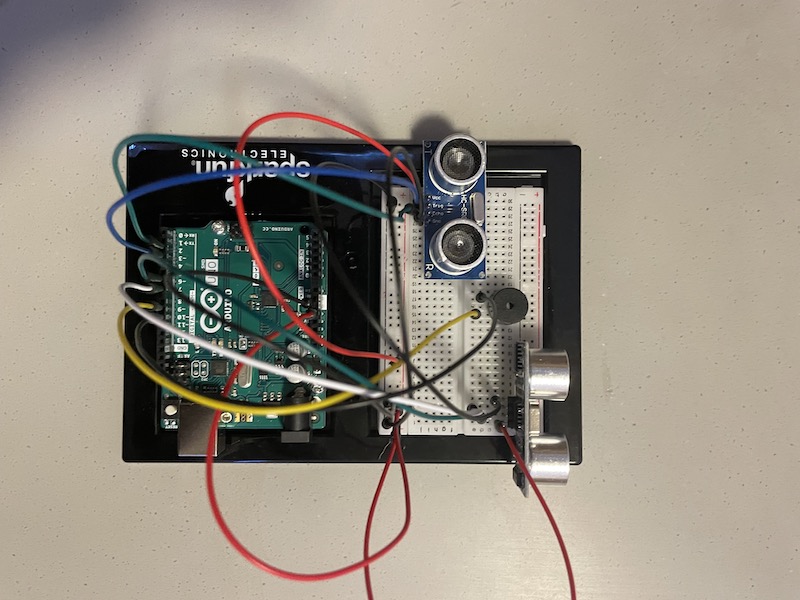
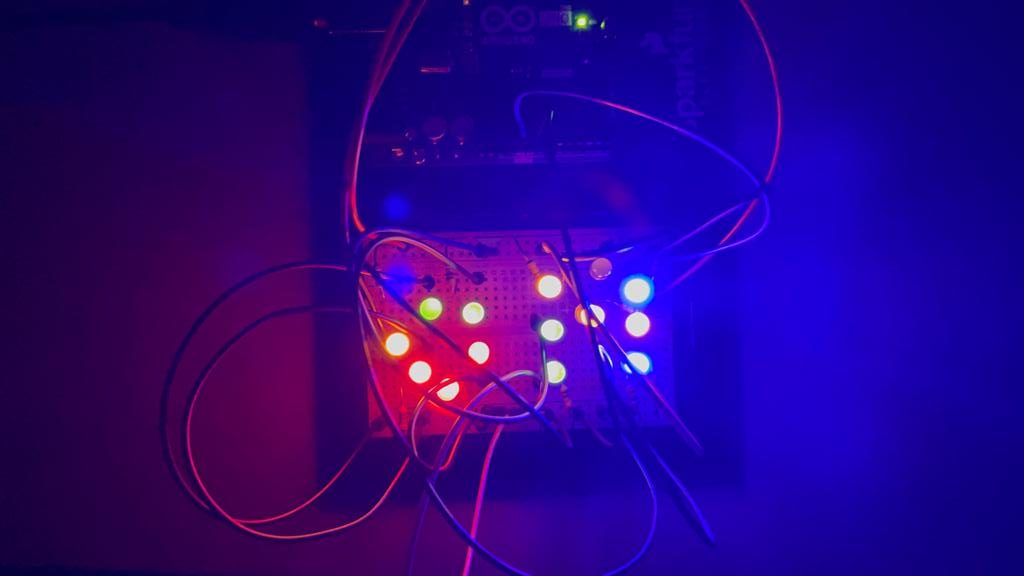
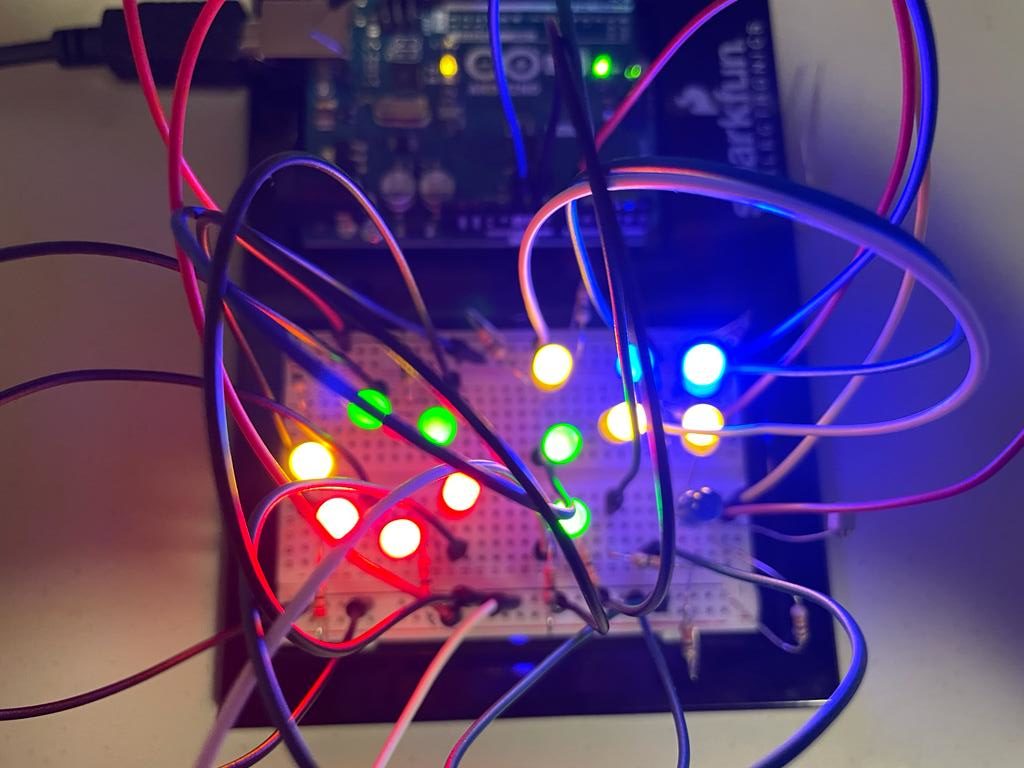
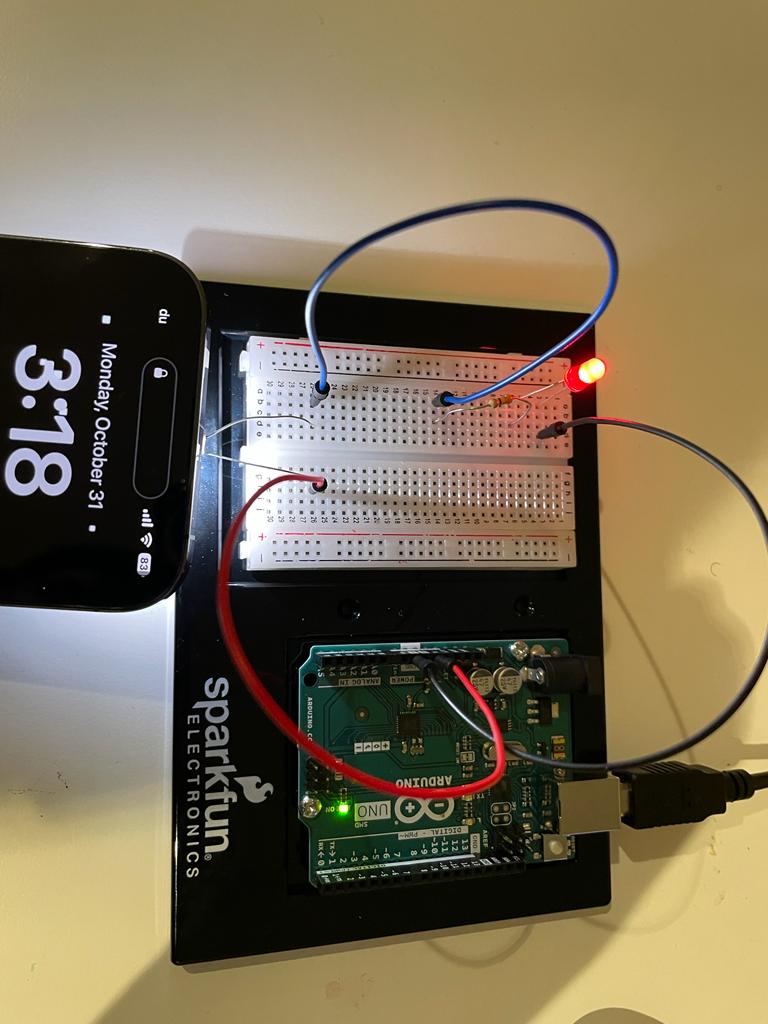
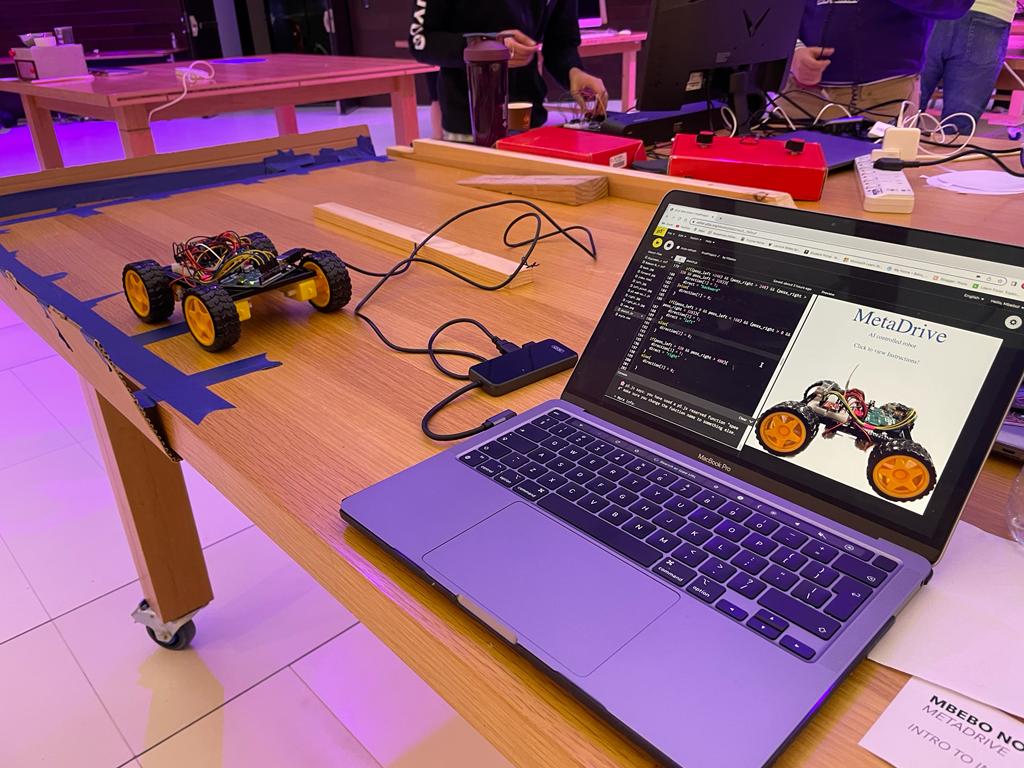
Project Pictures:
Aspects I’m proud of:
I’m particularly proud of how I drew the hand skeleton, measured the hand gestures and hand positions from the handsfree.js.
function fingerPosition () {
  // Check for pinches and create dots if something is pinched
  const hands = handsfree.data?.hands


  if (hands?.pinchState) {
    // Loop through each hand
    hands.pinchState.forEach((hand, handIndex) => {
      // Loop through each finger
      hand.forEach((state, finger) => {
        if (hands.landmarks?.[handIndex]?.[fingertips[finger]]) {

          // Landmarks are in percentage, so lets scale up
          let x = 640 - hands.landmarks[handIndex][fingertips[finger]].x * 640
          let y = hands.landmarks[handIndex][fingertips[finger]].y * 480

          // Set the position of each finger
          prevPointer[handIndex][finger] = {x, y}
        }
      })
    })
  }

  //pinch right left index finger to decrease volume
  if (hands?.pinchState && hands.pinchState[0][0] === 'released') {
    if(speed > 50){
      speed-=10;
    }
  }

  //pinch right index finger to increase volume
  if (hands?.pinchState && hands.pinchState[1][0] === 'released') {
    if(speed < 200){
      speed +=10;
    }
  }

  //pinch right middle finger to play christmas songs
  if (hands?.pinchState && hands.pinchState[1][1] === 'held') {
    christmas = 1;
  }else{
    christmas = 0;
  }


  let posx_right= int(prevPointer[1][1].x);
  let posy_right = int(prevPointer[1][1].y);

  let posx_left= int(prevPointer[0][1].x);
  let posy_left = int(prevPointer[0][1].y);

  if( (posy_right < 150) && (posy_left < 150) && (posx_right > 320 && posx_left < 320) ){
      direction[0] = 1;
      direct = "foward";
  }
  else{
    direction[0] = 0;
    direct = "";
  }

  if((posy_left >240) && (posy_right > 240) && (posx_right > 320 && posx_left < 320)){
    direction[1] = 1;
    direct = "backward"
  }else{
    direction[1] = 0;
  }

  if((posx_left > 0 && posx_left < 160) && (posx_right > 0 && posx_right < 320)){
    direction[2] = 1;
    direct = "left"
  }
  else{
    direction[2] = 0;
  }

  if(posx_left > 320 && posx_right > 480){
    direction[3] = 1;
    direct = "right"
  }
  else{
    direction[3] = 0;

  }

}
Future Improvements:
I plan to make the communication between arduino and p5js wireless and probably attach a camera to the robot to access the robot arial vision. Another area of improvement is to remodel the robot’s body and 3D print the model.