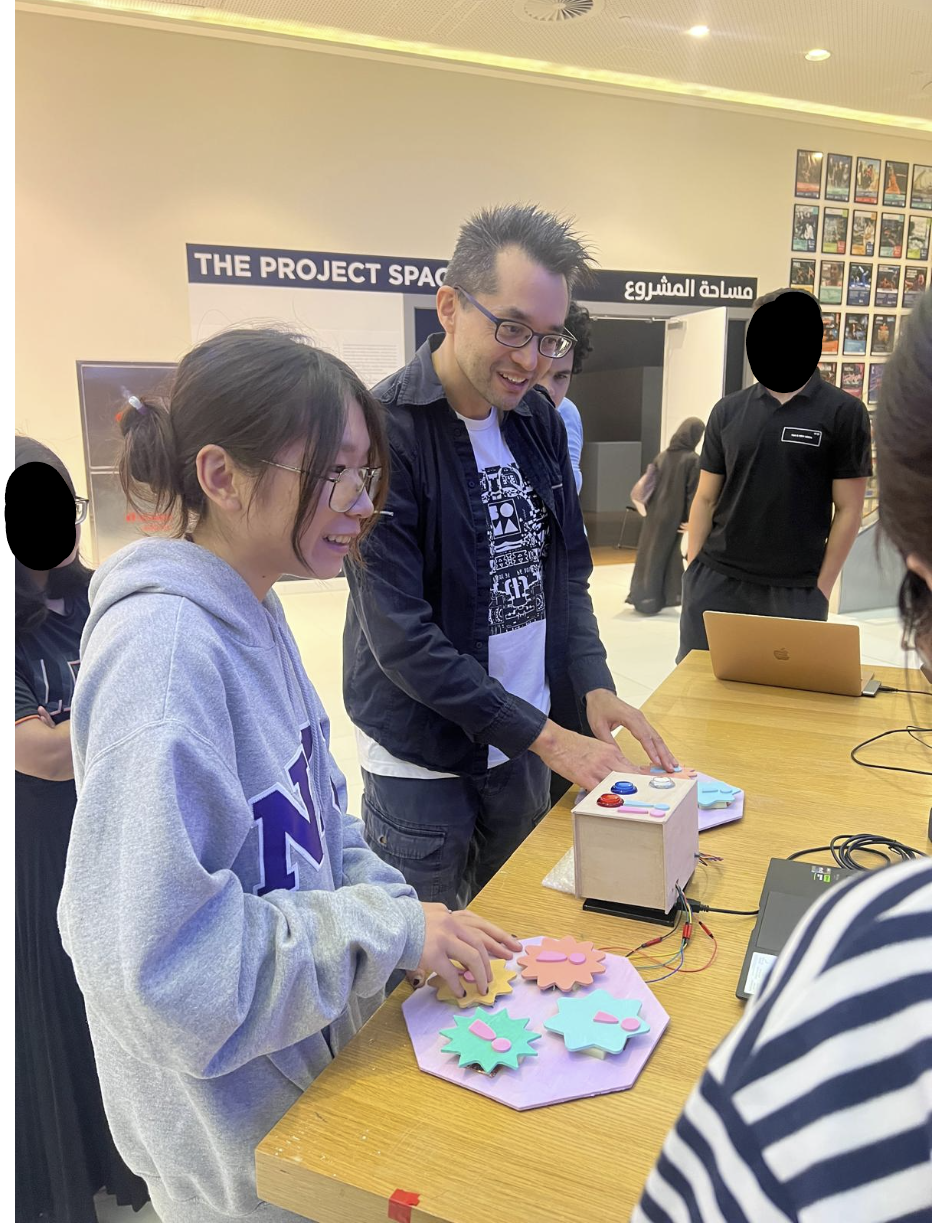
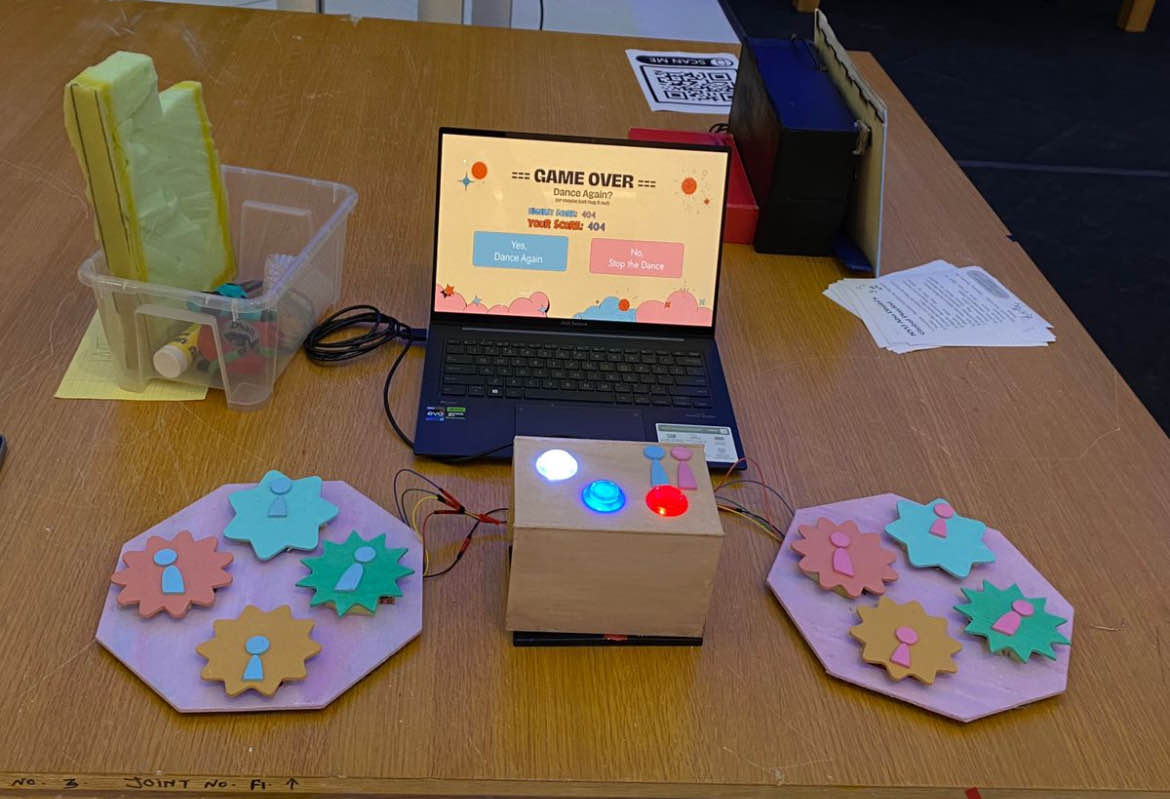
For my final project, it is an extension of my midterm project onto a physical scale. The project is a game where two players have to work cooperatively to “dance” to input the right sequence to defeat the orbs that appear on the screen moving closer to them. In my final project I initially wanted to make a dance pad which user can control using their feet, but after evaluating the amount of material and time left to complete the project, I decided to scale down my project scope. Additionally, I decided to make a game box which players can press as in an arcade rather than using the button on my laptop.
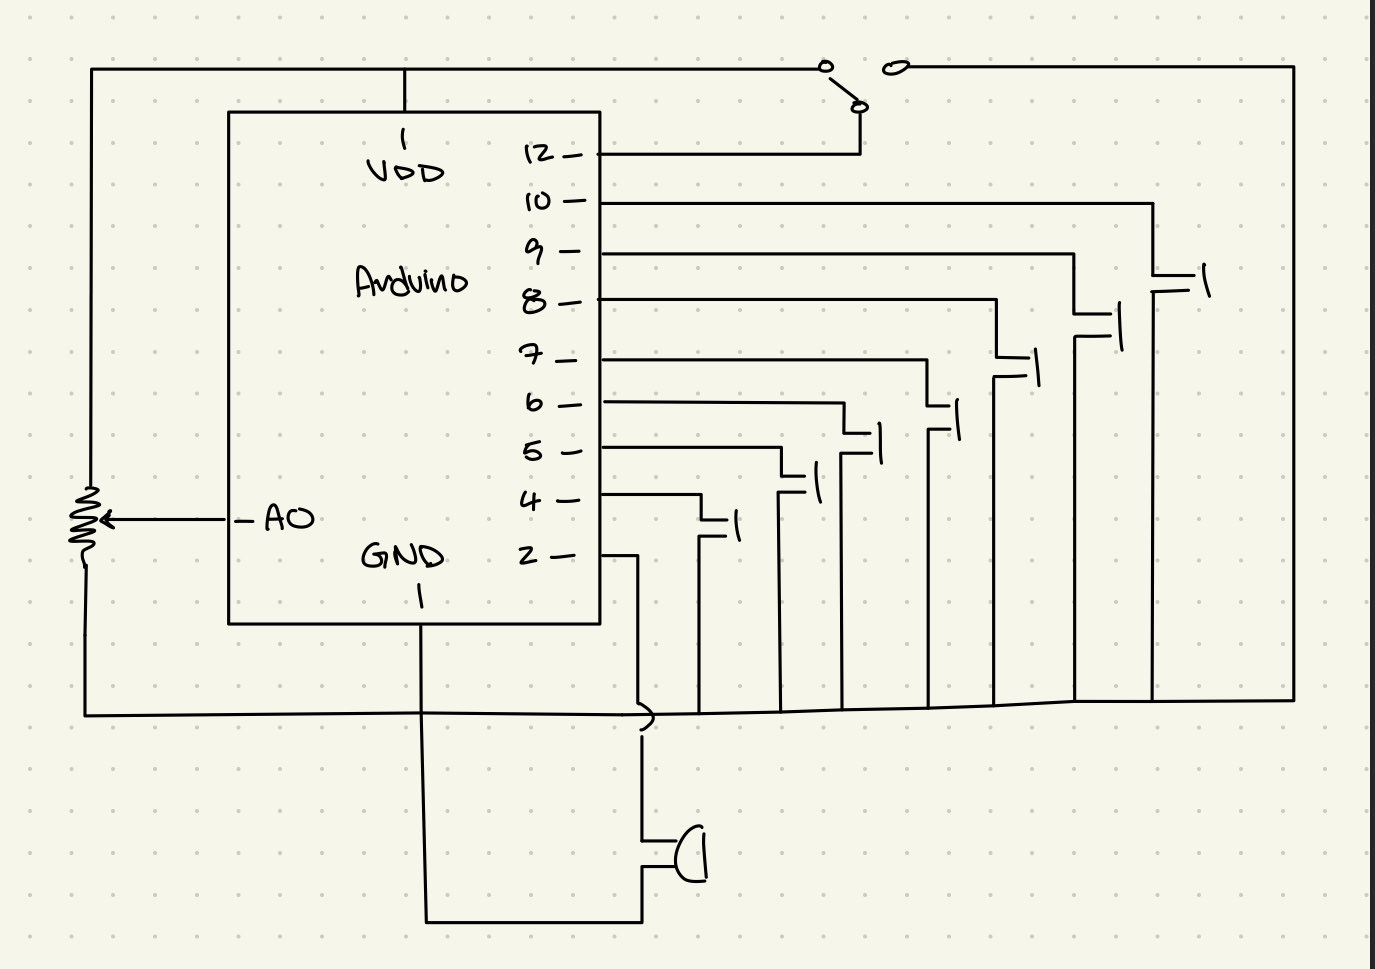
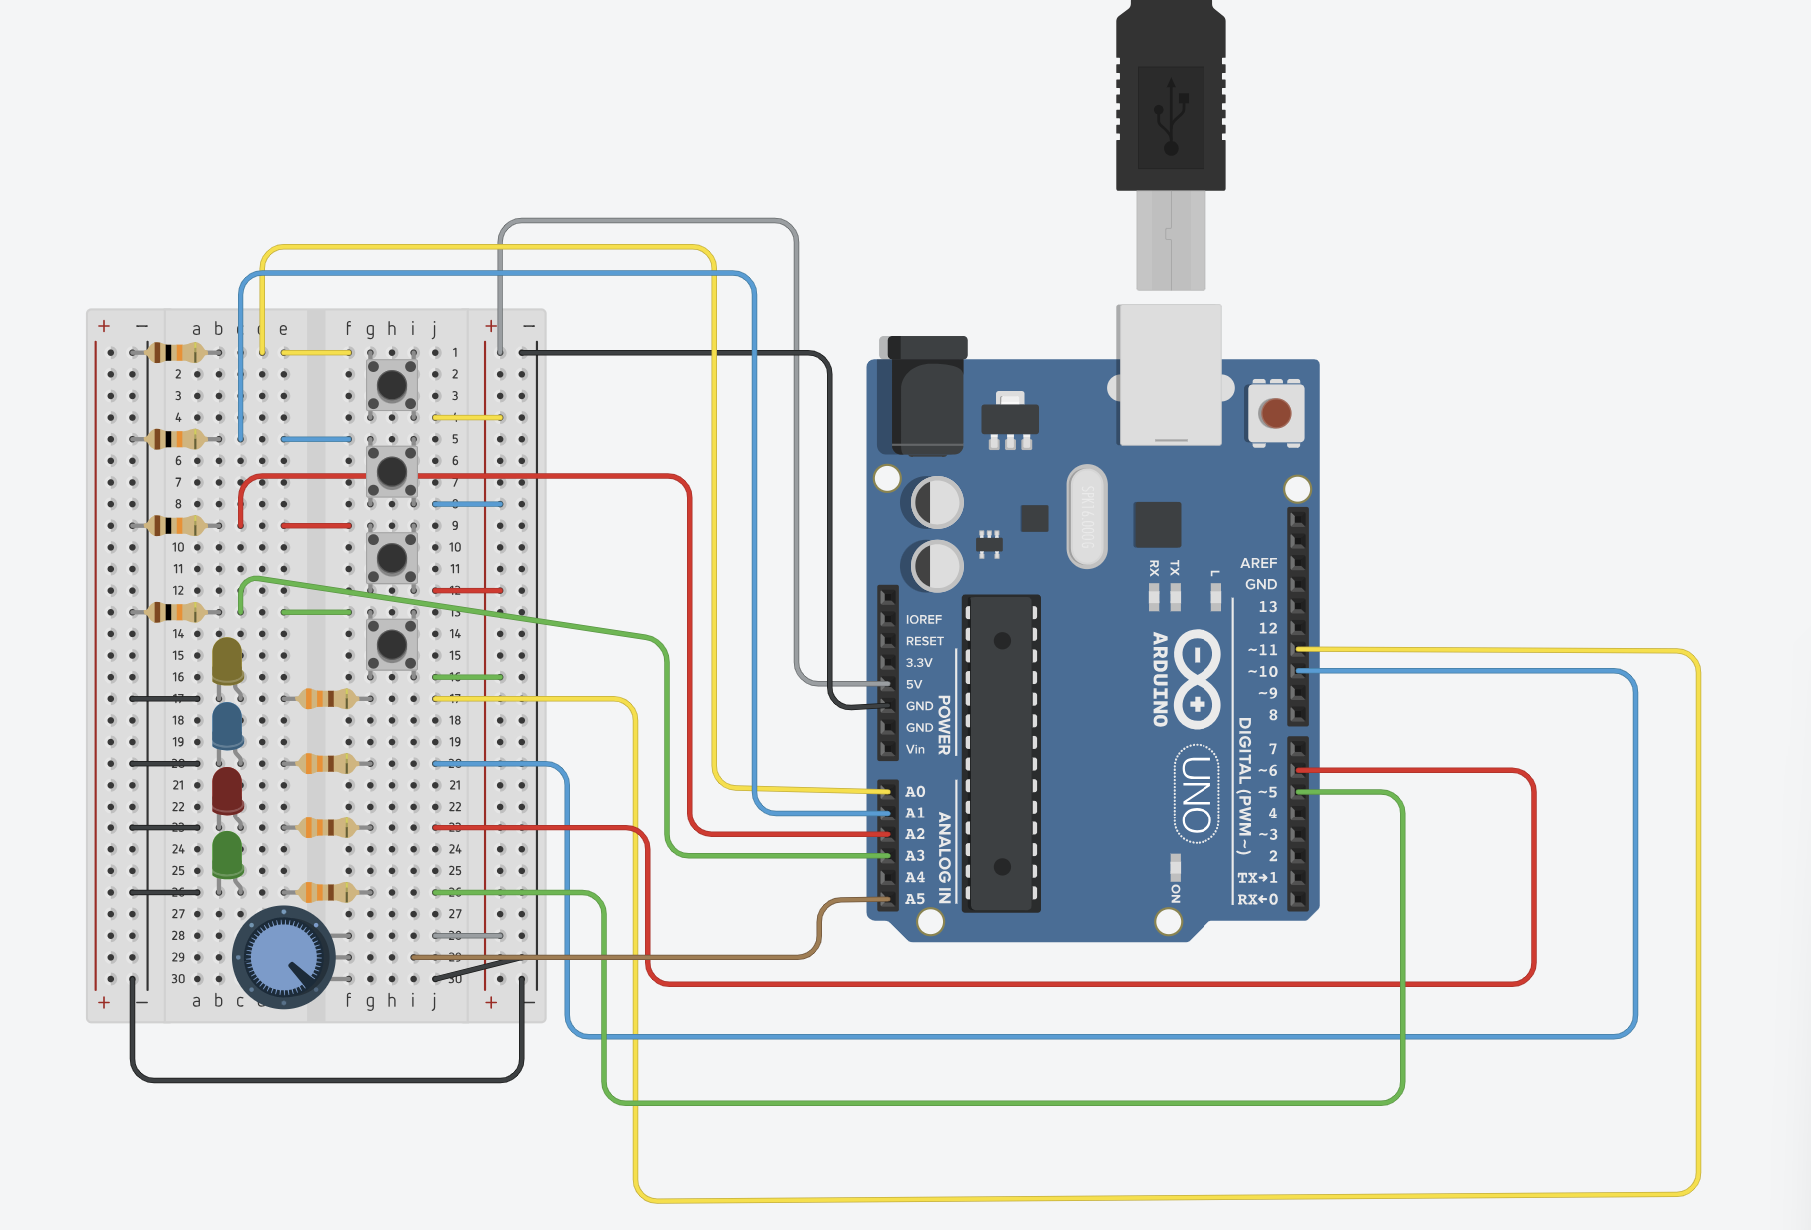
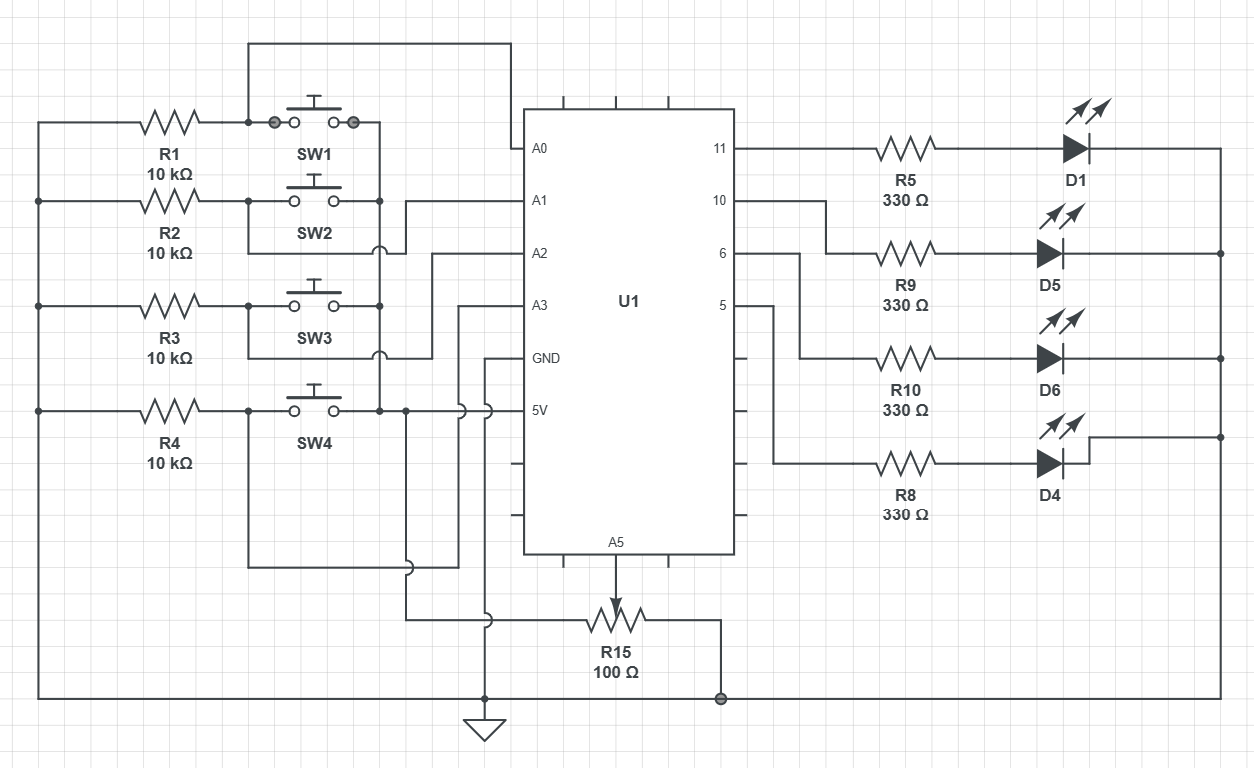
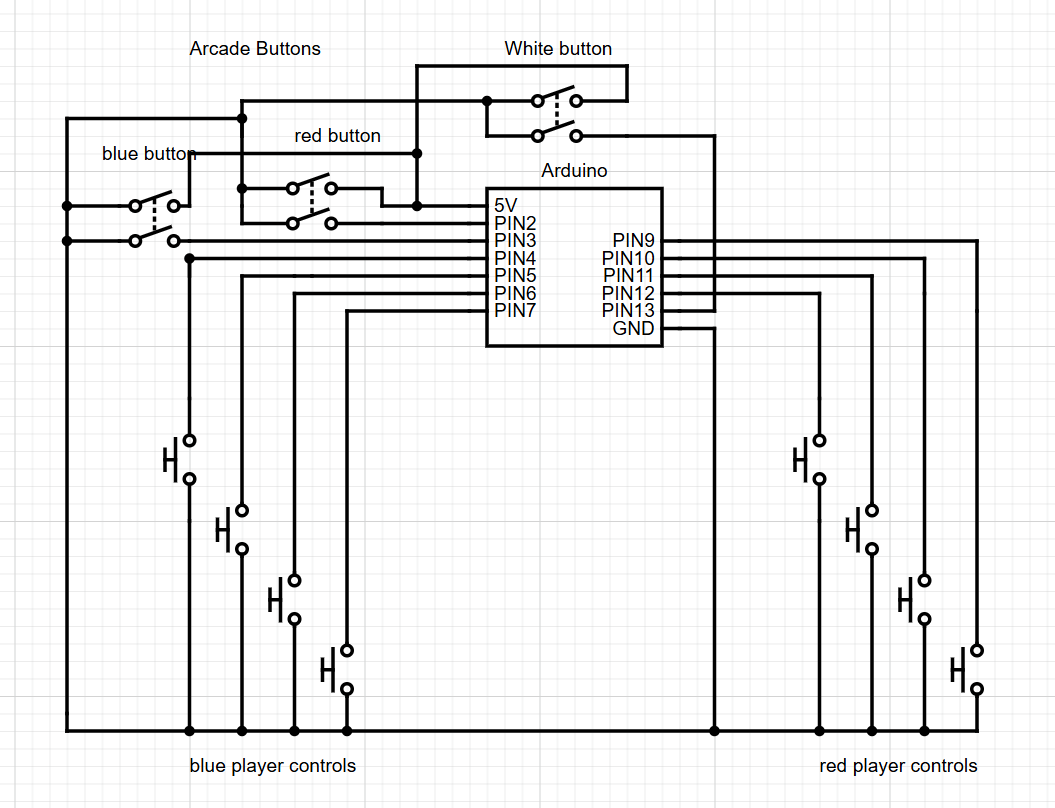
Schematic
Serial Communication
For my project, the serial communication was mostly reliant on the signal from Arduino rather than p5. Since I didn’t attach any output device (LED, buzzer) on the Arduino, I didn’t need p5 to send anything back to Arduino. On the other hand, Arduino would continuously check if any of the buttons that I had made were pressed and if they were pressed, send a send to p5 so the characters moved, or the game state changed. In the future, I would like to add a buzzer to indicate a life loss or when the player advances to the next round to provide game feedback to the player.
p5 Code (Serial Communication)
function readSerial(data) {
  // Send control values (left, right) to Arduino
  if (data && data.length > 6){
    let fromArduino = split(trim(data), ",");
    redUP_arrowPressed = int(fromArduino[0]);
    redDOWN_arrowPressed = int(fromArduino[1]);
    redRIGHT_arrowPressed = int(fromArduino[2]);
    redLEFT_arrowPressed = int(fromArduino[3]);

    blueUP_arrowPressed = int(fromArduino[4]);
    blueDOWN_arrowPressed = int(fromArduino[5]);
    blueRIGHT_arrowPressed = int(fromArduino[6]);
    blueLEFT_arrowPressed = int(fromArduino[7]);

    proceedButton = int(fromArduino[8]);
    yesButton = int(fromArduino[9]);
    noButton = int(fromArduino[10]);
  }
}
Arduino Serial Communication
void loop() {
  // Read the state of the UP_BUTTON (HIGH = not pressed, LOW = pressed)
  int redUPButtonState = digitalRead(redUP_BUTTON);
  int redDOWNButtonState = digitalRead(redDOWN_BUTTON);
  int redRIGHTButtonState = digitalRead(redRIGHT_BUTTON);
  int redLEFTButtonState = digitalRead(redLEFT_BUTTON);

  int blueUPButtonState = digitalRead(blueUP_BUTTON);
  int blueDOWNButtonState = digitalRead(blueDOWN_BUTTON);
  int blueRIGHTButtonState = digitalRead(blueRIGHT_BUTTON);
  int blueLEFTButtonState = digitalRead(blueLEFT_BUTTON);

  int proceedButtonState = digitalRead(proceedButton);
  int yesButtonState = digitalRead(yesButton);
  int noButtonState = digitalRead(noButton);

  // Print the value (HIGH or LOW) to the Serial Monitor
  Serial.print(redUPButtonState);
  Serial.print(",");
  Serial.print(redDOWNButtonState);
  Serial.print(",");
  Serial.print(redRIGHTButtonState);
  Serial.print(",");
  Serial.print(redLEFTButtonState);

  Serial.print(",");
  Serial.print(blueUPButtonState);
  Serial.print(",");
  Serial.print(blueDOWNButtonState);
  Serial.print(",");
  Serial.print(blueRIGHTButtonState);
  Serial.print(",");
  Serial.print(blueLEFTButtonState);

  Serial.print(",");
  Serial.print(proceedButtonState);
  Serial.print(",");
  Serial.print(yesButtonState);
  Serial.print(",");
  Serial.println(noButtonState);

}
Integration of Serial Communication into P5
Since my p5 were originally mapped to button on the keyboard, all I had to do was replace the variables mapped to the keyboard to the Arduino through the serial communication. Although that sounds easy enough to change, when I was implementing the buttons to change the game states, I ran into a lot of problems with the communication because I had initialized my buttons with INPUT_PULLUP rather than simply INPUT. By initializing the button to INPUT_PULLUP, the button was more sensitive and would remain on an ON-state longer compared to initializing it to INPUT. As I wanted a quicker and smoother response with the buttons, I had to make the program wouldn’t move on to the next sequence when the ON-signal was still being processed between p5 and the Arduino. As such I did a hybrid catch statements to make sure the signal was in the OFF-state before it read another ON-state signal.
Controlling the ON and OFF state
if (!serialCheck) {
    isCheckSerial();
  }

  else {

    if (proceedButton == 1) {
      buttonReleased = true;
    }

    if (!musicPlaying){
      playMusic();
      musicPlaying = true;
    }

    if (gameState == 'start' && buttonReleased){
      startScreen();
    }

    else if(gameState == 'friendship warning' && buttonReleased){
      showFriendShipWarning();
    }
.
.
.
Integration
function proceedButtonPressed(){
  console.log('gamestate', gameState, proceedButton)

  if (gameState == 'start' && proceedButton == 0){
    gameState = 'friendship warning';
    buttonReleased = false;

  }

  else if(gameState == 'friendship warning' && proceedButton == 0){
    gameState = 'tutorial';
    buttonReleased = false;

  }
As for the player controls, it was much easier to replace the mapping from the keyboard to the buttons and the ON-signal wasn’t as noticeable.
player1Moves() {
    fill(this.playerColor);
    if (redUP_arrowPressed == 0) {

// redUP_arrowPressed being an int variable that holds either 1 (OFF) or 0 (ON)
Reflection
Overall, I am really happy with the out of my project and amount of time I put into making sure the visuals and themes were consistent. I am really glad people enjoyed the little game I made, and I hope in the future I’ll get to work on it more and make it less buggy. For future implements, I want to make the orbs on the screen be actual creatures or monsters which the players will have to defeat. Additionally, I hope to highlight the combination which the players will have to press, so I don’t have to directly remind or tell the player to read from left to right. I also wish to build a smooth storyline/ streamline from the starting page to the game. Some people were telling me there were too many instructions to read.
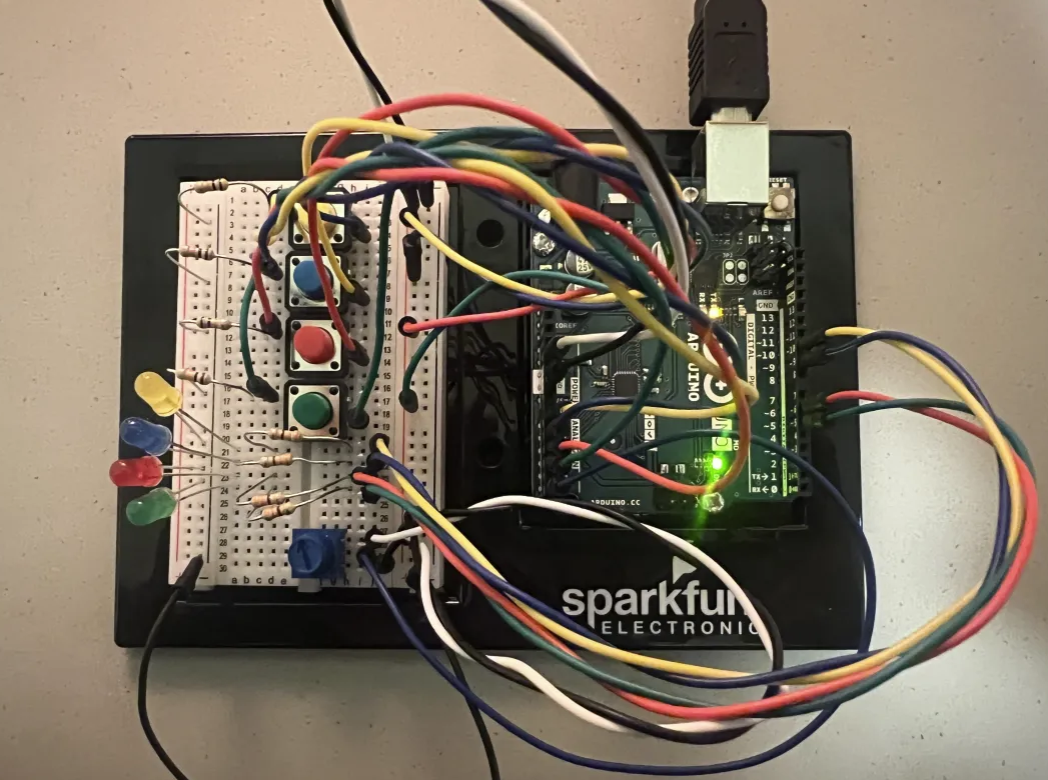
On the physical side, I want to make my game pad less wobbly. Due to the wires under the game pad, when players were hitting the key, the input may not always be registered and made the experience a bit less enjoyable. I would also like to add more game feedback in terms of sound and LED lights that can help signal which orb was just defeat or when they move onto the next round. Since these were small aspects to the game, I didn’t focus on these tasks within the time constraint, but for future implementations, these are topics I can think about adding.
Project
Full Arduino Code
const int redUP_BUTTON = 12;
const int redDOWN_BUTTON = 11;
const int redRIGHT_BUTTON = 10;
const int redLEFT_BUTTON = 9;

const int blueUP_BUTTON = 7;
const int blueDOWN_BUTTON = 6;
const int blueRIGHT_BUTTON = 5;
const int blueLEFT_BUTTON = 4;

const int proceedButton = 13;
const int yesButton = 3;
const int noButton = 2;

void setup() {
  // Start serial communication at 9600 baud
  Serial.begin(9600);

  // Set button pins as input with internal pull-up resistors
  pinMode(redUP_BUTTON, INPUT_PULLUP);
  pinMode(redDOWN_BUTTON, INPUT_PULLUP);
  pinMode(redRIGHT_BUTTON, INPUT_PULLUP);
  pinMode(redLEFT_BUTTON, INPUT_PULLUP);

  pinMode(blueUP_BUTTON, INPUT_PULLUP);
  pinMode(blueDOWN_BUTTON, INPUT_PULLUP);
  pinMode(blueRIGHT_BUTTON, INPUT_PULLUP);
  pinMode(blueLEFT_BUTTON, INPUT_PULLUP);

  pinMode(proceedButton, INPUT_PULLUP);
  pinMode(yesButton, INPUT_PULLUP);
  pinMode(noButton, INPUT_PULLUP);
}
void loop() {
  // Read the state of the UP_BUTTON (HIGH = not pressed, LOW = pressed)
  int redUPButtonState = digitalRead(redUP_BUTTON);
  int redDOWNButtonState = digitalRead(redDOWN_BUTTON);
  int redRIGHTButtonState = digitalRead(redRIGHT_BUTTON);
  int redLEFTButtonState = digitalRead(redLEFT_BUTTON);

  int blueUPButtonState = digitalRead(blueUP_BUTTON);
  int blueDOWNButtonState = digitalRead(blueDOWN_BUTTON);
  int blueRIGHTButtonState = digitalRead(blueRIGHT_BUTTON);
  int blueLEFTButtonState = digitalRead(blueLEFT_BUTTON);

  int proceedButtonState = digitalRead(proceedButton);
  int yesButtonState = digitalRead(yesButton);
  int noButtonState = digitalRead(noButton);

  // Print the value (HIGH or LOW) to the Serial Monitor
  Serial.print(redUPButtonState);
  Serial.print(",");
  Serial.print(redDOWNButtonState);
  Serial.print(",");
  Serial.print(redRIGHTButtonState);
  Serial.print(",");
  Serial.print(redLEFTButtonState);

  Serial.print(",");
  Serial.print(blueUPButtonState);
  Serial.print(",");
  Serial.print(blueDOWNButtonState);
  Serial.print(",");
  Serial.print(blueRIGHTButtonState);
  Serial.print(",");
  Serial.print(blueLEFTButtonState);

  Serial.print(",");
  Serial.print(proceedButtonState);
  Serial.print(",");
  Serial.print(yesButtonState);
  Serial.print(",");
  Serial.println(noButtonState);

}
Link to P5: https://editor.p5js.org/yamdn/sketches/1TavUEyVF