Midterm Project – Move to the beat

Concept:

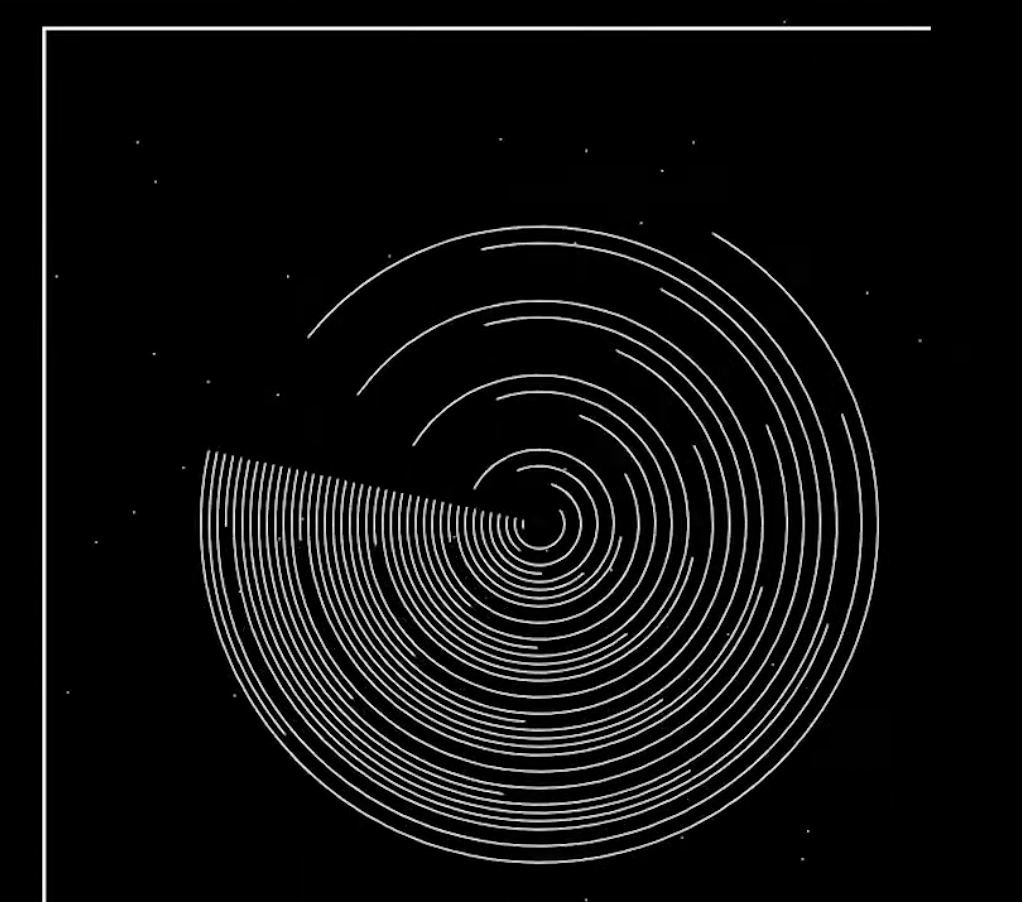
For my midterm project, i wanted to create a record player with a character dancing to the music that it played, why? because if there is something that i am interested in, that would be music and i wanted to display my love for music in this code. The experience begins with a record in the middle with two buttons, one is “Play/Stop” and the other is “Restart”and a character on top of the record. When the “Play/Stop” button is pressed the record starts spinning and starts to play the mp3 file of a sample i created by the software “Logic” in the same time the character, lets call him “Joey” starts dancing to the beat. When the “Play/Stop” button is pressed again the mp3 file and the spinning record animation pauses. For the second button  “Restart” , this button restarts the experience to the beginning , the mp3 file is 54 seconds long .

As for research, i searched for spinning record codes on YouTube, i got some results and i liked the way it looked, it was close to the idea i had in my head. As for the simplicity of the code and my current skills, that is the best i could do, but i am very happy with way it turned out.

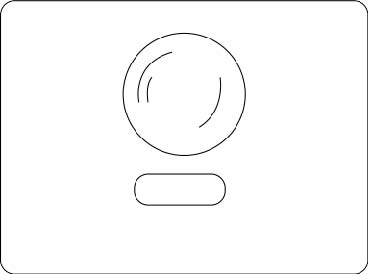
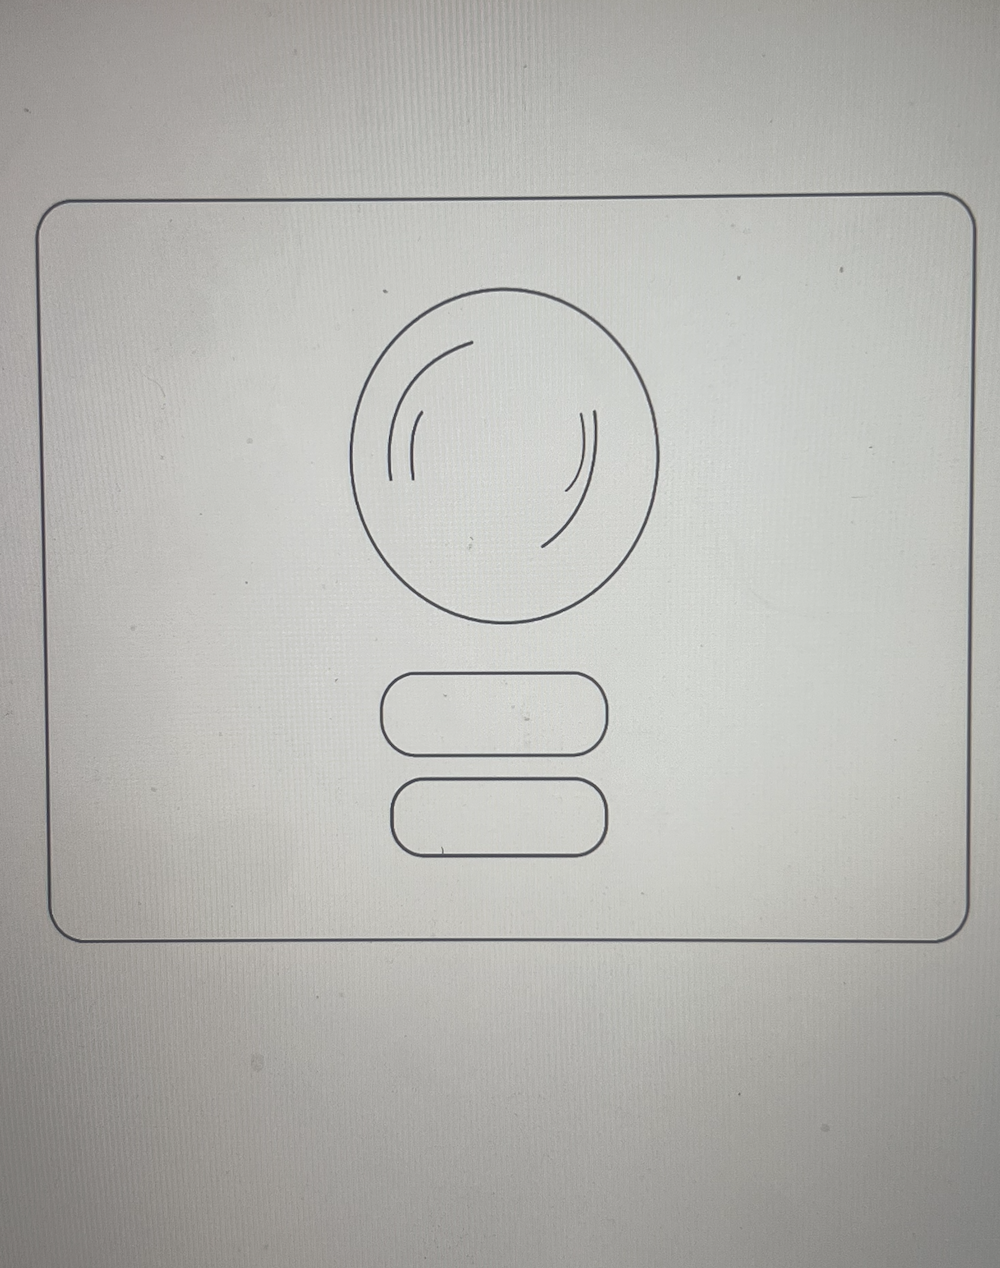
I began creating sketches on Adobe Illustrator, which led me to my final design.
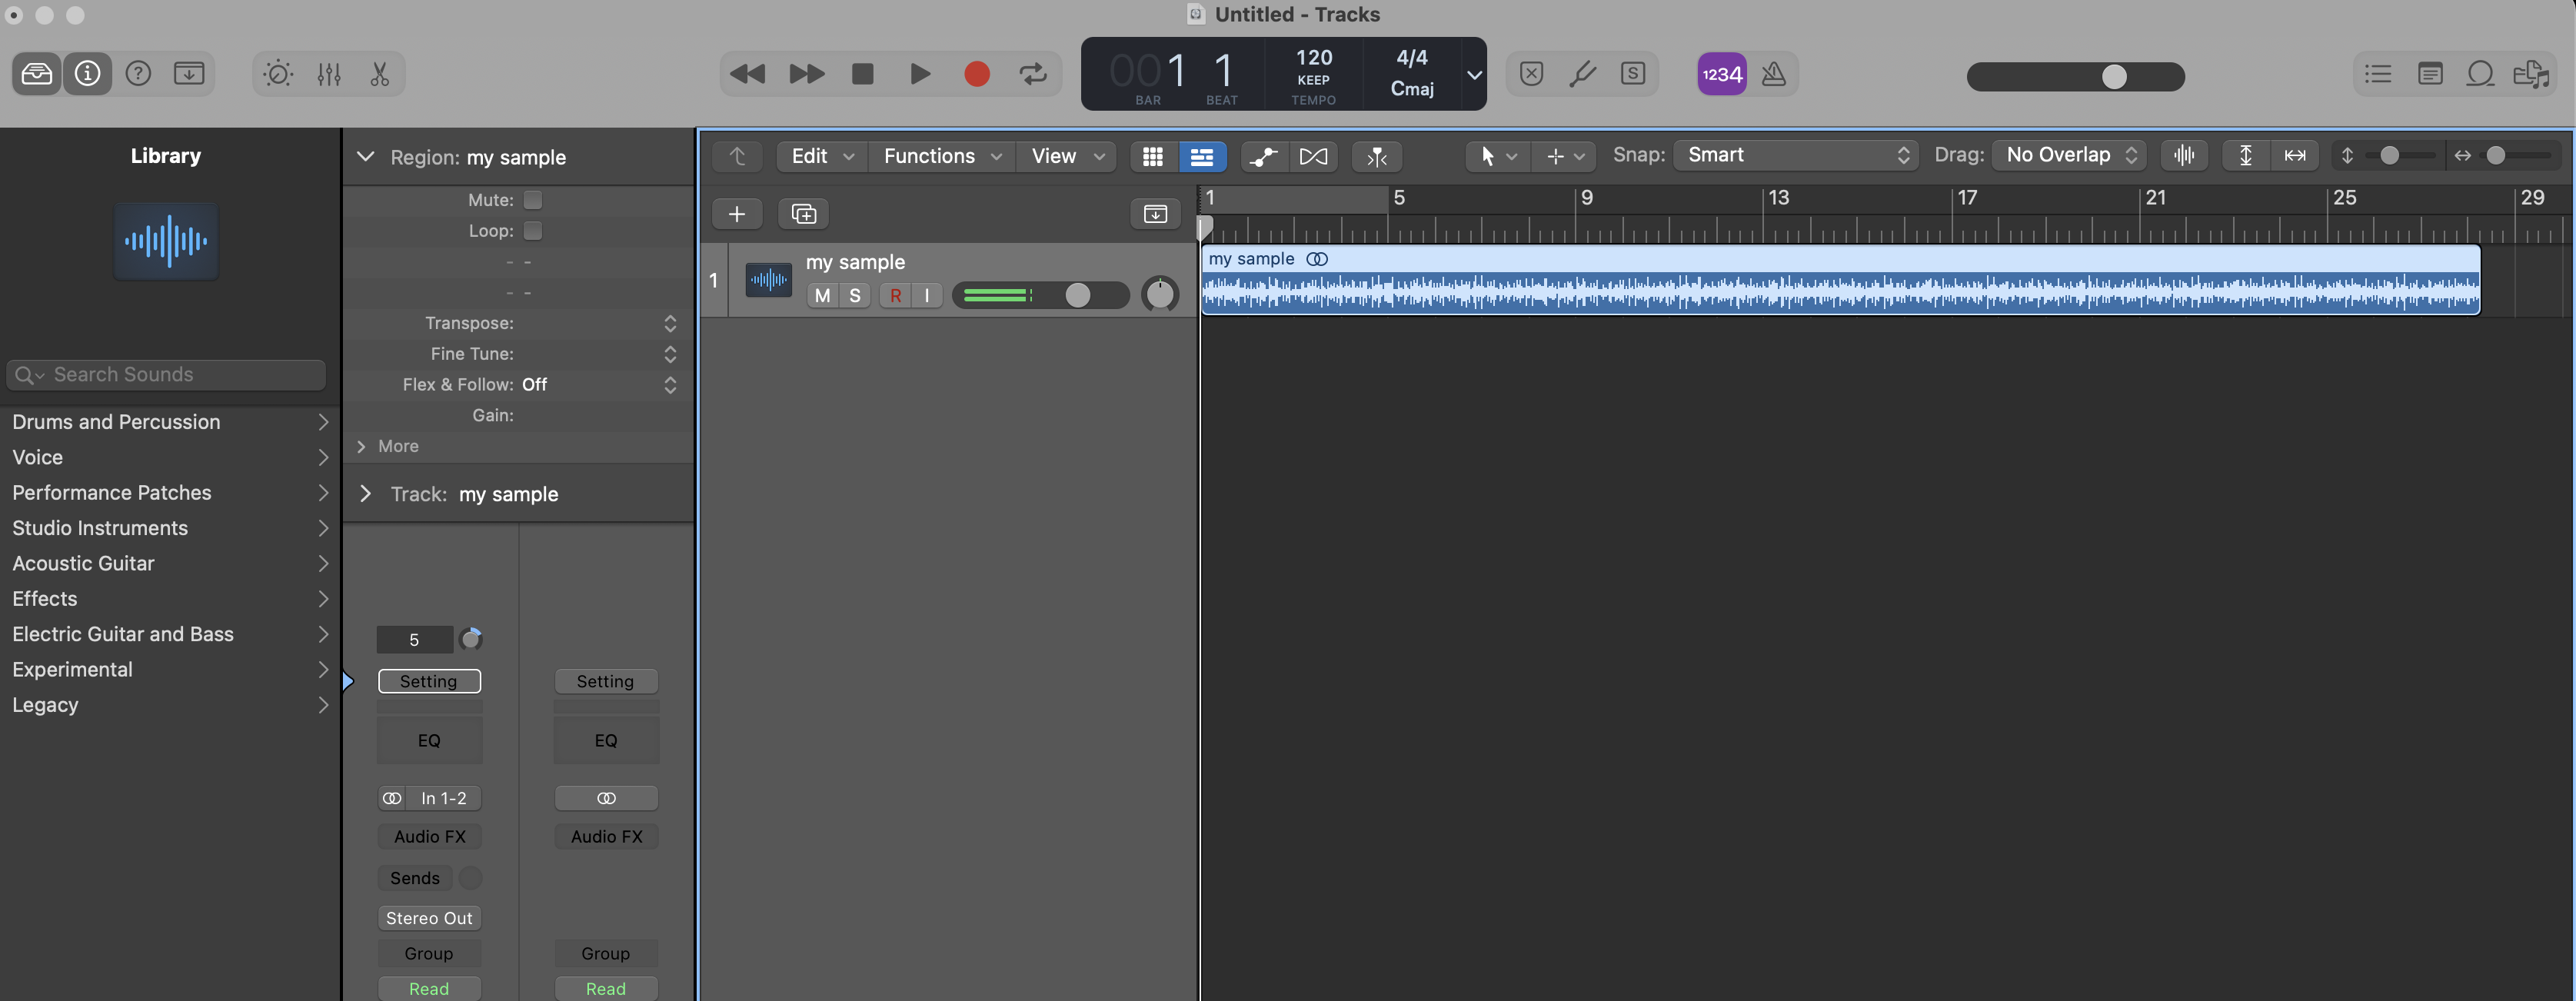
Logic file:

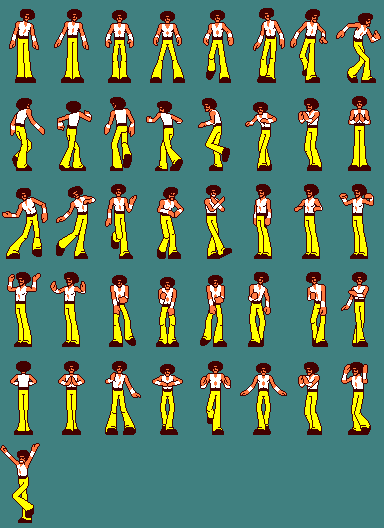
Sprite sheet website:

https://www.spriters-resource.com/game_boy_gbc/dancedancerevolutiongbjpn/sheet/156290/

extra research :

https://www.easytechjunkie.com/what-is-a-record-player.htm

From class:

  • push() and Pop() : push() to save the current drawing style and pop() to restore the previous drawing style
  • mouseClicked() : to check if the mouse click is within the boundaries of the Play/Stop button and Restart button.
  • preLoad() : “loadSound” and “loadImage”  to check before calling the sound and image to load and run the code


My Sketch: “Move To The Beat”


My code :

// Declare a variable to store the button object
let btn;

let btnReplay;

// Variables to control rotation animation
let p = 0; // Flag to control animation playback (0: stopped, 1: playing)
let replay = 0; // Flag to control replay
let angle = 0; // Angle for rotating the shape

let imgs = []; // Array to store images

let mySound; // Sound object

function preload() {
  mySound = loadSound('data/music.mp3'); // Load the music file before running the code

  for (let i = 0; i <= 40; i++) {
    imgs[i] = loadImage('data/part' + i + '.png'); // Load a series of images before runninng the code
  }
}

function setup() {
  createCanvas(500, 500); // Create a 500x500 pixel canvas
  background("#408080"); // Set the background color to a shade of blue-green same as the background of the spritesheet character
  btn = new Button(250, 400, 120, 50, "Play/Stop"); // Create a button object for Play/Stop
  btnReplay = new Button(250, 460, 100, 50, "Restart"); // Create a button object for Restart
}

let f = 0; // Frame counter

function draw() {
  record(250, 250); // Call the record function to draw a rotating shape
  btn.show(); // Display the Play/Stop button
  btnReplay.show(); // Display the Restart button

  // Check if the animation is playing, and update the frame counter
  if (p == 1) {
    if (frameCount % 10 == 0) {
      f = (f + 1) % 40;
    }
  }

  image(imgs[f], 225, 60); // Display the current image frame

  // Check if the music is playing, and update the animation playback flag
  if (mySound.isPlaying()) {
    p = 1;
  } else {
    p = 0;
  }
}

// Function to draw a rotating shape
function record(x, y) {
  push();
  translate(x, y); // Translate the origin to the specified position

  // If p is set to 1, increment the angle for rotation
  if (p == 1) {
    angle += 0.1;
  }
  rotate(angle); // Rotate the subsequent shapes based on the angle

  fill(0); // Fill color for the central ellipse
  ellipse(0, 0, 200, 200); // Draw a central ellipse

  noFill();
  stroke(100); // Set stroke color
  strokeWeight(5); // Set stroke weight

  // Draw four arcs to create a pattern
  arc(0, 0, 150, 150, 0, PI / 4);
  arc(0, 0, 120, 120, PI / 4, PI / 2);
  arc(0, 0, 100, 100, PI, (3 * PI) / 2);
  arc(0, 0, 150, 150, PI / 2, PI);

  pop(); // Restore the previous drawing settings
}

// Function to respond to mouse clicks
function mouseClicked() {
  // Check if the mouse click is within the boundaries of the Play/Stop button
  if (
    mouseX > btn.x - btn.w / 2 &&
    mouseX < btn.x + btn.w / 2 &&
    mouseY > btn.y - btn.h / 2 &&
    mouseY < btn.y + btn.h / 2
  ) {
    // Toggle the value of p to start or stop the rotation animation
    if (p == 1) {
      mySound.pause(); // Pause the music
      p = 0; // Stop the animation
    } else {
      mySound.pause(); // Pause the music
      mySound.play(); // Start playing the music
      p = 1; // Start the animation
    }
  }

  // Check if the mouse click is within the boundaries of the Restart button
  if (
    mouseX > btnReplay.x - btnReplay.w / 2 &&
    mouseX < btnReplay.x + btnReplay.w / 2 &&
    mouseY > btnReplay.y - btnReplay.h / 2 &&
    mouseY < btnReplay.y + btnReplay.h / 2
  ) {
    mySound.stop(); // Stop the music
    mySound.play(); // Start playing the music
    p = 1; // Start the animation
  }
}
// Define a class called Button
class Button {
    // Constructor that initializes button position (x, y) and dimensions (w, h)
    constructor(x, y, w, h, text) {
        this.x = x; // X-coordinate of the button
        this.y = y; // Y-coordinate of the button
        this.w = w; // Width of the button
        this.h = h; // Height of the button
        this.text = text;   //text inside the button
    }

    // Method to display the button
    show() {
        // Save the current drawing style
        push();

        // Set the rectangle drawing mode to center
        rectMode(CENTER);

        // Set the fill color
        fill(200, 230, 150);

        // Check if the mouse is within the button's boundaries
        if (mouseX > this.x - this.w / 2 && mouseX < this.x + this.w / 2 && mouseY > this.y - this.h / 2 && mouseY < this.y + this.h / 2) {
            // If the mouse is inside, change the fill color to a darker shade
            fill(200, 180, 50);
        }

        // Draw a rectangle with rounded corners at the specified position and dimensions
        rect(this.x, this.y, this.w, this.h, 10);

        fill(255);
        textAlign(CENTER,CENTER);
        textSize(25);
        text(this.text,this.x,this.y);

        // Restore the previous drawing style
        pop();
    }
}

Part of my Code that I am proud of / difficulties:

That would be the variable p, getting it to be controlled with the mouseClicked function. Also variable p controls the animations. this was a journey of trial and error until i made it work. Another is fidgeting with the coordinates of the arc function and the use of increments to make the arcs rotate, i used the help of the reference sheet on the p5js website to figure out the rotation element and angles. That was difficult, sometimes they would just not work, i kept trying over and over again until everything worked cohesively.

This function is activated every time the button is clicked, it checks whether the mouse is on the play/stop button or on restart button  , also variable p decides if the music played or not :


// Function to respond to mouse clicks
function mouseClicked() {
  // Check if the mouse click is within the boundaries of the Play/Stop button
  if (
    mouseX > btn.x - btn.w / 2 &&
    mouseX < btn.x + btn.w / 2 &&
    mouseY > btn.y - btn.h / 2 &&
    mouseY < btn.y + btn.h / 2
  ) {
    // Toggle the value of p to start or stop the rotation animation
    if (p == 1) {
      mySound.pause(); // Pause the music
      p = 0; // Stop the animation
    } else {
      mySound.pause(); // Pause the music
      mySound.play(); // Start playing the music
      p = 1; // Start the animation
    }
  }

  // Check if the mouse click is within the boundaries of the Restart button
  if (
    mouseX > btnReplay.x - btnReplay.w / 2 &&
    mouseX < btnReplay.x + btnReplay.w / 2 &&
    mouseY > btnReplay.y - btnReplay.h / 2 &&
    mouseY < btnReplay.y + btnReplay.h / 2
  ) {
    mySound.stop(); // Stop the music
    mySound.play(); // Start playing the music
    p = 1; // Start the animation
  }


In this part variable p decides if the angle has to increase :


// Function to draw a rotating shape
function record(x, y) {
  push();
  translate(x, y); // Translate the origin to the specified position

  // If p is set to 1, increment the angle for rotation
  if (p == 1) {
    angle += 0.1;
  }
  rotate(angle); // Rotate the subsequent shapes based on the angle

  fill(0); // Fill color for the central ellipse
  ellipse(0, 0, 200, 200); // Draw a central ellipse

  noFill();
  stroke(100); // Set stroke color
  strokeWeight(5); // Set stroke weight

  // Draw four arcs to create a pattern
  arc(0, 0, 150, 150, 0, PI / 4);
  arc(0, 0, 120, 120, PI / 4, PI / 2);
  arc(0, 0, 100, 100, PI, (3 * PI) / 2);
  arc(0, 0, 150, 150, PI / 2, PI);

  pop(); // Restore the previous drawing settings
}

Finally, in this part of the code variable p decides if the animation(sprite sheet character) is good to start/run:


let f = 0; // Frame counter

function draw() {
  record(250, 250); // Call the record function to draw a rotating shape
  btn.show(); // Display the Play/Stop button
  btnReplay.show(); // Display the Restart button

  // Check if the animation is playing, and update the frame counter
  if (p == 1) {
    if (frameCount % 10 == 0) {
      f = (f + 1) % 40;
    }
  }

  image(imgs[f], 225, 60); // Display the current image frame

  // Check if the music is playing, and update the animation playback flag
  if (mySound.isPlaying()) {
    p = 1;
  } else {
    p = 0;
  }
}


Areas of improvement / future work:

I would like to in the future projects to create something more complex and a bit more creative, also bettering my skills in coding, thank you for viewing my project.

Link  to my code :

https://editor.p5js.org/mka413/sketches/zrBYeGRWy


Midterm progress #3

At this point after completing my template and look of my code, it may be simple but i translated what i shared in my last progress report. I am very proud of my code as it was quite challenging for me since i had some difficulties. i added an animation of a circle with 4 arches rotating to give an illusion that the record is spinning. I inserted a button that would make the record spin when pressed on and also pause the record when clicked on again. In the final sketch there will be a sprite sheet dancing character which will be dancing to a sample of music i created using the software “Logic”.

Initial sketch:

i sketched out my design on adobe illustrator to see how i would like my sketch to look like, and luckily it turned out exactly how i wanted it to be.

My final design:

My code:

// Declare a variable to store the button object
let btn;

// Variables to control rotation animation
let r = 0;
let angle = 0;

function setup() {
  createCanvas(500, 500); // Create a 500x500 pixel canvas
  background("#408080"); // Set the background color to a shade of blue-green
  btn = new Button(250, 400, 120, 50); // Create a button object at the specified position and dimensions
}

function draw() {
  record(250, 250); // Call the record function to draw a rotating shape
  btn.show(); // Call the show method of the button object to display it
}

// Function to draw a rotating shape
function record(x, y) {
  push();
  translate(x, y); // Translate the origin to the specified position

  // If r is set to 1, increment the angle for rotation
  if (r == 1) {
    angle += 0.1;
  }
  rotate(angle); // Rotate the subsequent shapes based on the angle

  fill(0); // Fill color for the central ellipse
  ellipse(0, 0, 200, 200); // Draw a central ellipse

  noFill();
  stroke(100); // Set stroke color
  strokeWeight(5); // Set stroke weight

  // Draw four arcs to create a pattern
  arc(0, 0, 150, 150, 0, PI/4);
  arc(0, 0, 120, 120, PI/4, PI/2);
  arc(0, 0, 100, 100, PI, 3 * PI/2);
  arc(0, 0, 150, 150, PI/2, PI);

  pop(); // Restore the previous drawing settings
}

// Function to respond to mouse clicks
function mouseClicked() {
  // Check if the mouse click is within the boundaries of the button
  if (mouseX > btn.x - btn.w / 2 && mouseX < btn.x + btn.w / 2 && mouseY > btn.y - btn.h / 2 && mouseY < btn.y + btn.h / 2) {
    // Toggle the value of r to start or stop the rotation animation
    if (r == 1) {
      r = 0;
    } else {
      r = 1;
    }
  }
}

Button code:

// Define a class called Button
class Button {
    // Constructor that initializes button position (x, y) and dimensions (w, h)
    constructor(x, y, w, h) {
        this.x = x; // X-coordinate of the button
        this.y = y; // Y-coordinate of the button
        this.w = w; // Width of the button
        this.h = h; // Height of the button
    }

    // Method to display the button
    show() {
        // Save the current drawing style
        push();

        // Set the rectangle drawing mode to center
        rectMode(CENTER);

        // Set the fill color to yellow
        fill(255, 255, 0);

        // Check if the mouse is within the button's boundaries
        if (mouseX > this.x - this.w / 2 && mouseX < this.x + this.w / 2 && mouseY > this.y - this.h / 2 && mouseY < this.y + this.h / 2) {
            // If the mouse is inside, change the fill color to a darker shade of yellow
            fill(200, 200, 0);
        }

        // Draw a rectangle with rounded corners at the specified position and dimensions
        rect(this.x, this.y, this.w, this.h, 10);

        // Restore the previous drawing style
        pop();
    }
}


Rotation of the arcs/ also a part of the code that made me proud:

I used the push and pop method we took in class to achieve this motion, also to achieve the arc “animation” i used the reference “arc()” on p5js website

arc() :

arc(50, 55, 50, 50, 0, HALF_PI);
noFill();
arc(50, 55, 60, 60, HALF_PI, PI);
arc(50, 55, 70, 70, PI, PI + QUARTER_PI);
arc(50, 55, 80, 80, PI + QUARTER_PI, TWO_PI);
describe(
  'A shattered outline of an ellipse with a quarter of a white circle at the bottom-right.'
);
// Function to draw a rotating shape
function record(x, y) {
  push();
  translate(x, y); // Translate the origin to the specified position

  // If r is set to 1, increment the angle for rotation
  if (r == 1) {
    angle += 0.1;
  }
  rotate(angle); // Rotate the subsequent shapes based on the angle

  fill(0); // Fill color for the central ellipse
  ellipse(0, 0, 200, 200); // Draw a central ellipse

  noFill();
  stroke(100); // Set stroke color
  strokeWeight(5); // Set stroke weight

  // Draw four arcs to create a pattern
  arc(0, 0, 150, 150, 0, PI/4);
  arc(0, 0, 120, 120, PI/4, PI/2);
  arc(0, 0, 100, 100, PI, 3 * PI/2);
  arc(0, 0, 150, 150, PI/2, PI);

  pop(); // Restore the previous drawing settings
}


I also used the function for the button to start and pause the record mouseClicked() :

From p5js website:

let cnv, d, g;
function setup() {
  cnv = createCanvas(100, 100);
  cnv.mouseClicked(changeGray); // attach listener for
  // activity on canvas only
  d = 10;
  g = 100;
}

function draw() {
  background(g);
  ellipse(width / 2, height / 2, d, d);
}

// this function fires after the mouse has been
// clicked anywhere
function mouseClicked() {
  d = d + 10;
}

// this function fires after the mouse has been
// clicked on canvas
function changeGray() {
  g = random(0, 255);
}
// Function to respond to mouse clicks
function mouseClicked() {
  // Check if the mouse click is within the boundaries of the button
  if (mouseX > btn.x - btn.w / 2 && mouseX < btn.x + btn.w / 2 && mouseY > btn.y - btn.h / 2 && mouseY < btn.y + btn.h / 2) {
    // Toggle the value of r to start or stop the rotation animation
    if (r == 1) {
      r = 0;
    } else {
      r = 1;
    }

Button function:

I created a class called button then set the x,y,w,h coordinates, in addition to the shape of the rectangle, and the color changes for when mouse is clicked

// Define a class called Button
class Button {
    // Constructor that initializes button position (x, y) and dimensions (w, h)
    constructor(x, y, w, h) {
        this.x = x; // X-coordinate of the button
        this.y = y; // Y-coordinate of the button
        this.w = w; // Width of the button
        this.h = h; // Height of the button
    }

    // Method to display the button
    show() {
        // Save the current drawing style
        push();

        // Set the rectangle drawing mode to center
        rectMode(CENTER);

        // Set the fill color to yellow
        fill(255, 255, 0);

        // Check if the mouse is within the button's boundaries
        if (mouseX > this.x - this.w / 2 && mouseX < this.x + this.w / 2 && mouseY > this.y - this.h / 2 && mouseY < this.y + this.h / 2) {
            // If the mouse is inside, change the fill color to a darker shade of yellow
            fill(200, 200, 0);
        }

        // Draw a rectangle with rounded corners at the specified position and dimensions
        rect(this.x, this.y, this.w, this.h, 10);

        // Restore the previous drawing style
        pop();
    }
}


Any difficulties? :

Fidgeting with the coordinates of the arc() function was tricky for me, its the first time for me to try and use it as it was not quite working for me, also figuring out the push and pop method was confusing at first. In future projects i would want to do something more complex and better my skills coding wise. I will be posting my final sketch soon.


midterm progress 2

so for now i still did not start with the coding part i am getting to it ,  but i finally found a idea for my midterm.

i saw a project of a spinning record, and i really liked this idea, it is going to have sound and animation , and i will add more to it  from buttons to music, and possibly add abstract art for the background.

The spinning record will play an instrumental mp3 file that i composed on the software Logic. on the bottom i will add a sprite sheet of a character dancing to the uploaded music.

Sprite sheet:

Spinning record example:

Logic instrumental:


Week 5: Reading reflection


Reflection

After reading this article about computer vision methods and how they are used in interactive media, I am incredibly excited by the remarkable potential that this field holds. Beginning with the enormous difficulty of obtaining meaningful information from digital video, which by its very nature lacks semantic content, the article emphasizes the difficulty of so doing. Also, the article presents basic computer vision techniques that detect motion, presence, and other interactive features encoded in video streams. The techniques include frame differencing, background subtraction, and brightness thresholding. The explanation of these techniques fascinates me since it makes them seem unexpectedly approachable, especially to novice programmers. Without a doubt, this accessibility emphasizes how computer vision has democratized the fields of art and design.

The article also emphasizes the essentiality of matching physical parameters with vision algorithms to improve their dependability. It demonstrates how astute environmental planning can dramatically boost computer vision systems’ functionality. I am inspired by the accessibility of these technologies for artistic efforts as I learn about the numerous multimedia authoring tools and plugins accessible to designers and artists. The article concludes with an encouraging illustration of LimboTime, a straightforward yet entertaining interactive game that was developed by workshop participants in just one afternoon. Such an illustration depicts how computer vision may enable designers and artists to explore new realms of interactive art. The article demystifies the complexity of computer vision techniques and emphasizes their accessibility while revealing their revolutionary power. As such, it highlights their capacity to enable creators of all skill levels to create interactive experiences, enhancing the field of multimedia and beyond. As it turns out, I am in awe of the nexus of technology and creativity, where pixels become dynamic canvases, providing new horizons for creative expression.

Midterm Progress

For my midterm project, i researched many concepts but the concept that intrigued me the most is using animated sine wave structures to show data. As for the difficulties, the coding part of this concept is ranging in complexity, which i will have to pay extra attention to. Ive seen many examples on this interactive concept, i will figure out a creative way to join/connect all the things i learned in class also integrate sounds, and hopefully will have a final look to my project and by watching more tutorials on p5 i will be able to accomplish these ideas. To be Updated.

Week 4: Reflection


Chapter 1 of “The Design of Everyday Things” by Don Norman, analyzes the importance of design in our daily interactions in a way that will make you stop and think. I was compelled to reflect on my interactions with everyday processes and objects while reading this chapter. The fundamental idea that design is essential in determining how we experience and interact with ordinary objects is introduced in this chapter, which also serves as the book’s introduction.

The idea that good design is essential for reducing frustration and improving usability is one of the main issues covered in this chapter. Several instances of badly designed products that aggravate users are provided by Norman, including doors with ambiguous push-and-pull instructions, phone systems with complicated user interfaces, and stovetops with perplexing burner controls. These examples speak to me since I’ve experienced frustrations like these in my own life. Amazingly, seemingly basic items can become annoyances if their design needs to be better considered.

Another principle Norman mentions is the idea of “natural mapping,” which relates to the notion that the link between controls and their functions should be intuitive and conform to the user’s mental model. In the context of user-centered design, this idea is extremely crucial. This idea appealed to me greatly because I frequently come across gadgets or user interfaces with controls that need to be organized or labeled sensibly.

“affordances” is a major concept covered in this chapter. According to Norman, an object’s perceived and actual qualities affect how it can be used. To demonstrate this idea, he used the illustration of a door. He contends that a well-designed door should have distinct affordances that make it obvious whether it should be pulled or pushed. This idea of affordances opened my eyes. It made me aware of how frequently I come across doors, faucets, or buttons without signs of their intended usage, resulting in unpleasant and confusing situations.

The notion that when users experience problems, it is the fault of the design they are having rather than the user is particularly thought-provoking in this chapter. This viewpoint is a welcome change from the usual tendency to criticize customers for not comprehending or using a product properly. It emphasizes how designers must make things that are simple to use and intuitive.

In conclusion, Chapter 1 of Don Norman’s book “The Design of Everyday Things” addresses the importance of design in our daily lives and its influence on our experiences. It emphasizes the significance of developing goods and systems with user-centered design concepts to reduce frustration and improve usability. After reading this chapter, I became more aware of how the design of commonplace items affects how we interact with the environment. It emphasized that excellent design is crucial for enhancing the caliber of our daily experiences, not just a nice-to-have.


Week 4: Assignment


This weeks assignment asked us to either do a data visualization or generative text, i thought data visualization was interesting and i wanted to see what i could create using the vast amount of data sets available.

I first found a data set on kaggle called spotify charts, i completed all of the codes necessary but for some reason the bar chart that i created kept giving me an error and its size did not change according to the data took from the spotify csv file. therefore, i searched for more data sets and i came upon a data set that shows Cats and Dogs household dataset which kind of worked but still was not flawless as it did not display the data that i chose.

Finally, as i was running out of time , i made a very simple chart on excel, which worked perfectly, which had name ,age , and how tall the seven people are.  I would still rather use the other data sets mentioned above, as it will give me better visuals and maybe change the course and look of the charts i create.


My code:

I wouldn’t say im proud of some parts of the code, as i wish i had done a better one with more complexity and creativeness, until next time.

let table;

function preload() { //it makes sure that everythings checks out before the other functions execute
  
  table = loadTable('information.csv', 'csv', 'header');
 
}

function setup() {
  createCanvas(400, 400);
  noLoop();
}

function draw() {
  background(255,200,204);
  
  //this makes sure there is content in the data
  if (table) {

    //get the amount of rows in the CSV
    let numRows = table.getRowCount();

    //get the column titled age and how_tall
    let age = table.getColumn('age');
    let how_tall = table.getColumn("how_tall");
     
    
    //iterate over the number of rows
    for (let i = 0; i < numRows; i++) {
      noStroke()
      let x = 100;
      let y = 100+(i*25); //i*25 will increment by 20 each time the loop runs
      let w = age[i]*5;  //age by itself was small, so * to get bigger 
      let h = 10;
       
         if (name[i] =='dana'){
           
           h=5;
         }   
      rect(x,y,w,h);


    }
  }
}

Editable link :

https://editor.p5js.org/mka413/sketches/qaidZGOFj

Assignment 2 – Reflection

After viewing the video, Casey Reas’ inventive coding innovations made me think of the many possibilities that coding can do towards the art world . He has transformed the complex language of code into a tool for creating interactive and visually appealing artworks. This method pushes the limits of what traditional conceptions of art may be, and I found it to be quite exciting.
I was also intrigued by Casey’s contribution to “Processing creation”. Designing a programming language and environment that is especially suited for artists and creators is a beautiful concept. It gives people the confidence to explore the realm of visual art and creative projects, regardless of their background in coding. I was moved by this democratization of digital art, which demonstrated the ability of technology to increase access to artistic expression.
Another fascinating topic was the investigation of generative art covered in the film. Unpredictability and dynamism are added to the creative process by employing algorithms and rules to produce art that changes over time or reacts to user interaction. I could not help but be impressed by the inventiveness of this strategy since it is like art that has a life of its own.
Casey’s work’s emphasis particularly struck me on interaction. The lines between the artist and the viewer are blurred when the public is allowed to interact with and affect the artwork. As a result, it becomes more interactive and engaging, which is a potent method to engage audiences.
Also demonstrating the depth of the creative coding community were Casey’s partnerships with other artists and creators. It is inspirational to consider how people may work together to create projects that are both inventive and beautiful to look at. It shows the potential for group innovation and the limitless opportunities that arise from working with others who share similar interests.

Assignment 2 – “Abstract art”

My concept

My concept was to create my version of abstract art of shades of blue, with one shade of maroon to counter the other colors. As I became more accustomed to coding and following what I’ve learned during class, I tried to implement the bouncing ball element, also added the concepts of conditional statements such as loops and if statements.

I tried to find a way that I could make the dark turquoise ball leave traces of its position on the canvas, but i was not successful in that, therefore I eventually just left it as it is.

A highlight of some code that you’re particularly proud of

I am proud of this part of my code which I am proud of because I was having trouble with how to make the ball bounce back, I eventually understood the if statement and how it works, as it was initially challenging for me.

   //to make the ball bounce back the opposite side
    
 if(circleA < 0 || circleA > width) 
    speedA = speedA * -1;
     
  }

  //  to make the ball bounce back the top to bottom
  
{
    if(circleY < 0 || circleY > height) {
    speedY = speedY * -1; 
      fill(25,23,22);


Embedded code

// state
let circleX = 100;
let circleY = 0;
let speedX = 10;
let speedY = 8;
let circleA= 100;
let circleB=400;
let speedA= 4;
let speedB= 8;
let a = 50;


function setup() {
  createCanvas(450, 450);
}

function draw() {
  
  background(204,255,229);
  fill(90,153,153)
  rect(250,202,300);
  noFill();
  fill(210,255,255);
  rect(0,202,300);
  noStroke();
  
  {//for loop
    for (let x = 0; x < 8; x += 2) { // same as x = x + 2
     fill(229,255,204)
    circle(a * x + 25, height / 2, a, a);
    circle(width / 2, a * x + 25, a, a);
  noStroke()
    }
  }

  // Frame based on state
  fill(0,102,102) //color of circle X,Y
  circle(circleX, circleY, 50);
  fill(102,0,0); //color of circle B,A
    circle(circleB, circleA, 50);
    fill(255,202,204)


  circleX = circleX + speedX;
  circleY = circleY + speedY;
  circleA=circleA+speedA;


  //make the ball bounce from left to right
  {
    if(circleX < 0 || circleX > width) 
    speedX = speedX * -1; 
  }
    {
      //to make the ball bounce back the opposite side
     if(circleA < 0 || circleA > width) 
    speedA = speedA * -1;
     
  }

  //  to make the ball bounce back the top to bottom
  {
    if(circleY < 0 || circleY > height) {
    speedY = speedY * -1; 
      fill(25,23,22); 
    }
    {
      
     
    }
}
}
  • Reflection and ideas for future work or improvements

What I think is most important at this moment is that I have to have more knowledge on how i can transform the ideas in my head into reality through coding. This assignment took more time than it should have because at first, i was partially confused about how things work and how they are going to be executed. Practicing and understanding fully how to write more precise and cohesive coding would be my goal to reach, nonetheless, i enjoyed creating this assignment.


Editable link:

https://editor.p5js.org/mka413/sketches/r-RMAvSOJ

Assignment 1 – self portrait

This is my version of a “smiley face”, I used the elements we’ve learnt last class to implement the variables in the background and experiment with them, as you move the mouse they make an x while changing colors.

Reflection

The skills that i hope to achieve, is to maybe make a more polished portrait, and to fully understand how to create more shapes that will allow me to produce better results. I would say it is personally for me a bit difficult as i have little knowledge about coding in general, but i managed to create this portrait after practicing a couple of times, i would say i got the hang of it, nonetheless, it is fun and interesting with experimenting different types of syntax and changing the variables as i continue to code.

function setup() {
  createCanvas(800, 800);
 background(0)
;
}

function draw() {
  //background
  fill(mouseX, mouseY,50) // to fade the colors

 
  circle(mouseY,400,300,) //to move the circle with the pointer
circle(400,mouseY,300) //to move the circle with the pointer

  //face
  fill(255,255,)
  circle(400,400,600)

  //eyes
  circle(280,330,90)
  circle(490,330,90)

  //pupils
fill(0)
  circle(280,330,50)
  circle(490,330,50)
  noStroke()
  
  //mouth
   strokeWeight(20);
  stroke('#f28865');
  arc(400, 550, 150, 200, .1, PI-.1);
  noStroke();
  
  //eyebrows
  stroke('#333');
  strokeWeight(9);
  noFill();
  arc(280, 310, 80, 80, PI+.9, -.9);
  arc(490, 310, 80, 80, PI+.9, -.9);
 

  //nose
   stroke('#333');
  strokeWeight(9);
  noFill();
  arc(400, 480, 50, 80, PI+.9, -.9);


}

 
editable link: https://editor.p5js.org/mka413/sketches/dnJhX_ugh