3 weeks (and a few changes to our preliminary idea) later, we finally have a working version of our game.
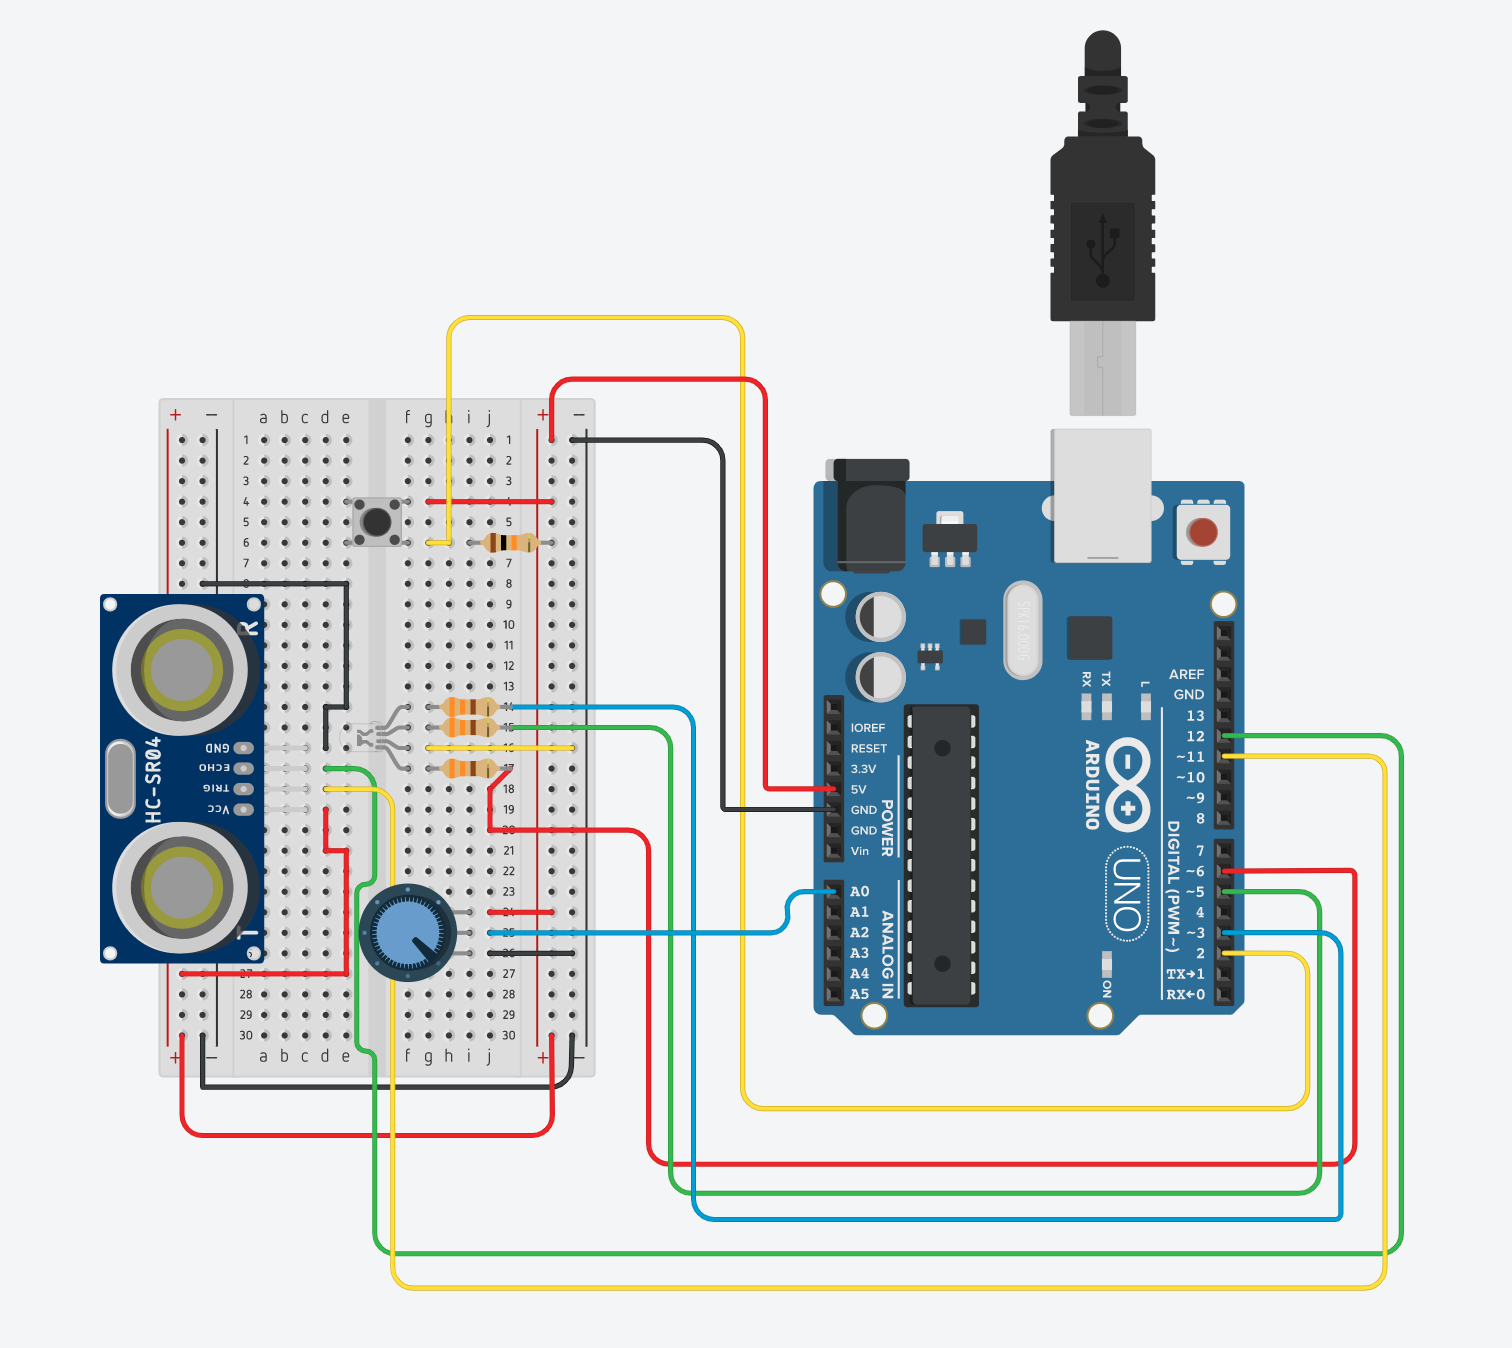
User testing videos, some screen recording demos, and a diagram of the Arduino setup can be found at the end of the post. The code for the project can be found on the github repository. A zipfile containing all the code and files can also be found at the end.
TLDR: the Arduino works better if it’s suspended in the air.
Game Concept:
This game is an NYUAD-themed game (yes we’re mentioning this for the third time over the past 3 weeks). The concept is very simple. The game consists of four levels which correspond to the four academic years of life at NYUAD, and each level consists of customized objects – both good and bad (for instance, you might see study away as an object but this only appears Sophomore year onwards. Similarly, capstone appears Junior year onwards). The player is represented as Faiza the Falcon at the bottom of the screen, and is controlled by moving the Arduino set in the horizontal direction. There are 2 metrics of performance, Academics and Health, both of which are set to 50 initially. Catching the good objects in each category will help improve the player’s performance in each. Similarly, catching the bad objects worsens the player’s performance in that particular category. The player has to take both performances to 100 to proceed to the next level and to eventually graduate!
Arduino-Processing Communication
Our Arduino consists of 3 sensors – a potentiometer, a button and an ultrasonic sensor. It also consists of a tricolored LED. The functions of all of these components are described below.
The ultrasonic sensor measures the distance between the sensor and a frame (a solid vertical surface) and sends relevant information to Processing, which then maps this distance to Faiza’s position on the screen. In this manner, using the Arduino set in the horizontal direction allows us to move Faiza on the screen.
The potentiometer is used to traverse between different options on the screen (where applicable). The use of the potentiometer can be found on the welcome screen and when the player loses a certain level (fails an academic year).
The button is used to make selections wherever needed, at different points in the game.
The tricolored LED shows how well the player is doing overall in the game. Processing uses a combination of both metrics of performance (Academic and Health) and sends a signal to Arduino to set the LED to the relevant color. Red, of course, indicates danger, green indicates that the player is safe and yellow indicates that the player should do better.
Code & Some features
Item
This is the class which describes all the attributes and methods of items which fall down the screen. These attributes include the items’ x-coordinates within a range on the screen (75% of the screen), the y-coordinate, the sprite image, the number of frames which each sprite image consists of, and the value associated with each (good or bad) item. The update() function in the Item class ensures that each item falls down the screen with a random vertical velocity, which again, is within a certain range. It also contains a display() function which determines how each sprite has to be displayed on the screen.
Player
This is the class representing the user and displaying the player’s avatar (Faiza the Falcon) on the screen. The main function of this class is the display() method which serves to display the correct frame of the sprite as well as flip it appropriately to illustrate movements to the right or to the left. This class also takes the mapped value of the distance sensor from the main program as the current position of the player on the screen.
Level
This is the class that coordinates the different game functions and the interactions between Player and Items. Since different levels have different sets of available objects, and said objects are further divided into categories, the Level class has a number of lists using different Java data structures to store necessary.
item_names is an ArrayList containing the names of all the objects available for the current level. We put these names in four .csv files, which are used to populate the item_names list. ArrayList is helpful for this list because it supports functions like contains(), size(), add().
frames and values are two HashMap with String keys and Integer values. Since different items have different numbers of sprite frames and values, these can be read (also from .csv files) and later called upon. We want to index these values using item names, which is why we decide to use HashMaps.
posAcademic, negAcademic, posHealth, and negHealth are four StringList storing the names of items that belong to four categories (as the names suggest, positive and negative for academics and health). The StringList structure is mostly identical to an ArrayList, only that it’s limited to storing String data. We recently discovered this data type and wanted to try it out. StringList supports the function hasValue() that can quickly check if a list contains a certain value, which comes in handy for our program.
We add two more StringLists positives and negatives which store the names of all the positive items and negative items respectively, regardless of which metrics they involve. These lists are mainly used for randomizing new items.
rare_items_count and rare_items_catch are two HashMaps using the names of rare items (described in details below) as keys to store how many times an object has appeared in a level, and how many times it has been caught by the player, respectively. These lists are used to put a limit on the frequencies of rare items appearing in a level.
The last list of this class is items, an ArrayList that stores Item objects. New items are created and added to this list, and later picked out to display on the screen.
Some other attributes of the Level class includes levelNum (0-3 corresponding to four academic years), academic and health to store Academics and Health metrics (default 50 each), a number of background images for different screens, away (boolean value to keep track of whether the player has caught a Study away item), etc.
The Level class also contains a number of methods, as will be explained below.
loadData() is called upon construction of an object. This method reads from the various .csv files we prepared beforehand to populate relevant lists as mentioned above. We first started out filling the lists manually, but then cleaned up the data into .csvs files instead to reduce confusion should we want to add new items, change frames, values, etc.
displayBackground() checks which level is currently played to display the correct background image. It also checks if the player is currently ‘studying away’.
addItems() randomizes new items for the game. We settle with the rate of two new items per second, one positive and one negative (we use positives and negatives lists for this). This method also takes into account rare_items_count and rare_items_catch to limit these items. displayItems() then picks items out of the list and display them.
checkCollision() iterates through the list of items to check whether Faiza the Falcon is colliding with any of them. Upon collision, the method checks the category to which the item belongs to adjust the performance metrics accordingly.
There are also a number of helper methods like colliding() (returning a boolean value of whether the player is ‘catching’ the item), lost() and won(), increase/decrease Health/Academic().
Level_test
This is the main game program that coordinates different levels and different screens, and it also processes data from Arduino program and sends data back.
Most of the screens of the game either has one option (selected through pressing the button) or two options. For those with two options, we use a threshold on the reading of the potentiometer to display which option is being selected (signified with >> <<). Pressing the button will select the highlighted option.
The main program reads from the Arduino programs three sensor values: button state, potentiometer values, and distance sensor value.
As described in the documentation of a previous week, we use a formula from an earlier lecture to add smoothing to the value reading from the distance measuring sensor. In our program, we use a smoothing factor of 0.2, which eases the movement of the player. We also add a threshold in case sudden jumps in distance are detected. The player will only move if the new position mapped from the distance measuring sensor is within 1/3 of screen width from the position of the player recorded in the previous frame.
The main program also inspects the current performance metrics and sends appropriate values to the Arduino program, which will control the color of the LED.
Features
The game consists of three rare items – Study away, J-term and Capstone. Since these are objects which aren’t as common as others (both in the context of the game and in reality), they function in a slightly different manner. For instance, a person can only get one J-term, one study away and one capstone in an academic year (in reality), hence this is what we implemented in our game too. The player is only presented with a maximum of three of each of these rare items within a certain level (this was implemented using certain boolean values). However, once the player catches one item of each of these types, that particular item won’t reappear in the same academic year in the game. To put this into perspective, if the player catches an item corresponding to a J-term, then a J-term will never appear again in the same academic year (level) and it will only appear a maximum of three times in case the player never manages to catch it.
In order to make the game a little more interactive and NYUAD-themed, we used several different images of the NYUAD campus as backgrounds for the different levels. However, there’s something even nicer to add to this! If the player catches an item which corresponds to a study away, the background changes to an image of the New York campus (yes this is the only way we can get a semester in New York during Covid times).
The sprites used to represent each of the items were created using https://www.piskelapp.com/. This was a very time-consuming but interesting process as we had to spend a lot of time paying attention to detail. It was also necessary to make all sprites ourselves because all items are NYUAD-themed and it was impossible to find anything on the internet.
Problems
We first planned to use the buzzer to play a sound upon collision with an item, but we ran into some problems with it. At one point, we got it to work as we wanted, but we noticed that some items triggered a sound when colliding with the player, while some others didn’t. We didn’t really understand what caused the problem, and the item choices seemed quite arbitrary. When we got back to working on it a few days later, for some reason no sound was playing. We suspected it might had something to do with the value we were sending from Processing to Arduino, but when we tried printing the value out in Processing while sending it to Arduino at the same time, it showed the correct value we wanted. We consulted Professor Aaron and worked on it some more, but we were not able to pinpoint what the problem actually was. Since we already tested the Processing program, and the other value sent from Processing to Arduino (LED value) worked without trouble, it might have been due to the buzzer itself. But since we only have one buzzer between the two of us, we were not able to test this out. In the end, we decided to not use the buzzer and replace it with the sound library of Processing.
When we first tried controlling the position of Faiza on the screen using the Arduino, we had to smoothen the values which were sent by the distance sensor and that gave us pretty good results. The description of that process can be found in one of our earlier posts, the link to which is attached. https://intro.nyuadim.com/2021/04/19/final-project-progress-ngoc-and-maaz/ For the most part, this allowed us to swiftly control Faiza using the Arduino but on the very last day, it would sometimes give weird results. However, lifting the Arduino set slightly above the solid surface allowed us to have results which were a lot more stable than what we got when we placed it on a table. The solution we found was completely coincidental but it improved the game play more than we expected.
At times, we faced difficulties trying to figure out how to store all items which were used in the game, particularly because each level had a separate list of good and bad items and each item had a different number of frames for its sprite, as well as a different value associated to it. With a lot of research and experimentation, we figured out these issues using some data structures which are described in the Code and some features section above.
Reflection
Ngoc: For the second half of the semester and during working on the project, I learned a lot about using the Arduino (which was something I’d been looking forward to since high school, I was not disappointed!). Our project also includes components from earlier lectures, so I think it was a nice wrap-up for what we have learned from the class. Working in a group also made me a lot more responsible, in that I could not afford to wait until the last week to start seriously working. I also came to realize I’m really lacking on the creative side, so working in a group really balanced this out (kudos to Maaz and his collection of sprites).
Maaz: When I started working with the Arduino at the beginning of Spring 2, I wasn’t comfortable with handling the components without supervision, particularly because I have never been a very big fan of working with hardware. Looking at this project and making my friends play the game, I am super proud of what we have created. This process involved a lot of problems, followed by a lot of research and problem-solving. Two days ago, Ngoc and I spent around 20 minutes solving a problem which was caused by using something called shapeMode() instead of rectMode() (sorry Professor, I know you won’t be proud). I have learnt a lot from working with Ngoc; from having a blank face when she first suggested we make a HashMap to making one on my own, this was an extremely nice process of learning and creating something which I am extremely proud of.
This week, we were supposed to start working on the final project right after finalizing our proposals. The link to the proposal for the game Ngoc and I are working on can be found below.
Ngoc and I sat down and discussed the Processing part of the game. Based on our past experience of working on games, we had slightly different opinions on how to go about the classes our game would contain, but there’s a lot I can learn from a sophomore and I believed that her idea of creating 4 different classes would make it easier for us to work on different parts of the game. The 4 classes and a description of what all of them would do are as follows:
Item
The Item Class will consist of all attributes of items which are to fall down the screen. These attributes will include the initial x and y coordinates of the items, their velocities as they fall down the screen, radii, image (to be displayed for each item) and more. The Item Class will also consist of relevant methods for all items, including their update() and display() methods.
Player
The Player class will characterize the user of the Processing program. The most fundamental attribute of a Player object is the x coordinate which is communicated from the Arduino program and updated accordingly. It will also have a display() method to show where the player is on the screen (represented by a sprite). Other information will also be communicated between different classes like Player, Level, Game to determine when the player will appear on the screen etc.
Level
A Level object encompasses one full game level and includes a number of objects from other classes, for example one level will include one player and multiple items, as well as new entities like performance metrics. This class coordinates the interactions between Item class and Player class like checking for collisions, and supports other key game functionalities like updating and displaying performances.
Game
An instance of the Game class will represent one entire game which will have four levels, each corresponding to one of the four academic years. It will also contain its own update() and display() functions, which will coordinate certain conditions and outputs to deal with those conditions. Moreover, it will also be responsible for calling the update() functions of other objects which are instantiated within the Game class and the Level class.
Remote Control Testing
The part we expect to be the hardest is getting the remote control to work. From working on previous assignments, we have seen that the distance measuring sensor gives pretty unstable readings and we were concerned with how that might reflect in our program, since smooth and correct mapping of the movement of the remote control onto the screen is a key game function.
We first experimented with mapping the distance onto the movement of a circle on a blank screen to make sure that we could get the sensor to work as we want. As expected, the movement of the circle was quite jittery and glitchy, but it did move in the way we intended. So this proved that we could indeed move the whole Arduino and breadboard combination as a remote control for the game.
We then experimented further with the Processing code to smoothen the movement of the player (which is still represented by a single moving circle for the sake of simplicity). We went back to an earlier example and used it in our Processing code, which gave much smoother player movement.
The differences between no smoothing vs. with smoothing are recorded as can be seen in the short demo:
The Arduino and Processing code for testing the remote control is as following:
const int trigPin = 11;
const int echoPin = 12;

float distance;

void setup() {
  // put your setup code here, to run once:
  Serial.begin(9600);
  Serial.println("0");
  pinMode(trigPin, OUTPUT);
  pinMode(echoPin, INPUT);
}

void loop() {
  // put your main code here, to run repeatedly:
//  distance = getDistance();
//  Serial.println(distance);
  while (Serial.available()) {
    if (Serial.read() == '\n') {
      distance = getDistance();
      delay(1);
      Serial.println(distance);
    }
  }
}

float getDistance()
{
  float echoTime;                   //variable to store the time it takes for a ping to bounce off an object
  float calculatedDistance;         //variable to store the distance calculated from the echo time

  //send out an ultrasonic pulse that's 10ms long
  digitalWrite(trigPin, HIGH);
  delayMicroseconds(10);
  digitalWrite(trigPin, LOW);

  echoTime = pulseIn(echoPin, HIGH);      //use the pulsein command to see how long it takes for the
                                          //pulse to bounce back to the sensor

  // calculatedDistance = echoTime / 148.0;  //calculate the distance of the object that reflected the pulse (half the bounce time multiplied by the speed of sound)
  calculatedDistance = echoTime / 58.0;

  return calculatedDistance;              //send back the distance that was calculated
}
For the Week 3 assignment, I made a game. This game was NYUAD-themed and the player used arrow keys to make Faiza the falcon avoid certain obstacles and get a 4.0 GPA. The link to that post is attached below.
This extra credit assignment is an extension of my Week 3 assignment, except that it makes use of buttons instead of arrow keys. There are 4 different buttons, each corresponding to a single direction.
I figured that the purpose of this assignment was to understand serial communication well, so I tried making good use of a game I had already made earlier.
The group exercises which were due on Monday, together with working on this game, have allowed me to understand the communication between Processing and Arduino a lot better.
Arduino code:
const int yellowButtonPin = 2;
const int greenButtonPin = 4;
const int redButtonPin = 7;
const int blueButtonPin = 8;


void setup() {
  Serial.begin(9600);
  Serial.println("0");
  pinMode(yellowButtonPin, INPUT);
  pinMode(greenButtonPin, INPUT);
  pinMode(redButtonPin, INPUT);
  pinMode(blueButtonPin, INPUT);
}

void loop() {
  while (Serial.available()) {
    if (Serial.read() == '\n') {
      int yellow_button = digitalRead(2);
      delay(1);
      int green_button = digitalRead(4);
      delay(1);
      int red_button = digitalRead(7);
      delay(1);
      int blue_button = digitalRead(8);
      delay(1);

      Serial.print(yellow_button);
      Serial.print(",");
      Serial.print(green_button);
      Serial.print(",");
      Serial.print(red_button);
      Serial.print(",");
      Serial.println(blue_button);
    }
  }

}
Processing code:
import java.lang.Math;
import processing.sound.*;
import processing.serial.*;
Serial myPort;
SoundFile file;

String audioName = "intro.mp3";
String path;

PImage[] images;
Game game;

// creating an array for distractions which are used later
Distractions[] distractions;

class Faiza{
  float posX, posY;
  float radius;
  float velocityX;
  float velocityY;
  float imgwidth, imgheight;
  String directionX;
  //String keyY, keyX;
  boolean move_up, move_down, move_right, move_left;
  boolean alive;
  int counter, frame;

  Faiza(float x, float y, float r, float img_w, float img_h){
    posX = x;
    posY = y;
    radius = r;
    velocityX = 0;
    velocityY = 0;
    imgwidth = img_w;
    imgheight = img_h;
    directionX = "right";
    move_up = false;
    move_down = false;
    move_right = false;
    move_left = false;
    alive = true;
    counter = 0;
    frame = 0;
  }

  void display(){
    update();
    if (directionX == "right"){
      image(images[0], float(int(posX - imgwidth/2)), float(int(posY - imgheight/2)), imgwidth, imgheight, int(frame * imgwidth), 0, int((frame + 1) * imgwidth), int(imgheight));
    }
    else if (directionX == "left"){
      image(images[0], float(int(posX - imgwidth/2)), float(int(posY - imgheight/2)), imgwidth, imgheight, int((frame + 1) * imgwidth), 0, int(frame * imgwidth), int(imgheight));
    }
  }

  void update(){
    //The condition below is for when Faiza moves left
    if (move_left == true){
       velocityX = -2;
       directionX = "left";
       if (posX - radius + velocityX < 6){
         velocityX = 0;
       }
       posX += velocityX;
    }

    //The condition below is for when Faiza moves right
    else if (move_right == true){
      velocityX = 2;
      directionX = "right";
      if (posX + radius + velocityX > 1018){
        velocityX = 0;
      }
      posX += velocityX;
    }

    //If none of the left and right keys are being pressed, Faiza stops moving horizontally
    else{
      velocityX = 0;
    }

    if (move_up == true){
      velocityY = -2;
      if (posY - radius + velocityY <= 5){
        velocityY = 0;
      }
      posY += velocityY;
    }

//The condition below is for when Faiza moves downwards
    else if (move_down == true){
      velocityY = 2;
      if (posY + radius + velocityY >= 762){
        velocityY = 0;
      }
      posY += velocityY;
    }

//If none of the up and down keys are being pressed, Faiza stops moving vertically
    else{
    velocityY = 0;
    }

    if (distance(game.gpa) <= (radius + game.gpa.radius)){
      game.level += 1;
    }

    if (!(posX >= 0 && posX <= 100 && posY >= 530 && posY <= 640)){
      for (int i = 0; i < 6; i++){
        if (distance(distractions[i]) <= radius + distractions[i].radius){
          counter += 1;
          println(counter);
          alive = false;
        }
      }
    }
  }

  // this distance method will be used to check for collisions with distractions
  double distance(Distractions target){
    float a = (posX - target.posX);
    float b = (posY - target.posY);
    double c = Math.pow(a, 2);
    double d = Math.pow(b, 2);
    return Math.pow(c + d, 0.5);
  }

   // this distance method will be used to check for collisions with the gpa (marking the end of the game)
   double distance(GPA target){
    float a = (posX - target.posX);
    float b = (posY - target.posY);
    double c = Math.pow(a, 2);
    double d = Math.pow(b, 2);
    return Math.pow(c + d, 0.5);
  }
}

class Distractions{
  float posX, posY;
  float radius;
  float imgwidth, imgheight;
  int frame;
  PImage img;
  float velocityX, velocityY;

  Distractions(float x, float y, float r, String _img, float img_w, float img_h){
    posX = x;
    posY = y;
    radius = r;
    img = loadImage(_img);
    imgwidth = img_w;
    imgheight = img_h;
    frame = 0;
    velocityX = random(2,5);
    velocityY = -1 * random(2,5);
  }

  void update(){
    if (posX + radius >= 1024){
      velocityX *= -1;
    }
    if (posX - radius <= 0){
      velocityX *= - 1;
    }
    if (posY - radius <= 10){
      velocityY *= -1;
    }
    if (posY + radius >= 780){
      velocityY *= -1;
    }

    posX += velocityX;
    posY += velocityY;
  }

  void display(){
    update();
    image(img, float(int(posX - imgwidth/2)), float(int(posY - imgheight/2)), imgwidth, imgheight, int(frame * imgwidth), 0, int((frame + 1) * imgwidth), int(imgheight));
  }
}

class GPA{
  float posX, posY;
  float radius;
  float imgwidth, imgheight;
  int frame;

  GPA(float x, float y, float r, float img_w, float img_h){
    posX = x;
    posY = y;
    radius = r;
    imgwidth = img_w;
    imgheight = img_h;
    frame = 0;
  }

  void display(){
    image(images[1], float(int(posX - imgwidth/2)), float(int(posY - imgheight/2)), imgwidth, imgheight, int(frame * imgwidth), 0, int((frame + 1) * imgwidth), int(imgheight));
  }
}

class Game{
  float game_width, game_height;
  Faiza faiza;
  GPA gpa;
  int level;

  Game(float game_wth, float game_hght){
    level = 1;
    game_width = game_wth;
    game_height = game_hght;
    faiza = new Faiza(34, 585, 27, 66, 66);
    gpa = new GPA(990, 35, 25, 70, 56);
  }

  void update(){
    if (faiza.alive == false){
      faiza.posX = 34;
      faiza.posY = 585;
      faiza.alive = true;
    }
  }

  void display(){
    update();

    image(images[2], 0, 0);

    if (level == 1){
      textMode(CENTER);
      textSize(40);
      fill(255, 213, 43);
      text("GET THAT 4.0!", 310, 65);
    }

    if (level != 1){
      textSize(150);
      fill(255, 213, 43);
      text("GAME", 270, 220);
      text("OVER", 290,350);
      textSize(50);
      text(faiza.counter + " distractions later,", 240, 550);
      text("you achieved that 4.0 GPA!", 200, 600);
    }

    if (level == 1){
      faiza.display();
      gpa.display();
    }

    for (int i = 0; i < 6; i++){
      distractions[i].display();
    }

  }
}


void setup(){
 size(1024,768);

 printArray(Serial.list());
 String portname=Serial.list()[1];
 println(portname);
 myPort = new Serial(this,portname,9600);
 myPort.clear();
 myPort.bufferUntil('\n');

 game = new Game(1024, 768);
 path = sketchPath(audioName);
 file = new SoundFile(this, path);
 file.loop();
 images = new PImage[3];
 images[0] = loadImage("faiza.png");
 images[1] = loadImage("gpa.png");
 images[2] = loadImage("background.png");

 distractions = new Distractions[6];
 distractions[0] =  new Distractions(100, 300, 58, "jake.png", 120, 120);
 distractions[1] =  new Distractions(444, 333, 48, "insta.png", 100, 100);
 distractions[2] =  new Distractions(900, 120, 48, "facebook.png", 100, 100);
 distractions[3] =  new Distractions(887, 635, 48, "netflix.png", 100, 100);
 distractions[4] =  new Distractions(134, 587, 48, "youtube.png", 100, 100);
 distractions[5] =  new Distractions(55, 100, 48, "ps.png", 120, 120);
}

void draw(){
  background(255, 255, 255);
  game.display();
}

// allowing key presses to dictate Faiza's movement
void keyPressed(){
  if (key == CODED){
    if (keyCode == RIGHT){
      game.faiza.move_right = true;
    }
    if (keyCode == LEFT){
      game.faiza.move_left = true;
    }
    if (keyCode == UP){
      game.faiza.move_up = true;
    }
    if (keyCode == DOWN){
      game.faiza.move_down = true;
    }
  }
}


void keyReleased(){
  if (key == CODED){
    if (keyCode == RIGHT){
      game.faiza.move_right = false;
    }
    if (keyCode == LEFT){
      game.faiza.move_left = false;
    }
    if (keyCode == UP){
      game.faiza.move_up = false;
    }
    if (keyCode == DOWN){
      game.faiza.move_down = false;
    }
  }
}


void serialEvent(Serial myPort){
  String s=myPort.readStringUntil('\n');
  s=trim(s);
  if (s!=null){
    println(s);
    int values[] = int(split(s,','));

    if (values.length == 4){
      if (values[0] == 1){
        game.faiza.move_left = true;
      }
      else{
        game.faiza.move_left = false;
      }

      if (values[1] == 1){
        game.faiza.move_down = true;
      }
      else{
        game.faiza.move_down = false;
      }

      if (values[2] == 1){
        game.faiza.move_up = true;
      }
      else{
        game.faiza.move_up = false;
      }

      if (values[3] == 1){
        game.faiza.move_right = true;
      }
      else{
        game.faiza.move_left = false;
      }
    }
  }

  myPort.write("\n");

}
I worked with Armaan for the 3 exercises involving serial communication.
Exercise 1: Make something that uses only one sensor on Arduino and makes the ellipse in processing move on the horizontal axis, in the middle of the screen, and nothing on Arduino is controlled by processing.
For this exercise, we made the ellipse move in the middle of the screen using a potentiometer. I did this exercise in class with Shreya and it hardly took any time then, but it took some time to revise the concepts and get things right when I worked with Armaan on the weekend.
Arduino Code:
void setup() {
  Serial.begin(9600);
  Serial.println("0");
}

void loop() {
  while (Serial.available()) {
    if (Serial.read() == '\n') {
      int sensor = analogRead(A0);
      delay(1);
      Serial.println(sensor);
    }
  }
}
Processing Code:
import processing.serial.*;
Serial myPort;
int xPos=0;
int yPos=0;

void setup(){
  size(960,720);
  printArray(Serial.list());
  String portname=Serial.list()[1];
  println(portname);
  myPort = new Serial(this,portname,9600);
  myPort.clear();
  myPort.bufferUntil('\n');
}

void draw(){
  background(255);
  ellipse(xPos,height/2,30,30);
}

void serialEvent(Serial myPort){
  String s=myPort.readStringUntil('\n');
  s=trim(s);
  if (s!=null){
    println(s);
    int value=int(s);
    if (value >= 0){
      // changing the x position of the ellipse using the potentiometer
      xPos=(int)map(value,0,1023,0, width);
    }
  }
  myPort.write("\n");
}
Exercise 2: Make something that controls the LED brightness from Processing
For this exercise, we made use of the x coordinate of the mouse to control the brightness of the LED. This was fairly easy after completing the first exercise.
Arduino Code:
int brightness = 0;

void setup() {
  Serial.begin(9600);
  Serial.println("0");
  pinMode(3, OUTPUT);
}

void loop() {
  while (Serial.available()) {
    brightness = Serial.parseInt();
    if (Serial.read() == '\n') {
      analogWrite(3, brightness);
      int sensor = analogRead(A0);
      delay(1);
      Serial.println(sensor);
    }
  }
}
Processing code:
import processing.serial.*;
Serial myPort;
int xPos=0;
int yPos=0;
int brightness = 0;

void setup(){
  size(960,720);
  printArray(Serial.list());
  String portname=Serial.list()[1];
  println(portname);
  myPort = new Serial(this,portname,9600);
  myPort.clear();
  myPort.bufferUntil('\n');
}

void draw(){
  background(255);
  ellipse(xPos,height/2,30,30);
  // controlling a variable called brightness using the mouse value
  brightness = int(map(mouseX, 0, width, 0, 255));
}

void serialEvent(Serial myPort){
  String s=myPort.readStringUntil('\n');
  s=trim(s);
  if (s!=null){
    println(s);
  }
  myPort.write(brightness + "\n");
}
I think this was the hardest exercise, because it was difficult to exactly determine the conditions when the LED had to be switched off. But then, we managed to handle this problem by using the y-position and y-velocity of the ball. Also, controlling the wind using the potentiometer was tricky. Eventually, we ended up the current value generated by the potentiometer and the previous value generated by the potentiometer and then sending them both to Processing. Processing would then compare the two values and decide if the ball had to move with the wind, and in case it did, decide the direction in which the wind was blowing (and the ball moving).
Arduino Code:
int brightness = 0;
int previousValue = 0;
int onOff = 0;

void setup() {
  Serial.begin(9600);
  Serial.println("0");
  pinMode(3, OUTPUT);
}

void loop() {
  while (Serial.available()) {
    onOff = Serial.parseInt();
    if (Serial.read() == '\n') {
      int sensor = analogRead(A0);
      delay(1);

      // sending the current and previous values to processing
      Serial.print(sensor);
      Serial.print(",");
      Serial.println(previousValue);

      // setting the previous value equal to current value
      previousValue = sensor;

      // turning the LED on or off based on signals from processing
      if (onOff == 1){
        analogWrite(3, 255);
      }
      else{
        analogWrite(3, 0);
      }
    }
  }
}
Processing Code:
PVector velocity;
PVector gravity;
PVector position;
PVector acceleration;
PVector wind;
float drag = 0.99;
float mass = 50;
float hDampening;

import processing.serial.*;
Serial myPort;
int wind_speed;

int xPos=0;
int yPos=0;
boolean onOff=false;

void setup() {
  size(640,360);
  printArray(Serial.list());
  String portname=Serial.list()[1];
  println(portname);
  myPort = new Serial(this,portname,9600);
  myPort.clear();
  myPort.bufferUntil('\n');

  noFill();
  position = new PVector(width/2, 0);
  velocity = new PVector(0,0);
  acceleration = new PVector(0,0);
  gravity = new PVector(0, 0.5*mass);
  wind = new PVector(0,0);
  hDampening=map(mass,15,80,.98,.96);
}

void draw() {
  background(255);
  if (!keyPressed){
    wind.x=wind_speed;
    velocity.x*=hDampening;
  }
  applyForce(wind);
  applyForce(gravity);
  velocity.add(acceleration);
  velocity.mult(drag);
  position.add(velocity);
  acceleration.mult(0);
  ellipse(position.x,position.y,mass,mass);
  if (position.y > height-mass/2) {
      velocity.y *= -0.9;  // A little dampening when hitting the bottom
      position.y = height-mass/2;
    }
}

void applyForce(PVector force){
  // Newton's 2nd law: F = M * A
  // or A = F / M
  PVector f = PVector.div(force, mass);
  acceleration.add(f);
}

void keyPressed(){
  if (keyCode==LEFT){
    wind.x=-1;
  }
  if (keyCode==RIGHT){
    wind.x=1;
  }
  if (key==' '){
    mass=random(25,80);
    position.y=-mass;
    velocity.mult(0);
  }
}

void serialEvent(Serial myPort){
  String s=myPort.readStringUntil('\n');
  s=trim(s);
  if (s!=null){
    println(s);
    int values[] = int(split(s,','));

    if (values.length == 2){
      // moving wind towards the right if the current value is greater than the previous value
      if (values[0] > values[1]){
        wind_speed = 20;
      }
      // moving wind towards the left if the current value is lesser than the previous value
      else if (values[0] < values[1]){
        wind_speed = -20;
      }
      // setting wind speed to 0 if both values are equal
      else if (values[1] == values[1]){
        wind_speed = 0;
      }
    }
  }

  if (round(position.y + mass) >= height && round(velocity.y) != 0){
    // sending a value of 1 if the ball touches the ground and is supposed to go back
    myPort.write(1 + "\n");
  }
  else{
    // sending a value of 0 if the ball doesn't touch the ground or touches and then stays on the ground (rest position)
    myPort.write(0 + "\n");
  }
}
For the final project, Ngoc and I plan on implementing a slightly modified version of the game “Tetris” by using both Arduino and Processing. The rules of the game are pretty simple. Blocks of different colors fall down the screen and stack on top of each other. The user controls the movement of the blocks (by gesturing in front of two different sensors in our version of the game), and the game speed increases by a certain value as blocks continue to drop. When the player manages to get 4 blocks of the same color in a sequence, the game speed is reset to the original value and the score increases by 1. The game ends when the entire screen is filled with blocks.
For the Processing part of the game, we plan on having two main classes, the block class and the game class.
Block Class: The block class will describe all the attributes of the blocks which continue to fall on the game screen. It will include methods which specify the limitations on the movement of the blocks, i.e. the block can not move out of the screen, the block can not cross another block, and that the block has to “sit” on top of another block if one is found directly below it.
Game Class: The game class will contain all the main features of the game. These include instantiating a new block to fall every time the previous block has stopped moving (i.e. settled at the last row or settled on top of another block). The game class will also check if blocks of the same color are found together in a sequence, then it will remove those blocks from the game screen and increment the score of the player. Moreover, it will control the number of lives a player has and what the game should do when the player uses a life. It will also control when the game ends.
For the hardware, we plan on using a number of different components corresponding to different game functions.
Buttons: we plan to have a few buttons for fundamental game control, for example starting a new game
Potentiometer: when presented with the options of levels at the beginning of the game, the player can use the potentiometer to traverse through the options and select a specific level
Photo resistor: the player can choose to spend one life by tapping on the photo resistor
LEDs: we plan to light up LEDs to signify the number of lives available to the player, and turning off one LED for each life spent
Ultrasonic sensors/distance measuring sensors: we plan to use two distance measuring sensors installed on two sides for the main game action. The initial concept is that the player can gesture in front of one of the two sensors to communicate which side to direct the block (i.e. tapping on the right moves the block one step to the right and vice versa)
This week, we were supposed to make a musical instrument which would involve both, a digital and an analog sensor.
For the most part, I faced a bad creative block. I knew I didn’t want anything extremely complicated, but I wanted it to be cool and fun to work with.
Hence, I first created something which wasn’t fully a musical instrument, but it helped me get a good idea about working with sounds in Arduino. I created an “instrument” consisting of a switch (digital sensor) and a photo resistor (analog sensor). The main idea here was to let changes in the button state and in the input generated by the photo resistor to play the intro song of Game of Thrones (9 out of 10 people who listened to it said it was close to the real intro song, so I’m hoping it’s not very disappointing).
I’ll be very honest, the GoT thing hit me before I did any research about it. Luckily, Google helped me find the notes which could be used to produce the song, and boom, a lot of my work was done. I coded the Arduino in a way where I stored all of the notes in an array (in order) and whenever the button was pressed or light was flashed (for the photo resistor), the next note of the song would be played. This allowed me to play the entire song in one go using ninety-five notes, where each note was played by either pressing the button or flashing light. The song could also be played any number of times. The video is attached below.
However, this wasn’t my best work and I knew I could do more. I wasn’t entirely satisfied with it because although I had used a digital and an analog sensor to create sound and make an “instrument”, I coded it in a way where any button press/flashing of light would only play the next note in a sequence which was already coded. Although playing the GoT intro song using the Arduino was something I found very cool, I felt the user didn’t have the liberty to play whatever note they wanted to as they usually do in a normal instrument.
So, I modified my work in the following way: I kept the photo resistor but instead of having one button, I now had 3. The combination of buttons and the photo resistor allowed me to implement the 7 most basic notes; Do, Re, Mi, Fa, Sol, La, Ti. I implemented them in the following manner.
Pressing the first button (red) without light plays Do.
Pressing the second button (yellow) without light plays Re.
Pressing the third button (blue) without light plays Mi.
Flashing the light/turning it on plays Fa.
Pressing the red button with the light on plays Sol.
Pressing the yellow button with the light on plays La.
Pressing the blue button with the light on plays Ti.
This implementation allowed me to have an instrument which could play the 7 fundamental notes using 7 different combinations of the buttons and photo resistor. The use of relevant conditional statements allowed me to achieve this behaviour.
The video below shows me using the instrument by working with the buttons and flashing lights while singing “D0-Re-Mi: The Sound of Music (1965)”; a song which was taught to us in elementary school. I am sorry for my horrible voice but years later, I was really vibing with the song.
The code for both, the GoT intro song and the main instrument can be found below.
#define NOTE_B0  31
#define NOTE_C1  33
#define NOTE_CS1 35
#define NOTE_D1  37
#define NOTE_DS1 39
#define NOTE_E1  41
#define NOTE_F1  44
#define NOTE_FS1 46
#define NOTE_G1  49
#define NOTE_GS1 52
#define NOTE_A1  55
#define NOTE_AS1 58
#define NOTE_B1  62
#define NOTE_C2  65
#define NOTE_CS2 69
#define NOTE_D2  73
#define NOTE_DS2 78
#define NOTE_E2  82
#define NOTE_F2  87
#define NOTE_FS2 93
#define NOTE_G2  98
#define NOTE_GS2 104
#define NOTE_A2  110
#define NOTE_AS2 117
#define NOTE_B2  123
#define NOTE_C3  131
#define NOTE_CS3 139
#define NOTE_D3  147
#define NOTE_DS3 156
#define NOTE_E3  165
#define NOTE_F3  175
#define NOTE_FS3 185
#define NOTE_G3  196
#define NOTE_GS3 208
#define NOTE_A3  220
#define NOTE_AS3 233
#define NOTE_B3  247
#define NOTE_C4  262
#define NOTE_CS4 277
#define NOTE_D4  294
#define NOTE_DS4 311
#define NOTE_E4  330
#define NOTE_F4  349
#define NOTE_FS4 370
#define NOTE_G4  392
#define NOTE_GS4 415
#define NOTE_A4  440
#define NOTE_AS4 466
#define NOTE_B4  494
#define NOTE_C5  523
#define NOTE_CS5 554
#define NOTE_D5  587
#define NOTE_DS5 622
#define NOTE_E5  659
#define NOTE_F5  698
#define NOTE_FS5 740
#define NOTE_G5  784
#define NOTE_GS5 831
#define NOTE_A5  880
#define NOTE_AS5 932
#define NOTE_B5  988
#define NOTE_C6  1047
#define NOTE_CS6 1109
#define NOTE_D6  1175
#define NOTE_DS6 1245
#define NOTE_E6  1319
#define NOTE_F6  1397
#define NOTE_FS6 1480
#define NOTE_G6  1568
#define NOTE_GS6 1661
#define NOTE_A6  1760
#define NOTE_AS6 1865
#define NOTE_B6  1976
#define NOTE_C7  2093
#define NOTE_CS7 2217
#define NOTE_D7  2349
#define NOTE_DS7 2489
#define NOTE_E7  2637
#define NOTE_F7  2794
#define NOTE_FS7 2960
#define NOTE_G7  3136
#define NOTE_GS7 3322
#define NOTE_A7  3520
#define NOTE_AS7 3729
#define NOTE_B7  3951
#define NOTE_C8  4186
#define NOTE_CS8 4435
#define NOTE_D8  4699
#define NOTE_DS8 4978


// code for GoT intro song is below (commented)


//int sensorPin = 2;
//int speakerPin = 4;
//int photoPin = A0;
//
//// setting the current and previous states for the button and (values) for the photoresistor
//boolean buttonState = LOW;
//boolean previousButtonState = LOW;
//
//int photoValue;
//int previousPhotoValue = 0;
//
//int i = 0;
//
//int notes[95] = {NOTE_G4, NOTE_C4, NOTE_DS4, NOTE_F4, NOTE_G4, NOTE_C4, NOTE_DS4, NOTE_F4, NOTE_G4, NOTE_C4, NOTE_DS4, NOTE_F4, NOTE_G4, NOTE_C4, NOTE_DS4, NOTE_F4, NOTE_G4, NOTE_C4, NOTE_E4,
//                 NOTE_F4, NOTE_G4, NOTE_C4, NOTE_E4, NOTE_F4, NOTE_G4, NOTE_C4, NOTE_E4, NOTE_F4, NOTE_G4, NOTE_C4, NOTE_E4, NOTE_F4, NOTE_G4, NOTE_C4, NOTE_DS4, NOTE_F4, NOTE_D4, NOTE_G3,
//                 NOTE_AS3, NOTE_C4, NOTE_D4, NOTE_G3, NOTE_AS3, NOTE_C4, NOTE_D4, NOTE_G3, NOTE_AS3, NOTE_C4, NOTE_D4, NOTE_G3, NOTE_AS3, NOTE_C4, NOTE_D4, NOTE_F4, NOTE_AS3, NOTE_DS4,
//                 NOTE_D4, NOTE_F4, NOTE_AS3, NOTE_DS4, NOTE_D4, NOTE_C4, NOTE_GS3, NOTE_AS3, NOTE_C4, NOTE_F3, NOTE_GS3, NOTE_AS3, NOTE_C4, NOTE_F3, NOTE_GS3, NOTE_AS3, NOTE_C4, NOTE_F3,
//                 NOTE_G4, NOTE_C4, NOTE_DS4, NOTE_F4, NOTE_G4, NOTE_C4, NOTE_DS4, NOTE_F4, NOTE_D4, NOTE_G3, NOTE_AS3, NOTE_C4, NOTE_D4, NOTE_G3, NOTE_AS3, NOTE_C4, NOTE_D4, NOTE_G3, NOTE_AS3,
//                 NOTE_C4, NOTE_D4};
//
//void setup()
//  {
//    pinMode(speakerPin,OUTPUT);
//    pinMode(sensorPin,INPUT);
//    Serial.begin(9600);
//  }
//
//void loop(){
//    buttonState = digitalRead(sensorPin);
//    photoValue = analogRead(photoPin);
//    if(buttonState == HIGH && previousButtonState == LOW)
//    {
//       // the %95 allows us to play notes all over again
//       tone(speakerPin, notes[i%95], 250);
//       i++;
//    }
//    previousButtonState = buttonState;
//
//    if (photoValue >= 400 && previousPhotoValue < 400) {
//      tone(speakerPin, notes[i%95], 250);
//      // i++ allows us to move to the next note in the array
//      i++;
//    }
//    previousPhotoValue = photoValue;
//
//   Serial.println(photoValue);
//  }


// code for main instrument is below


// assigning the pin for each component to a variable
int button1Pin = 7;
int button2Pin = 2;
int button3Pin = 8;
int photoPin = A0;
int speakerPin = 4;

// setting the current and previous state variables for all 3 buttons and the photoresistor value
boolean button1state = LOW;
boolean button1previousState = LOW;
boolean button2state = LOW;
boolean button2previousState = LOW;
boolean button3state = LOW;
boolean button3previousState = LOW;

int photoValue;
int previousPhotoValue = 0;

// creating an array called notes which stores the notes Do,Re,Mi,Fa,Sol,La,TI
int notes[7] = {NOTE_C4, NOTE_D4, NOTE_E4, NOTE_F4, NOTE_G4, NOTE_A4, NOTE_B4};


void setup() {
  // assigning the pin modes to the components
  pinMode(button1Pin, INPUT);
  pinMode(button2Pin, INPUT);
  pinMode(button3Pin, INPUT);
  pinMode(speakerPin, OUTPUT);
  Serial.begin(9600);
}

void loop() {
  // reading in a digital manner the state of the button and in an analog manner the input generated by the photoresistor
  button1state = digitalRead(button1Pin);
  button2state = digitalRead(button2Pin);
  button3state = digitalRead(button3Pin);
  photoValue = analogRead(photoPin);

  // specifying conditional statements for different combinations of components to play different notes
  if (button1state == HIGH && button1previousState == LOW && button2state == LOW && button3state == LOW && photoValue < 400){
    tone(speakerPin, notes[0], 250);
  }

  if (button2state == HIGH && button2previousState == LOW && button1state == LOW && button3state == LOW && photoValue < 400){
    tone(speakerPin, notes[1], 250);
  }

  if (button3state == HIGH && button3previousState == LOW && button1state == LOW && button2state == LOW && photoValue < 400){
    tone(speakerPin, notes[2], 250);
  }

  if (button3state == LOW && button2state == LOW && button1state == LOW && photoValue >= 400 && previousPhotoValue < 400){
    tone(speakerPin, notes[3], 250);
  }

  if (button1state == HIGH && button1previousState == LOW && button2state == LOW && button3state == LOW && photoValue >= 400){
    tone(speakerPin, notes[4], 250);
  }

  if (button2state == HIGH && button2previousState == LOW && button1state == LOW && button3state == LOW && photoValue >= 400){
    tone(speakerPin, notes[5], 250);
  }

  if (button3state == HIGH && button3previousState == LOW && button1state == LOW && button2state == LOW && photoValue >= 400){
    tone(speakerPin, notes[6], 250);
  }

  button1previousState = button1state;
  button2previousState = button2state;
  button3previousState = button3state;
  previousPhotoValue = photoValue;
}
For the Week 9 assignment, we were supposed to get information from at least one analog sensor and at least one switch, and use this information to control at least two LEDs, one in an analog fashion and one in a digital fashion, in a creative way.
I’ll be very honest, I started the assignment on Saturday but I wasn’t very comfortable with working with the circuit. I knew I could experiment with the coding part, but the fear of damaging any equipment meant that trial-and-error wasn’t the best choice when it came to setting up the circuit. But after going through some websites and class examples and after the Monday class (29th March), I became a lot more confident about setting up my circuit.
I tried to create a traffic signal using Arduino. I set up my circuit with 3 LEDs, corresponding to the red, yellow and green lights, one switch (digital sensor) and one potentiometer (analog sensor).
The red LED can be turned on and off using the switch. It is controlled digitally and its brightness can only be set as HIGH or LOW. When it is on, the potentiometer can then be used to take input and the input generated can be used to make the traffic signal work. The input generated can be mapped onto a variable called mappedValue, which only stores values between 0 to 255 (just like in the class examples).
When the value of ‘mappedValue’ crosses 100, the red light is turned off and the yellow LED is turned on. This yellow LED is controlled in an analog fashion and its brightness is equal to the mappedValue at all instances.
When the value of mappedValue crosses 150, the yellow LED is turned off and the green LED is turned on. The green LED is controlled digitally and its brightness can once again only be set as HIGH or LOW. The green LED stays on as long as mappedValue takes values between 150 and 255.
The entire process can then be repeated in the reverse order, starting from the green LED and finishing at the red LED, which can once again be turned on and off using the switch/button.
A video of the working circuit is attached below.
The code:
int buttonPin = 2;
int ledPin = 3;
int led2Pin = 9;
int led3Pin = 11;
int knobPin = A0;
int ledState = LOW;
int prevButtonState = LOW;

void setup() {
  // set pin modes for the 3 LEDs and the button
  pinMode(ledPin, OUTPUT);
  pinMode(led2Pin, OUTPUT);
  pinMode(led3Pin, OUTPUT);
  pinMode(buttonPin, INPUT);
  // needed in order to start serial communication
  Serial.begin(9600);
}

 void loop() {
  // check to see what state our button is in, and store that information
  int currentButtonState = digitalRead(buttonPin);

  // if the button is currently being prssed down, AND during the last frame is wasn't pressed down
  if (currentButtonState == HIGH && prevButtonState == LOW) {
      // flip the LED state
      if (ledState == HIGH){
        ledState = LOW;
      } else if (ledState == LOW){
        ledState = HIGH;
      }
  }

  // set our LED to turn on and off according to our variable that we flip above
//  digitalWrite(ledPin, ledState);

  //we need to remember the state of our button for the next time through LOOP
  prevButtonState = currentButtonState;

  // reading the input generated by the potentiometer and then mapping it to a variable called 'mappedValue'
  int knobValue = analogRead(knobPin);
  int mappedValue = map(knobValue, 0, 1023, 0, 255);

//  if (mappedValue >= 120 && ledState == LOW){
//    digitalWrite(ledPin, LOW);
//    analogWrite(led2Pin, 0);
//    digitalWrite(led3Pin, HIGH);
//  }
//  else if (mappedValue < 120 && ledState == LOW){
//    digitalWrite(ledPin, LOW);
//    analogWrite(led2Pin, mappedValue);
//    digitalWrite(led3Pin, LOW);
//  }
//  else if (mappedValue >= 120 && ledState == HIGH){
//    digitalWrite(ledPin, HIGH);
//    analogWrite(led2Pin, 0);
//    digitalWrite(led3Pin, LOW);
//  }
//  else if (mappedValue < 120 && ledState == HIGH){
//    digitalWrite(ledPin, HIGH);
//    analogWrite(led2Pin, mappedValue);
//    digitalWrite(led3Pin, LOW);
//  }


  // setting conditions for turning the 3 different LEDs on and off based on the input generated by the potentiometer
  if (mappedValue < 100 && ledState == HIGH){
    digitalWrite(ledPin, HIGH);
    analogWrite(led2Pin, 0);
    digitalWrite(led3Pin, 0);
  }

  if (mappedValue >= 100 && mappedValue <= 150 && ledState == HIGH){
    digitalWrite(ledPin, LOW);
    analogWrite(led2Pin, mappedValue);
    digitalWrite(led3Pin, LOW);
  }

  if (mappedValue > 150 && ledState == HIGH){
    digitalWrite(ledPin, LOW);
    analogWrite(led2Pin, 0);
    digitalWrite(led3Pin, HIGH);
  }

  if (mappedValue >= 0 && mappedValue <= 5 && ledState == LOW){
    digitalWrite(ledPin, LOW);
  }
}
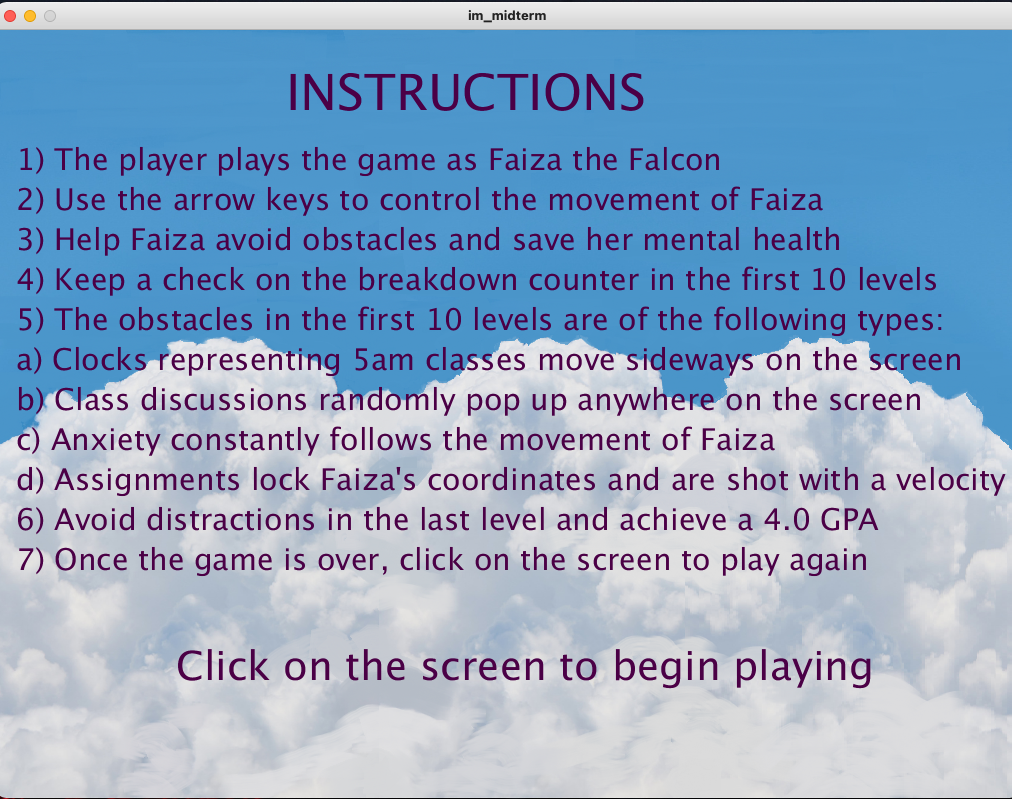
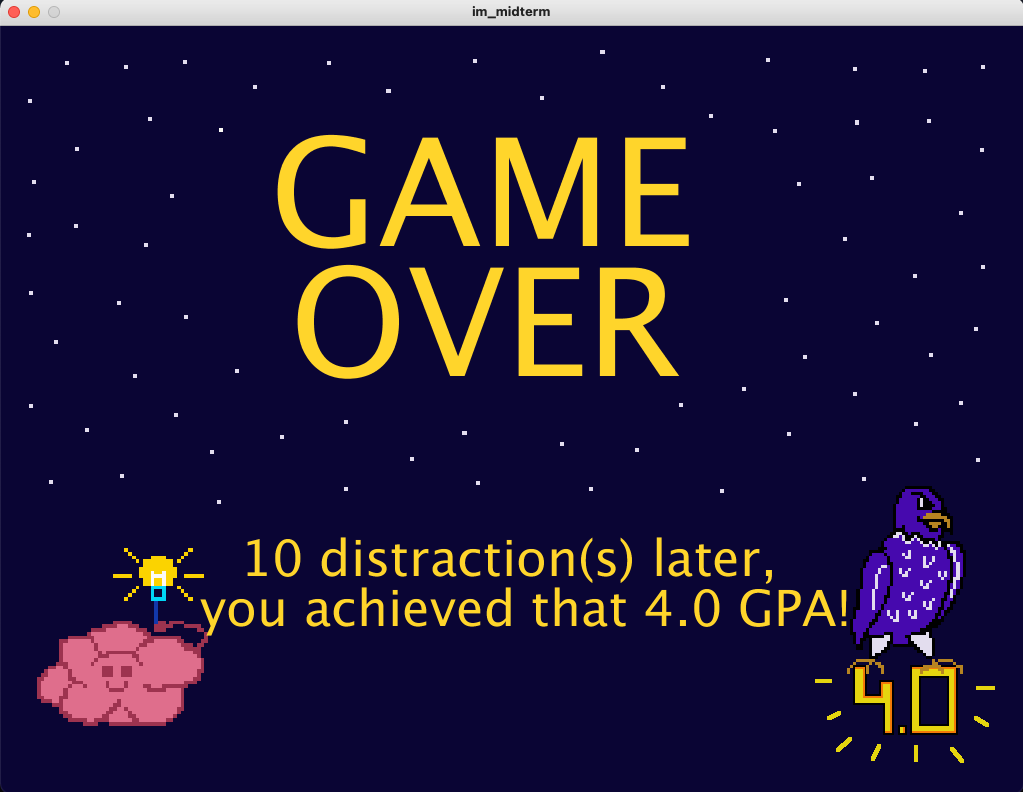
For the midterm project, we were supposed to make a game, and I decided to expand on the game which I created for my week 3 assignment and named it “Uni Sufferers”. The main principle of this game is very similar to my Week 3 game, and the basic rules can be seen in the image below (screenshot of one of the displays of the game).
Concept:
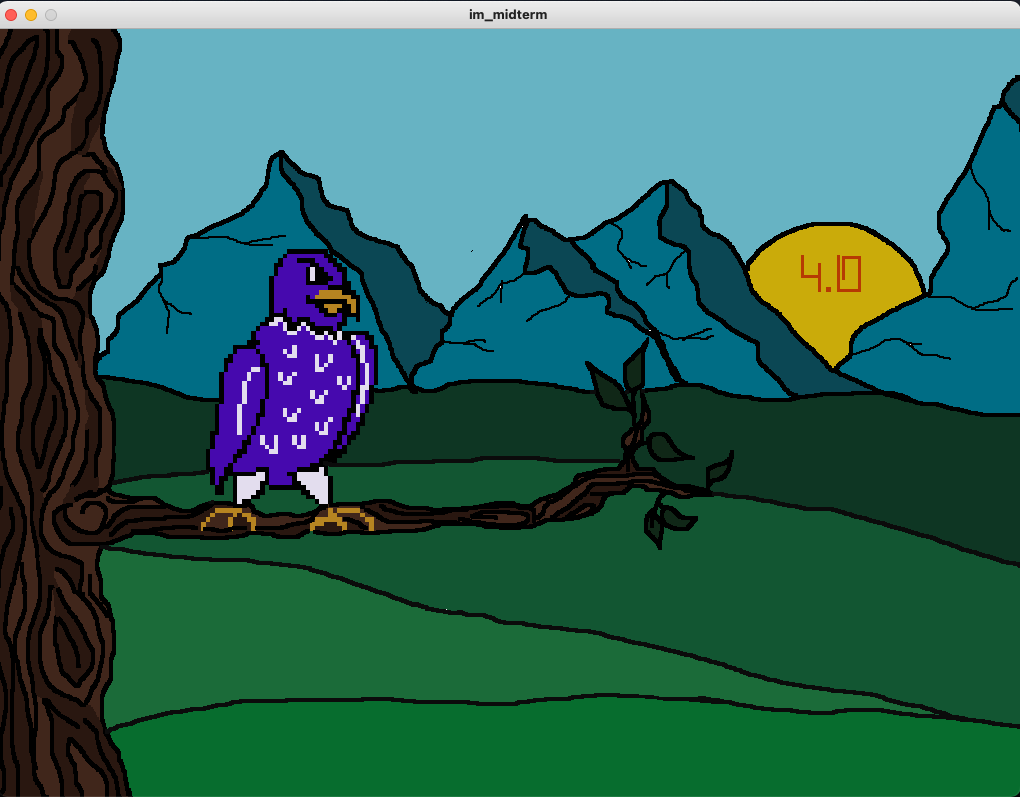
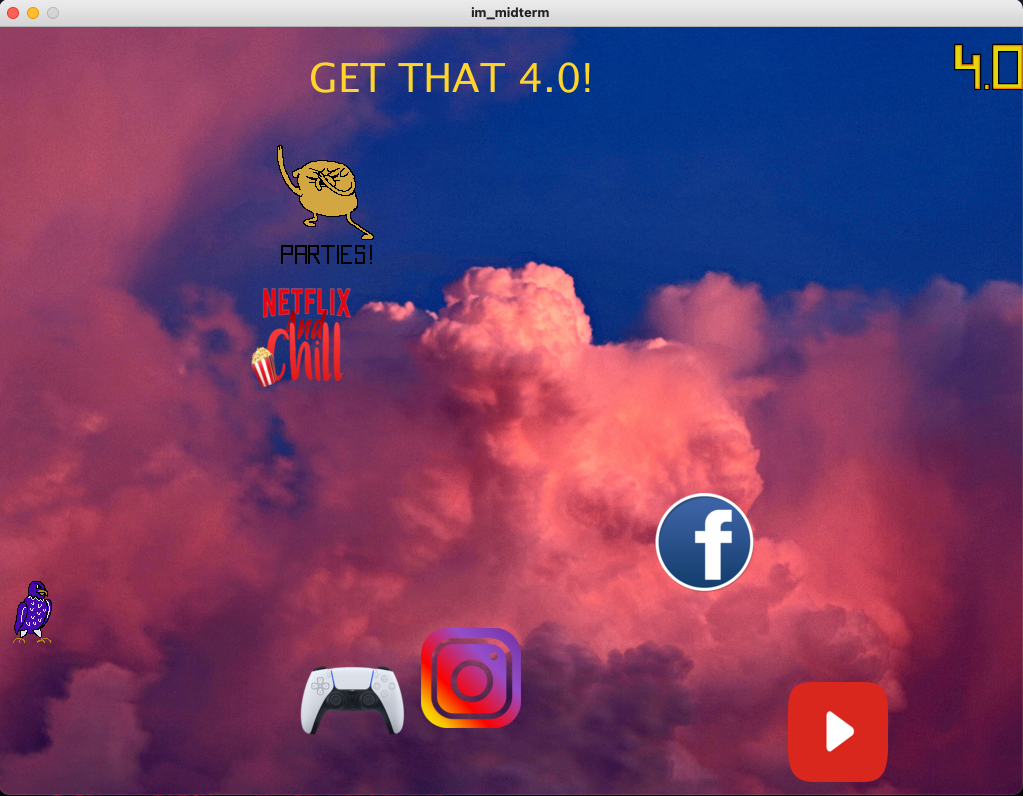
Almost everyone we know around us has been greatly affected by the change in education systems since the beginning of the pandemic. Virtual classes have led to people having to take 5am classes (due to difference in time zones), having lower attention spans, facing anxiety and having to get through tens of assignments every week. In between all of this, we often fail to realize the importance of taking care of our mental health. This game is an NYUAD-themed game built around the idea of the player helping Faiza the Falcon (our beloved mascot) avoid multiple obstacles in order to save her mental health. These obstacles are 5am zoom classes, class discussions, assignments and anxiety, all of which behave in different ways. The last level (level 11) is about helping Faiza achieve the 4.0 GPA by avoiding certain distractions once she is able to save her mental health.
Main features:
All of the obstacles in the game behave in very different ways.
The clocks in the first few levels only move horizontally between the corners of the grid. They have end points, and once they touch one of the end points, the direction of their velocity is reversed and they continue moving in the opposite direction.
The class discussions behave in a very interesting way. They pop up at random locations on the screen, stay there for a while and then they disappear and move to a completely different random location.
Anxiety remained my favorite throughout the game (I promise it made me very anxious as I tried to make it work on the very last day). Anxiety constantly follows Faiza as Faiza moves around the screen, but with a lesser speed. This means that Faiza can not stay at the same location for a long period of time because the moving anxiety will chase her down.
Assignments are shot toward’s Faiza’s coordinates at a certain point in time. They lock Faiza’s coordinates and are then fired with a certain velocity.
Distractions represent different objects like facebook, instagram, playstation and youtube and all of them behave in the same way. They are instantiated with random velocities within a certain range and they rebound off the walls as they hit them.
Main Difficulties:
One of the main difficulties I faced was the repetition of blocks of code. Many of the classes had attributes and methods which were repetitive and so I learnt how to make use of inheritance in Java. This allowed me to have basic attributes and methods which all other classes can inherit from.
I found it hard to figure out how to make new discussions appear on the screen one at a time at different locations. To counter this, I made a discussions_list of size 1 which holds one discussion at a time and after a certain period of time (using frameCount%), the old discussion would be replaced with a new one.
Perhaps the most difficult part for me was to figure out the functionalities of assignments and anxiety. I countered each one of them in the following ways:
a) Since I intended to make anxiety follow Faiza at all times, I decided to make a dummy within the Anxiety class which would allow everything to be dealt with within the Anxiety class. This dummy would not be visible but would have the same x and y coordinates (target_x and target_y), same radius (target_r) and would move with key strokes the same as Faiza did. Then I created variables called difference_x and difference_y which recorded the difference in the x and y coordinates of the anxiety and the dummy. By using trigonometric identities, I could then figure out the direction in which anxiety had to move in order to follow the dummy (and hence, Faiza). Since Faiza’s (and hence the dummy’s) coordinates were constantly changing, it seemed like anxiety is constantly following Faiza.
b) Making the assignments work was a little easier after I figured out how to make anxiety work. This again had target coordinates which were those of Faiza. Whenever an object of the Assignment class was instantiated, it would lock the coordinates of Faiza at that time, then make use of trigonometry to be shot at that position with a certain velocity.
Final thoughts:
I don’t think I have ever worked harder for any project, any class. I don’t even know how many all-nighters I have pulled off to try to make this work, but I am super proud of how much I have learnt and more importantly, of how I have made this work.
This was so much more than learning about the features of classes. This was about learning how to reflect images, how to implement parallax backgrounds (you can see the background moving as Faiza moves in the x-direction). Honestly, when I started this I didn’t even know not all backgrounds could be implemented as parallax backgrounds – they had to be symmetric for them to look nice, otherwise it’s just a broken image. Additionally, this project was about learning how to make sprites on my own using https://www.piskelapp.com/ (I made most of them on my own, including that of Faiza, assignments, class discussions, anxiety, GPA, brain and parties). I have learnt about working with collision detection and with counters to display real-time scores as the game progresses. It also helped me learn how to use key presses and mouse clicks to start (and restart) the game and control movements of certain objects.
I have learnt a lot from this process and enjoyed it way more than I thought I would.
Attached below is a video which shows me playing the game once.
Below are also the code and the zip file for the assignment (I am sorry for having one long block of code, I’m just more comfortable working that way).
import java.lang.Math;
import processing.sound.*;
SoundFile intro_song, background_song;
String audioName = "intro.mp3";
String audioName2 = "background.mp3";
String path, path2;
Game game;
// creating arrays for distractions and assignments which are used later
// also creating an array for the possible positions where assignments are launched
Distractions[] distractions;
Discussion[] discussion_list;
Discussion[] discussion_list2;
Assignment[] assignments;
Assignment[] assignments2;
Assignment[] assignments3;
int[][] position_list;
// Creating a Creature class which stores all the basic attributes, including the creature's position, radius, initial x and y velocities, and image attributes.
// Each 'creature' will inherit certain attributes from this class and its display function where necessary.
class Creature {
float posX, posY, radius, velocityX, velocityY, imgwidth, imgheight;
PImage sprite_image;
int num_frames, frame;
String directionX;
Creature(float x, float y, float r, String image_name, float img_w, float img_h, int number_frames) {
posX = x;
posY = y;
radius = r;
velocityX = 0;
velocityY = 0;
directionX = "right";
sprite_image = loadImage(image_name);
imgwidth = img_w;
imgheight = img_h;
num_frames = number_frames;
frame = 0;
}
// This function displays the image of each creature and inverts it according to the creature's direction of motion. It calls the update function of that specific creature.
void display() {
update();
if (directionX == "right") {
image(sprite_image, float(int(posX - imgwidth/2)), float(int(posY - imgheight/2)), imgwidth, imgheight, int(frame * imgwidth), 0, int((frame + 1) * imgwidth), int(imgheight));
} else if (directionX == "left") {
image(sprite_image, float(int(posX - imgwidth/2)), float(int(posY - imgheight/2)), imgwidth, imgheight, int((frame + 1) * imgwidth), 0, int(frame * imgwidth), int(imgheight));
}
}
void update() {
}
}
class Faiza extends Creature {
boolean move_up, move_down, move_right, move_left;
boolean alive;
int breakdown_counter, distraction_counter;
Faiza(float x, float y, float r, String image_name, float img_w, float img_h, int number_frames) {
super(x, y, r, image_name, img_w, img_h, number_frames);
move_up = false;
move_down = false;
move_right = false;
move_left = false;
// Initially Faiza is set to alive, if Faiza collides with any of the obstacles, then "alive" becomes false and Faiza returns to her original position
alive = true;
// creating two counters which record the number of collisions with obstacles (Level 1-10) and distractions (level 11) respectively
breakdown_counter = 0;
distraction_counter = 0;
}
void update() {
if (game.level >= 1 && game.level <= 5) {
// For level 1-5 there are restrictions on the movement of Faiza because of the grid present in these levels
// Hence, the following if conditions will restrict Faiza's movement by using coordinates of the lines in the grid/maze.
// The first condition is for when Faiza moves left
if (move_left == true){
velocityX = -2;
directionX = "left";
if (posX - radius + velocityX < 6) {
velocityX = 0;
}
if (posX - radius > 270 && posX - radius + velocityX < 280 && (posY - radius < 396 || posY + radius > 484)) {
velocityX = 0;
}
if (posX - radius > 650 && posX - radius + velocityX < 660 && posY - radius < 286) {
velocityX = 0;
}
if (posX - radius > 820 && posX - radius + velocityX < 830 && posY + radius > 244) {
velocityX = 0;
}
posX += velocityX;
}
// the next condition is for when Faiza moves right
else if (move_right == true) {
velocityX = 2;
directionX = "right";
if (posX + radius < 120 && posX + radius + velocityX > 110 && (posY - radius < 396 || posY + radius > 484)) {
velocityX = 0;
}
if (posX + radius < 750 && posX + radius + velocityX > 740 && posY + radius > 244) {
velocityX = 0;
}
if (posX + radius < 920 && posX + radius + velocityX > 910 && posY - radius < 526) {
velocityX = 0;
}
if (posX + radius > 1018) {
velocityX = 0;
}
posX += velocityX;
}
// If none of the left and right keys are being pressed, Faiza stops moving horizontally
else {
velocityX = 0;
}
// The condition below is for when Faiza moves upwards
if (move_up == true) {
velocityY = -2;
if (posX + radius < 120 && posY - radius + velocityY < 288) {
velocityY = 0;
}
if (posX + radius >= 120 && posX - radius <= 270 && posY - radius + velocityY < 398) {
velocityY = 0;
}
if (posX - radius > 270 && posX - radius <= 650 && posY - radius + velocityY < 288){
velocityY = 0;
}
if (posX - radius > 650 && posX + radius < 920 && posY - radius + velocityY < 168) {
velocityY = 0;
}
if (posX + radius >= 920 && posY - radius + velocityY < 528){
velocityY = 0;
}
posY += velocityY;
}
// The condition below is for when Faiza moves downwards
else if (move_down == true) {
velocityY = 2;
if (posX + radius < 120 && posY + radius + velocityY > 613) {
velocityY = 0;
}
if (posX + radius >= 120 && posX - radius <= 270 && posY + radius + velocityY > 482) {
velocityY = 0;
}
if (posX - radius > 270 && posX + radius < 750 && posY + radius + velocityY > 612){
velocityY = 0;
}
if (posX + radius >= 750 && posX - radius <= 820 && posY + radius + velocityY > 242) {
velocityY = 0;
}
if (posX - radius > 820 && posX + radius <= 1024 && posY + radius + velocityY > 612) {
velocityY = 0;
}
posY += velocityY;
}
// If none of the up and down keys are being pressed, Faiza stops moving vertically
else {
velocityY = 0;
}
}
else if (game.level >= 6) {
//The condition below is for when Faiza moves left
if (move_left == true) {
velocityX = -2;
directionX = "left";
if (posX - radius + velocityX < 6) {
velocityX = 0;
}
posX += velocityX;
}
//The condition below is for when Faiza moves right
else if (move_right == true) {
velocityX = 2;
directionX = "right";
if (posX + radius + velocityX > 1018) {
velocityX = 0;
}
posX += velocityX;
}
//If none of the left and right keys are being pressed, Faiza stops moving horizontally
else {
velocityX = 0;
}
if (move_up == true) {
velocityY = -2;
if (posY - radius + velocityY <= 5) {
velocityY = 0;
}
posY += velocityY;
}
//The condition below is for when Faiza moves downwards
else if (move_down == true) {
velocityY = 2;
if (posY + radius + velocityY >= 762) {
velocityY = 0;
}
posY += velocityY;
}
//If none of the up and down keys are being pressed, Faiza stops moving vertically
else {
velocityY = 0;
}
}
// Animating Faiza by continuously iterating over each frame in it's sprite when Faiza is moving
if ((frameCount%5 == 0) && (velocityX != 0 || velocityY != 0)) {
frame = (frame + 1) % (num_frames - 1);
}
// If Faiza is not moving, the frame where Faiza is still is displayed
else if (velocityX == 0 && velocityY == 0) {
frame = 8;
}
// For all the following blocks of code, "alive" is set to False when Faiza collides with any of these objects, and so Faiza returns to the starting position in that level
// Also, the breakdown counter is incremented by 1 for every collision
if (game.level >= 2 && game.level <= 5) {
if (distance(game.clock) <= radius + game.clock.radius) {
breakdown_counter += 1;
alive = false;
}
}
if (game.level == 4 || game.level == 5) {
if (distance(game.clock2) <= radius + game.clock2.radius) {
breakdown_counter += 1;
alive = false;
}
}
if (game.level == 5) {
if (distance(game.clock3) <= radius + game.clock3.radius) {
breakdown_counter += 1;
alive = false;
}
}
if (game.level >= 3 && game.level <= 5) {
if (distance(discussion_list[0]) <= radius + discussion_list[0].radius) {
breakdown_counter += 1;
alive = false;
}
}
if (game.level >= 6 && game.level <= 10) {
if (distance(discussion_list2[0]) <= radius + discussion_list2[0].radius) {
breakdown_counter += 1;
alive = false;
game.anxiety.alive = false;
game.anxiety2.alive = false;
}
}
if (game.level >= 1 && game.level <= 5) {
if (distance(game.brain) <= radius + game.brain.radius) {
game.level += 1;
game.clock = new Clock(310, 330, 32, "clock.png", 66, 66, 4);
game.clock2 = new Clock(695, 570, 32, "clock.png", 66, 66, 4);
game.clock3 = new Clock(500, 440, 32, "clock.png", 66, 66, 4);
alive = false;
}
}
if (game.level >= 6 && game.level <= 10) {
if (distance(game.brain2) <= radius + game.brain2.radius) {
game.level += 1;
alive = false;
game.anxiety.alive = false;
game.anxiety2.alive = false;
}
}
if (game.level == 11) {
if (!(posX >= 0 && posX <= 100 && posY >= 530 && posY <= 640)) {
for (int i = 0; i < 6; i++) {
if (distance(distractions[i]) <= radius + distractions[i].radius) {
distraction_counter += 1;
alive = false;
}
}
}
// checking collision with the gpa in the last level
if (distance(game.gpa) <= (radius + game.gpa.radius) && game.level == 11) {
game.level += 1;
}
}
// Incrementing x_shift in the Game class when Faiza in moving in the x-direction to implement parallax effect
if (posX >= 0) {
game.x_shift += velocityX;
}
}
// this distance method will be used to check for collisions with distractions
double distance(Creature target) {
float a = (posX - target.posX);
float b = (posY - target.posY);
double c = Math.pow(a, 2);
double d = Math.pow(b, 2);
return Math.pow(c + d, 0.5);
}
}
// Creating the obstacle Clock, which moves sideways within a certain x-range.
// Appears in levels 1-5
class Clock extends Creature {
// x_left and x_right represent the boundaries of the movement of the clock
int x_left, x_right, choose_direction;
Clock(float x, float y, float r, String image_name, float img_w, float img_h, int number_frames) {
super(x, y, r, image_name, img_w, img_h, number_frames);
x_left = 270;
x_right = 740;
velocityX = 3;
// Choosing a random starting direction and multiplying vx by -1 if it's direction is chosen to be left at the beginning.
choose_direction = int(random(0,2));
if (choose_direction == 0) {
velocityX *= -1;
}
}
void update() {
// Animating the clock by continuously iterating over each frame in it's sprite.
if (frameCount % 12 == 0){
frame = (frame + 1) % num_frames;
}
// Making the clock change it's direction if it hits one of the boundaries
if (posX - radius <= x_left) {
velocityX *= -1;
directionX = "right";
}
if (posX + radius >= x_right) {
velocityX *= -1;
directionX = "left";
}
posX += velocityX;
posY += velocityY;
}
}
// creating the discussion class which represents random class discussions which pop up anywhere on the screen
// appears in levels 3-10
class Discussion extends Creature {
Discussion(float x, float y, float r, String image_name, float img_w, float img_h, int number_frames) {
super(x, y, r, image_name, img_w, img_h, number_frames);
}
void update() {
// Animating the quiz by continuously iterating over each frame in its sprite.
if (frameCount % 20 == 0) {
frame = (frame + 1) % num_frames;
}
}
}
// Creating the obstacle Anxiety, which continuously follows Faiza wherever she goes
// appears in levels 6-10
class Anxiety extends Creature {
float target_x, target_y, target_r, velocity;
boolean alive;
boolean move_up, move_down, move_right, move_left;
float difference_x, difference_y, angle;
Anxiety(float x, float y, float r, String image_name, float img_w, float img_h, int number_frames, float tx, float ty, float tr) {
super(x, y, r, image_name, img_w, img_h, number_frames);
// Here we make a 'dummy' object which is precisely mapped to Faiza. It has it's separate keystroke functions which perfectly imitate
// Faiza's movements. This makes our task easier since everything is now handled within the Anxiety class. The 'dummy' object has of course, been
// made invisible so that it seems Anxiety is always following Faiza. target_x, target_y, and target_r represent the position and radius of the 'dummy' object respectively.
target_x = tx;
target_y = ty;
target_r = tr;
// All attributes below are very similar to that of Faiza
// There is also a velocity attribute to set the velocity of anxiety
alive = true;
velocity = 1.7;
move_up = false;
move_down = false;
move_right = false;
move_left = false;
difference_x = 0;
difference_y = 0;
angle = 0;
}
void update() {
if (frameCount % 20 == 0) {
frame = (frame + 1) % num_frames;
}
// all the conditions below have been copies from Faiza's class to exactly imitate Faiza's movements
if (move_left == true) {
velocityX = -2;
directionX = "left";
if (target_x - target_r + velocityX < 6) {
velocityX = 0;
}
target_x += velocityX;
}
else if (move_right == true) {
velocityX = 2;
directionX = "right";
if (target_x + target_r + velocityX > 1018) {
velocityX = 0;
}
target_x += velocityX;
}
else {
velocityX = 0;
}
if (move_up == true) {
velocityY = -2;
if (target_y - target_r + velocityY <= 5) {
velocityY = 0;
}
target_y += velocityY;
}
else if (move_down == true) {
velocityY = 2;
if (target_y + target_r + velocityY >= 762) {
velocityY = 0;
}
target_y += velocityY;
}
else {
velocityY = 0;
}
// We now calculate difference_x and difference_y for the difference in x and y positions between Anxiety and the 'dummy' respectively,
// then we calculate angle between them, and increment x and y by velocity*cos(angle) and velocity*sin(angle) respectively
// the angle constantly changes as Faiza and the dummy move, hence anxiety constantly follows Faiza
difference_x = target_x - posX;
difference_y = target_y - posY;
// to avoid zero division error in the angle
if (difference_x == 0 && difference_y > 0) {
angle = radians(90);
}
if (difference_x == 0 && difference_y < 0) {
angle = radians(270);
}
else {
angle = atan(difference_y/difference_x);
}
// incrementing x and y positions using the fact that cos(-x) = cos(x) and sin(-x) = -sin(x):
if (difference_x == 0 && difference_y > 0) {
posX += velocity * cos(angle);
posY += velocity * sin(angle);
}
if (difference_x == 0 && difference_y < 0) {
posX += velocity * cos(angle);
posY += velocity * sin(angle);
}
if (difference_x > 0 && difference_y == 0) {
posX += velocity * cos(angle);
posY += velocity * sin(angle);
}
if (difference_x < 0 && difference_y == 0) {
posX -= velocity * cos(angle);
posY += velocity * sin(angle);
}
if (difference_x > 0 && difference_y > 0) {
posX += velocity * cos(angle);
posY += velocity * sin(angle);
}
if (difference_x < 0 && difference_y < 0) {
posX -= velocity * cos(angle);
posY -= velocity * sin(angle);
}
if (difference_x < 0 && difference_y > 0) {
posX -= velocity * cos(angle);
posY -= velocity * sin(angle);
}
if (difference_x > 0 && difference_y < 0) {
posX += velocity * cos(angle);
posY += velocity * sin(angle);
}
// Since Anxiety is following the 'dummy', we have to take into account the collision between the dummy and Anxiety
// and set both the dummy's and Faiza's alive attributes to False.
if (game.level >= 6 && game.level <= 10) {
if (distance() <= radius + target_r) {
alive = false;
game.faiza.breakdown_counter += 1;
game.faiza.alive = false;
}
}
}
// defining the distance method for calculating the distance between Anxiety and the dummy
double distance() {
float a = (posX - target_x);
float b = (posY - target_y);
double c = Math.pow(a, 2);
double d = Math.pow(b, 2);
return Math.pow(c + d, 0.5);
}
// We slightly modify the display function for Anxiety since we don't want the text beneath Anxiety's image to be inverted when anxiety moves leftwards
void display() {
update();
if (directionX == "right" || directionX == "left") {
image(sprite_image, float(int(posX - imgwidth/2)), float(int(posY - imgheight/2)), imgwidth, imgheight, int(frame * imgwidth), 0, int((frame + 1) * imgwidth), int(imgheight));
}
}
}
// Creating the obstacle Assignment, which is instantiated randomly at one of the 4 boundaries of the game's screen.
// First, it captures the position of Faiza, then locks those target coordinates (denoted by target_x and target_y) and is then fired towards them.
// Appears in levels 8-10
class Assignment extends Creature {
float target_x, target_y, velocity;
float difference_x, difference_y, angle;
Assignment(float x, float y, float r, String image_name, float img_w, float img_h, int number_frames, float tx, float ty) {
super(x, y, r, image_name, img_w, img_h, number_frames);
// target_x and target_y represent the coordinates of Faiza
// we make use of angles and difference in x and y to fire assignments towards faiza with a velocity
target_x = tx;
target_y = ty;
difference_x = target_x - posX;
difference_y = target_y - posY;
velocity = 8;
if (difference_x == 0 && difference_y > 0) {
angle = radians(90);
}
if (difference_x == 0 && difference_y < 0) {
angle = radians(270);
}
else {
angle = atan(difference_y/difference_x);
}
}
void update() {
if (frameCount % 20 == 0) {
frame = (frame + 1) % num_frames;
}
// We use the fact that cos(-x) = cos(x) and sin(-x) = -sin(x) and divide the possible directions of movement into cases:
if (difference_x == 0 && difference_y > 0) {
posX += velocity * cos(angle);
posY += velocity * sin(angle);
}
if (difference_x == 0 && difference_y < 0) {
posX += velocity * cos(angle);
posY += velocity * sin(angle);
}
if (difference_x > 0 && difference_y == 0) {
posX += velocity * cos(angle);
posY += velocity * sin(angle);
}
if (difference_x < 0 && difference_y == 0) {
posX -= velocity * cos(angle);
posY += velocity * sin(angle);
}
if (difference_x > 0 && difference_y > 0) {
posX += velocity * cos(angle);
posY += velocity * sin(angle);
}
if (difference_x < 0 && difference_y < 0) {
posX -= velocity * cos(angle);
posY -= velocity * sin(angle);
}
if (difference_x < 0 && difference_y > 0) {
posX -= velocity * cos(angle);
posY -= velocity * sin(angle);
}
if (difference_x > 0 && difference_y < 0) {
posX += velocity * cos(angle);
posY += velocity * sin(angle);
}
}
}
// Creating the distractions class which represents different distractions which appear in level 11
class Distractions extends Creature {
Distractions(float x, float y, float r, String image_name, float img_w, float img_h, int number_frames) {
super(x, y, r, image_name, img_w, img_h, number_frames);
// all distractions are instantiated with random speeds within a certain limit
velocityX = random(2, 5);
velocityY = -1 * random(2, 5);
}
void update() {
if (frameCount % 12 == 0) {
frame = (frame + 1) % num_frames;
}
// setting conditions for rebounding the distractions when they hit the corners of the screen
if (posX + radius >= 1024) {
velocityX *= -1;
}
if (posX - radius <= 0) {
velocityX *= - 1;
}
if (posY - radius <= 10) {
velocityY *= -1;
}
if (posY + radius >= 780) {
velocityY *= -1;
}
posX += velocityX;
posY += velocityY;
}
}
// Creating the Brain class which appears in levels 1-10 which represents the mental health
class Brain extends Creature {
Brain(float x, float y, float r, String image_name, float img_w, float img_h, int number_frames) {
super(x, y, r, image_name, img_w, img_h, number_frames);
}
void update() {
if (frameCount % 20 == 0) {
frame = (frame + 1) % num_frames;
}
}
}
// Creating the GPA class which appears in level 11
class GPA extends Creature {
GPA(float x, float y, float r, String image_name, float img_w, float img_h, int number_frames) {
super(x, y, r, image_name, img_w, img_h, number_frames);
}
}
class Game {
int game_width, game_height;
Faiza faiza;
GPA gpa;
Brain brain, brain2;
Clock clock, clock2, clock3;
Anxiety anxiety, anxiety2;
int level;
PImage intro_bg, final_bg, over_bg, game_background;
int x, x_shift, width_right, width_left;
Discussion discussion, discussion2;
int rand_int, rand_int2, rand_int3;
Game(int game_wth, int game_hght) {
level = -1;
x = 0;
// x_shift will be used to move the background image when faiza is moving with some x-velocity
x_shift = 0;
width_right = 0;
width_left = 0;
// rand_int, rand_int2 and rand_int3 are used for random integers which decide the boundary from which assignments are generated
rand_int = 0;
rand_int2 = 0;
rand_int3 = 0;
game_width = game_wth;
game_height = game_hght;
intro_bg = loadImage("start_background.png");
game_background = loadImage("background1.png");
final_bg = loadImage("background.png");
over_bg = loadImage("gameover_background.png");
faiza = new Faiza(34, 585, 27, "faiza.png", 66, 66, 9);
gpa = new GPA(990, 35, 25, "gpa.png", 70, 56, 1);
brain = new Brain(980, 570, 30, "brain_waving.png", 85, 85, 2);
brain2 = new Brain(980, 50, 30, "brain_waving.png", 85, 85, 2);
clock = new Clock(310, 330, 32, "clock.png", 66, 66, 4);
clock2 = new Clock(695, 570, 32, "clock.png", 66, 66, 4);
clock3 = new Clock(500, 440, 32, "clock.png", 66, 66, 4);
anxiety = new Anxiety(500, 500, 25, "anxiety.png", 66, 66, 3, 34, 585, faiza.radius);
anxiety2 = new Anxiety(1000, 700, 25, "anxiety.png", 66, 66, 3, 34, 585, faiza.radius);
// instantiating discussions to be added to the array of discussions
discussion = new Discussion(int(random(300,711)), int(random(300,591)), 25, "Discussions.png", 66, 66, 3);
discussion2 = new Discussion(int(random(120,995)), int(random(300,591)), 25, "Discussions.png", 66, 66, 3);
discussion_list = new Discussion[1];
discussion_list2 = new Discussion[1];
discussion_list[0] = discussion;
discussion_list2[0] = discussion2;
// adding distractions to the array of distractions
distractions = new Distractions[6];
distractions[0] = new Distractions(100, 300, 58, "jake.png", 120, 120, 6);
distractions[1] = new Distractions(444, 333, 48, "insta.png", 100, 100, 1);
distractions[2] = new Distractions(900, 120, 48, "facebook.png", 100, 100, 1);
distractions[3] = new Distractions(887, 635, 48, "netflix.png", 100, 100, 1);
distractions[4] = new Distractions(134, 587, 48, "youtube.png", 100, 100, 1);
distractions[5] = new Distractions(55, 100, 48, "ps.png", 120, 120, 1);
// having a position_list array which holds possible coordinates of where assignments can be launched
position_list = new int[4][2];
position_list[0][0] = int(random(30, 995));
position_list[0][1] = 30;
position_list[1][0] = 994;
position_list[1][1] = int(random(150, 731));
position_list[2][0] = int(random(30, 995));
position_list[2][1] = 730;
position_list[3][0] = 30;
position_list[3][1] = int(random(150, 401));
assignments = new Assignment[1];
assignments[0] = new Assignment(position_list[rand_int][0], position_list[rand_int][1], 30, "assignment.png", 66, 66, 4, faiza.posX, faiza.posY);
assignments2 = new Assignment[2];
assignments2[0] = new Assignment(position_list[rand_int][0], position_list[rand_int][1], 30, "assignment.png", 66, 66, 4, faiza.posX, faiza.posY);
assignments2[1] = new Assignment(position_list[rand_int2][0], position_list[rand_int2][1], 30, "assignment.png", 66, 66, 4, faiza.posX, faiza.posY);
assignments3 = new Assignment[3];
assignments3[0] = new Assignment(position_list[rand_int][0], position_list[rand_int][1], 30, "assignment.png", 66, 66, 4, faiza.posX, faiza.posY);
assignments3[1] = new Assignment(position_list[rand_int2][0], position_list[rand_int2][1], 30, "assignment.png", 66, 66, 4, faiza.posX, faiza.posY);
assignments3[2] = new Assignment(position_list[rand_int3][0], position_list[rand_int3][1], 30, "assignment.png", 66, 66, 4, faiza.posX, faiza.posY);
}
void update() {
// Sending Faiza back to her original position when faiza.alive == False and then setting faiza.alive to True again
if (faiza.alive == false) {
faiza.posX = 34;
faiza.posY = 585;
faiza.alive = true;
}
position_list[0][0] = int(random(30, 995));
position_list[0][1] = 30;
position_list[1][0] = 994;
position_list[1][1] = int(random(150, 731));
position_list[2][0] = int(random(30, 995));
position_list[2][1] = 730;
position_list[3][0] = 30;
position_list[3][1] = int(random(150, 401));
// changing the assignments in each position of the assignments array after certain intervals
if (level == 8) {
rand_int = int(random(0,4));
if (frameCount % 200 == 0) {
assignments[0] = new Assignment(position_list[rand_int][0], position_list[rand_int][1], 30, "assignment.png", 66, 66, 4, faiza.posX, faiza.posY);
}
}
else if (level == 9) {
rand_int = int(random(0,4));
rand_int2 = int(random(0,4));
if (frameCount % 200 == 0) {
assignments2[0] = new Assignment(position_list[rand_int][0], position_list[rand_int][1], 30, "assignment.png", 66, 66, 4, faiza.posX, faiza.posY);
}
if (frameCount % 201 == 0) {
assignments2[1] = new Assignment(position_list[rand_int2][0], position_list[rand_int2][1], 30, "assignment.png", 66, 66, 4, faiza.posX, faiza.posY);
}
}
else if (level == 10) {
rand_int = int(random(0,4));
rand_int2 = int(random(0,4));
rand_int3 = int(random(0,4));
if (frameCount % 200 == 0) {
assignments3[0] = new Assignment(position_list[rand_int][0], position_list[rand_int][1], 30, "assignment.png", 66, 66, 4, faiza.posX, faiza.posY);
}
if (frameCount % 201 == 0) {
assignments3[1] = new Assignment(position_list[rand_int2][0], position_list[rand_int2][1], 30, "assignment.png", 66, 66, 4, faiza.posX, faiza.posY);
}
if (frameCount % 202 == 0) {
assignments3[2] = new Assignment(position_list[rand_int3][0], position_list[rand_int3][1], 30, "assignment.png", 66, 66, 4, faiza.posX, faiza.posY);
}
}
// Resetting the position of the Anxieties when anxiety.alive or anxiety2.alive are False
if (anxiety.alive == false || anxiety2.alive == false) {
anxiety.posX = 500;
anxiety2.posX = 1000;
anxiety.target_x = 34;
anxiety2.target_x = 34;
anxiety.posY = 500;
anxiety2.posY = 700;
anxiety.target_y = 585;
anxiety2.target_y = 585;
anxiety.alive = true;
anxiety2.alive = true;
}
// adding new discussions to the discussion_lists which are instantiated at newer random positions
// in later levels, discussions are instantiated more frequently.
if (frameCount % 300 == 0) {
discussion = new Discussion(random(300,711), random(300,591), 25, "Discussions.png", 66, 66, 3);
discussion_list[0] = discussion;
}
if (frameCount % 150 == 0) {
discussion2 = new Discussion(random(120, 995), random(130, 739), 25, "Discussions.png", 66, 66, 3);
discussion_list2[0] = discussion2;
}
// the following blocks of code check the collisions of assignments with faiza
if (game.level == 8) {
if (faiza.distance(assignments[0]) <= faiza.radius + assignments[0].radius) {
faiza.breakdown_counter += 1;
faiza.alive = false;
anxiety.alive = false;
anxiety2.alive = false;
rand_int = int(random(0,4));
assignments[0] = new Assignment(position_list[rand_int][0], position_list[rand_int][1], 30, "assignment.png", 66, 66, 4, faiza.posX, faiza.posY);
}
}
if (game.level == 9) {
for (int i = 0; i < 2; i++) {
if (faiza.distance(assignments2[i]) <= faiza.radius + assignments2[i].radius) {
faiza.breakdown_counter += 1;
faiza.alive = false;
game.anxiety.alive = false;
game.anxiety2.alive = false;
rand_int = int(random(0,4));
rand_int2 = int(random(0,4));
assignments2[0] = new Assignment(position_list[rand_int][0], position_list[rand_int][1], 30, "assignment.png", 66, 66, 4, faiza.posX, faiza.posY);
assignments2[1] = new Assignment(position_list[rand_int2][0], position_list[rand_int2][1], 30, "assignment.png", 66, 66, 4, faiza.posX, faiza.posY);
}
}
}
if (game.level == 10) {
for (int i = 0; i < 3; i++) {
if (faiza.distance(assignments3[i]) <= faiza.radius + assignments3[i].radius) {
faiza.breakdown_counter += 1;
faiza.alive = false;
anxiety.alive = false;
anxiety2.alive = false;
rand_int = int(random(0,4));
rand_int2 = int(random(0,4));
rand_int3 = int(random(0,4));
assignments3[0] = new Assignment(position_list[rand_int][0], position_list[rand_int][1], 30, "assignment.png", 66, 66, 4, faiza.posX, faiza.posY);
assignments3[1] = new Assignment(position_list[rand_int2][0], position_list[rand_int2][1], 30, "assignment.png", 66, 66, 4, faiza.posX, faiza.posY);
assignments3[2] = new Assignment(position_list[rand_int3][0], position_list[rand_int3][1], 30, "assignment.png", 66, 66, 4, faiza.posX, faiza.posY);
}
}
}
}
void display() {
update();
// displaying the introduction screen
if (level == -1) {
image(intro_bg, 0, 0);
textSize(80);
text("UNI SUFFERERS", 230, 80);
textSize(40);
fill(255, 213, 43);
text("Press the space bar to proceed", 200, 650);
}
// displaying the instructions screen
if (level == 0) {
image(game_background, 0, 0);
textSize(50);
fill(75, 0, 70);
text("INSTRUCTIONS", 290, 80);
textSize(30);
text("1) The player plays the game as Faiza the Falcon", 20, 140);
text("2) Use the arrow keys to control the movement of Faiza", 20, 180);
text("3) Help Faiza avoid obstacles and save her mental health", 20, 220);
text("4) Keep a check on the breakdown counter in the first 10 levels", 20, 260);
text("5) The obstacles in the first 10 levels are of the following types:", 20, 300);
text("a) Clocks representing 5am classes move sideways on the screen", 20, 340);
text("b) Class discussions randomly pop up anywhere on the screen", 20, 380);
text("c) Anxiety constantly follows the movement of Faiza", 20, 420);
text("d) Assignments lock Faiza's coordinates and are shot with a velocity", 20, 460);
text("6) Avoid distractions in the last level and achieve a 4.0 GPA", 20, 500);
text("7) Once the game is over, click on the screen to play again", 20, 540);
textSize(40);
text("Click on the screen to begin playing", 180, 650);
}
// moving the background when faiza is moving in the x direction to give parallax effect
if (level >= 1 && level <= 10) {
x = 0;
x = x_shift;
width_right = x % game_width;
width_left = game_width - width_right;
image(game_background, 0, 0, width_left, game_height, width_right, 0, game_width, game_height);
image(game_background, width_left, 0, width_right, game_height, 0, 0, width_right, game_height);
}
if (level == 11) {
image(final_bg, 0, 0);
//textMode(CENTER);
textSize(40);
fill(255, 213, 43);
text("GET THAT 4.0!", 310, 65);
textSize(20);
text(faiza.distraction_counter + " distraction(s)", 860, 740);
}
if (level == 12) {
image(over_bg, 0, 0);
textSize(150);
fill(255, 213, 43);
text("GAME", 270, 220);
text("OVER", 290, 350);
textSize(30);
text(faiza.breakdown_counter + " breakdowns and " + faiza.distraction_counter + " distraction(s) later,", 240, 550);
text("you finally got that 4.0 GPA!", 300, 590);
text("Think you can do better? Click on the", 240, 630);
text("screen to play again!", 340, 670);
}
textSize(40);
fill(75, 0, 70);
if (level == 1) {
text("GO SAVE YOUR MENTAL HEALTH!", 180, 70);
}
else if (level == 2) {
text("5 AM CLASSES ARE WAITING!", 210, 70);
}
else if (level == 3) {
text("TOO EASY? LET'S POP THINGS UP!", 170, 70);
}
else if (level == 4) {
text("HAVE MORE OF IT!", 290, 70);
}
else if (level == 5) {
text("AND MORE!", 360, 70);
}
else if (level == 6) {
textSize(35);
text("SOME THINGS JUST WON'T STOP FOLLOWING YOU", 65, 60);
}
else if (level == 7) {
text("THIS AIN'T GETTING ANY BETTER", 150, 65);
}
else if (level == 8) {
text("WAIT, WHAT? ASSIGNMENT?", 210, 65);
}
else if (level == 9) {
text("WHAT? THERE WERE TWO?", 230, 65);
}
else if (level == 10) {
text("YOU'RE KIDDING ME...", 270, 65);
}
if (level >= 1 && level <= 10) {
textSize(20);
text(faiza.breakdown_counter + " breakdown(s)", 860, 740);
}
// creating the grid for the first few levels
if (level >= 1 && level <= 5) {
stroke(0, 0, 0);
strokeWeight(7);
line(0, 100, 1024, 100);
line(0, 115, 1024, 115);
strokeWeight(9);
line(0, 280, 120, 280);
line(120, 280, 120, 390);
line(120, 390, 270, 390);
line(270, 280, 270, 390);
line(120, 490, 270, 490);
line(0, 620, 120, 620);
line(120, 490, 120, 620);
line(270, 490, 270, 620);
line(270, 280, 650, 280);
line(650, 280, 650, 160);
line(270, 620, 750, 620);
line(750, 620, 750, 250);
line(750, 250, 820, 250);
line(820, 250, 820, 620);
line(650, 160, 920, 160);
line(920, 160, 920, 520);
line(920, 520, 1024, 520);
line(820, 620, 1024, 620);
}
// calling the display function of all objects in the relevant levels
if (level >= 1 && level <= 11) {
faiza.display();
}
if (level >= 2 && level <= 5) {
clock.display();
}
if (level >= 4 && level <= 5) {
clock2.display();
}
if (level == 5) {
clock3.display();
}
if (level >= 3 && level <= 5) {
discussion_list[0].display();
}
if (level >= 6 && level <= 10) {
discussion_list2[0].display();
brain2.display();
anxiety.display();
}
if (level >= 7 && level <= 10) {
anxiety2.display();
}
if (level >= 1 && level <= 5) {
brain.display();
}
if (level == 8) {
assignments[0].display();
}
if (level == 9) {
assignments2[0].display();
assignments2[1].display();
}
if (level == 10) {
assignments3[0].display();
assignments3[1].display();
assignments3[2].display();
}
if (level == 11) {
gpa.display();
for (int i = 0; i < 6; i++) {
distractions[i].display();
}
}
}
}
void setup() {
size(1024, 768);
game = new Game(1024, 768);
// setting up the introductory song and the background song
path = sketchPath(audioName);
intro_song = new SoundFile(this, path);
intro_song.loop();
path2 = sketchPath(audioName2);
background_song = new SoundFile(this, path2);
}
void draw() {
background(255, 255, 255);
game.display();
}
// Defining keyPressed and keyReleased for Faiza and the 'dummies' in Anxiety and Anxiety2:
void keyPressed() {
// displaying the isntructions screen when the space bar is pressed at the intro screen
if (keyCode == 32 && game.level == -1) {
game.level = 0;
}
if (key == CODED) {
if (keyCode == RIGHT) {
game.faiza.move_right = true;
game.anxiety.move_right = true;
game.anxiety2.move_right = true;
}
if (keyCode == LEFT) {
game.faiza.move_left = true;
game.anxiety.move_left = true;
game.anxiety2.move_left = true;
}
if (keyCode == UP) {
game.faiza.move_up = true;
game.anxiety.move_up = true;
game.anxiety2.move_up = true;
}
if (keyCode == DOWN) {
game.faiza.move_down = true;
game.anxiety.move_down = true;
game.anxiety2.move_down = true;
}
}
}
void keyReleased() {
if (key == CODED) {
if (keyCode == RIGHT) {
game.faiza.move_right = false;
game.anxiety.move_right = false;
game.anxiety2.move_right = false;
}
if (keyCode == LEFT) {
game.faiza.move_left = false;
game.anxiety.move_left = false;
game.anxiety2.move_left = false;
}
if (keyCode == UP) {
game.faiza.move_up = false;
game.anxiety.move_up = false;
game.anxiety2.move_up = false;
}
if (keyCode == DOWN) {
game.faiza.move_down = false;
game.anxiety.move_down = false;
game.anxiety2.move_down = false;
}
}
}
void mouseClicked(){
// starting the game when the mouse is clicked at the instructions screen
if (game.level == 0) {
intro_song.stop();
background_song.loop();
game.level = 1;
}
// restarting the game when the mouse is clicked at the game over screen
if (game.level == 12){
background_song.stop();
game = new Game(1024, 768);
intro_song.loop();
}
}
For the midterm project, I decided to expand on the game I created for the Week 3 assignment. The rules of this game, similar to those of the game I previously created, are pretty straightforward. Attached below is the link to my game for the Week 3 assignment.
The game I am creating is primarily based on collision detection. In the previous version of the game (Week 3), the player played the game as Faiza the Falcon, and had to avoid certain obstructions (referred to as distractions in the game) on the way to obtain a 4.0 GPA.
My midterm project, however, will come with a lot more features. I aim to extend my previous idea in a way where I can create multiple levels (I am aiming for 10 levels), in increasing orders of difficulty. My Week 3 game will only be the final level of my midterm project.
The first (hopefully) 9 levels are based on an entirely different concept, where Faiza has to avoid different obstructions, again, but in order to save her mental health. These obstructions will be things like early morning/late night classes (due to timezone differences), assignments and anxiety. Unlike my previous game where all obstructions behaved in the same way, this version will have all of the obstructions behaving in entirely different ways. For instance, anxiety will constantly be following Faiza, and assignments will be shot at Faiza’s coordinates as they continue to change.
Over the weekend, did a lot of research on how I could implement many of these features. Firstly, I worked on learning how to use inheritance in Java. The previous version of my game had a lot of blocks of code which were repeated, and I learnt how using inheritance could let me create a Creature() class with all the basic attributes and methods, which other classes could inherit from. This made my code a lot simpler and nicer to work with.
Secondly, I worked on getting suitable sprites and backgrounds for different parts of the game, including the introduction screen, the final screen and the main game screen. I also managed to do some research on the implementation of the “following” behavior of some of the obstructions (as I intend to make anxiety follow Faiza), and realized that this had to be done using trigonometric functions (and I’m still in the process of figuring that out).
Overall, I believe this week was more about getting things together in one place and finalizing what the final game should look like. There’s a lot of work to be done in the coming week, but I’m really looking forward to it.
Attached below are the screenshots of some of the things I have managed to come up with.
import java.lang.Math;
import processing.sound.*;
SoundFile file;

String audioName = "intro.mp3";
String path;

Game game;

// creating an array for distractions which are used later
Distractions[] distractions;

class Creature {
  float posX, posY, radius, velocityX, velocityY, imgwidth, imgheight;
  PImage sprite_image;
  int num_frames, frame;
  String directionX;

  Creature(float x, float y, float r, String image_name, float img_w, float img_h, int number_frames) {
    posX = x;
    posY = y;
    radius = r;
    velocityX = 0;
    velocityY = 0;
    directionX = "right";
    sprite_image = loadImage(image_name);
    imgwidth = img_w;
    imgheight = img_h;
    num_frames = number_frames;
    frame = 0;
  }

  void display() {
    update();
    if (directionX == "right") {
      image(sprite_image, float(int(posX - imgwidth/2)), float(int(posY - imgheight/2)), imgwidth, imgheight, int(frame * imgwidth), 0, int((frame + 1) * imgwidth), int(imgheight));
    } else if (directionX == "left") {
      image(sprite_image, float(int(posX - imgwidth/2)), float(int(posY - imgheight/2)), imgwidth, imgheight, int((frame + 1) * imgwidth), 0, int(frame * imgwidth), int(imgheight));
    }
  }

  void update() {
  }
}


class Faiza extends Creature {
  boolean move_up, move_down, move_right, move_left;
  boolean alive;
  int counter;

  Faiza(float x, float y, float r, String image_name, float img_w, float img_h, int number_frames) {
    super(x, y, r, image_name, img_w, img_h, number_frames);
    move_up = false;
    move_down = false;
    move_right = false;
    move_left = false;
    alive = true;
    counter = 0;
  }

  void update() {
    //The condition below is for when Faiza moves left
    if (move_left == true) {
      velocityX = -2;
      if (posX - radius + velocityX < 6) {
        velocityX = 0;
      }
      posX += velocityX;
    }

    //The condition below is for when Faiza moves right
    else if (move_right == true) {
      velocityX = 2;
      if (posX + radius + velocityX > 1018) {
        velocityX = 0;
      }
      posX += velocityX;
    }

    //If none of the left and right keys are being pressed, Faiza stops moving horizontally
    else {
      velocityX = 0;
    }

    if (move_up == true) {
      velocityY = -2;
      if (posY - radius + velocityY <= 5) {
        velocityY = 0;
      }
      posY += velocityY;
    }

    //The condition below is for when Faiza moves downwards
    else if (move_down == true) {
      velocityY = 2;
      if (posY + radius + velocityY >= 762) {
        velocityY = 0;
      }
      posY += velocityY;
    }

    //If none of the up and down keys are being pressed, Faiza stops moving vertically
    else {
      velocityY = 0;
    }

    if ((frameCount%5 == 0) && (velocityX != 0 || velocityY != 0)) {
      frame = (frame + 1) % (num_frames - 1);
    } else if (velocityX == 0 && velocityY == 0) {
      frame = 8;
    }

    if (distance(game.gpa) <= (radius + game.gpa.radius) && game.level == 11) {
      game.level += 1;
    }

    if (!(posX >= 0 && posX <= 100 && posY >= 530 && posY <= 640)) {
      for (int i = 0; i < 6; i++) {
        if (distance(distractions[i]) <= radius + distractions[i].radius) {
          counter += 1;
          alive = false;
        }
      }
    }
  }

  // this distance method will be used to check for collisions with distractions
  double distance(Distractions target) {
    float a = (posX - target.posX);
    float b = (posY - target.posY);
    double c = Math.pow(a, 2);
    double d = Math.pow(b, 2);
    return Math.pow(c + d, 0.5);
  }

  // this distance method will be used to check for collisions with the gpa (marking the end of the game)
  double distance(GPA target) {
    float a = (posX - target.posX);
    float b = (posY - target.posY);
    double c = Math.pow(a, 2);
    double d = Math.pow(b, 2);
    return Math.pow(c + d, 0.5);
  }
}

class Distractions extends Creature {

  Distractions(float x, float y, float r, String image_name, float img_w, float img_h, int number_frames) {
    super(x, y, r, image_name, img_w, img_h, number_frames);
    velocityX = random(2, 5);
    velocityY = -1 * random(2, 5);
  }

  void update() {
    if (frameCount % 12 == 0) {
      frame = (frame + 1) % num_frames;
    }

    if (posX + radius >= 1024) {
      velocityX *= -1;
    }
    if (posX - radius <= 0) {
      velocityX *= - 1;
    }
    if (posY - radius <= 10) {
      velocityY *= -1;
    }
    if (posY + radius >= 780) {
      velocityY *= -1;
    }

    posX += velocityX;
    posY += velocityY;
  }
}

class GPA extends Creature {

  GPA(float x, float y, float r, String image_name, float img_w, float img_h, int number_frames) {
    super(x, y, r, image_name, img_w, img_h, number_frames);
  }
}

class Game {
  float game_width, game_height;
  Faiza faiza;
  GPA gpa;
  int level;
  PImage intro_bg, final_bg, over_bg;

  Game(float game_wth, float game_hght) {
    level = 0;
    game_width = game_wth;
    game_height = game_hght;
    faiza = new Faiza(34, 585, 27, "faiza.png", 66, 66, 9);
    gpa = new GPA(990, 35, 25, "gpa.png", 70, 56, 1);
    intro_bg = loadImage("start_background.png");
    final_bg = loadImage("background.png");
    over_bg = loadImage("gameover_background.png");

    distractions = new Distractions[6];
    distractions[0] =  new Distractions(100, 300, 58, "jake.png", 120, 120, 6);
    distractions[1] =  new Distractions(444, 333, 48, "insta.png", 100, 100, 1);
    distractions[2] =  new Distractions(900, 120, 48, "facebook.png", 100, 100, 1);
    distractions[3] =  new Distractions(887, 635, 48, "netflix.png", 100, 100, 1);
    distractions[4] =  new Distractions(134, 587, 48, "youtube.png", 100, 100, 1);
    distractions[5] =  new Distractions(55, 100, 48, "ps.png", 120, 120, 1);
  }

  void update() {
    if (faiza.alive == false) {
      faiza.posX = 34;
      faiza.posY = 585;
      faiza.alive = true;
    }
  }

  void display() {
    update();

    if (level == 0) {
      image(intro_bg, 0, 0);
    }

    if (level == 11) {
      image(final_bg, 0, 0);
    }

    if (level == 11) {
      textMode(CENTER);
      textSize(40);
      fill(255, 213, 43);
      text("GET THAT 4.0!", 310, 65);
    }

    if (level == 12) {
      image(over_bg, 0, 0);
      textSize(150);
      fill(255, 213, 43);
      text("GAME", 270, 220);
      text("OVER", 290, 350);
      textSize(50);
      text(faiza.counter + " distraction(s) later,", 240, 550);
      text("you achieved that 4.0 GPA!", 200, 600);
    }

    if (level > 0 && level <= 11) {
      faiza.display();
    }

    if (level == 11) {
      gpa.display();
    }

    if (level == 11) {
      for (int i = 0; i < 6; i++) {
        distractions[i].display();
      }
    }
  }
}


void setup() {
  size(1024, 768);
  game = new Game(1024, 768);
  path = sketchPath(audioName);
  file = new SoundFile(this, path);
  file.loop();
}

void draw() {
  background(255, 255, 255);
  game.display();
}

// allowing key presses to dictate Faiza's movement
void keyPressed() {
  if (keyCode == 32 && game.level == 0) {
    game.level = 11;
  }
  if (key == CODED) {
    if (keyCode == RIGHT) {
      game.faiza.move_right = true;
    }
    if (keyCode == LEFT) {
      game.faiza.move_left = true;
    }
    if (keyCode == UP) {
      game.faiza.move_up = true;
    }
    if (keyCode == DOWN) {
      game.faiza.move_down = true;
    }
  }
}

void keyReleased() {
  if (key == CODED) {
    if (keyCode == RIGHT) {
      game.faiza.move_right = false;
    }
    if (keyCode == LEFT) {
      game.faiza.move_left = false;
    }
    if (keyCode == UP) {
      game.faiza.move_up = false;
    }
    if (keyCode == DOWN) {
      game.faiza.move_down = false;
    }
  }
}
I learnt from my mistake in the Week 3 assignment and started working on the Week 4 assignment earlier than usual. Initially, the plan was to work on data visualization, but then I felt there was more for me to learn from generative text output (I think it is cooler). Attached below is the screenshot of what I ended up making.
Yes, as simple as it seems, this assignment really did take me 2 days. I was not very comfortable with generative text because I felt we went over it pretty quickly in class last Wednesday, so the first goal was to fully understand the example we covered in class.
I then decided to expand on the class example using a similar model but by adding a couple of more features. One way this could be done was to show the text being drawn on the screen, and this is what I ended up doing. To do this, I had to make sure that the block of code which drew the text was included in the draw() function. If I included that in the setup(), like in the class example, it would all be displayed at once, because setup() is called only once when the code is run.
Next, I found it hard to figure out how to move text to the next line while using a single string, because it was going out of the screen. I tried using “\n” inside the string but this didn’t work. I then made 4 different strings, and used if conditions to ensure that each string was drawn in the appropriate place after the previous string was completed.
Lastly, I played with the colors and used a couple of variables, some of which were used inside the stroke() function, until I ended up having something which satisfied my aesthetics.
The video is attached below. The only reason I have this song in the background is because it helped me get through Saturday night, when I spent Valentine’s day trying to make this thing work 🙂
Attached below is the code for the assignment
import geomerative.*;
import processing.sound.*;
SoundFile file;

String audioName = "song.mp3";
String path;

RFont font;
RPoint[] pnts, pnts2, pnts3, pnts4;
float xValue = 0;
float yValue = 0;
int i = 0;
int j = 0;
int k = 0;
int l = 0;
int r = 150;
boolean change = true;
float xOffset = 0;
float xOffset2 = 0;
float xOffset3 = 0;
float xOffset4 = 0;
float diam = 20;

void setup(){
  frameRate(120);
  background(255);
  size (800, 800);
  path = sketchPath(audioName);
  file = new SoundFile(this, path);
  file.loop();
  RG.init(this);
  font = new RFont("Franklin Goth Ext Condensed.ttf", 150, RFont.LEFT);

  // getting the points along the multiple strings
  RCommand.setSegmentLength(1);
  RCommand.setSegmentator(RCommand.UNIFORMLENGTH);
  RGroup grp, grp2, grp3, grp4;
  grp = font.toGroup("This took me");
  grp = grp.toPolygonGroup();
  pnts = grp.getPoints();

  xOffset = width - grp.getBottomRight().x - grp.getBottomLeft().x;
  xOffset = xOffset/2;

  grp2 = font.toGroup("2 hours");
  grp2 = grp2.toPolygonGroup();
  pnts2 = grp2.getPoints();

  xOffset2 = width - grp2.getBottomRight().x - grp2.getBottomLeft().x;
  xOffset2 = xOffset2/2;

  grp3 = font.toGroup("--------");
  grp3 = grp3.toPolygonGroup();
  pnts3 = grp3.getPoints();

  xOffset3 = width - grp3.getBottomRight().x - grp3.getBottomLeft().x;
  xOffset3 = xOffset3/2;

  grp4 = font.toGroup("days");
  grp4 = grp4.toPolygonGroup();
  pnts4 = grp4.getPoints();

  xOffset4 = width - grp4.getBottomRight().x - grp4.getBottomLeft().x;
  xOffset4 = xOffset4/2;

  noFill();
}

void update(){
  stroke(r, r, 0, 75);
  // setting a different color for the third string
  if (i >= pnts.length && j >= pnts2.length && k < pnts3.length){
    stroke(50);
  }
  ellipse(xValue, yValue, diam, diam);
}

void draw(){
      // printing the first string on the canvas
      if (i < pnts.length){
        update();
        if (r >= 0 && change == true){
          r -= 1;
        }
        else if(r == 225 && change == false){
          r -= 1;
          change = true;
        }
        else{
          r +=1;
          change = false;
        }
        xValue =  pnts[i].x + xOffset;
        yValue = pnts[i].y + height/2 - 150;
        i++;
      }

      // printing the second string after the first one has been printed
      if (i >= pnts.length){
        if (j < pnts2.length){
        update();
        if (r >= 0 && change == true){
          r -= 1;
        }
        else if (r == 225 && change == false){
          r -= 1;
          change = true;
        }
        else{
          r +=1;
          change = false;
        }
        xValue =  pnts2[j].x + xOffset2;
        yValue = pnts2[j].y + height/2;
        j++;
        }

      // printing the 3rd string on the canvas after the first two have been printed
      if (i >= pnts.length && j >= pnts2.length){
        if (k < pnts3.length){
          update();
        if (r >= 0 && change == true){
          r -= 1;
        }
        else if (r == 225 && change == false){
          r -= 1;
          change = true;
        }
        else {
          r +=1;
          change = false;
        }
        xValue =  pnts3[k].x + xOffset3 + 60;
        yValue = pnts3[k].y + height/2;
        k++;
        }

      // printing the 4th string after the first 3 have been printed
      if (i >= pnts.length && j >= pnts2.length && k >= pnts3.length){
        if (l < pnts4.length){
          update();
        if (r >= 0 && change == true){
          r -= 1;
        }
        else if (r == 225 && change == false){
          r -= 1;
          change = true;
        }
        else{
          r +=1;
          change = false;
        }
        xValue =  pnts4[l].x + xOffset4;
        yValue = pnts4[l].y + height/2 + 150;
        l++;
        }
      }
      }
      }

}