Midterm Project – Tank Game

Inspiration

I remember one of the game I played when I was a child having a small arcade handle. There was a specific tank game that I remember to be really difficult to even reach the fifth level because of the small screen and the aggressive attack from the enemies. Below is an image of the game I mentioned:
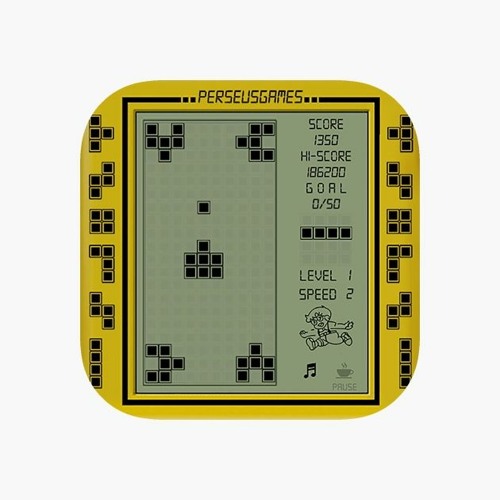
Therefore, I want to replicate this game as my midterm project using p5.js.

Character design:

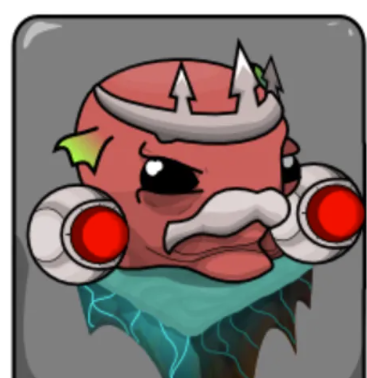
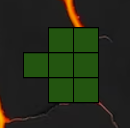
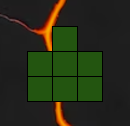
There are only 2 types of characters in the game: the Player and the Enemies. As similar to the inspiration game, I made the player to have the exact design. It has 2 rows and a body and a head to shoot the bullets. The layout and the head position will change based on the key arrows. Below is the illustration:
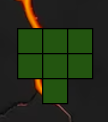
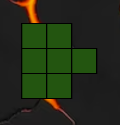
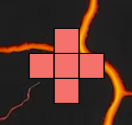
Next is the enemy design. Instead of having the same enemy design, I made the enemies to have a plus sign. This is because the enemies will not move from the their position. However, I want to make it more difficult to win, so I made the enemies to have the ability to change the shooting direction based on the player’s position.

Below is the code snippet for the changing of enemies’ shooting direction:

//change the bullet direction based on the player's position
for (let i = 0; i < enemiesList.length; i++) {
  if (player.y == int(enemiesList[i].y)) {
    if (player.x < enemiesList[i].x) {
      enemiesList[i].direction = 3;
    } else {
      enemiesList[i].direction = 1;
    }
  }
  if (player.x == int(enemiesList[i].x)) {
    if (player.y < enemiesList[i].y) {
      enemiesList[i].direction = 0;
    } else {
      enemiesList[i].direction = 2;
    }
  }
}

Game structure:

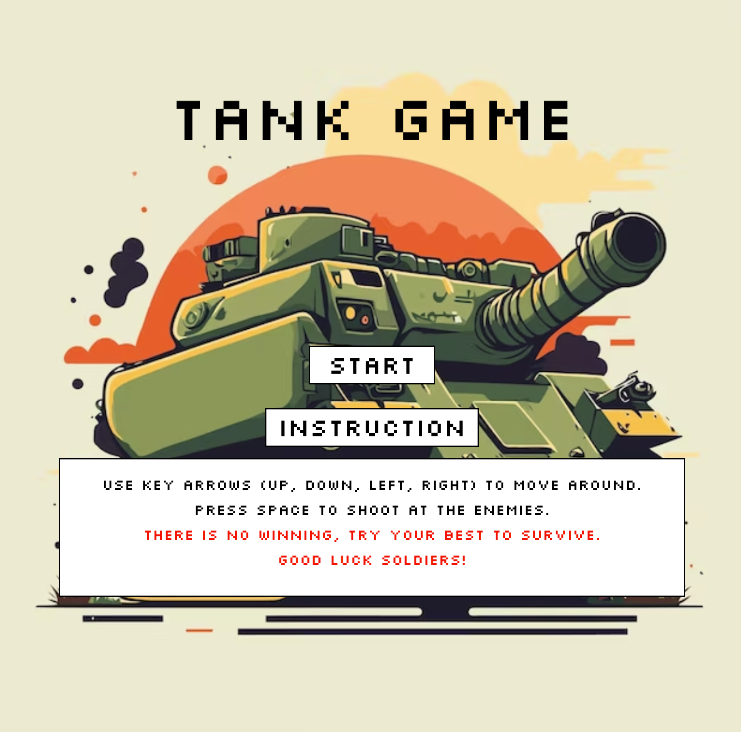
Initially, the first thing the user will see is the Main game page. The page includes a “Start” button and a button for instruction. It looks like below:

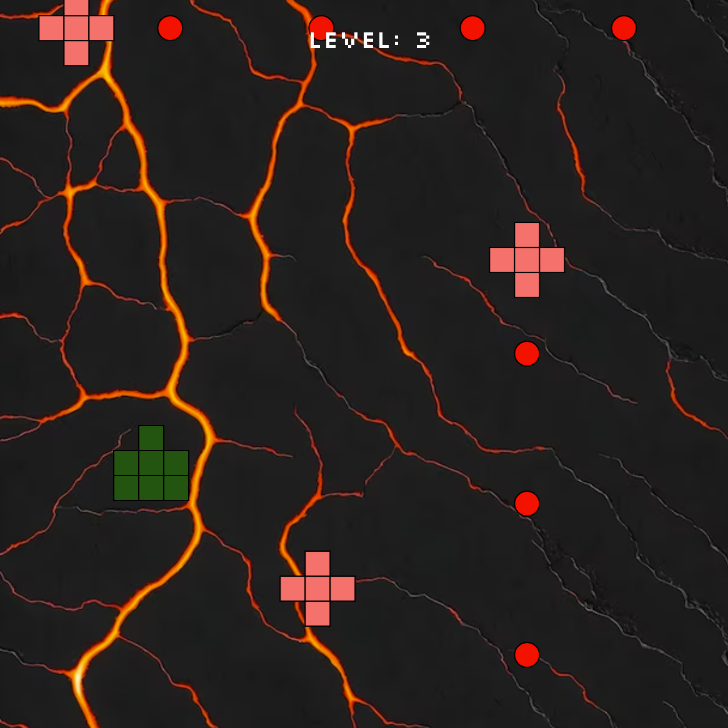
The player can use the arrow keys to move around and use the space bar to shoot at the enemies. The game goal is not to obtain to highest score but to survive as long as possible. Below is the main screen game, it includes player, enemies and level information:

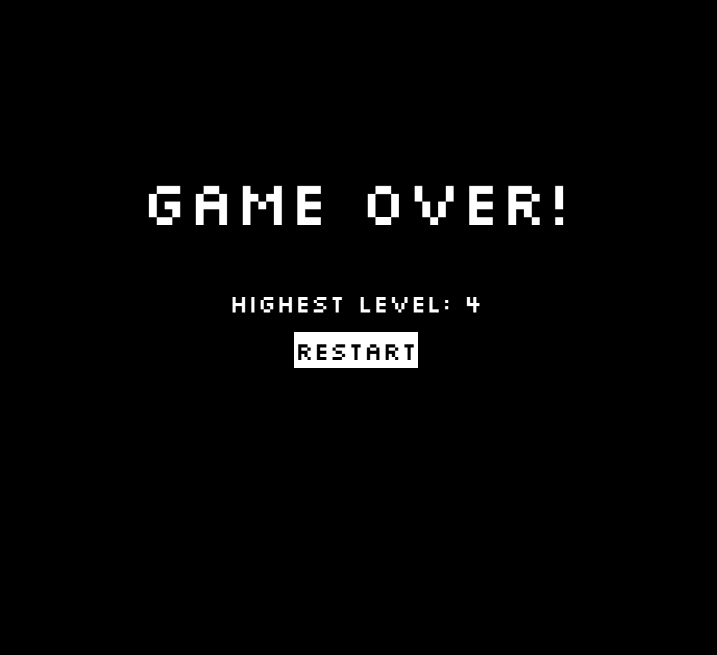
Finally, if the player’s character is hit by the enemy’s bullet, it will display the “Game Over” screen and display the highest level achieved:

Below is the code snippet for the Player, Enemy and Bullet objects:

class Player {
  constructor(x, y, w) {
    this.x = x;
    this.y = y;
    this.w = w;
    this.direction = 0;
    this.layout = 1;
  }
}

class Enemy {
  constructor(x, y, w) {
    this.x = x;
    this.y = y;
    this.w = w;
    this.direction = int(random(3));
  }
}

class Bullet{
  constructor(x, y, w, direction, rectWidth, colorCode){
    this.x = x;
    this.y = y;
    this.w = w;
    this.direction = direction;
    this.rectWidth = rectWidth;
    this.colorCode = colorCode;
  }
}

Design and Sounds:

Since this is similar to an arcade game, I chose and the characters’ design to be built up from blocks of squares. Because of this, I chose to the fonts to have the similar effect, made up from different squares. I uploaded a font file from the Google Fonts (Silk).

For sound, there are 4 different sound effects. The first one is the background music that will play in throughout the game play experience. The second one is the shooting sound when the user hits the space bar. The third one is when the enemy is hit by the bullet. Lastly, there is a losing sound effect if the player is hit.

Below is the code snippet for all the sounds used:

sound = loadSound("sound/shoot.wav");
hit = loadSound("sound/hit.mp3");
bgSound = loadSound("sound/bg.mp3");
loseSound = loadSound("sound/lose.mp3");

Obstacles and Improvements:

It is really difficult to know the exact position of the characters to control when they are hit. Currently it only works partially. This means that even though the system recognizes that the player is hit, it takes a bit of time for the screen to change. My thought is that my math for coordinate checking is wrong. However, I tried to changes the coordinates multiple times but it does not seem to work.

Another thing that is really difficult to do is the enemies are spawned overlap with the player’s position. Sometimes, this make an immediate lose game because the user does not have enough time to move. I tried to but conditions but it does not seem to work.

For improvements, I want to make the enemies to be more interactive. I want them to move around according to the player’s position and shoot towards them. The current version only target the player partially.

Game link:

Fullscreen link

Week 5 – Midterm Project Concept – Classic Tank Game

Concept:

For my midterm project, I am inspired by my childhood game: a classic Tank Game in the small brick game console.

The game is basically divided into different levels. As you come to the next level, the speed come from the bullet will be faster and more component will spawn in the game. Also, the player only has a limited number of lives. When those lives are used up, it is game over. The user can move around to dodge the bullet. However, because the screen is relatively small to contain both player and enemies, it becomes more and more difficult to win.

Design:

I aim for a similar design as its original. I want player tank will have a brick-like display which is distinguished from the enemies. However, instead of doing a monochrome game similar to the original, I want to add colors and random movements to the enemies. It will be either the enemies will move close and close to the player’s tank or the tank will move and shoot bullets randomly.

Object Oriented Class:

  • Tank – Need to have 2 designs, one for player and one for the enemies.
  • Player – Lives, Points
  • Game – Call all the player and enemies state and changes of levels.

Most Frightening Part:

  • The tank movements. In the best case, I want the enemies tank to move based on the players movements. In other words, they would move close and close to the player’s tank. Since the player’s tank will constantly moving, the enemy target path will also change accordingly.
  • Levels. I think it is quite difficult to have the correct parameters for each level. As the level increases, the parameters such as speed and number of enemies will also increase.

Risk Prevention:

  • I will continue to come up with a way to have the tank targeting the player’s tank. However, in the worst case scenario, I can make the tank to move randomly. As I increase the number of tanks, the disadvantage of not having targeting tank will disappear.
  • I will try to be careful with the game state control. It is really important to know when a player wins to move to the next level. Or when the player loses to allow replay sufficiently. Therefore, I will make sure these parameters are set up appropriately for different levels.

Reading Reflection – Week 5 – Computer Vision’s View

Computer Vision is full of bits and bytes. There is no way perfect algorithm to obtain the computer vision of the background. The computer vision seems to only see the whole back as a series of pixels. This means that without human to define what these pixels are, the computer does not know what to do with the image in their vision. In other words, the image data is a stream of nonsense to the computer.

The way the computer analyze the changes in its vision is similar to how the sensors work, I think. For example, in one of the techniques mentioned in the reading, “detecting motion” is done by comparing the pixels of the first frame (F1) and the subsequent frame (F2). Any changes in pixels detected by the processor can be concluded that was a movement in the vision. However, it is clear that this technique is unable to recognize what type of shape is it as well as the color of the moving objects. Similarly, since this algorithm is created to only detect motion, it does not understand the general image that it is capturing.

Therefore, computer vision can only do good at the jobs that t is assigned.

Assignment 4 – The Emotion Tree

To make this assignment, I browse the Kaggle for a while to find any suitable data table that can be used for my assignment. I came across a table about emotion of the twitter quotes. The table consists of 6 emotions: sadness, joy, love, angry, fear, surprise.

Since the data has different emotions, I am inspired by the movie Inside Out and assign each emotion with a color. In particular, sadness is blue, joy is yellow, love is pink, angry is red, fear is purple and surprise is green. These colors will be displayed as options for the users to choose what type of quotes they want to read.

Since the initial file consists of different mix of emotions, I organize the file and make it into 5 different files for different emotions. Then I load the emotion tables into the sketch file and continuously display a random text from the file after the MousePressed event. Below is the example code for the first 2 emotions:

function mousePressed() {
  //sadness
  if (dist(mouseX, mouseY, 30, 30) < 50) {
    let stringList = sadness.getColumn('text');
    string = stringList[int(random(stringList.length-1))];
    push();
    translate(width / 2, height);
    background('black');
    fill("white");
    branch(70, 0);
    pop();
  } 
  //joy
  else if (dist(mouseX, mouseY, 30, 100) < 50) {
    let stringList = joy.getColumn('text');
    string = stringList[int(random(stringList.length-1))];
    push();
    translate(width / 2, height);
    background('black');
    fill("white");

    branch(70, 1);
    pop();
  }

Furthermore, the colors of the emotions will also be presented as the color of the leaves on the tree. I initially want the leaves on the tree to be responsive to display text after clicking on them. However, it is incredibly difficult because of recursively called translation function. As a result, I can not figure out the position of the leaves to add interactions. I believe that this is not the best way to do for this approach. However, I modify the idea so that the users can still choose the emotions using the circle at the top of the page.

Reflection:

As I said before, I want to add interaction to the leaves of the tree. I added the class for the leaves (Leaf class), but I was successfully implemented that. Furthermore, I wanted to add animation such as leaves falling and changing of night and day.

My sketch:
Reference:

Recursive Tree

Reading Reflection – Design is difficult

I feel that design is difficult, especially when we are designing for others. Since the product is designed for the users, we have to understand their behavior. Take the example of a door in the reading: The way a hurried person interacts with the door will much different from someone who takes their time to use the door. While the first one needs to prioritize the efficiency of how the door works, the latter can be focused on the creative aspects of it.

Furthermore, it sometimes difficult to be someone’s shoes. Assume that we are designing a product for the public customer. However, because we are the product owner, we understand the product much more than anyone else outside of the product scope. There will be a lot of things that are obvious under our eyes but it serves no meaning in the users’ eyes. That is why Human Centered Design is really important. However, the human here is our application users and not ourselves.

Reading Response – Interactivity and Others

How can we define interactivity? I realize that the word “interactive” has been overused by many things that involve some kind of human’s action in it. However, I believe that similar to the reading, the human’s interaction with any object must also result in a response from the object. Hence, the object is interaction. To some sense, this is similar to having a conversation where the speaker expects a response from the listener. Furthermore, as in the reading mentioned, the interaction is just not simply the meaningless communication between communicators but it must involve the process of thinking in related to the given subject. It is worth noting that the level between the subjects in the interactive conversation should be similar.

Another aspect that interests me is the notion of whether interactivity is subjective. While the reading is trying define the term interactivity universally, I would like the think that interactivity is subjective. It does not limit to the functionality of the interaction, but I would rather argue that some interactivity are designed to target a certain group of people. For example, any interaction that requires a response from the text/quote questions without audio support could not consider as interactive to the young children who have not studied how to read yet. Each design for interaction seems to target a certain subject group, or all, but it is certain that interaction is not universal in my opinion.

Assignment 3 – Laser Skull

Inspiration:

I was inspired by a game that I used to play a few years ago: Quadropus Rampage. In the game, the final boss, which I unfortunately still could not defeat, is a head that can shoot laser to attack. Here is an illustration:

Therefore, I wanted to make something similar and I went for the skull. Similar to the first assignment of making a portrait, I made the skull using simple shapes available in p5.js. Then, I transformed the code into the class Skull so that I can easily manipulate the size of the skull as well as its position.

Next, I added the laser shooting from the skull eyes. I created a laser function in the Skull class and draw a line from the skull’s eyes position to the mouse position. The skull will only shoot laser if the mouse is pressed. Below is the code for the Skull class:

class Skull {
  constructor(posX, posY, scaleObj) {
    this.posX = posX;
    this.posY = posY;
    this.scaleObj = scaleObj;
    this.dirX = 2;
    this.dirY = -1;
  }
  
  //skull drawing
  show() {
    
    //head
    drawingContext.shadowBlur = 0;
    strokeWeight(0);
    fill("cyan");
    ellipse(
      this.posX * this.scaleObj,
      this.posY * this.scaleObj,
      100 * this.scaleObj,
      60 * this.scaleObj
    );
    rectMode(CENTER);
    rect(
      this.posX * this.scaleObj,
      (this.posY + 30) * this.scaleObj,
      70 * this.scaleObj,
      25 * this.scaleObj
    );

    //skull eyes
    fill("black");
    circle(
      (this.posX - 20) * this.scaleObj,
      this.posY * this.scaleObj,
      15 * this.scaleObj
    );
    circle(
      (this.posX + 20) * this.scaleObj,
      this.posY * this.scaleObj,
      15 * this.scaleObj
    );
    
    //skull mouth
    fill("black");
    rect(
      this.posX * this.scaleObj,
      (this.posY + 33.5) * this.scaleObj,
      3.5 * this.scaleObj,
      18 * this.scaleObj
    );
    rect(
      (this.posX - 15) * this.scaleObj,
      (this.posY + 33.5) * this.scaleObj,
      3.5 * this.scaleObj,
      18 * this.scaleObj
    );
    rect(
      (this.posX + 15) * this.scaleObj,
      (this.posY + 33.5) * this.scaleObj,
      3.5 * this.scaleObj,
      18 * this.scaleObj
    );
  }
  
  //laser starts from the eyes
  laser(x, y) {
    stroke("white");
    strokeWeight(4);
    drawingContext.shadowBlur = 10;
    drawingContext.shadowColor = color("red");
    line((this.posX - 20) * this.scaleObj, this.posY * this.scaleObj, x, y);
    line((this.posX + 20) * this.scaleObj, this.posY * this.scaleObj, x, y);
  }
  
  //constant movement
  update() {
    if (this.posX * this.scaleObj > width || this.posX < 0) {
      this.dirX *= -1;
    }
    if (this.posY * this.scaleObj > height || this.posY < 0) {
      this.dirY *= -1;
    }

    this.posX += this.dirX;
    this.posY += this.dirY;
  }
}

Furthermore, I reused the Ball class in the previous class to make this as an interactive experience. Every time the skull successfully shoot down 1 ball, a new ball will appear and the background color will randomly change.

Also, since I wanted to add the scale much later on, I have to add it for every function I used which is quite time consuming. Therefore, I think for every class I will add a scale component just in case I want to change any dimension.

Reflection:

I want to add much more interactivity such as users can control the skull by mouse. Furthermore, I want to add obstacles and enemies to the game so that it can be more similar to the game that I played.

Below is the canvas:

Reading Reflection – Linh Tran – Week 2 – Digital Art Identification

What defines art? Since the rise of technology and digital world, the art world is gradually shifted from classical arts, the unchangeable details imprint on physical paper, to the digital art pieces, in which the picture is generated by various algorithms. Throughout the talk, Casey Raes displays examples of different art pieces that are made from randomized algorithms. However, this raises the question whether the randomized algorithm creates a unique artwork since the details are generated and produced a different texture. In other words, it is important to understand the line that distinguishes a new art piece.

As in the talk, a single algorithm can produce different behavior and artistic presentation. For example, in one of the scenes, with the same algorithm that is repeatedly re-compiled, the details are output in different angles, shapes and colors. However, it remains obvious that the art pieces are made from the same algorithm because their style and texture combinations stay the same. Therefore, while it is fascinating that the art piece will change with time and space, it seems to me that the algorithm is the one defines digital art. This is because the algorithm controls how the details in the artwork react with each other. Hence, it makes more sense to identify with the constructed algorithm than the randomized display.

Assignment 2 – Linh Tran – Tic Tac and Toe

I was trying to apply what I have learnt in class into 1 project. However, since I am not particularly good with art, I decided to do an interactive project. This was when I remember of a game that I played a lot with my friends before: Tic Tac Toe.

I used a nested for loop to create a 2D array so that all the steps can be stored and correctly outputted. Since I want the game to be 2 players, as the way it is in  Tic Tac Toe, I used different colors (black and white) to signify for the difference in players.

In this assignment, I aims to make everything as flexible as possible. Therefore, I made the dimensions of the board environment editable. In other words, the user can change the dimension before starting the game. Below is the code for displaying the moves with any initialized dimensions:

for (let i = 0; i < boardSizeX; i++){
  for (let j=0; j < boardSizeY; j++){
    if (moves_lst[i][j] > 0){
      fill("white");
      ellipse((i + 1)*widthX - widthX/2, (j+1)*widthX - widthX/2, widthX, widthX);
    }
    else if(moves_lst[i][j] < 0)
    {
      fill('black');
      ellipse((i + 1)*widthX - widthX/2, (j+1)*widthX - widthX/2, widthX, widthX);
    }
  }
}

I part that I am proud of is doing the checking condition. I used the nested for loops to loop through every single piece and 4 cases (horizontal, vertical, diagonal left, and diagonal right). However, I also think that it is not the most efficient way to write this the program need to loop through every element in the array for every draw loop.

function checking_win(player){
    //horizontal
    for (let i = 0; i < boardSizeX; i++){
      for (let j=0; j < boardSizeY-4; j++){
        if (moves_lst[i][j] == player && moves_lst[i][j+1] == player && moves_lst[i][j+2] == player && moves_lst[i][j+3] == player && moves_lst[i][j+4] == player){
          return true;
        }
      }
    }
   //vertical
    for (let i = 0; i < boardSizeX-4; i++){
      for (let j=0; j < boardSizeY; j++){
        if (moves_lst[i][j] == player && moves_lst[i+1][j] == player && moves_lst[i+2][j] == player && moves_lst[i+3][j] == player && moves_lst[i+4][j] == player){
          return true;
        }
      }
    }
    //diagonal right
    for (let i = 0; i < boardSizeX-4; i++){
      for (let j=0; j < boardSizeY-4; j++){
        if (moves_lst[i][j] == player && moves_lst[i+1][j+1] == player && moves_lst[i+2][j+2] == player && moves_lst[i+3][j+3] == player && moves_lst[i+4][j+4] == player){
          return true;
        }
      }
    }
    //diagonal left
    for (let i = 3; i < boardSizeX; i++){
      for (let j=0; j < boardSizeY-4; j++){
        if (moves_lst[i][j] == player && moves_lst[i-1][j+1] == player && moves_lst[i-2][j+2] == player && moves_lst[i-3][j+3] == player && moves_lst[i-4][j+4] == player){
          return true;
        }
      }
    }
}

Reflection:

In general, I want to improve the algorithm for the checking function. Also, the current codes only allow modification directly on the codes.  I want to make it more user friendly by allowing to make changes on the displaying screen.

Below is my p5.js screen:

Assignment 1 – Self Portrait – Bubbling Portrait

I just tried to paly around with p5.js after the class. My first lesson about this was “Auto-refresh” does not mean “Auto-save”. I learnt this the hard way. After turning the Auto-refresh on, I proceed to finish my code without the thought the save it. However, after an incident with losing the internet connections, my work was lost after the page was refreshed and I had to rewrite the code from scratch. Learning from mistakes, I saved my code after every changes and turned of “Auto-refresh”.

I sketch the portrait mostly by ellipse and arc. I started from the head which then includes eyes, nose, mouth, and hair. The eyes include a few different ellipses for the eyeballs. Nose and mouth are much simpler, just a single arc for each is sufficient.

However, the most difficult part for me was the hair. To make the front part, I used the arc to produce a half circle. Furthermore, I want to have highlights on the hair. I used the arc function with changes in stroke colors to mimic the hair strands. The most difficult thing in this step is to know the exact starting point and ending point of the arc. Below is the codes for it:

noFill();
stroke("white");
arc(width / 2 + 20, height / 2 - 15, 150, 120, PI, PI + HALF_PI - QUARTER_PI);
arc(width / 2 + 20, height / 2 - 15, 100, 120, PI, PI + HALF_PI - QUARTER_PI);
arc(
  width / 2 - 10,
  height / 2 - 15,
  150,
  120,
  PI + HALF_PI + QUARTER_PI,
  TWO_PI
);
arc(
  width / 2 - 20,
  height / 2 - 15,
  100,
  120,
  PI + HALF_PI + QUARTER_PI,
  TWO_PI
);

I then added a pony tail using the Bezier curve. The final steps were adding ears and body using simple ellipse codes.

Finally, I attempt to do animation in p5.js. Using circles, I assign random position for each circle after every reloading. Each circle will start with a random size. They will increase and decrease in size as time pass. This was done using the sin() function:

circle(10, 10, sin(x)*100);
x = x + 0.01;

for (let i = 0; i < 15; i++){
  circle(posLst[i][0], posLst[i][1], sin(sizeLst[i])*100);
  sizeLst[i] = sizeLst[i] + 0.01;
}

My sketch:

Reflection:

After trying this assignment, I realize that a lot of things can be replaced with variables. Then, the positions of the eyes, nose, etc. will be relative from that variable positioning. This would make any fix much easier in terms of position. I realized this halfway of my code when I want to move things a bit downwards. The more I have on the sketch, the long it takes for me to fix all of the position coordinates.

What I want to do next is to add interactivity into the sketch. My sketch currently only has some simple animation on the background. I also want to have animation on the portrait character as well as some interaction with the portrait.