Final Project – Khalifa AlShamsi

Concept:

The concept of this project revolves around creating an interactive UFO game titled “UFO Escape.” The main goal is to score points by avoiding collisions with asteroids and navigating through space. What sets this game apart is its unique control scheme: players use a glove equipped with a gyroscope sensor as the game controller. This setup allows the game to translate the player’s hand tilt movements into navigational commands within the game environment to turn the UFO in different directions.

Final Concept of the project:

Video of interaction:


Description of interaction design

Implementing the “UFO Escape” game involves an interaction design that merges physical computing with digital interfaces to create an immersive gaming experience. Here’s a detailed breakdown of the interaction design and implementation:

Hardware Setup:
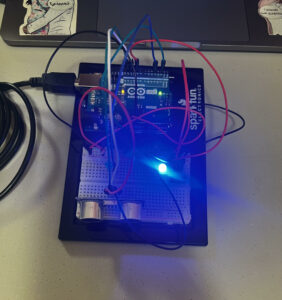
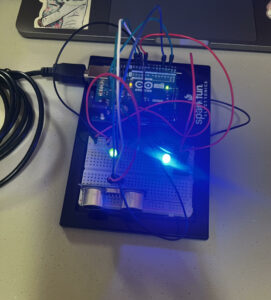
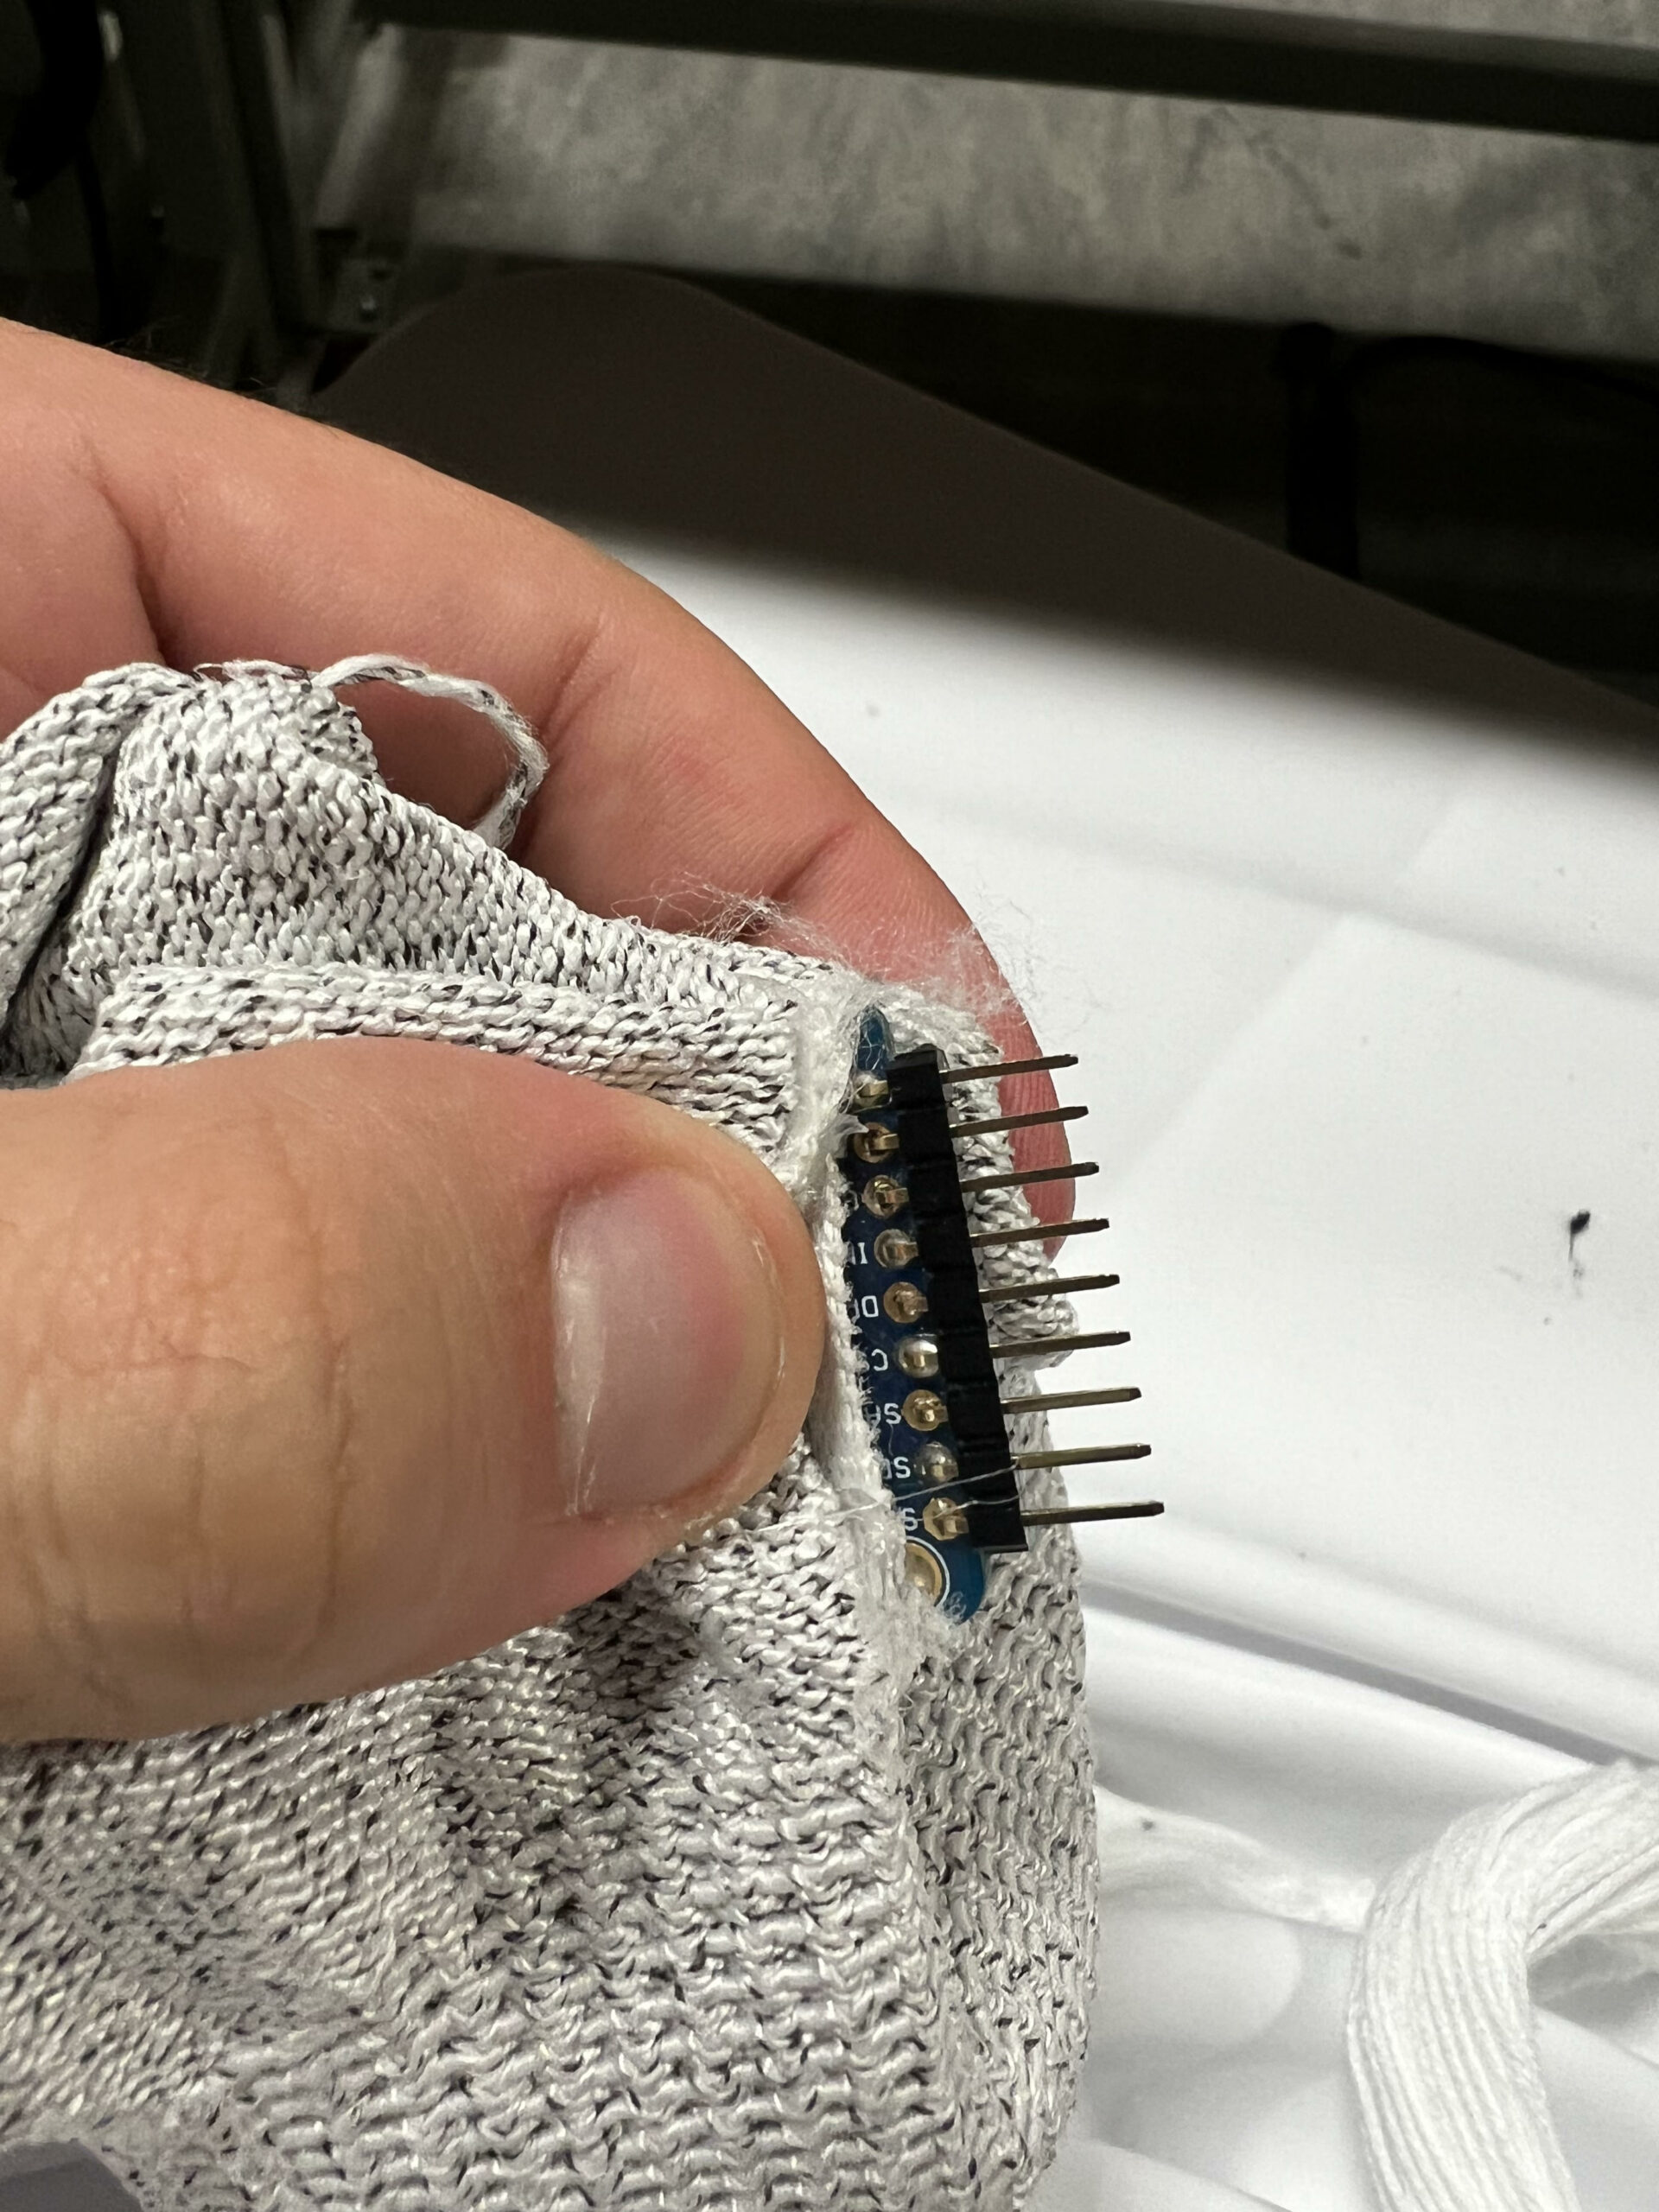
Gyroscope Sensor (3-Axis Gyroscope L3GD20H):
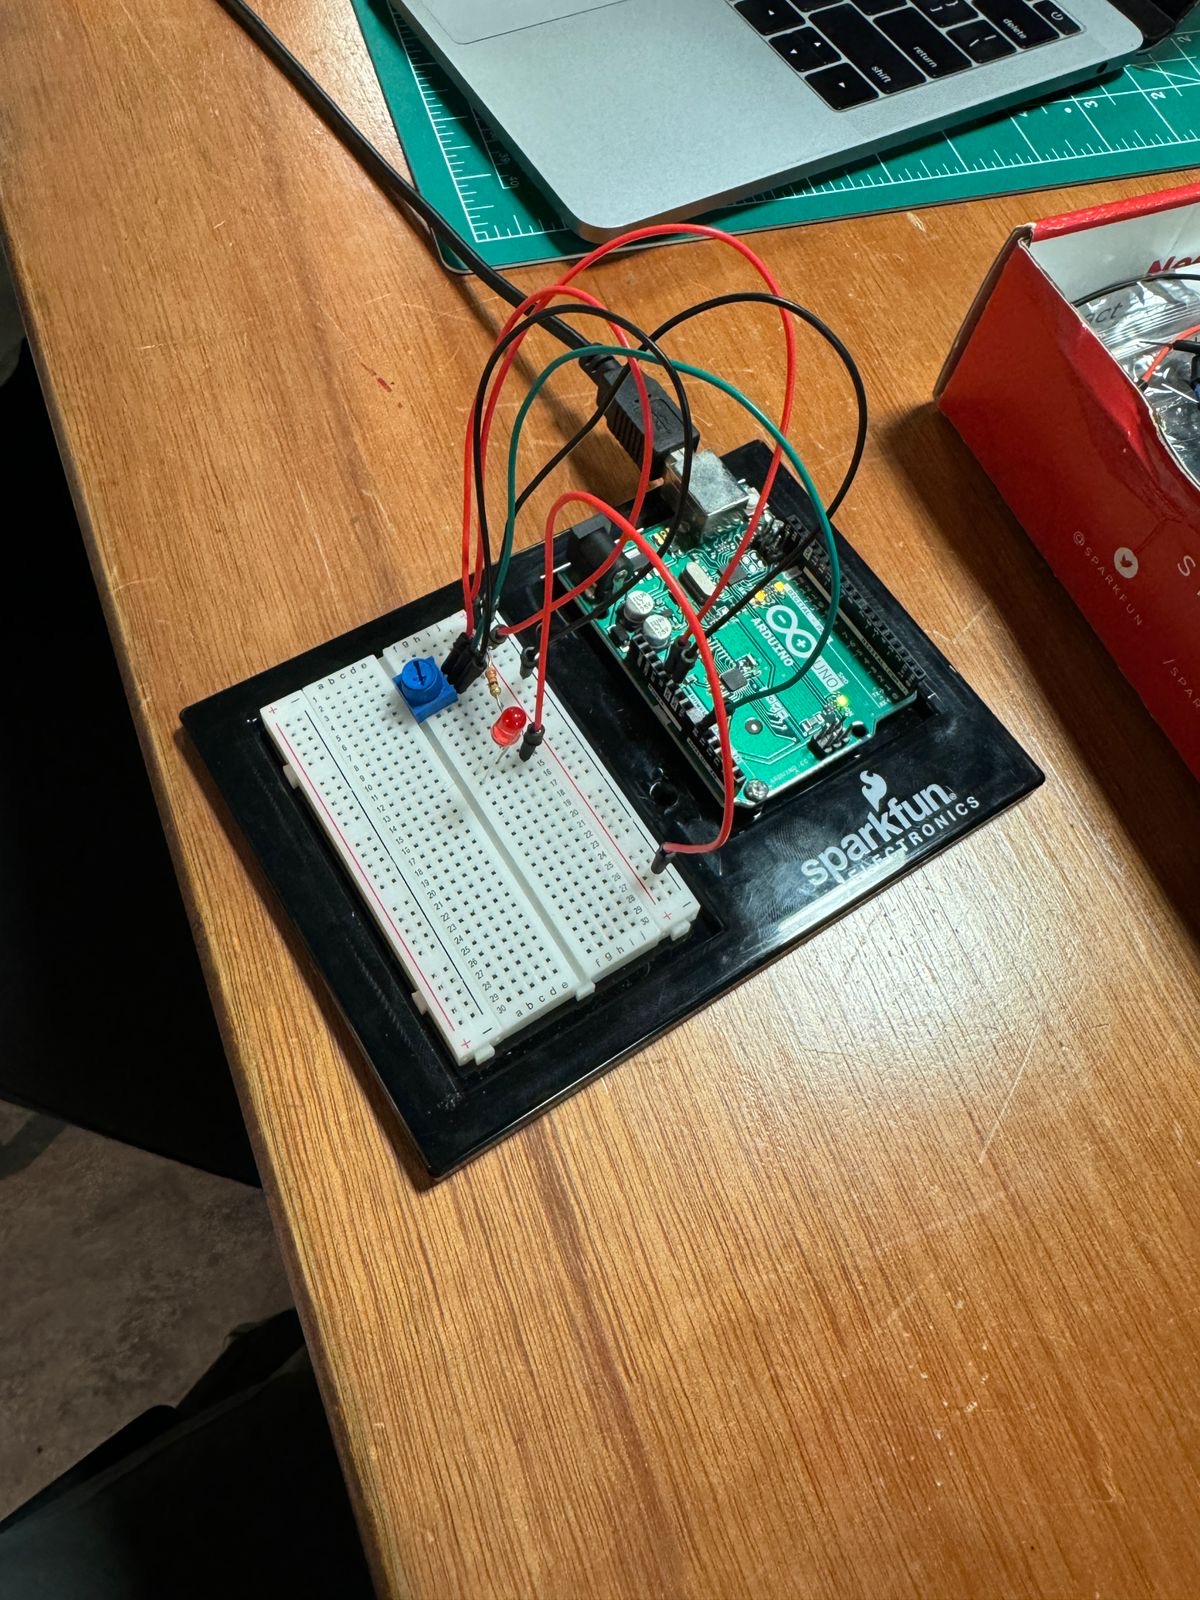
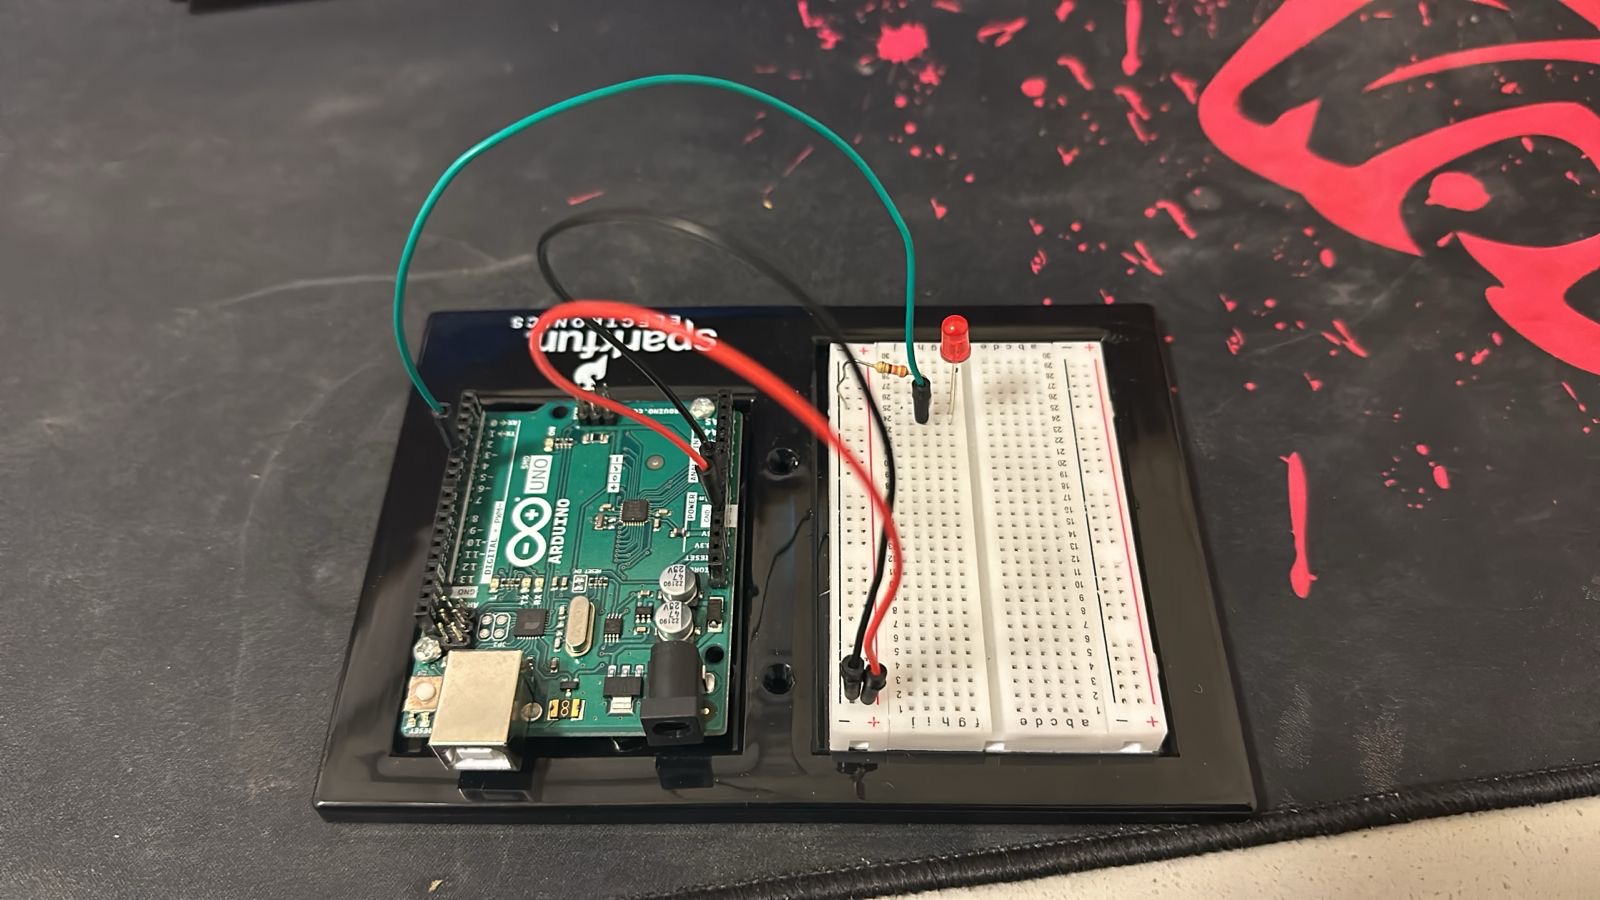
This sensor is integrated into a wearable glove made from velcro, foam tape, and cloth. The glove is then connected to an Arduino UNO using 4 jumper wires soldered to a 90-cm length. It is then covered by heat-shrinkable rubber tubing for aesthetics and a better wire management setup.

I kept changing the glove’s prototypes due to either wiring issues or the fact that none were non-adjustable. Below are the different versions of the glove.
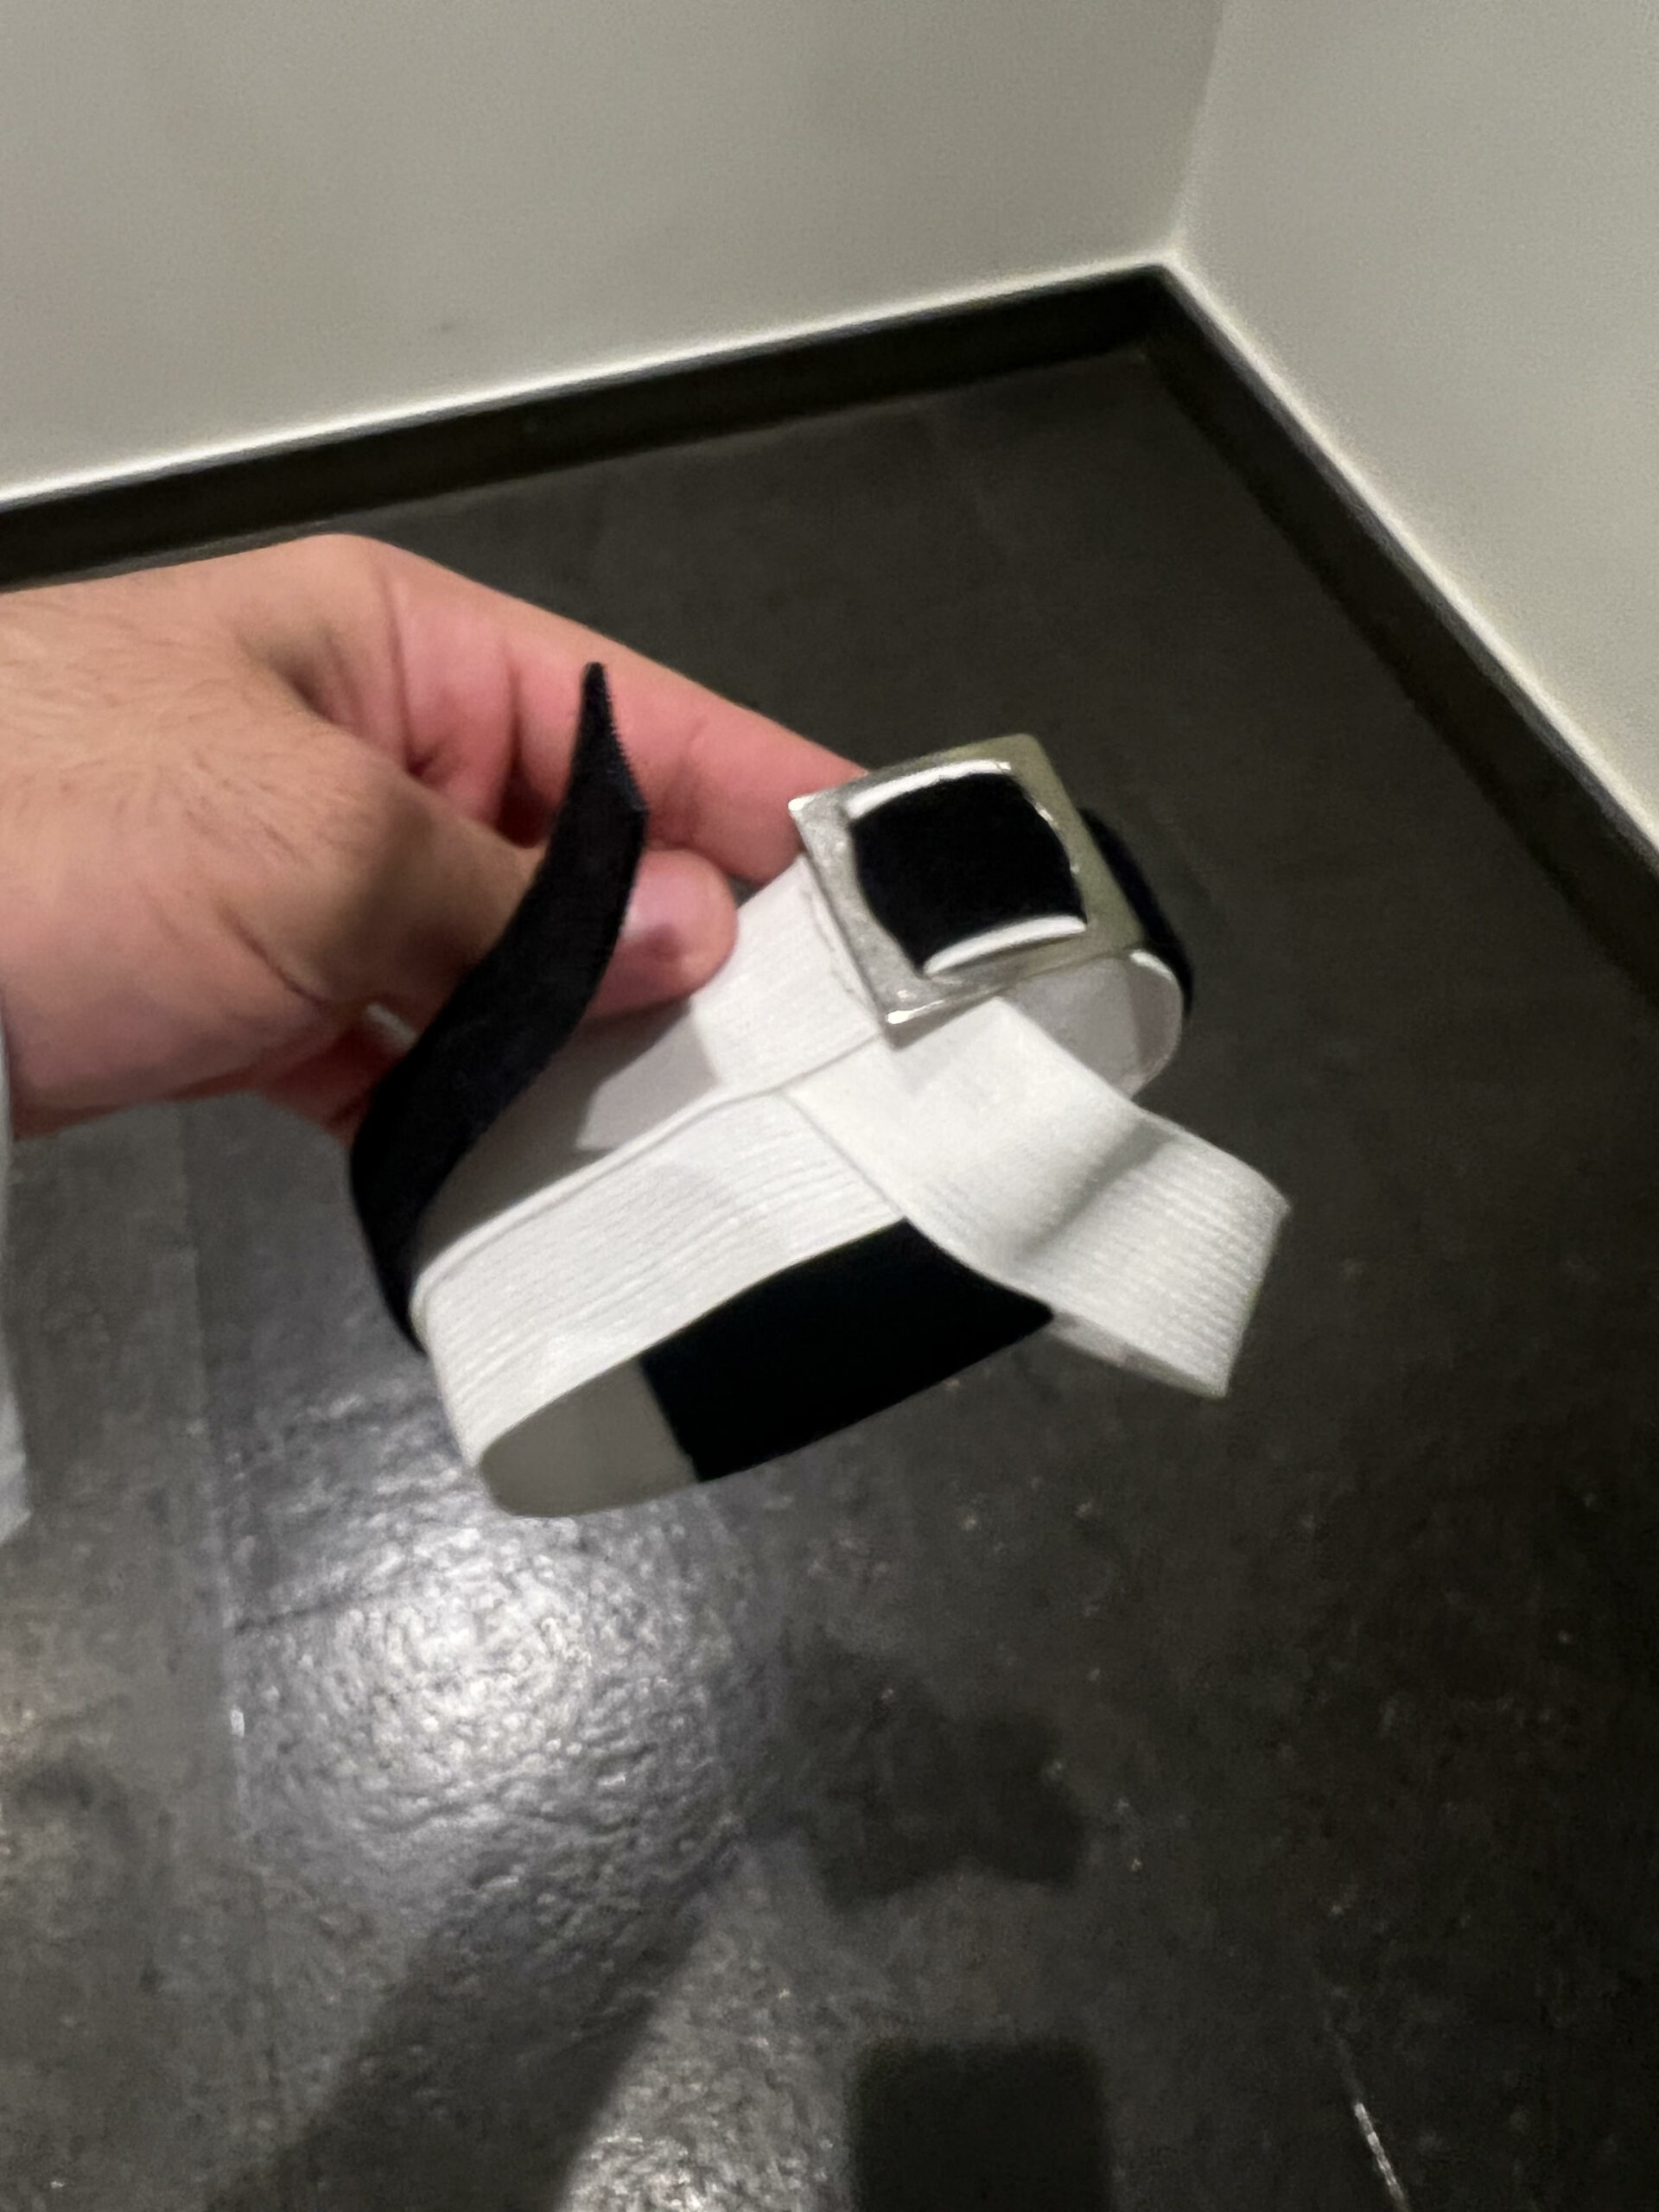
First Prototype:

This version did not allow the cables to function properly due to the positioning of the gyroscope.
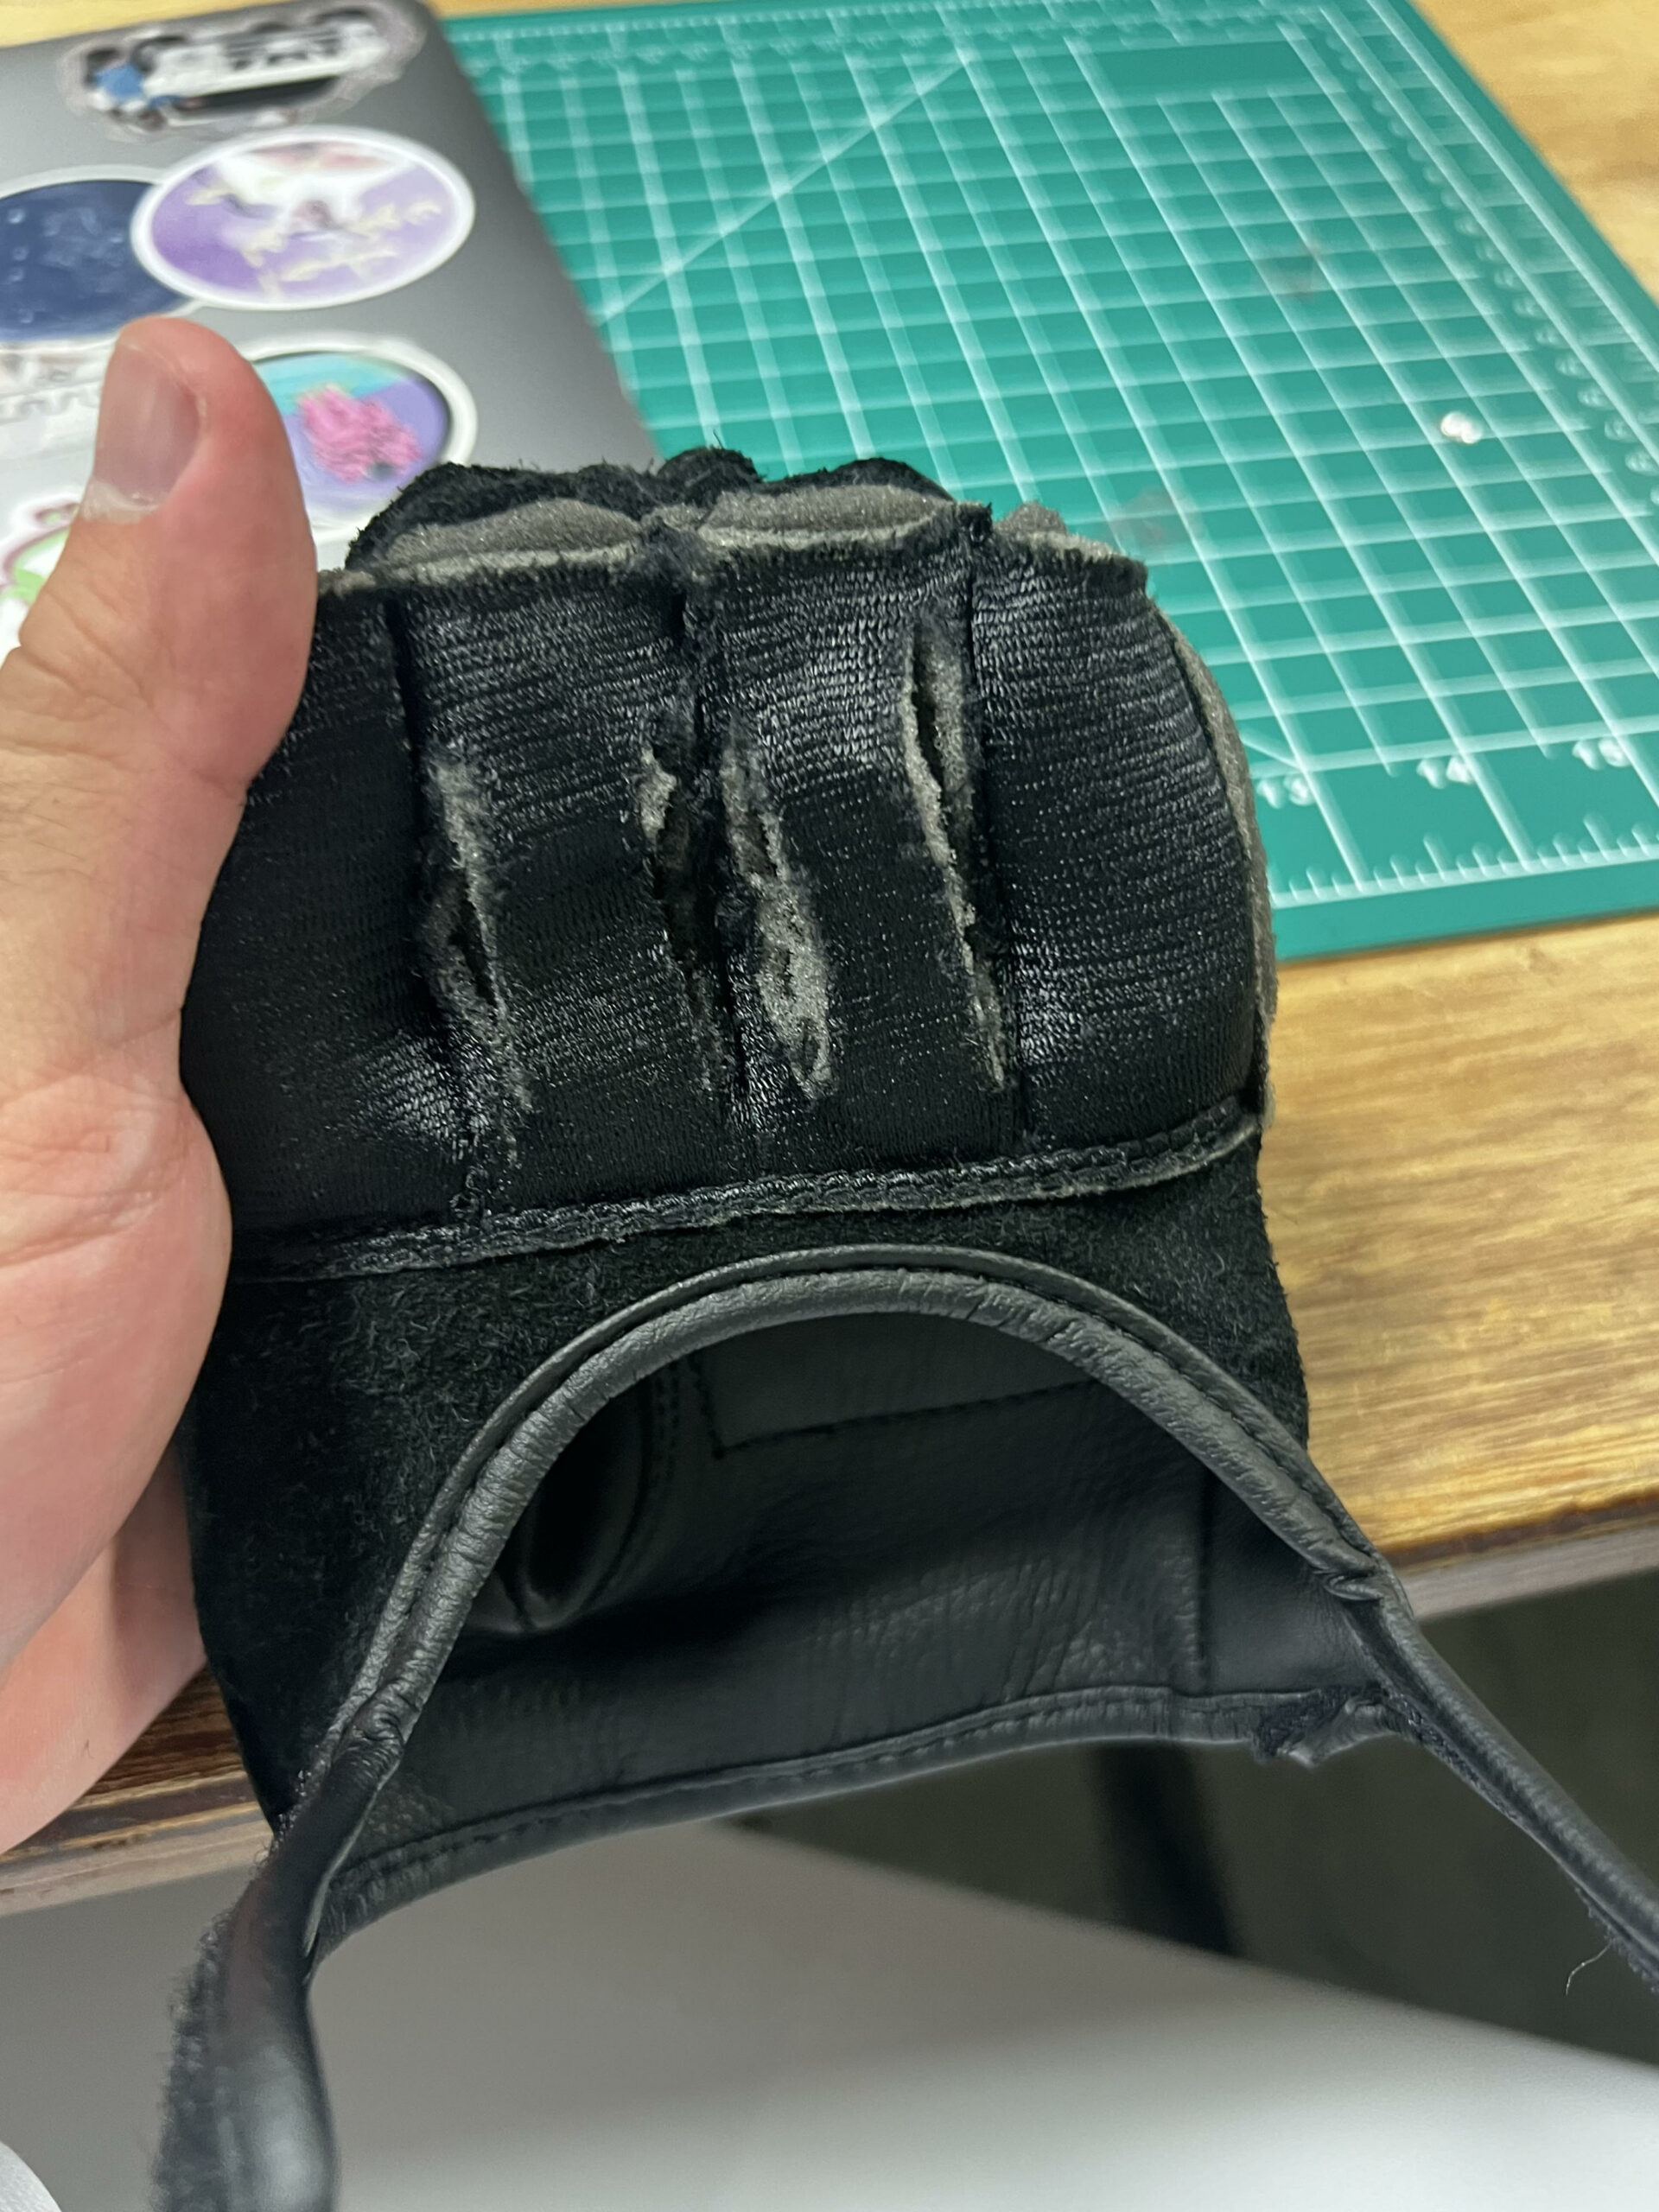
Second Prototype:

This glove secured the gyroscope, but due to it not being adjustable, it kept causing issues with the wires whenever a different sized hand would wear it.
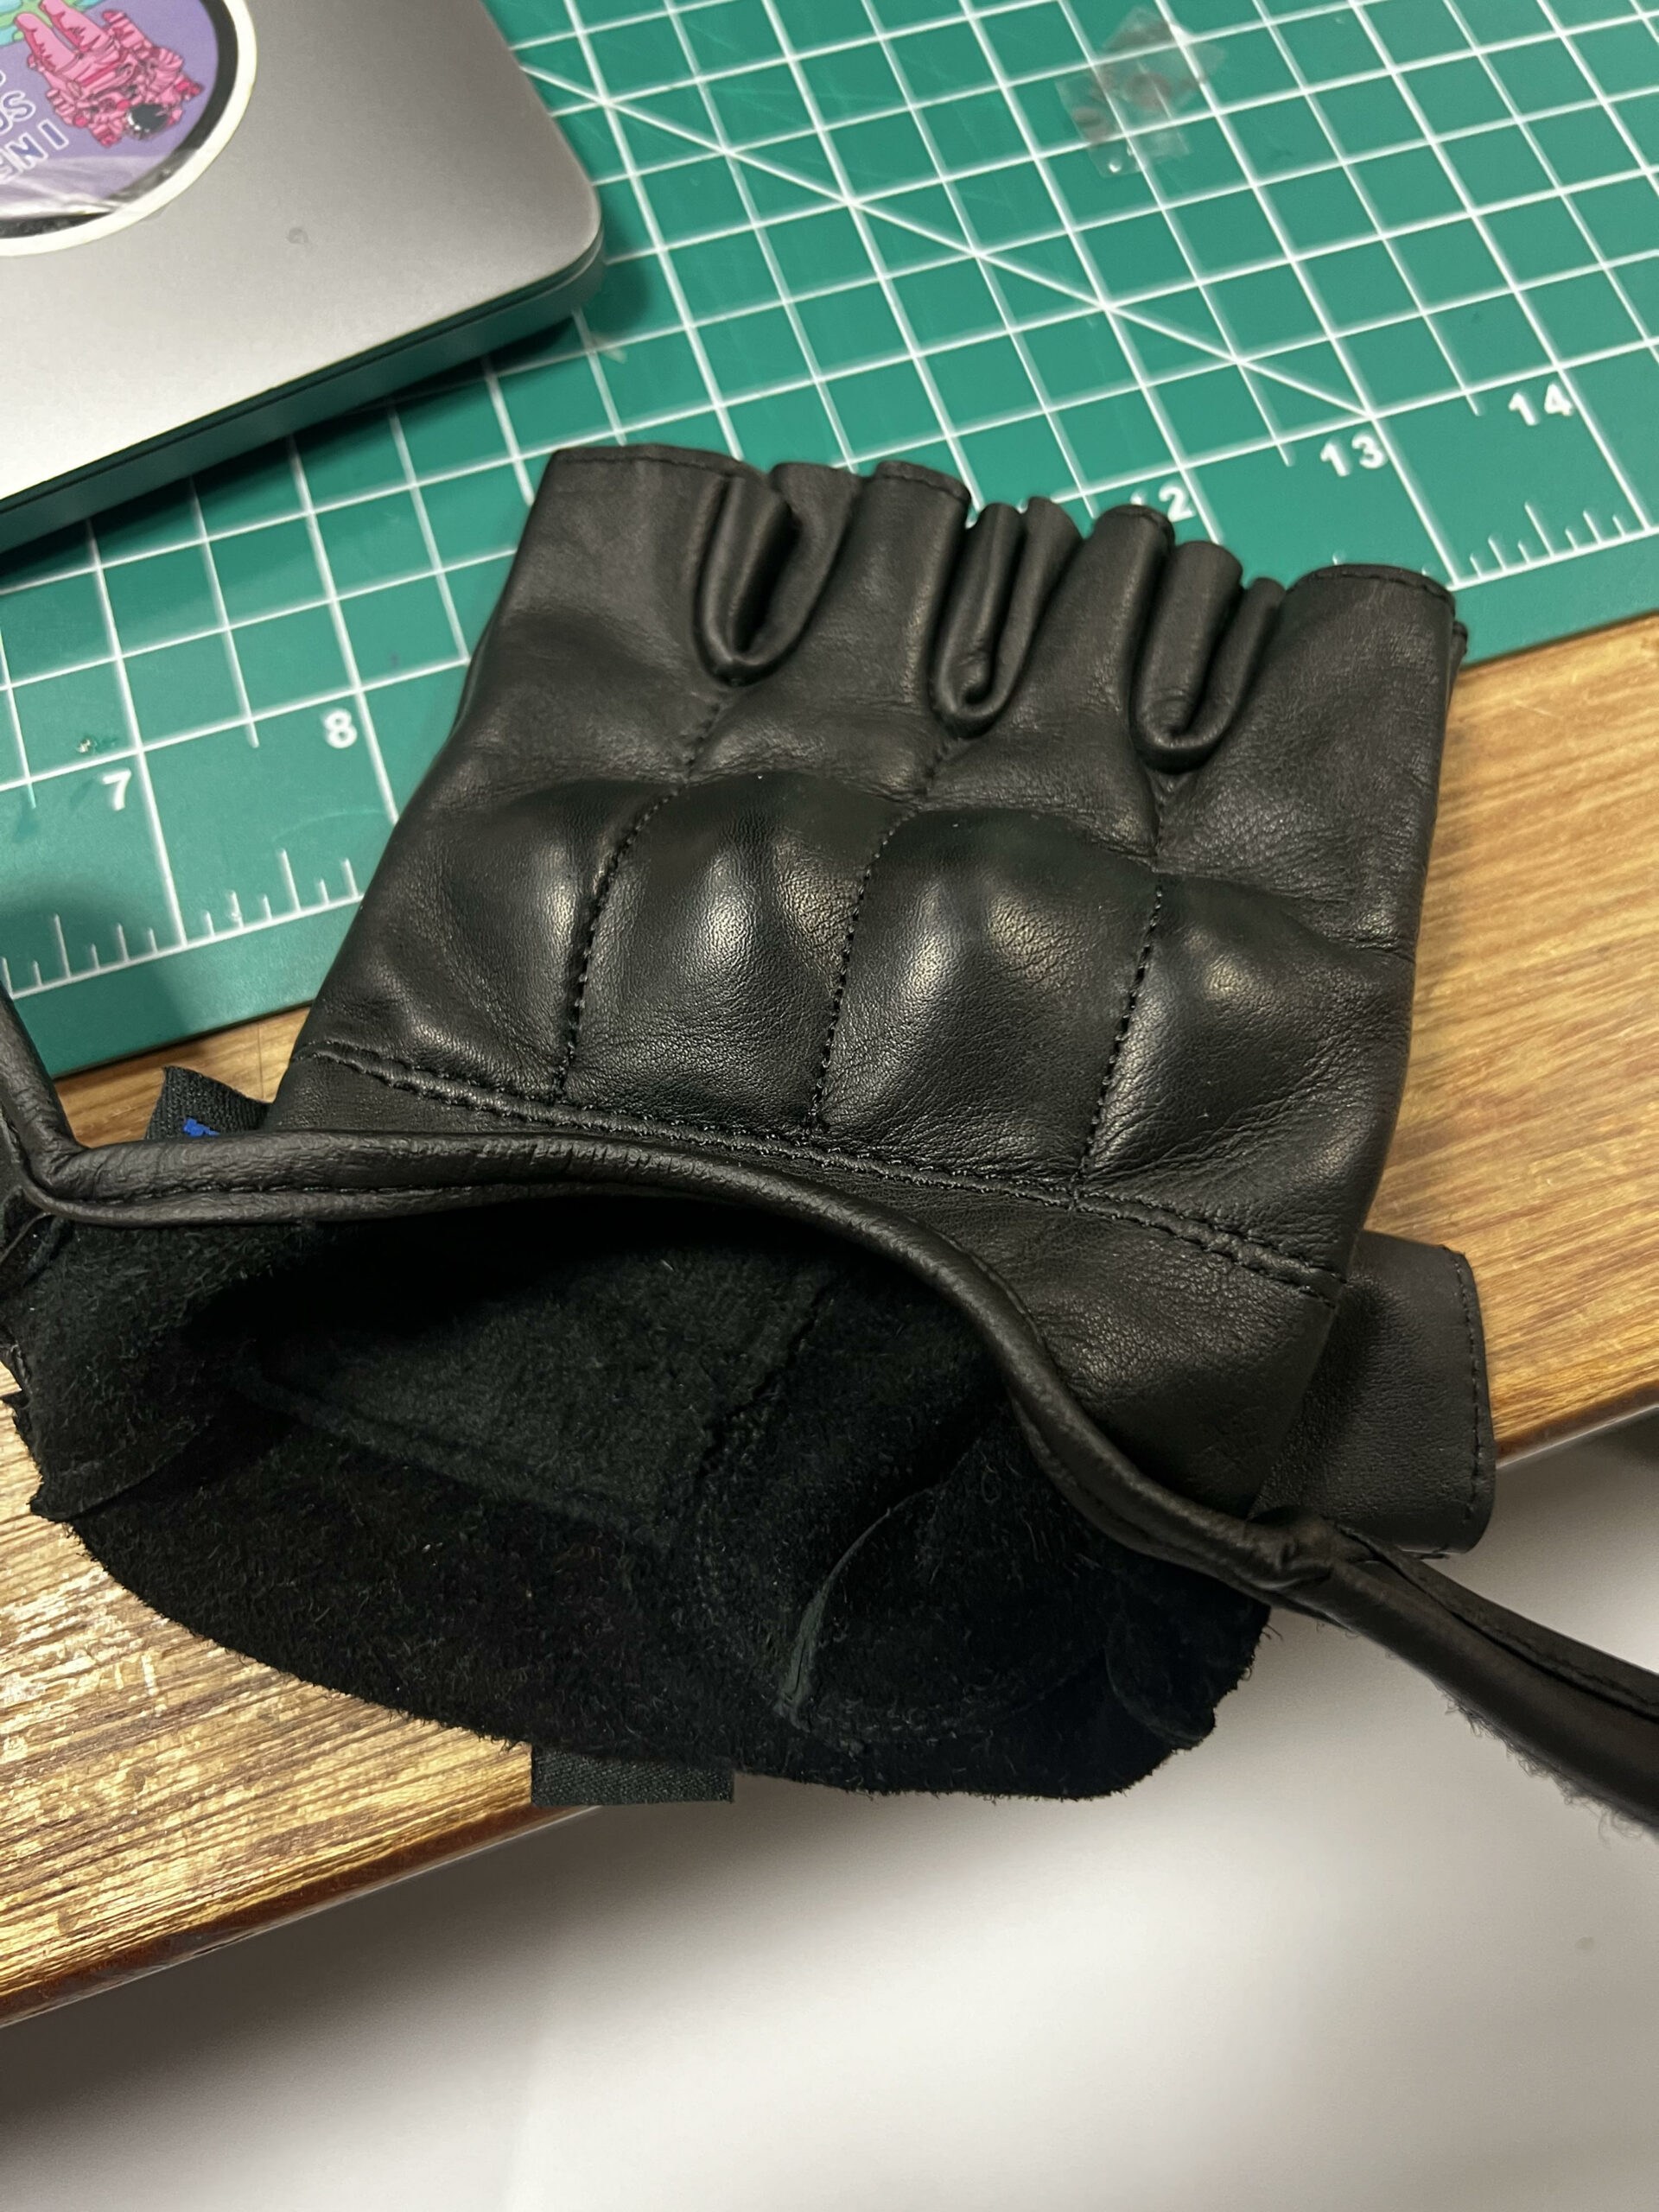
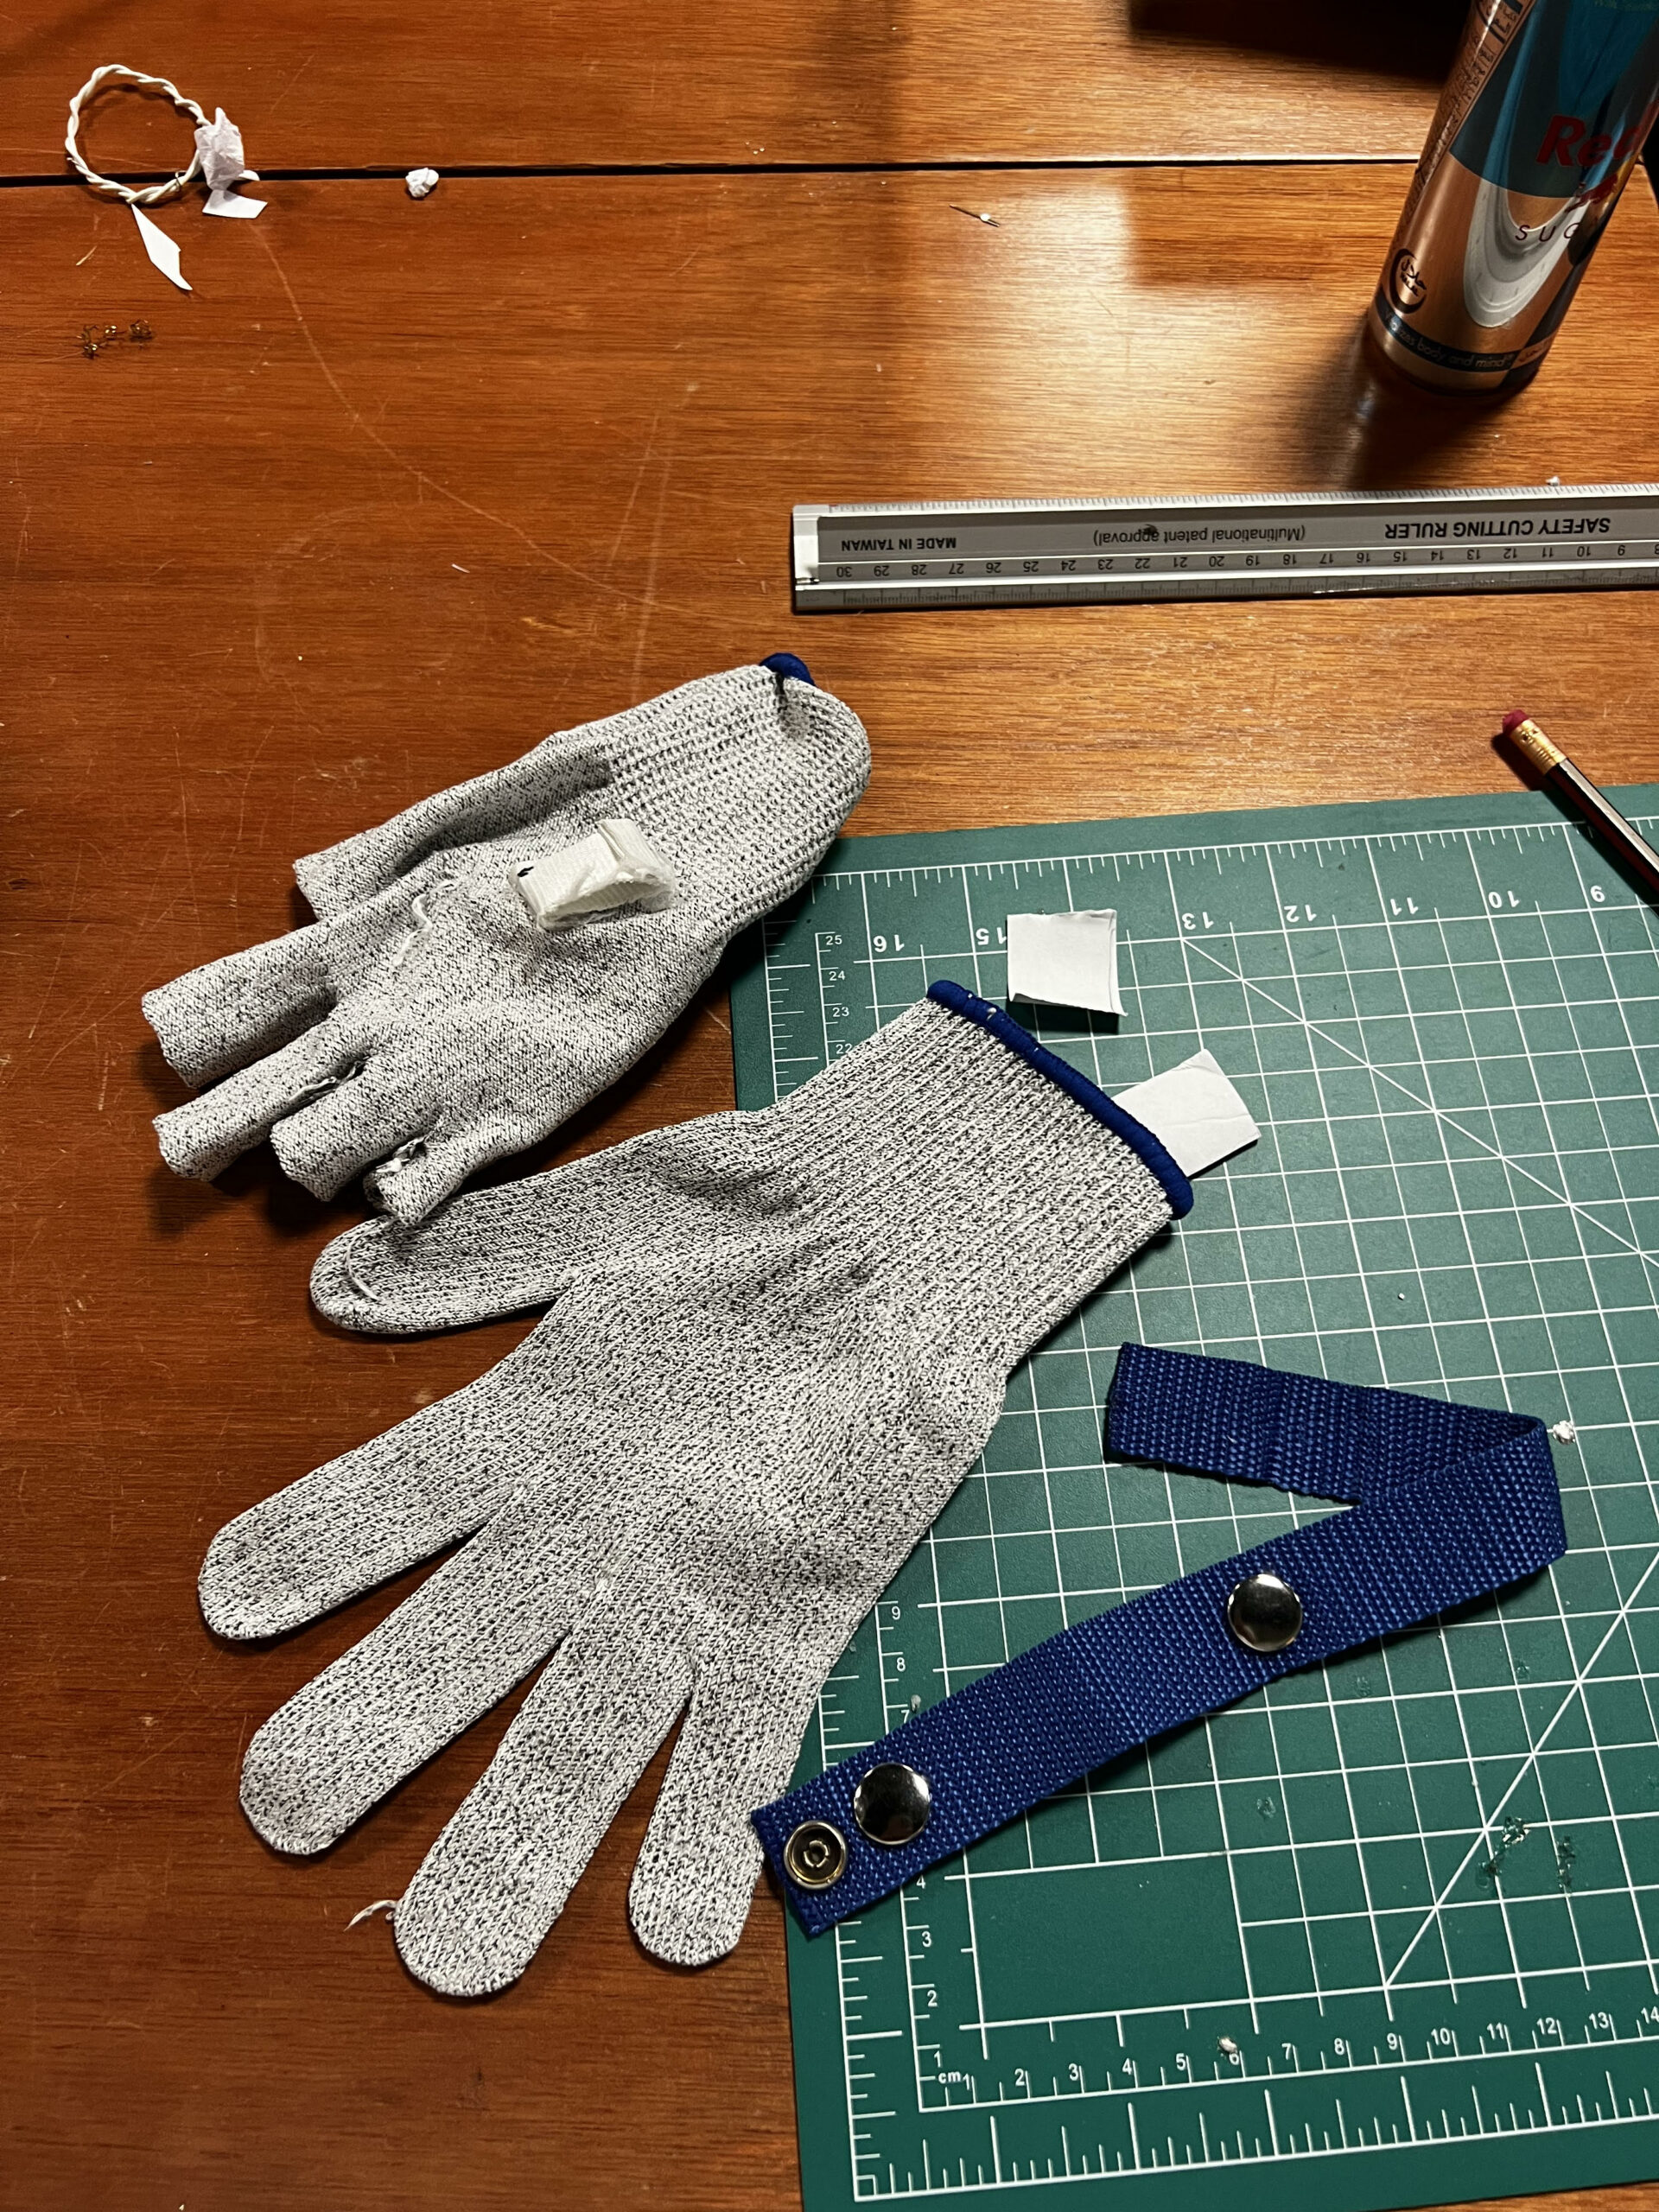
Final Prototype:

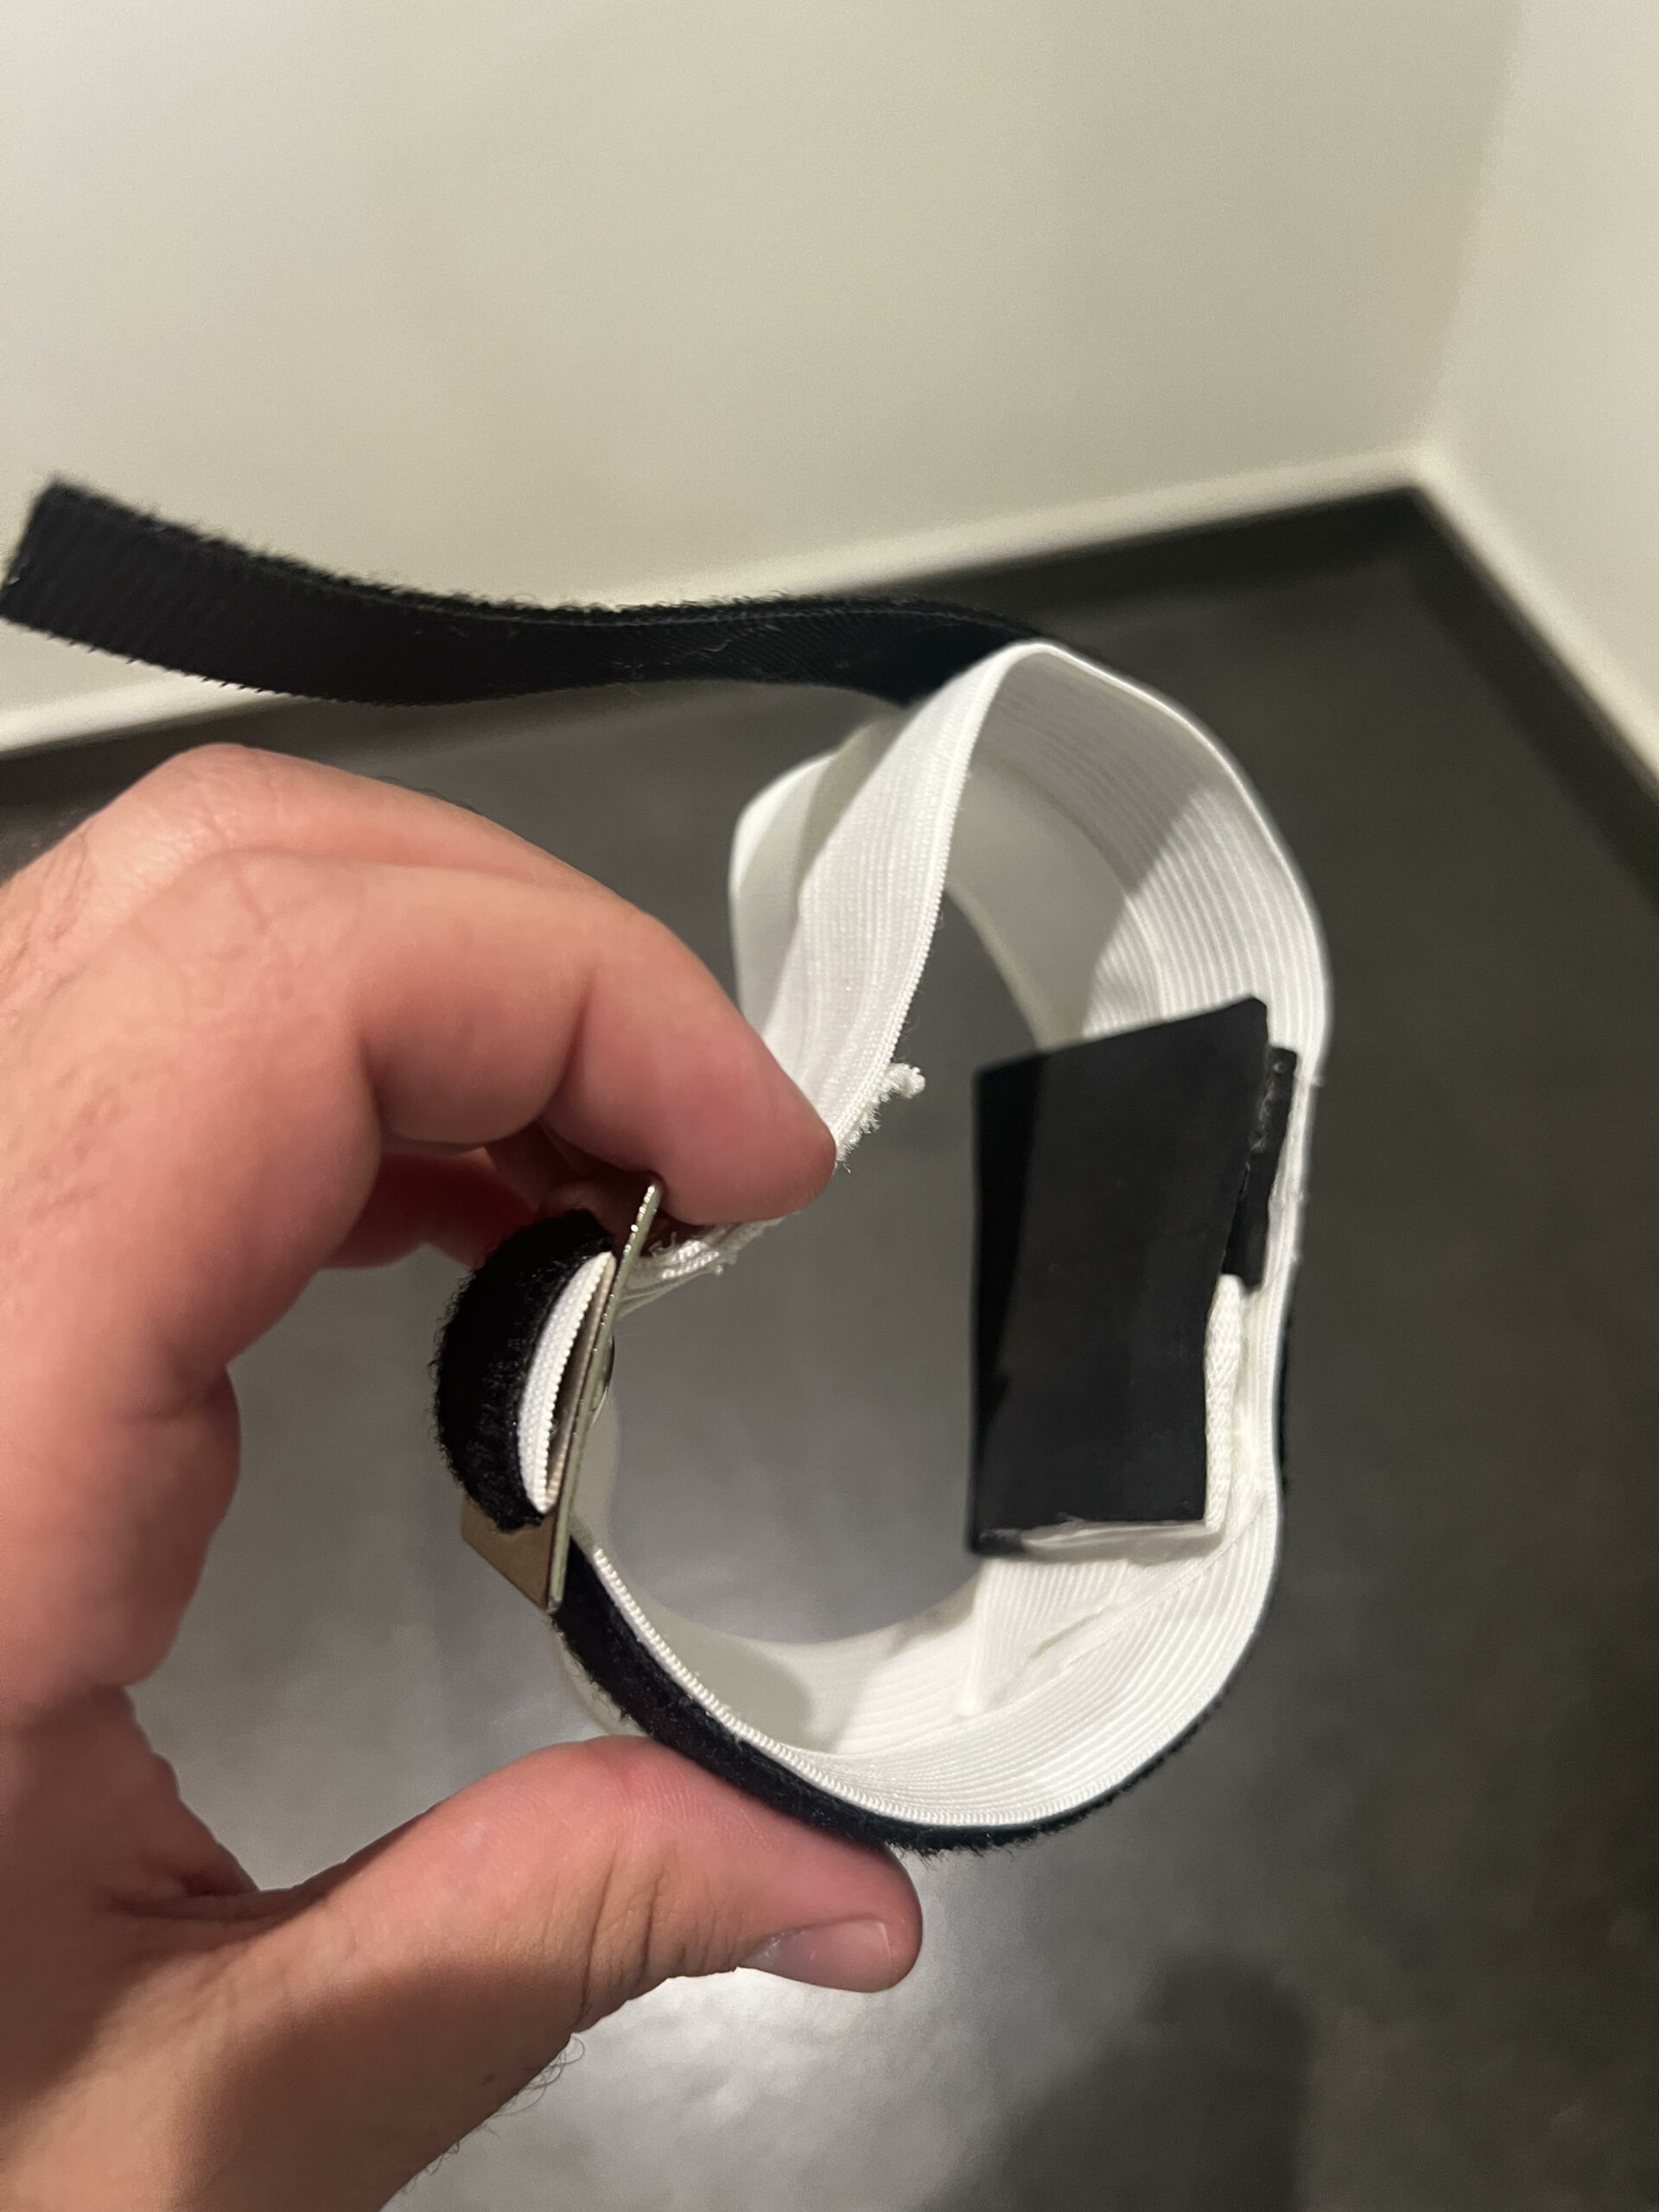
This glove concept fixed all the issues mentioned previously, from sizing difficulties to wire management, making it the ideal version for various hand sizes. It was made from scratch in the IM lab using different materials to secure the glove and a metal piece to lock in the velcro I got from home from a metal glove.
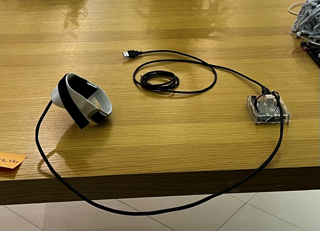
Cabling:


The cable was soldered on a stranded wire to extend the jumper wires for a more usable length for the glove.

How the code works:

The gyroscope sensor extracts the X and Y variables read by the Arduino to determine the hand’s position and movement. The Arduino Uno sends those as instructions for where the UFO should be positioned, which the P5 file reads and translates.

// Function to move the player based on arrow key inputs
  move() {
    let moveSpeed = 10; // Speed multiplier
    this.gotoX += gyroData.x * moveSpeed;
    this.gotoY += gyroData.y * moveSpeed;

    this.gotoX = constrain(this.gotoX, 30, width - 30);
    this.gotoY = constrain(this.gotoY, 30, height - 30);

    this.x = lerp(this.x, this.gotoX, 0.1);
    this.y = lerp(this.y, this.gotoY, 0.1);

    if (frameCount % 100 === 0) {
      obstacles.push(new Obstacle()); // Add new obstacles
    }

    this.gotoX = constrain(this.gotoX, 30, width - 30); // Keeps player within horizontal bounds
    this.gotoY = constrain(this.gotoY, 30, height - 30); // Keep player within vertical bounds
    // //This is only so the player cannot exist the canvas
  }

This processes the gyroscope data to interpret the player’s hand movements as specific commands (left, right, up, down, accelerate).

Serial Communication:
The Arduino transmits the processed data to a computer via serial communication, and in my case, it provided the P5 with the full library of serial communication, which made the process work for me.

/**
 * p5.webserial
 * (c) Gottfried Haider 2021-2023
 * LGPL
 * https://github.com/gohai/p5.webserial
 * Based on documentation: https://web.dev/serial/
 */

'use strict';

Game Mechanics:

The game is developed in a way that makes it hard for the player to achieve a high score by making the meteorites come down faster and faster as the player progresses to higher scores.

// Function to update obstacle position
  update() {
    this.y += map(score, 0, 10, gameSpeed, gameSpeed + 5); // Moves obstacles down the screen
    //this will make game harder as time grows
  }
}

Also, the player should be included in the provided map of the game so no cheating occurs and the game is played fairly based on skill levels.

this.gotoX = constrain(this.gotoX, 30, width - 30); // Keeps player within horizontal bounds this.gotoY = constrain(this.gotoY, 30, height - 30); // Keep player within vertical bounds // //This is only so the player cannot exist the canvas }

Player Interaction:
Players wear the gyroscope-equipped glove and move their hands to control the UFO within the game. Movements are intuitive: tilting the hand to the sides steers the UFO laterally, while tilting forward or backward would control vertical movement, and depending on how fast you tilt your hands, you could possibly send the UFO in any direction of the map faster than needed making you very aware of what move you would wanna make next as the meteoroids are coming down.

Visuals/Audio:
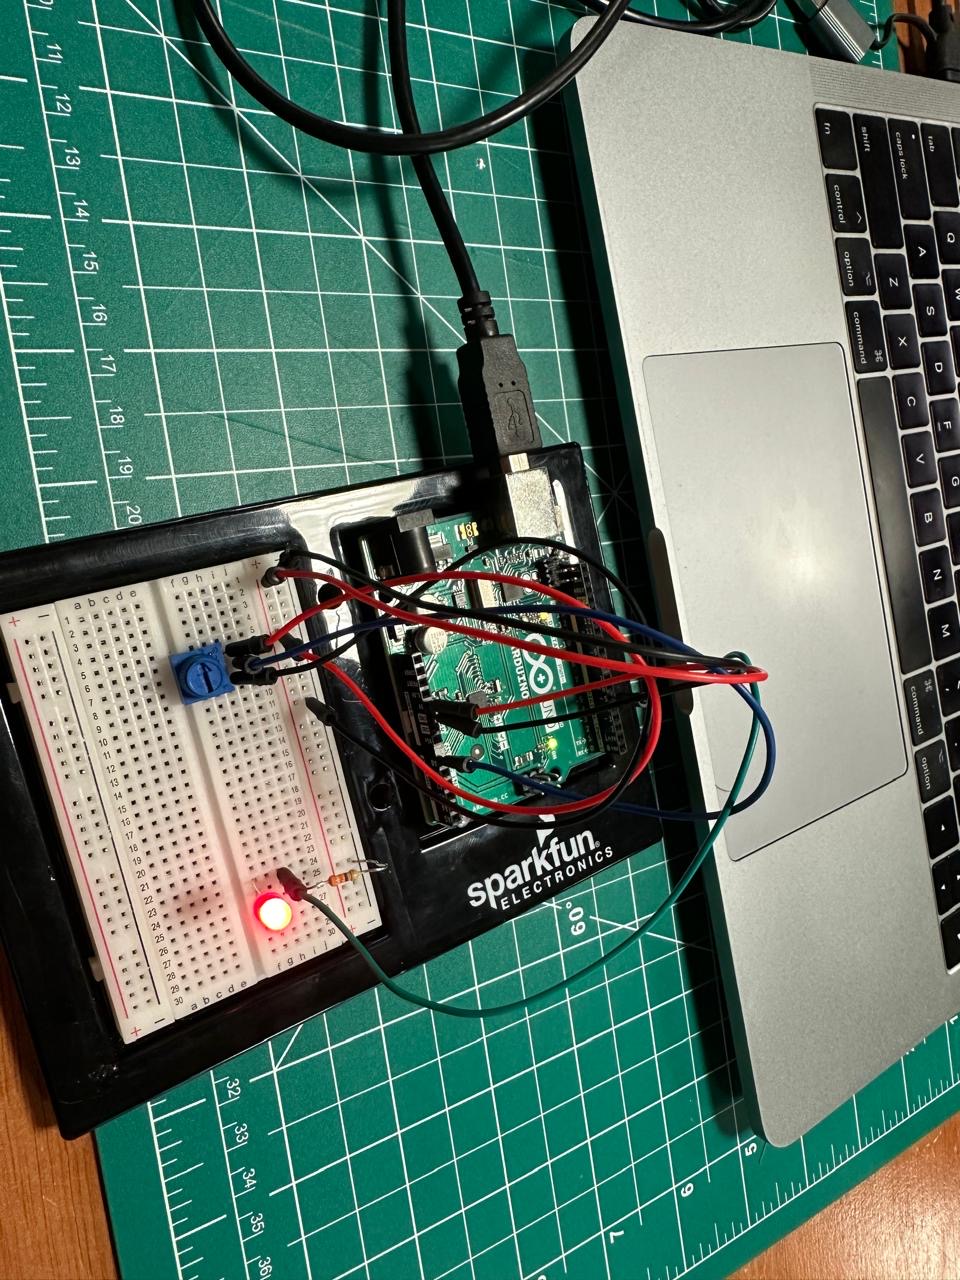
The game provides real-time visual feedback by updating the position and movements of the UFO based on the player’s actions as well as background noise for when the UFO is flying around.

P5 Sketch:

let port; // Serial port instance
let gyroData = { x: 0, y: 0 }; // Placeholder for gyro data
let serialInterval; // Interval for polling serial data

// Variables for game assets
let bgImage; // Variable to hold the background image for menu and game over screens
let bgMusic; // Variable to hold the background music for gameplay
let player; // Player object
let obstacles = []; // Array to store obstacles
let gameSpeed = 6; // Speed at which obstacles move
let score = 0; // Player's score
let gameState = "MENU"; // Initial game state; that is "MENU", "PLAYING", or "GAME OVER"
let rockImage; // Variable to hold the rock image
let gameOverImage;


// Preload function to load game assets before the game starts
function preload() {
  // bgImage = loadImage("space.png"); // Loads the background image
  menuImage = loadImage("menu.jpeg");
  // gameplayBgImage = loadImage("gameplay.jpg"); // Loads the gameplay background image
  bgMusic = loadSound("gameplaysound.mp3"); // Loads the background music
  rockImage = loadImage("rock-2.png"); // Loads the rock image
}

// The setup function to initialize the game
function setup() {
  createCanvas(750, 775).parent("canavs-container"); // Size of the game canvas
  openButton = createButton("Connect Arduino")
    .position(410, 20)
    .style("background-color", "rgba(244,238,238,0.1)(255, 50)")
    .style("border-radius", "70px")
    .style("padding", "10px 20px")
    .style("font-size", "15px")
    .style("color", "white")
    .mousePressed(openSerialPort); // Click to open serial port
  player = new Player(); // Initializes the player object
  textAlign(CENTER, CENTER); // Setting text alignment for drawing text
  textFont("arial");
}

function openSerialPort() {
  port = createSerial(); // Initialize the serial port instance
  if (port && typeof port.open === "function") {
    port.open("Arduino", 9600); // Open with a predefined preset
    // Set up polling to check for serial data every 100ms
    serialInterval = setInterval(readSerialData, 100); // Poll for data
  } else {
    console.error("Failed to initialize the serial port.");
  }
}

function readSerialData() {
  if (port && port.available()) {
    let rawData = port.readUntil("\n"); // Reads data till newline
    if (rawData && rawData.length > 0) {
      let values = rawData.split(","); // Splits by commas
      if (values.length === 2) {
        gyroData.x = parseFloat(values[0]); // Parse X value
        gyroData.y = parseFloat(values[1]); // Parse Y value
      } else {
        console.error("Unexpected data format:", rawData); // Error handling
      }
    }
  }
}

// Draw function called repeatedly to render the game
function draw() {
  // Displays the space background image only during menu and game over states but displays a different image during gameplay
  if (gameState === "PLAYING") {
    background("#060C15");
    noStroke();
    fill(255);
    for (let star of stars) {
      circle(star.x, star.y, star.r);
      star.y += star.yv;
      if (star.y > height + 5) star.y = -5;
    }
  }

  // Handles game state transitions
  if (gameState === "MENU") {
    drawMenu();
  } else if (gameState === "PLAYING") {
    if (!bgMusic.isPlaying()) {
      bgMusic.loop(); // Looping the background music during gameplay
    }
    playGame();
  } else if (gameState === "GAME OVER") {
    bgMusic.stop(); // Stops the music on game over
    drawGameOver();
  } else {
    //info
    drawInfo();
  }
}

function drawInfo() {
  background("#060C15");
  noStroke();
  fill(255);
  for (let star of stars) {
    circle(star.x, star.y, star.r);
    star.y += star.yv;
    if (star.y > height + 5) star.y = -5;
  }
  textSize(16);
  text(
    "Connect the Arduino\n Wear the glove\n, Control the UFO through tilting your hand \nLeft, Right, Up and Down.",
    width / 2,
    height / 2
  );
  stroke(255);
  Button("MENU", width / 2, height - 100, 100, 40);
}

// ---------------Function to display the game menu
function drawMenu() {
  background(menuImage);
  fill(200, 100, 100);
  stroke(200, 100, 100);
  textSize(62);
  strokeWeight(2);
  text("UFO ESCAPE", width / 2, 140);
  fill(255);
  text(
    "UFO ESCAPE",
    width / 2 - map(mouseX, 0, width, -5, 5),
    135 - map(mouseY, 0, height, -2, 2)
  );
  let x, y;
  if (frameCount % 40 < 20) {
    x = width / 2 - map(frameCount % 40, 0, 20, -5, 5);
    y = 400;
  } else {
    x = width / 2 - map(frameCount % 40, 20, 40, 5, -5);
    y = 400;
  }
  Ufo(x, y, 60, 30);
  //startButton
  Button("START", width / 2, 550);
  //info page
  Button("INFO", width - 115, 40, 100, 40);
}

// Function to handle gameplay logic
function playGame() {
  fill(255);
  textSize(25);
  text(`Score: ${score}`, width / 2, 50);

  player.show(); // Displays the player
  player.move(); // Moves the player based on key inputs

  // Adding a new obstacle at intervals
  if (frameCount % 120 == 0) {
    obstacles.push(new Obstacle());
  }

  // Updates and displays obstacles
  for (let i = obstacles.length - 1; i >= 0; i--) {
    obstacles[i].show();
    obstacles[i].update();
    // Checks for collisions
    if (player.collidesWith(obstacles[i])) {
      gameOverImage = get();
      gameState = "GAME OVER";
    }
    // Removes obstacles that have moved off the screen and increment score
    if (obstacles[i].y > height) {
      obstacles.splice(i, 1);
      i--;
      score++;
    }
  }
}

// Function to display the game over screen
function drawGameOver() {
  if (gameOverImage) image(gameOverImage, 0, 0);
  fill(200, 100, 100);
  stroke(200, 100, 100);
  textSize(46);
  text("GAME OVER", width / 2, height / 2 + 50);
  fill(255);
  text(score, width / 2, height / 2 - 50);

  Button("RESTART", width / 2, 550);
}

// Function to reset the game to its initial state
function resetGame() {
  obstacles = []; // Clear existing obstacles
  score = 0; // Reset score
  player = new Player(); // Reinitialize the player
  stars = [];
  for (let i = 0; i < 100; i++) {
    let r = random(1, 3);
    stars.push({
      x: random(width),
      y: random(height),
      r: r,
      yv: map(r, 1, 3, 0.01, 0.1),
    });
  }
}

// Player class
class Player {
  constructor() {
    this.width = 60; // Width of the UFO
    this.height = 30; // Height of the UFO
    this.x = width / 2; // Starting x position
    this.y = height - 100; // Starting y position
    this.gotoX = this.x;
    this.gotoY = this.y;
    this.speed = 5;
  }

  // Function to display the UFO
  show() {
    this.y = lerp(this.y, this.gotoY, 0.1);
    this.x = lerp(this.x, this.gotoX, 0.1); //and change this.gotoX
    stroke(200, 100, 100);

    Ufo(this.x, this.y, this.width, this.height);
  }

  // Function to move the player based on arrow key inputs
  move() {
    let moveSpeed = 10; // Speed multiplier
    this.gotoX += gyroData.x * moveSpeed;
    this.gotoY += gyroData.y * moveSpeed;

    this.gotoX = constrain(this.gotoX, 30, width - 30);
    this.gotoY = constrain(this.gotoY, 30, height - 30);

    this.x = lerp(this.x, this.gotoX, 0.1);
    this.y = lerp(this.y, this.gotoY, 0.1);

    if (frameCount % 100 === 0) {
      obstacles.push(new Obstacle()); // Add new obstacles
    }

    this.gotoX = constrain(this.gotoX, 30, width - 30); // Keeps player within horizontal bounds
    this.gotoY = constrain(this.gotoY, 30, height - 30); // Keep player within vertical bounds
    // //This is only so the player cannot exist the canvas
  }

  // Function to detect collision with obstacles
  collidesWith(obstacle) {
    return (
      dist(
        obstacle.x + obstacle.radius,
        obstacle.y + obstacle.radius,
        this.x,
        this.y
      ) < 45
    );
  }
}

// Obstacle class
class Obstacle {
  constructor() {
    this.radius = random(15, 30); // Random radius for obstacle
    this.x = random(this.radius, width - this.radius); // Random x position
    this.y = -this.radius; // Starts off-screen so it looks like its coming towards you
  }

  // Function to display the rocks
  show() {
    image(rockImage, this.x, this.y, this.radius * 2, this.radius * 2); // Draws them as a circle
  }

  // Function to update obstacle position
  update() {
    this.y += map(score, 0, 10, gameSpeed, gameSpeed + 5); // Moves obstacles down the screen
    //this will make game harder as time grows
  }
}
function Button(txt, x, y, w = 200, h = 60) {
  fill(255, 50);
  if (
    mouseX > x - w / 2 &&
    mouseX < x + w / 2 &&
    mouseY > y - h / 2 &&
    mouseY < y + h / 2
  ) {
    fill(255, 80);
    if (mouseIsPressed) {
      mouseIsPressed = false; //so only one click happnes
      action(txt);
    }
  }
  rect(x, y, w, h, h / 2);
  fill(255);
  textSize(h / 2);
  text(txt, x, y);
}
function action(txt) {
  switch (txt) {
    case "START":
      gameState = "PLAYING";
      resetGame();
      break;
    case "RESTART":
      gameState = "MENU";
      resetGame();
      break;
    case "INFO":
      stars = [];
      for (let i = 0; i < 100; i++) {
        let r = random(1, 3);
        stars.push({
          x: random(width),
          y: random(height),
          r: r,
          yv: map(r, 1, 3, 0.01, 0.1),
        });
      }
      gameState = "INFO";
      break;
    case "MENU":
      gameState = "MENU";
      break;
  }
}

function Ufo(x, y, w, h) {
  fill(255); // Sets color to white
  rectMode(CENTER);
  rect(x, y, w, h, 20); // Draws the UFO's body
  fill(20); // Sets the glass color to red
  arc(x, y - h / 4, w / 2, h / 1, PI, 0, CHORD); // Draws the glass
  stroke(255);
  let a = map(x, 0, width, 0, PI / 4);

  arc(x, y - h / 4, w / 2 - 5, h - 5, -PI / 4 - a, -PI / 6 - a);

  for (let i = 1 + frameCount; i < 10 + frameCount; i++) {
    let x_ = map(i % 10, -1, 10, -30, 30);
    circle(x + x_, y, 5);
  }
}

Arduino Code:

#include <Wire.h>
#include <Adafruit_L3GD20_U.h>

// Initialize the L3GD20 object
Adafruit_L3GD20_Unified gyro = Adafruit_L3GD20_Unified(20); // Sensor ID

void setup() {
  Serial.begin(9600); // Start serial communication at 9600 baud

  // Initialize the L3GD20 gyroscope
  if (!gyro.begin()) {
    Serial.println("Failed to find L3GD20 gyroscope");
    while (1) {
      delay(10); // Halt if initialization fails
    }
  }
}

void loop() {
  sensors_event_t event;
  gyro.getEvent(&event);

  // Send the X and Y gyro data with a newline at the end
  Serial.print(event.gyro.x, 4); // X-axis gyro data with 4 decimal places
  Serial.print(","); // Comma separator
  Serial.println(event.gyro.y, 4); // Y-axis gyro data with 4 decimal places

  delay(100); // Adjust delay as needed
}

What are some aspects of the project that you’re particularly proud of?

To be honest, the whole final project makes me proud that I was able to create such a complicated code with actual use in the end. The glove prototypes are also something that I was proud of because I have never created a glove from scratch before. I am just glad that it all worked out in the end and that the cables stopped popping out of the gloves whenever someone would put them on.

What are some areas for future improvement?

I would say that expanding on the game itself and making different levels and maps for the UFO to fly around in would also exemplify the game. Also, creating a button in the glove to restart once you press it would make it easier for the player to control the whole game if they lose.

Final Project User Testing – Khalifa Alshamsi

Through user testing, I improved the look of the device itself by covering the wire with insulated heat-shrinkable tubes so that it doesn’t get caught up by anything over the user’s hand. Also, an issue that was resolved after more testing was that, for some odd reason, the code kept looping over the positioning of the UFO, making it glitch after a while of playing the game.

Video of the problem:

After the improvements:

After playing once or twice, people can understand the concept, which made me realize that I needed to create an info tab to finalize the project.

Week 12 Reading Response – Khalifa Alshamsi

Reflecting on “Design Meets Disability,” the book pushes the boundaries of traditional views on assistive device design by advocating for a blend of functionality and aesthetic appeal. This approach resonates strongly with the current trends in consumer technology, where design and personal expression play pivotal roles. For instance, eyewear, originally a purely functional item for vision correction, has evolved into a fashion statement, highlighting the argument that assistive devices can similarly be fashion-forward and not just functional. However, while Pullin champions a more inclusive design philosophy, evidence from the current market for assistive devices shows a lag in the widespread adoption of this philosophy. Many products, particularly for less visible disabilities, remain starkly functional, suggesting a discrepancy between Pullin’s ideal and the industry’s execution. This gap may stem from various factors, including cost constraints and limited awareness among designers about the possibilities for aesthetic integration without compromising functionality.

The reading subtly nudges one to consider potential biases in how society and designers view disability and assistive technologies. Pullin seems optimistic about the convergence of design and disability, which might seem biased to those who see significant structural and societal barriers still in place. This optimism does not fully address the economic and practical challenges of redesigning assistive devices as fashionable items, which could be perceived as an oversight or a bias towards a more idealistic outlook. The reading has shifted my perspective, making me more aware of the need for a holistic approach to design—one that considers both function and form. It raises questions about the feasibility of such integration: How can designers balance the cost implications with the desire for style? How can the industry be incentivized to adopt this approach? These questions underline the complexities of implementing Pullin’s vision in real-world settings, suggesting the need for a broader dialogue among designers, manufacturers, and users within the disability community.

Final Project Proposal – Khalifa Alshamsi

Finalized Concept for the Project:
The final project involves developing a gyroscope-based controller using an Arduino that interfaces with p5.js to enhance the gaming experience in a space simulation game. This setup aims to provide a more intuitive and immersive way for players to control a spaceship using natural hand movements.

Design and Description of the Arduino Program

Hardware Setup:

Input: 3-axis gyroscope sensor integrated into an Arduino board. This sensor detects the controller’s orientation and motion.
Output: Serial signals sent to a computer running the p5.js application.

Functionality:

The Arduino program continuously reads data from the gyroscope sensor, including angular velocity and orientation relative to its starting position.
The program processes these data to determine the intended motion or command (e.g., turn left, accelerate).
These interpreted commands are then sent as serial data to the p5.js application, formatted as simple strings or numerical values.

Interaction with p5.js:

Sending: Commands such as “turn_left”, “turn_right”, “accelerate”, and “stop” based on gyroscope readings.
Receiving: The Arduino may receive feedback from the p5.js application for settings adjustments based on user preferences or gameplay state.

Design and Description of the p5.js Program

Software Setup:

Runs on a computer and serves as the interface between the Arduino controller and the space simulation game.

Functionality:

The p5.js application listens for serial communication from the Arduino, parsing the incoming data into actionable game commands. It translates these commands into manipulations of the game environment, such as rotating the spaceship or changing speed, ensuring real-time responsiveness to the player’s movements.

Interaction with Arduino:

Receiving: Commands like rotations and accelerations are received from the Arduino.

Sending: p5.js can send calibration data back to Arduino, error messages if commands are unrecognized, or game state information that might influence how sensor data is processed.

Conclusion
This project’s core is the integration of Arduino with a gyroscope sensor and the p5.js application. Arduino captures and interprets the controller’s physical movements, turning them into digital commands, while p5.js translates these into meaningful game interactions. This system is designed to elevate the player’s gaming experience, making it more engaging by simulating the piloting of a spaceship with realistic controls.


Week 12 – Khalifa Alshamsi, Snehil Ahuja, and Saeed Lootah

  1. Make something that uses only one sensor  on Arduino and makes the ellipse in p5 move on the horizontal axis, in the middle of the screen, and nothing on Arduino is controlled by p5
  2. Make something that controls the LED brightness from p5

For these two exercises, we made it so that the potentiometer that is connected to the Arduino controls the LED on the breadboard and the ellipse in the p5 sketch in the middle of the screen, and also when the keyboard keys are pressed up or down it would change the brightness of that LED light.

P5.js Code:

let LEDbrightness = 0;

function setup()
{
  createCanvas(400, 400);
}


function textDisplay() //display text in the starting
{
  text("PRESS SPACE TO START SERIAL PORT", width/2 - 109, height/2 - 5);
}

function draw()
{

  background(255);

  if (serialActive) //if serial is active
  {
    text("CONNECTED", width/2 - 27, height/2 - 5);
    text("PRESS UP/DOWN ARROW KEYS TO CHANGE BRIGHTNESS!", width/2 -180, height/2 + 15);
  }
  else
  {
    textDisplay();
  }
}


function keyPressed() //built in function
{
  if (key == " ") //if space is pressed then
  {
    setUpSerial(); //setup the serial
  }
  else if (keyCode == DOWN_ARROW)
  {
    if (LEDbrightness != 0)
    {
      LEDbrightness = LEDbrightness - 20;
    }
  }
  else if (keyCode == UP_ARROW)
  {
    if (LEDbrightness != 250)
    {
      LEDbrightness = LEDbrightness + 20;
    }
  }

}

//callback function
function readSerial(data)
{
    let sendToArduino = LEDbrightness + "\n"; //add the next line to dimness counter
    writeSerial(sendToArduino); //write serial and send to arduino
}

Arduino Code:

const int LED_PIN = 5;
int brightness = 0;

void setup()
{
  Serial.begin(9600);

  pinMode(LED_PIN, OUTPUT);

  while (Serial.available() <= 0)
  {
    Serial.println("CONNECTION STARTED");
  }
}
void loop()
{

    while (Serial.available())
    {
      brightness = Serial.parseInt();
      Serial.println(brightness);

      if (Serial.read() == '\n')
      {
        analogWrite(LED_PIN, brightness);
      }
    }
}

Video and Photos for Exercise 1:

For exercise 1, since we were just getting started, the main problem was understanding how serial communication works. We had some kind of idea when it was being presented to us, but until we started working, we didn’t really know. Other than that, there weren’t really any specific challenges. We didn’t need to use the trim() method, we had one value coming in from the Arduino, which was the potentiometer, and we had some troubles at first, but once we casted it as an integer value (it’s received as a string), then mapped it to the width and made the mapped value the x-position of the ellipse the project was done.

You’ll notice in the image that there’s an LED. The LED was there to test whether or not there was power being outputted from the potentiometer. We added it while we were debugging.

Video and Photos for Exercise 2:

Like the previous exercise there was only one value that was being communicated between the arduino and the p5js code so it was fairly simple. The hard part was just getting it such that tapping it reduced the brightness value by a specific amount and increasing it by a certain amount.


3. Take the gravity wind example and make it so every time the ball bounces one led lights up and then turns off, and you can control the wind from one analog sensor

For this exercise, the code creation uses p5, where physics principles like gravity and wind influence the ellipse’s motion. The sketch also communicates with the Arduino, which can control an LED based on the object’s motion, specifically if it bounces.

P5.js Code:

let dragForce = 0.99;
let mass = 20;
let ledState = 0;
let velocity;
let gravity;
let position;
let acceleration;
let wind;
let force;
let bounced = false;


function setup() {
  createCanvas(640, 480);
  textSize(18);
  position = createVector(width / 2, 0);
  velocity = createVector(0, 0);
  acceleration = createVector(0, 0);
  gravity = createVector(0, 0.3 * mass);
  wind = createVector(0, 0);
}

function draw() {
  background(0,40);
  // background(0);
  // background(255);

  if (!serialActive) {
    fill(255);
    text("Press Space Bar to select Serial Port", 20, 30);
  } else {

    noStroke();
    force = p5.Vector.div(wind, mass);
    acceleration.add(force);
    force = 0;
    force = p5.Vector.div(gravity, mass);
    acceleration.add(force);
    force = 0;
    velocity.add(acceleration);
    velocity.mult(dragForce);
    position.add(velocity);
    acceleration.mult(0);

    ellipse(position.x, position.y, mass, mass);
    if (position.y > (height - mass / 2)-30 ) {
      velocity.y *= -0.9;
      position.y = (height - mass / 2)-30;
      ledState= 1;
      
      if (!bounced) {
        fill(255, 0, 0); // Red when just bounced
        bounced = true; // Update bounce state
      } else {
        fill(255); // White otherwise
        bounced = false; // Reset bounce state
      }
    } else {
      ledState = 0;
    }
  
    
  }

  rect(0,height-30,width,30);
  
}

function keyPressed() {
  if (key == " ") {
    // important to have in order to start the serial connection!!
    setUpSerial();
  }
}

function readSerial(data) {
  if (data != null) {
    // make sure there is actually a message
    // split the message
    let fromArduino = split(trim(data), ",");
    // if the right length, then proceed
    if (fromArduino.length == 1) {
      let windCurrent = int(fromArduino[0]);
      wind.x = map(windCurrent, 0, 1023, -1, 1);
    }

    //////////////////////////////////
    //SEND TO ARDUINO HERE (handshake)
    //////////////////////////////////
    let sendToArduino = ledState + "\n";
    writeSerial(sendToArduino);
  }
}

Arduino code:

int ledPin = 5;
int potPin = A0;

void setup() {
  Serial.begin(9600);

  pinMode(LED_BUILTIN, OUTPUT);

  // Outputs on these pins
  pinMode(ledPin, OUTPUT);

  // start the handshake
  while (Serial.available() <= 0) {
    digitalWrite(LED_BUILTIN, HIGH); // on/blink while waiting for serial data
    Serial.println("0"); // send a starting message
    delay(300);            // wait 1/3 second
    digitalWrite(LED_BUILTIN, LOW);
    delay(50);
  }
}

void loop() {
  // wait for data from p5 before doing something
  while (Serial.available()) {
    digitalWrite(LED_BUILTIN, HIGH); // led on while receiving data

    int right = Serial.parseInt();
    if (Serial.read() == '\n') {
      digitalWrite(ledPin, right);
      int potValue = analogRead(potPin);
      delay(5);
      Serial.println(potValue);
    }
  }
}

Video and Photos for Exercise 3:

Understandably, this was the hardest of the 3. We first manipulated the code given to us (which had the wind and ball code). We changed the wind global variable in much the same way as the first exercise: The potentiometer value was mapped to the wind variable. The hard part was the bouncing. There was a point during the exercise where we felt we had written everything correctly, and after going through the code together, we couldn’t see what was wrong. We made a variable called bounced and had it such that inside of the if statement, which would be called upon when the ball was supposed to bounce, the variable would be the opposite of what it was previously (if true then false, if its false then true). We then realized we were initializing the bounced variable inside of the draw function. We made it a global variable, and then it worked.

Final Project Concept – Khalifa Alshamsi

Concept: To create a gyroscope controller wearable controller that is connected to a spaceship game in which there would be power-ups and better graphics for the final project.

Objectives:
Design a Gyroscope Controller: Create a hardware prototype of a gyroscope-based controller that can detect and interpret the user’s hand motions as input commands.
Develop Interface Software: Write software that interprets the gyroscope data and translates it into game commands that are compatible with the game.
Integrate with a Space Simulation Game: Modify my existing Midterm game or develop a simple new game designed to work specifically with this controller.
User Testing and Feedback: Conduct testing sessions to gather feedback and improve the interface and game interaction based on user responses.

Methodology
Hardware Development: Use a 3-axis gyroscope sensor to capture tilt and rotation. Design the controller’s physical form factor to be strapped around the hands.
Integrate with Bluetooth or USB for wireless connectivity with the P5js game.

Software Development: Develop software to read data from the gyroscope sensor. Convert the gyroscope data into P5js-compatible input commands.
Ensure the software supports real-time interaction with minimal latency.

Game Integration: Adapt a spaceship simulation game to respond to the new controller inputs. Implement basic gameplay features such as navigation, obstacle avoidance, and speed control using gyroscope inputs.

Testing and Iteration: Test the controller with users of varying gaming experience. Collect qualitative and quantitative feedback on usability, responsiveness, and enjoyment. Refine the hardware and software iteratively based on this feedback.

Reading Response Week 11 – Khalifa Alshamsi

Bret Victor’s “A Brief Rant on the Future of Interaction Design” emphasizes touchscreen technology. His critique resonates deeply with those of us concerned about the narrow trajectory of technological innovation where tactile and kinesthetic interaction is marginalized in favor of visually dominated interfaces. Victor’s call for broader sensory involvement in technological interfaces is a plea for innovation and an argument rooted in the natural human interaction with the world. Evidence supports his viewpoint from various fields, including educational psychology, which suggests that multi-sensory learning environments enhance understanding and retention (Wolfe and Nevills). This aligns with Victor’s advocacy for interfaces that engage more of our bodily senses, not less.

Victor’s reflections and the subsequent responses to his original piece stimulate a broader conversation about the potential biases in technology design. His critique may seem biased to those who champion digital minimalism and current devices’ sleek, streamlined aesthetics. However, it raises an essential question about whom technology is truly serving. Has reading his arguments changed my beliefs? Absolutely. It’s led me to reconsider the role of physicality in digital interaction and consider the untapped possibilities of interfaces that could mimic more complex human behaviors and interactions. This reflection opens up questions about the potential for future technologies: How far can we push the boundaries of interaction design to make digital experiences more immersive and intuitive without sacrificing functionality? How can designers balance the need for advanced functionality with intuitive physical interactions?

Citation:

Wolfe, P., & Nevills, P. (2004). Building the reading brain, PreK-3. Corwin Press.

Week 11 Project – Khalifa Alshamsi

Concept:

The concept of this project was to create a mini drum pad, or what is equivalent to one, with the hardware we have available. The device would use buttons to trigger different buzzer sounds, mimicking the functionality of a traditional drum pad. Each button on the device would correspond to a different sound, with the frequency of these sounds adjustable via a potentiometer. This allows the user to modify the pitch of the tones.


Code:

// Defining pins assignments for buttons and buzzers
const int buttonPin1 = 2;
const int buttonPin2 = 3;
const int buttonPin3 = 4;
// Coded with the Aid of ChatGPT
const int buttonPin4 = 5; // Monitoring and playbacks button
// Coded with the Aid of ChatGPT
const int buzzerPin1 = 8;
const int buzzerPin2 = 9;
const int buzzerPin3 = 10;
const int potPin = A0; // Potentiometer connected to A0 for frequency control

// Variables to manage button states and debounce timing
int buttonState1 = 0;
int lastButtonState1 = 0;
int buttonState2 = 0;
int lastButtonState2 = 0;
int buttonState3 = 0;
int lastButtonState3 = 0;
int buttonState4 = 0;
int lastButtonState4 = 0;

unsigned long lastDebounceTime1 = 0;
unsigned long lastDebounceTime2 = 0;
unsigned long lastDebounceTime3 = 0;
unsigned long lastDebounceTime4 = 0;
unsigned long debounceDelay = 50; // Debounce delay in milliseconds

// Struct to hold buzzer activation data including the pin and frequency
struct BuzzerAction {
  int buzzerPin;
  int frequency;
};

// Coded with the Aid of ChatGPT
BuzzerAction record[100]; // Array to store each buzzer activation
int recordIndex = 0; // Index for recording array
//Coded with the Aid of ChatGPT

void setup() {
  // Initialize all button and buzzer pins
  pinMode(buttonPin1, INPUT);
  pinMode(buttonPin2, INPUT);
  pinMode(buttonPin3, INPUT);
// Coded with the Aid of ChatGPT
  pinMode(buttonPin4, INPUT);
// Coded with the Aid of ChatGPT
  pinMode(buzzerPin1, OUTPUT);
  pinMode(buzzerPin2, OUTPUT);
  pinMode(buzzerPin3, OUTPUT);
  pinMode(potPin, INPUT); // Setups potentiometer pin as input
}

void loop() {
  // Reads current state of buttons
  int reading1 = digitalRead(buttonPin1);
  int reading2 = digitalRead(buttonPin2);
  int reading3 = digitalRead(buttonPin3);
// Coded with the Aid of ChatGPT
  int reading4 = digitalRead(buttonPin4);
// Coded with the Aid of ChatGPT
  int potValue = analogRead(potPin); // Reads potentiometer value
  int frequency = map(potValue, 0, 1023, 200, 2000); // Maps potentiometer value to frequency range

  // Handle button 1 press and recording
  debounceAndRecord(reading1, &lastButtonState1, &buttonState1, &lastDebounceTime1, buzzerPin1, frequency);

  // Handle button 2 press and recording
  debounceAndRecord(reading2, &lastButtonState2, &buttonState2, &lastDebounceTime2, buzzerPin2, frequency);

  // Handle button 3 press and recording
  debounceAndRecord(reading3, &lastButtonState3, &buttonState3, &lastDebounceTime3, buzzerPin3, frequency);

  // Handles button 4 for playback
  if (reading4 != lastButtonState4) {
    lastDebounceTime4 = millis();
  }
  if ((millis() - lastDebounceTime4) > debounceDelay) {
    if (reading4 != buttonState4) {
      buttonState4 = reading4;
      if (buttonState4 == HIGH) {
        for (int i = 0; i < recordIndex; i++) {
          // Play each recorded buzzer action with the specific frequency recorded
          tone(record[i].buzzerPin, record[i].frequency, 200);
          delay(250); // Short delay between each buzzer action for clarity
        }
        recordIndex = 0; // Resets record index after playback
      }
    }
  }

  // Update last button states for next loop iteration
  lastButtonState1 = reading1;
  lastButtonState2 = reading2;
  lastButtonState3 = reading3;
  lastButtonState4 = reading4;
}
// Coded with the Aid of ChatGPT
// Function to handle button debouncing and recording buzzer actions
void debounceAndRecord(int reading, int *lastButtonState, int *buttonState, unsigned long *lastDebounceTime, int buzzerPin, int frequency) {
  if (reading != *lastButtonState) {
    *lastDebounceTime = millis(); // Reset debounce timer
  }
  if ((millis() - *lastDebounceTime) > debounceDelay) {
    if (reading != *buttonState) {
      *buttonState = reading; // Updates button state
      if (*buttonState == HIGH && recordIndex < sizeof(record) / sizeof(record[0])) {
        record[recordIndex++] = {buzzerPin, frequency}; // Records the buzzer activation
        tone(buzzerPin, frequency, 200); // Plays buzzer at recorded frequency
      }
    }
  }
  *lastButtonState = reading; // Updates last button state for debouncing
// Coded with the Aid of ChatGPT
}


Hardware Configuration: The system is designed with four button inputs and three buzzer outputs. Additionally, a potentiometer is used to control the frequency of the buzzer sounds.

Button Functionality: Buttons 1 to 3 are connected to buzzers and are responsible for triggering sounds with variable frequencies determined by the potentiometer. Button 4 is designated for playback. It plays back a sequence of sounds that have been recorded based on earlier interactions with buttons 1 to 3.

Frequency Control: The frequency of the sounds is dynamically adjusted using a potentiometer. The analog value from the potentiometer is mapped to a specified frequency range (200 Hz to 2000 Hz), which determines how the buzzers sound.

Debouncing: To ensure reliable button press detection without noise interference, the code implements debouncing logic. This involves measuring the time since the last button state change and updating the state only if this interval exceeds a predefined threshold (50 milliseconds).

Recording and Playback (Aided by Chatgpt)

Recording: When a button (1 to 3) is pressed, the action (which buzzer is activated and at what frequency) is recorded in an array. This includes storing both the pin of the buzzer and the frequency at which it was activated.

Playback: When button 4 is pressed, the system iterates over the recorded actions and plays them sequentially. Each action triggers the corresponding buzzer to sound at the recorded frequency for a short duration.
Loop and Functions:

The main loop continuously checks the state of each button and the potentiometer, updating the frequency accordingly.  A helper function, debounceAndRecord, is used to handle the logic for both debouncing and recording the buzzer actions associated with each button press.

Video of Project:

Reflection and ideas for future work or improvements:

Integrating a small display screen would significantly improve its functionality, further enhancing the project. This screen would provide real-time visual feedback on button presses and frequency outputs, allow users to scroll through and select different sounds or presets, and serve as a simple interface for directly programming the device.

The potential for further development and refinement holds exciting prospects. The integration of a display screen and the addition of more customizable buttons are immediate steps that will enhance the device’s usability and versatility. Further innovations could include wireless connectivity for easy integration with other music production software or the addition of sensors to enable gesture-based controls, which would offer an even more dynamic and immersive user experience.

Several key insights stand out after reflecting on what this project has taught us. First, the practical challenges of hardware interfacing taught us the importance of robust design and a solid plan for creating it. There is also a need for effective wire management and physical housing to enhance device durability and aesthetics.

Looking Ahead:

Overall, this project resulted in a functional and entertaining product and served as a significant learning experience, underscoring the importance of patience, precision, and creativity in making it happen. These lessons will guide further improvements and innovations in our future projects.


Week 10 Exploring – Khalifa Alshamsi

Concept:

This project’s concept is to utilize a combination of hardware components (Arduino, ultrasonic sensor, LEDs, and a slide switch) to create an interactive system that responds to physical proximity and manual control.

Setup:

Video:

Code:

const int ledPin = 8;           // LED connected to digital pin 8
const int trigPin = 12;         // Ultrasonic Sensor Trigger pin
const int echoPin = 11;         // Ultrasonic Sensor Echo pin
const int ledPin1 = 9;          // First LED pin (PWM capable)
const int ledPin2 = 4;          // Second LED pin
const int switchPin = 2;        // Slide switch pin
bool ledEnabled = false;        // State to keep track of LEDs response state

long duration;                  // Variable to store the time it takes for the echo to return
float distance;                 // Variable to store the calculated distance

void setup() {
  pinMode(trigPin, OUTPUT);     // Sets the trigPin as an Output
  pinMode(echoPin, INPUT);      // Sets the echoPin as an Input
  pinMode(ledPin1, OUTPUT);     // Sets the first LED pin as an Output
  pinMode(ledPin2, OUTPUT);     // Sets the second LED pin as an Output
  pinMode(switchPin, INPUT_PULLUP); // Sets the switchPin as an Input with internal pull-up resistor
  Serial.begin(9600);           // Start serial communication at 9600 baud
}

void loop() {
  // Read the state of the switch
  ledEnabled = digitalRead(switchPin) == LOW; // Check if switch is active

  // Measure the distance from the ultrasonic sensor
  digitalWrite(trigPin, LOW);
  delayMicroseconds(2);
  digitalWrite(trigPin, HIGH);
  delayMicroseconds(10);
  digitalWrite(trigPin, LOW);
  duration = pulseIn(echoPin, HIGH);
  distance = duration * 0.034 / 2; // Speed of sound wave divided by 2 (go and return)
  Serial.print("Distance: ");
  Serial.println(distance);

  if (ledEnabled) {
    // Pulse the first LED based on distance
    int brightness = map(distance, 0, 200, 255, 10);
    brightness = constrain(brightness, 10, 255);
    analogWrite(ledPin1, brightness);

    // Toggle the second LED based on distance threshold
    digitalWrite(ledPin2, distance < 30 ? HIGH : LOW);
  } else {
    // Turn off LEDs when switch is off
    analogWrite(ledPin1, 0);
    digitalWrite(ledPin2, LOW);
  }
  delay(100);  // Short delay to stabilize loop and reduce sensor noise
}

Reflection:

Reflecting on this project, I’ve realized it was a substantial learning experience and a test of my problem-solving skills. Integrating various components—Arduino, ultrasonic sensor, LEDs, and a slide switch—presented several challenges that enhanced my understanding of electronic systems and their programming. One of the main difficulties encountered was ensuring stable and reliable readings from the ultrasonic sensor. Interferences occasionally led to erratic LED behaviors, requiring adjustments in the placement and coding to filter out spurious signals effectively. Another challenge was debouncing the slide switch to achieve consistent results, underscoring software stability’s importance in hardware projects. Managing multiple outputs based on input from a single sensor also pushed me to think critically about how different components interact within an embedded system. This project bolstered my technical skills and deepened my appreciation for the meticulous detail required in electronic design and the creative potential of combining simple elements to produce complex interactions.

Week 10 Reading Response – Khalifa Alshamsi

Tom Igoe’s blog posts offer the developmental and philosophical underpinnings of physical computing. In “Physical Computing’s Greatest Hits (and misses),” Igoe revisits a series of projects that have significantly influenced how physical computing is taught. By analyzing successful and less effective projects, Igoe highlights the iterative nature of learning in this field, which is crucial for students and educators aiming to refine their approach to technology and design.

On the other hand, “Making Interactive Art: Set the Stage, Then Shut Up and Listen” delves into the essence of interactive art. Igoe argues for the importance of minimal intervention by the artist, allowing the audience to engage freely with the artwork. This approach fosters a unique dialogue between the viewer and the piece, enhancing the personal connection and interpretive freedom. This philosophy not only redefines the role of the creator but also elevates the interactive experience, making it a personal journey for each participant.

Reflecting on Tom Igoe’s insights, I’ve learned about physical computing and art’s iterative and interactive nature. The blog posts illustrate the importance of trial, error, and refinement in developing effective educational strategies for technology and design. Moreover, Igoe’s approach to interactive art—emphasizing minimal artist intervention—has shown me how creating environments for audience engagement can transform the reception and meaning of art. These perspectives challenge traditional roles and invite a deeper understanding of how technology can facilitate more personalized and impactful experiences.