Weekly Assignment 4

Concept:

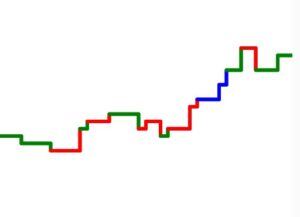
Initially I had some difficulty in choosing the data because I wasn’t sure what kind of data I should look for. Eventually, for my dataset, I chose a csv file that contained data regarding stars. The information contained in the csv are: temperature, luminosity, radius, absolute magnitude, star type, star color, and the spectral class. Of these categories, I used the radius, star type, and star color. Even after I chose my dataset, I wasn’t sure how to exactly visualize it since there wasn’t a category that specifically translated into x and y axis positions. So in the end I just ended up arranging the stars in order they had from the csv but separated by their type.

Coding:

My project consists of 6 different windows that can be navigated by the buttons on the top where each button switches the canvas to show the corresponding star type. The stars are aligned in the center and are arranged in order of the csv data and dare drawn by the color according to the data stored in the csv. Determining the radius of the stars was a bit tricky because the discrepancy between the smallest and the largest radius was too huge so I had to scale the radius for bigger and smaller stars.

switch(int(this.starType)){
      case 0:
        this.radius *= 100;
        break;
      case 1:
        this.radius *= 50;
        break;
      case 2:
        this.radius *= 1000;
        break;
      case 3:
        this.radius *= 20;
        break;
      case 4:
        this.radius *= 1;
        break;
      case 5:
        this.radius /= 10;
        break;
    }

So this is how I scaled the star sizes. For the bigger stars, since the radius is greater than the distance between the stars, the stars overlap and create a shape which is what I somewhat expected/aimed to achieve to create some sort of art. For the switching menus, I just created a separate drawing function that ignored all the stars that are not the current target to be drawn on the canvas.

Challenge:

My initial challenge for this assignment was deciding what kind of data to be used and how to visualize the chosen data. I couldn’t find an appropriate data and be creative with the data I have chosen so I basically had to compromise with what I found. Once I was working with the data set for my current final project, a challenge I ran into was that the data for each stars weren’t arranged by their types. So for example, after 10 type 0 stars, there would be 10 type 1 stars and later on after cycling through all the types there would be 10 type 0 stars again and so on. This was a problem for me since I wanted to arrange the stars based on the star types and align them in order. So I came up with a mechanism where I literally stored the x coordinates for all the stars in a 2d array where the columns were the star types and the rows are the arrays for actual x coordinates. And then in the instantiation of the star instances, for each star that is being instantiated, the counter for that star’s type will be increased and therefore the star’s x coordinate will be directed to the according x coordinate being stored in the 2d array. I know I could’ve took a different approach by sorting the array in a certain format, but I feel particularly proud with my problem solving skills even though it may not be the most efficient method.

let xCoArr = []
let xCoCounterArr = [0, 0, 0, 0, 0, 0];
   
... 

for(let i = 0; i < 6; i++){
  let xCo = 10; //the first x coordinate
  for(let j = 0; j < 40; j++){
    xCoRow.push(xCo); //Stores the x coordinate positions in the array
    xCo += 17; //the distance between the stars
  }
  xCoArr.push(xCoRow); //pushes each x coordinate array per star type
}

...

this.xCo = xCoArr[this.starType][xCoCounterArr[this.starType]];
xCoCounterArr[this.starType]++;


Reflection:

This wasn’t my particular favorite nor best assignment because I was really not sure what exactly to do till the last minute, but it still was a good experience in dealing with csv and using it to visualize through p5js. I think my best takeaway from this assignment is the problem solving experience with the arranging of the stars.

Weekly Assignment 3

Concept:

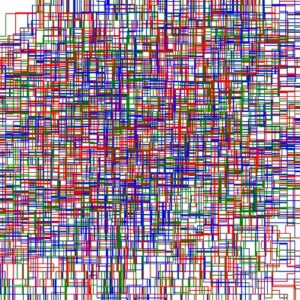
For the first time, I had a fixed idea from the beginning of what I wanted to do for this assignment. I wanted to replicate a computer circuit and signals going through and simulate the signals as blood cells going through the veins. I wanted to have a canvas full of randomly generated veins going everywhere and then have each blood cells precisely follow that vein for each veins.

Making Process:

Initially, I created a class of veins and tried to test out printing a single instance of a vein. I needed a function that would create several lines that would consistently build on top of each other to create a single vein going across the canvas. I decided to create an array attribute that stored multiple line parameters(x1,y1,x2,y2) that would add up to create a vein. Each line segment would have a random color between red, green, and blue.

constructor(){
  this.paramArray = [];
  this.initPos = int(random(0,400));
  this.posVar = 0;

...

  let counter = 0;
  if(counter % 2 == 0){
    //storing of initial x value before adding changes and then adding changes
    let tempPosVar = this.posVar;
    this.posVar += (int(random(1,5)) * 10);
    color = this.colorRange[int(random(0,3))];
    this.paramArray.push([tempPosVar, this.initPos, this.posVar, this.initPos, color]);
  }
    else{
      let tempInitPos = this.initPos;
      this.initPos += (int(random(-4,4)) * 10);
      //in case random initPos is 0, to prevent incosistent vein
      if (this.initPos == tempInitPos)
        this.initPos -= 10;
      //push the 5 parameters in the array
      this.paramArray.push([this.posVar, tempInitPos, this.posVar, this.initPos,     color]);
  }
  counter++;
...


After I achieved this, I then proceeded to create an entire circuit of 300 sets of veins going from left to right and top to bottom

Then I worked on the blood class for the cells to follow its assigned vein. This part, I am particularly proud of since planning ahead helped me a lot. Since I knew there was going to be instances of two separate classes, I specifically created the attribute of the coordinates for each lines in a vein stored in an array so that I could pass it on to the blood cell instance. Therefore, in the blood class’s display function I can easily pass on the cell’s coordinates based on the lines’ coordinates.

if(this.lineNum < this.veinRoute.length){
        
  //the actual printing of the cell 
  strokeWeight(0);
  fill(60, 100, 100);
  circle(this.x, this.y, 4);
        
  //The cell movement mechanism: the cell position variable will move towards the end of the current line it is on the vein
        
  //For x position
  if(this.x != this.veinRoute[this.lineNum][2]){
    if(this.x < this.veinRoute[this.lineNum][2])
      this.x++;
    if(this.x > this.veinRoute[this.lineNum][2])
      this.x--;
    }
        
  //For y position
  else if(this.y != this.veinRoute[this.lineNum][3]){
    if(this.y < this.veinRoute[this.lineNum][3])
      this.y++;
    if(this.y > this.veinRoute[this.lineNum][3])
      this.y--;
    }
        
      //If the cell is on the end of the line, move on to the next line of the vein
  else
    this.lineNum++;
  }
      
//If the cell had reached the end of the vein, reset to the beginning of the vein
else{
  this.x = this.veinRoute[0][0];
  this.y = this.veinRoute[0][1];
  this.lineNum = 0;
}

Now that my setup for the whole project has finished, I created an array of vein and blood cell instances. Then I changed the coloring a little to make it aesthetically appealing. Instead of the normal RGB that I am used to, I decided to implement the HSB color mode to differentiate the cell and the veins brightness. This is the following result:

I also added another set of cells going backwards on the veins to populate the circuit a little more.

Challenge:

My challenge at this point was that the cells were all initialized at the same moment, which initially creates a recognizable pattern which is a phenomenon that I didn’t like. The reason why this happens is because I initialize and draw the veins and blood cells at the same time

for(let i = 0; i < 300; i++){
  groupOfVeins.push(new veins(i));
}
  
for(let j = 0; j < 300; j++){
  //do the setup for the veins and create the blood cells based on it
  groupOfVeins[j].create();
  groupOfBloodFor.push(new blood(groupOfVeins[j].paramArray, true));
  groupOfBloodBack.push(new blood(groupOfVeins[j].paramArray, false));
}

...

for(let j = 0; j < 300; j++){
  groupOfVeins[j].display();
  groupOfBloodFor[j].display();
  groupOfBloodBack[j].display();
}

At this point, I consulted with Professor Ang and he gave me the advise of a) create and print each vein and cell one by one, b) try to involve less fixed numbers and create a pattern that can be randomized each run therefore creating a new result for each run. So I worked with the first task and successfully made a function that initialize the veins one by one instead of doing the whole thing at once using an array. I also slowed this process using the frameCount variable to show what exactly is going on.

Then I applied changed for suggestion B where I set colors for horizontal veins as red and vertical veins for blue. I also set a random parameter that changed the range of the veins each run which somewhat makes a new pattern each time it runs

if(frameCount % 75 == 0){
  if(counter < maximumNumber){
    initialize();
  }
  else{
    counter = -1;
    resetCanvas();
  }
  counter++
}

...

function initialize(){
  groupOfVeins.push(new veins(counter));  
  groupOfVeins[counter].create();
  groupOfBloodFor.push(new blood(groupOfVeins[counter].paramArray, true));
  groupOfBloodBack.push(new blood(groupOfVeins[counter].paramArray, false));
}


Finally I made a version where the color of the veins would be black so only the cells would be seen which makes it look like a swarm of fireflies dancing in the dark

Reflection:

Overall through this project, I was able to learn new things about OOP using p5js especially regarding using attributes and passing them. At first I was somewhat annoyed that each time I had to use the attribute I had to put “this.” in front of the attribute name to use it which caught me aback the first hour but later on I was so glad that p5js was very lenient with passing attributes of one instance for another of different class. I also learned how to use the HSB color scheme which added the sprinkle on top of my project’s aesthetics.

This was also an assignment where I liked each variation of my work since each variation kept its uniqueness which all looked cool to me in different ways. This ended up making my documentation super long but in the end I thought it was a good thing for me try different things on this project.

weekly assignment 2

Concept

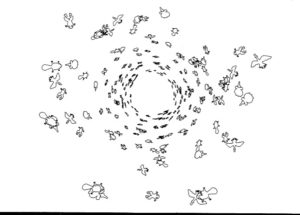
For this assignment, I wanted to make an art that is hectic, colorful, and mesmerizing which is what comes to my mind when I think of media art. First, I read through the old computer arts magazine for inspiration and one piece of art got stuck in my head which was:

I really liked this piece because the shapes looked like it was spiraling towards the center which feels infinitely faraway. Thus, I decided to implement some spiraling component in my art piece with motion and color. At first, I wanted to have a bezier curve squiggling towards the center from all directions, making a huge squiggling circle. But manipulating with multiple bezier curves turned out to be very difficult so ended up with two bezier curves moving across the canvas, squiggling using the random function which I decided to keep. The shape I wanted to spiral was a circle simply because the shapes were going to orbit around the center in a circle. The color of the background and the circle shapes were randomly set using a random function and were randomly changed as well by calling the random color function which added/subtracted each RGB value randomly.

Code

* IF YOU CLICK THE CENTER CIRCLE, YOU CAN SEE THE PAUSE MENU

in the pause menu, you can control the toggleLeft and toggleRight variable which determines the distance between each circle’s orbit and has a default value of 10. You can also control the sin factor which is the constant multiplied to the sin component that determines the orbit and has a default value of 1/2.

The code has several sections. First, there is the initial section of establishing the global variables and setup function that sets up a random color for the background. Second, the draw function has a two conditional branches based on the boolean variable onOff where if this is true the drawTrue function will be called and thus drawn, and if it is false, drawPaused function will be called and the art will be paused.

function draw() {
  if(onOff > 0)
    drawTrue();
  else{
    drawPaused();
  }
  button = circle(300,300,10);
}

onOff variable can be switched true and false by clicking the button circle in the center. Third, the functions mouseClicked and drawPaused are functions that deal with pausing gimmick and changing the sin factor variable and toggle variables. Lastly, the drawTrue function which is the code that runs the art has also two compartments: one that deals with the squiggling bezier curves and one that draws the circles. The bezier curve gimmick really caused me a headache because initially I didn’t understand how it worked so after trial and error, I made a two separate bezier drawing functions: one going from top left corner to lower right and one vice versa. Both of these functions take a direction parameter and an array of parameter which have four elements for the four parameters of bezier shape which are randomly added/subtracted to make the bezier curve squiggle. The other component that deals with the orbiting circles use the for loop to draw 200 circles orbiting around using the sin() cos() function to constantly move the circle around the orbit. To diversify the speed between each 0rbit, I created an array of angles where each element is the speed of the orbit.

for(let i = 0; i < 100; i++){
    let x1 = 0;
    let y1 = 0;
    strokeWeight(1);
    if(i % 2 == 0){
      x1 = 300 + toggleLeft * i * sin(angle[i]);
      y1 = 300 + toggleLeft * i * cos(angle[i]);
    }
    else{
      x1 = 300 + toggleRight * i  * cos(angle[i]);
      y1 = 300 + toggleRight * i * factor * sin(angle[i]);
    }
    randomColor(colorsCircle);
    fill(colorsCircle[0], colorsCircle[1], colorsCircle[2])
    circle(x1, y1, i * 1);
    circle(y1, x1, i * 1);
  }
  
  for(let j = 0; j < 100; j++){
    angle[j] += 0.0314 + (j * 0.001);
  }

And this is my full code:

let onOff = 1;
let xMotion = 0;
let yMotion = 0;
let colors = [0,0,0];
let colorsCircle = [0,0,0];
let paramsA = [0,0,0,0];
let paramsB = [0,0,0,0];
let counter = 0;
let toggleLeft = 10;
let toggleRight = 10;
let factor = 1/2;

let angle = [];

function setup() {
  createCanvas(600, 600);
  for(let i = 0; i < 3; i++){
    colors[i] = random(0,255);
  }
  for(let j = 0; j < 100; j++){
    angle.push(j);
  }
}

function draw() {
  if(onOff > 0)
    drawTrue();
  else{
    drawPaused();
  }
  button = circle(300,300,10);
}

function mouseClicked(){
  if(dist(mouseX, mouseY, 300, 300) <= 10)
    onOff *= -1;
  else if(dist(mouseX, mouseY, 110,400) <= 20 && toggleLeft > 1){
    toggleLeft--;
    console.log(toggleLeft);
  }
  else if(dist(mouseX, mouseY, 160,400) <= 20 && toggleLeft < 10){
    toggleLeft++;
    console.log(toggleLeft);
  }
  else if(dist(mouseX, mouseY, 420,400) <= 20 && toggleRight > 1){
    toggleRight--;
    console.log(toggleRight);
  }
  else if(dist(mouseX, mouseY, 510,400) <= 20 && toggleRight < 10){
    toggleRight++;
    console.log(toggleRight);
  }
  else if(dist(mouseX, mouseY, 100,525) <= 25){
    factor = 1/2;
  }
  else if(dist(mouseX, mouseY, 300,525) <= 25){
    factor = 1;
  }
  else if(dist(mouseX, mouseY, 500,525) <= 25){
    factor = 2;
  }
}

function drawPaused(){
  background(255);
  textSize(100);
  fill(0);
  
  text('Paused', 150, 200);
  triangle(100, 400, 120, 380, 120, 420);
  triangle(170, 400, 150, 380, 150, 420);
  triangle(430, 400, 450, 380, 450, 420);
  triangle(500, 400, 480, 380, 480, 420);
  
  fill(255);
  rect(75, 500, 50,50);
  rect(275, 500, 50,50);
  rect(475, 500, 50,50);
  
  
  textSize(25);
  fill(0);
  text('1/2', 80, 525);
  text('1', 290, 525);
  text('2', 480, 525);
  
  text("Toggle Left", 75, 350);
  text("Toggle Right", 400, 350);
  text("Sin Factor", 250, 470);
  
}

function drawTrue(){
  background(colors[0], colors[1], colors[2]);
  fill(colors[0],colors[1],colors[2])
  stroke(colors[0]);
  strokeWeight(10);
  
  if(xMotion < 610 && yMotion > -10){
    xMotion ++;
    yMotion --;
  }
  else{
    xMotion = -10;
    yMotion = 610;
    paramsA = [0,0,0,0];
    paramsB = [0,0,0,0];
  }
  
  if(counter == 10){
    randomColor(colors);
    counter = 0;
    randomParam(paramsA);
    randomParam(paramsB);
  }
  drawBezierX(xMotion, paramsA);
  drawBezierY(yMotion, paramsB);
  counter++;
  
  for(let i = 0; i < 100; i++){
    let x1 = 0;
    let y1 = 0;
    strokeWeight(1);
    if(i % 2 == 0){
      x1 = 300 + toggleLeft * i * sin(angle[i]);
      y1 = 300 + toggleLeft * i * cos(angle[i]);
    }
    else{
      x1 = 300 + toggleRight * i  * cos(angle[i]);
      y1 = 300 + toggleRight * i * factor * sin(angle[i]);
    }
    randomColor(colorsCircle);
    fill(colorsCircle[0], colorsCircle[1], colorsCircle[2])
    circle(x1, y1, i * 1);
    circle(y1, x1, i * 1);
  }
  
  for(let j = 0; j < 100; j++){
    angle[j] += 0.0314 + (j * 0.001);
  }
}

function randomColor(colorsArr){
  for(let i = 0; i < 3; i++){
    colorsArr[i] += random(-15,15);
  }
}

function drawBezierX(dirX, param){
  bezier(dirX + param[0], dirX + param[0], dirX + 10, dirX + 10 + param[1], dirX + 20, dirX + 20 + param[2], dirX + 30,dirX + 30 + param[3]);
}
function drawBezierY(dirY, param){
  bezier(dirY + param[0], dirY + param[0], dirY + 10, dirY + 10 + param[1], dirY + 20, dirY + 20 + param[2], dirY + 30, dirY + 30 + param[3]);
}

function randomParam(param){
  for(let i = 0; i < 4; i++){
    param[i] += random(-30,30);
  }
}

Reflection

Like the last assignment, for this assignment, I didn’t have a concrete plan on what I wanted to create through p5js but rather I did a lot of exploring, meddling, and experimenting with the code and stumbling upon many gimmicks that I didn’t intend but looked cool. After two practices, I found myself getting more and more used to this language and how to create and use functions and the draw function to achieve what I want. I also learned and got used to the interactive part of the p5js with mouseClicked function and how to have a panel with set of buttons on the canvas using this function.

Week 1 Self Portrait

Concept

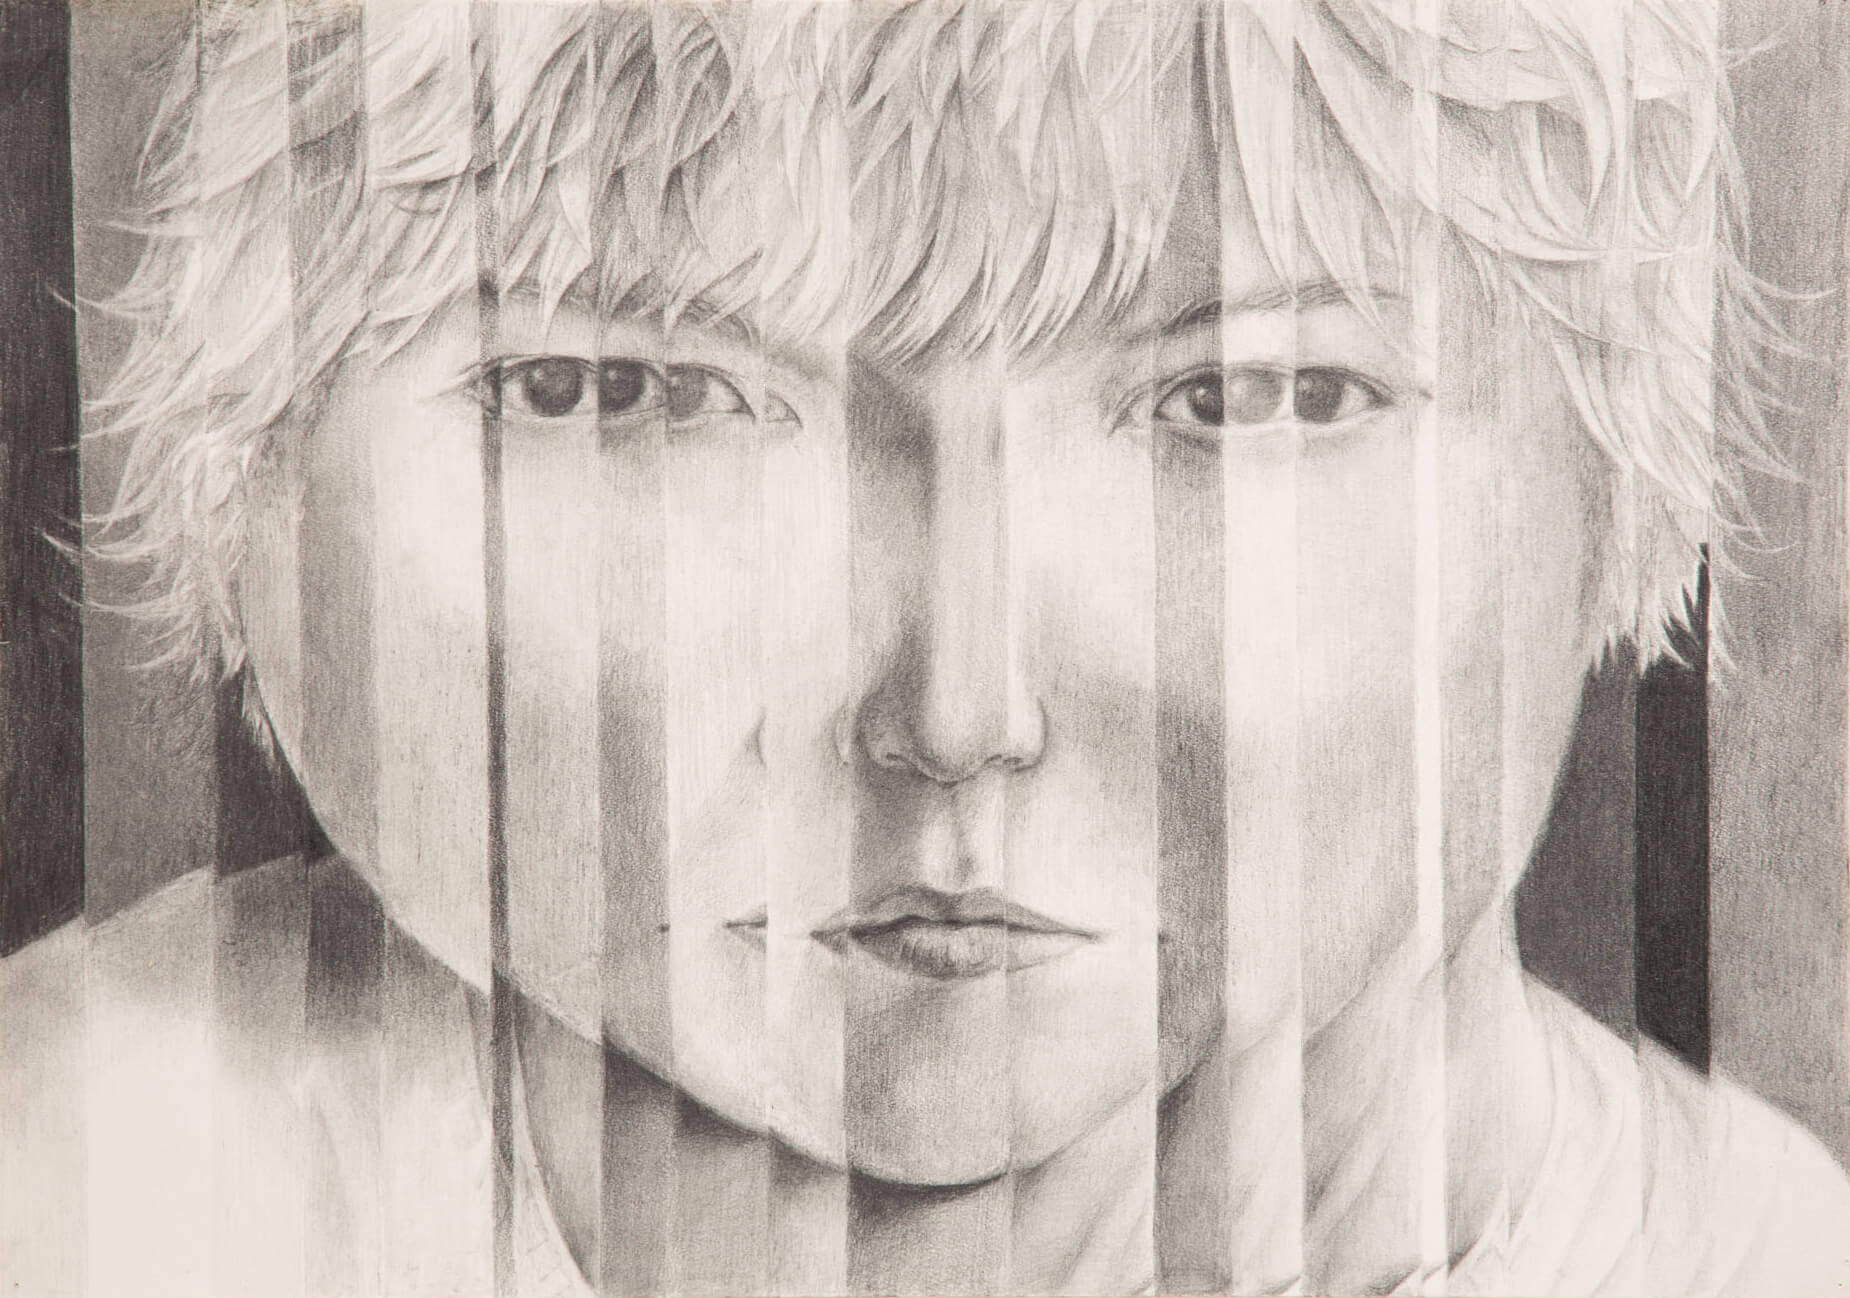
I, for one, am not much of an artist. I hate having to draw specific lines and shape because I am always bad at details. That is why for this assignment, I decided to get creative with what a “face” is. As the assignment directions describe, I decided to stay far away from a realistic face and focus more on practicing what I can do with p5js. The motive for this portrait is this picture:

a self portrait through a shattered glass. Unfortunately, I don’t have the artistic skills, nor coding skills to replicate this painting on p5js, so I decided to use simple shapes and arcs to recreate my own self portrait.

Making Process

I didn’t have a full picture of what I was going to make from the beginning so it was very much coming up with new ideas as I working. Initially, I split the canvas with rectangles using a for loop and then I thought I could use this different sections as a gradation of colors so I set the color fill variable with the iterator in order to achieve that. Since the canvas was split in 12 different rectangles, I created an array of size 12 and use the iterator to find the color value stored in the array to make gradually changing color scheme. Then I built the face structure using the arc element also using the for loop I set for creating the split in the canvas. One issue with this method however, is that each arc from the four sections (x < 250 & y < 250, x  > 250 & y < 250, x < 250 & y > 250, x > 250 & y > 250) are all identical. While it does look haphazard because of this, I decided to leave it like this because a) for this assignment I focused more on getting used to p5js so I wanted to keep the for loop iteration in my drawing, b) this had an unintended modern art sensation which I thought was cool. So since I got this modern art looking progress going on, I decided to stick with that theme and incorporate simple shapes to represent my facial features: circles for eyes, triangle for nose, and an arc for my mouth. When I was done with the facial features, I realized that the result looked a little too simple. So to spice things up, I decided to make the facial features move which leads to the next section of my documentation.

Challenge

Turns out, making shapes move in certain behavior on the canvas was much more difficult than I expected. My initial assumption on how to make this work was to make a variable for the x and y position parameters and increase or decrease them. However, when I quickly learned that the shapes didn’t move as I suspected, I had go through a lot of trial and error to try to fix the bugs and get what I wanted. After time, I managed to fix the nose and mouth motion using a speed variable that would be added to the x and y position parameters. If the shape position would reach the left/right or top/bottom end, the speed variable would be multiplied by -1 so the shape motion would go opposite direction and loop so that it would move consistently. The real challenge, however, was the eye motion going in circles. For this one, I couldn’t figure out how to have a shape move in circles, so I did some research. Thankfully, I found a source code online that managed to make this happen

(https://editor.p5js.org/kchung/sketches/SJkdHhWUQ)

so I referred to this code and learned the sin() function and cos() function with an increasing angle variable according to radian to make a shape move in circle.

let x1 = 225 + 25 * sin(angle);
let y1 = 200 + 25 * cos(angle);
let x2 = 325 + 40 * cos(angle);
let y2 = 150 + 40 * sin(angle);

circle(x1,y1, 50);  
circle(x2,y2, 50);

angle += 0.0314;


Wrapping Up

After the challenging parts, I decided to add some sprinkles on the product like changing up the stroke colors and the weight or make a warming up in color gimmick using the angle variable I set for the circle motion. For colors, I knew I wanted to use red, green, and blue because they are the RGB (I know its cheesy but still I thought it was cool). For the color in the background being blue was pure coincidence after playing with the gradation effect so I was left with red and green which each became the color for the nose and the mouth. For the eye color being yellow, I just thought it was a nice color match.

Reflection

Looking back on working on this assignment, I was able to use some of the the basic coding knowledge that I knew beforehand such as conditions, iteration, arrays, etc.. but I also learned a lot about p5js coding environment and its unique functions like how the draw() function behaves or the shape elements. Through this assignment I was reminded a lot about processing which I learned in my freshman year in Intro to CS. As for future possible improvements, I know for sure my code is a hot mess with no comments, very haphazardly organized, and not the most efficient so I hope to be able to code a little more cleanly and in a better way next time, and also learn & utilize more of what p5js can offer.