Final project Digital Doodle: Ingy el sheikh& Fatema Nassar

Finally!!

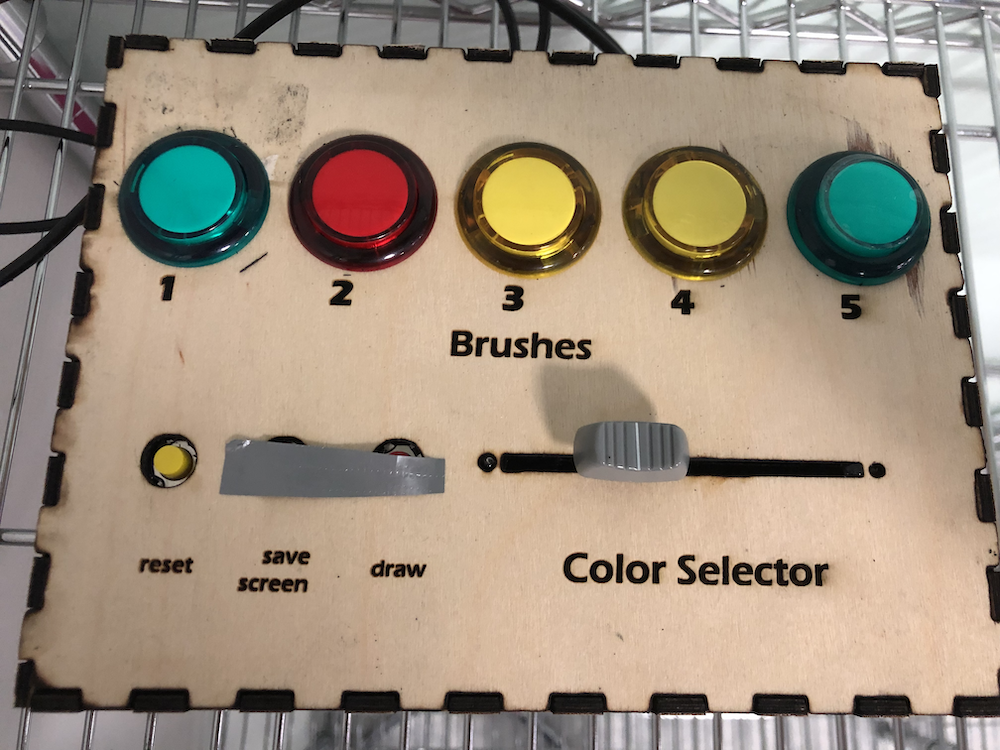
This was quite a journey, with many ups and downs but definitely one that ended in relief and content! The idea of our final project revolved giving our audience a chance to go back to their childhood and just have fun! Anyone that interacts with our project is given the opportunity to just draw whatever their heart desires, and the physical interactivity (because users will draw with their hands)  gives it an extra interesting and more immersive experience. We wanted our project to give the user complete freedom, so they users can choose between 5 different brushes and use the color they want to draw using the color selector.

Implementation:

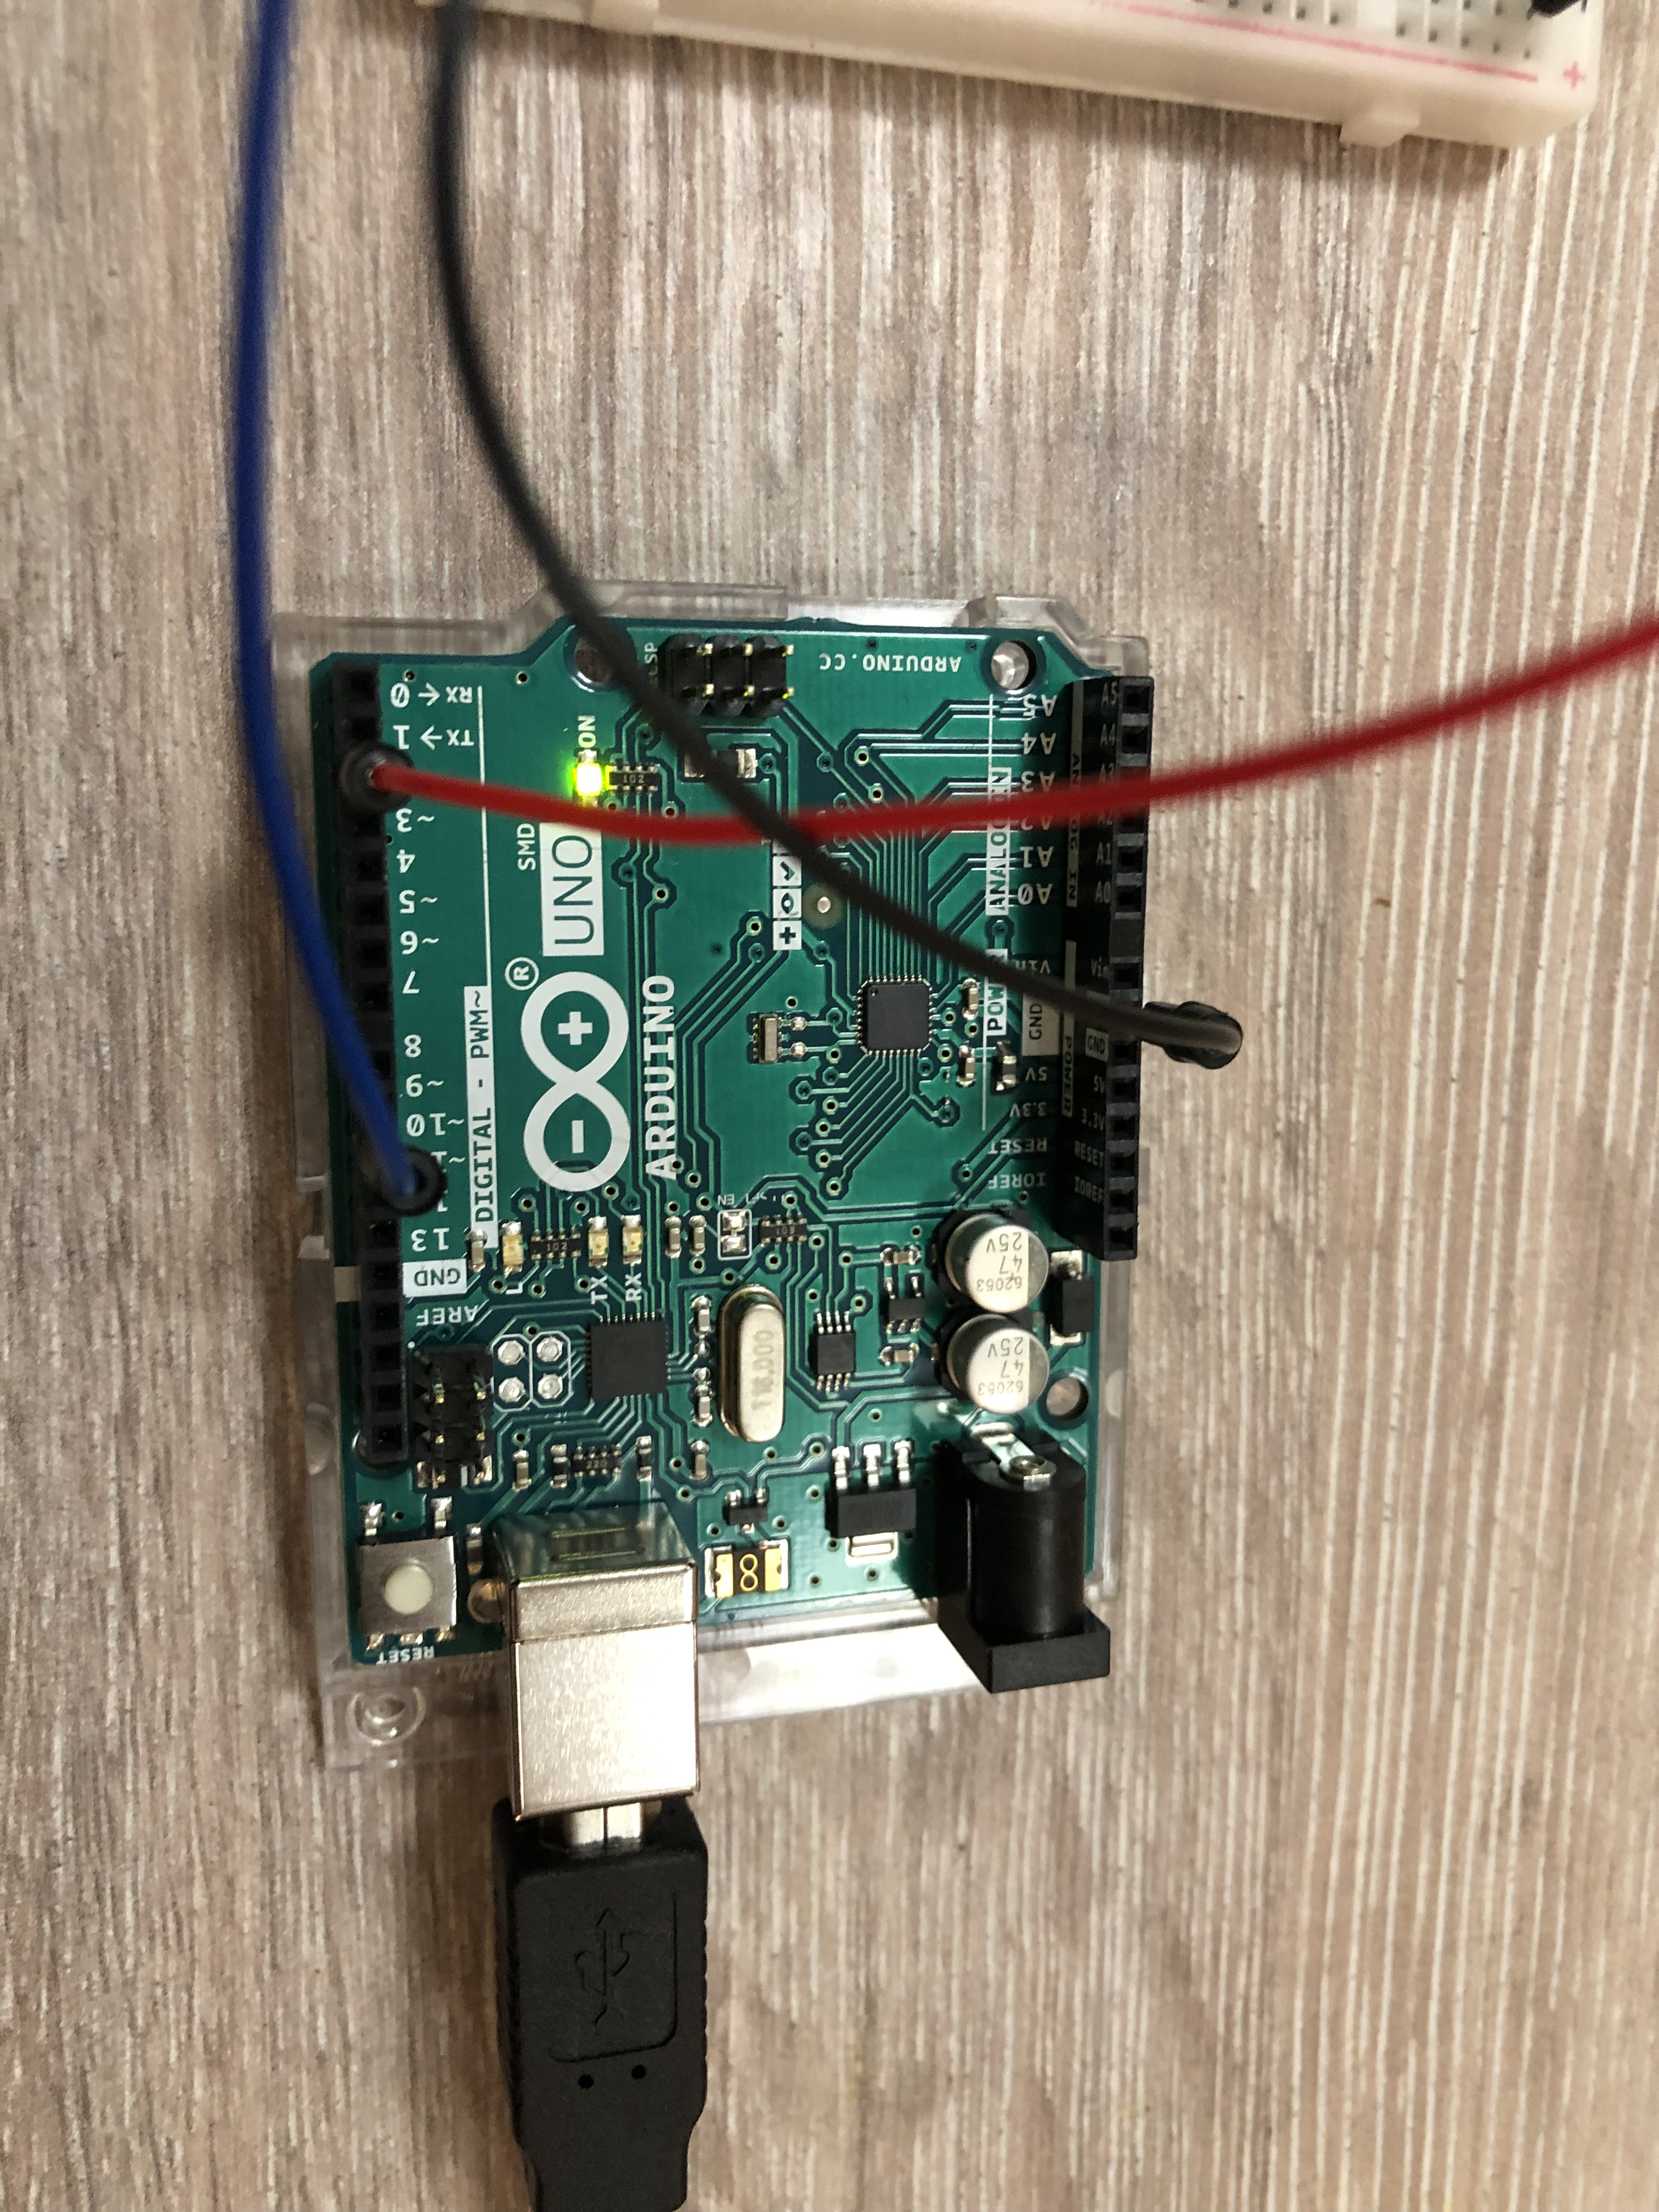
There were mainly two aspects of this project, the processing aspect and the Arduino aspect (and serial communication). This is essentially also how we split the work between us. Fatema essentially took on the challenge of the processing side of things and I took on the challenge of the Arduino side of things and the blog documentations. So Fatema is the one that created the beautiful generative art pieces that played the role of our brushes, and she worked on the fiducial tracking as well (which was a pain! so she did a great job). While I focused on the arduino side of things, wiring up the buttons and slide potentiometer, creating the color gradient and its code on processing, and creating the serial communication between arduino and processing, I also took responsibility of the blog documentation. However, we also found ourselves working together most of the time, Fatema would help me with the arduino when I was stuck and vice versa. So it eventually turned into us working together on most of the aspects of the project rather than individually which worked out great!

lessons learned/how to improve:

This project is one that definitely helped us grow. Naturally it was not a perfect linear growth, hence there is always room for improvement. reflecting on where we can improve is definitely an essential thing to do. After the showcase these are the things we noticed could have been executed better:

  1. During our presentation to the class on the 13th, a very inconvenient and stupid mistake (we just need to move the location of the project slightly due to lighting issue) caused us to panic and not be able to show the class our project. lesson learned! we should have set up earlier especially since our project was not very straight forward and is prone to spontaneous errors.Luckily it all worked out in the end.
  2. When it comes to the project itself, we found that we should have included some sort of feedback for when the buttons are pressed, just to let the person know which brush they are using.
  3. We also learned that sometimes the finer details take even more time and effort than the bigger aspects of the project! and they bring the project together at the end.
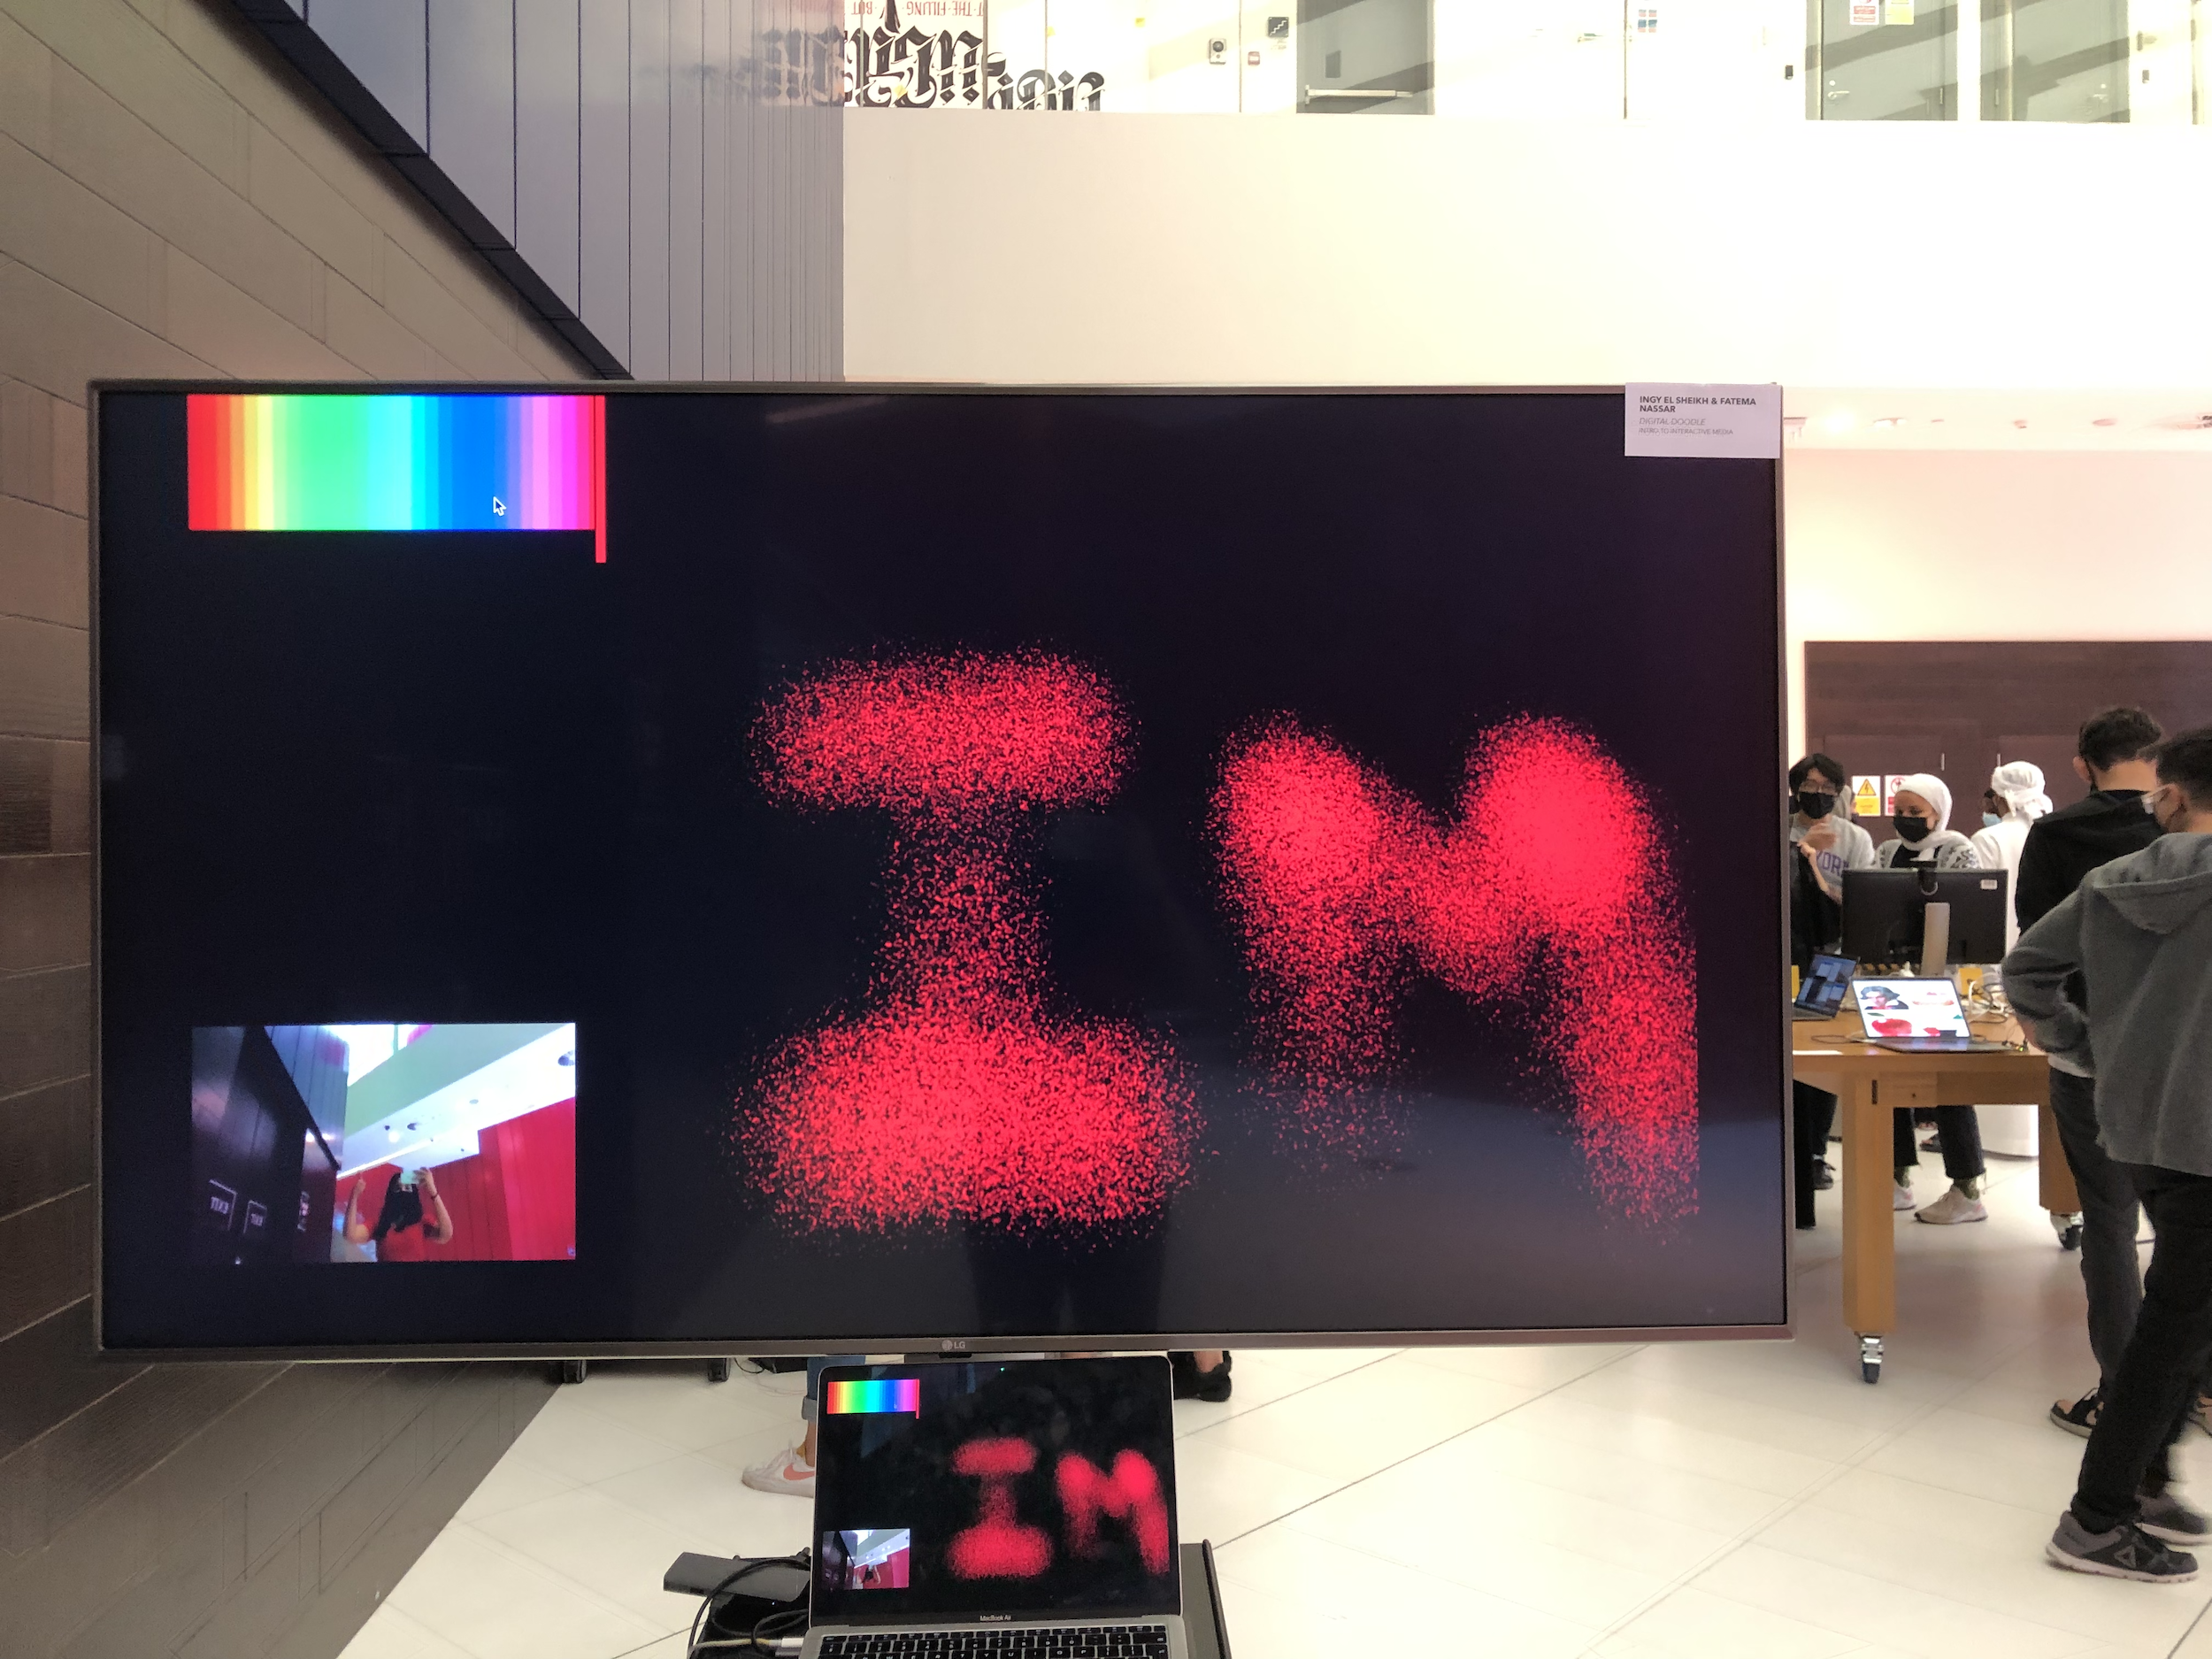
IM showcase:

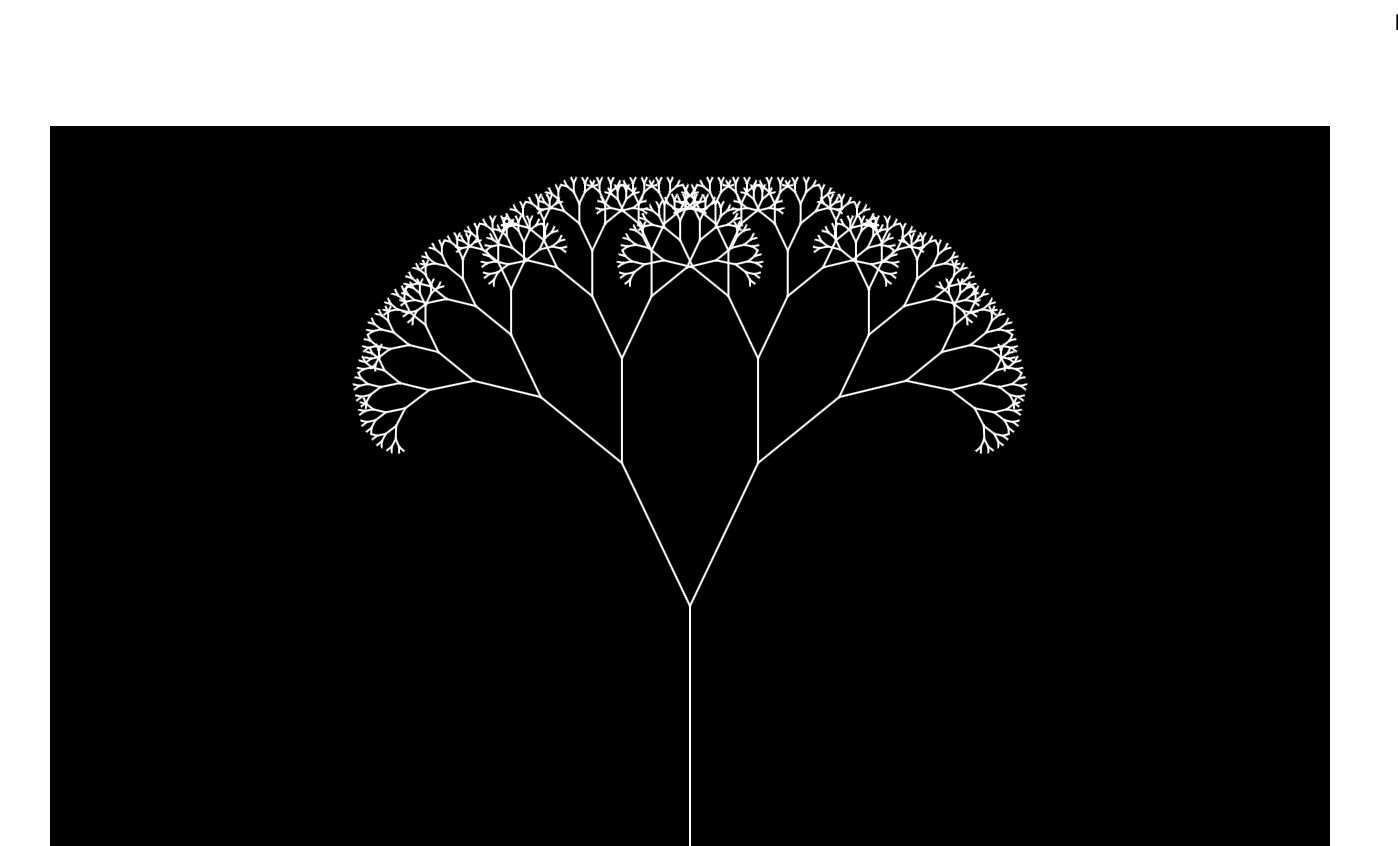
Here are some of the very unique masterpieces that people created on our digital doodle in the showcase. It was so much fun seeing how different people interacted differently with our project!

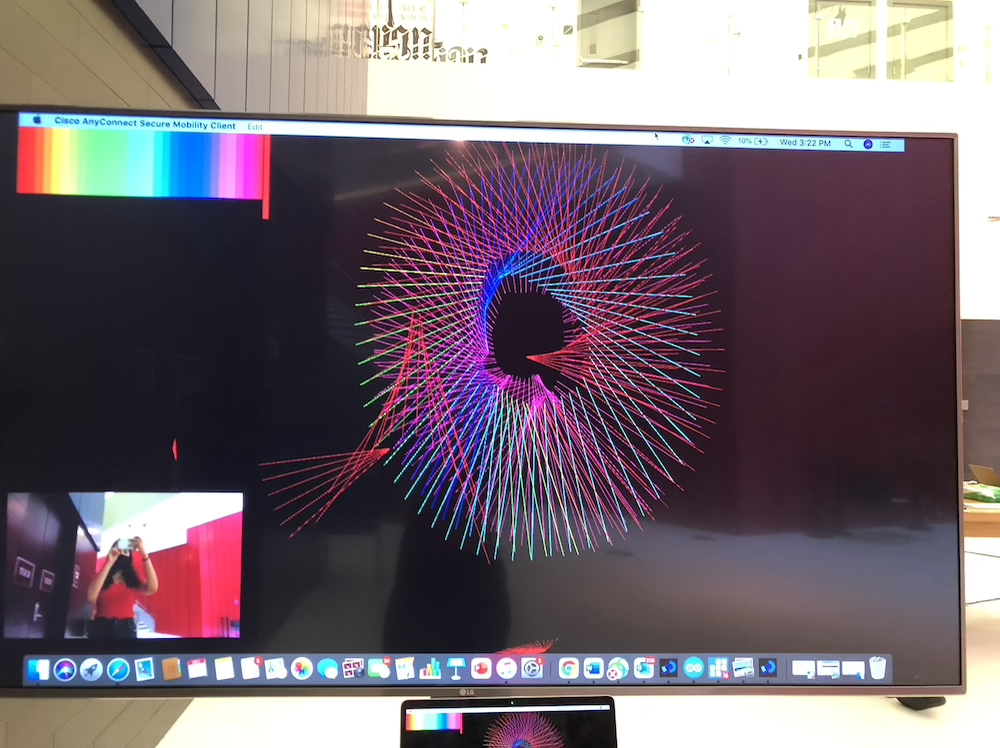
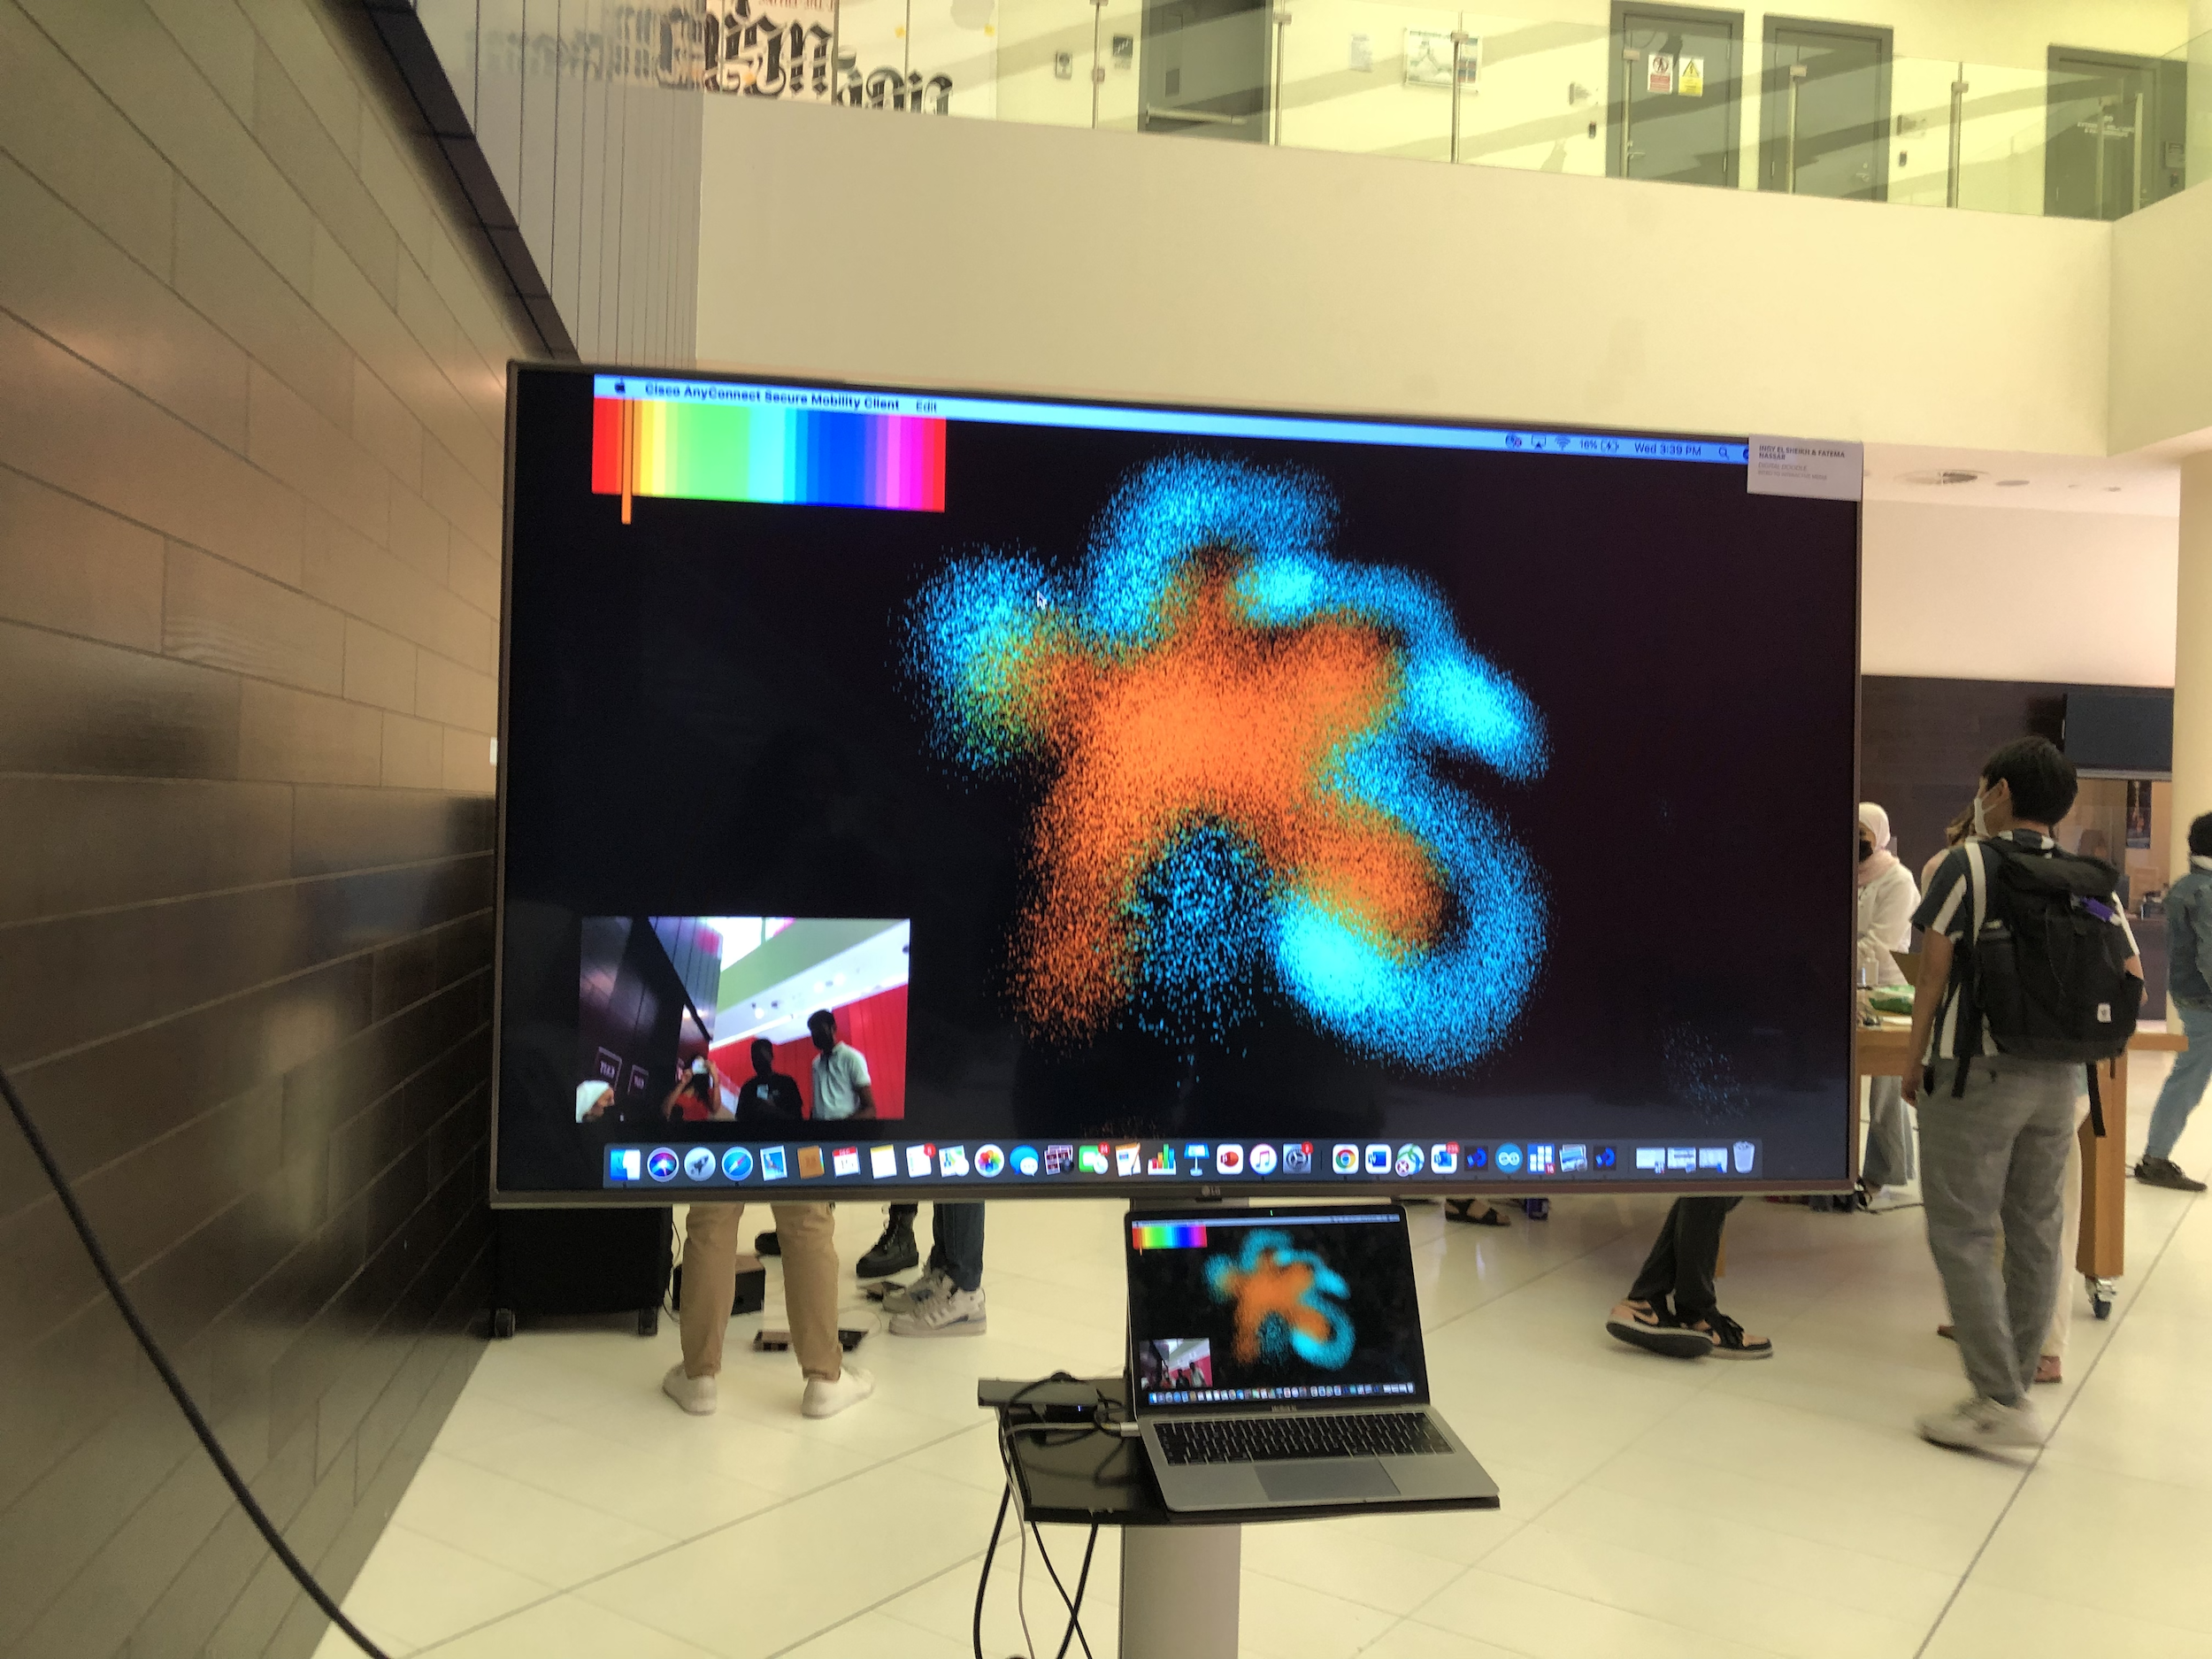
And here are a few video out of many of people interacting with our project (you can see how people move in the camera on the screen)!!

Arduino code:

int left = 0;
int right = 0;
int buttonOne = 9;
int buttonTwo = 10;
int buttonThree = 11;
int buttonFour = 12;
int buttonFive = 13;
int buttonSix = 3;//reset
int buttonSeven = 5;//Draw
int buttonEight = 4;//saveScreen


int val1 = 0;
int val2 = 0;
int val3 = 0;
int val4 = 0;
int val5 = 0;
int val6 = 0;
int val7 = 0;
int val8 = 0;

void setup() {
  pinMode(buttonOne, INPUT);
  pinMode(buttonTwo, INPUT);
  pinMode(buttonThree, INPUT);
  pinMode(buttonFour, INPUT);
  //   pinMode(buttonFive, INPUT);
  Serial.begin(9600);
  Serial.println("0,0");

}
void loop() {
  while (Serial.available()) {
    right = Serial.parseInt();
    left = Serial.parseInt();
    if (Serial.read() == '\n') {

      int sensor = analogRead(A0);
      delay(1);
      val1 = digitalRead(buttonOne);
      delay(1);

      val2 = digitalRead(buttonTwo);
      delay(1);

      val3 = digitalRead(buttonThree);
      delay(1);
      //
      val4 = digitalRead(buttonFour);
      delay(1);

      val5 = digitalRead(buttonFive);
      delay(1);

      val6 = digitalRead(buttonSix);
      delay(1);

      val7 = digitalRead(buttonSeven);
      delay(1);
      
      val8 = digitalRead(buttonEight);
      delay(1);


      Serial.print(sensor);
      Serial.print(',');
      Serial.print(val1);
      Serial.print(',');
      Serial.print(val2);
      Serial.print(',');
      Serial.print(val3);
      Serial.print(',');
      Serial.print(val4);
      Serial.print(',');
      Serial.print(val5);
      Serial.print(',');
      Serial.print(val6);//
      Serial.print(',');
      Serial.print(val7);//
      Serial.print(',');
      Serial.println(val8);
    }
  }


}

Processing Code:

import processing.video.*;
import jp.nyatla.nyar4psg.*;
import processing.serial.*;
import java.util.*;
import processing.sound.*;

SoundFile beep;

int n=1, mode=1;
PVector mouseloc = new PVector(0, 0);
PVector p;

PImage img;
PGraphics pg;
Capture cam;
MultiMarker nya;

PImage save;

Brush myBrush = new Brush(1, 2, mouseloc);


// serial stuff
Serial myPort;
int xPos=0;
int yPos;
boolean onOff=false;
boolean onOff2=false;
PImage myImage;
color pix;

int [] val = {0, 0, 0, 0, 0, 0, 0, 0};
int [] valprev = {0, 0, 0, 0, 0, 0, 0, 0};

void setup() {
  //size(1280, 720, P3D);
  colorMode(RGB, 100);
  fullScreen(P3D);

  printArray(Serial.list());
  String portname=Serial.list()[2];
  println(portname);
  myPort = new Serial(this, portname, 9600);
  myPort.clear();
  myPort.bufferUntil('\n');
  myImage  = loadImage("color.jpeg");

  //img = createImage(1920, 1080);
  //printArray(Capture.list());
  //cam=new Capture(this, 1920, 1080);
  pg = createGraphics(1440, 900, P3D);
  cam = new Capture(this, 640, 360);
  // String[] devices = Capture.list();
  //println(devices);
  print(cam.width +"  "+cam.height);
  cam.start();
  pg.beginDraw();
  pg.background(0);
  pg.loadPixels();
  pg.endDraw();


  nya=new MultiMarker(this, width, height, "data/camera_para.dat", NyAR4PsgConfig.CONFIG_PSG);
  nya.addARMarker("data/patt.hiro", 40);//id=0
  cam.start();

  background(0);
  loadPixels();
  //beep= new SoundFile(this,"Buzzer-sound.mp3");
  beep= new SoundFile(this,"beep-09.wav");
   
}

int c=0;

void draw() {

  c++;
  if (cam.available() !=true) {
    return;
  }

  background(255);
  if (cam.available() == true) {
    cam.read();
  }

  pg.beginDraw();
  //pg.background(0);
  pg.loadPixels();
  pg.translate(width, 0);
  pg.scale(-1, 1);
  pg.image(cam, 0, 0, width, height);
  pg.endDraw();

  nya.detect(pg);
  imageMode(CORNER);
  //nya.drawBackground(pg);
  updatePixels();
  image(pg,0,height-height/3,width/4,height/4);


  if ((!nya.isExist(0))) {
    return;
  }
  p=nya.screen2ObjectCoordSystem(0, width/2, height/2);
  image(pg,0,height-height/3,width/4,height/4);
  updatePixels();

  if (mode==1) {
    drawScreen();
  }
  // nya.endTransform();

  else if (mode==2) {
    loadPixels();
    save("pic"+String.valueOf(n++)+".jpeg");
    delay(10);
    loadPixels();
    takeScreenShot();
    mode=1;
    delay(500);
    mode=3;
  }
  else if(mode==3){
    //display
    pg.beginDraw();
    pg.background(200);
    pg.imageMode(CENTER);
    for(int i=1; i<n+1; i++){
      save = loadImage("pic"+i+".jpeg");
      pushMatrix();
      rotate(random(0,HALF_PI));
      float widthh=random(width/6,width/4), heightt=random(height/6,height/4),locX=random(width),locY=random(height);
      pg.image(save,locX, locY);
      popMatrix();
    }
  }
}


void drawScreen() {
  //brush color picker
  imageMode(CENTER);
  fill(0);
  rectMode(CENTER);
  noStroke();
  rect(myImage.width/2, myImage.height/2, myImage.width, myImage.height*1.5);
  image(myImage, myImage.width/2, myImage.height/2, myImage.width, myImage.height);
  color pix = get(xPos, myImage.height/2);
  fill(pix);
  stroke(0);
  rect(xPos, myImage.height/2, 10, myImage.height*1.5);

  buttonPressed();

  myBrush.setCol(pix);

  mouseloc.x = p.x;
  mouseloc.y = p.x;
  myBrush.draww(mouseloc);
  loadPixels();
}

//void sound(){
//  if (valprev[0] == 1) {
//   beep.play();
//  }
////  } else if (valprev[1] == 1 ) {
////    buzzer.play();
////  } else if (valprev[2]==1 ) {
////    beep.play();
////  } else if (valprev[3]==1 ) {
////     beep.play();
////  } else if (valprev[4]==1 ) {
////   beep.play();
////  }
////  // reset
////  else if (valprev[5]==1 ) {
////beep.play();
////    }
////  else if (valprev[6]==1 ) { //draw
////beep.play();
////  } else if (valprev[7]==1 ) { //save screen
////   beep.play();
////  }
////}


//  }


void buttonPressed() {
  if (val[0] == 1 ) {
    myBrush.setbrush(1);
   
  } else if (val[1] == 1 ) {
    myBrush.setbrush(2);
  } else if (val[2]==1 ) {
    myBrush.setbrush(3);
  } else if (val[3]==1 ) {
    myBrush.setbrush(4);
  } else if (val[4]==1 ) {
    myBrush.setbrush(5);
  }
  // reset
  else if (val[5]==1 ) {
    println("bla");
    background(0);
    loadPixels();
    //for (int i=0; i<width*height; i++) {
    //  pixels[i]=color(0);
    //}
  } else if (val[6]==1 ) { //draw
    mode=1;
  } else if (val[7]==1 ) { //save screen
    mode=2;
  }
}


void takeScreenShot(){
  rectMode(CENTER);
  stroke(50);
  rect(width/2, height/2, width,height);
  delay(100);
  
}

void serialEvent(Serial myPort) {
  String s=myPort.readStringUntil('\n');
  s=trim(s);
  if (s!=null) {
    println(s);
    int values[]=int(split(s, ','));
    if (values.length==9) {
      xPos=(int)map(values[0], 89, 912, 0, myImage.width);

      //yPos=(int)map(values[1],0,1023,0, height);
      //yPos=height/2-230;
      //myBrush.setbrush(2);

      val[0] = (int)values[1];  // read it and store it in val[]
      val[1] = (int)values[2];
      val[2] = (int)values[3];
      val[3] = (int)values[4];
      val[4] = (int)values[5];
      val[5] = (int)values[6];//reset
      val[6] = (int)values[7];//draw
      val[7] = (int)values[8];//saveScreen
    }
    myPort.write(int(onOff)+","+int(onOff2)+"\n");
  }
  for(int i=0;i<8;i++){
    valprev[i]=val[i];
  }
}
class Brush {

  int brushN;

  float stepSize, linelength, diam;
  float angle;
  float x, y, tempX, tempY;
  color col;
  //
  int counter;
  PFont font;
  float fontSize;
  String letters;
  float  fontSizeMin;
  //

  //linemoduelw
  PShape lineModule;

  float [] numX={ -100, -70, 0, 70, 100, 70, 0, -70};
  float [] numY={ 0, 70, 100, 70, 0, -70, -100, -70};

  Brush(int defaultt, float step_size, PVector mouse) {
    // 1 blur
    // 2 random cylinder
    // 3 dynamic shapes
    // 4 text lines
    // 5 rotating lines
    brushN = defaultt;
    stepSize = step_size;
    angle = 270;
    x = mouseX;
    y = mouse.y;
    col = color(255);
    linelength = 100;
    diam = 2;
    fontSizeMin=200;

    fontSize=50;
    letters = "It isn't true that my mattress is made of cotton candy. It was the first time he had ever seen someone cook dinner on an elephant. Homesickness became contagious in the young campers' cabin. Every manager should be able to recite at least ten nursery rhymes backward.";
  }
  void setbrush(int brushn) {
    brushN=brushn;
  }
  void setSize(float size) {
    stepSize=size;
  }
  void setCol(int colorr) {
    col=colorr;
  }
  void setLineLength(float len) {
    linelength=len;
  }
  void setDiam(float diamm) {
    diam= diamm;
  }

  void setAngle(float ang) {
    angle=ang;
  }

  void draww(PVector mouse) {

    switch (brushN) {
    case 2:
      setLineLength(100);
      setSize(5);
      setDiam(2);
      blur(mouse);
      break;

    case 3:
      setLineLength(100);
      setSize(3);
      randomprisms(mouse);
      break;

    case 4:

      dynamicShapes(mouse);
      break;

    case 5:
      textlines(mouse);
      break;

    default :
      setLineLength(100);
      strokeWeight(1);
      rotatingLines(mouse);
      break;
    }
  }

  void helper_randomPrisms() {
    float angle = TWO_PI/8;
    float rad = 100 * random(0.5, 1);
    for (int i=0; i<8; i++) {
      numX[i]=cos(angle * i) * rad;
      numY[i]=sin(angle * i) * rad;
    }
  }

  void blur(PVector mouse) {
    float [] blurX ={ -stepSize, -stepSize, 0, stepSize, stepSize, stepSize, 0, -stepSize};
    float [] blurY ={         0, stepSize, stepSize, stepSize, 0, -stepSize, -stepSize, -stepSize};
    float d = dist(x, y, mouse.x, mouse.y);

    if (d > stepSize) {
      // gets the angle between the mouse and the location of the brush so that next point is drawn in the right intended location
      angle = (float)Math.atan2(mouse.y-y, mouse.x-x);

      tempX = x;
      tempY = y;

      nya.beginTransform(0);
      //
      //translate(x, y);
      rotate(angle);
      noStroke();
      fill(col, 40);

      //
      for (int i=0; i<500; i++) {
        int dir =  int(random(0, 7));
        rotate(random(5));
        println(blurX[dir]);
        tempX=blurX[dir]*random(1, 10);
        tempY=blurY[dir]*random(1, 10);
        circle(tempX, tempY, diam);
      }
      //
      nya.endTransform();

      x = mouse.x;
      y = mouse.y;
    }
  }

  void randomprisms(PVector mouse) {
    float d = dist(x, y, mouse.x, mouse.y);

    if (d>stepSize) {
      // gets the angle between the mouse and the location of the brush so that next point is drawn in the right intended location
      angle = (float)Math.atan2(mouse.y-y, mouse.x-x);
      for ( int i=0; i<8; i++) {
        numX[i]+=random(0-stepSize/2, stepSize/2);
        numY[i]+=random(0-stepSize/2, stepSize/2);
      }

      nya.beginTransform(0);
      //
      //translate(x, y);
      rotate(angle+random(-0.1, 0.1));
      stroke(col);
      strokeWeight(stepSize/4);
      rectMode(CENTER);
      noFill();
      rect(0, 0, linelength*random(0.95, 1)*d/100, linelength*random(0.95, 1)*d/100);

      nya.endTransform();

      x=x+(float)Math.cos((angle))*stepSize;
      y=y+(float)Math.sin((angle))*stepSize;
    }


    helper_randomPrisms();
  }

  void dynamicShapes(PVector mouse) {
    float d = dist(x, y, mouse.x, mouse.y);
    println("x: ", x, "y", y, " mouse.x: ", mouse.x, "mouse.y: ", mouse.y);
    if (d>stepSize) {
      //
      lineModule = createShape();
      stroke(col);
      strokeWeight(1);
      noFill();
      lineModule.beginShape();

      lineModule.vertex(100, 0); // first point

      lineModule.vertex(0, 100);// /
      lineModule.vertex(-100, 0);// \
      lineModule.vertex(0, -100);// /
      lineModule.vertex(100, 0);// \

      lineModule.endShape();
      // gets the angle between the mouse and the location of the brush so that next point is drawn in the right intended location
      angle = (float)Math.atan2(mouse.y-y, mouse.x-x);


      nya.beginTransform(0);
      //
      //translate(mouse.x, mouse.y);
      rotate((angle-PI));
      shape(lineModule, 0, 0, d, noise(1+frameCount*0.0001)*10);
      //
      nya.endTransform();


      x=x+(float)Math.cos((angle))*stepSize;
      y=y+(float)Math.sin((angle))*stepSize;
    }
  }

  void textlines(PVector mouse) {
    float d = dist(x, y, mouse.x, mouse.y);
    if (d>stepSize) {
      // gets the angle between the mouse and the location of the brush so that next point is drawn in the right intended location
      angle = (float)Math.atan2(mouse.y-y, mouse.x-x);
      for ( int i=0; i<8; i++) {
        numX[i]+=random(-4, 4);
        numY[i]+=random(-4, 4);
      }

      nya.beginTransform(0);
      //
      //translate(x, y);
      rotate(angle+random(-0.1, 0.1));
      stroke(col);
      strokeWeight(stepSize/4);
      noFill();
      beginShape();
      curveVertex(numX[0], numY[0]);///////////////
      curveVertex(numX[0], numY[0]);///////////////
      curveVertex(numX[1], numY[1]);//mid
      curveVertex(numX[2], numY[2]);///////////////
      curveVertex(numX[3], numY[3]);// mid
      curveVertex(numX[4], numY[4]);///////////////
      curveVertex(numX[5], numY[5]);//mid
      curveVertex(numX[6], numY[6]);///////////////
      curveVertex(numX[7], numY[7]);//mid
      curveVertex(numX[0], numY[0]);///////////////
      curveVertex(numX[0], numY[0]);///////////////


      endShape();

      nya.endTransform();

      x=x+(float)Math.cos((angle))*stepSize;
      y=y+(float)Math.sin((angle))*stepSize;
    }


  }

  void rotatingLines(PVector mouse) {

    nya.beginTransform(0);
    strokeWeight(1);
    stroke(col);

    rotate(radians(angle));
    line(0, 0, linelength, 0);
    //
    nya.endTransform();

    angle +=5;

    linelength= int(noise(50+0.01*frameCount)*300);
  }
}


Final project Progress: Fatema Nassar, Ingy El Sheikh

Idea:

Basically, our idea was to imitate a sketchbook.The user gets to draw with their hands. There are 5 different generative art pieces, hence five different ‘brushes’ that the user can draw with.The user can choose which brush to use, by pushing  the button corresponding to each brush connect to. arduino.We also decided to incorporate an element of allowing the user to choose the color they want to draw with using a color gradient on processing, that we connected to Arduino through a slide potentiometer. The user can reset the drawing, showing them a blank sketch so they. start the drawing again. We also, wanted to incorporate allowing the user to save the drawing they made to make it more personal to each individual, but we haven’t done that yet.

Process:

This is the order we chose to complete the project in:

  1. First of all, we finalized the idea since we were not working together initially. We decided on everything we needed and the process we would complete the project in.
  2. The brushes were complete (the 5 generative art pieces that play as the brushes)
  3.  started working on the fiducial QR code (which was a pain !) in order to allow the user to use their hands to draw on the sketch, we decided we will have a glove with the QR stuck to it and the user will wear the glove to draw, luckily we were able to get it to work. Simultaneously we were working on the arduino side of things, completing first the color gradient. The color gradient on processing is actually an image and the get(); function was used to get the color at the position of the rectangle that was also mapped and connected to arduino through the slide potentiometer.
  4. Completed the the creation of the box using the laser cutter ! as well as finishing connecting the arcade buttons on arduino and creating code to connect it to processing, so that each button corresponds to a different brush.
  5. We then finished assembling the box and creating the reset button (to return the sketch back to being blank again). We decided to create a box, so that the arduino doesn’t show as it is not very visually pleasing, and in order to ensure that nothing moves around as we are using a lot of wires that may move around.
  6. We conducted user testing. 

Difficulties:

First of all, the QR code was very difficult to get to work, but after so many days of trying to figure it out we were able to get it work. On the arduino side of things, there were so many connection on the arduino, and so much code that sometimes, they were glitches and loose wires which was very frustrating.  But after several tests and removing the wires and re attaching them , we were able to get everything working well.

User Testing:

User #1:

User #2:

Feedback& next steps:

The feedback for both users was. generally the same:

  1. The camera is flipped, hence when the user moves their hand to the left the drawing draws to the right. We are aware of that and it is our next step.
  2. The QR code sometimes does not get picked up, so the drawing stops, this is because the user is holding the QR code as just a paper now,  so. when they hold it wrong on bend it backwards the camera doesn’t pick it up. In order to fix that we will stick it on a glove that the user will wear, so the qr is always the right side up, and straight, hence it will be fixed to the camera will always pick it up.
  3. Lastly, the users wanted us to incorporate adding the names of the brushes to the box so they know which brush corresponds to which button. However, we are a bit skeptical about doing so because we feel like we would be giving to much instruction on what the buttons do. We will take more opinions on this matter.

processing code:

import processing.video.*;
import jp.nyatla.nyar4psg.*;
import processing.serial.*;
import java.util.*;

int n=1, mode=1;
PVector mouseloc = new PVector(0, 0);
PVector p;

Capture cam;
MultiMarker nya;

Brush myBrush = new Brush(1, 2, mouseloc);


// serial stuff
Serial myPort;
int xPos=0;
int yPos;
boolean onOff=false;
boolean onOff2=false;
PImage myImage;
color pix;

int [] val = {0, 0, 0, 0, 0, 0, 0, 0};

void setup() {
  size(1280, 720, P3D);
  colorMode(RGB, 100);
  //fullScreen(P3D);

  printArray(Serial.list());
  String portname=Serial.list()[0];
  println(portname);
  myPort = new Serial(this, portname, 9600);
  myPort.clear();
  myPort.bufferUntil('\n');
  myImage  = loadImage("color.jpeg");

  printArray(Capture.list());
  cam=new Capture(this, 1280, 720);
  nya=new MultiMarker(this, width, height, "data/camera_para.dat", NyAR4PsgConfig.CONFIG_PSG);
  nya.addARMarker("data/patt.hiro", 40);//id=0
  cam.start();

  background(0);
  loadPixels();
}

int c=0;

void draw() {

  c++;
  if (cam.available() !=true) {
    return;
  }

  pushMatrix();
  cam.read();
  scale(-1, 1);
  //image(cam, -cam.width, 0);
  translate(width, 0);
  nya.detect(cam);
  nya.drawBackground(cam);
  popMatrix();


  if ((!nya.isExist(0))) {
    return;
  }
  p=nya.screen2ObjectCoordSystem(0, width/2, height/2);
  updatePixels();

  if (mode==1) {
    drawScreen();
  }
  // nya.endTransform();

  if (mode==2) {
    // save("pic"+String.valueOf(n++)+".tif");
    // delay(10);
    // takeScreenShot();
    // delay(10);
  }
}


void drawScreen() {
  //brush color picker
  imageMode(CENTER);
  fill(0);
  rectMode(CENTER);
  noStroke();
  rect(myImage.width/2, myImage.height/2, myImage.width, myImage.height*1.5);
  image(myImage, myImage.width/2, myImage.height/2, myImage.width, myImage.height);
  color pix = get(xPos, myImage.height/2);
  fill(pix);
  stroke(0);
  rect(xPos, myImage.height/2, 10, myImage.height*1.5);

  buttonPressed();
  myBrush.setCol(pix);

  mouseloc.x = p.x;
  mouseloc.y = p.x;
  myBrush.draww(mouseloc);
  loadPixels();
}

void buttonPressed() {
  if (val[0] == 1 ) {
    myBrush.setbrush(1);
  } else if (val[1] == 1 ) {
    myBrush.setbrush(2);
  } else if (val[2]==1 ) {
    myBrush.setbrush(3);
  } else if (val[3]==1 ) {
    myBrush.setbrush(4);
  } else if (val[4]==1 ) {
    myBrush.setbrush(5);
  }
  // reset
  else if (val[5]==1 ) {
    println("bla");
    background(0);
    loadPixels();
  }
}

void serialEvent(Serial myPort) {
  String s=myPort.readStringUntil('\n');
  s=trim(s);
  if (s!=null) {
    println(s);
    int values[]=int(split(s, ','));
    if (values.length==9) {
      xPos=(int)map(values[0], 89, 912, 0, myImage.width);

      //yPos=(int)map(values[1],0,1023,0, height);
      //yPos=height/2-230;
      //myBrush.setbrush(2);

      val[0] = (int)values[1];  // read it and store it in val[]
      val[1] = (int)values[2];
      val[2] = (int)values[3];
      val[3] = (int)values[4];
      val[4] = (int)values[5];
      val[5] = (int)values[6];//reset
      val[6] = (int)values[7];//draw
      val[7] = (int)values[8];//saveScreen
    }
    myPort.write(int(onOff)+","+int(onOff2)+"\n");
  }
}
class Brush {

  int brushN;

  float stepSize, linelength, diam;
  float angle;
  float x, y, tempX, tempY;
  color col;
  //
  int counter;
  PFont font;
  float fontSize;
  String letters;
  float  fontSizeMin;
  //

  //linemoduelw
  PShape lineModule;

  float [] numX={ -100, -70, 0, 70, 100, 70, 0, -70};
  float [] numY={ 0, 70, 100, 70, 0, -70, -100, -70};

  Brush(int defaultt, float step_size, PVector mouse) {
    // 1 blur
    // 2 random cylinder
    // 3 dynamic shapes
    // 4 text lines
    // 5 rotating lines
    brushN = defaultt;
    stepSize = step_size;
    angle = 270;
    x = mouseX;
    y = mouse.y;
    col = color(255);
    linelength = 100;
    diam = 2;
    fontSizeMin=200;

    fontSize=50;
    letters = "It isn't true that my mattress is made of cotton candy. It was the first time he had ever seen someone cook dinner on an elephant. Homesickness became contagious in the young campers' cabin. Every manager should be able to recite at least ten nursery rhymes backward.";
  }
  void setbrush(int brushn) {
    brushN=brushn;
  }
  void setSize(float size) {
    stepSize=size;
  }
  void setCol(int colorr) {
    col=colorr;
  }
  void setLineLength(float len) {
    linelength=len;
  }
  void setDiam(float diamm) {
    diam= diamm;
  }

  void setAngle(float ang) {
    angle=ang;
  }

  void draww(PVector mouse) {

    switch (brushN) {
    case 2:
      setLineLength(100);
      setSize(5);
      setDiam(2);
      blur(mouse);
      break;

    case 3:
      setLineLength(100);
      setSize(3);
      randomprisms(mouse);
      break;

    case 4:

      dynamicShapes(mouse);
      break;

    case 5:
      textlines(mouse);
      break;

    default :
      setLineLength(100);
      strokeWeight(1);
      rotatingLines(mouse);
      break;
    }
  }

  void helper_randomPrisms() {
    float angle = TWO_PI/8;
    float rad = 100 * random(0.5, 1);
    for (int i=0; i<8; i++) {
      numX[i]=cos(angle * i) * rad;
      numY[i]=sin(angle * i) * rad;
    }
  }

  void blur(PVector mouse) {
    float [] blurX ={ -stepSize, -stepSize, 0, stepSize, stepSize, stepSize, 0, -stepSize};
    float [] blurY ={         0, stepSize, stepSize, stepSize, 0, -stepSize, -stepSize, -stepSize};
    float d = dist(x, y, mouse.x, mouse.y);

    if (d > stepSize) {
      // gets the angle between the mouse and the location of the brush so that next point is drawn in the right intended location
      angle = (float)Math.atan2(mouse.y-y, mouse.x-x);

      tempX = x;
      tempY = y;

      nya.beginTransform(0);
      //
      //translate(x, y);
      rotate(angle);
      noStroke();
      fill(col, 40);

      //
      for (int i=0; i<500; i++) {
        int dir =  int(random(0, 7));
        rotate(random(5));
        println(blurX[dir]);
        tempX=blurX[dir]*random(1, 10);
        tempY=blurY[dir]*random(1, 10);
        circle(tempX, tempY, diam);
      }
      //
      nya.endTransform();

      x = mouse.x;
      y = mouse.y;
    }
  }

  void randomprisms(PVector mouse) {
    float d = dist(x, y, mouse.x, mouse.y);

    if (d>stepSize) {
      // gets the angle between the mouse and the location of the brush so that next point is drawn in the right intended location
      angle = (float)Math.atan2(mouse.y-y, mouse.x-x);
      for ( int i=0; i<8; i++) {
        numX[i]+=random(0-stepSize/2, stepSize/2);
        numY[i]+=random(0-stepSize/2, stepSize/2);
      }

      nya.beginTransform(0);
      //
      //translate(x, y);
      rotate(angle+random(-0.1, 0.1));
      stroke(col);
      strokeWeight(stepSize/4);
      rectMode(CENTER);
      noFill();
      rect(0, 0, linelength*random(0.95, 1)*d/100, linelength*random(0.95, 1)*d/100);

      nya.endTransform();

      x=x+(float)Math.cos((angle))*stepSize;
      y=y+(float)Math.sin((angle))*stepSize;
    }


    helper_randomPrisms();
  }

  void dynamicShapes(PVector mouse) {
    float d = dist(x, y, mouse.x, mouse.y);
    println("x: ",x,"y", y," mouse.x: ", mouse.x,"mouse.y: " ,mouse.y);
    if (d>stepSize) {
      //
      lineModule = createShape();
      stroke(col);
      strokeWeight(1);
      noFill();
      lineModule.beginShape();

      lineModule.vertex(100, 0); // first point

      lineModule.vertex(0, 100);// /
      lineModule.vertex(-100, 0);// \
      lineModule.vertex(0, -100);// /
      lineModule.vertex(100, 0);// \

      lineModule.endShape();
      // gets the angle between the mouse and the location of the brush so that next point is drawn in the right intended location
      angle = (float)Math.atan2(mouse.y-y, mouse.x-x);


      nya.beginTransform(0);
      //
      //translate(mouse.x, mouse.y);
      rotate((angle-PI));
      shape(lineModule, 0, 0, d, noise(1+frameCount*0.0001)*10);
      //
      nya.endTransform();


      x=x+(float)Math.cos((angle))*stepSize;
      y=y+(float)Math.sin((angle))*stepSize;
    }
  }

  void textlines(PVector mouse) {
    float d = dist(x, y, mouse.x, mouse.y);
    d= constrain(d, 60, 7000);
    if (d>stepSize) {
      // gets the angle between the mouse and the location of the brush so that next point is drawn in the right intended location
      angle = (float)Math.atan2(mouse.y-y, mouse.x-x);
      fontSize= fontSizeMin*60/d;
      font = createFont("Calibri", fontSize);

      textFont(font, fontSize);
      char newLetter = letters.charAt(counter);
      stepSize = textWidth(newLetter);
      fill(col);
      //stroke(col);


      nya.beginTransform(0);
      //
      //translate(x, y);
      
      rotate(angle);
      text(newLetter, 0, 0);
      //
      nya.endTransform();

      counter++;

      if (counter>letters.length()-1) counter=0;

      x = x + (float)Math.cos(angle)*stepSize;
      y = y + (float)Math.sin(angle)*stepSize;
    }
  }

  void rotatingLines(PVector mouse) {

    nya.beginTransform(0);
    strokeWeight(1);
    stroke(col);
    
    rotate(radians(angle));
    line(0, 0, linelength, 0);
    //
    nya.endTransform();

    angle +=5;

    linelength= int(noise(50+0.01*frameCount)*300);
  }
}

Arduino code:

int left = 0;
int right = 0;
int buttonOne = 9;
int buttonTwo = 10;
int buttonThree = 11;
int buttonFour = 12;
int buttonFive = 13;
int buttonSix = 3;//reset
int buttonSeven = 5;//Draw
int buttonEight = 4;//saveScreen


int val1 = 0;
int val2 = 0;
int val3 = 0;
int val4 = 0;
int val5 = 0;
int val6 = 0;
int val7 = 0;
int val8 = 0;

void setup() {
  pinMode(buttonOne, INPUT);
  pinMode(buttonTwo, INPUT);
  pinMode(buttonThree, INPUT);
  pinMode(buttonFour, INPUT);
  //   pinMode(buttonFive, INPUT);
  Serial.begin(9600);
  Serial.println("0,0");

}
void loop() {
  while (Serial.available()) {
    right = Serial.parseInt();
    left = Serial.parseInt();
    if (Serial.read() == '\n') {

      int sensor = analogRead(A0);
      delay(1);
      val1 = digitalRead(buttonOne);
      delay(1);

      val2 = digitalRead(buttonTwo);
      delay(1);

      val3 = digitalRead(buttonThree);
      delay(1);
      //
      val4 = digitalRead(buttonFour);
      delay(1);

      val5 = digitalRead(buttonFive);
      delay(1);

      val6 = digitalRead(buttonSix);
      delay(1);

      val7 = digitalRead(buttonSeven);
      delay(1);
      
      val8 = digitalRead(buttonEight);
      delay(1);


      Serial.print(sensor);
      Serial.print(',');
      Serial.print(val1);
      Serial.print(',');
      Serial.print(val2);
      Serial.print(',');
      Serial.print(val3);
      Serial.print(',');
      Serial.print(val4);
      Serial.print(',');
      Serial.print(val5);
      Serial.print(',');
      Serial.print(val6);//
      Serial.print(',');
      Serial.print(val7);//
      Serial.print(',');
      Serial.println(val8);
    }
  }


}


Final project progress

Final idea:

Thinking of my final project idea, this crossed my mind.We are surrounded by the four classical elements (air, earth, fire, and water) within our environment, we interact with these elements whether we see it or not everyday. I wanted to bring that interaction to life through this project.The idea is to create 4 generative art pieces for each of these elements, that represents them in some way(using different patterns and colors etc..). Then audience member will be asked to choose which element they want to interact with. The processing art piece created for that element will move with the person interacting with it so that they feel like they are controlling the elements in a way or are In harmony with them.

I will be working solo

Material/space needs:

In order for the project to succeeded I will definitely be needing:

  1. Kinect /kinect adapter
  2. projector (space for projector, I need space and a projector because using a small screen to move the generative will be very underwhelming)
  3. speakers (sound effects for each element)

Hardest parts:

I think the hardest parts will be getting he Kinect to accurately locate the person, and to connect it to the processing sketches, hopefully Daniel Shiffman’s videos will come in handy. I have already started working on all the generative art pieces.

Progress so far:

These are what I have in mind for each element’s generative art piece :

For the water  I already start working on it and this is what I have so far:

For the wind I am planning to use perlin noise and create something like this

25 Perlin noise ideas | perlin noise, noise, generative art

For the earth  I plan to use Daniel shieffmens recursive tree as reference, and add more details to it.

For the fire I intend to use the coding train’s challenge #103, and create a fire smoke like effect.

Regarding the Kinect part of the project, I have check out the Kinect from the interactive media lab, but came to realize that I need an adapter that is specific to the Kinect that I don’t have yet. But I did work on the coding aspect of the Kinect to track the average location and this is what I have so far (reference:Daniel Shiffman):

import org.openkinect.freenect.*;
import org.openkinect.processing.*;

// The kinect stuff is happening in another class
KinectTracker tracker;
Kinect kinect;


void setup() {
  size(640, 520);
  kinect = new Kinect(this);
  tracker = new KinectTracker();
}

void draw() {
  background(255);

  // Run the tracking analysis
  tracker.track();
  // Show the image
  tracker.display();

  // Let's draw the raw location
  PVector v1 = tracker.getPos();
  fill(50, 100, 250, 200);
  noStroke();
  ellipse(v1.x, v1.y, 20, 20);

  // Let's draw the "lerped" location
  PVector v2 = tracker.getLerpedPos();
  fill(100, 250, 50, 200);
  noStroke();
  ellipse(v2.x, v2.y, 20, 20);

  // Display some info
  int t = tracker.getThreshold();
  fill(0);
  text("threshold: " + t + "    " +  "framerate: " + int(frameRate) + "    " + 
    "UP increase threshold, DOWN decrease threshold", 10, 500);
}

// Adjust the threshold with key presses
void keyPressed() {
  int t = tracker.getThreshold();
  if (key == CODED) {
    if (keyCode == UP) {
      t+=5;
      tracker.setThreshold(t);
    } else if (keyCode == DOWN) {
      t-=5;
      tracker.setThreshold(t);
    }
  }
}
class KinectTracker {

  // Depth threshold
  int threshold = 745;

  // Raw location
  PVector loc;

  // Interpolated location
  PVector lerpedLoc;

  // Depth data
  int[] depth;
  
  // What we'll show the user
  PImage display;
   
  KinectTracker() {
    // This is an awkard use of a global variable here
    // But doing it this way for simplicity
    kinect.initDepth();
    kinect.enableMirror(true);
    // Make a blank image
    display = createImage(kinect.width, kinect.height, RGB);
    // Set up the vectors
    loc = new PVector(0, 0);
    lerpedLoc = new PVector(0, 0);
  }

  void track() {
    // Get the raw depth as array of integers
    depth = kinect.getRawDepth();

    // Being overly cautious here
    if (depth == null) return;

    float sumX = 0;
    float sumY = 0;
    float count = 0;

    for (int x = 0; x < kinect.width; x++) {
      for (int y = 0; y < kinect.height; y++) {
        
        int offset =  x + y*kinect.width;
        // Grabbing the raw depth
        int rawDepth = depth[offset];

        // Testing against threshold
        if (rawDepth < threshold) {
          sumX += x;
          sumY += y;
          count++;
        }
      }
    }
    // As long as we found something
    if (count != 0) {
      loc = new PVector(sumX/count, sumY/count);
    }

    // Interpolating the location, doing it arbitrarily for now
    lerpedLoc.x = PApplet.lerp(lerpedLoc.x, loc.x, 0.3f);
    lerpedLoc.y = PApplet.lerp(lerpedLoc.y, loc.y, 0.3f);
  }

  PVector getLerpedPos() {
    return lerpedLoc;
  }

  PVector getPos() {
    return loc;
  }

  void display() {
    PImage img = kinect.getDepthImage();

    // Being overly cautious here
    if (depth == null || img == null) return;

    // Going to rewrite the depth image to show which pixels are in threshold
    // A lot of this is redundant, but this is just for demonstration purposes
    display.loadPixels();
    for (int x = 0; x < kinect.width; x++) {
      for (int y = 0; y < kinect.height; y++) {

        int offset = x + y * kinect.width;
        // Raw depth
        int rawDepth = depth[offset];
        int pix = x + y * display.width;
        if (rawDepth < threshold) {
          // A red color instead
          display.pixels[pix] = color(150, 50, 50);
        } else {
          display.pixels[pix] = img.pixels[offset];
        }
      }
    }
    display.updatePixels();

    // Draw the image
    image(display, 0, 0);
  }

  int getThreshold() {
    return threshold;
  }

  void setThreshold(int t) {
    threshold =  t;
  }
}


The four elements of nature: interactive art using processing and Arduino

Idea:

The four elements of nature are water, air, earth, and fire. The idea is to create 4 generative art pieces for each of these elements, that represents them in some way(using different patterns and colors etc..). Then audience member will be asked to choose which element they want to interact with. The processing art piece created for that element will move with the person interacting with it so that they feel like they are controlling the elements in a way or are In harmony with them.

Method #1:

I am planning to use a kinect in order to detect the movement of the audience, and program a Processing sketch that will analyze the data from the Kinect and translate that into patterns and colors. Arduino will be used as kind of the controller in the project. Basically, Arduino will be used to choose which element you want to interact with.

I am also not sure if this is possible, but I want to use the potentiometer to enhance on the generative art, for example if someone is interacting with the fire element, turning the potentiometer would draw even more flames and enhance on the drawing. Or if someone is interacting with the earth element turning the potentiometer would make more towers and trees grow etc..

Method #2:

the second method to do this would be just by using an ultrasonic distance sensor and whenever someone comes close to the sensor the generative art piece would gradually fade in. Whenever they remove their hand it would gradually fade out.

I prefer the first method but it is much more complex and a lot of issues may arise.


In class exercises

Exercise 1:

Arduino Code:

int left = 0;
int right = 0;

void setup() {
  Serial.begin(9600);
  Serial.println("0,0");
  pinMode(2, OUTPUT);
  pinMode(5, OUTPUT);
}

void loop() {
  while (Serial.available()) {
    right = Serial.parseInt();
    left = Serial.parseInt();
    if (Serial.read() == '\n') {
      digitalWrite(2, right);
      digitalWrite(5, left);
      int sensor = analogRead(A0);
      delay(1);
      int sensor2 = analogRead(A1);
      delay(1);
      Serial.print(sensor);
      Serial.print(',');
      Serial.println(sensor2);
    }
  }
}

Processing code:

import processing.serial.*;
Serial myPort;
int xPos=0;
int yPos;
boolean onOff=false;
boolean onOff2=false;

void setup(){
  size(960,720);
  printArray(Serial.list());
  String portname=Serial.list()[2];
  println(portname);
  myPort = new Serial(this,portname,9600);
  myPort.clear();
  myPort.bufferUntil('\n');
}

void draw(){
  background(255);

  ellipse(xPos,yPos,30,30);
  
  if (mousePressed){
    if(mouseX<=width/2)
      onOff2=true;
    else
      onOff=true;
  }else{
    onOff=onOff2=false;
  }
}

void serialEvent(Serial myPort){
  String s=myPort.readStringUntil('\n');
  s=trim(s);
  if (s!=null){
    println(s);
    int values[]=int(split(s,','));
    if (values.length==2){
      xPos=(int)map(values[0],0,1023,0, width);
      //yPos=(int)map(values[1],0,1023,0, height);
        yPos=height/2;
    }
  }
  myPort.write(int(onOff)+","+int(onOff2)+"\n");
}

Exercise 2:

Arduino code:

int left = 0;
int right = 0;

void setup() {
  Serial.begin(9600);
  Serial.println("0,0");
  pinMode(3, OUTPUT);
  pinMode(5, OUTPUT);
}

void loop() {
  while (Serial.available()) {
    right = Serial.parseInt();
    left = Serial.parseInt();
    if (Serial.read() == '\n') {
      analogWrite(3, right);
      analogWrite(5, left);
      int sensor = analogRead(A0);
      delay(1);
      int sensor2 = analogRead(A1);
      delay(1);
      Serial.print(sensor);
      Serial.print(',');
      Serial.println(sensor2);
    }
  }
}


Processing code:

import processing.serial.*;
Serial myPort;
int xPos=0;
int yPos=0;
int onOff=0;
int onOff2=0;
int brightness=0;

void setup() {
  size(960, 720);
  printArray(Serial.list());
  String portname=Serial.list()[0];
  println(portname);
  myPort = new Serial(this, portname, 9600);
  myPort.clear();
  myPort.bufferUntil('\n');
}

void draw() {
  background(255);
  brightness=int(map(mouseY, 0, height, 0, 255));
  ellipse(xPos, yPos, 30, 30);
  if (mousePressed) {
    if (mouseX<=width/2) {
      onOff2=brightness;
    } else {
      onOff=brightness;
    }
  } else {
    onOff=onOff2=0;
  }
}

void serialEvent(Serial myPort) {
  String s=myPort.readStringUntil('\n');
  s=trim(s);
  if (s!=null) {
    println(s);
    int values[]=int(split(s, ','));
    if (values.length==2) {
      xPos=(int)map(values[0], 0, 1023, 0, width);
      //yPos=(int)map(values[1],0,1023,0, height);
      yPos=mouseY;
    }
  }
  myPort.write(int(onOff)+","+int(onOff2)+"\n");
}


Exercise 3:

Arduino code:

const int wind = A0;
const int brightness = 3;
int onOff = 0;

void setup() {
  Serial.begin(9600);
  Serial.println("0");


}

void loop() {
  while (Serial.available()) {
    onOff = Serial.parseInt();
    if (Serial.read() == '\n') {
      int sensor = analogRead(wind);
      delay(1);
      Serial.println(sensor);
      if (onOff == 1) {
        analogWrite(brightness, 255);
      } else {
        analogWrite(brightness, 0);
      }
    }
  }
}


Processing code:

import processing.serial.*;
Serial myPort;

PVector velocity;
PVector gravity;
PVector position;
PVector acceleration;
PVector wind;
float drag = 0.99;
float mass = 50;
float hDampening;


int pos;
int prevPos = 0;
boolean Right = true;
int maxPos;

void setup() {
  size(640, 360);
  noFill();
  printArray(Serial.list());
  String portname=Serial.list()[2]; 
  myPort = new Serial(this, portname, 9600);
  myPort.clear();
  myPort.bufferUntil('\n');


  velocity = new PVector(0, 0);
    position = new PVector(width/2, 0);
  acceleration = new PVector(0, 0);
  gravity = new PVector(0, 0.5*mass);
  wind = new PVector(0, 0);
  hDampening=map(mass, 15, 80, .98, .96);
  maxPos = (int)map(1023, 0, 1023, 0, width*.01);
 
}

void draw() {
  background(255);
  if (!keyPressed) {
    if (prevPos < pos) {
     Right = true;
    } else if (prevPos > pos) {
Right = false;
    }
    if (!Right) {
      wind.x = -(maxPos-pos);
    } else {
      wind.x = pos;
    }
    velocity.x*=hDampening;
  }
  applyForce(wind);
  applyForce(gravity);
  velocity.add(acceleration);
  velocity.mult(drag);
  position.add(velocity);
  acceleration.mult(0);
  ellipse(position.x, position.y, mass, mass);
  if (position.y > height-mass/2) {
    velocity.y *= -0.9;  // A little dampening when hitting the bottom
    position.y = height-mass/2;
  }
  prevPos = pos;
}

void applyForce(PVector force) {
 
  PVector f = PVector.div(force, mass);
  acceleration.add(f);
}

void keyPressed() {
  if (keyCode==LEFT) {
    wind.x=-1;
  }
  if (keyCode==RIGHT) {
    wind.x=1;
  }
  if (key==' ') {
    mass=random(15, 80);
    position.y=-mass;
    velocity.mult(0);
  }
}

void serialEvent(Serial myPort) {
  String s=myPort.readStringUntil('\n');
  s=trim(s);
  if (s!=null) {
    int value = int(s);
    pos = (int)map(value, 0, 1023, 0, width*.01);
  }
  if (round(velocity.y) < 0) {
    myPort.write(1 + "\n");
  } else {
    myPort.write(0 + "\n");
  }
}

Electronic Drums: Fatema Nassar &Ingy

General Idea:

After a lot of thinking and research we decided we wanted to try something and we honestly didn’t know if it would work or not. Our initial Idea was to created some sort of drum set. We felt like it would be a cool challenge to take on! The idea is to have 6 pads attached to a board, and each pad creates a different sound or tone when you press on it.

First attempt:

In our first attempt we started trying to create the “drums” using piezo buzzers. We assembled together a foam board with 6 pads, each with an piezo buzzer attached to it. We think we got a bit to courageous and we put together the whole instrument and it did not end up fully working. We believe the conceptualization and idea could work (it did work to a certain extent).

We think the reason why it didn’t work is because we wanted each pad to create a sound when we press on it. However, we believe the vibrations created by pressing on one of the pads to create the sound was also picked up by the other pads which made the buzzer go crazy. The serial monitor is what helped us get to that conclusion. We tried to fix it however, we did not have enough time to do so. Hence, we decided to switch it up a bit.

The piezo buzzers we had to remove 🙁

Attempt 2 (This one actually worked :))

We met again, and decided to use force sensitive resistors instead. We reassembled the board and substituted the piezo buzzer with force sensitive resistors, we also added a layer of sponge in the middle between the board and the separate tabs. Each pad has a different tune when pressed on.

We then decided to use a button as our digital read, as a switch for Led lights that we added. The Leds only light up when you press on the pads. So the button switches the LEDS on and off but they only light up when we press on the tabs, if we press on the tabs when the button is off the LEDS won’t light up we we press on the tabs.

This video shows how the button is used:

Final touches:

Just to add some visual appeal to the board we decided to print out pictures off different drums to complete a drum set and stick them on each pad. Even thought the tunes don’t really sound like drums lol 🙂

Finally this our result!

#include "pitches.h"

const int inputPins[] = { A0, A1, 2, A3, A4, A5};
int inputs[6];
int threshold[] = {250, 900, 940, 960, 900, 750};
int leds[] = {2, 3, 4, 5, 6, 7};
bool flag = HIGH;
bool prev, curr;
const int buzzerPin = 13, button = 12;
long timer[6];

int notes[10] = {NOTE_C4, NOTE_D4, NOTE_E4, NOTE_F4, NOTE_G4, NOTE_A4, NOTE_B4, NOTE_C5, NOTE_D5, NOTE_E5};

void setup() {
  // put your setup code here, to run once:
  Serial.begin(9600);
  for (int i = 0; i < sizeof(inputPins); i++) {
    pinMode(inputPins[i], INPUT);
  }
  pinMode(button, INPUT);
  for (int i = 0; i < sizeof(leds); i++) {
    pinMode(leds[i], OUTPUT);
  }
  pinMode(buzzerPin, OUTPUT);

}

void loop() {
  if (curr == 1 && curr != prev) {
    flag = !flag;
    Serial.println("flag");
  }
  curr = digitalRead(button);
  for (int i = 1; i < 6; i++) {
    inputs[i] = analogRead(inputPins[i]);

    Serial.print(i + 1);
    Serial.print(" : ");

    Serial.print(inputs[i]);
    Serial.print(" ");

    if (inputs[i] > threshold[i]) {
      tone(buzzerPin, notes[i * 2], 500);
      if (flag) {
        digitalWrite(leds[i], HIGH);
      }
      else {
        digitalWrite(leds[i], LOW);
      }

    }
    else {
      digitalWrite(leds[i], LOW);
    }


  }
  Serial.println("");

  for (int j = 0; j < 6; j++) {

  }
  prev = digitalRead(button);
}


Angry Dog!

Inspiration/idea:

This idea  came from me really missing my dog back home:(

If you are a dog owner you know they get really upset/angry when you stop petting them/being near to them. So I decided to use the ldr sensor (analog sensor) to imitate the motion of petting/being near to the dog. The dogs eyes start being lit up with red led light which portray the dogs anger, then when you get closer and touch the ldr sensor the dogs eyes stop glowing (he stops being mad). The touching of the sensor is like touching or petting the dog. Another option to make the dogs eyes stop glowing is giving him a treat which is portrayed using a yellow led light, when you click on the button  (digital sensor) you give the dog the treat so his eyes stop glowing and he isn’t upset anymore!

Process:

First of all I wanted to get the more difficult part of the process out of the way which is the ldr. I used the basic way to make an ldr, and followed the steps on our blog. Then I used constrain (map) in order to get the led lights to dim and brighten up all the way. Where I map the values from half the max until the max of the photocell readings into 0 -> 255 so that as they increase the brightness increases, and constrain that within 0 to 255. hence fulfilling the analog fashion needed for the project. This is the video of the ldr sensor working alone before continuing the rest of the project.


I  also extrapolated the power and the ground to the rest of the board using two jumper wires, in order to give myself extra space to work with. There I put the button digital switch to control the idea of the treat. The button is used to switch off the eyes as well and the yellow led with the treat on it, hence presenting the digital fashion needed for the project.


Finishing touches:

In order to show the story in a more creative way, I printed out images of the dog and the bone and made the led lights to be the eyes of the dog. And stuck the image of the bone to the yellow led light and the button itself to make it clear that pressing the button means giving the dog a bone.

Struggles:

First of all, I face a struggle in the beginning where my ldr sensor was not working at all, I talked to professor Aaron about it and it turns out the actual ldr was not working so I substituted it for another one and it worked, this took up a lot of my time. Another problem I faced was that I couldn’t get the leds to work with the ldr and button simultaneously, then I was able to figure it out by adding the analog write and digital write in an if statement as seen below:

int currentButtonState = digitalRead(buttonPin);
Serial.println(currentButtonState);

  // if the button is currently being prssed down, AND during the last frame is wasn't pressed down
  if (currentButtonState == HIGH && prevButtonState == LOW) {
      // flip the LED state

       ledState1 = !ledState1;
    ledState2 = !ledState2;
  }
      if (ledState1 == HIGH && ledState2 == HIGH) {           //if the bulbs were previously off then were turned on by button
    
      int ldrValue =analogRead(A0);                  //store reading from photocell
      int brightness = constrain( map(ldrValue, 596, 850, 0, 255), 0, 255);       //map the values from half the max until the max of the photocell readings into 0 -> 255 so that as they increase teh brightness increases, and constrain that within 0 to 255
      
Serial.println(ldrValue);

    analogWrite(ledRight, brightness);             //change output of sun bulb accordingly
    analogWrite(ledLeft, brightness);
    digitalWrite(ledPin, ledState2);//change output of moon bulb accordingly
    }
 else {
    digitalWrite(ledRight, ledState2); 
    digitalWrite(ledLeft, ledState2); //make bulbs's state = LOW, hence turned off
    digitalWrite(ledPin, ledState2);
    
    }

    prevButtonState = currentButtonState;

Also, another struggle I face was that the led light was not dimming and lighting up the way I wanted it to, in order to fix that I used constrain(map) and added the values I needed in order to make the led fully light up and dim down with the ldr.

Final result:


Code:

int buttonPin = 2;

int ledPin = 6;


int prevButtonState = LOW;


int brightness;
int ledLeft = 3;
int ledRight = 5;
int ledState1; 
int ledState2;

 
void setup() {


 pinMode(ledPin, OUTPUT);

pinMode(ledRight,OUTPUT);
pinMode(ledLeft,OUTPUT);
pinMode(buttonPin, INPUT);
Serial.begin(9600);
}

void loop() {


delay(20);


int currentButtonState = digitalRead(buttonPin);
Serial.println(currentButtonState);

  // if the button is currently being prssed down, AND during the last frame is wasn't pressed down
  if (currentButtonState == HIGH && prevButtonState == LOW) {
      // flip the LED state

       ledState1 = !ledState1;
    ledState2 = !ledState2;
  }
      if (ledState1 == HIGH && ledState2 == HIGH) {           
    
      int ldrValue =analogRead(A0);                  //store reading from photocell
      int brightness = constrain( map(ldrValue, 596, 850, 0, 255), 0, 255);       //map the values from half the max until the max of the photocell readings into 0 -> 255 so that as they increase teh brightness increases, and constrain that within 0 to 255
      
Serial.println(ldrValue);

    analogWrite(ledRight, brightness);             
    analogWrite(ledLeft, brightness);
    digitalWrite(ledPin, ledState2);
    }
 else {
    digitalWrite(ledRight, ledState2); 
    digitalWrite(ledLeft, ledState2); 
    digitalWrite(ledPin, ledState2);
    
    }

    prevButtonState = currentButtonState;    
 

  }


Get your feet off the coffee table!

Idea:

My idea was inspired by a childhood memory that I think a lot of us will resonate with. You know when you used to put your feet up on the table as a child and your moms face would just turn red and she would yell at you to take you feet off of her coffee table. In this production the led light will turn red as soon as I put my feet on the coffee table 🙂

Implementation:

I attached one jumper cable to the digital input PIN number 10 and connected it with the positive terminal on the led light, while the short leg (negative terminal) is connected to ground through a 330 ohm resistor.The “switch” in this case were two jumper cables (stuck to the table) where when they touch the foil wrapped around my leg, make the led light up. One of the jumper cables was connected to another jumper cable that is connected to PIN number 2. While the other jumper cable that the “switch” consisted off was connected another jumper cable that was connected to ground. Hence, pin 10 is two turn the led on and off while pin 2 will check if the foil has pin touched or not.

Code:

void setup() {
  pinMode(10,OUTPUT);
  pinMode(2,INPUT_PULLUP);
  

}

void loop() {

  if(digitalRead(2)==LOW){
    
  digitalWrite(10,HIGH);
  }

  if(digitalRead(2)==HIGH){
digitalWrite(10,LOW);
}
}

Final project:


Midterm Final: Save NYUAD!

Building up on the progress I posted a while ago, I am happy the process went smoothly. I did face a few minor issues but the help from professor Aaron and Jack, aided me in getting through them.

Issues and solutions:

First of all an initial issue that I had regarding the game was that I wasn’t able to fix the issue that the thief was above the darkness. Initially I was using load pixels/ image processing with pixels which did make the flashlight effect, but after professor Aaron’s help, the conclusion that in order to make the thief behind the darkness as well I had to switch to using a PGraphic object was reached. I drew the nyu background and the thief image into the pgraphic object and so I can access the pixels of that pgraphic object in the for loops, instead of just the background image.


void theGame(){
  
    black = createGraphics(1200, 800);
  black.beginDraw();
  black.background(0);
  black.endDraw();
 
  mask = createGraphics(1200, 800);
  mask.beginDraw();
  mask.background(0);
  mask.endDraw(); 

pg=createGraphics(1200,800);
pg.beginDraw();

 
  pg.image(nyu,0,0);
    pg.image(thief,x,y);
   if(dist(x,y,mouseX,mouseY)<100){
     if(mousePressed==true){
        gameState="WIN";
       file.stop();
       if(!sound.isPlaying());
  sound.play();
     } 
   }
   
  pg.endDraw();
   
  mask.beginDraw();
  mask.background(0);
  mask.noStroke();
  mask.fill(255);
   
  mask.ellipse(mouseX, mouseY, 200, 200);
 
  mask.endDraw();
  
  pg.mask(mask);

Another issue I faced was that using keyPressed after game over to return to the play mode did not work as I had to keep pressing the key, hence in order to fix this I created a new function “reset game”, which helped fix this issue as well as replay the sounds and the reset the time back to countdown from 5.

void resetGame(){
  if (keyPressed==true){
 gameState="PLAY";
 file.loop();
 laugh.stop();
 sound.stop();
  timeLeft=6;
}

Further development:

Developments I mad since the progress post are extensive. First of all I added the start page with instructions and the “win” or “lose” pages as well, with the transitions from each one to the other.

Intro page:
Win page:

Game Over page:

I also made the thief image appear at random locations every time a new game is played, and included the mouse pressed event for the player to be able to press on the thief and win.

Finalizing minor details:

In my opinion the finer details brought the whole project together. The sound effects of the thief laughing when you lose the game as well as the alarm sirens makes the game more interesting. The timer makes the suspenseful mood , making the game much more fun to play. Adding the timer was bit confusing but with the help of this youtube video I was able to do it (https://www.youtube.com/watch?v=JXqukW44Dhs&t=813s) .

The sounds I used were gotten from (https://freesound.org/)

Final Result:

This is the zip code if anyone wants to try out the game.

midterm__work_on_this_

Code:

import processing.sound.*;
SoundFile file;
SoundFile sound;
SoundFile laugh;


PImage nyu;
PImage thief;
PImage introPic;
PImage winningPic;
PImage gameOver;
PImage image;
 float r1 ;
 float r2 ;


int buttonX, buttonY;
int buttonWidth, buttonHeight;

color buttonColor, baseColor;    //colors of play button

PFont f; 
PGraphics pg;
PGraphics black, mask;
String gameState;
float x;
float y;

Timer countdownTimer;
int timeLeft;


void setup() {
  size(1200, 800); 
gameState=("START");

  PFont.list();

 f = createFont("Times New Roman",75);

x = random(-20, 1100);
 y = random(-20, 600);

nyu=loadImage("nyu.png");
thief=loadImage("thief.png");
    
  buttonColor = color(0);
  baseColor = color(102);
  buttonWidth = 200;
  buttonHeight = 80;
  buttonX = width/2+300;
  buttonY = 3*height/4 + 100;     
  
    countdownTimer=new Timer(1000);
    timeLeft=6;
file= new SoundFile(this,"theme.mp3");
sound= new SoundFile(this,"alarm.wav");
laugh= new SoundFile(this,"evil laugh.wav");
}


void draw() {
  background(0);

 
if (gameState=="START"){

  introScreen();
  if (keyPressed==true){
       file.loop();
    gameState="PLAY"; //transition to play state if key pressed
    countdownTimer.start();
  }       
}

else if (gameState=="PLAY"){
  theGame();
}

else if (gameState=="WIN"){
 
 congratsScreen();
 if (keyPressed==true){
    gameState="PLAY";
    resetGame();
    x = random(-20, 1100);
 y = random(-20, 600);
}
}
else if (gameState=="LOSE"){
  gameOver();
    
    resetGame();

    x = random(-20, 1100);
 y = random(-20, 600);
}
}
     
  //code for the actual game
 void theGame(){
  //pgraphics
    black = createGraphics(1200, 800);
  black.beginDraw();
  black.background(0);
  black.endDraw();
 
  mask = createGraphics(1200, 800);
  mask.beginDraw();
  mask.background(0);
  mask.endDraw(); 

pg=createGraphics(1200,800);
pg.beginDraw();

 //code for allowing the players to click on the thief image
  pg.image(nyu,0,0);
    pg.image(thief,x,y);
   if(dist(x,y,mouseX,mouseY)<100){
     if(mousePressed==true){
        gameState="WIN"; //if the player presses on the image the player wins
       file.stop();
       if(!sound.isPlaying());
  sound.play();
     } 
   }
   
  pg.endDraw();
   
  mask.beginDraw();
  mask.background(0);
  mask.noStroke();
  mask.fill(255);
   
  mask.ellipse(mouseX, mouseY, 200, 200);
 
  mask.endDraw();
  
  pg.mask(mask);


  image(black,0,0);
   image(pg, 0, 0);
   //countdown timer logic
   if (countdownTimer.complete()==true){
     if(timeLeft>1){
       timeLeft--;
       countdownTimer.start();
   }else{
     gameState="LOSE"; //code for if the timer finishes the player loses
     file.stop();
     sound.stop();
       if(!laugh.isPlaying());
  laugh.play();
   }
   }
   //showing the timer
   String s="Time Left:"+timeLeft;
   textAlign(LEFT);
   textSize(20);
   fill(255,0,0);
   text(s,20,100);
 }
//code for the start/intro screen
void introScreen(){

   background(157,157,165);


      fill(buttonColor);
    
    imageMode(CORNERS);
     introPic=loadImage("introPic.png");
    image(introPic, 0,0,1200, 650);       
     
   
    stroke(255);
    rect(buttonX, buttonY, buttonWidth, buttonHeight, 20);      //key pressed play button
    
    textFont(f,25); 
    textAlign(CENTER, CENTER);
    fill(255);
textSize(20);
    String play = "Press any key to play";          //text in play button to clarify it
    text(play, buttonX+100 , buttonY+30);
    
    textSize(30);
    String instructions="Find the thief using the flashlight before the time finishes";
     text(instructions, buttonX-500 , buttonY+15);
     String instructionsCont="Click on the thief to capture him,You have 5 seconds!";
    text(instructionsCont,buttonX-500 , buttonY+50);

  }
//code for the congrats screen when the player wins
void congratsScreen(){
  winningPic=loadImage("busted2.png");
image(winningPic, 0,height/5,1200,800);  
textFont(f,40); 
    textAlign(CENTER, CENTER);
    fill(255);
textSize(40);
    String congrats = "Congrats You Busted Him!";         
    text(congrats, width/2,80);
     String replay = "Click any key to play again";          
    text(replay, width/2,130);
}
//code for the gameover screen when a player loses
void gameOver(){
  background(0);
  textSize(80);
String gameover = "GAME OVER!";
String gameovercont="HE GOT AWAY WITH IT";          
    text(gameover, width/2-250,height/4);
    text(gameovercont, width/2-400,height/2);
    textSize(40);
     String replay = "Click on any key to play again";          
    text(replay, width/2-200,height/2+200);
 

}
//code to reset the game, along with the sound and the timer
void resetGame(){
  if (keyPressed==true){
 gameState="PLAY";
 file.loop();
 laugh.stop();
 sound.stop();
  timeLeft=6;
}
}


Midterm Progress

Idea:

I wanted to create something, fun and simple. I remember loving the where’s Waldo books when I was young, and there was this super Mario game where you have to find Mario. I decided to incorporate nyuad as a theme. The players have to find the thief on our campus before it’s too late!

These are the main points of the game:

  1. The campus will be pitch black other than a flashlight the the player has.
  2. use the flashlight to find the thief before the 45 second timer goes off, if you don’t it is game over and nyuad will be robbed !
  3. the thief will change places every time a new game is started.

Progress until now:

First of all in order to create a unique background I loaded a nyuad backdrop image.

Then after a lot of research and a lot of help from the coding train(https://www.youtube.com/watch?v=j-ZLDEnhT3Q)  I was able to create the flashlight effect and make the rest pitch black. By using image processing with pixels.

void draw() {


  loadPixels();
  nyu.loadPixels();

 
  for (int x = 0; x < nyu.width; x++ ) {
    for (int y = 0; y < nyu.height; y++ ) {

      
      int loc = x + y*width;

      float r = red  (nyu.pixels[loc]);
      float g = green(nyu.pixels[loc]);
      float b = blue (nyu.pixels[loc]);

      
      float distance = dist(mouseX,mouseY,x,y);

      
      float adjustBrightness = map(distance, 0, 200, 2, 0);
      pixels[loc]=color(r*adjustBrightness,g*adjustBrightness,b*adjustBrightness);
    
    }


  }
  updatePixels();
 image(sprites[direction][step], x, y);
  
  }


This created this effect which I think is very cool:


Now I had to incorporate a sprite in order to add the thief. This is what I decided to go with

Challenges:

there are definitely a lot of questions that I need to ask in order to be able to move forward. The main one being, that when I added the sprite (thief) to the game he was visible above the darkness as is shown here:

I am not sure how to fix this.

Next steps:

  1. add instructions to the beginning and a game over or congratulations indication at the end.
  2. make the sprite appear in random locations every time a new game begins.
  3. make the game stop (and congrats appears) when the mouse is clicked on the sprite.
  4. add alarm sounds to when the thief is found.

Hopefully it goes well!

PImage nyu;
PImage spritesheet;
PImage[][] sprites;
int direction = 1; 
int step = 0;
int x;
int y;
int speed = 3;
void setup() {
  size(1200, 800);
 
  spritesheet = loadImage("thief.png");


  sprites = new PImage[4][3]; 

  int w = spritesheet.width/3;
  int h = spritesheet.height/4;

  for (int y=0; y < 4; y++) {
    for (int x=0; x< 3; x++) {
      sprites[y][x] = spritesheet.get(x*w, y*h, w, h);
    }
}

  x = width/2;
  y = height/2;
  
  imageMode(CENTER);
   nyu = loadImage( "nyu.png" );
}

void draw() {


  loadPixels();
  nyu.loadPixels();

 
  for (int x = 0; x < nyu.width; x++ ) {
    for (int y = 0; y < nyu.height; y++ ) {

      
      int loc = x + y*width;

      float r = red  (nyu.pixels[loc]);
      float g = green(nyu.pixels[loc]);
      float b = blue (nyu.pixels[loc]);

      
      float distance = dist(mouseX,mouseY,x,y);

      
      float adjustBrightness = map(distance, 0, 200, 2, 0);
      pixels[loc]=color(r*adjustBrightness,g*adjustBrightness,b*adjustBrightness);
    
    }


  }
  updatePixels();
 image(sprites[direction][step], x, y);
  
  }