The Moon Of Neon Dandelions

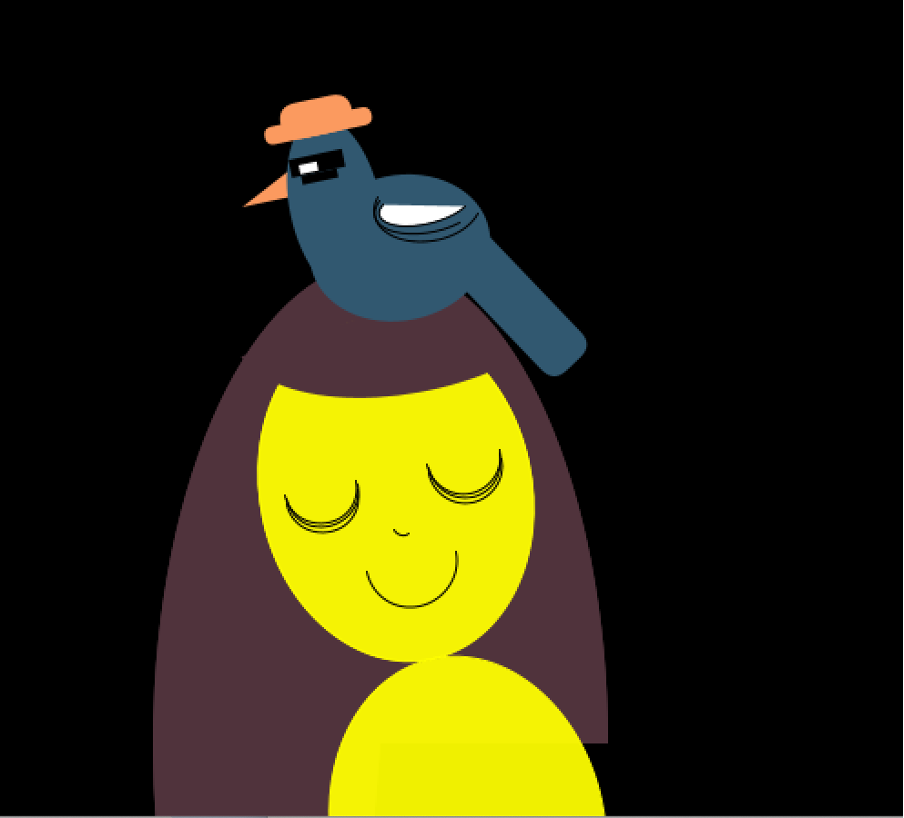
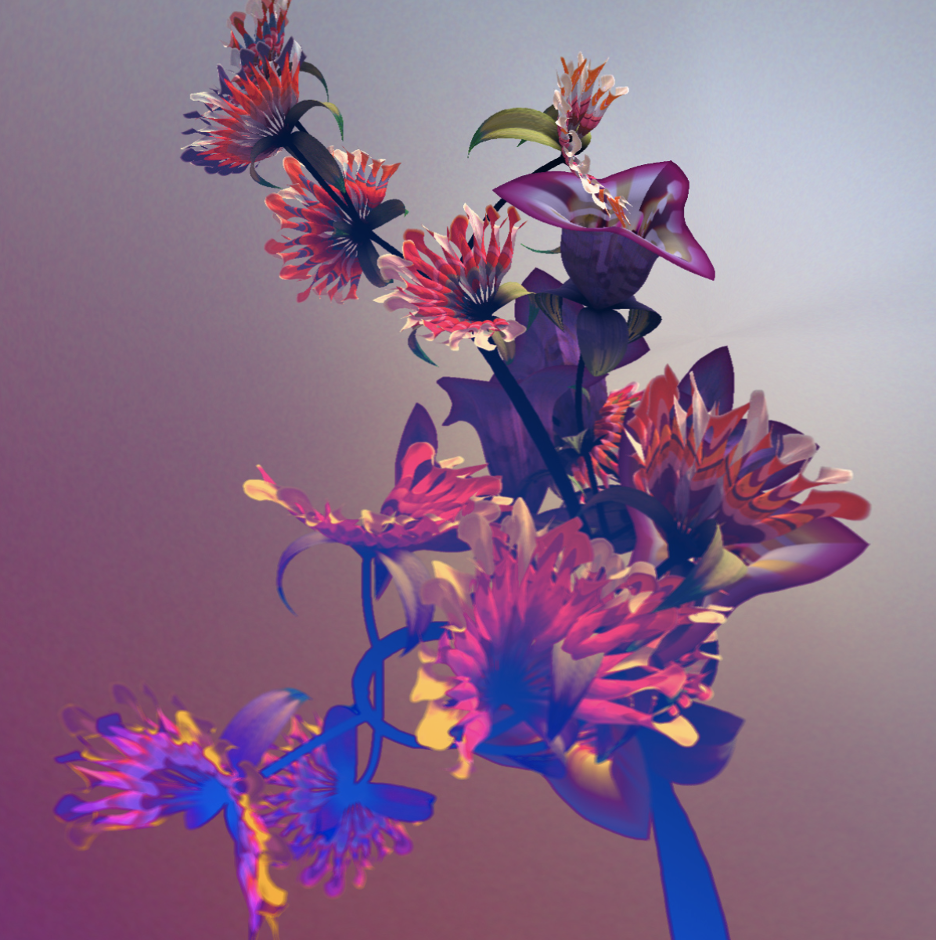
This week’s project of creating generative art was really fun and interesting as I had a clear vision of what I wanted to achieve from the beginning of the process. I noticed that initially, as I started looking for inspiration for generative art online,  I was gripped by art that depicted nature in one way or another. Daniel Brown had a piece with flowers and the bright colors on it were something I wanted to have in my work in addition to elements of nature. Here’s the work:

Hybrid Landscapes by Daniel Brown

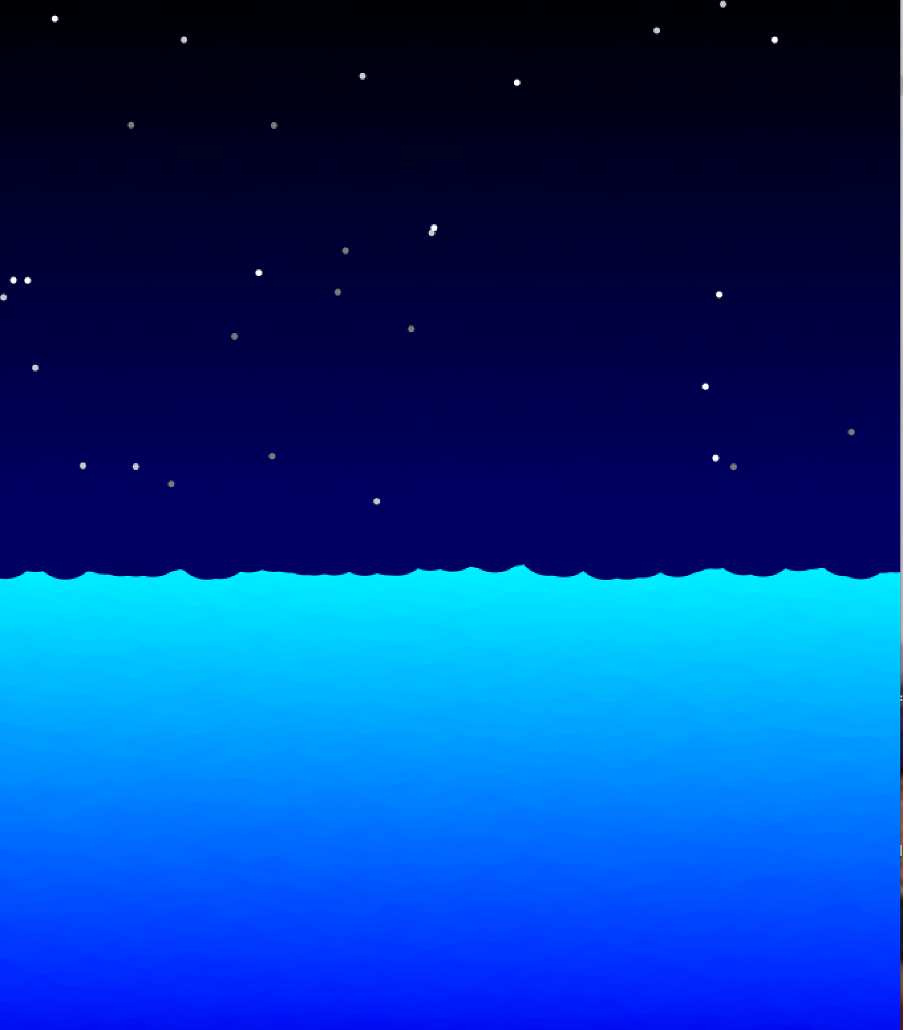
As I brainstormed, I finalized on an idea of creating a piece contemplating what’s on the other side of the moon – the far side that we never get to see. I wanted to begin with something very natural, something that looks like the moon, and then transition that to my wacky thoughts on the question to create an experience for the person who views the work.
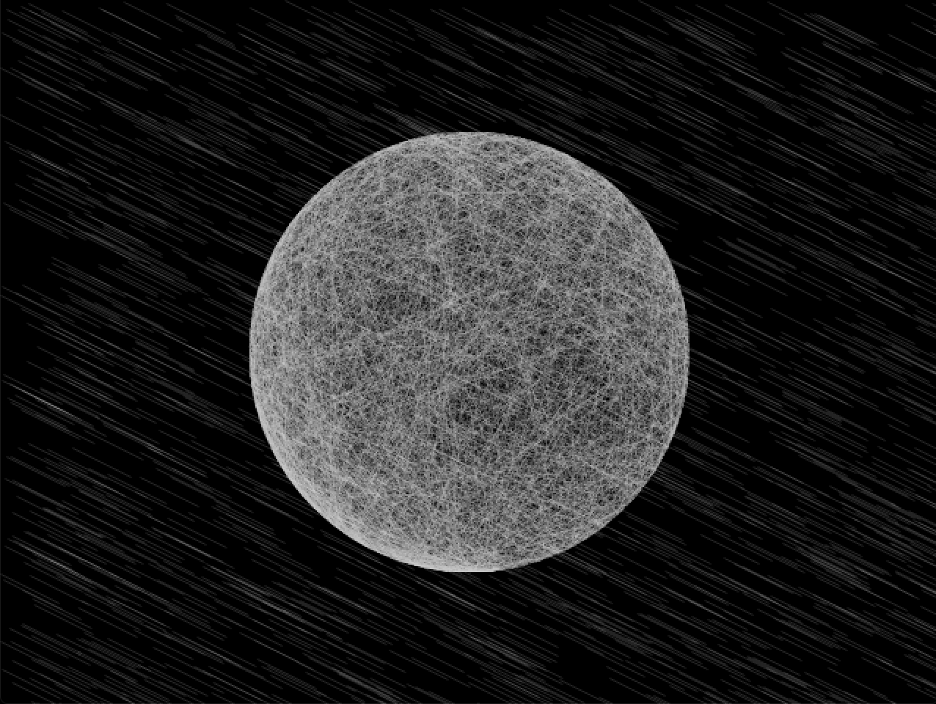
The Moon

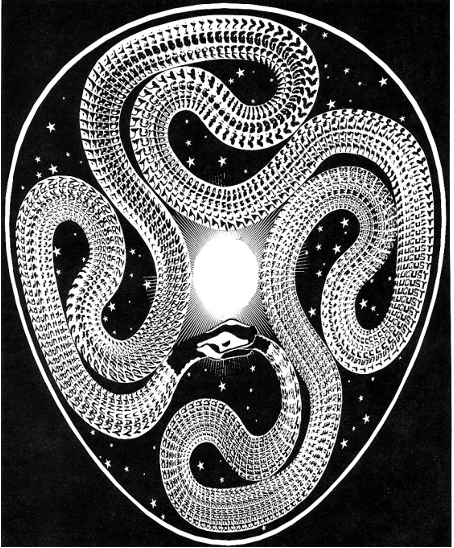
I began looking for works that have already achieved creating a realistic moon using processing but unfortunately, I couldn’t find anything. I didn’t want to give up on the idea of creating a realistic moon and I played around with processing to see if I could get close. This is when I came across a print by Anders Hoff’s:

Anders Hoff’s Inconvergence

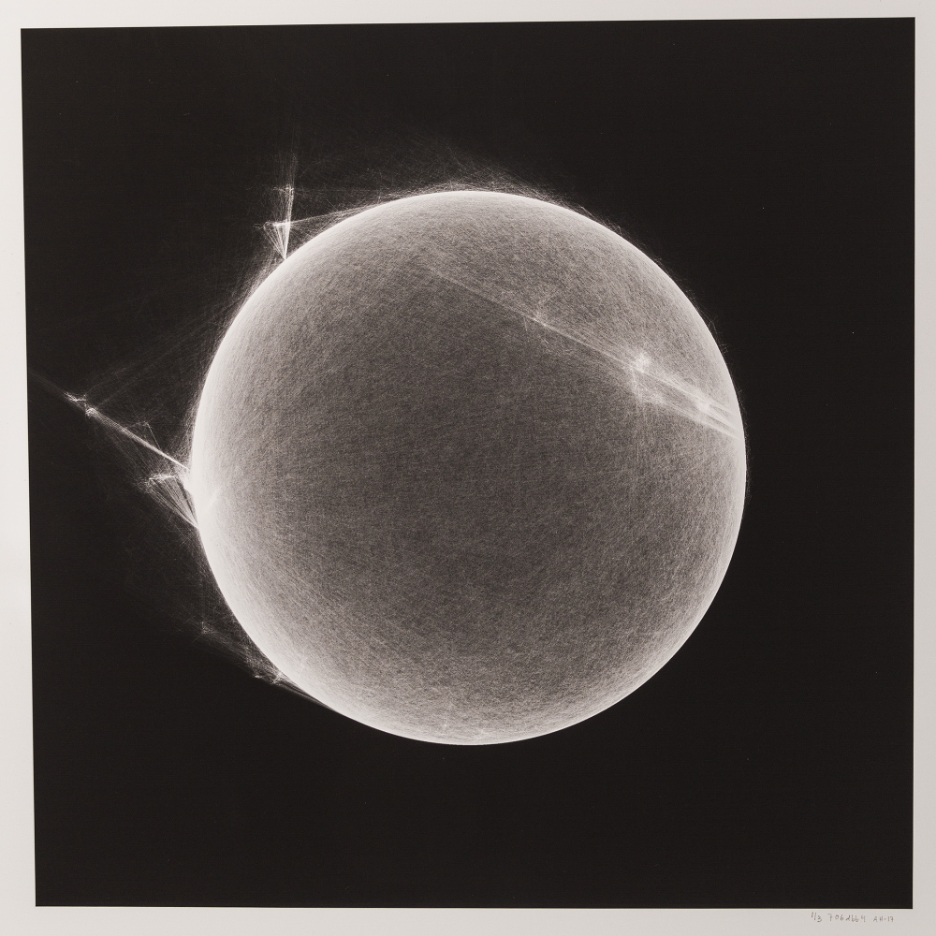
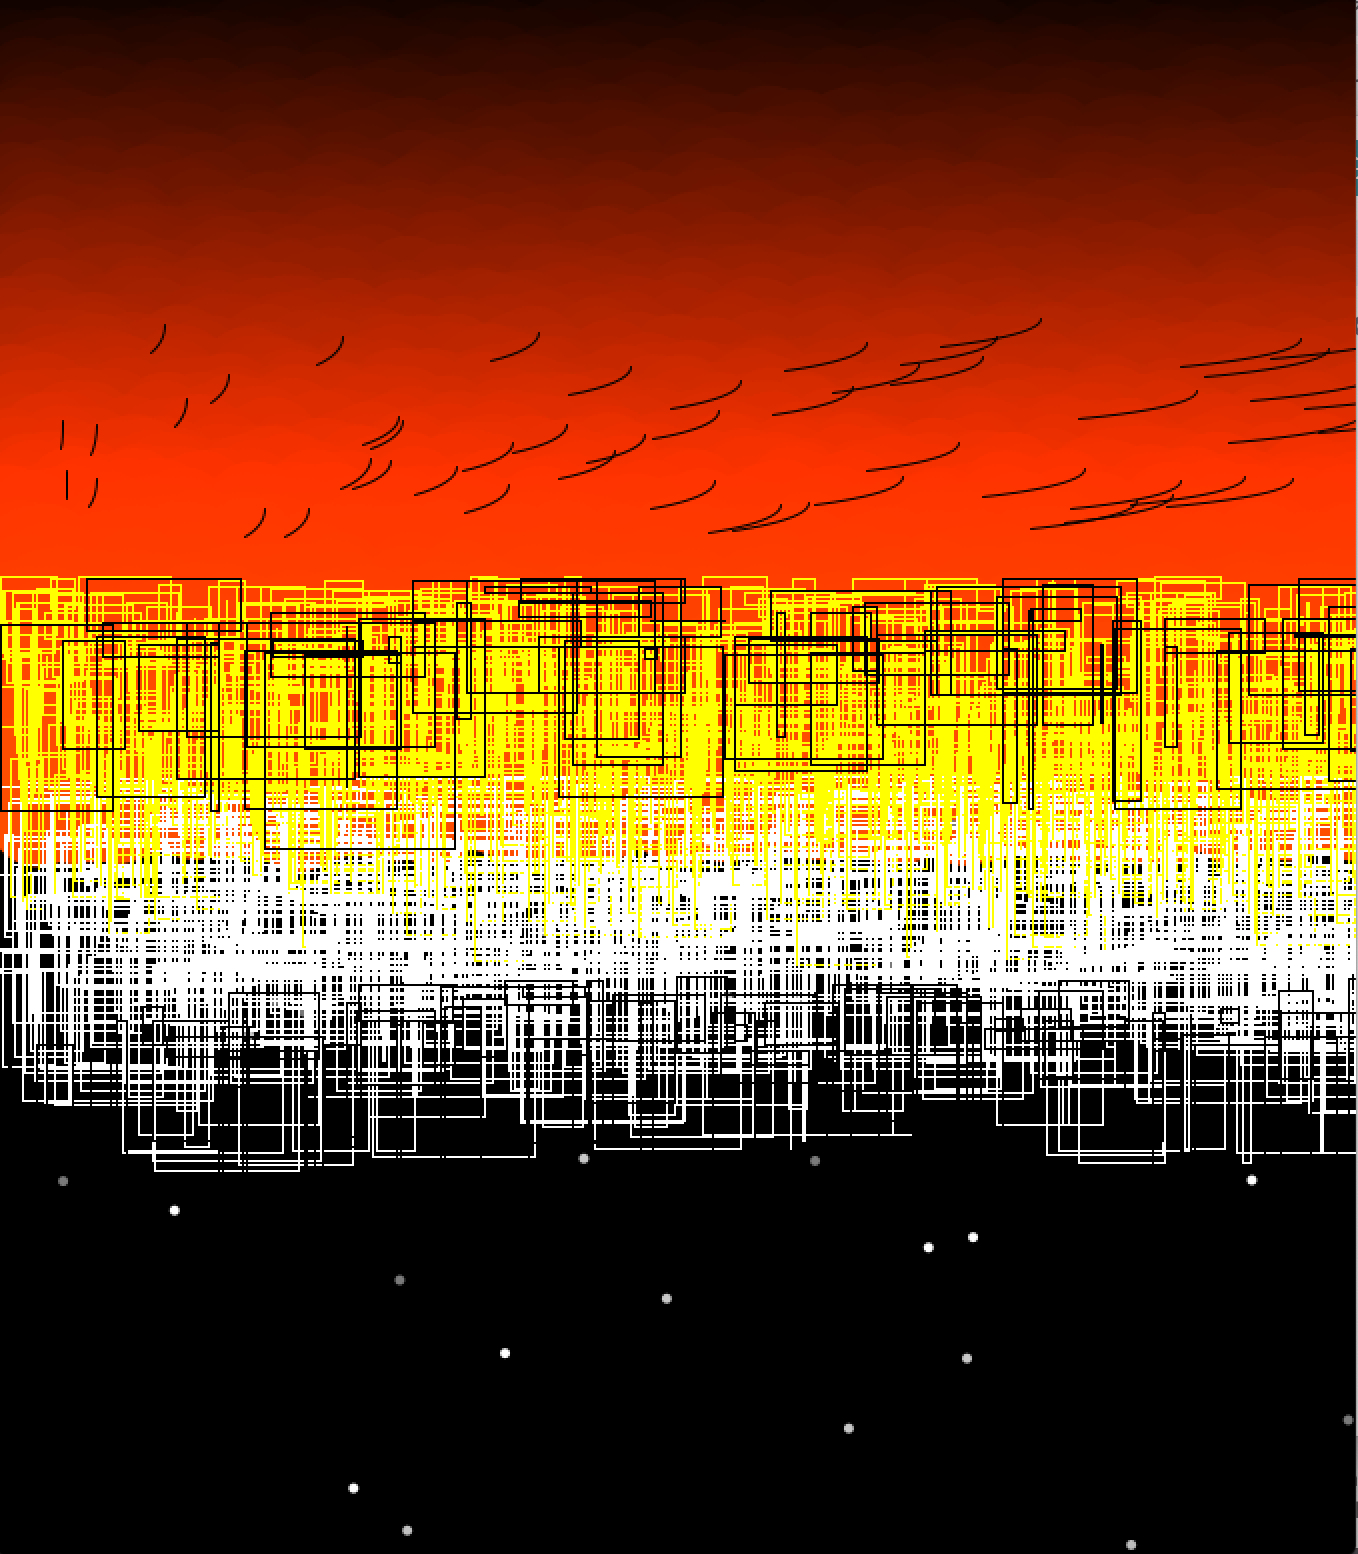
The circle is made of a lot of lines to create a planet-like texture and I found this idea very intriguing and I decided to use this because his print looked like a planet, so my idea was that I could create something that resembled the moon. This concept of creating something that looks natural entirely out of straight lines was one of the most favorite things that I learned from this week. The idea was to connect random points of the circle with lines and to get patterns and I restricted the angles of the lines to different ranges over time. For the parameters of the line, I randomized the angles and took the sine and cosine of it, multiplied it by the radius of the circle to obtain points on the circle. This took some time to figure out because my positions kept showing up incorrectly even though mathematically it should be on the circle. Finally, I realized that I made a mistake with the radius, I had used diameter instead of it. 

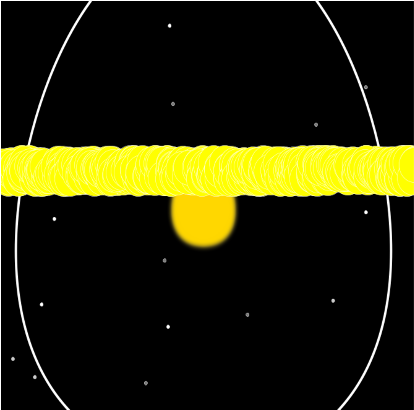
In the background, I put in stars at first but I didn’t quite like how it looked. In the end, after trying out different things, I ended up creating this depiction of stars when photographed in a timelapse or a star shower. I used lines for the same.
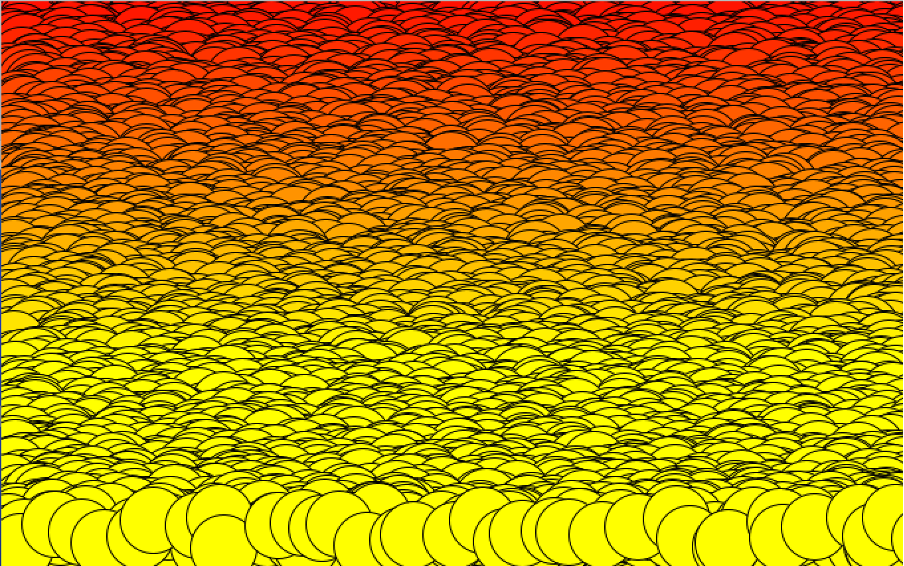
My version of the moon


Neon Dandelions

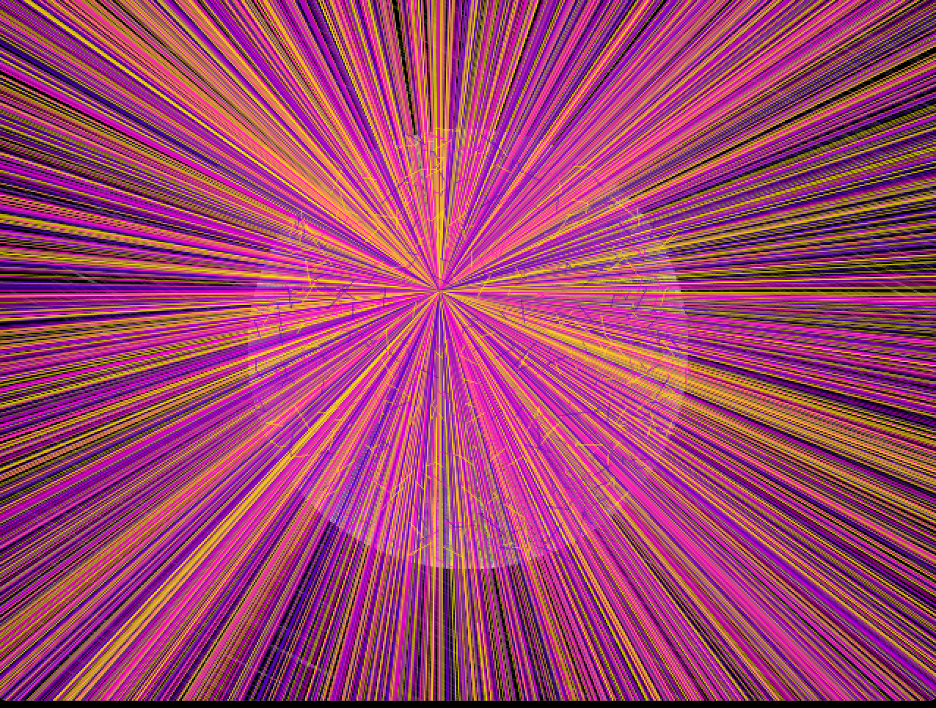
After many many extreme ideas on what to put on the other side of the moon, ranging from cheese to flowers, I finalized on making them be made out of neon dandelions. I was intrigued by the shape of dandelions and wanted to work on making one, so I decided to make my moon be made of dandelions. My idea was to create this effect of getting gripped into the art as the moon gets constructed and then creating a swift transition to hallucinations where the neon elements appear, mimicking the process of when you get too carried away into something, you start imagining things. I used bright colors of yellow, purple, and pink.

I used a class for organizing my dandelions. It had the following features: X and Y coordinates for a position, the radius of the dandelion, the color of the dandelion, an array of colors. It had a constructor to initialize these positions, the color, and the radius. It had the functions of drawing dandelions and also a transition effect to show the transition from the moon to neon dandelions. There is a shadow of the moon in the transition and as an effect of one looking at the moon for a long time, you will see an illusion of a darker circle nearby over the neon lights (if you look at it long enough) which was a fun addition to the visual experience. 

I end the visuals with a quick blackout. 

I started off with the idea of presenting the other side of the moon by having the moon suddenly rotating to reveal the neon dandelions, but given that I made the moon by drawing lines one over the other, I couldn’t figure out a way to retain the idea of lines creating the moon and the rotation effect. I tried the 3d rotation in one of my trials, but it didn’t look quite as realistic as to how it did for a 2d version of the moon with lines. Here’s a video of the final output and the code is below that:

Code:

Dandelion[] dandelions = new Dandelion[500];
float radius=150;
float count=0;


color c1 =  #FFEB00; //yellow
color c2 = #5600CC; //purple
color c3 = #FF01D7; //pink


void setup() {
  size(640, 480);
  background(0);
  frameRate(500);
  
  //calling constructor to create Dandelion objects - colors are randomly assigned from the array of colors 
  for (int i=1; i<=dandelions.length; i++) {
    dandelions[i-1] = new Dandelion(int(random(3)));
  }
}

void draw() {
  
  //creating the moon scenery
  if (frameCount<3000) {
    stroke(202, 202, 202);
    moon();
    stars();
  }

  //transition to the "other side" of the moon - of neon dandelions
  if ((frameCount>=3000) && (frameCount<3010 )) {
    delay(100);
    for (int i=1; i<=dandelions.length; i++) {
      dandelions[i-1].transition();
    }
  }

 //momentary blackout
  if (frameCount==3010) {
    background(0);
  }

//dandelion moon
  if (frameCount>3005 && frameCount<6000 ) {
    for (int i=1; i<=dandelions.length; i++) {
      dandelions[i-1].dandDraw();
    }
  }


//final blackout
  if ((frameCount>=6000)) {
    background(0);
  }
}


void moon() {
  float i=random(0-count*PI/20, PI/20); //randomized angle of first line - the angles are restricted to give a patterned effect and it increases as frameCount increases
  float j=random(i, PI/20); //randomized angle of second line
  strokeWeight(0.1); //thinner strokes
  
  pushMatrix();
  translate(width/2, height/2);
  line((sin(i)*radius), (cos(i)*radius), (sin(j)*radius), (cos(j)*radius)); //gives chords
  if (frameCount%5==0) {
    count++;
  }
  popMatrix();
}

//shooting stars effect or a stars timelapse
void stars() {

  fill(255, 255, 255);
  stroke(255, 255, 255);
  float i = random(0, width);
  float j=random(0, width);
  line(i, j, i+40, j+20);
  rotate(90);
  delay(5);
  fill(0);//graying it out
  line(i, j, i+40, j+20);
  rotate(-90);
}

Dandelion Class –

class Dandelion{
 float posX;
 float posY;
 float dandRad; //radius of dandelion
 float colorPick;
 color[] colors ={c1, c2, c3}; 
 color dandColor;

 
 //constructor
 Dandelion(int colorPick)
 {  
   dandColor=colors[colorPick]; 
   
   posX=random(width/2-150,width/2+radius);
   posY=random(height/2-150,height/2+radius);
   
   //while condition to get points within the circle
   while(((posX- width/2)* (posX- width/2))+ ((posY - height/2)*(posY - height/2) )>=(radius*radius))
   { 
     posX=random(width/2-150,width/2+radius);
     posY=random(height/2-150,height/2+radius);
   }
   dandRad=5;
 }
 
//draw individual dandelions 
 void dandDraw(){
  fill(dandColor);
   //circle(posX,posY,dandRad);
   stroke(dandColor);
   strokeWeight(0.5);
   float l=random(20);
   line(posX,posY,posX+random(-l,l),posY-random(-l,l));
  
  }
  
  
//transition
  void transition(){
    fill(dandColor);
   stroke(dandColor);
   strokeWeight(0.5);
   float l=random(20);
   line(300,200,300+random(-l,l)*frameCount*0.5,300-random(-l,l)*frameCount*0.5);
}
}


References

http://danielbrowns.com/

https://img.inconvergent.net/print/706dbb4.html


Metropolis Loop Art

I had a hard time settling down on an idea for this week’s assignment. The main objective of the week was to create artwork using the loops for() or while(). I ended up working on something that was miles away from my initial idea. Initially, I was inspired by the work Rainbow’s Egg by Colin Emmett and as I worked on recreating that work, I ended up creating an animation with circles in an attempt to mimic a snake.

The movement of the circles pushed me to work on something based on them and I began getting more ideas for it in terms of colors, positions, and shapes with loops as opposed to my idea of recreating the Rainbow’s Egg. I was more inspired by this which was a definite indication for me to start afresh with this idea.

I wanted to work with loops not only to make multiple shapes and animate them but on color as well to achieve a sort of gradient. When thinking of gradients from real life, the first thing that came to mind was the sunsets at NYU Abu Dhabi. In order to recreate it, I looked into the RGB codes of red, yellow, and orange and looked at how the codes change amongst these colors in order to change variables in the loop to achieve the gradient. Here were my first attempts trying to get a sunset-like gradient. I wanted to check out how the output would look without a stroke and I was able to achieve a very subtle shading of the sky and I was very happy with this result:

I played a lot with colors here and I got to see how easily colors change the mood of a work. Here are some examples:

After this, I thought of expanding my canvas and perhaps draw a cityscape and waters. I also dabbled into making an oceanic scene with a more darker-blue shade gradient. I put in some star-like objects which I had made when I was making the Rainbow’s Egg sketch. The colors I used for the stars varied in shades of greyish-white and I used random() to get the position to achieve a twinkle effect.

With so many ideas and sceneries in my mind, I settled on creating a cityscape and I was heavily inspired by the movie, Metropolis (1927). For what is it, some of the visuals and elements portrayed in the movie were very captivating to me and so, I decided to work with a cityscape with the colors achieving a reddish gradient, to paint some darker emotions. Then for creating a multitude of buildings of all sizes and shapes, I used loops and random() and the colors: yellow and black. Inspired by the seascape art I made earlier, I put in a mirror image of the cityscape but with tones of black and white. I put in stars as well. Finally, I used loops to create some arcs to portray some birds :))

Visuals from Metropolis (1927)

On the whole, I see the work as the two shades of the city – day and night, but I also interpret this as the underground city against the colossal buildings in Metropolis with the underground city stripped of all shades and tones of colors and working around the heavy, massive structures of the skyscrapers in the city, but with no light, just darkness. Here’s a video showing the final piece.

Screenshot of the final work


I’m very happy with how it turnt out, I love looking at it and seeing the shapes and colors. The more I look at it, different interpretations keep popping up in my head and I love that about this piece! Documenting this was pretty interesting because for this work, I hadn’t started off with a concrete idea but rather, I kept experimenting and I stuck to elements that were appealing, and over time, this work came to be. Here’s the code:

int offset = 30;


void setup() {
  size(680, 780);
  //noLoop();
}


void draw() {
  noStroke();
  background(0, 0, 0);

  sky();
  stars();
  buildings();
  birds();
}


void sky() {
  for (int i=0; i<height/2; i++) {
    for (int j=0; j<50; j++) {
      fill(i, i*0.2, 0);
      circle((5+random(24)+20*j), (i+random(24)), 50);
    }
  }
}


void stars() {
  for (int i=0; i<10; i++) {
    fill(255);
    ellipse(random(width), height/2+random(height/2), 5, 5);
    fill(122);
    ellipse(random(width), height/2+random(height/2), 5, 5);
    fill(200);
    ellipse(random(width), height/2+random(height/2), 5, 5);
  }
}


void buildings() {
  noFill();
  for (int i =0; i<width; i++) {
    stroke(255);
    //rect(i,height/2-10,random(50),random(50));
    rect(i, height/2-random(100)+100, random(100), random(100));
    stroke(255, 255, 0);
    rect(i, height/2-100-random(100)+100, random(50), random(100));
  }
  for (int i =0; i<width; i+=10) {
    stroke(0);//rect(i,height/2-10,random(50),random(50));
    rect(i+random(40), height/2-100+random(40), random(100), random(100));
    rect(i+random(40), height/2+100+random(40), random(50), random(100));
  }
}


void birds() {
  for (int i =0; i<width; i+=10) {
    stroke(0);
    arc(i+random(40), height/3-random(100), i, 40, radians(0), radians(45));
  }
}


Self Portrait: I’m a Hat

For the first week of class, our assignment was to create a self-portrait with the aim of getting comfortable with coding on Processing. I was very excited about the assignment and had very elaborate ideas for my sketch. But as I started getting more familiar with the functions available on Processing, my initial sketch evolved a lot. Regardless of the changes, I had some core elements I wanted in my portrait which I was able to have in the final sketch! Here’s a quick screenshot of the final animation of my portrait:


Inspiration –  Core Elements I wanted:

I wanted a black background with neon-ish colors for my portrait and I wanted some movement on my face. After some thinking, I also decided on having a pigeon with sunglasses and a hat in my drawing because I’ve always loved pigeons and their behavior around humans and also, one of my favorite comic strips is from Jimmy Craig featuring a pigeon in a hat from the ‘they can talk comics’ and I’ve always had some strange love for it. Here’s the comic:

So, I decided to incorporate that into my portrait. In the end, these were the things I wanted to achieve:

      1. My smiling face (perhaps moving)
      2. Pigeon with a hat
      3. Black background with bright color settings

Process:

Here were the initial sketches, as you’ll notice, I was pretty ambitious with the hair waves but in the end, I decided to work on achieving the elements I wanted in the portrait than focussing on the nitty-gritty details, my aim was to achieve the essence of what I had pictured in my portrait:


I simplified the rough sketches into concrete shapes that can be achieved on Processing using functions like circle(), ellipse(),arc(),rect(),etc. The approach I took to achieve abstract shapes was layering. Out of all the functions, I found the arc() function very hard to understand but after experimenting with it, I became much more comfortable with it. I also wanted my body to be angled as if I’m leaning sideways and I was able to achieve that with the rotate() function. 

For the bird, I used a bunch of ellipses and a rectangle for the tail. For the beak, I used a triangle. The hat was made with two rectangles and I used the fifth parameter to have more rounded edges. For the wings, I used a mix of shapes using arc().  I was very particular about the sunglasses of the pigeon, I wanted the sunglasses that are usually featured in memes (the pixellated version). So, I took some time to look at them and made a tinier version for my pigeon using rectangles. 

This was how the portrait looked after I made the pigeon and me. I had a scare in between because I forgot to remove a fill() function with red for my eyes and mouth, and I had a scary version of me on screen chilling with a pigeon. 

Then, I added in some color on my body and I added in some hands using lines and ellipses. Finally, I decided to add in movement, to have the pigeon move its head and me moving in sync with it. I also wanted something trippy in the background, but soon realized that that would mean I’d have so many conflicting elements that are moving taking attention away from the pigeon and me. So, I decided to tone it down by just having circles in the background with changing colors which also changed in sync with the pigeon’s movement. I achieved the movement by using variables bird_shake and shake and bird_shake would have the values of either 0 or 1, they would alternate after each iteration using the following statement:

bird_shake = 1 - bird_shake;

shake was the variable I used as an offset to move my body in the portrait. 

Final Output:

Here’s the final output of my portrait:

Here’s the code:

void setup() {
  background(0);
  size(640, 480);
  frameRate(5);
}

int bird_shake = 0;


void draw() {
  int shake = bird_shake*5;
  bg();
  face(shake);
  features(shake);
  bird(shake);
  bird_shake = 1 - bird_shake;
}

void bg(){
  background(0);

  if (bird_shake==0){
    fill(255, 200, 95);
  }
  else{
    fill(251, 154, 95);
  }

//circle bg
  circle(120,320,100);
  circle(200,400,190);
  circle(0,20,170);
  circle(80,500,80);
  circle(300,30,30);
  circle(550,250,250);
  circle(340,370,20);
  circle(500,60,100);
  circle(500,400,100);
  circle(200,200,100);
  circle(80,180,100);
  
}

void face(int shake)
{
  int x = width/2;
  int y = height/2;
  
  fill(80, 51, 60);
  

  //hair
  arc(x-60+shake, y+200, 250, 530, radians(100), radians(360));
  stroke(255, 0, 0);
  fill(255, 255, 0, 240);
  
  
  //face
  stroke(255, 255, 0);
  rotate(-PI/15);
  ellipse(200+shake, 350, 150, 190);
  
  //body
  stroke(0);
  fill(24, 0, 255, 240);
  ellipse(200+shake, 540, 150, 190);
  rotate(0);
}


void features(int shake) {
  noFill();
  stroke(0);
  
  //eyes
  arc(160+shake, 340, 40, 40, radians(0), radians(180));
  arc(160+shake, 345, 40, 40, radians(0), radians(180));
  arc(160+shake, 342, 40, 40, radians(0), radians(180));
  arc(240+shake, 340, 40, 40, radians(0), radians(180));
  arc(240+shake, 342, 40, 40, radians(0), radians(180));
  arc(240+shake, 345, 40, 40, radians(0), radians(180));

  //mouth
  arc(200+shake, 390, 50, 50, radians(0), radians(180));
  //nose
  arc(200+shake, 370, 10, 10, radians(60), radians(170));
  noStroke();
  
  //bangs
  fill(80, 51, 60);
  arc(230+shake*1.2, 250, 200, 100, radians(70), radians(167));
    
  //dancing hands
  fill(255, 255, 0, 240);
  stroke(255, 255, 0, 240);
  line(270+shake, 530, 400, 400);
  ellipse(400+shake, 400, 40, 10);
  line(140+shake,530,60,400);
  ellipse(50+shake,400,40,10);
  
  noFill();
  noStroke();
}


void bird(int shake) {
 
  //beak
  fill(251, 154, 95);
  triangle(150+8*bird_shake, 180, 200+10*bird_shake, 160, 200, 180);
  
  //head
  fill(49, 88, 112);
  ellipse(200+shake, 190, 50, 100);
   
  //sunglasses
  fill(0);
  rect(180+shake, 160, 30, 10);
  rect(185+shake, 170, 20, 5);
  
  //reflections
  fill(255, 255, 255);
  rect(185+shake, 164, 10, 5);
  
  //hat
  fill(251, 154, 95);
  rect(180+shake, 130, 40, 20, 30);
  rect(190+shake, 140, 40, 10, 40);
  rect(170+shake, 140, 40, 10, 40);
  
  //body
  fill(49, 88, 112);
  ellipse(230+shake, 220, 100, 80);

  //tail
  rotate(45);
  rect(290+shake, -120, 130, 30, 10);
  rotate(-45);
  
  //wing
  noFill();
  stroke(0);
  arc(250+shake, 200, 60, 40, radians(30), radians(210));
  arc(250+shake, 200, 60, 30, radians(60), radians(210));
  fill(255, 255, 255);
  arc(248+shake, 200, 50, 20, radians(30), radians(210));
  noStroke();

}