Concept
My final project is a pet cat experience. For someone who loves cats but was never fortunate enough to be blessed with one because her mother dislikes the idea of having a cat in the house, I want to take this opportunity to give those who are in the same situation like myself to experience the joy of having a cat, without upsetting their mothers.
I hope this cat will provide comfort for cat lovers like me, or even turn non-cat lovers into one!
Pictures and Videos
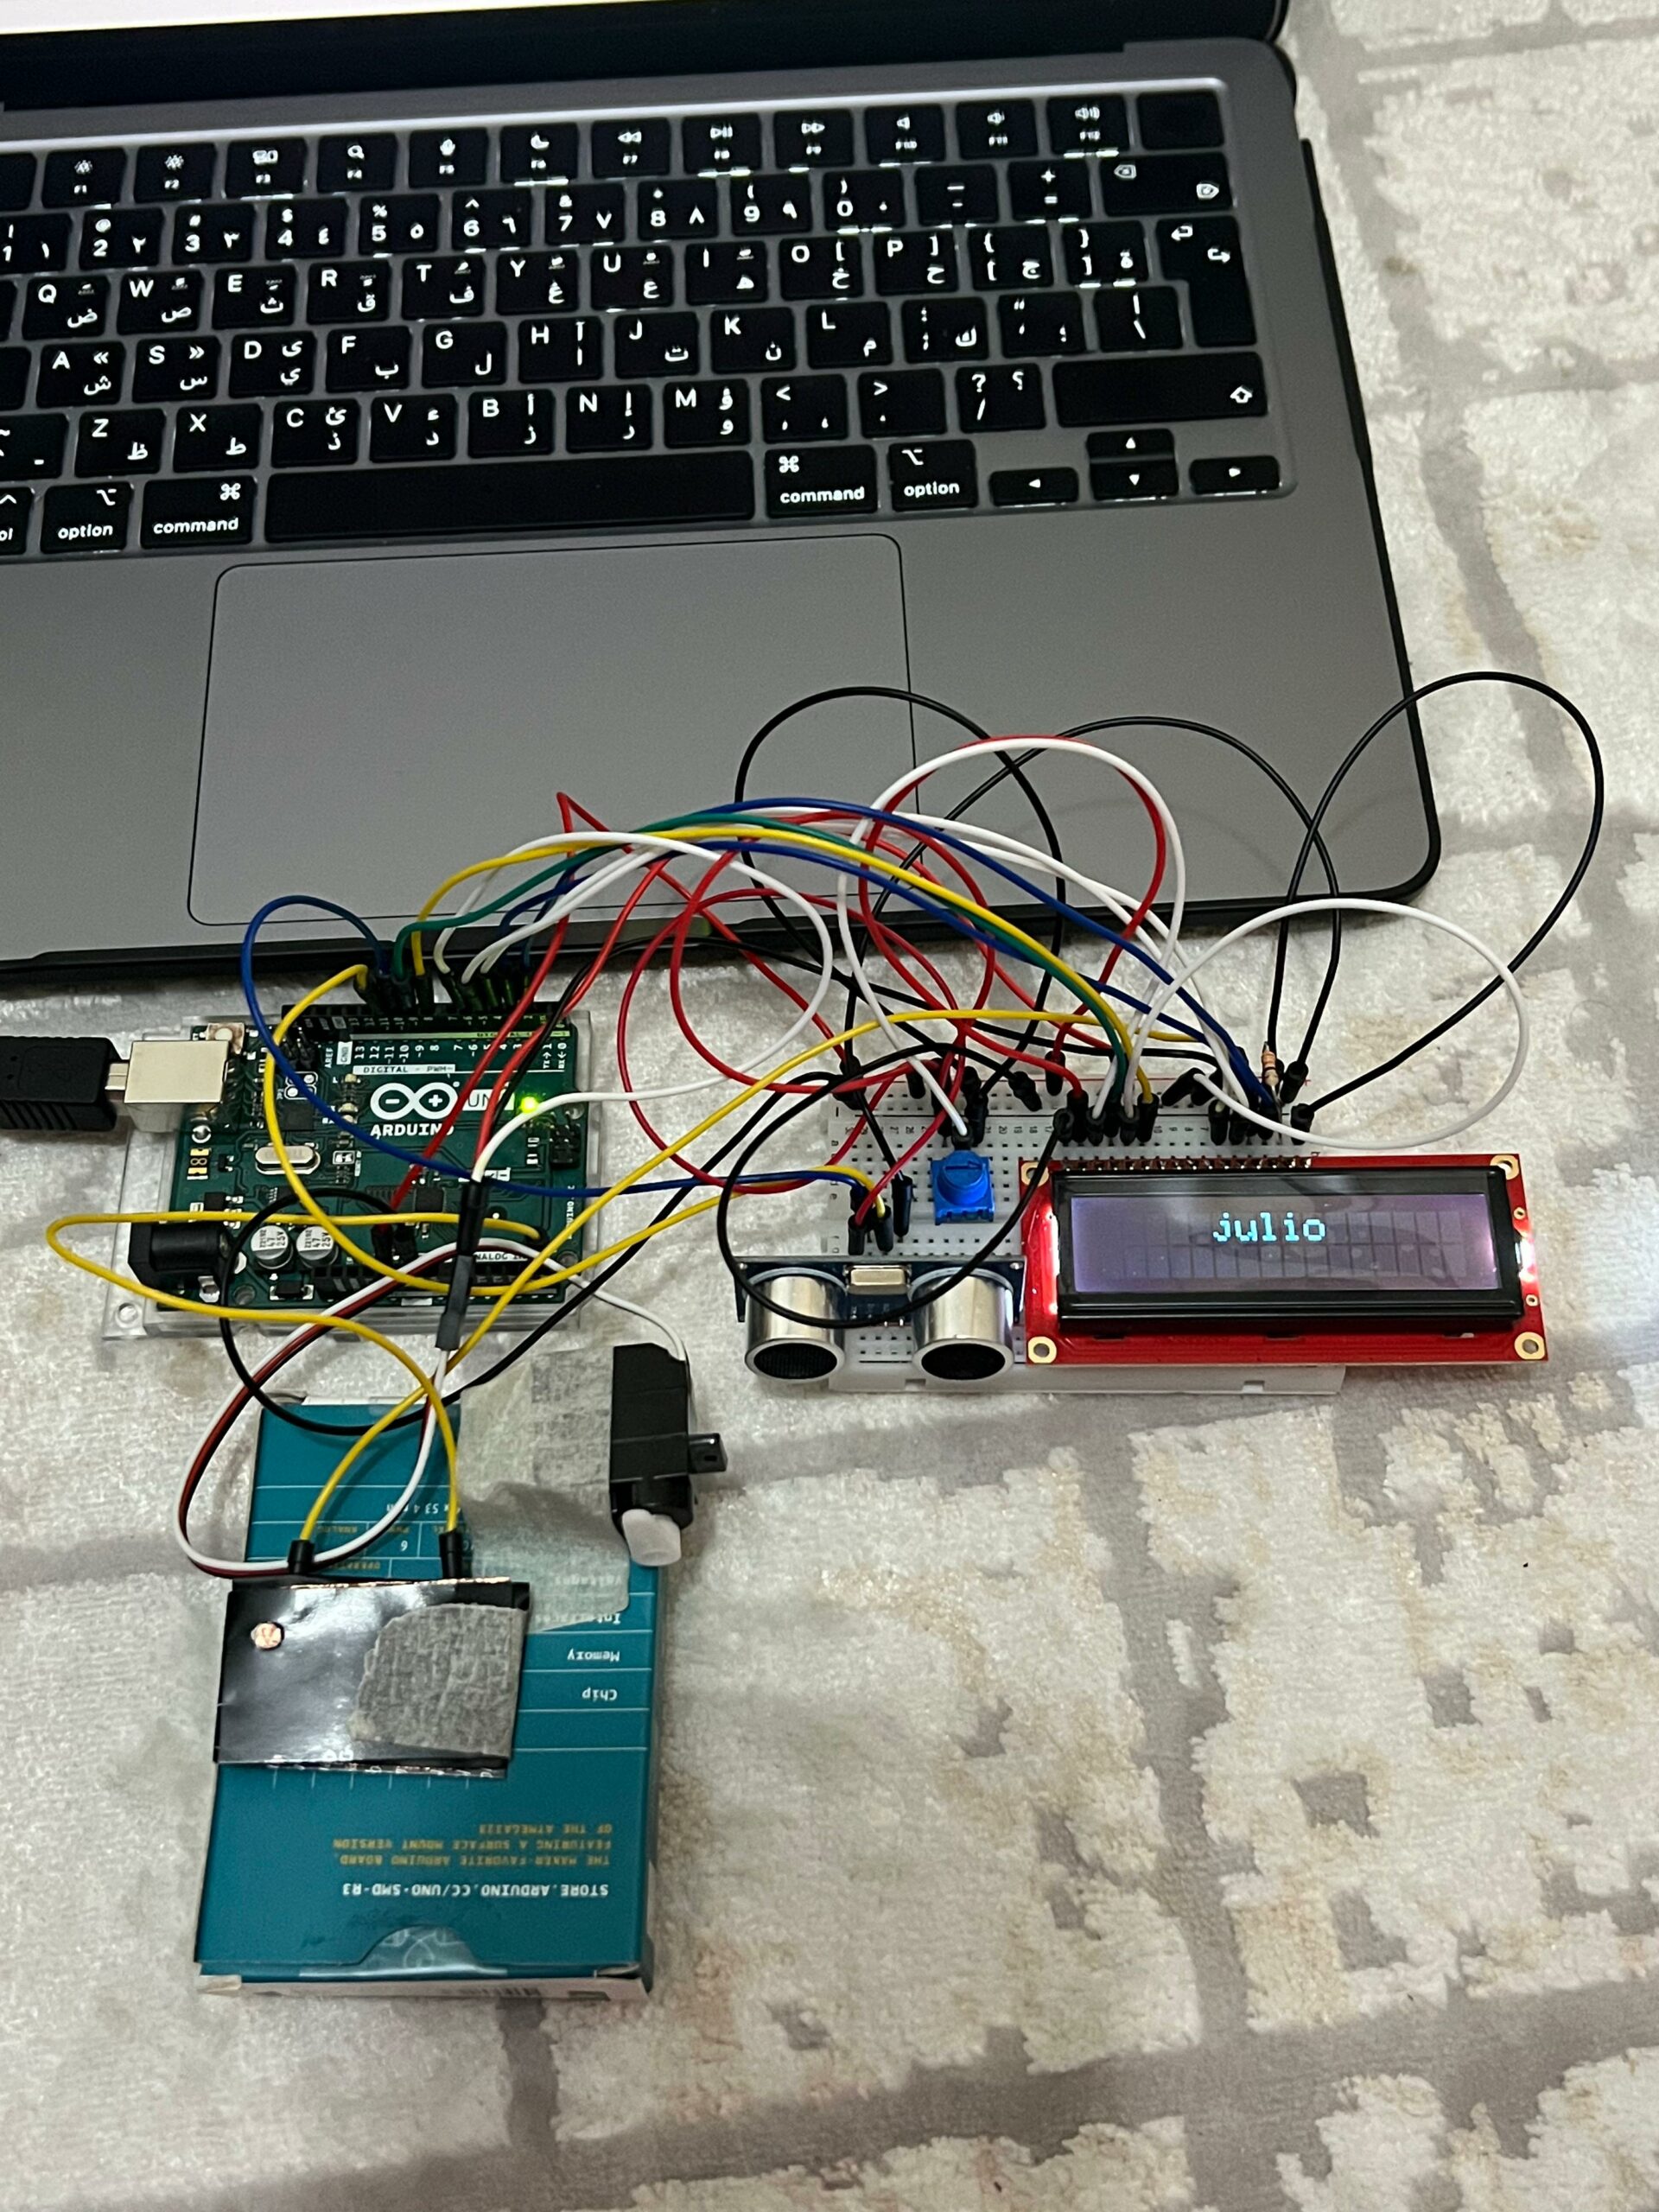
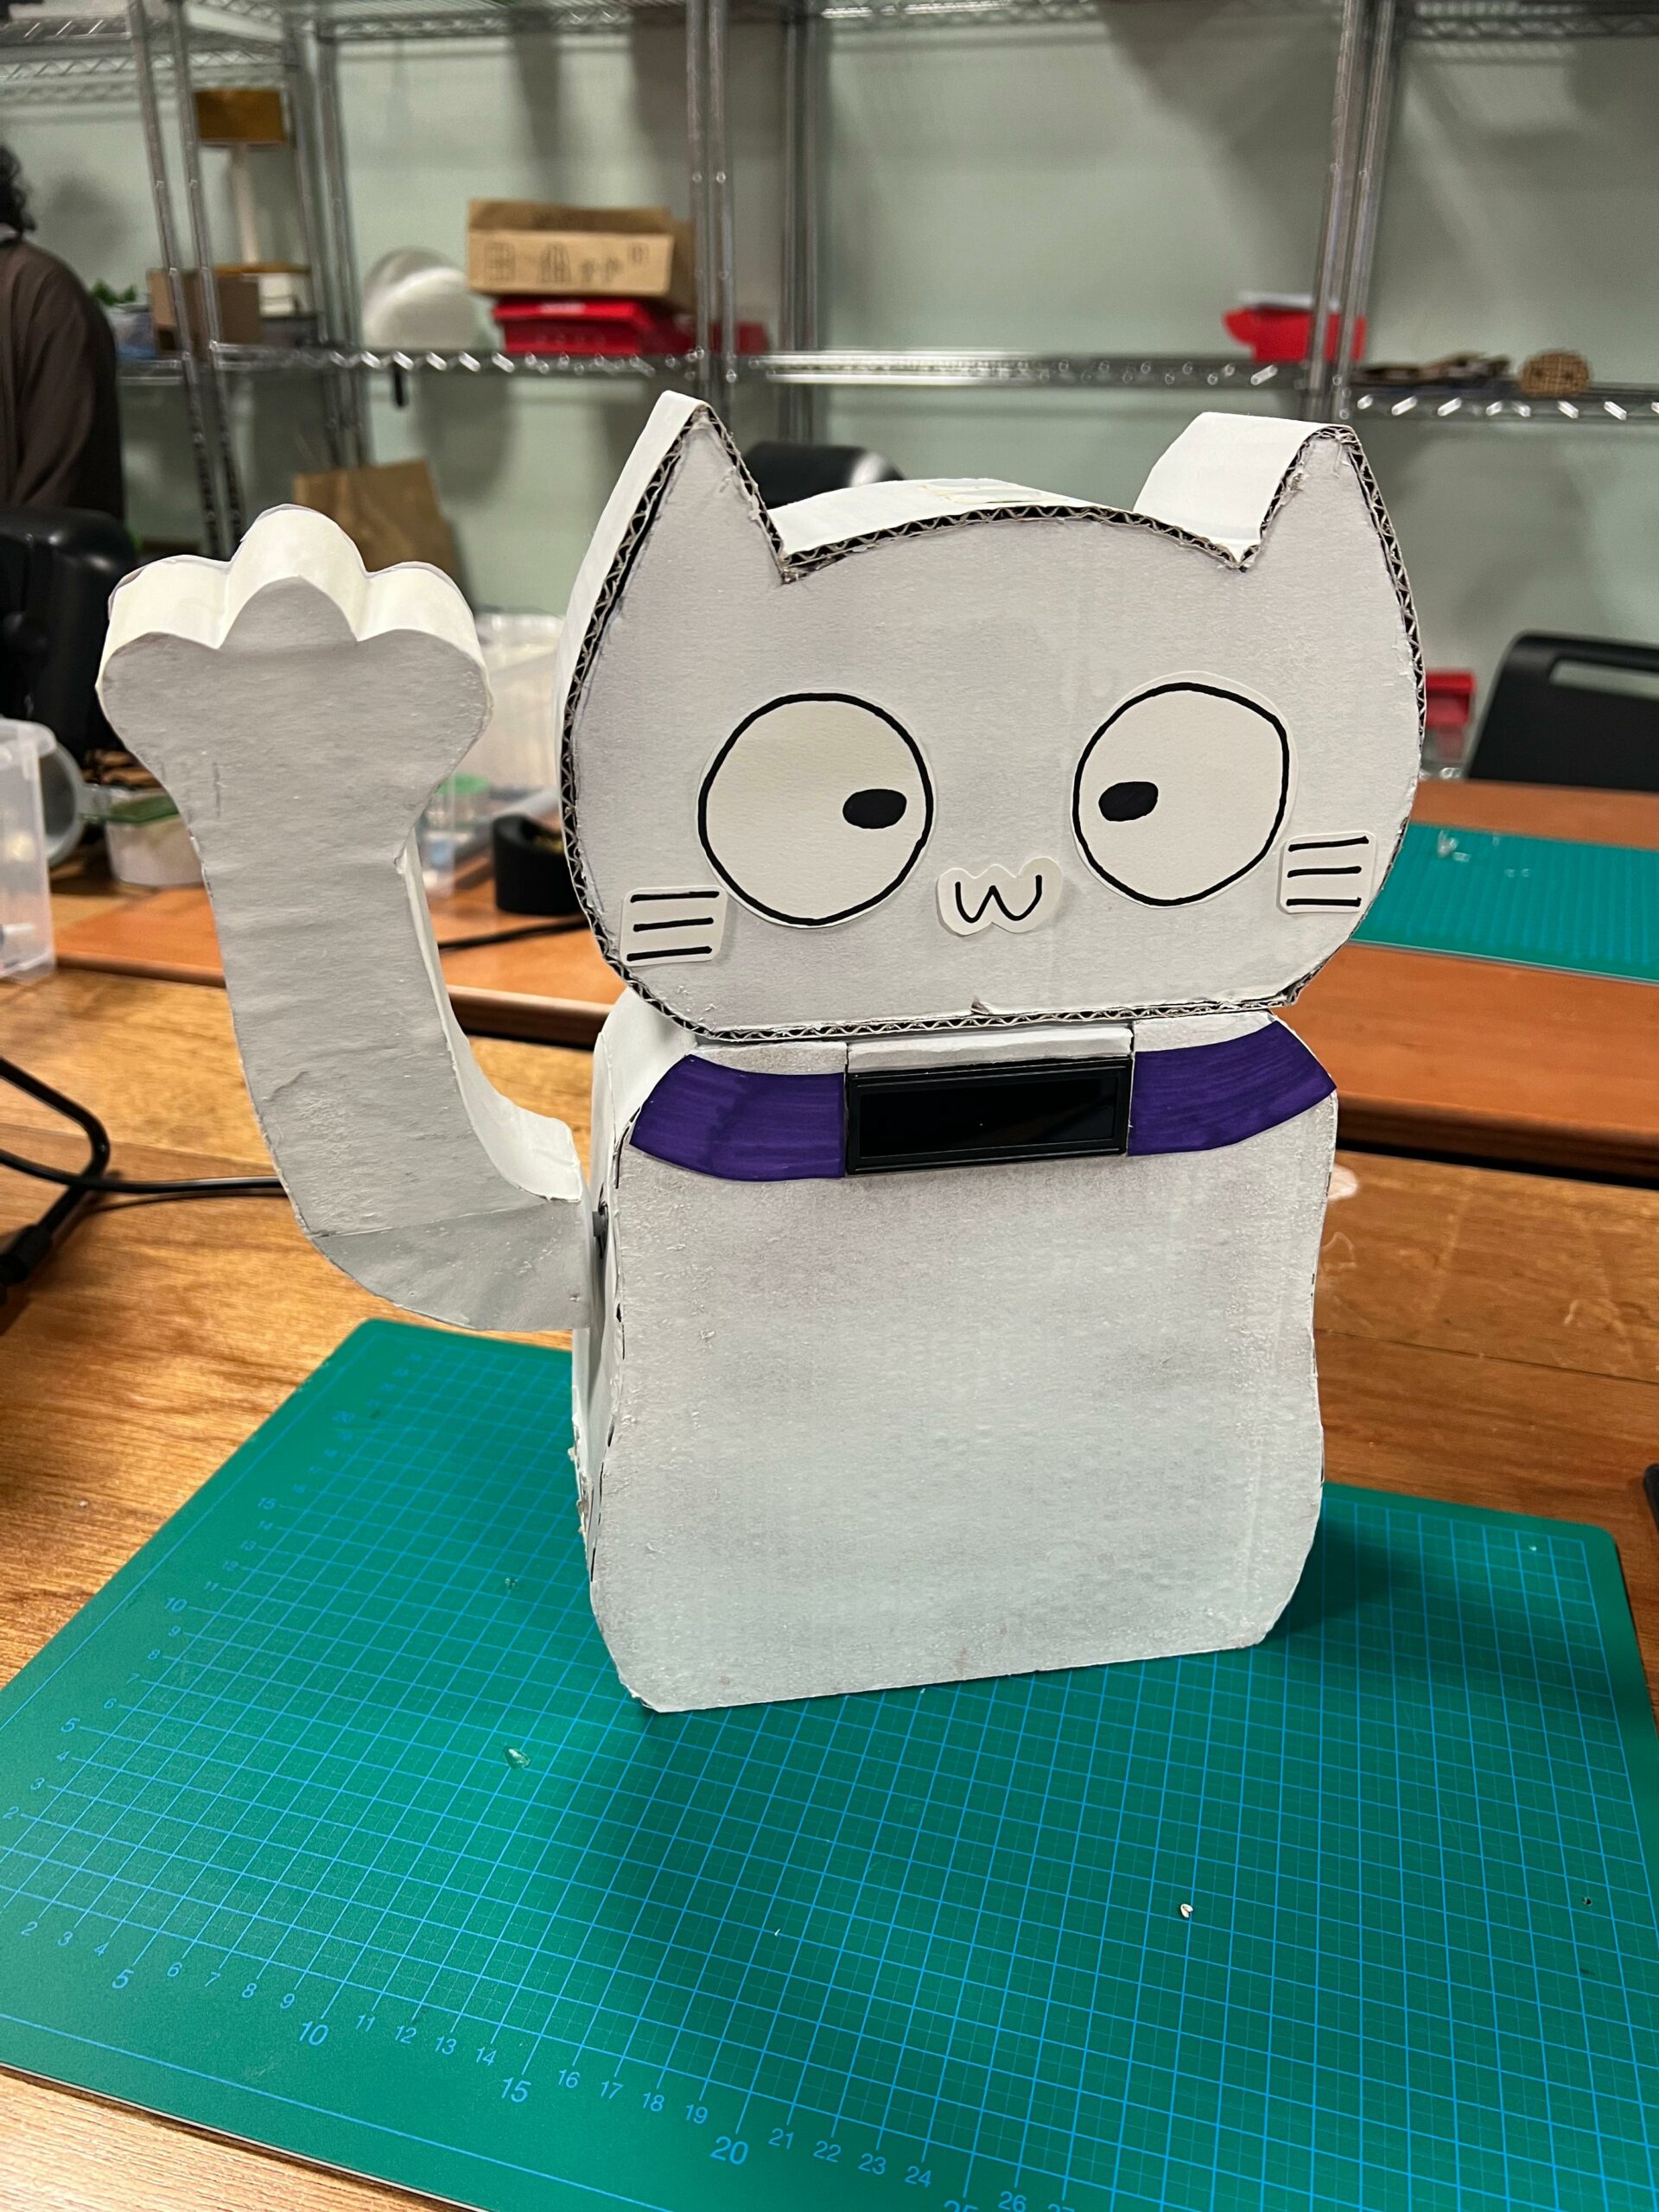
Some pictures of the physical project:
User testing video from the first version:
Demo of final version:
Implementation
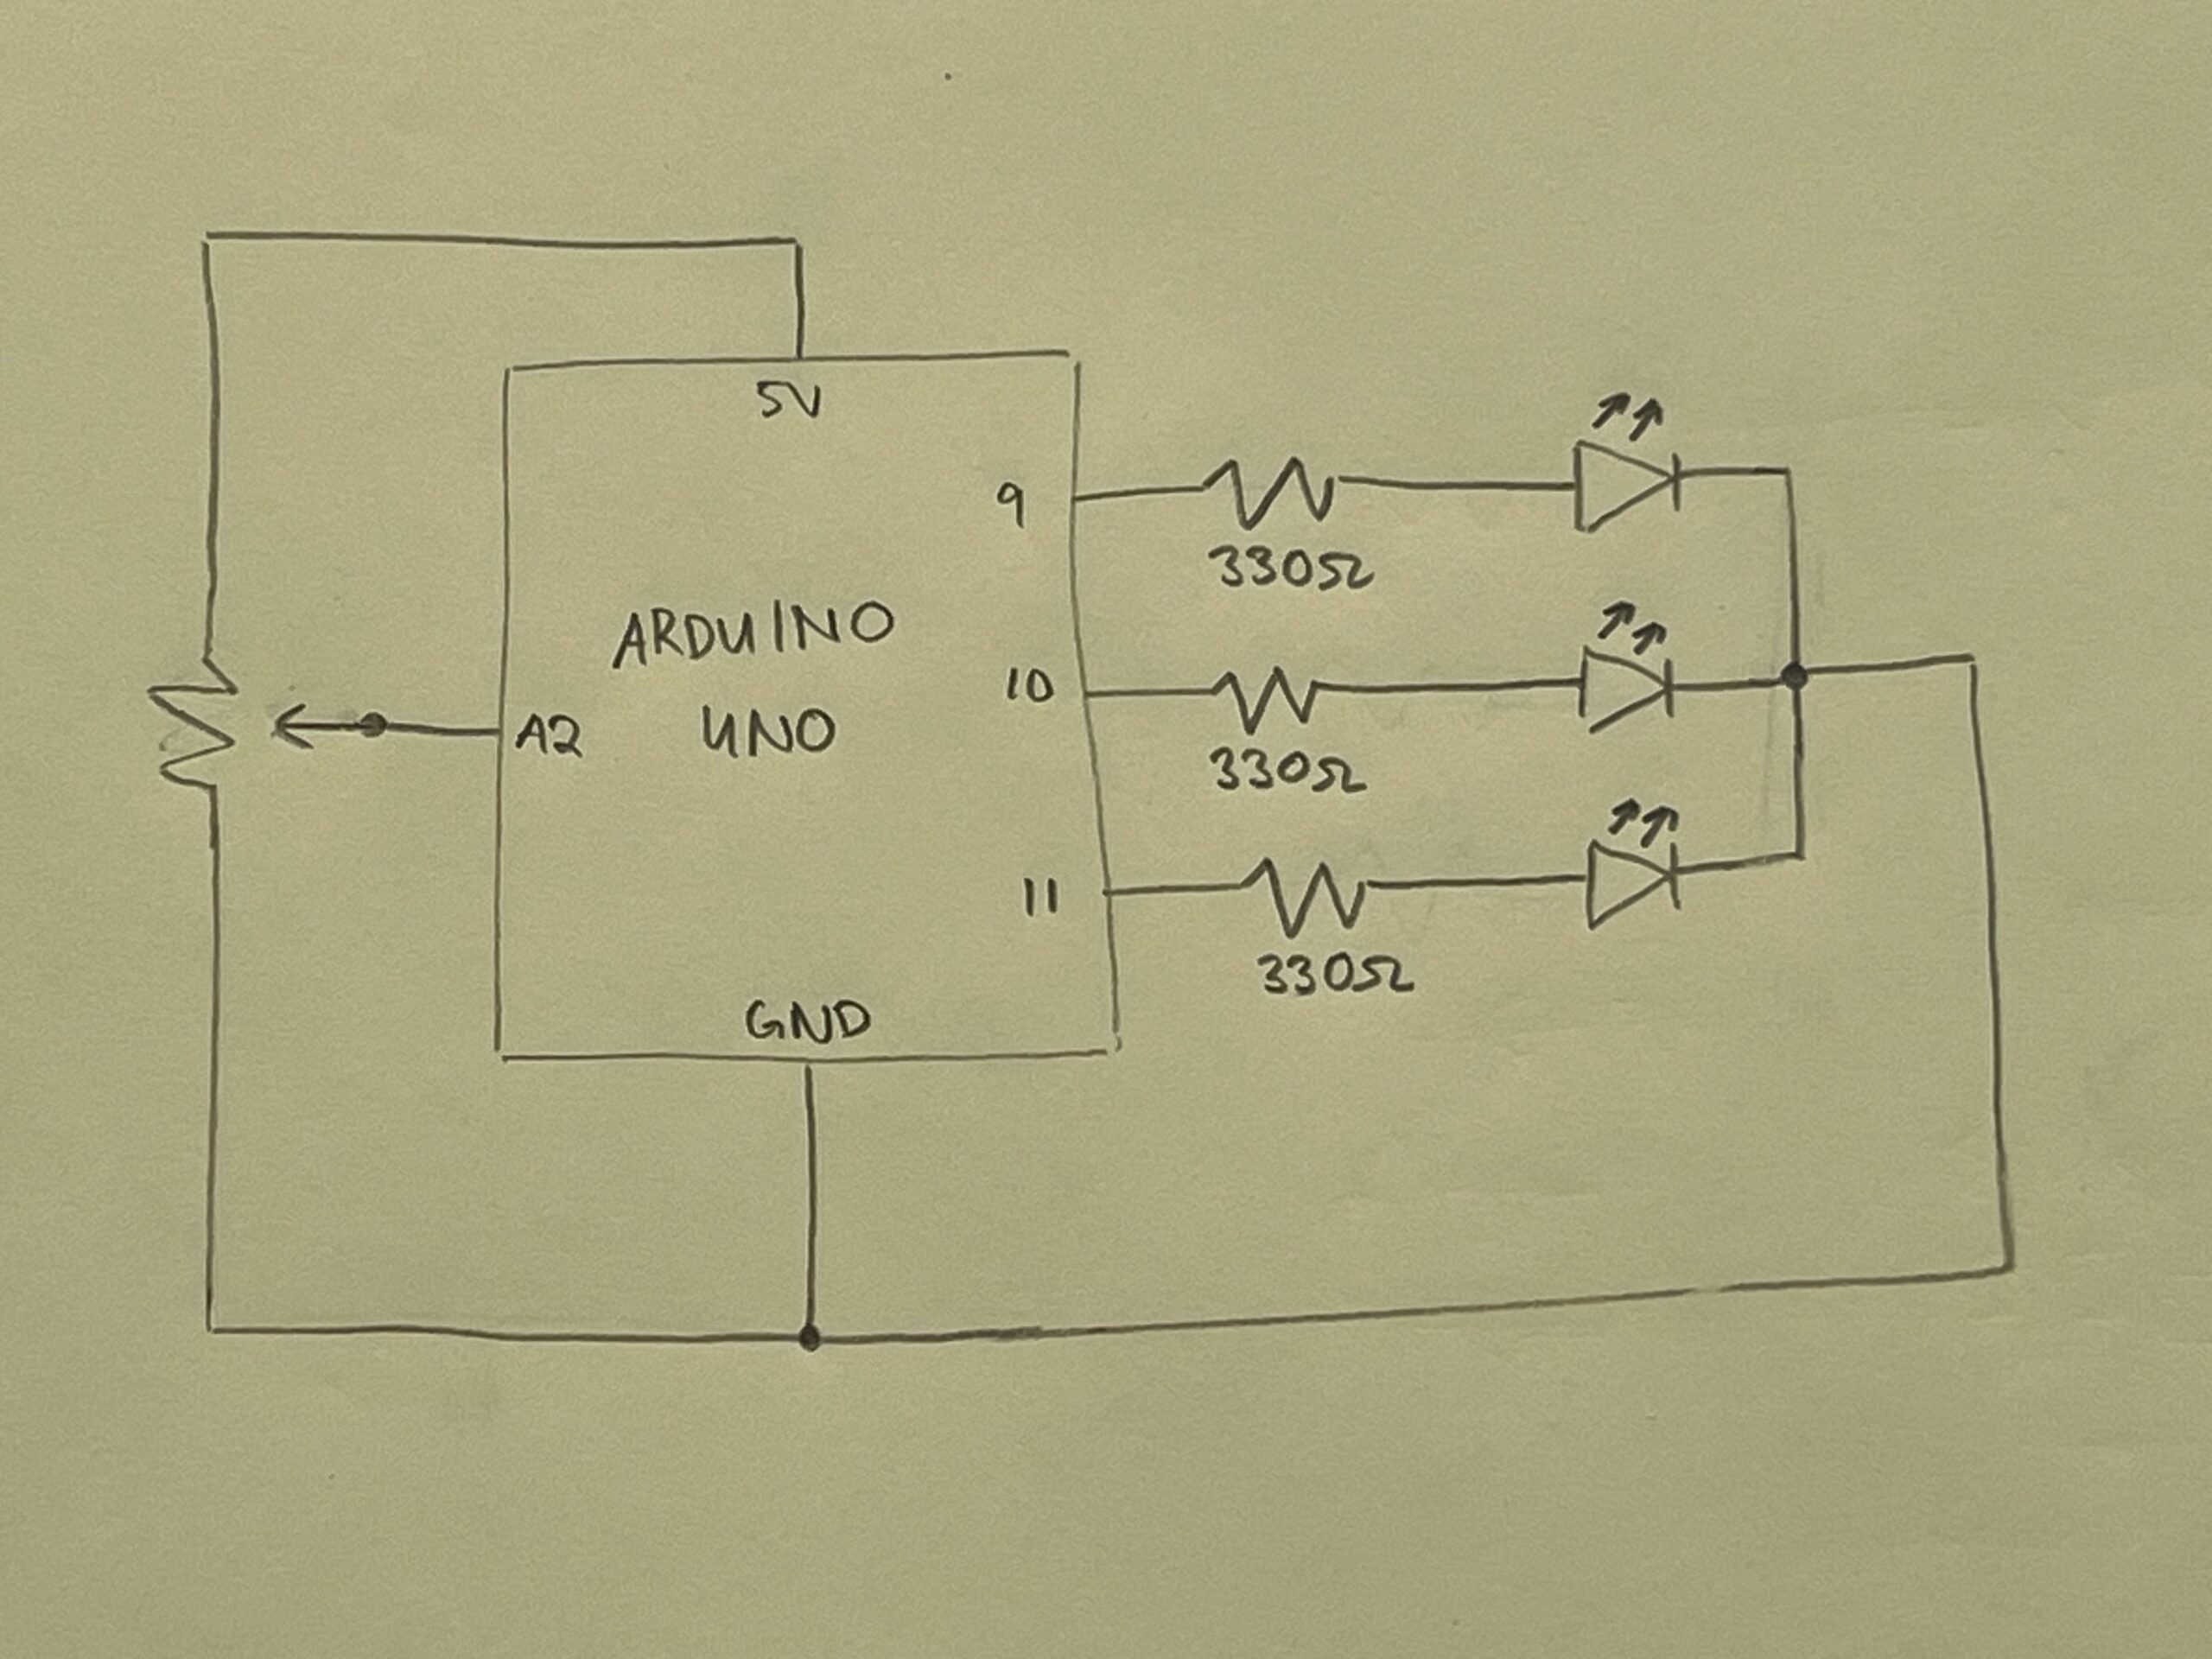
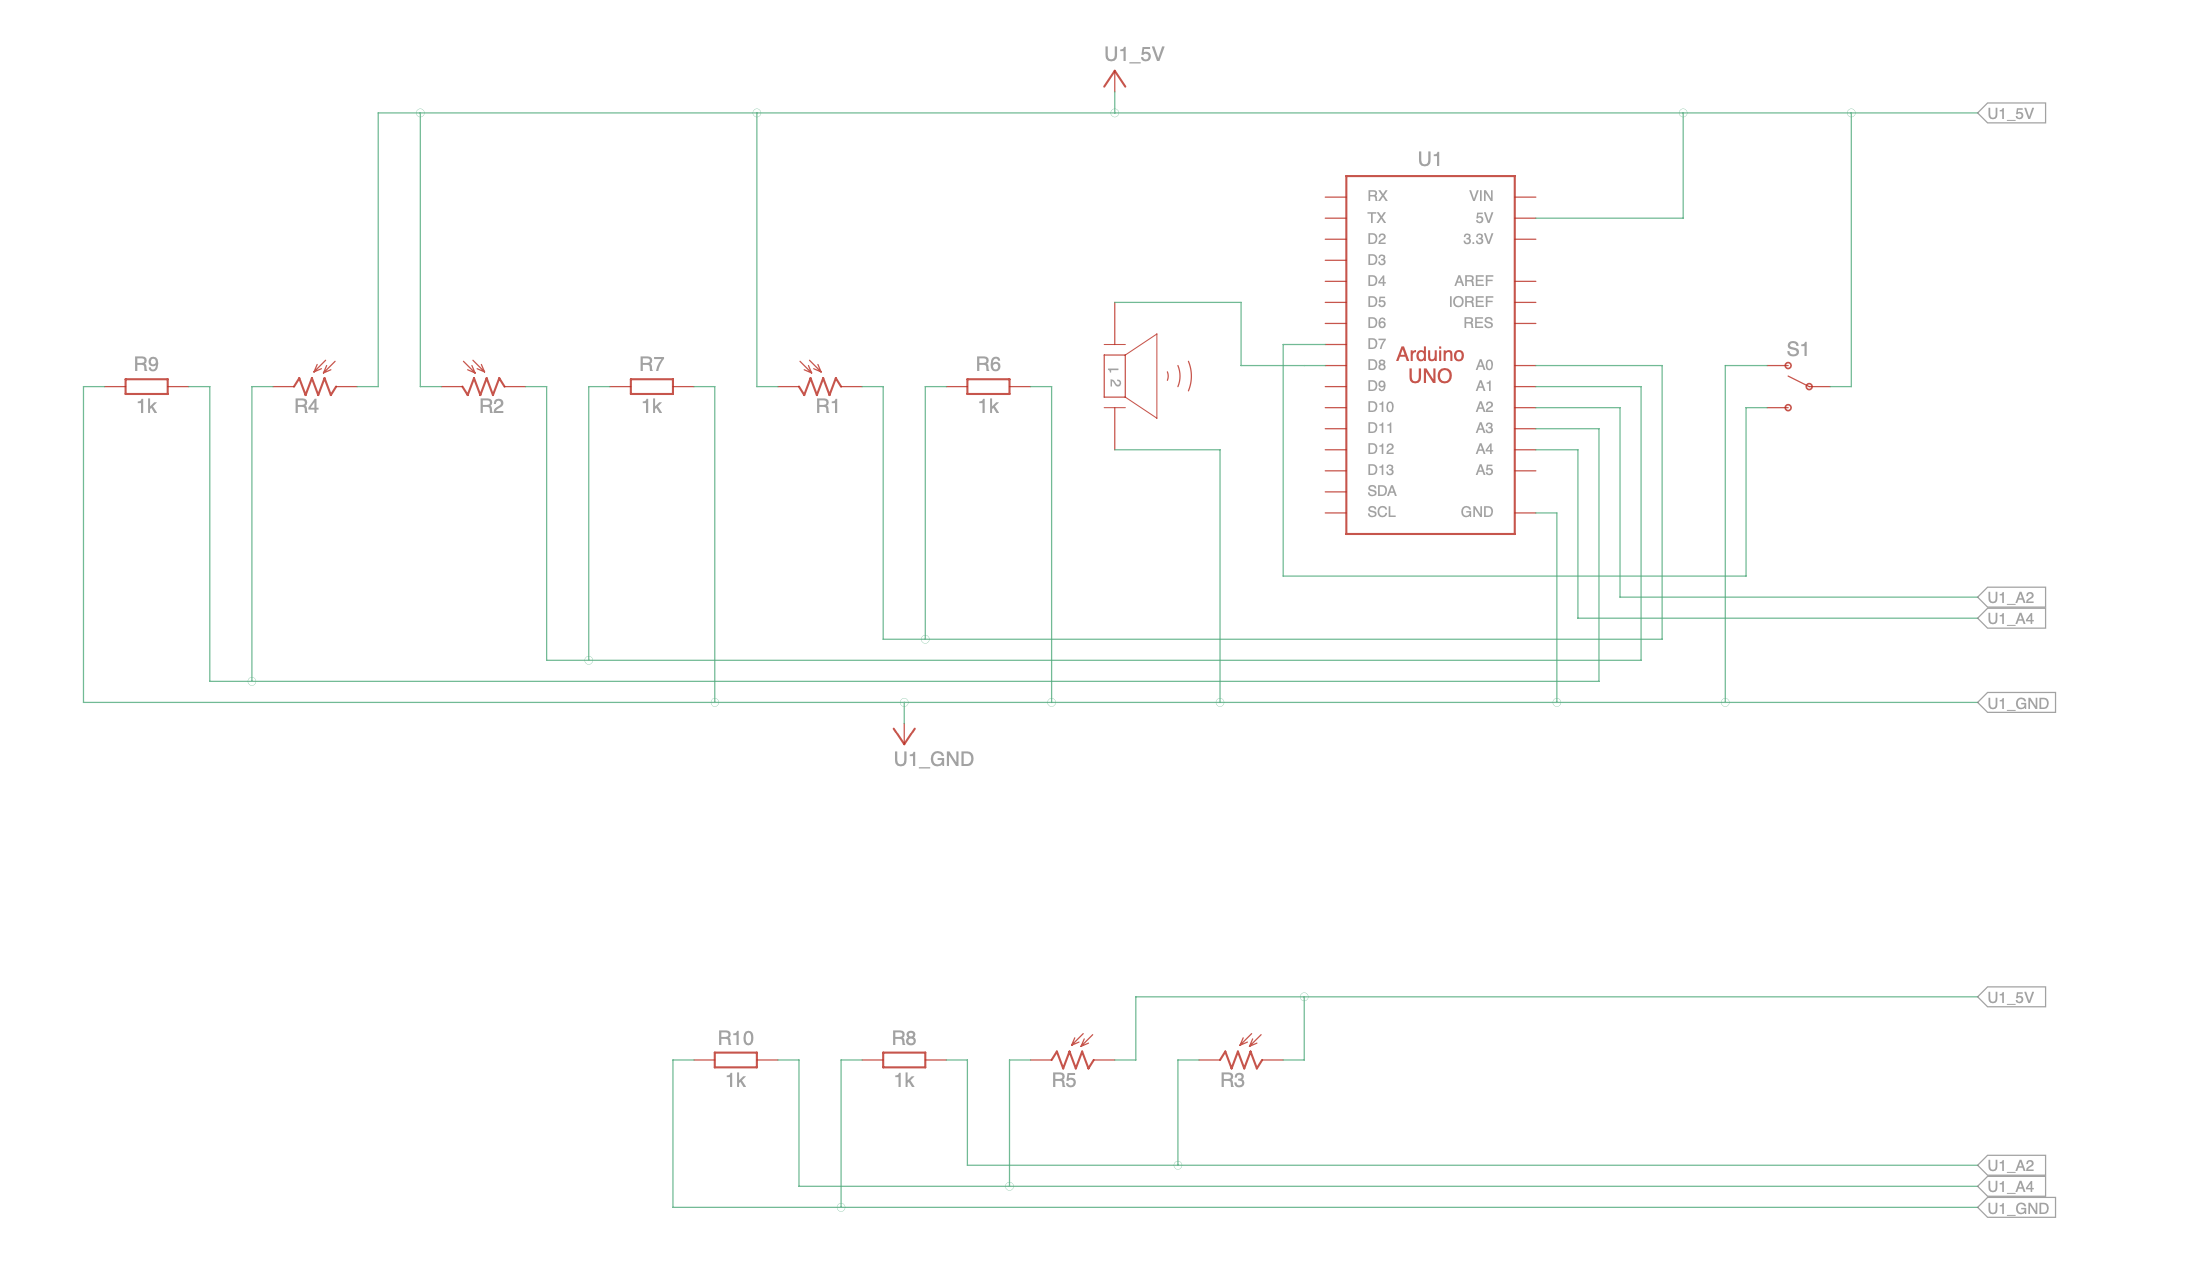
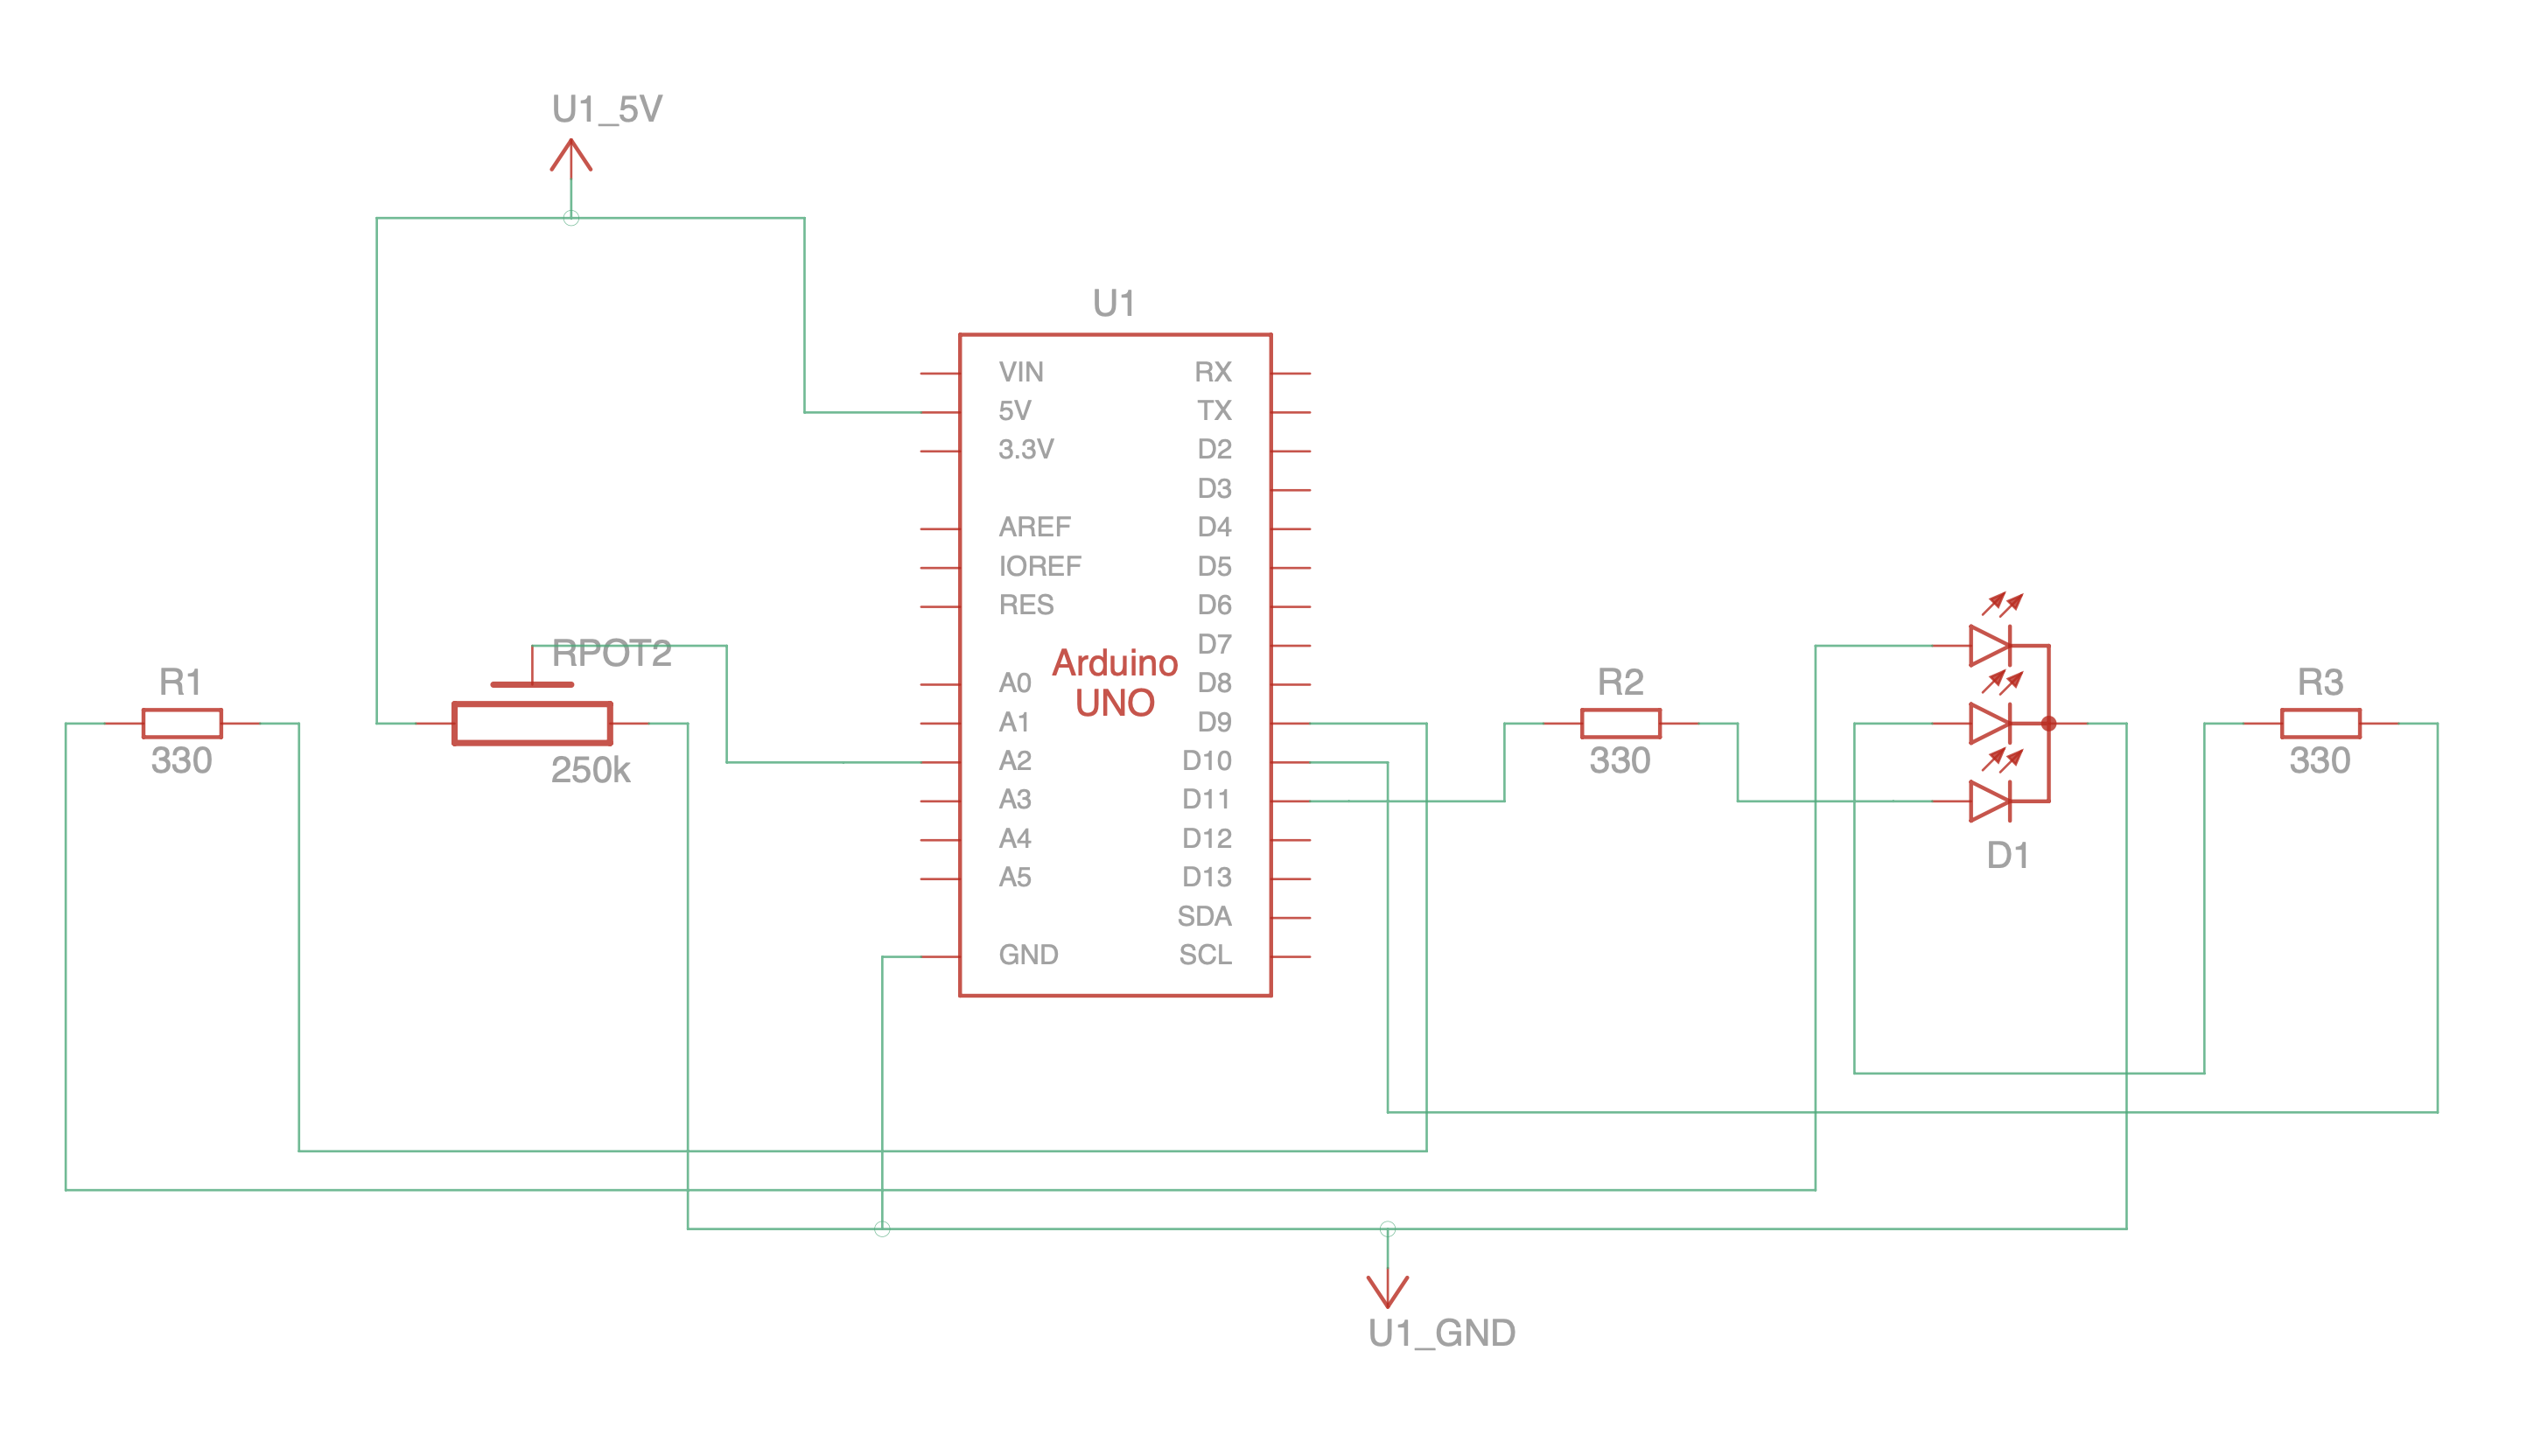
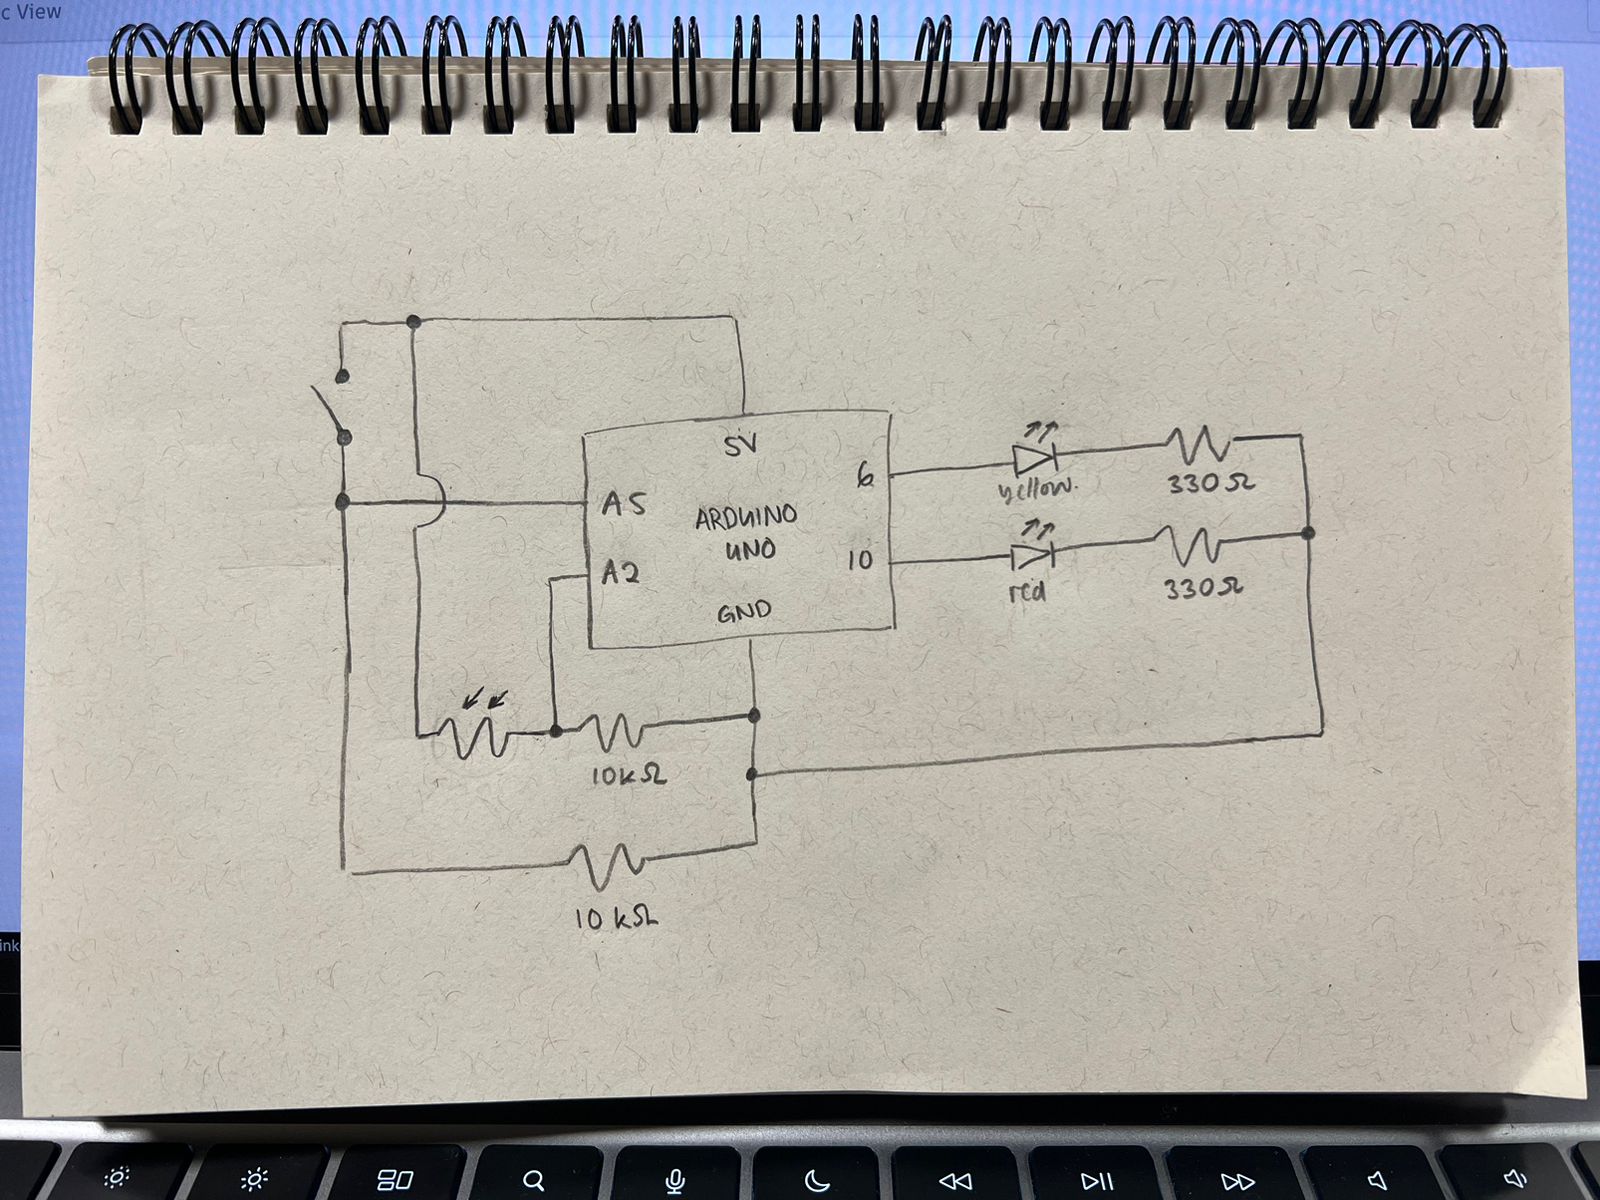
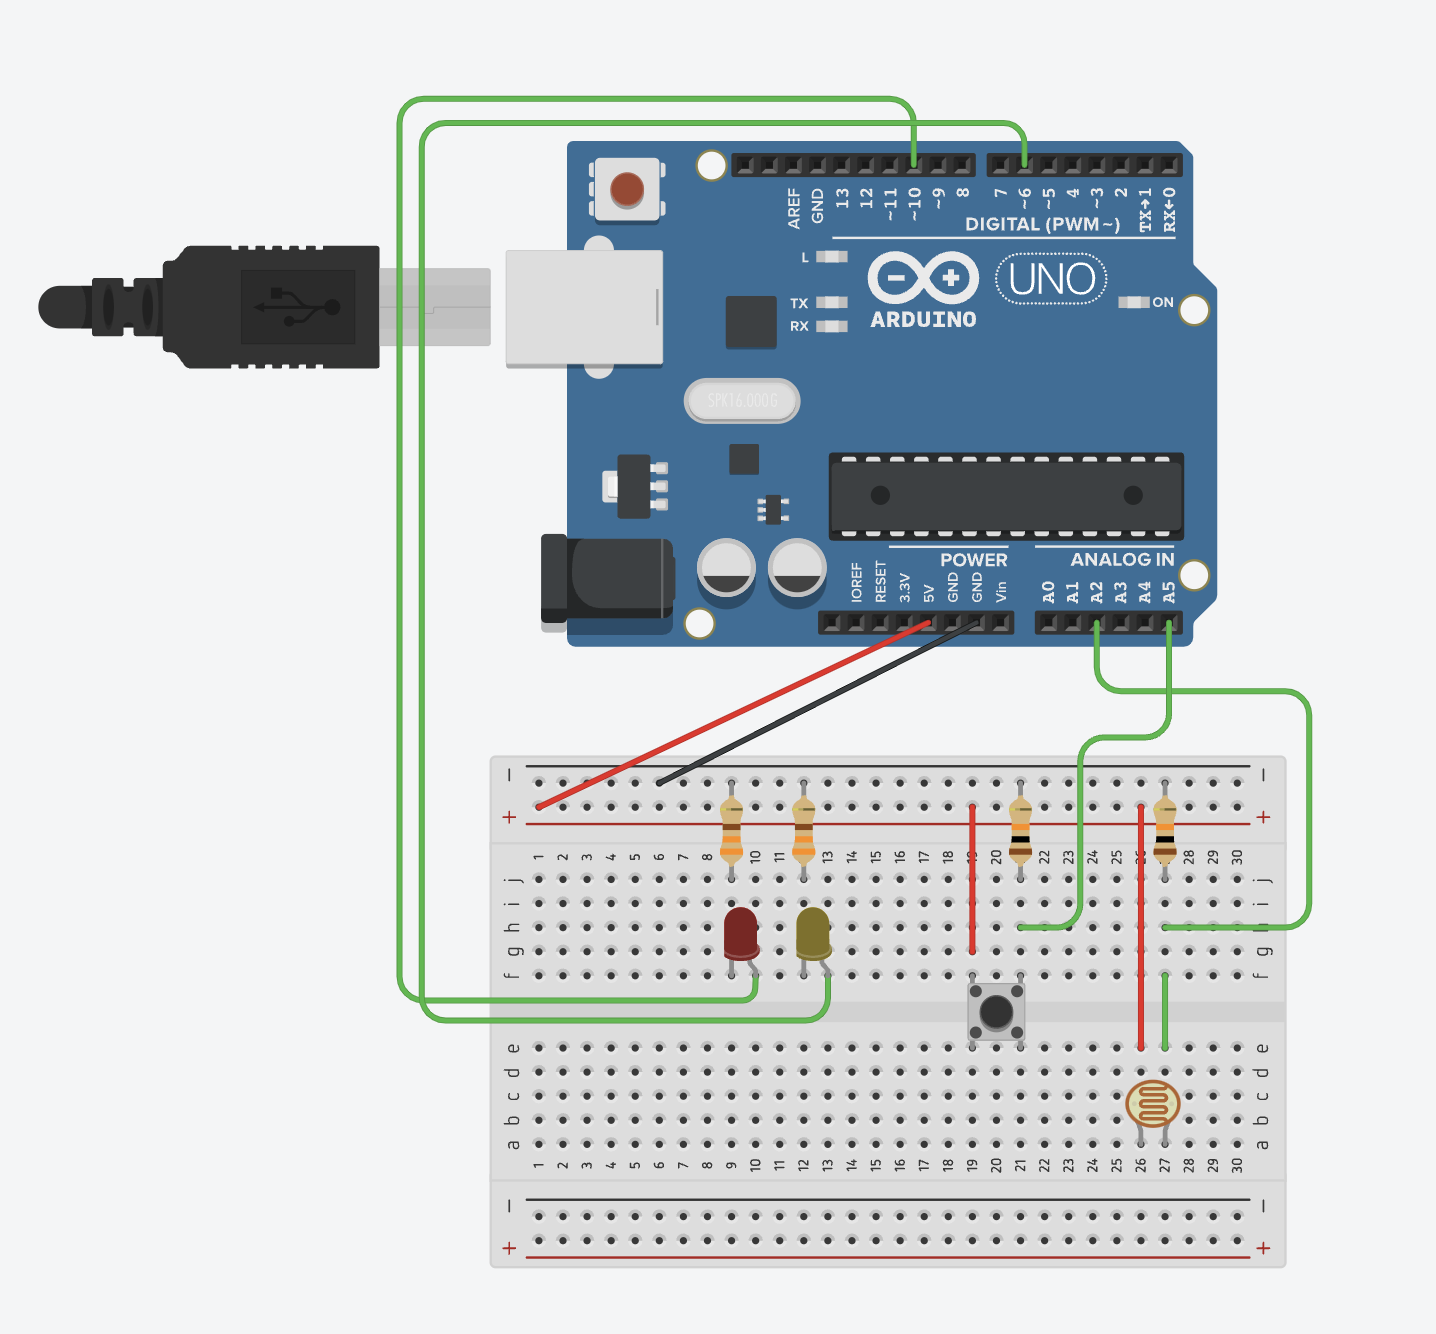
Schematic:
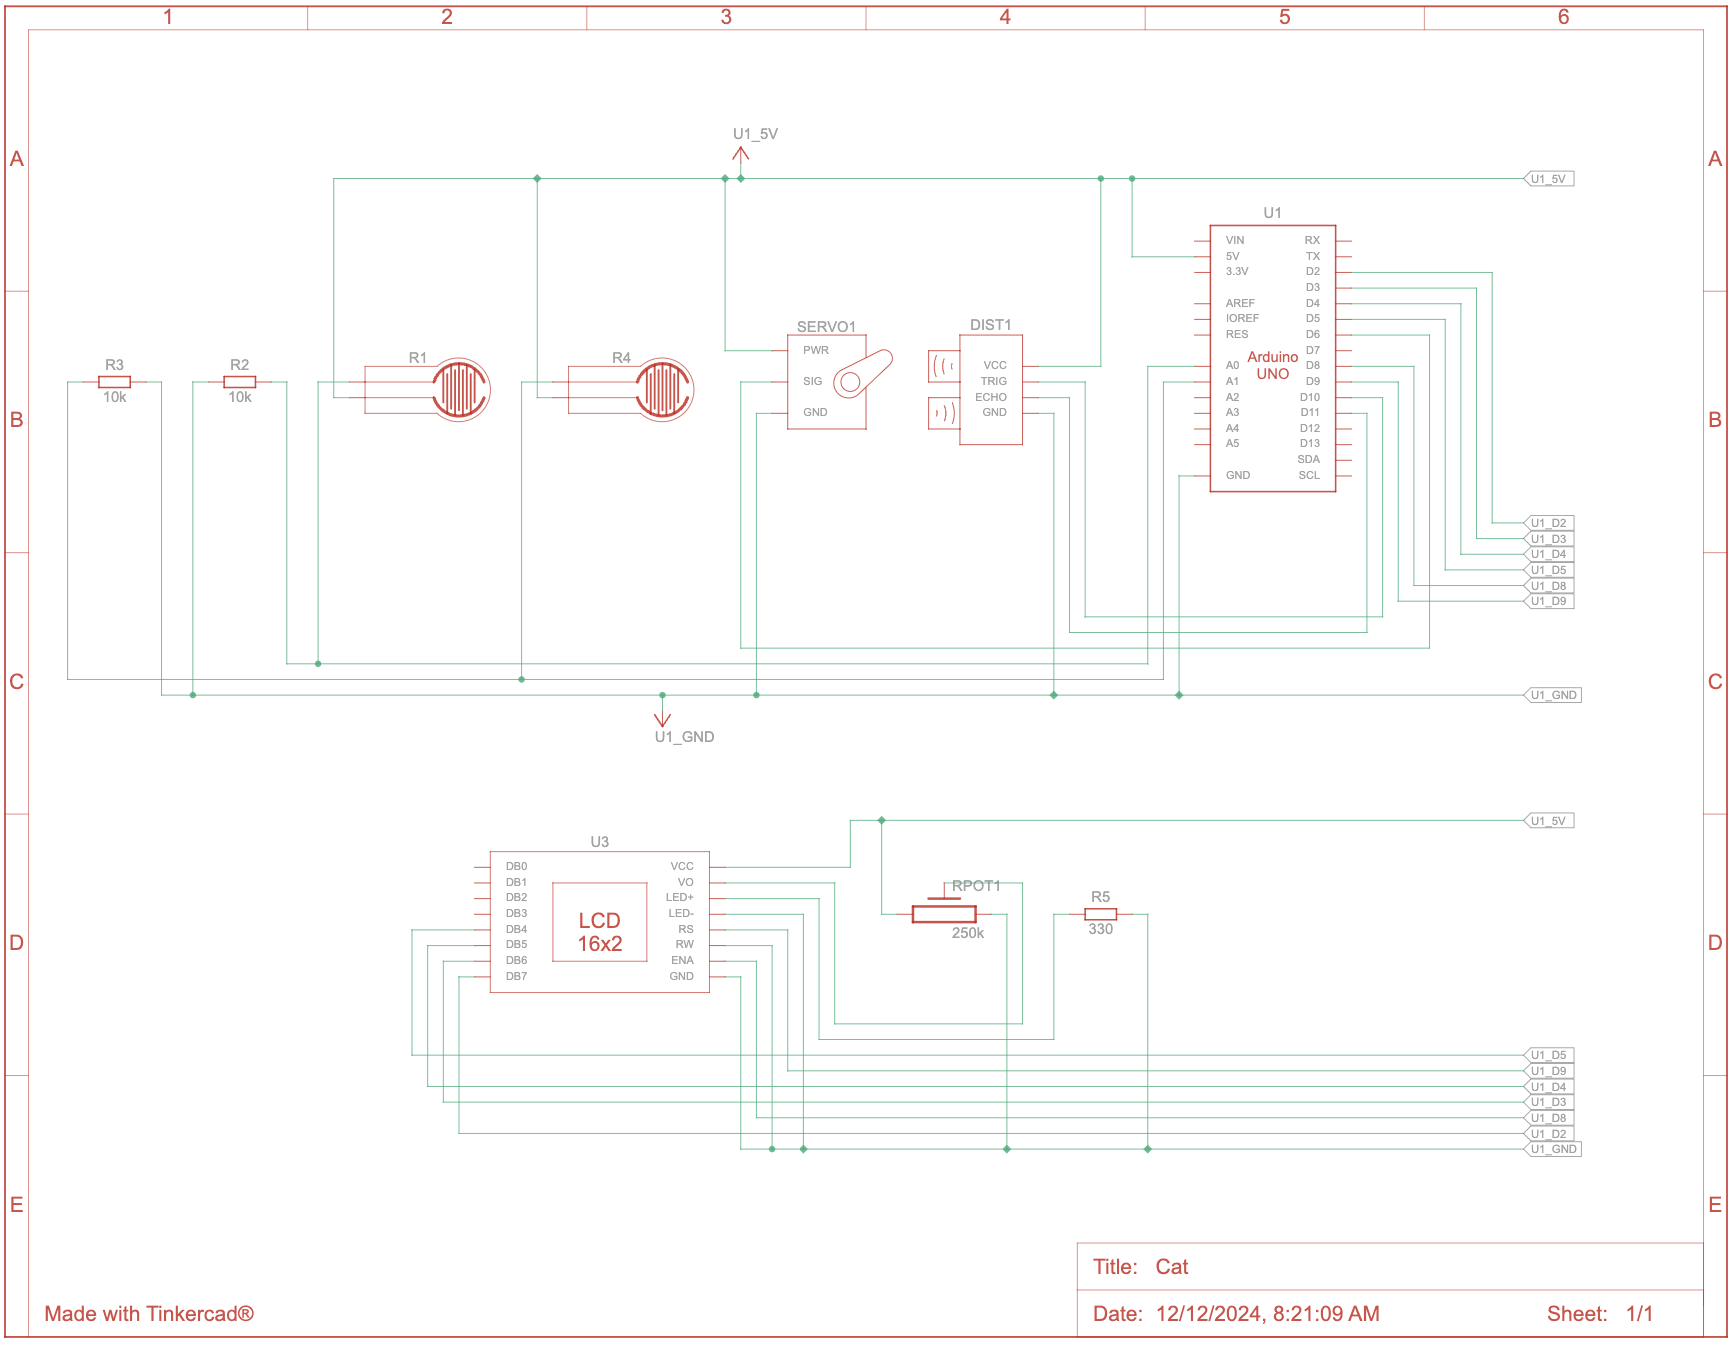
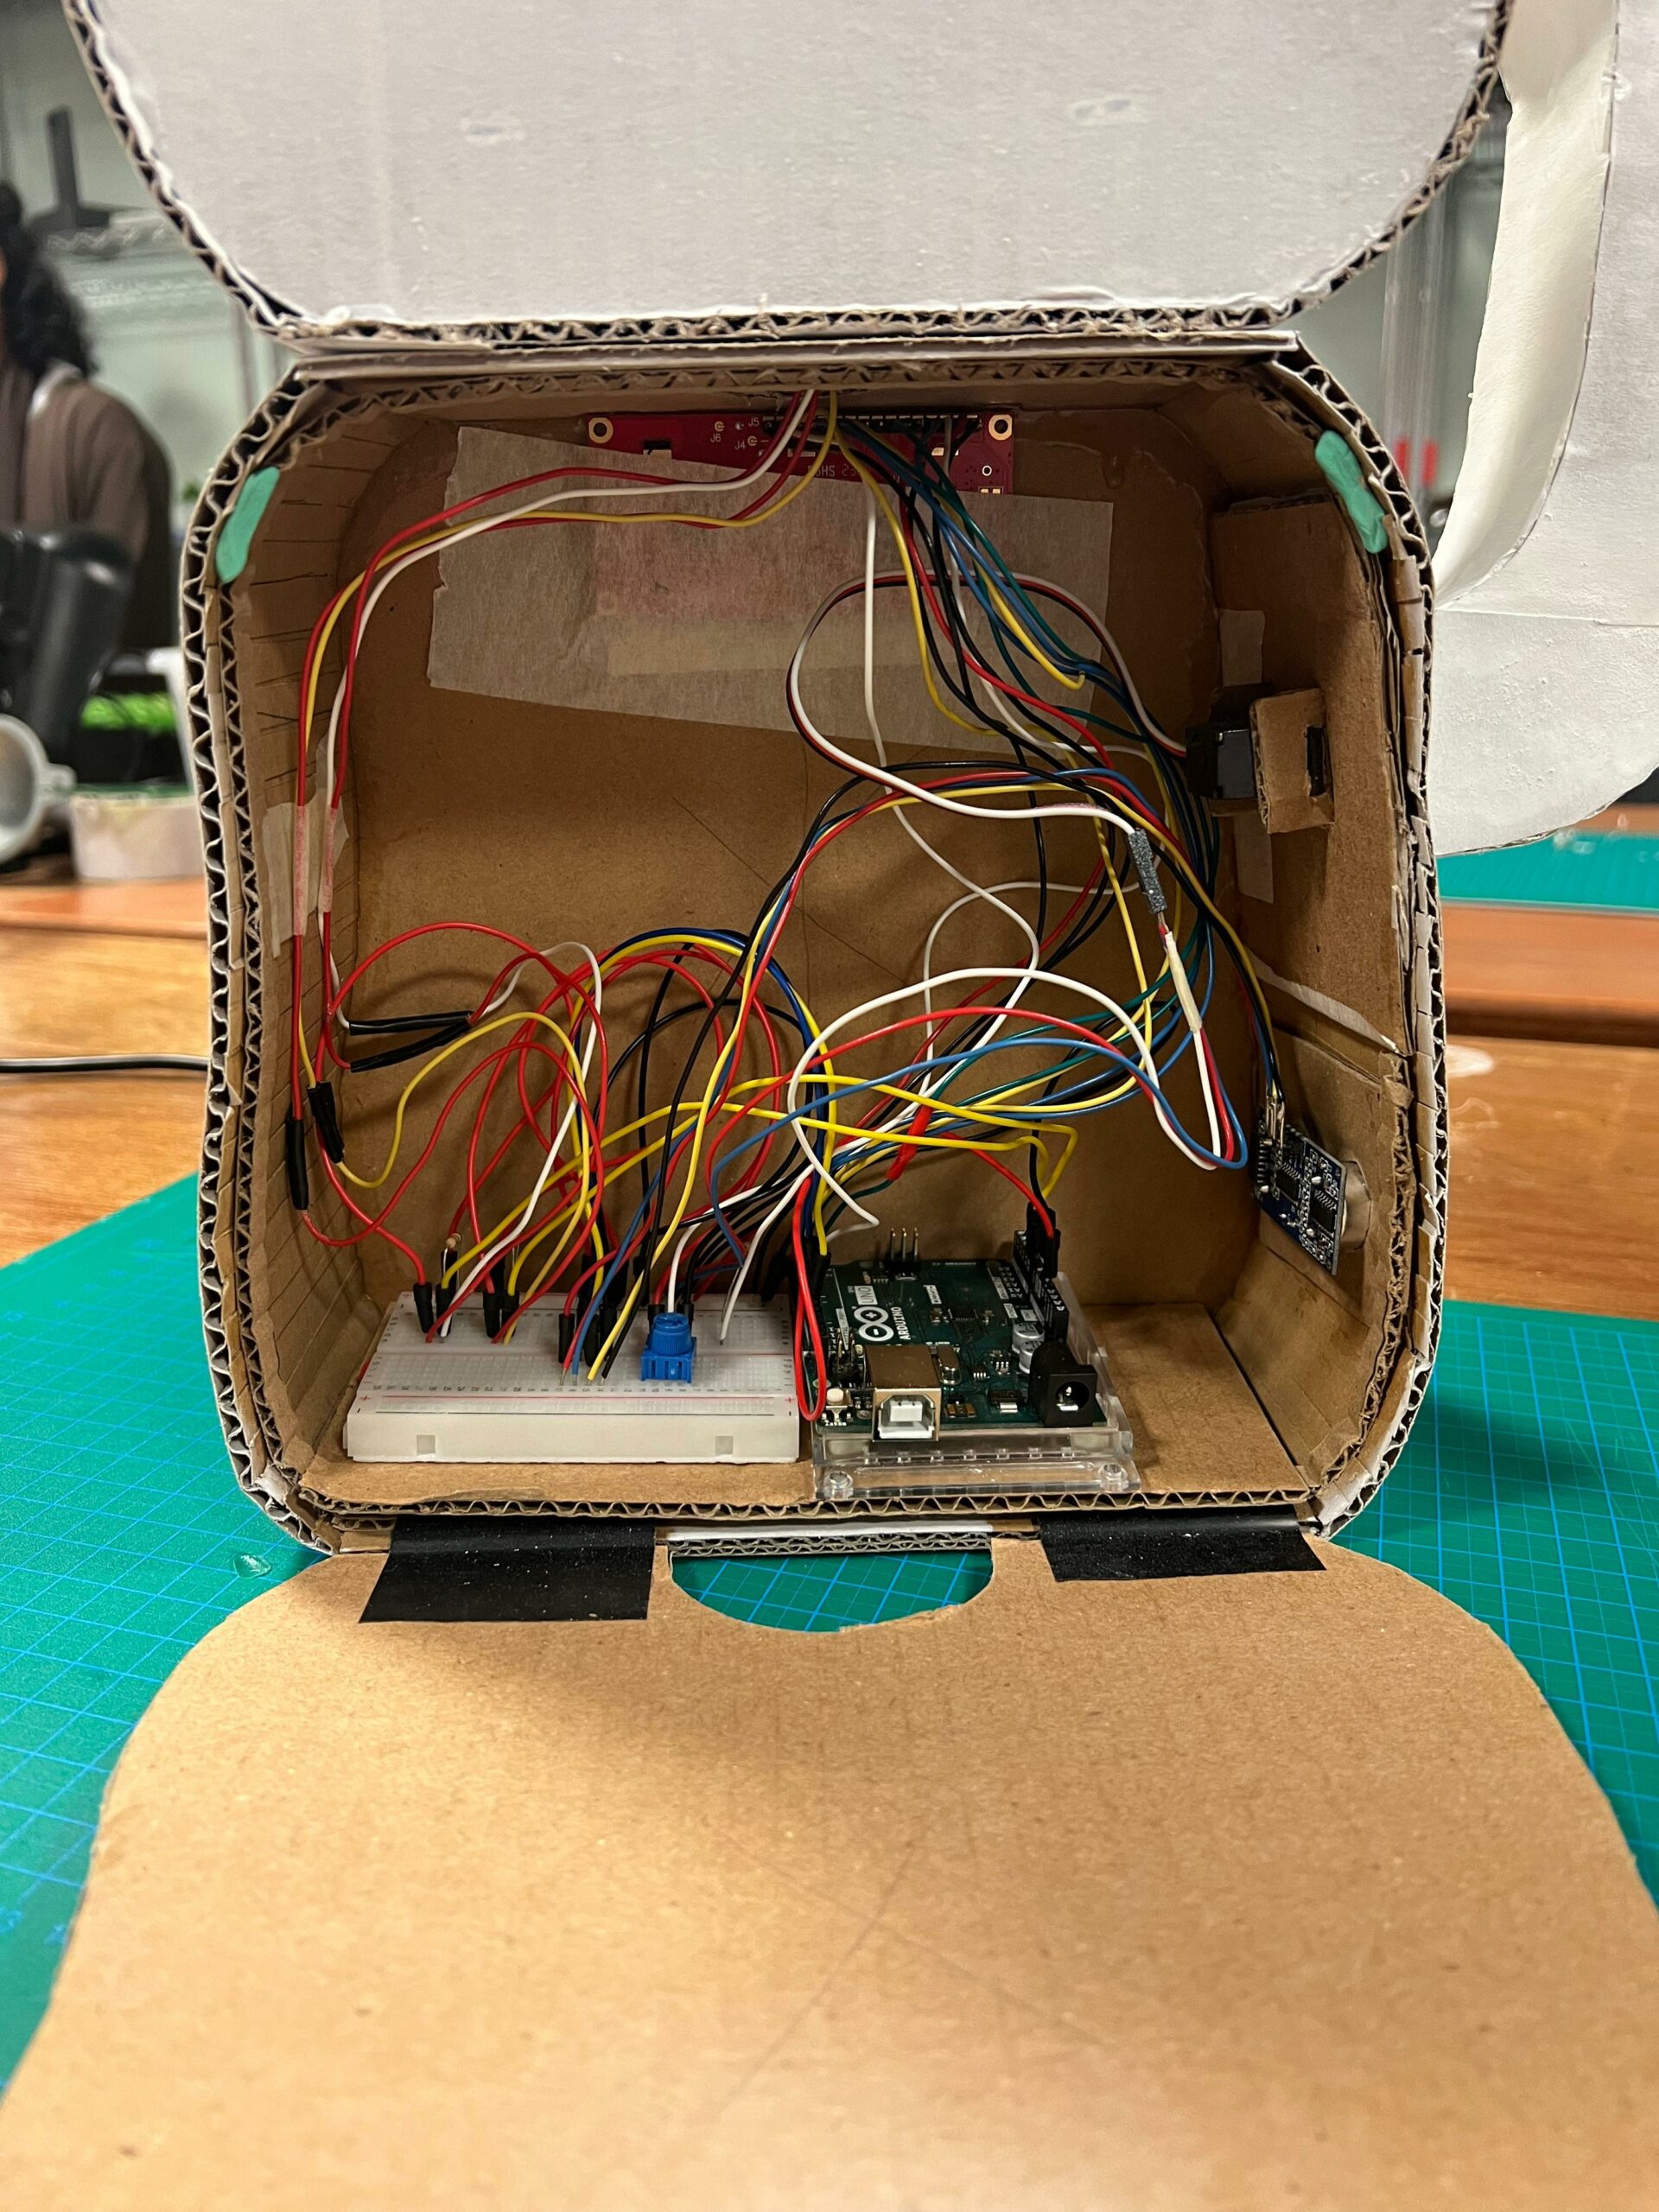
The cat itself is built using cardboard. The Arduino and breadboard are placed inside the body of the cat, accessible by opening the back panel of the body.
The arm of the cat is connected to a servo motor protruding from one side of the cat, and on the bottom of this same side, an electronic sensor also protrudes.
The head of the cat is also attached to the main body of the cat. On the bottom of the head, there is a circular hole to allow the wires connecting the two force sensors on the head to be able to connect to the breadboard and Arduino placed in the main body.
Over on the p5 side, I used a class to easily switch between the different states of the experience (start, play, end). Buttons were also made for user input to enter the name of the cat of their choosing and a submit button to confirm the name and trigger the sending of the name over to Arduino to be displayed on the LCD.
For the gifts, I illustrated each of the gifts on PowerPoint. The gifts are of a bird, a mouse, a yarn ball, a toy fish, and a donut.
I uploaded a meow sound onto p5 that plays when the cat is pet (based on the readings of the force sensors from Arduino).
Interaction Design
The cat is built from cardboard, and it has a collar in which the user can choose a name of their liking to be displayed on the collar. Cats love pets and users will be able to pet the cat and have it meow in content as a response.
When users extend their hand towards the cat, the cat lowers its paw and hand the users a “gift”. This act of gift giving from a cat is “an expression of affection and trust” which “shows they value the users companionship and consider them part of their social group.” (Cited from here)
However, the “gifts” the cats bring can range from random toys, to animals. This will be reflected in the p5.js sketch wherein every time a user extends their hand, the cat will give them a new “gift”.
Arduino
On the Arduino side, it was used mainly to get sensor readings and sending them to p5. It was used to calculate distance based on the readings from the ultrasonic sensor, change the servo motor position based on the distance readings, and output the name from p5 onto the LCD.
Here is a snippet of the code of how I triggered the move of the cat’s arm depending on the distance reading. It was initially using delay, but since delay will stop the whole program, I used millis() for time, stated the interval for delay between each increment or decrement of the servo position, and used the following code:
int servInt = 5;

// check if it's time to update the servo position

if (time - servoTime >= servInt) {
  // update the last move time
  servoTime = time;

  if (distance <= 10 && increasing) {
    // increment position
    pos++;
    if (pos >= 90) {
      // change direction
      increasing = false;
    }
  } else if (distance > 10 && !increasing){
    // decrement position
    pos--;
    if (pos <= 0) {
      // change direction
      increasing = true;
    }
  }
  // move the servo to the new position
  myservo.write(pos);
}
And here is the code for writing onto the LCD based on the name sent from the p5 sketch:
if (Serial.available()){

  name = Serial.readStringUntil('\n');
  name.trim();
  // only update LCD if the name has changed
  if (name != previousName) {
    // update the last displayed name
    previousName = name;
    // center-align the name
    int offset = (16 - name.length()) / 2;
    // reset to the first row
    lcd.setCursor(0, 0);
    // clear the row without lcd.clear()
    lcd.print("                ");
    // position the cursor to the beginning
    lcd.setCursor(offset, 0);
    // display the new name
    lcd.print(name);
  }

}
p5.js
On p5, I developed a class called Screen with 3 methods that would display the different states of the experience (start, play, and end). An input box and submit button was created for the name of the cat to be read from user input and then sent to Arduino. I also used p5 to play the cat’s meow when it is petted.
Here is a snippet of the code to randomize the gift and display the gift when the user’s hand is under the cat’s arm and the cat’s hand is lowered.
// in the main sketch

function randomizeGift(){
  while (!isDown){
    gift = gifts[int(random(0, gifts.length))]
    break;
  }
}

// in the Screen class, under the play() method

    // displaying gift when cat hand is lowered
    if (isDown){
      image(gift, width/2, height/2+h3)
      gift.resize(0,300)
    }
Communication between Arduino and p5.js
From Arduino:
Ultrasonic Sensor and Servo Motor
The ultrasonic sensor is placed on the side of the cat, under one of the cat’s paws that is raised. The reading from the ultrasonic sensor is used to calculate the distance of the hand from the cat. If the distance is smaller than a certain threshold, this triggers the servo motor to turn which causes the cat’s paw to lower and touch the user’s hand. Once the hand is lowered, it triggers the display of the randomized object the cat hands to the user on the P5 sketch. So to p5, Arduino will send the value of the calculated distance, and a boolean that states whether the hand is down or not.
Force Sensors
Two force sensors are placed on the cats head, so that when a user pets the cat, this force is recorded. Both of the force readings are sent to p5 to trigger the sound of a cat’s meow to play from P5.
From p5:
LCD Screen
The P5 sketch prompts the user to fill in an input box to give the cat a name of their choosing. This name will be sent to the Arduino to be displayed on the LCD screen which is bplaced on the cat’s neck, like a collar.
Highlights
I’m really proud of how everything came together, but specifically in how I managed to handle the communication between arduino and p5 in terms of the cat hand interaction. On the arduino side, having calculated distance, using this distance value as a condition that triggers the change in position of the servo motor for the cat’s hand to lower, and using a boolean value to state if the cat’s hand is lowered or not is one thing I’m proud of for being able to pull off. Then on the p5 side, using the boolean variable of whether the cat’s hand is down or not to create a function that randomizes the gift and then within a method in the class that I created, I used this function and then displayed the gift when the cat’s arm is down. I think managing this whole process and communication to work well is something that I’m very proud of.
Resources
Calculation of distance from ultrasonic sensor
Challenges
I initially had issues with the delay of the servo motor, since delay would stop all of the code
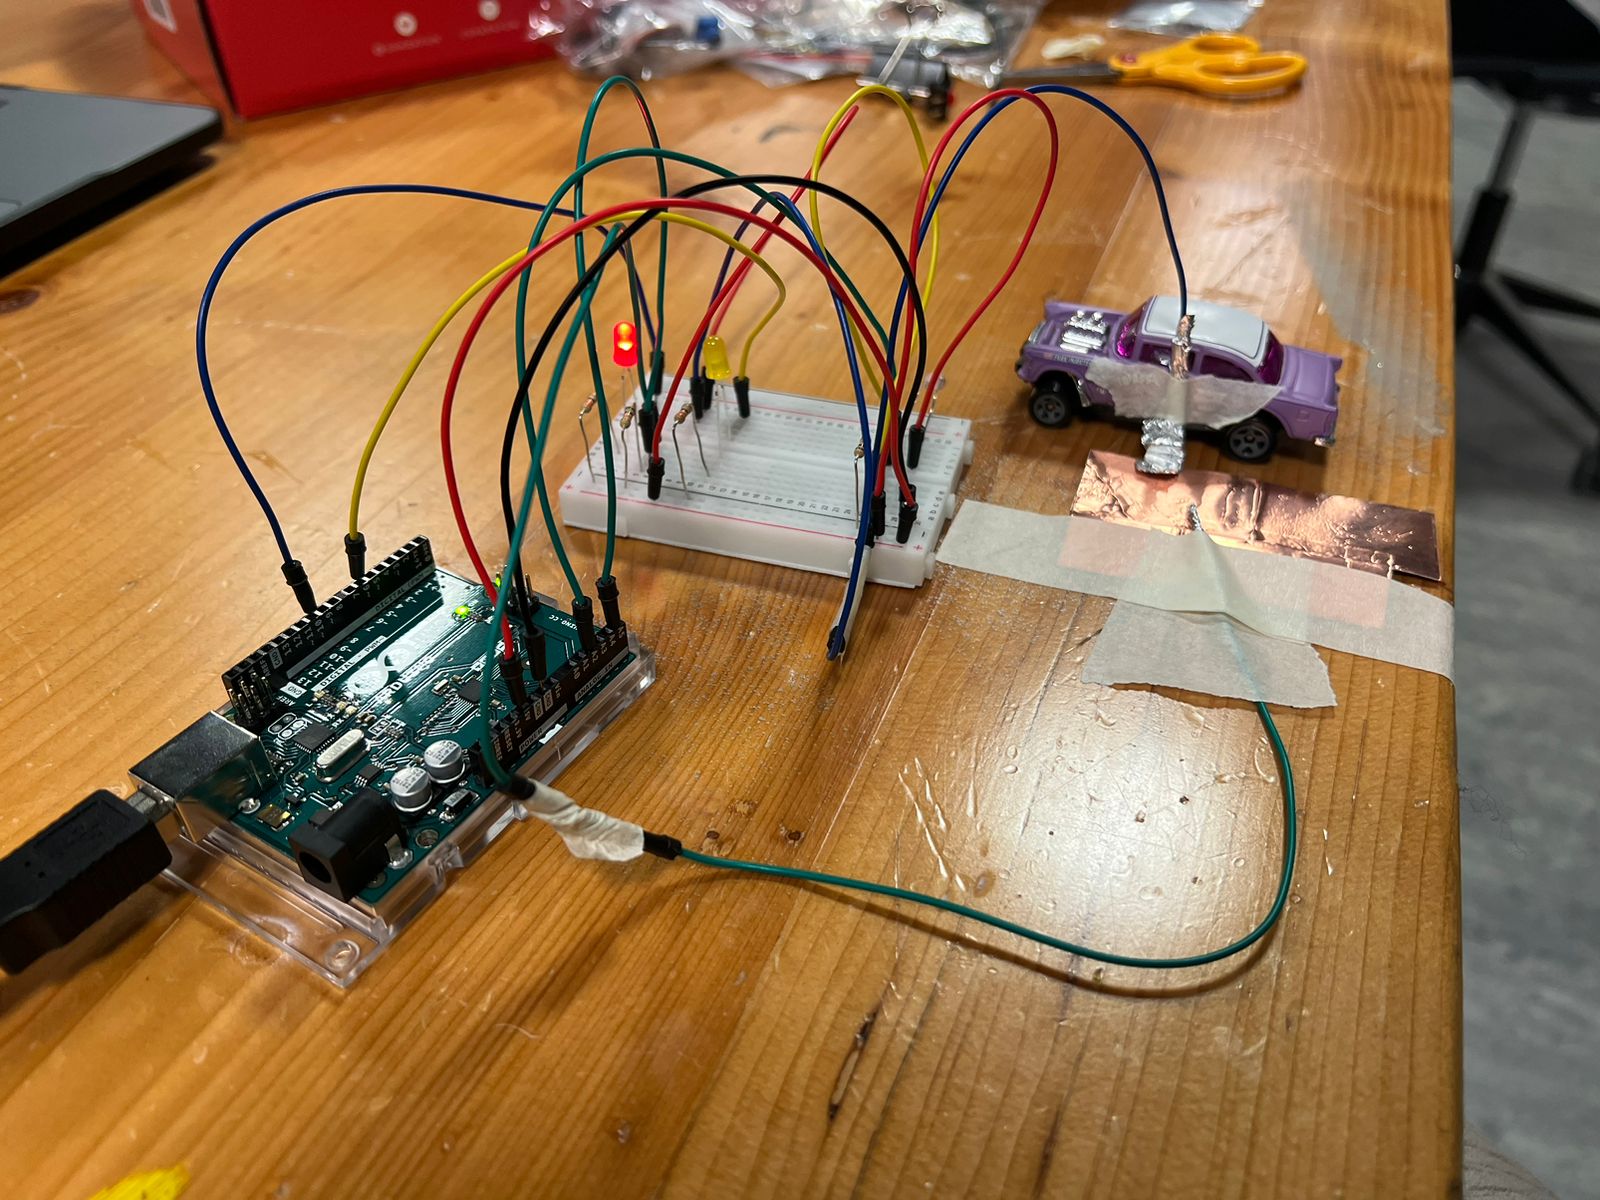
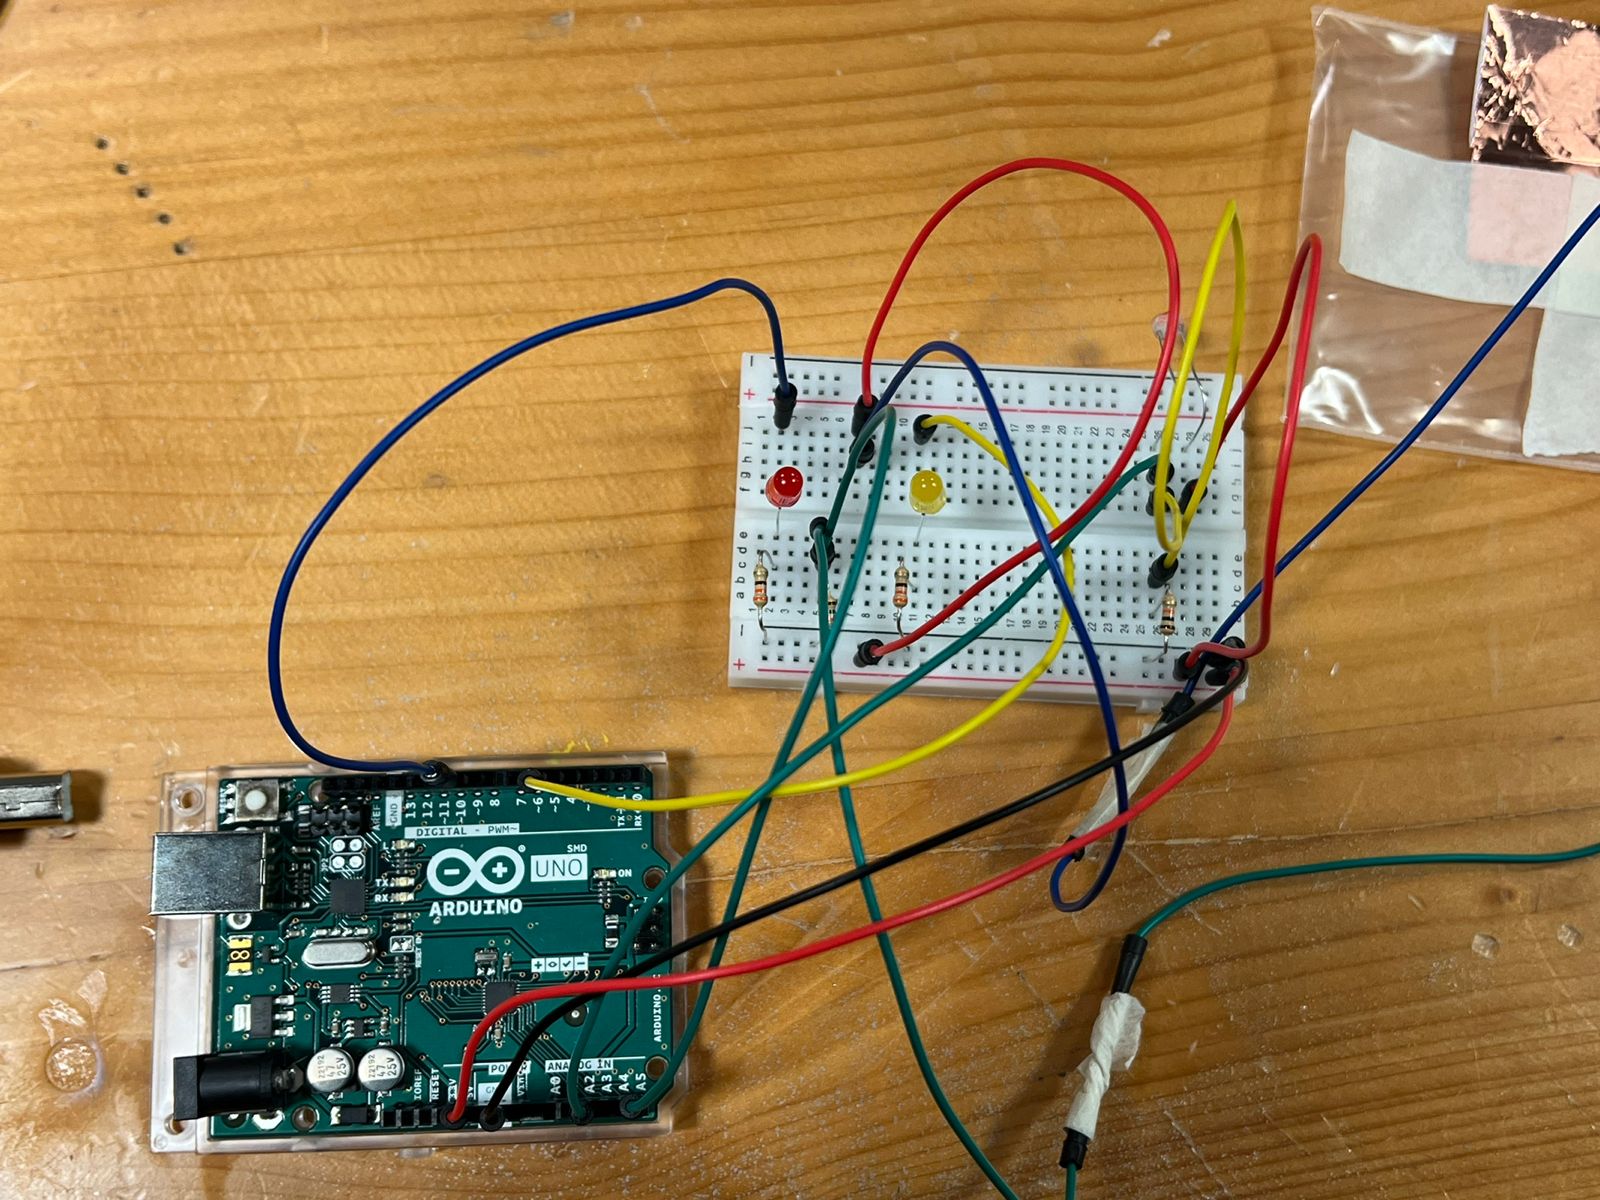
One of the greatest challenges that I had with this project was finding the perfect pressure/force sensor to use for the petting and meowing experience. I initially made a prototype of a pressure sensor using velostat and copper tape which worked, but when I tried implementing it on a bigger scale, it was not giving me a varying range of readings. I then turned to use a piezo sensor, but the results were similar. It was then that I found the small force sensor that was very sensitive and is exactly what I was looking for, just that it was a tad bit small, so I ended up using two of them to cover a larger area of the cat’s head to trigger the meow sound.
Future Improvements
For the future, as I have been advised by a user I had the pleasure of meeting at the IM Showcase, I would like to implement a more technical approach to the project. I would like to try using a sensor for facial expression to detect the user’s facial expression (and thus emotions) and based on this reading, the cat will have certain reactions (or perhaps facial expressions as well, displayed on a larger LCD screen) as a response to the user’s emotions. I think with this approach, the experience will create a deeper relationship between the user and the cat, just as a real owner and pet relationship.
Fall 2024 Interactive Media Showcase Documentation
Tuesday 10 December 2024