Final Project Concept

For my final project, I want to create a  Harry Potter-inspired Magic Wand Simulator. The project would use an infrared (IR) sensor attached to the tip of the wand to detect gestures and proximity, allowing users to perform actions like raising, flicking, or pointing the wand to trigger spells.

Each spell corresponds to specific animations and effects in p5 and provides feedback through physical outputs controlled by Arduino, such as lighting up LEDs or playing sounds. Ideally I would want the motion to be accurate like the films/books. So hopefully the movements will be detected accurately. For example, creating the motion for Lumos, causes the p5 screen to brighten. I plan to create the p5 screen to look like a Hogwarts common room, and be able to move objects, turn the light on/off, etc, based on the wand’s movement.


Week 11 Assignment | Serial Communication Exercise 1-3

Example 1 – Arduino to p5 communication

IMG_3382

P5 code

let X = 0; // ellipse x position


function setup() {
  createCanvas(400, 400); 
}

function draw() {
  background(240); 

  fill('rgb(134,126,126)'); 
  ellipse(X, height/2, 80); 
}

function keyPressed() {
  if (key === " ") {
    setUpSerial(); // Start the serial connection on space bar press
  }
}

// Processes incoming data from Arduino
function readSerial(data) {
  if (data != null) {
    let fromArduino = split(trim(data), ","); // Split incoming data by commas

    if (fromArduino.length >= 1) {
      // Process the first value for X position
      let potValue = int(fromArduino[0]); // Convert string to integer
      X = map(potValue, 0, 1023, 50, width - 50); // Map potentiometer value to X position
      Y = height / 2; // Keep Y position constant
    }
  }
}

Arduino code

void setup() {
  Serial.begin(9600); //  serial communication
}

void loop() {
  int potValue = analogRead(A0); // potentiometer value
  Serial.println(potValue);     // send the value to the serial port
  delay(10);                   
}

Example 2 – P5 to Arduino Communication


p5 code

let brightness = 0; // Brightness value to send to Arduino

function setup() {
  createCanvas(640, 480);
  textSize(18);
}

function draw() {
  background(255);

  if (!serialActive) {
    // If serial is not active display instruction
    text("Press Space Bar to select Serial Port", 20, 30);
  } else {
    // If serial is active, display connection status and brightness value
    text("Connected", 20, 30);
    text('Brightness = ' + str(brightness), 20, 50);
  }

  // Map the mouseX position (0 to width) to brightness (0 to 255)
  brightness = map(mouseX, 0, width, 0, 255);
  brightness = constrain(brightness, 0, 255); // Ensures brightness is within the range 0-255

  // Sends brightness value to Arduino
  sendToArduino(brightness);
}

function keyPressed() {
  if (key == " ") {
    // Start serial connection when the space bar is pressed
    setUpSerial();
  }
}


function readSerial(data) {
  if (data != null) {

  }
}
// We dont need this part of the code because we are not getting any value from the Arduino

// Send brightness value to Arduino
function sendToArduino(value) {
  if (serialActive) {
    let sendToArduino = int(value) + "\n"; // Convert brightness to an integer, add newline
    writeSerial(sendToArduino); // Send the value using the serial library
  }
}

Arduino code

void setup() {
  Serial.begin(9600); //  serial communication
}

void loop() {
  int potValue = analogRead(A0); // potentiometer value
  Serial.println(potValue);     // send the value to the serial port
  delay(10);                   
}

Example 3 – Bi-Directional Communication
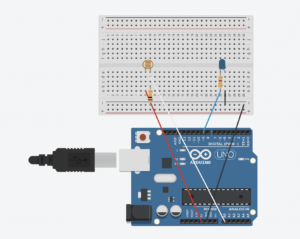


p5 code

let velocity;
let gravity;
let position;
let acceleration;
let wind;
let drag = 0.99;
let mass = 50;


let windValue = 0; // Wind value from Arduino (light sensor)
let serialConnected = false; // Tracks if the serial port is selected

function setup() {
  createCanvas(640, 360);
  textSize(18); 
  noFill();

  position = createVector(width / 2, 0);
  velocity = createVector(0, 0);
  acceleration = createVector(0, 0);
  gravity = createVector(0, 0.5 * mass);
  wind = createVector(0, 0);
}

function draw() {
  background(255);

  if (!serialConnected) {
    // Show instructions to connect serial port
    textAlign(CENTER, CENTER);
    fill(0); // Black text
    text("Press Space Bar to select Serial Port", width / 2, height / 2);
    return; // Stop loop until the serial port is selected
  } else if (!serialActive) {
    // Show connection status while waiting for serial to activate
    textAlign(CENTER, CENTER);
    fill(0);
    text("Connecting to Serial Port...", width / 2, height / 2);
    return; // Stop until the serial connection is active
  } else {
    // display wind value and start the simulation if connected
    textAlign(LEFT, TOP);
    fill(0);
    text("Connected", 20, 30);
    text('Wind Value: ' + windValue, 20, 50);
  }

  // Apply forces to the ball
  applyForce(wind);
  applyForce(gravity);

  // Update motion
  velocity.add(acceleration);
  velocity.mult(drag);
  position.add(velocity);
  acceleration.mult(0);

  // Draw the ball
  ellipse(position.x, position.y, mass, mass);

  // Check for bounce
  if (position.y > height - mass / 2) {
    velocity.y *= -0.9; 
    position.y = height - mass / 2; // Keep the ball on top of the floor 

    // Sends signal to Arduino about the bounce
    sendBounceSignal();
  }

  // Update wind force based on Arduino input
  wind.x = map(windValue, 0, 1023, -1, 1); // Map sensor value to wind range
}

function applyForce(force) {
  let f = p5.Vector.div(force, mass);// Force divided by mass gives acceleration
  acceleration.add(f);
}

// Send a bounce signal to Arduino
function sendBounceSignal() {
  if (serialActive) {
    let sendToArduino = "1\n"; // Signal Arduino with "1" for a bounce
    writeSerial(sendToArduino);
  }
}

// incoming serial data from Arduino
function readSerial(data) {
  if (data != null) {
    windValue = int(trim(data)); // store the wind value
  }
}

// Press space bar to initialize serial connection
function keyPressed() {
  if (key == " ") {
    setUpSerial(); // Initialize the serial connection
    serialConnected = true; // Mark the serial port as selected
  }
}

// Callback when serial port is successfully opened
function serialOpened() {
  serialActive = true; // Mark the connection as active
}

Arduino code

const int ledPin = 9;  // Digital pin 9 connected to the LED
const int lightSensor = A0; // Analog input pin A0 for the light sensor

void setup() {
  Serial.begin(9600);      // Start serial communication
  pinMode(ledPin, OUTPUT); // Set LED pin as an output
}

void loop() {
  // Read the light sensor value
  int lightValue = analogRead(lightSensor);

  // Send the light value to p5.js
  Serial.println(lightValue);

  // Check for bounce signal (when ball touches the ground) from p5.js
  if (Serial.available() > 0) {
    int bounceSignal = Serial.parseInt();
    if (Serial.read() == '\n' && bounceSignal == 1) {
      // Turn on the LED briefly to indicate a bounce
      digitalWrite(ledPin, HIGH);
      delay(100);
      digitalWrite(ledPin, LOW);
    }
  }

  delay(50); // Small delay 
}


Week 11 | Reading Response

The reading explains how good design transcends functionality. The transition from medical necessity to mainstream artistry shows how constraints can drive innovation. It challenges the assumption that advances flow only from mainstream to niche needs, showing that disability inspired innovations can enrich and transform general design.

Aimee Mullins’s carved wooden legs is an example of how disability can be used as a unique and artistic expression. Mullins’s prosthetic legs are not just functional but also works of art, showcasing intricate carvings and unique designs that celebrate individuality rather than hiding difference. This approach challenges the traditional narrative of discretion in assistive devices, turning them into tools for personal empowerment and storytelling. It blends function with artistry creating meaningful user experiences. Just as Mullins’s legs redefine prosthetics as wearable art, I think it’s amazing to create projects that invite users to see technology as not just practical but as an extension of self expression and creativity.

The reading presents a compelling argument for balancing functionality and artistic expression in design, particularly in the context of disability. I agree with most of the points made especially the idea that design should aim to empower users and reduce stigma. However, I question the extent to which simplicity is always the best approach in inclusive design. I always believe less is more, but while minimalism can enhance cognitive accessibility, it may not always meet the diverse needs of users. In some cases, a more complex design with customizable features could provide greater flexibility and inclusivity, especially for users with varying preferences or conditions, like the color changing display or text size change on the iPhone, for those who have vision problems. 

Week 10 | Assignment

Concept
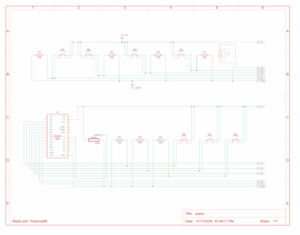
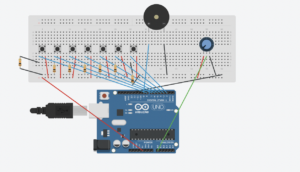
For this assignment, Ghadir and I created a mini piano keyboard using Arduino with 7 notes (C, D, E, F, G, A, B). Each note is played using a button, and the pitch can be changed using the potentiometer. The switch allows the sound to shift higher or stay at the original pitch depending on its position.

Each button corresponds to a specific frequency for one note. When you press a button, the Arduino sends a signal to the buzzer to play that frequency. The blue switch works as a pitch modifier. This combination creates a mini keyboard where you can experiment with simple melodies and play around with tone changes.

Schematic

Digital Arduino

Demo Video

Reflection
To improve the project, we could’ve add more interactivity by including volume control, perhaps using a potentiometer. Another idea is to incorporate visual feedback, like an LED or an LCD display, to indicate which note or pitch is being played. These improvements would make the keyboard more versatile and closer to a real musical instrument.

Code

// Pin definitions for each button
const int buttonPins[7] = {2, 3, 4, 5, 6, 7, 8}; // Buttons for notes C, D, E, F, G, A, B
const int buzzerPin = 9;                         // Pin for the buzzer
const int potentiometerPin = A0;                 // Pin for the potentiometer

// Frequencies for notes C, D, E, F, G, A, B
const int noteFrequencies[7] = {261, 294, 329, 349, 392, 440, 493};

void setup() {
  // Set each button pin as input
  for (int i = 0; i < 7; i++) {
    pinMode(buttonPins[i], INPUT);
  }
  pinMode(buzzerPin, OUTPUT);  // Set the buzzer pin as output
  Serial.begin(9600);          // Start serial monitor for debugging
}

void loop() {
  int potValue = analogRead(potentiometerPin);    // Read the potentiometer value (0-1023)
  
  // Map potentiometer value to a "volume" level (duration)
  int volumeLevel = map(potValue, 0, 1023, 10, 200); // Larger value = longer tone duration

  bool notePlayed = false;      // Track if a note is being played

  // Check each button to see if it's pressed
  for (int i = 0; i < 7; i++) {
    if (digitalRead(buttonPins[i]) == HIGH) {
      int frequency = noteFrequencies[i];      // Get the note's frequency

      // Play the note with duration based on potentiometer setting
      tone(buzzerPin, frequency);
      delay(volumeLevel);
      noTone(buzzerPin);
      
      notePlayed = true;                       // Indicate that a note is played
      break;                                   // Play only one note at a time
    }
  }

  // Stop the tone if no button is pressed
  if (!notePlayed) {
    noTone(buzzerPin);
  }

  delay(10);                                   // Small delay for stability
}


Week 10 | Reading Response

The author’s “Brief Rant on the Future of Interaction Design” and their follow-up response focuses on how much we lose by relying so heavily on touchscreens. I find their argument pretty convincing especially their critique of “Pictures Under Glass,” which, as they put it, restricts the real power of our hands. They back this up with simple but relatable examples, like the feel of turning a page or lifting a glass, where you can actually feel the weight, texture, and resistance. With touchscreens, on the other hand, all we get is this flat, “glassy” feeling, stripping away any real tactile feedback and creating a disconnect between our natural capabilities and the digital world.

In the follow-up response, the author clarifies that the original piece wasn’t meant to prescribe solutions. This distinction feels important because, often, when we discuss technological limitations we jump to solutions without fully understanding the problem. By reframing interaction design around human capabilities, the author challenges us to think about interfaces that go beyond visual appeal and engage more fully with our innate physical skills.  I agree with their argument that future interfaces should not only acknowledge but amplify these natural interactions rather than reduce them to simplified swipes and taps. I still think touch screens can be beneficial and can offer other tactile sensations and experiences. Just because it’s different doesn’t mean it’s less interactive. Take the example the author gives about turning a page; sure, turning a page on a flat screen isn’t exactly the same as flipping through a real book. But the way a digital page moves, the sound effect, the visual cues.  It still feels interactive and immersive in its own way. I don’t see one as being better than the other; they’re just different experiences that each bring something unique. 

Week 9 reading

The two readings, “Making Interactive Art: Set the Stage, Then Shut Up and Listen” and “Physical Computing’s Greatest Hits (and Misses),” both explore principles of interactive design but from slightly different angles.

In the first reading, the author emphasizes the importance of giving participants agency in interactive art. Rather than dictating the experience, the artist sets up an environment and then allows the audience to interpret, explore, and interact with it on their own terms. Creating a “conversation” between the artwork and the participant, the creator must observe and learn from these interactions, potentially adjusting the work based on this “feedback.”

The second reading explores common themes and projects in physical computing, like theremins, gloves, floor pads, and video mirrors, all of which require some form of user input to trigger responses. The recurring theme here is that these projects are designed to engage people through touch, movement, or other physical interactions, often allowing users to shape the output in real time. This reading emphasizes the joy of creation and discovery that can emerge when designers revisit popular concepts and bring new variations to them, emphasizing that even “overdone” projects can have originality.

Both reaidngs highlight how interactive art and physical computing are inherently participatory. They rely on the user to create meaning and engage with the work actively. The first reading emphasizes letting go of control over the audience’s experience, while the second celebrates the creativity in giving people intuitive ways to interact with technology. I think these ideas encourage designers to focus less on forcing an experience and more on creating frameworks where users feel empowered to explore, which aligns well with user-centered design principles.

Week 9 | Assignment 7

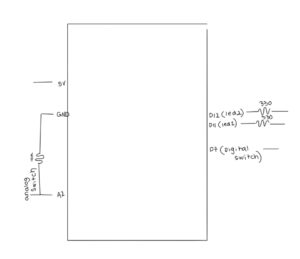
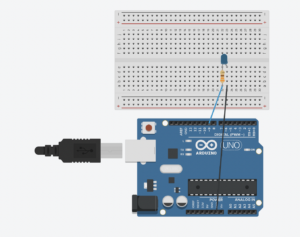
For this assignment I created a simple LED Control with an Analog Sensor and On/Off Switch. Arduino controls the two LEDs independently. One LED’s brightness changes, The second LED is controlled by an on/off switch. I was inspired by the light switches we have at home, that work with on/off switch but also can be dimmed (for this assignment’s sake I had to use 2 LEDs). But it was cool to create a somewhat similar version of that and understand how it works.

I originally used the ultra sonic sensor, since I wanted to experiment with something we haven’t used in class, but it didn’t work, I couldn’t figure out if the issue came from the code or the arduino. So I restarted and decided to take a step back and create something I was more familiar with.

GitHub

My Arduino

This is my attempt of drawing the schematic

Reading week 8

Don Norman’s “Emotion and Design: Attractive Things Work Better” connects into psychology, especially how emotions affect our thinking and problem-solving. The reading made me think of affective neuroscience, which looks at how emotions, like being happy or stressed, can change the way we think. It ties into the broaden and build theory, which suggests that positive emotions, like happiness, make us more creative and flexible In our thinking. However negative emotions like anxiety, narrow our focus, which can be helpful for immediate problems but isnt  great for creative tasks. He explains how positivity can make us more tolerant of small design flaws. Because positive emotions activate brain areas like the prefrontal cortex. Affective neuroscience explains that while positive emotions broaden our thinking, negative emotions activate survival focused areas like the amygdala, narrowing our focus and making creative tasks more difficult, which makes sense because when we feel good, we’re more patient and less likely to get frustrated, allowing that creative flow to unfold. I also really liked how Norman said aesthetically pleasing designs not only look good but actually make things work better. Since I notice that when my study notes look organized and pretty I understand and memorize them much better.

This connects to the article on Margaret Hamilton too, where her ability to stay calm under pressure helped her solve those Apollo 11 software issues. Just like how Norman argues that positive emotions improve performance, her emotional state played a huge role in how she handled the stress. Both readings show that emotions, whether it is about dealing with stress or how a design makes us feel, directly affect how well we can perform on tasks. I find It interesting how much emotions actually affect and impact us.

Midterm Project

Concept

For my midterm I created a simple game inspired by the movie “Cloudy with a Chance of Meatballs.” The goal of the game is to avoid the falling meatballs. The longer the player survives without getting hit, the higher their score will be and the harder it will become. The game consists of a start screen, avatar selection, the main gameplay, and an end screen showing the player’s final score.

Sketch

https://editor.p5js.org/fatimy/sketches/8T66V9Gl1

Mechanics

  1. Avatar Selection: Players choose between two avatars, Flint or Sam.
  2. Gameplay: Meatballs fall randomly from the top of the screen. The Player is controlled by the mouse. Users must react quickly to dodge the falling meatballs.
  3. Scoring System: users earn points for surviving longer without getting hit by a meatball. The score increases based how many meatballs avoided. The game tracks the users best score, stored locally, encouraging players to improve their survival time in future attempts.
  4. End of Game: The game ends when the player is hit by a meatball, triggering the “Game Over” screen. The users current score is displayed along with the best score.
  5. Music and Sound Effects:  light background music plays during the start and player selection screens. Fast-paced music plays during the gameplay to heighten the tension as players dodge the meatballs. Both audios are soundtracks from the movie.


Highlighted code

Im happy with the speed of the meatball. even though it does seem pretty slow at first, I like how it increases and gets difficult after a while. Making it difficult to beat the best score.

Im also happy with the look of the end screen. I found it hard to choose the background, fonts and colors to try to make it look good, and im still not satisfied with the overall look of the game, but I tried my best to make it look ok.

  // reset ball position and increase speed if it goes off the screen
  if (y > height) {
    // check if the ball goes off-screen
    y = -20; // reset the ball to the top of the screen
    speed += 0.5; // increase the ball's speed
    score += 1; // add to score
    pickRandom(); // randomize ball's x-position
  }
}
// end screen (screen 3)
function endScreen() {
  background(0);
  fill("rgb(177,10,10)");
  textAlign(CENTER);
  textFont(myFont1);
  textSize(60);
  stroke("red");
  text("GAME OVER", width / 2, height / 2 - 40);
  fill(255);
  textFont(myFont2);
  textSize(30);
  stroke("red");
  text("YOUR SCORE = " + score, width / 2, height / 2 + 20);
  // check if the player's score is a new best score
  if (score > bestScore) {
    bestScore = score; // update
    localStorage.setItem("bestScore", bestScore); // save it to localStorage
  }
  fill(255);
  stroke("red");
  text("BEST SCORE = " + bestScore, width / 2, height / 2 + 60); // display best score
  // detect hover for "PLAY AGAIN"
  if (
    mouseX > width / 2 - 100 &&
    mouseX < width / 2 + 100 &&
    mouseY > height / 2 + 100 &&
    mouseY < height / 2 + 160
  ) {
    fill("red");
    textSize(40); // make "PLAY AGAIN" bigger when hovered
  } else {
    fill(225);
    textSize(30);
    noStroke();
  }
  text("PLAY AGAIN", width / 2, height / 2 + 150);
}


Improvements

The selection for the Avatar isn’t perfect and the collision detection isn’t perfect. Also I didn’t include the fullscreen function (I tried, didn’t work).

I wrote everything in one javascript, I kept saying I’ll organize it when Im done. Once I was done I didn’t want to change a lot of things to not affect the gameplay etc. I wish I created classes for the balls, avatar and had everything organized. I also think I could’ve written my code a lot simpler.

I think adding sound when the collision happens would be good. Also having other foods fall other than meatballs or having powers ups, to make the game more interesting and fun.

Problems

The main problems I faced were

  1. the images (for some reason they only showed on the top left corner) RESOLVED
  2. Full screen didn’t work (I tried different types of fullscreen functions (maybe its just my laptop) NOT SOLVED
  3. problems with the audio overlapping and lagging RESOLVED
  4. P5.js kept saying that image or sound wasn’t loaded even though it was (very frustrating)
  5. trying to figure out the area for the player selection and collision HALF SOLVED

Sources

https://editor.p5js.org/ehersh/sketches/Hk52gNXR7

chat-gpt:

  • saving best score to local storage
  • song playing (to fix overlapping problem)