Extremely weird kissing switch!

My main motivation came from Professor Aaron. Professor wanted us to be weird so I decided to be as weird as I can and decided to make a kissing switch 🙂

It started of with the ideation where I took inspiration from one of the videos we were shown in class where a guys connected cables with aluminum foil to his face and his face moved with the sound. That way I decided that one part would be attached to the face and one part would be placed on a cardboard pad.

With some sketchy soldering I soldered the Arduino cables to longer ones so that the kissing pad can be more accessible from a distance:

Here is how the kissing pad looks like:

Finally when everything was connected, I wanted the lights to blink in the tempo of a heartbeat when a kiss occurs. So naturally I searched up on Google what is the heartbeat of a person that is kissing. The answer was: 100. Let’s implement that into our code:

void heartbeatLED() {
  // Calculate the duration of one beat in milliseconds
  int beatDuration = 60000 / 100; // 100 beats per minute

  // Half of the beat duration for on and off phases
  int phaseDuration = beatDuration / 2;

  // Blink the LED with heartbeat rhythm
  for (int i = 0; i < 100; i++) { // Blink for 100 heartbeats
    digitalWrite(led0, HIGH); // Turn the LED on
    delay(phaseDuration); // Wait for the on phase
    digitalWrite(led0, LOW); // Turn the LED off
    delay(phaseDuration); // Wait for the off phase
  }
}

Finally, this is how everything looks connected together (practical presentation of how it works will be shown in class):

Video Demonstration:

I also arranged the lights in a heart formation whilst still thinking of how to make a “casing” in heart shape to make it look more pretty.

Overall I really liked exploring the Arduino for the first time and really tried to make something weird and push myself out of my comfort zone. I’m really excited for what is about to come 🙂

USB Sticks, Water Taps and Cars – The balance between Beauty and Usability

Often times we can see beautiful designs which overwhelm us, which don’t really have any practicality or are not usable at all. At the same time we can often see practical and useful designs being ugly and really not pleasing to the human eye. Let me show you some examples:

Disco Truck? What do discos and cement-trucks have in common? Looks cool though.

Sushi Chairs….Okay they have the usability of a chair, I’ll give them that but the design man, it doesn’t add anything.

There are many other examples like this which we can see in our everyday life. A really good one is USB Sticks. I always have a problem with USB sticks, I try to put the stick into the port, doesn’t go in, okay, let’s try the other side, doesn’t go in again, wait what? I try the first side again, IT WORKS, how? magic! Jokes aside, USB sticks are just very weird, at least for me.

A design I really really like is Water Taps with sensors. They just save so much time, are much more hygienic and much better for the environment. Triple the benefit!!

Cars! Cars are a thing I love. As a young person that is transitioning from a teenager to a young man in his twenties, everyday I get more and more interested into cars. Let me show you my favorite design in a car. It offers amazing design and at the same time, it is one of the most aerodynamic cars in the world.

Say hi to the McLaren Speedtail. The speedtail is a perfect example of what happens when we combine beauty and usability (and a lot of money).

All in all, as the heading says, the best combination of beauty and usability (usually when they’re both balanced) will result in something we like to call “Good Design”.


Midterm Assignment – A Blast to the Past!

My Midterm Assignment can be described in the following way: “A computer geeks dream”. Jokes aside, this is an Idea I have had on mind for a long time and I decided that this is the right time for me to make it reality. Let’s dive deep into it:

Ideation:

As the midterm assignment was approaching I was a little bit scared of what I should do. I heard people around me all say they are going to make a game or some visual artistic piece but I wanted to do something different. Then I realized, what is my first experience with computers and technology? The answer was clear and simple: WINDOWS XP (My first computer with a Pentium 3 and 1GB of ram Is one I will always remember)

Concept

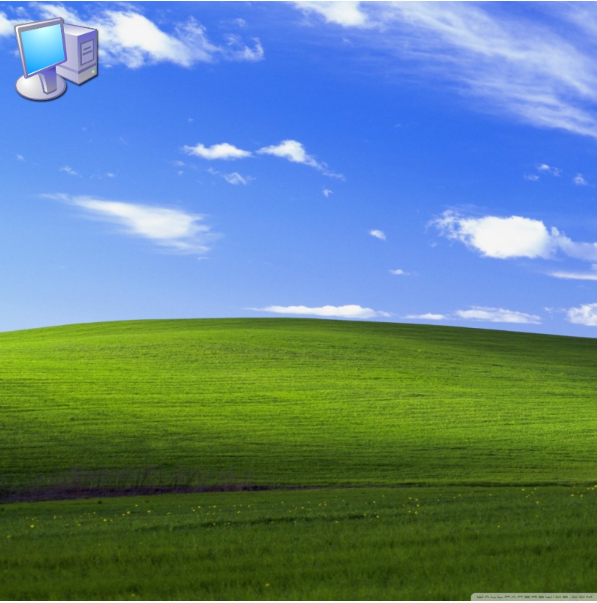
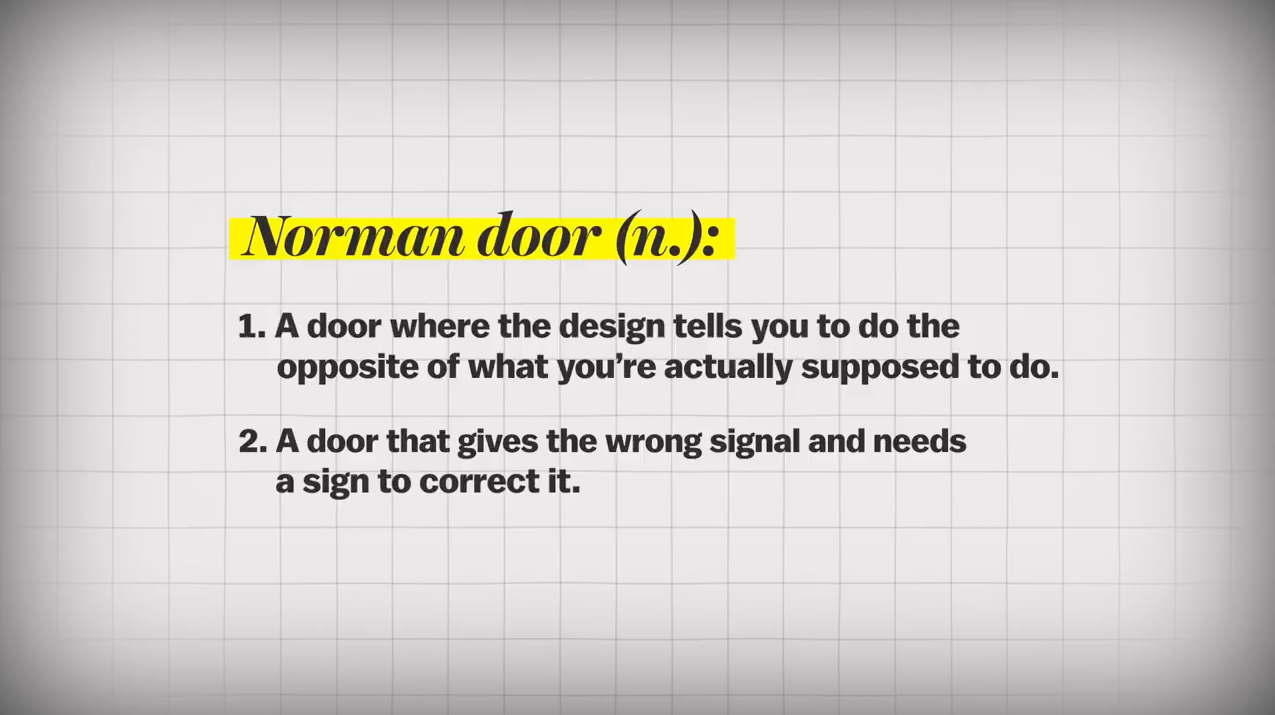
The concept was pretty simple. Make a small Windows XP emulator that will include the original icons and sounds as well as display the infamous windows errors which don’t make sense (for example: Keyboard not found: Press some button – like how am I supposed to press a button on the keyboard if it’s disconnected???). Before Explaining the technical side, I will let you explore the project a little bit.

Execution

This assignment was done in a way that was very thought of and self reflective based on the readings we have done for the class in the past month. It is focused on human centered design as well as it incorporates many techniques like the obviousness of the design and the “lack of need for instructions”. It starts of simple with a power button which is familiar to everyone as well as the whole windows ecosystem which is easy to figure out. The icons have been made draggable, blue when clicked and with the original click sound, just like a real windows XP. For organization purposes they have been divided in different classes, as shown below:

class Icon {
  constructor(image, label, x, y, width, height) {
    this.image = image;
    this.label = label;
    this.x = x;
    this.y = y;
    this.width = width;
    this.height = height;
    this.isHighlighted = false;
    this.isDragging = false; // New property to track dragging state
    this.offsetX = 0; // Offset between mouse and icon x position during drag
    this.offsetY = 0; // Offset between mouse and icon y position during drag
    this.clickCount = 0;
  }

  draw() {
    push();
    if (this.isHighlighted || this.isDragging) {
      tint(0, 0, 255); // Tint for highlight
      fill("blue"); // Color for highlighted text
    } else {
      noTint();
      fill(255); // Default text color
    }

    image(this.image, this.x, this.y, this.width, this.height);
    text(this.label, this.x, this.y + this.height + 10); // Adjust text position below the icon
    pop();
  }

  contains(px, py) {
    return (
      px >= this.x &&
      px <= this.x + this.width &&
      py >= this.y &&
      py <= this.y + this.height
    );
  }

  click() {
    if (this.contains(mouseX, mouseY)) {
      this.isHighlighted = true;
      clickSound.play();

      // Check if the current icon is the last clicked icon
      if (lastIconClicked === this.label) {
        this.clickCount++; // Increment only if the same icon is clicked consecutively
      } else {
        // Reset all icons' click counts if a different icon is clicked
        icons.forEach((icon) => (icon.clickCount = 0));
        this.clickCount = 1;
        lastIconClicked = this.label; // Update the last clicked icon label
      }

      console.log(
        `Clicked on Icon: ${this.label}, Click Count: ${this.clickCount}`
      );

      // Check if the icon is clicked two times in a row
      if (this.clickCount % 2 == 0 && this.label === "midterm.exe") {
        errorImageLogic();
        this.clickCount = 0; // Reset click count after opening the icon
      } else if (this.clickCount % 2 == 0 && this.label === "My Computer") {
        myComputerLogic();
        this.clickCount = 0; // Reset click count after opening the icon
      } else if (this.clickCount % 2 == 0 && this.label === "Recycle Bin") {
        recycleBinLogic();
        this.clickCount = 0; // Reset click count after opening the icon
      } else if (this.clickCount == 1 && this.label === "errorImage") {
        spawnErrorImages();
        this.clickCount = 0; // Reset click count after spawning error images
      }
    } else {
      this.isHighlighted = false;
    }
  }

  mousePressed() {
    if (this.contains(mouseX, mouseY)) {
      this.isDragging = true;
      this.offsetX = this.x - mouseX;
      this.offsetY = this.y - mouseY;
    }
  }

  mouseReleased() {
    this.isDragging = false;
  }

  mouseDragged() {
    if (this.isDragging) {
      this.x = mouseX + this.offsetX;
      this.y = mouseY + this.offsetY;
    }
  }
}

Shown above is the class for the Icons which makes it easy to add them or take them away.

class Window {
  constructor(image, width, height) {
    this.image = image;
    this.width = width;
    this.height = height;
    this.x = 50;
    this.y = 50;
    this.closeButtonSize = 50; // Size of the close button
  }

  draw() {
    image(this.image, this.x, this.y, this.width, this.height);
  }

  clicked(mx, my) {
    // Check if close button is clicked
    if (
      mx > this.x + this.width - this.closeButtonSize &&
      mx < this.x + this.width &&
      my > this.y &&
      my < this.y + this.closeButtonSize
    ) {
      clickSound.play();
      specialWindow = null; // Close the window
    }

    // Check if the bottom half of the window is clicked
    if (
      this.image === errorImage &&
      mx >= this.x &&
      mx <= this.x + this.width &&
      my >= this.y + this.height / 2 &&
      my <= this.y + this.height
    ) {
      errorShouldSpawn = true;
      // Logic for clicking the bottom half of the error window
      for (let i = 0; i < 40; i++) {
        setTimeout(() => {
          spawnErrorImages();
        }, i * 100); // spawn more error windows over time
      }

      // Transition to blue screen after 2 seconds
      setTimeout(() => {
        loop();
        currentState = State.BLUE_SCREEN;
      }, 4000);
    }
  }
}

Shown above is the code for the Window class which displays the windows where the icons are clicked and also controls the behavior of the error prompts.

Challenges and closing statement

The main challenges included the clicking of the buttons and dragging them around as well as the behavior of the error messages shown.

Special thanks to Pi and Professor Aaron Sherwood for the help throughout the whole execution of the project. You guys really motivated me to make my childhood dream come true. If you showed this to 5 year old Darko and said he made that he would literally be so excited.

At the same time, thank YOU as a reader for “wasting” 5 minutes of your day to appreciate my work. Remember to put a smile on your face and appreciate very day as much as you can. Spread love with your family, friends, professors and even strangers cause you never know what tomorrow brings.

Darko Loves You <3

Stay Safe!

Reading Response Week 5 : OpenAi Sora, Apple Vision Pro, Virtual Reality and the rise of Computer Vision

For this reading response I decided to take a different kind of approach and Instead of acknowledging and kind of rephrasing what is said in the original piece, I decided to look at the topic from a different pair of lenses.

Starting off, when we talk about Computer Vision and this interaction between computer systems and machines with humans, it always comes out as some kind of a new concept. One example is Virtual Reality and the New Apple Vision Pro headset which actually is an augmented reality (AR) headset but I don’t want to get deeper into that. What if I tell you that this concepts have actually been around since the 1970, YES, THE 1970S, that is like 50 years ago!

To explore more about the concept you can read the book “What you should wear to an artificial Reality?” but to summarize, the author talks about this development of this artificial reality world starting of from the 1970s with his exhibition called METAPLAY which involved two people playing with a ball that was not even a real one (it was just a projection on a screen). That quickly escalated to his projects called VIDEOPLACE, DIGITAL DRIVING and CRITTER which all worked on this idea to connect people throughout this computer vision and manage interaction in spaces which don’t really exist in real life.

On the other side, what I found interesting is the rise of AI systems in the past few years, specifically one that was announced in the past week and that is the OpenAi Sora, an AI software that can supposedly make videos out of simple prompts and all of that without even filming a single second. I am really interested in how this affects the Computer Vision, Film and Interactive Media World


Assignment #5 – Progress on the midterm

For my Midterm Assignment I decided to go a little bit back in time to the Windows XP era, basically the Windows of my childhood.  Just hearing the sounds of a windows XP computer turning on brings back so many memories.

My midterm is going to be exactly that, a Windows XP emulator with a twist, It has errors all over it and it gives us the famous Blue screen of death. Fun isn’t it? Let me show you my progress so far.

For the opening screen I decided to have a button which would be used to “turn on the computer”. It looks something like this:

Furthermore when we click the button the original Windows XP sound plays and I have also added the original background and My Computer Icon:

Snippet of code where I load these elements upon a click:

if(mouseIsPressed === true)
        {
          noLoop();
          clickSound.play();
          noTint();
          image(windowsImage, width/2,height/2, 400,400);
          imageMode(CENTER);
          windowsSound.play();
          image(computerIcon, width/10, height/10, 60, 60)


I know there is a long way to go but for now you can enjoy the sketch using the window below.

Assignment #4 – life.

For this assignment I decided to combine data visualization and text in a relatable, motivating and interesting theme. My project is called life and it shows the unpredictability of our everyday life as well as the highs and lows we all go through.

To make my idea come true, I created a .csv file which would interpret life as a line that goes up and down, representing the battles we fight. I later uploaded the csv file to my sketch and decided to add some effects.

When we hover over the lowest point, a text that says “It has its lows” appears. Similar to that when we hover over the highest point, a text that says “It has its highs” appears. Apart from those two effects, whenever u hover over the straight parts of the line (beginning and end) the line starts to wobble up and down, simulating the unpredictability of life. To add an artistic touch I filled the insides of the line with black.

The code that does all of this can be seen below:

if (x < 150 || x > 450) {
      if (dist(mouseX, mouseY, x, y) < 50)
        y += map(noise(frameCount * 0.01, i * 0.01), 1, 0, -400, 400);
    } else if (mouseX > 250 && mouseX < 330 && mouseY > 400 && mouseY < 550) {
      text("It has its lows", mouseX, mouseY);
    } else if (mouseX > 330 && mouseX < 410 && mouseY > 20 && mouseY < 150) {
      text("It has its highs", mouseX, mouseY);
    }

And finally, enjoy:

The Design of Everyday Things : Why are doors so complicated?

In this weeks reading I really had fun exploring the composition of designing and the elements, complexity and usefulness of design with an example of a door. Yes, a single door was used to explain the whole theory of the design of everyday things.

A door is a perfect example of confusion in design. Even though simple, we always find a way to confuse ourselves and pull a door if we should push it, push a door if we should pull it, or neither of those, maybe we just needed to slide the door open.

A good way to fix that is to look at the hinge (or if you are a designer: don’t hide the hinge please) or give the “user” proper information on how they should handle the door. That leads to us talking about the two big aspects of good design:

      • Discoverability
      • Understanding

A story that the author mentions is a story of a friend that got trapped in a doorway of a Post Office in  an European system. The door system, which was made out of six doors, is a perfect example of failed discoverability since it did not provide enough information for the “user” and it just led to confusion.

Another topic that comes into conversation is the complexity of modern devices. The theory is that modern devices and machines are made by humans so they are quite limited in what they can do. At the same time, proper guidance (aid, manuals) must be provided in these complex devices since they are created by engineers who have deeper understanding of the device, unlike the people that operate it.


Assignment #3 – Click to spawn

For this assignment we had to use Object Oriented programming so I decided to combine classes, arrays and functions in a fun interactive way. It all started of with the idea of a moving car that was shown to us in class. I decided to replicate that with circles. It ended up looking pretty boring so I was looking for ideas of how I can make it fun, interactive with the user and at the same time look like an “art piece”.

What a better way to find inspiration than to look at Pi’s works (thank you Pi) where I noticed his particle work which spawns small particles in a circle and lets us as users disturb the harmony. My first complication was transforming the motion of the circles from a static one direction pathway to a rotation around the middle. In order to do that, I declared specific variables in the constructor like angle offset and circle radius. By defining the x and y positions using sin and cos i managed to get the drones going in a circle. It still seemed pretty simple so I added a little bit of noise to make the animation look a little bit randomized. It ended up looking pretty nice actually.

The challenge and code

Of course, like always Darko never thinks what he does is enough so he does extremely difficult things to sleep right. And guess what, that is what I did this time. Okay I’m maybe overreacting a little bit but I decided to make the circles spawn every time the mouse button is clicked and my code ended up looking like this:

let drones = []; // necessary global variables
let droneSpacing = 120;
let speed = 5;
let angle = 0;
let r, g, b;

function setup() {
  createCanvas(400, 400);
}

function draw() {
  background(0, 15);

  for (let i = 0; i < drones.length; i++) {
    drones[i].run(); //spawning the drones
    drones[i].runDriving(); //making the drones rotate
  }
}

function mousePressed() {
  drones.push(new Drones(drones.length)); // add drones when the mouse button is pressed
}

class Drones {
  constructor(angleOffset) {
    //construtor for each drone
    this.angleOffset = angleOffset;
    this.droneRadius = 50;
    this.noiseOffsetX = random(1000);
    this.noiseOffsetY = random(1000);
  }

  run() {
    this.spawnDrones();
  }

  spawnDrones() {
    let noiseX = noise(this.noiseOffsetX); //setting the noise offsets for x and y
    let noiseY = noise(this.noiseOffsetY);
    let x =
      width / 2 +
      cos(angle + this.angleOffset) * droneSpacing +
      map(noiseX, 0, 1, -5, 5); //updating the x position based on the angle, spacing and noise
    let y =
      height / 2 +
      sin(angle + this.angleOffset) * droneSpacing +
      map(noiseY, 0, 1, -5, 5); //updating the y position based on the angle, spacing and noise
    fill(random(255), random(255), random(255)); //randomizing fill colors
    circle(x, y, this.droneRadius);
  }

  runDriving() {
    this.driveDrones();
  }

  driveDrones() {
    angle += 0.007; // rotation speed
    this.noiseOffsetX += 30; // x and y noise
    this.noiseOffsetY += 30;
  }
}

Final Product

The final product can be seen below. Enjoy and have fun 🙂

The Art of Interactive Design – Am I really interacting with my fridge?

To begin with, this reading was really fun and it showed me another dimension of the word “interactivity” and what interactive media really means. I have always struggled explaining to my friends and family back home when describing my major: soo you work with computers? programming? robotics? but wait you also design?

-Well yeah I kind of do it all 🙂

Nevertheless let’s get back on the subject. I really agree with the authors description of interactivity, a combination of subtasks (listening, thinking, speaking) or all in all a conversation between two and more people/objects…

Since its start in 1980 and its peak in 1990, the word interactive has really changed a lot and at the same time used in the wrong way. Take a look at this advertisement:

How can a chocolate almond coconut raisin bar be interactive? On the other side we have the fridge theory? – Is the opening and closing of the fridge while the light is turning on and off any kind of interaction.

To answer the question the author looks at interactivity as a combination of listening thinking and speaking and they all have to be present (none can be left out). On the scale of interactivity though we can have highly interactive, moderately interactive and so on. The fridge is a very low level interaction.

Important mention: things that are not interactive :

-Books

-Movies

-Dancing

-Performance art (or is it? I will let you think about it:)

Assignment #2 – Earth is in danger

For this assignment I took inspiration from the 1966 Version of ProgrammInformation21 which is written in German and luckily I have been learning German for over 6 years now. The piece I was initially interested is this one:

Initially I created the circles and added a little bit of noise but it was too simplistic for my liking so I decided to make the circles come out from one of the edges of the canvas. After doing that I noticed that the circles kind of reminded me of a meteor so I started creating a concept of a meteor heading towards earth.  That lead to me “inventing” the piece code I am most proud of. It looks like this:

for (let i = 70; i < 3000; i += 30) {
    strokeWeight(5);
    let noiseFactor = 5;
    let posX = mouseX - i + random(-noiseFactor, noiseFactor);
    let posY = mouseY - i + random(-noiseFactor, noiseFactor);
    if (i == 70) {
      fill(92, 64, 51);
      circle(posX, posY, i);
    } else if (i > 70 && i < 150) {
      fill(255, 255, 0);
      circle(posX, posY, i);
    } else if (i > 150 && i < 450) {
      fill(255, 165, 0);
      circle(posX, posY, i);
    } else {
      fill(255, 0, 0);
      circle(posX, posY, i);
    }
  }

I wanted to add stars in the background that would be randomized and different every time someone runs the code and in order to make it static compared to the other elements of the canvas I needed to draw on a different buffer. It was also fun to add the element of surprise so now every time we click on the mouse button Earth changes into a random color. The final product looks like this:

I also added a little satelitte which rotates around Earth and adds another layer of animation.

Further improvements can be done and more interesting animations can be added. For the moment I already feel like I am overcrowding the screen with elements a little bit, so I decided not to add any more complexity.