Final Project Documentation!

As cliche as it sounds, this semester really did fly by; I can’t believe I’m sitting at the airport gate documenting my very last post for Intro to IM already! Many things have changed since my last update about my game, and I’m excited to share everything I’ve learned these last few days.

So as I mentioned before, I was almost done with my p5.js part…or at least I thought so. However, I turned out running into two main problems with it, which were: 1) setting up the code so that I can go from start screen –> draw game stage –> game over stage and repeat this process, and 2) figuring out the code for connecting with Arduino + the buttons on my physical controller, which relates to the Arduino part.

Just to recap, here were the items on my to-do list from my last post:

  • reset + start game
  • Arduino connection
  • Building a physical game controller using Arduino

…which basically encapsulates my progress that I’ve made this week!

Moreover, here’s my initial concept and the description of interactive design:

  • Concept: create a dinosaur game that is upgraded to a Christmas version.
  • Description fo interactive design: users will be able to control and play the game by using a physical game controller.

Problem #1: reset + start game

I knew I was going to have problems with this function because I wasn’t able to figure this out for my last project, which was my midterm game. However, because this is the final assignment, I was determined to get to the bottom of it and tackle this challenge. Unfortunately, my game kept jumping straight to the “game over” screen from the “start” screen when I tried to replay it after my gingerbread man “died,” when I was trying to get it to go through the order of the three stages I had, which were the “start” screen, “draw game” screen, and then “game over” screen, and looping again when I tried to replay it by pressing “backspace” button. This was a HUGE struggle I had because I was just stuck in this loop without being able to identify what was causing this; but with a lot of hours spent discussing and debugging with Jack and professor Shiloh, I realized that it was a combination of different mistakes in my code, such as adding “noLoop()” at the end of this part of the code:

for (let c of chimneys) {
      c.move();
      c.show();
      if (gingerbreadman.hits(c)) {
        gameState = "gameOver";
      }

as well as realizing that the main reason why my game immediately jumped to “game over” stage was because the gingerbread man had already ran into the chimneys even before the game “reset” since I never redrew the chimneys despite having a redraw function for the gingerbread man. This was why I couldn’t replay the game, for my code made it so that when the gingerbread man hits a chimney, the game will immediately be over! So I added the following code in “function setup(),” which successfully redrew the chimneys and thus erasing all the previous chimneys that were being drawn in the previous stage:

chimney1 = new Chimney1();
chimney2 = new Chimney2();

While it was a simple and easy mistake, it took me such a long time to realize it.

Problem #2: Arduino connection

Now, this was another struggle of mine that I wasn’t able to solve fully in my last assignment where I had to connect Arduino with p5.js. Thankfully, I had Jack to help me again, and he walked me through the initial setup of connection, etc. During this I realized that:

  • I don’t need to assign a specific key from my keyboard to the button when I was transmitting my p5.js code from keyboard keys to button pins on Arduino.
  • I don’t need to use a third party application/installation to call on the serial port library.
  • Serial port is like a “tube,” where ideally information from both p5.js and Arduino will transmit to each other – this will ensure that I’m receiving the correct data from both sides, even if I’m only feeding information from one platform to other (in this case, from Arduino to p5.js).

Here’s the code highlight for connecting Arduino and p5.js:

function readSerial(data) {
  ////////////////////////////////////
  //READ FROM ARDUINO HERE
  ////////////////////////////////////

  if (data != null) {
    // make sure there is actually a message
    // split the message
    let fromArduino = split(trim(data), ",");
    // console.log(fromArduino);
    // if the right length, then proceed
    if (fromArduino.length == 3) {
      // only store values here
      // do everything with those values in the main draw loop
      GREEN = fromArduino[0];
      RED = fromArduino[1];
      BLUE = fromArduino[2];
    }

    //////////////////////////////////
    //SEND TO ARDUINO HERE (handshake)
    //////////////////////////////////
    let sendToArduino = GREEN + "," + RED + "," + BLUE + "\n"; //?
    writeSerial(sendToArduino);
  }
}

It was interesting to learn that the “fromArduino.length” indicates how many variables I’d like to establish, and that each will be an array ([]) numbering from 0, which meant that in this case, it’d be arrays 0,1,2. I also realized that each array should be separated by a comma.

This was also a function that was crucial/necessary in setting up the connection:

 let serial; // constructing variable for serial port library

...

 function keyPressed() {
    if (key === "A") {
    // important to have in order to start the serial connection!!
    setUpSerial();
    }
  }// end of keyPressed

Through this method that Jack taught me, I didn’t run into the constant error messages of how “p5.js port is not a serial library,” which was the problem I had for my last assignment.

Problem #3: Building a physical game controller using Arduino

Now, this was honestly the most interesting and exciting part of my final project, which was surprising because I was the most intimated with this aspect before I began.

At first, I was going towards a totally wrong direction; all of my button setups on my breadboard were completely incorrect, so I had to fix all of them after Jack showed me this page, which basically showed how to construct buttons on Arduino. So I repeated that for all of my 3 buttons, which carried out the “START GAME,” “RESTART GAME,” and “JUMP” functions. Once I was done building the circuit, I also made sure to construct them in p5.js by doing the following:

let GREEN = 0; //JUMP key
let RED = 0; //RESTART GAME key
let BLUE = 0; //START GAME key

I also realized that it’s best to use three = sign, and that I can simply set the button code so that it’s either pressed or not pressed, which were 1 or 0 respectively. This led me to create a code like the following for the three buttons:

function drawGame() {
    //make it so that when you press the up arrow, the gingerbread man will jump
    if (GREEN === "1") {
      gingerbreadman.jump();
      jump.play();
    }

Now once I was done with p5.js, I moved onto my Arduino code, where I constructed the pinMode for each button and digitalRead functions for each. Here’s the Arduino code:

void setup() {
  Serial.begin(9600);
  pinMode(10, INPUT);
  pinMode(11, INPUT);
  pinMode(12, INPUT);
  // start the handshake
  while (Serial.available() <= 0) {
    Serial.println("0,0,0"); // send a starting message
    delay(300);            // wait 1/3 second
  }
}

void loop() {
  // wait for data from p5 before doing something
  while (Serial.available()) {
    int GREEN = Serial.parseInt();
    int RED = Serial.parseInt();
    int BLUE = Serial.parseInt();
    if (Serial.read() == '\n') {
      int GREEN = digitalRead(10);
      delay(1);
      int RED = digitalRead(11);
      delay(1);
      int BLUE = digitalRead(12);
      delay(1);
      Serial.print(GREEN);
      Serial.print(',');
      Serial.println(RED);
      Serial.print(',');
      Serial.println(BLUE);
    }
  }
}

Thankfully, till here it was successful! I was almost done…but I still had to create a physical controller that was an extension of the Arduino buttons that I had already. For this, I used thin wooden boards to create a controller box; I used the laser cutter, saw, and the exacto knife to cut the pieces that made up the box as well as the 3 circles for my 3 larger buttons (green, red, and white). Then I learned how to solder from Maryam and Vivianna (special shoutout to both of them!), which was honestly the BEST thing I’ve tried in this course, haha. Here’s a photo of what my controller looked like at this point before decoration:
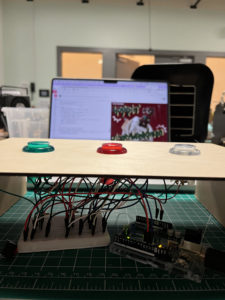
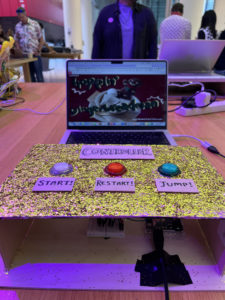
It was so satisfying to test the code and find out that your large buttons successfully work! Once that was all done, I simply hid the Arduino breadboard and the microcontroller inside the box, and decorated the wooden box with gold glitter, paint, and glue as well as tags that indicated which button was for what function.

What I’m proud of:

Now that I’ve described the problems I’ve struggled with, here are some things that I was proud of! For creating the actual physical game controller, I ended up designing, crafting, and putting everything together myself from scratch to finish because I was running out of time. I honestly didn’t expect myself to finish it this quickly, and also didn’t expect myself to have no struggles with soldering because it was something that I was completely oblivious of. I was also proud of myself for figuring out and overcoming the challenges that I previously weren’t able to conquer before, such as connecting Arduino to p5.js and being able to make my game be repeatable! I was also proud of the decoration that I did, which is shown below:

User experience/showcase: 

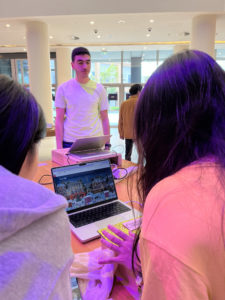
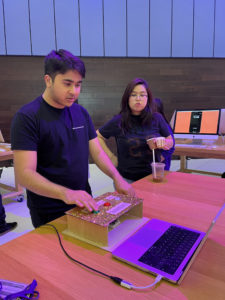
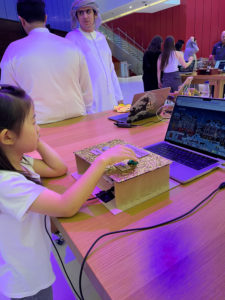
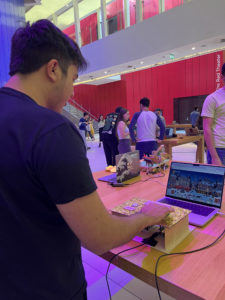
The showcase was a blast! Although there were some unexpected errors at times (ex. my game site crashing and having to reload every 20 minutes or so or my game starting to lag after going past a certain score point), I was happy to see my users actively interacting with the game and just having fun. 🙂 Here are some photos that I took of them playing my game after getting their consent:

p5.js code of the final game

User testing video:

Future improvements:

One thing that kept coming up was having no limits to how much the users could make their gingerbread man jump; many of them figured out that they can use this to “cheat” the game because they could just make the gingerbread man constantly be up in the air by pressing down on the button continuously, which lagged the game but also meant they could go on forever. So I thought it’d be necessary to place some kind of a limit either for the amount of jumps they can do, the height that they can reach, or putting a time limit on the game.

Another thing that I thought I could try was making it like a flappy bird game instead of a dinosaur game, because the chimneys would have been perfect as a flappy bird game! I could’ve placed the chimneys at both the bottom and top of the screen and have the users try to float the gingerbread man between them, and that would’ve been cool as well.

Aaaaand that’s it! That’s a wrap of this course and the semester. 🙂 Huge thanks and props to our professor, the lab assistants, Jack, and our class for working altogether so hard for the past four months, and I hope to work with them again in future IM classes as well! But for now, holidays are awaiting all of us eagerly. 😉

Progress Check (90%): Final Project: Hopping Ginger Bread Man

Disclaimer: the title is a little deceiving – I’m not 90% done (more like 60%) yet, but I’ll hopefully get there by the end of this week!

My initial outline of completing this project was finishing the physical constructing part (the Arduino) and then moving onto the coding (p5.js), but I ended up jumping between both of them instead.

Since my first very rough brainstorm post about my gingerbread man game, I’ve made a lot of adjustments, additions, and progress in general. In this post, I will report my progress by dividing it into two: the p5.js part and the Arduino part.

P5.js:

The game (only the coding part) that I have so far can be shown here.

For the coding part of my game, I consulted my good ol’ friend Daniel Shiffman’s “Chrome Dinosaur Game” tutorial that I found on his website (here’s the link). Thankfully, his tutorial didn’t encompass any groundbreaking new skills that I had no idea about, so it was mostly for me to review and refresh my memory because it’s been a while since I have coded games on p5.js. I also was able to get access to these two links (https://www.jsdelivr.com/?docs=gh and https://github.com/bmoren/p5.collide2D#colliderectrect), from which I got directory listing and learned about the function “collideRectRect” respectively. One thing that was particularly interesting/new for me was constructing the chimneys as obstacles and also animating the gingerbread man; it was fun to set up a movement for both the chimneys (along the x axis) and the gingerbread man (along the y axis), and control the level of jump, gravity, etc. I also couldn’t really find any chimney illustrations that fitted my vision, so I ended up drawing them and uploading the pictures myself.

I’d say my code highlights are adding animation/movement to the chimneys, which can be shown below:

class Chimney1 {
  constructor(){
    this.r = 120;
    this.x = width;
    this.y = height - this.r;
  }
  
  move(){
    this.x -= 3;
  }
  
  show(){
    image(chimney1Img, this.x, this.y, this.r, this.r);
  }
}

…and also constructing the collision between the gingerbread man and the chimneys, as shown below:

hits(chimneys) {
return collideRectRect(this.x, this.y, this.r, this.r, chimneys.x+20, chimneys.y, chimneys.r, chimneys.r);
}

These were some of the struggles I’ve faced with p5.js:

  • Adjusting the “collideRectRect()” function – it was hard to get the perfect measurement of both the chimneys and the gingerbread man’s image boundaries and set it so that the unnecessary empty spaces that surrounds the actual illustrations acted as the “collision points,” thus making it hard for the user to aim the gingerbread man’s jumping.
  • Constantly shifting + playing around with the “jump” function of the gingerbread man, as well as gravity.

Arduino:

Here are some sources that I’ve used to aid my process of making a physical game controller with Arduino:

link 1

link 2

Work I still have left to do:

Although I’m mostly done with the coding part, these questions still remain in my mind:

  • connecting arduino + p5js?
  • how to minimize the distance between gingerbread man and the chimneys before making it count as a “fail?”

…and here’s the list of things that I still need to do:

  • reset + start game
  • Arduino connection
  • building a physical game controller using Arduino

Sources used: 

Gingerbreadman image

Main game background image

Ending screen image 

Website where I downloaded all my audio clips from

Final Project Vision

Ah, the time has finally come. I can’t believe we are already very close to showcasing everything we’ve learned in this course!

For my final project, I thought I’d like to create a game and also combine the music element in it because I just couldn’t give up either one. And because I am already in my Christmas festive mood, I thought it’d be cute to display a Christmas-related game for the users to play during the showcase!

Because I love playing the dinosaur game, I was thinking of creating a Christmas version of that, as well as including Christmas music/sound effects in the game. I searched it up in case there’s a similar game, and I found one that’s called “Ginger Ninga,” which is pictured below:

(Here’s the link to the game.)

I would like to change some elements of the game while still going with the general idea of having gingerbread man as my main character and having the basic elements that are similar to the dinosaur game. My game will consist of:

  • Five tries (hearts) so that it goes on for longer
  • Christmas-themed background
  • Have presents as the prize icon while having icicles as obstacles
  • Will have the gingerbread man jump over from iceberg to iceberg
  • Each time the gingerbread man collects presents, the game will play a “ho-ho-ho” sound; on the contrary, each time the gingerbread man dies, a sound of “ahh!” will play.
  • Will also play Christmas lofi music in the background:)

I will also have to make sure that the user will be able to play the game by using Arduino instead of the keyboard, which is the part that I’m not too sure about – I’ll probably be using either the switch or the potentiometer to control the gingerbread man’s movement, but this is still up in the air as of now. I’m also thinking of incorporating a red and green LED light so that when the gingerbread man successfully collects “prizes,” the green light will turn on, while if it dies, the red one will turn on.

I’m very excited to get started, but I’m also a little worried about the logistics and the details of it as well. I’ll definitely have to seek out the professor to further discuss about my rough idea!

Assignment #8: Arduino and p5js examples

Here are three examples of linking Arduino and p5js! Despite my anxious worries, they turned out to be not too difficult compared to other assignments that we had to do in the past.

Example 1: controlling the ellipse on p5js to move horizontally by using a sensor on Arduino.

Here’s the full code that I used for p5js, which I got inspired by a YouTube tutorial that was filmed by Quarduino (link:https://www.youtube.com/watch?v=MtO1nDoM41Y). In this video I learned that I could download a third party application that was also created by p5 to access the serial port, which I downloaded from this site.

I’ve made some changes, such as playing around with whether I wanted the entire circle to be filled/just have the outer rim be filled, the size and position of the ellipse, etc. I also accidentally made the ellipse so that it shrinks/expands in size, but not actually moving, which was what the prompt was saying – so I quickly fixed my code for the ellipse to this so that I was controlling the x-axis position by the incoming data from the Arduino sensor:

ellipse(data,250,100,100);

Here are the photos + video of it running:

Example 2: make something that controls the LED brightness from p5

This one turned out to be the easiest one, and the most satisfying! I was suddenly inspired by the idea of “don’t press the red button” image, like the one below: Why We Always Want To Push The Big Red Button (PICTURE LINK) So I decided that I’ll create something similar in p5 so that when I press the “red button,” the red LED on the Arduino will turn on!

I again used the p5.serialcontrol system to connect the two, and soon I had the final result. It was a very simple circuit on the Arduino part, and the p5js coding wasn’t too difficult either, but it was really fun to create it.

Here’s the full code for p5js, and the full code for Arduino is listed here:

const int ledPin = 13;      // the pin that the LED is attached to

void setup() {
  // initialize the serial communication:
  Serial.begin(9600);
  // initialize the ledPin as an output:
  pinMode(ledPin, OUTPUT);
}

void loop() {
  int brightness;

  // check if data has been sent from the computer:
  if (Serial.available() > 0) {
    // read the most recent byte (which will be from 0 to 255):
    brightness = Serial.read();
    // set the brightness of the LED:
    analogWrite(ledPin, brightness);
  }
}

Here’s the picture and the video of it running:

Example 3: take the gravity wind example and make it so every time the ball bounces one led lights up and then turns off, and you can control the wind from one analog sensor.

This one really took me a long, long time, and I ended up not being able to complete it. I kept getting stuck with the error message saying “TypeError: p5.SerialPort is not a constructor,” and although I discovered the problem later thanks to Professor Shiloh’s help (he said that I don’t need to access the serial port library to complete this), I ran into other problems even after removing the following code line, which was what was causing these error messages:

serial = new p5.SerialPort();

Here is the full code that I have.

I hope to finish this and crack the mystery in the near future!

Assignment #7: Create Your Own Instrument!


Concept: 

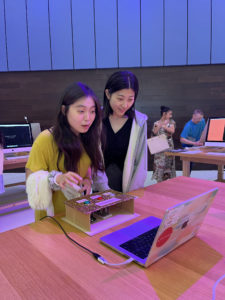
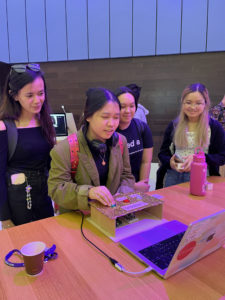
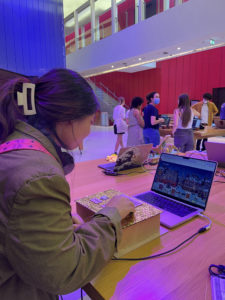
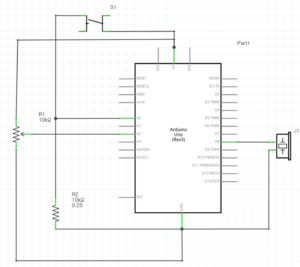
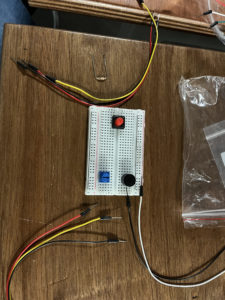
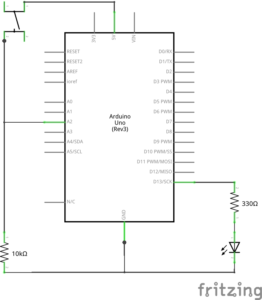
To be frank, we both didn’t really have a mind-blowing, creative inspiration when we got started on this project, which is why we decided to create something that’s simple but also making sure that it will leave enough room for user to be creative with it on our behalf. The idea that we had was to create an instrument that is able to be controlled by the user, such as its beats, pitch, etc., and it consisted of one digital sensor (switch), one analog sensor (potentiometer), and a Piezo speaker, along with the according wires that were needed. Here’s the picture of our initial state that we began with, along with the schematic:

Process/Coding:

While building the circuit itself was fairly easy and efficient since it was just a matter of connecting the wires into the respective places, the coding process was a little bit more complicated as we ran into a few obstacles:

  • Initially, the turn-off function of the switch wasn’t working — this was because of the delay time, so we realized that we had to press on the switch for a while instead of just pressing lightly.
  • We also had to adjust the tone range of our “instrument” — initially it was around 5000, but we later made it to 2000 so that it doesn’t hurt our ears as much even when we turn it up to the maximum tone.
  • Sometimes, the instrument won’t turn off at all even when we pressed down on the switch with enough strength and time; this was due to a small error in the code.

But after a few trials and errors, we were able to fulfill our initial vision for our instrument by controlling both the beat and the pitch either simultaneously or separately.

There was one aspect of the code that was still slightly flawed when we went back to review it, but the final product seemed to work fine despite it so we kept it, which is shown here:

// the loop routine runs over and over again forever:
void loop() {
  // read values from potentiometer
  int sensorValue = analogRead(potentiometer)/5*5;  // <- to mitigate unintended frequency change caused by the sensor 
  delay(1);  // delay in between reads for stability
  frequency = map(sensorValue,0,1024,0,2000); // limit frequency range to avoid unpleasant sound

  manageOutputPattern(); // determines which sound mode will be played

  if (!!outputPattern) { // if outputPattern is 0, idle(). Else make sound.
    makeSound();
  } else {
    idle();
  }

  // was supposed to do something similar to x 1.3 delay in "ToneMelody" example
  // But this is flawed as noteDuration is less than (1300-1000) when BPS is >2. 
  // However, the product seems to work fine so will not correct this issue.
  counter = (counter + 1) % 1300;

To see the entire code, click here.
Final Product: 

Here’s what the final product looked like:

Here’s a brief instruction on how to use the instrument:

  1. When you press on the switch button, the Piezo buzzer will start making sounds.
  2. You can use the potentiometer to control the pitch/tone of the sound and you can use the switch button to control the beat length of each sound. Mind the fact that each time you press on the switch button, the beats will get faster and faster. There will be 5 different beat speed offered.
  3. By pressing the switch button for the 6th time, you will be able to turn off the instrument completely.

…and here’s the video of it running:

Reflection:

Despite some minor hiccups that we’ve faced during the making process, this project was actually pretty manageable and simpler than we thought it’d be! It was exciting to hear how the sound changed as we adjusted the potentiometer/pressed the switch button to create a melody. Potentially creating a song or playing an already existing one by using this instrument that we made will be really fun, and we’re proud of the final product that we ended up with!

Assignment #6 – Digital & Analog Sensor

Concept:

Originally, I had zero ounce of creativity involved in this project, and was about to finish it in its incomplete state because I couldn’t solve one part of the circuit; but after talking with the professor before Tuesday’s class, I was able to fix the circuit and operate both lights! This was when I spontaneously got the idea to operate the lights in a Christmas-y mood, so I decided to play a Christmas song in the background and turn the LEDs on and off according to the beats of it.

Process/Coding:

I first began creating the analog sensor, because I was more confident with this one since I almost finished it during last Thursday’s class time. I followed the analog schematic sketch that professor provided in our class lectures, and then I simply attached a red LED light to the circuit to make it be connected to the analog sensor. However, I hit a wall when I tried to control the red LED light’s brightness via analog sensor; although the serial monitor showed that my serial print sensor value was reading correctly, the data was not transfer into my LED light for some reason. Thankfully, I was able to consult Professor Shiloh because I was working in the lab, and he told me that I had connected one of my wires in the wrong place – I had forgotten that only the numbers with squiggly lines are the ones that work for analog circuits, and I had plugged it into 13, which was a non-squiggly number. I also had to fix digitalWrite to analogWrite before I could have the operation run smoothly. Here’s a piece of my code after I had fixed it:

void setup() {
  // analog
  Serial.begin(9600);
  pinMode(10, OUTPUT);
  pinMode(A2, INPUT);
}
void loop() {

  //analog
  int sensorValue = analogRead(A2);
  Serial.println(sensorValue);
  delay(1);
  analogWrite(ledRED, sensorValue);
}


After that was done, this was what I had:

…and here’s a video of it running: IMG_9766 2

Then, I moved onto the digital sensor part, which was a little bit more challenging for me. For this I also referred to professor’s example that he gave during lectures, which was this one:
I basically combined this one and the analog circuit I made earlier, and I also wrote out the code for controlling the blue LED light with the button that I added. Here’s the code that I used for it:

int currentButtonState = digitalRead(buttonPin);
  // if the button is currently being prssed down, AND during the last frame is wasn't pressed down
  if (currentButtonState == HIGH && prevButtonState == LOW) {
      // flip the LED state
      if (ledState == HIGH){
        ledState = LOW;
      } else if (ledState == LOW){
        ledState = HIGH;
      }

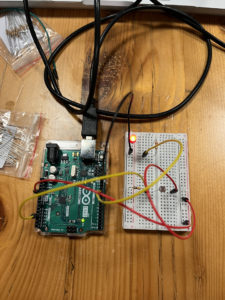
However, when I tried to run the entire code, I realized that only the red LED light was still flashing, but the blue LED light was not on at all. I tried changing the code, but even when I changed it so that the blue LED light was on the whole time, it stayed constant without responding to the button. I couldn’t figure out the problem, so I even asked one of the lab assistants, and we played around with the circuit wires till we realized that I already had a wire from the analog circuit plugged in at 5v, when I also needed to plug in a wire connected to the button in that space as well. So when I plugged in the wire from digital circuit after pulling out the analog circuit wire, the blue LED light responded to the button correctly!

However, because I had to make space for the digital circuit, this meant the red LED light wasn’t going to work; although I’ve tried to play around with different positions of the wires and on the breadboard, I couldn’t get both to work simultaneously but rather separately on their own.

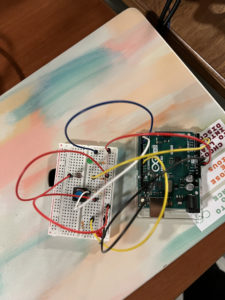
Here’s what I had by this point of the progress:

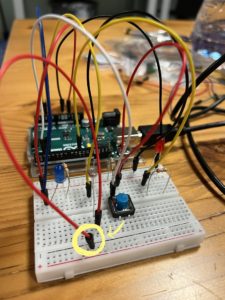
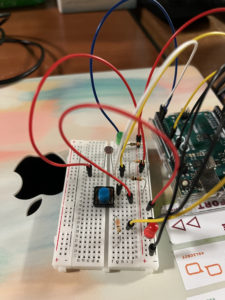
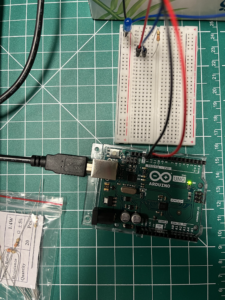
At this point I was on the verge of giving up…but thankfully Professor Shiloh came to my rescue as usual! Turns out I just had one of the red wires’ ends plugged in a wrong hole of the breadboard (pictured below) – when I switched the end over to the other side’s ‘+’ strip and plugged it in there, both lights started operating smoothly!

At this point, I had the idea of making my project related to Christmas, so I took care of some of the details such as:

  • Picking a song as the background soundtrack that my lights were going to operate to. I ended up choosing ‘Silent Night’ by Michael Buble (the king of Christmas songs, period) because it was nice and slow, which made the switching between the lights easy.
  • I had to move locations because the lab lights were too bright, thus making it harder for the LEDs to be depicted on camera. Thankfully, the outside was a perfect location because it was already pretty late at night, making the surroundings dark so that the LEDs could really pop against it.
  • I controlled the blue light with a button and the red one with my fingers.

Final Product:

I had to break down the video into smaller clips because the file was too big, but here they are, along with the photos:


Reflection:

Despite the very rough start and almost having an even worse ending, I’m glad I stuck with it till the end and asked for help – it was so satisfying to see how everything clicked and operated at the end! Rewatching the video also cracked me up because my stiff, amateur controlling of the LEDs was a stark contrast with the song’s solemn vibe, haha. Something I’d like to fix next time is making the red LED (the analog one) more easy to control because it was hard for me to turn it off completely with my fingers. But overall, it really put my skills to test and was a fun project to work on!

Unusual Switch Assignment #5 – Pull the Tissue

Concept: 

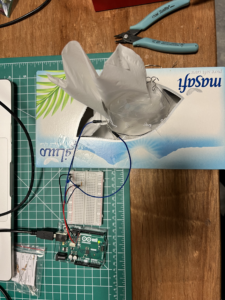
The idea of using tissue box as a part of my assignment came absolutely out of the blue while I was sitting in the IM lab in the dark, staring at the screen and having no clue where I should begin. Then I saw a tissue box in front of me, so I thought, ‘why not?’ and decided to make the LED turn on when I pull out a tissue paper from the box.

Process:

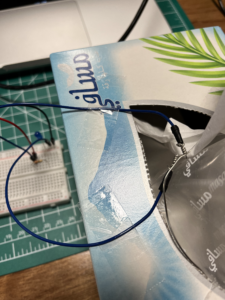
I first created a basic LED circuit, which I based off from one of the examples that professor Shiloh gave during this Tuesday’s lecture. Then, I played around with the wires’ positions and figured out which placements allowed the LED light to turn on. Once I had that down, I added two blue wires to the circuit that connected the LED light, to which I added two more pieces of wire that I cut from a thin wire coil. I wasn’t really sure whether wrapping the wire pieces around the end of each blue wire would work, but thankfully when I tested it by making the ends of wire pieces touch each other, it turned off the LED light that was previously on, which was what I was aiming for. Here’s how I wrapped the wire pieces around the ends of blue wires:

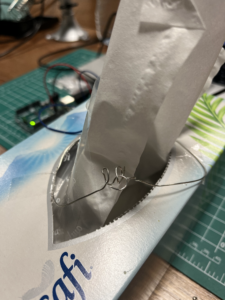
Then I just twisted the ends of the two wire pieces in a way so that they will be connected to each other but still loose enough so that they will be able to turn off and on based on the movement of the tissue being pulled out as the wires’ contact will be disrupted by it, like this:

Final Product: 

Here’s the final overview of the project:

…and final videos of it running!

IMG_9541

IMG_9546

Reflection: 

This was surprisingly simple and less time-consuming compared to all the other projects that I’ve done in this class so far; I think it’s because it didn’t involve any coding, which is what I usually struggle with! As a person who loves hands-on projects, I definitely enjoyed getting a tangible result at the end of the process. 🙂

MIDTERM: PONG STREAK

Concept:

My idea for my midterm project has changed more times than I count. What was first supposed to be a snowball fight became a volleyball game, then a tennis rally, and then finally settled into a ping pong streak game. Because I kept facing challenges and had to make adjustments to my plans and codes, this project took SUCH a long time even though the end result seems to be (a little bit too) simple. I decided to make the game in such a way so that the way to win is to get 5 points under the time constraint of 20 seconds.

Process/Coding:

Because my pong streak game was inspired by/is an alteration of the pong game, I decided to play the actual online pong game in order to get a grasp of what kind of elements I should add in my coding. Then, I searched up simulations/coding process of the pong game that others have posted, and I found this video to be extremely helpful in terms of what kind of objects that I will need to include in my tennis game as well as what point of the game I can start from, such as “paddles” and the pong ball.

One technique that came in handy was the “function preload()” skill, which I used to upload an image, audio file, and a font style! Here’s the code that I used with this function:

function preload() {
  font = loadFont("JetBrainsMono-ExtraBold.ttf");
  song = loadSound("media_doorbell.mp3");
  photo = loadImage("cat.webp");
}

Then, I used the mouseX function for the pong bar/paddle so that it will freely move by the player’s intentions.

Once I was done with the paddle, I moved onto creating the title of the game, as well as the tennis ball itself. As for inserting the title “PONG STREAK,” I used the skills that I’ve learned from last time with our text assignment; I downloaded my desired text file from this website and inserted it into p5.js, and was able to use the “loadFont” function to load the text into the canvas, which produced the following title font:

Now that I had the basics such as the title, background, canvas, etc. done, it was time to code the details – the first and the biggest part of my code for this project was called “class pongBall.” Because I had to add many details for the ball in order to make it move, I decided that creating a class might be easier, which made it easier for me to include everything such as “move,” “draw,” and “barCollisions” under a single class. Here’s the code that I used for my pong ball:

class pongBall {
  constructor() {
    this.xPos = xBall;
    this.yPos = 50;
    this.xSpeed = (5, 9);
    this.ySpeed = (-9, -5);
  }

  move() {
    xBall += xSpeed;
    yBall += ySpeed;
  }

  checkForCollisions() {
    if (xBall < 10 || xBall > 500 - 10) {
      xSpeed *= -1;
    }
    if (yBall < 10 || yBall > 445 - 10) {
      ySpeed *= -1;
    }
  }

  draw() {
    fill(218, 255, 115);
    ellipse(xBall, yBall, 20, 20);
  }

  // Bounce off the bar
  barCollisions() {
    if (xBall > mouseX && xBall < mouseX + 90 && yBall + 10 >= 440) {
      xSpeed *= -1;
      ySpeed *= -1;
      score++;
      song.play();
    }
  }
}

It was after this part of my progress when things started to get really confusing. Having to use completely new functions such as “gameState” with different sub-actions such as “start” and “play” or creating new functions such as “startScreen” and “playScreen” and having my game run through these different stages smoothly took a long, LONG time.

And because I wanted to make my game include time constraint as well as an outcome (win/lose), having to figure these out was a tricky process. Thankfully, I was able to use this p5.js resource to guide me through the timer/countdown code process, which was a lot more simple compared to other methods that I found online. Here’s the code highlight for the countdown function:

//countdown
 textAlign(CENTER, CENTER);
 fill("white");
 textSize(50);
 text(timer, width / 2, height / 2);
 if (frameCount % 60 == 0 && timer > 0) {
   // if the frameCount is divisible by 60, then a second has passed. it will stop at 0
   timer--;
 }

As for the win/lose outcome, I ended up just combining it with the countdown function instead of separating it, so that it just continued without a break.

if (timer == 0) {
   gameState = "end";
   image(photo, 200, 200, 250, 250);
   fill(255);
   textSize(25);
   text("GAME OVER", width / 2, height * 0.7);
   {
     if (score >= 5) {
       text("YOU WIN", width / 2, height / 3);
     } else {
       text("YOU LOSE", width / 2, height / 3);
     }
   }

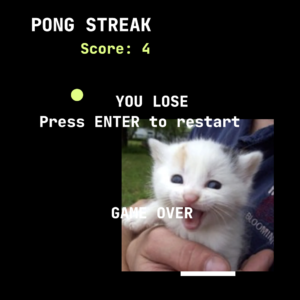
I was pretty happy with myself by this point, where my project looked something like this when you reached the end of the game – I especially liked the little kitten’s grin, which was an image I got from this site:

At this point, I felt like I was on the verge of going absolute bonkers because I have been spending 3 days on this project; and while I really tried to make my game reset/restart without closing the program, I never succeeded in making it work in the end. Here’s the code that I used, and I hope I’ll be able to identify the problem later on when I have more time in my hands to do so.

function draw() {
  if (gameState == "start") {
    startScreen();
  }
  if (gameState == "play") {
    playScreen();
  }
  if (gameState == "end") {
    restartScreen();
  }
}

function restartScreen() {
  if (keyCode == ENTER) {
    gameState = "start";
  }
}

Final Product:

Despite the ups-and-downs that I’ve had with this project, I’m pretty proud of my super-simple, very quick game:

Reflection:

This was undoubtedly the most challenging yet the most eye-opening/fulfilling project that I’ve had so far in this course! While it consisted of multiple mental breakdowns and panic attacks, it also really pushed me to understand all the skills I’ve learned throughout this semester because it really tested my knowledge that I’ve gained till now. It was both satisfying yet disappointing to see my skills so plainly through this project because while I did make progress in coding from my initial “absolutely no knowledge in coding whatsoever” stage, I also realized just how much there is to learn still. It was disheartening to see that none of my creative ideas and anticipations for exploring couldn’t come alive because of my limitations in coding. Something that I definitely enjoyed was installing sound effects as well as learning how to add points each time the ping pong ball hit the paddle/bar, because it was really satisfying to see how the points accumulated! It was cool to see how I was actually trying out all the back-end details that went behind the video games that I so casually played without giving thought about what kind of coding was necessary for those games to work. Next time I’ll definitely figure out how to make the game reset without having to refresh the page again, because that was a limitation that I couldn’t overcome for this project; I’d also love to create something with more color, photos, and a story rather than just creating a basic game like this one!

Midterm Progress Check

Concept: 

The idea of creating a snowball fight game for my midterm project actually was totally out of the blue; I was listening to Christmas carol playlist as usual (yes, I’m that person who puts Christmas songs on repeat since September till the actual holiday), and was thinking about how it’s such a shame that I won’t be able to have a snowball fight with my friends in the UAE this winter, when I realized that I actually can have one…via game! 🙂

Process/Coding:

Once I had this idea in mind, I immediately jumped to work. The first thing I did was creating the background canvas, which I envisioned as a gradient background of black – navy – orange in order to make it obvious that the game is set during the nightfall. This is the link to the code video by Kazuki Umeda that I used to get help in learning how to create gradients in p5.js, and here’s the link to the actual code.

One interesting thing I learned from this tutorial was how to create gradients by using a function called linearGradient, which was simpler than I thought it would be! The result ended up being like this:
It ended up being the perfect background color for my snowball fight game. 🙂

So far this is all I have, but I’ve brainstormed some ideas on how this game should work:

  • Involve two characters
  • The goal of this game is to reach exactly 30 points by throwing either small, medium, or large sized snowball. Whoever reaches exactly 30 points first wins the game.
  • Each character will have the choice to choose which snowball size they’d like to throw (I’ve yet to decide the points for the different snowballs) each round.
  • Both players will take turns (player A throws, then player B throws).
  • They will have “battery” shown above their heads to indicate just how much points they have fulfilled so far.

To be completely honest, I’m not sure how much of this vision I’ll be able to fulfill with my limited skills, but I hope I’ll be able to make at least most of this idea come true on screen. I’m so excited to see the progress I’ll make throughout this next week on this project!

Assignment #4 – Text Output

Concept:

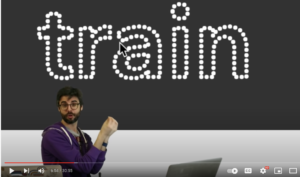
With this assignment, I didn’t have a particular vision in mind but instead wanted to focus on exploring and combining new skills that I haven’t tried yet. So, without an exact picture in mind, I searched up some tutorials on YouTube and found one that I really liked, which looked like this:

Process/Coding:

First things first, I had to figure out how to insert a font of my choice into p5.js because none of the default fonts appealed to me. For this I referenced this source, specifically the “custom font” section, from which I realized that I had to download a font file and insert it using a specific format name such as “.ttf” or “.otf.” Here’s the code that I used for uploading the font:

function preload(){
  font = loadFont('knewave.ttf');
}

My font was named Knewave, and it was taken from this website.

Once I had my font, I had to think of a quote or a phrase that I wanted to use, which was honestly the most no-brainer part of this assignment. I went with the first phrase that came into my mind, which was “go with the flow.”

For generating this text on screen, I used this code:

textFont(font);
 textSize(80);
 fill(255);
 noStroke();
 text('Go with the Flow',12,180);

After this, it got tricky as I tried to make the dots form into the shape of the letters and have them bounce off from each other, making them disperse after its initial shape. For this, I went back to the tutorial by The Coding Train and learned the idea of “function Vehicle,” which was what controlled the dots’ movements such as velocity, dimension, position, etc. I was also able to control the colors and the thickness of the dots in this “vehicle.js” file as well, which is shown below:

function Vehicle(x,y){
  this.pos = createVector (x,y);
  this.target = createVector(x,y);
  this.vel = p5.Vector.random2D ();
  this.acc = createVector ();
  this.r = 8;
}

Vehicle.prototype.update = function(){
  this.pos.add(this.vel);
  this.vel.add(this.acc);
}

Vehicle.prototype.show = function(){
  stroke(199, 236, 242);
  strokeWeight(7);
  point(this.pos.x,this.pos.y);
}

(original author of the code: Daniel Shiffman, here’s the link to the code)

Then, in order to bring in this vehicle function and actually draw the dots, I plugged the according values of variable points back into the draw function. But unfortunately, when I ran the program, it didn’t stay in this format long enough as I wanted them to:
Instead, they dispersed into a formless shape way too fast. And since I didn’t quite figure out how to slow the movement, I decided to just create the phrase in text form and let it sit there, while the dots will just bounce off from the letters, like this:

Because I wanted there to be more pop of a color rather than simply making it black and white only, I decided to create three text layers of gradient blue so that they will give an illusion of being more 3D. Here’s what it looked like after I was done layering the texts:
And finally, I decided to add a simple loop using the click of a mouse so that I could freeze the moment of the dots dispersing when the dots were at the desired pattern. And once you clicked on the screen once, you’d have to continuously press down on the screen for the dots to continue moving; if you released the mouse, the dots will stay frozen. For this function, I used the following code:

//stopping the dots in the pattern that you'd like
function mousePressed() {
  loop();
}

function mouseReleased() {
  noLoop();
}

And here is the final product!

Reflection:

The process of learning a new function (function Vehicle) and also learning how to animate the dots in a way that they start in an assemble before they disperse was an interesting process! It was a pretty tough concept to get at first because I was introduced to many new functions, but it also made the satisfaction at the end when I saw the final product be extra special as well. One thing that I’d like to change about my product is to have a “reset” button which will reset all the dots into its original place once it is pressed – this is something that I’ll hope to achieve in my midterm project!