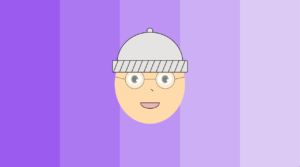
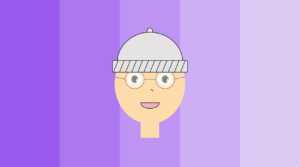
Week 4: generative typography

Description:

Creating a generative typography/text output.

Inspiration:

For this week’s assignment, I tried to remake the Digital Rain from the Matrix movie which consists of downward-flowing green characters representing the activity of the virtual environment of the Matrix on screen.

Process:

I have used two main classes: the first one represents a single character whereas the second class represents a combination of characters (vertical series of characters).

Let’s start with the first one. The “Letter” class includes a single function in addition to the constructor. The constructor takes two arguments representing both the x and y coordinates and randomly generates a character (Japanese character) using the ASCII table codes. Round() is used to find the closest integer, whereas the create() function prints the character on the display window.

// Letter class
class Letter{
  // Attributes
  char character;
  int xcoord, ycoord;
  
  // Constructor
  Letter(int xcoord, int ycoord){
    // x-coordinate
    this.xcoord=xcoord;
    // y-coordinate
    this.ycoord=ycoord;
    // Randomly generates a Japanese character (letter)
    character= char(round(random(12448, 12543)));
  }
  
  void create(){
    // Prints the character on the display window
    text(character, xcoord, ycoord);
  }
}

The second class representing the combination of characters includes two functions in addition to the constructor. One of its attributes is an array of “Letter” objects, which gets initialized in the constructor. I used a for loop to add the characters to the array, with the coordinates depending on the font size. The steps variable is used for the combination’s movement on the screen and is randomly chosen (between 5 and 10).  The generate() function is mainly a for() loop that goes through the combination (array) and prints every character keeping in mind that the first character’s (the one at the bottom) color is lighter than the other ones. The gradient was achieved using transparency (alpha). The move() function moves the combinations to the bottom of the screen and checks when it disappears so that it can be taken to the top again.

// Combination class
class Combination {
  // Attributes
  ArrayList<Letter> combinations;
  int steps, startingpoint;
  
  // Constructor
  Combination(int xcoord, int ycoord){
    combinations = new ArrayList<Letter>();
    startingpoint = ycoord;
      
    // Create the Letters and add them to the array
    for(int ycoord2=startingpoint; ycoord2<FontSize*round(random(10,25))+startingpoint; ycoord2+=FontSize){
      combinations.add(new Letter(xcoord, ycoord2));
    }
    // Steps or Speed of the combination
    steps = round(random(5,10));
  }
  
  void generate(){
    for(int i=0; i<combinations.size(); i++){
        // Change the color of the text to green
        fill(text_color, i*15);
        // Make the first char's color lighter
        if (i==combinations.size()-1){
          fill (firstchar_color);
        }
        // Print the letters
        combinations.get(i).create();
        // Move the combination
        move(i);   
    }
  }
  
  void move(int i){
    // Check when the combination leaves the screen 
    if (combinations.get(0).ycoord>height){
      for(int j=0; j<combinations.size(); j++){
        // Get the combination to the top
        combinations.get(j).ycoord=-FontSize*(combinations.size()-(1+j));
      }
    }
    // Move the combination
    combinations.get(i).ycoord += steps;
  }
}

In the Setup() function, I set the size to 854 x 480, and the textAlign to the center top, and I changed the font to “Courier New”. Then using a for loop, I added all the generated combinations to the main array.

void setup(){
 size(854, 480);
 background(background_color);
 textAlign(CENTER, TOP);
 F= createFont("Courier New", FontSize);
 textFont(F);
 
 // Add all the combinations to the array
 Combinations = new ArrayList<Combination>();
   for(int i=10; i<width-10; i+=FontSize){
     // Set the Y coordinate randomly
     Combinations.add(new Combination(i,round(random(0,height-200))));
   }
 }

The draw() function resets the background and prints the characters.

void draw(){
  // Reset the background
  background(background_color);
  // Print all the characters
  for (int i=0; i<Combinations.size(); i++){
    Combinations.get(i).generate();
  }
}

View post on imgur.com

Full Code:

PFont F;
int FontSize = 20;
color background_color = #161d20;
color text_color = #20c950;
color firstchar_color = #82e2a3;
ArrayList<Combination> Combinations;

// Letter class
class Letter{
  // Attributes
  char character;
  int xcoord, ycoord;
  
  // Constructor
  Letter(int xcoord, int ycoord){
    // x-coordinate
    this.xcoord=xcoord;
    // y-coordinate
    this.ycoord=ycoord;
    // Randomly generates a Japanese character (letter)
    character= char(round(random(12448, 12543)));
  }
  
  void create(){
    // Prints the character on the display window
    text(character, xcoord, ycoord);
  }
}

// Combination class
class Combination {
  // Attributes
  ArrayList<Letter> combinations;
  int steps, startingpoint;
  
  // Constructor
  Combination(int xcoord, int ycoord){
    combinations = new ArrayList<Letter>();
    startingpoint = ycoord;
      
    // Create the Letters and add them to the array
    for(int ycoord2=startingpoint; ycoord2<FontSize*round(random(10,25))+startingpoint; ycoord2+=FontSize){
      combinations.add(new Letter(xcoord, ycoord2));
    }
    // Steps or Speed of the combination
    steps = round(random(5,10));
  }
  
  void generate(){
    for(int i=0; i<combinations.size(); i++){
        // Change the color of the text to green
        fill(text_color, i*15);
        // Make the first char's color lighter
        if (i==combinations.size()-1){
          fill (firstchar_color);
        }
        // Print the letters
        combinations.get(i).create();
        // Move the combination
        move(i);   
    }
  }
  
  void move(int i){
    // Check when the combination leaves the screen 
    if (combinations.get(0).ycoord>height){
      for(int j=0; j<combinations.size(); j++){
        // Get the combination to the top
        combinations.get(j).ycoord=-FontSize*(combinations.size()-(1+j));
      }
    }
    // Move the combination
    combinations.get(i).ycoord += steps;
  }
}

void setup(){
 size(854, 480);
 background(background_color);
 textAlign(CENTER, TOP);
 F= createFont("Courier New", FontSize);
 textFont(F);
 
 // Add all the combinations to the array
 Combinations = new ArrayList<Combination>();
   for(int i=10; i<width-10; i+=FontSize){
     // Set the Y coordinate randomly
     Combinations.add(new Combination(i,round(random(0,height-200))));
   }
 }

void draw(){
  // Reset the background
  background(background_color);
  // Print all the characters
  for (int i=0; i<Combinations.size(); i++){
    Combinations.get(i).generate();
  }
}


Week 3: Generative artwork using OOP

Description:

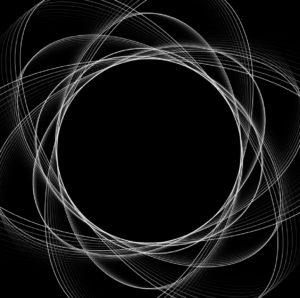
For this week’s assignment, I created a generative artwork using Object-Oriented Programming. Using mainly ellipses, I tried to generate a spiral that contracts and expands continuously and repetitively. 

To improve the program’s clarity and organization, I utilized classes, variables, and a couple of functions.

Setup:

First, I had to set the display window’s size to 640 x 640 (1:1 aspect ratio) to get a square window, then used a pitch-black background.

void setup(){
  size(640, 640);  
  background(0);
}
Class:
Name & Attributes:

I have only used one class named Ellipse which has two float attributes (xradius, and yradius) that respectively store the width and height of the ellipse.

class Ellipse{
  float xradius, yradius;
}
Constructor:

The constructor here takes two float arguments (xradius and yradius) then sets the attributes to those values.

Ellipse(float xradius, float yradius){
  this.xradius=xradius;
  this.yradius=yradius;
}
Functions:

I have used two functions (one to draw a single ellipse, and the other to draw multiple ellipses). The first function takes xradius and yradius as arguments, then proceeds to draw an ellipse. The second is more complicated. In fact, it starts by moving the shapes to the middle of the display window by setting the x-axis offset to width/2 and the y-axis offset to height/2 using the translate() function, then inside the for() loop, the ellipses are generated with an xradius that depends on the frameCount. To get a sort of spiral, the window is rotated with an angle that equals the frameCount.

void build(float xradius, float yradius){
  ellipse(0, 0, xradius, yradius);
}

void build_all(){
  translate(width/2, height/2);
  for (int i=0; i<400; i+=40) {
    float framecount = radians(frameCount);
    xradius = yradius - i*cos(framecount);
    rotate(cos(framecount));
    build(xradius, yradius);
  }
}
draw():

To get a sort of motion, I have set the transparency (alpha) to 85 instead of resetting the background at each frame.

void draw(){
  fill(0,85);
  rect(0,0,width,height);
  stroke(250);
  noFill();
  ellipse.build_all();
}

View post on imgur.com

Whole code:
// Ellipse Class
class Ellipse{
  // Attributes
  float xradius, yradius;
  
  // Constructor
  Ellipse(float xradius, float yradius){
    // Width of the ellipse
    this.xradius=xradius;
    // Height of the ellipse
    this.yradius=yradius;
  }
  
  // Generate one ellipse
  void build(float xradius, float yradius){
    ellipse(0, 0, xradius, yradius);
  }
  
  // Generate all ellipses
  void build_all(){
    // Move the shapes to the middle
    translate(width/2, height/2);
    for (int i=0; i<400; i+=40) {
      // Convert frameCount to rad
      float framecount = radians(frameCount);
      // Change the xradius depending on the framecount 
      xradius = yradius - i*cos(framecount);
      // Rotate the ellipses
      rotate(cos(framecount));
      // Call to the first function
      build(xradius, yradius);
    }
  }
}

Ellipse ellipse;

void setup(){
  size(640, 640);  
  background(0);
  // Create an ellipse
  ellipse = new Ellipse(380,380);
}

void draw(){
  // Add visible motion
  fill(0,85);
  rect(0,0,width,height);
  stroke(250);
  noFill();
  // Generate the ellipses
  ellipse.build_all();
}

Week 2: Simple Work of Art

Description:

For this assignment, I mainly used for() loops to make a simple work of art.

Inspiration:

Inspired by the Fraser spiral illusion used to test a person’s ability to be hypnotized, I decided to implement a set of particles in a constant rotation around the center of the display window.

Process:
Setup():

First, I had to set the display window’s size to 640 x 640 (1:1 aspect ratio) to get a square instead of a rectangle.

void setup(){
  size(640,640);
}
Global variables:

I have only used two global variables which are:

  • Angle: for the rotation of the spiral.
  • Spacing: To manage the space between the particles (dots).
float angle=0;
float spacing=80;
Draw():

To set a proper animation, I have added (background(0)) to clear the display window at the beginning of each frame (60 frames per second).

void draw(){
  // Clear the background
  background(0);
}
Random():

To generate random colors, I have used the random(255) function which returns an unexpected value within the range of (0,255) each time it is called.


void draw(){
  // Clear the background
  background(0);
  
  // Fill with randomly generated colors
  fill(random(255), random(255), random(255));
}
Translate():

The Translate() function allowed me to move the shapes to the middle of the display window by setting the x-axis offset to width/2 and the y-axis offset to height/2.


void draw(){
  // Clear the background
  background(0);
  
  // Fill with randomly generated colors
  fill(random(255), random(255), random(255));
  translate(width/2,height/2);
}
Rotate():

To add a motion to the spiral, the rotate() function was necessary. After each frame, the angle of rotation increases by 0.02 rad which is a little over 1 degree.

For() loops:

At the center of rotation, I have added a rectangle, and 4 circles using a for() loop to avoid unnecessary repetition.

View post on imgur.com

The main for loop is used to generate all the particles using both sin() and cos() multiplied by the spacing which also gets incremented inside the for() loop.

void draw(){
  // Clear the background
  background(0);
  
  // Fill with randomly generated colors
  fill(random(255), random(255), random(255));
  translate(width/2,height/2);
  rotate(angle);
  
  // Draw the shapes at the center
  rect(-20, -20, 40, 40);
  
  for (int j=0; j<=30; j+=10){
    ellipse(0,0,40-j,40-j);
  }
  
  // Draw the particles
  for(int i=0; i<width*2; i++){
    rect(cos(i)*spacing, sin(i)*spacing, 5, 5);
    spacing+=2;
  }
}

And at the end, I had to reset the spacing.


void setup(){
  size(640,640);
}

float angle=0;
float spacing=80;

void draw(){
  // Clear the background
  background(0);
  
  // Fill with randomly generated colors
  fill(random(255), random(255), random(255));
  translate(width/2,height/2);
  rotate(angle);
  
  // Draw the shapes at the center
  rect(-20, -20, 40, 40);
  
  for (int j=0; j<=30; j+=10){
    ellipse(0,0,40-j,40-j);
  }
  
  // Draw the particles
  for(int i=0; i<width*2; i++){
    rect(cos(i)*spacing, sin(i)*spacing, 5, 5);
    spacing+=2;
  }
  angle+=0.02;
  
  // Reset the spacing
  spacing=80;
}

View post on imgur.com


Week 1: Self-Portrait

Description:

For the first assignment, the prompt was to create a self-portrait in Processing using only basic shapes (ellipses, lines, rectangles, arcs…), which might seem easy at first but gets slowly but surely harder.

Size:

I opted for a basic 1280×720 size (16:9 aspect ratio), also known as the standard HD.

size(1280,720);

Background:

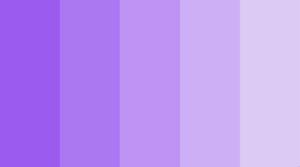
For the background, I decided to go for a “blocky” left-to-right gradient to match the rest of the portrait, instead of switching between colors gradually. The five shades of purple (for NYUAD) I used were: #9b5bee, #ac78f1, #bd94f3, #ccaff5, #dccaf5 (darker to lighter).

// Background
noStroke();
fill(#9b5bee);
rect(0,0,256,720);
fill(#ac78f1);
rect(256,0,512,720);
fill(#bd94f3);
rect(512,0,768,720);
fill(#ccaff5);
rect(768,0,1024,720);
fill(#dccaf5);
rect(1024,0,1280,720);
Hat:

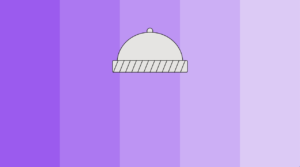
In order to draw the Beanie, I mainly used ellipses, arcs, rectangles, and a set of diagonal lines. The color used to fill the hat is platinum (a light shade of yellowish-gray). Its hex code is #e5e4e2. For the diagonal lines, I used a for loop to avoid unnecessary repetition.

// Hat
fill(#e5e4e2);
ellipse(width/2,height/2-225,25,25);
arc(width/2, height/2-90, 280, 260, PI, 2*PI);
rect(width/2-160,height/2-100,320,50,6,6,6,6);
for(int i=0; i<=300; i+=26){
line(width/2-136+i,height/2-100,width/2-156+i,height/2-50);
}
Face & Eyes: 

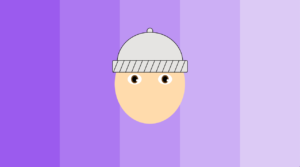
To match my skin tone, I have used the color with the hex code #ffdbac, then #6e4318 for brown eyes. In terms of shapes, ellipses were sufficient to do the iris and the pupils. I used “width/2” and “height/2” variables to center the portrait in the display window.

// Face
fill(#ffdbac);
ellipse(width/2, height/2, 300, 340);

//Eyes
fill(255);
ellipse(width/2-65, height/2-20, 60, 45);
ellipse(width/2+65, height/2-20, 60, 45);
fill(#6e4318);
ellipse(width/2-65, height/2-20, 30, 35);
ellipse(width/2+65, height/2-20, 30, 35);
fill(0);
ellipse(width/2-65, height/2-20, 20, 25);
ellipse(width/2+65, height/2-20, 20, 25);
fill(255);
ellipse(width/2-65+11, height/2-15, 10, 10);
ellipse(width/2+65+11, height/2-15, 10, 10);
noFill();
Glasses:

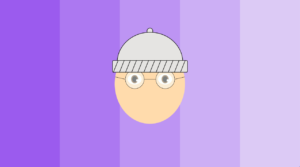
I have set the transparency (alpha) to half (127) to get realistic glass color. The color used is #f6feff. I have used two ellipses, 2 diagonal lines, and one straight line.

// Glasses:
fill(#f6feff,127);
stroke(1);
ellipse(width/2-65, height/2-20, 80, 80);
ellipse(width/2+65, height/2-20, 80, 80);
line(width/2-65+40,height/2-20,width/2+65-40,height/2-20);
line(width/2-65-40,height/2-20,width/2-65-83,height/2-30);
line(width/2+65+40,height/2-20,width/2+65+83,height/2-30);
Nose & Mouth:

To draw a clear nose and mouth, I have increased the stroke weight to 2, then used an arc as well as lines to draw them. The color used for the mouth is #ebb5b8.

//Nose
noFill();
strokeWeight(2);
stroke(10);
arc(width/2, height/2+30, 25, 12, 2+PI, 2*PI);

// Mouth
fill(#EBB5B8);
arc(width/2, height/2+80, 80, 50, 0, 3.14);
line(width/2-40, height/2+80, width/2+40, height/2+80);
Neck: 

A single rectangle was enough!

// Neck
fill(#ffdbac);
noStroke();
rect(width/2-40,height/2+150,80,80);
Shoulders & Shirt:

I have used a couple of ellipses, an arc, and a rectangle with rounded edges. The colors used were: #a0b2c6 for the shirt, and #e4e6eb for the buttons.


// Shoulders
fill(#a0b2c6);
rect(width/2-200,height/2+220,400,180,28,28,28,28);
fill(#ffdbac);
arc(width/2, height/2+220, 80, 50, 0, PI);

// Shirt
fill(#e4e6eb);
ellipse(width/2, height/2+270, 20, 20);
ellipse(width/2, height/2+320, 20, 20);
stroke(#e4e6eb);
strokeWeight(5);
line(width/2-120, height/2+320,width/2-120,height);
line(width/2+120, height/2+320,width/2+120,height);