Final Project (Submission Post)

Aaron, Majid, Hassan.

CONCEPT

How would someone virtually learn how complicated it is to drive a car? Would teaching someone how to drive a car virtually save a lot of money and decrease potential accidents associated with driving? These questions inspired our project, which is to create a remote-controlled car that can be controlled using hand gestures (that imitate the driving steering wheel movements), specifically by tracking the user’s hand position and a foot pedal. The foot pedal will be used to control the acceleration, braking, and reversing. We will achieve all these by integrating a P5JS tracking system into the car, which will interpret the user’s hand gestures and translate them into commands that control the car’s movements. The hand gestures and pedal control will be synced together via two serial ports that will communicate with the microcontroller of the car.

Experience

The entire concept is not based only on a driving experience. We introduce a racing experience by creating a race circuit. The idea is for a user to complete a lap in the fastest time possible. Before you begin the experience, you can view the leaderboard. After your time has been recorded, a pop-up appears for you to input your name to be added to the leaderboard. For this, we created a new user interface on a separate laptop. This laptop powers an Arduino circuit connection which features an ultrasonic sensor. The ultrasonic sensor checks when the car has crossed the start line and begins a timer, and detects when the user ends the circuit. After this, it records the time it took a user to complete the track and sends this data to the leaderboard.

This piece of code is how we’re able to load and show the leaderboard.

function loadScores() {
  let storedScores = getItem("leaderboard");
  if (storedScores) {
    highscores = storedScores;
    console.log("Highscores loaded:", highscores);
  } else {
    console.log("No highscores found.");
  }
}

function saveScores() {
  // make changes to the highscores array here...
  storeItem("leaderboard", highscores);
  console.log("Highscores saved:", highscores);
}


IMPLEMENTATION(The Car & Foot Pedal)

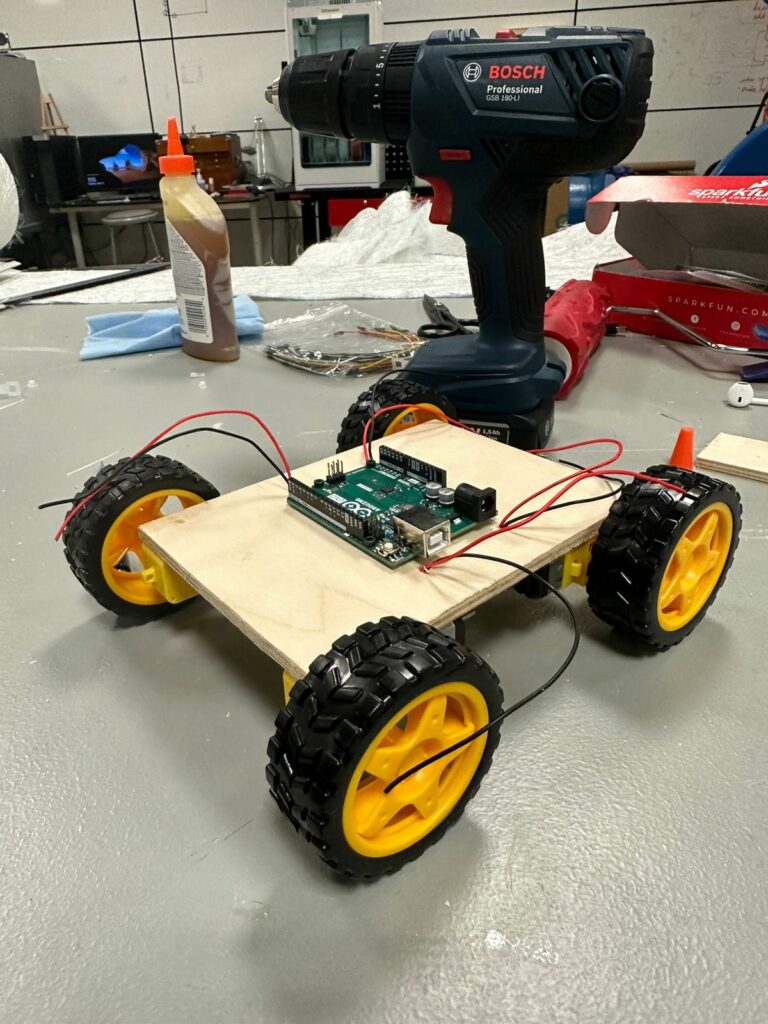
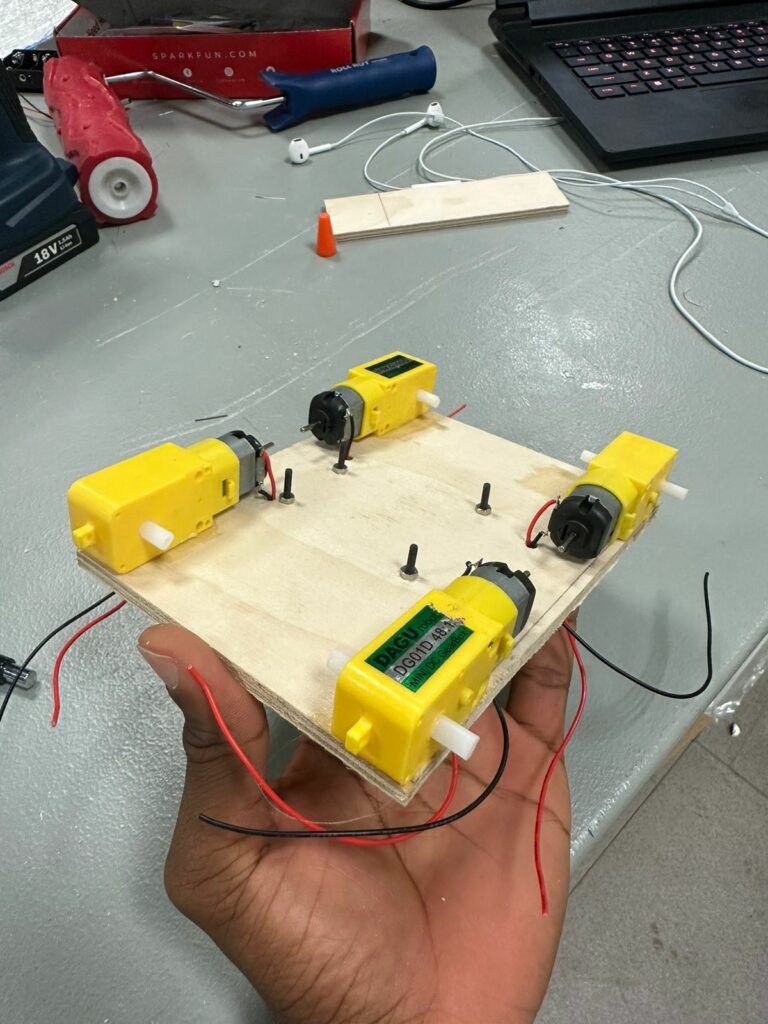
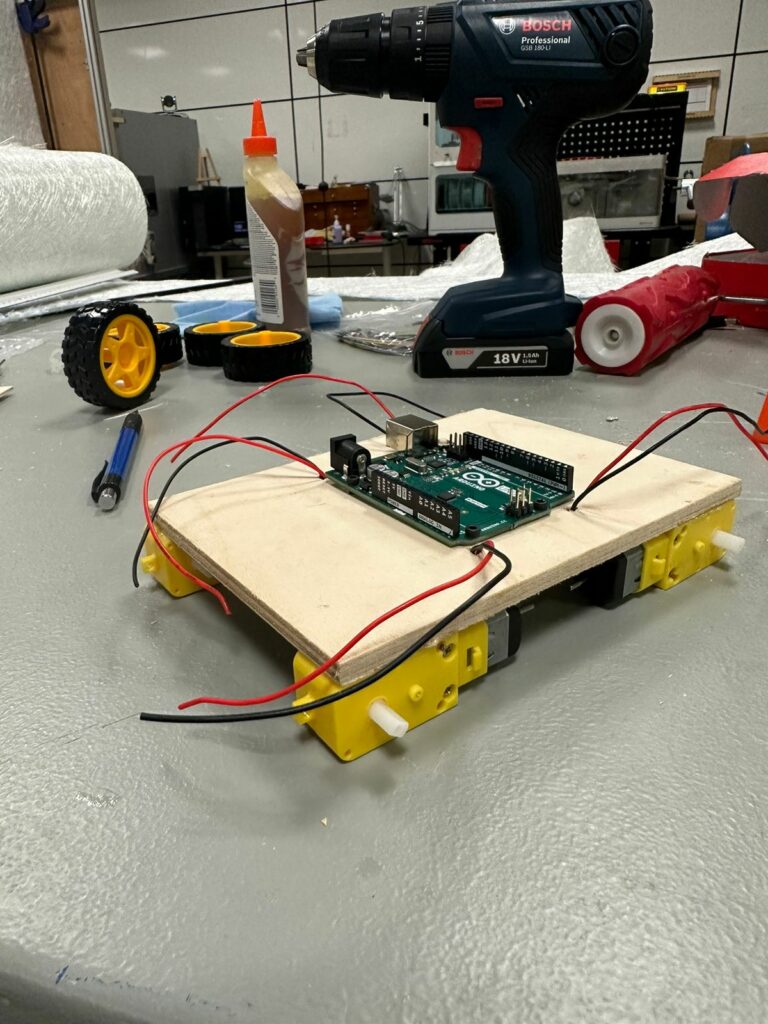
We first built the remote-controlled car using an Arduino Uno board, a servo motor, a Motor Shield 4 Channel L293D, an ultrasonic sensor, 4 DC motors, and other peripheral components. Using the Motor Shield 4 Channel L293D decreased numerous wired connections and allowed us space on the board on which we mounted all other components. After, we created a new Arduino circuit connection to use the foot pedal. 

The foot pedal sends signals to the car by rotating a potentiometer whenever the pedal is engaged. The potentiometer value is converted into forward/backward movement before it reaches p5.js via serial communication.

P5/Arduino Communication

At first, a handshake is established to ensure communication exists before proceeding with the program:

//////////////VarCar/////
// Define Serial port
let serial;
let keyVal;
//////////////////////////
const HANDTRACKW = 432;
const HANDTRACKH = 34;

const VIDEOW = 320;
const VIDEOH = 240;

const XINC = 5;
const CLR = "rgba(200, 63, 84, 0.5)";

let smooth = false;
let recentXs = [];
let numXs = 0;

// Posenet variables
let video;
let poseNet;

// Variables to hold poses
let myPose = {};
let myRHand;

let movement;
////////////////////////

let Acceleration = 0;
let Brake = 0;
let data1 = 0;
let data2 = 0;

let s2_comp=false;

function setup() {
 // Create a canvas
  //createCanvas(400, 400);

  // // Open Serial port
  // serial = new p5.SerialPort();
  // serial.open("COM3"); // Replace with the correct port for your Arduino board
  // serial.on("open", serialReady);

  ///////////////////////////
  // Create p5 canvas


The Hand Gestures

Two resources that helped detect the user’s hand position were PoseNet and Teachable Machine. We used these two resources to create a camera tracking system which was then programmed to interpret specific hand gestures, such as moving the hand right or left to move the car in those directions. This aspect of our code handles the hand tracking and gestures.

if (myPose) {
    try {
      // Get right hand from pose
      myRHand = getHand(myPose, false);
      myRHand = mapHand(myRHand);

      const rangeLeft2 = [0, 0.2 * HANDTRACKW];
      const rangeLeft1 = [0.2 * HANDTRACKW, 0.4 * HANDTRACKW];
      const rangeCenter = [0.4 * HANDTRACKW, 0.6 * HANDTRACKW];
      const rangeRight1 = [0.6 * HANDTRACKW, 0.8 * HANDTRACKW];
      const rangeRight2 = [0.8 * HANDTRACKW, HANDTRACKW];

      // Check which range the hand is in and print out the corresponding data
      if (myRHand.x >= rangeLeft2[0] && myRHand.x < rangeLeft2[1]) {
        print("LEFT2");
        movement = -1;
      } else if (myRHand.x >= rangeLeft1[0] && myRHand.x < rangeLeft1[1]) {
        print("LEFT1");
        movement = -0.5;
      } else if (myRHand.x >= rangeCenter[0] && myRHand.x < rangeCenter[1]) {
        print("CENTER");
        movement = 0;
      } else if (myRHand.x >= rangeRight1[0] && myRHand.x < rangeRight1[1]) {
        print("RIGHT1");
        movement = 0.5;
      } else if (myRHand.x >= rangeRight2[0] && myRHand.x <= rangeRight2[1]) {
        print("RIGHT2");
        movement = 1;
      }
      // Draw hand
      push();
      const offsetX = (width - HANDTRACKW) / 2;
      const offsetY = (height - HANDTRACKH) / 2;
      translate(offsetX, offsetY);
      noStroke();
      fill(CLR);
      ellipse(myRHand.x, HANDTRACKH / 2, 50);
      pop();
    } catch (err) {
      print("Right Hand not Detected");
    }
    print(keyVal)


The Final Result & Car Control

The final result was an integrated system consisting of the car, the pedal, and gesture control in P5.JS. When the code is run in p5.js, the camera detects a user’s hand position and translates it into movement commands for the car.

The entire code for controlling the car.

//////////////VarCar/////
// Define Serial port
let serial;
let keyVal;
//////////////////////////
const HANDTRACKW = 432;
const HANDTRACKH = 34;

const VIDEOW = 320;
const VIDEOH = 240;

const XINC = 5;
const CLR = "rgba(200, 63, 84, 0.5)";

let smooth = false;
let recentXs = [];
let numXs = 0;

// Posenet variables
let video;
let poseNet;

// Variables to hold poses
let myPose = {};
let myRHand;

let movement;
////////////////////////

let Acceleration = 0;
let Brake = 0;
let data1 = 0;
let data2 = 0;

let s2_comp=false;

function setup() {
 // Create a canvas
  //createCanvas(400, 400);

  // // Open Serial port
  // serial = new p5.SerialPort();
  // serial.open("COM3"); // Replace with the correct port for your Arduino board
  // serial.on("open", serialReady);

  ///////////////////////////
  // Create p5 canvas
  createCanvas(600, 600);
  rectMode(CENTER);

  // Create webcam capture for posenet
  video = createCapture(VIDEO);
  video.size(VIDEOW, VIDEOH);
  // Hide the webcam element, and just show the canvas
  video.hide();

  // Posenet option to make posenet mirror user
  const options = {
    flipHorizontal: true,
  };

  // Create poseNet to run on webcam and call 'modelReady' when model loaded
  poseNet = ml5.poseNet(video, options, modelReady);

  // Everytime we get a pose from posenet, call "getPose"
  // and pass in the results
  poseNet.on("pose", (results) => getPose(results));
}

function draw() {
  // one value from Arduino controls the background's red color
  //background(0, 255, 255);
  
  /////////////////CAR///////
  background(0);

  strokeWeight(2);
  stroke(100, 100, 0);
  line(0.2 * HANDTRACKW, 0, 0.2 * HANDTRACKW, height);
  line(0.4 * HANDTRACKW, 0, 0.4 * HANDTRACKW, height);
  line(0.6 * HANDTRACKW, 0, 0.6 * HANDTRACKW, height);
  line(0.8 * HANDTRACKW, 0, 0.8 * HANDTRACKW, height);
  line(HANDTRACKW, 0, HANDTRACKW, height);
  line(1.2 * HANDTRACKW, 0, 1.2 * HANDTRACKW, height);

  if (myPose) {
    try {
      // Get right hand from pose
      myRHand = getHand(myPose, false);
      myRHand = mapHand(myRHand);

      const rangeLeft2 = [0, 0.2 * HANDTRACKW];
      const rangeLeft1 = [0.2 * HANDTRACKW, 0.4 * HANDTRACKW];
      const rangeCenter = [0.4 * HANDTRACKW, 0.6 * HANDTRACKW];
      const rangeRight1 = [0.6 * HANDTRACKW, 0.8 * HANDTRACKW];
      const rangeRight2 = [0.8 * HANDTRACKW, HANDTRACKW];

      // Check which range the hand is in and print out the corresponding data
      if (myRHand.x >= rangeLeft2[0] && myRHand.x < rangeLeft2[1]) {
        print("LEFT2");
        movement = -1;
      } else if (myRHand.x >= rangeLeft1[0] && myRHand.x < rangeLeft1[1]) {
        print("LEFT1");
        movement = -0.5;
      } else if (myRHand.x >= rangeCenter[0] && myRHand.x < rangeCenter[1]) {
        print("CENTER");
        movement = 0;
      } else if (myRHand.x >= rangeRight1[0] && myRHand.x < rangeRight1[1]) {
        print("RIGHT1");
        movement = 0.5;
      } else if (myRHand.x >= rangeRight2[0] && myRHand.x <= rangeRight2[1]) {
        print("RIGHT2");
        movement = 1;
      }
      // Draw hand
      push();
      const offsetX = (width - HANDTRACKW) / 2;
      const offsetY = (height - HANDTRACKH) / 2;
      translate(offsetX, offsetY);
      noStroke();
      fill(CLR);
      ellipse(myRHand.x, HANDTRACKH / 2, 50);
      pop();
    } catch (err) {
      print("Right Hand not Detected");
    }
    print(keyVal)


    //print(movement);
   // print("here")
    //print(writers);
  }
  //////////////////////////

  if (!serialActive1 && !serialActive2) {
    text("Press Space Bar to select Serial Port", 20, 30);
  } else if (serialActive1 && serialActive2) {
    text("Connected", 20, 30);

    // Print the current values
    text("Acceleration = " + str(Acceleration), 20, 50);
    text("Brake = " + str(Brake), 20, 70);
    mover();
  }

}

function keyPressed() {
  if (key == " ") {
    // important to have in order to start the serial connection!!
    setUpSerial1();
  } else if (key == "x") {
    // important to have in order to start the serial connection!!
    setUpSerial2();
    s2_comp=true
  }
}

/////////////CAR/////////
function serialReady() {
  // Send initial command to stop the car
  serial.write("S",0);
  print("serialrdy");
}

function mover() {
    print("mover");

  // Send commands to the car based wwon keyboard input
  if (Acceleration==1) {
    writeSerial('S',0);
   
    //print(typeof msg1)
    
  }else if (Brake==1) {
    writeSerial('W',0);
  }else if ( movement < 0) {
    print("left")
    writeSerial('A',0);
  }else if ( movement > 0) {
        print("right")

    writeSerial('D',0);
  }else if (movement== 0) {
    print("stop");
    writeSerial('B',0);
  }
}

// When posenet model is ready, let us know!
function modelReady() {
  console.log("Model Loaded");
}

// Function to get and send pose from posenet
function getPose(poses) {
  // We're using single detection so we'll only have one pose
  // which will be at [0] in the array
  myPose = poses[0];
}

// Function to get hand out of the pose
function getHand(pose, mirror) {
  // Return the wrist
  return pose.pose.rightWrist;
}

// function mapHand(hand) {
//   let tempHand = {};
//   tempHand.x = map(hand.x, 0, VIDEOW, 0, HANDTRACKW);
//   tempHand.y = map(hand.y, 0, VIDEOH, 0, HANDTRACKH);

//   if (smooth) tempHand.x = averageX(tempHand.x);

//   return tempHand;
// }
function mapHand(hand) {
  let tempHand = {};
  // Only add hand.x to recentXs if the confidence score is greater than 0.5
  if (hand.confidence > 0.2) {
    tempHand.x = map(hand.x, 0, VIDEOW, 0, HANDTRACKW);

    if (smooth) tempHand.x = averageX(tempHand.x);
  }

  tempHand.y = map(hand.y, 0, VIDEOH, 0, HANDTRACKH);

  return tempHand;
}

function averageX(x) {
  // the first time this runs we add the current x to the array n number of times
  if (recentXs.length < 1) {
    console.log("this should only run once");
    for (let i = 0; i < numXs; i++) {
      recentXs.push(x);
    }
    // if the number of frames to average is increased, add more to the array
  } else if (recentXs.length < numXs) {
    console.log("adding more xs");
    const moreXs = numXs - recentXs.length;
    for (let i = 0; i < moreXs; i++) {
      recentXs.push(x);
    }
    // otherwise update only the most recent number
  } else {
    recentXs.shift(); // removes first item from array
    recentXs.push(x); // adds new x to end of array
  }

  let sum = 0;
  for (let i = 0; i < recentXs.length; i++) {
    sum += recentXs[i];
  }

  // return the average x value
  return sum / recentXs.length;
}

////////////////////////

// This function will be called by the web-serial library
// with each new *line* of data. The serial library reads
// the data until the newline and then gives it to us through
// this callback function
function readSerial(data) {
  ////////////////////////////////////
  //READ FROM ARDUINO HERE
  ////////////////////////////////////

  if (data != null) {
   // print(data.value);
    let fromArduino = data.value.split(",");
    if (fromArduino.length == 2) {
      //print(int(fromArduino[0]));
      //print(int(fromArduino[1]));
      Acceleration = int(fromArduino[0]);
      Brake  = int(fromArduino[1])
      
    }

    //////////////////////////////////
    //SEND TO ARDUINO HERE (handshake)
    //////////////////////////////////
    if(s2_comp){
    let sendToArduino = Acceleration + "," + Brake + "\n";
      // mover()
    //print("output:");
    //print(sendToArduino);
    //writeSerial(sendToArduino, 0);
    }
  }
}


The car moves forward/backward when a user engages the foot pedals, and steers left/right when the user moves his/her hand left/right. The components of the car system are able to communicate via serial communication in p5.js. To enable this, we created 2 serial ports(one for the car and the other for the foot pedal). 


CHALLENGES

One challenge we may face during the implementation is accurately interpreting the user’s hand gestures. The camera tracking system required a lot of experimentation and programming adjustments to ensure that it interprets the user’s hand movements while also being light and responsive. Originally the camera was tracking the X and Y axis, but it caused p5 to be very slow and laggy because of the number of variables that it needs to keep track of. The solution was to simply remove one of the axes, this improved the responsiveness of the program drastically.


The initial plan was to operate the car wirelessly, however, this was not possible due to many factors, such as using the wrong type of Bluetooth board. With limited time, we resorted to working with two serial ports for communication between the car, the pedals, and the hand gesture control. This introduced a new problem- freely moving the car. However, we solved the issue by using an Arduino USB extension cable for the car to be able to move freely.


Another major roadblock was the serial ports in p5js. Since the project uses both a pedal and the car, there was the need to use 2 separate Arduino Uno boards to control both systems. This necessitated the use of 2 serial ports in p5js. The original starter code for connecting p5 to Arduino was only for 1 serial port. A lot of time was spent adjusting the existing code to function with 2 serial ports. 


Lessons learned, especially with regard to robots, is be grouped into the following points: 

Planning is key: The project can quickly become overwhelming without proper planning. It’s important to define the project goals, select appropriate devices and how to sync the code to those devices and create a detailed project plan. 

Test as often as you can before the showcase date: Testing is crucial in robotics projects, especially when dealing with multiple hardware components and sensors. This one was no exception. It’s important to test each component and module separately before combining them into the final project.

Future steps needed to take our project to the next level.

  1. Expand functionality: While the current design allows for movement in various directions, there are other features that could be added to make the car more versatile. We plan on adding cameras and other sensors(LiDar) to detect obstacles to create a mapping of an environment while providing visual feedback to a user.
  2. Optimize hardware and software: We also plan on optimizing the hardware and software components used. This would involve changing the motors to more efficient or powerful motors, using more accurate sensors (not using the ultrasonic sensor), or exploring other microcontrollers that can better handle the project’s requirements. Additionally, optimizing the software code can improve the car’s responsiveness and performance. For example, our software code can detect obstacles but cannot detect the end of a path.  Regardless, we believe we can engineer a reverse obstacle-sensing algorithm to create an algorithm that could detect cliffs and pot-holes, and dangerous empty spaces on roads to ultimately reduce road accidents.

User Testing

Final User Testing Update

Group: Majid, Hassan, Aaron

Concept

This project aims to create a small-scale self-driving experience. It implements a machine-learning module that captures user hand gestures for steering and a foot pedal for accelerating, braking, and stopping.  A user controls the car by imitating the driving steering wheel movements in real life in front of a computer camera and engaging the pedals with the foot. However, that isn’t implemented yet.

Implementation

To make this possible and achieve a near-real-life driving experience, we implemented a machine learning module that uses a camera to capture a user’s hand gestures. This machine learning module is implemented in p5.js and is synced with the pedal and the robot via Bluetooth; however, that isn’t implemented yet. Regardless, a network is created between the robot and the pedals for user control.

From interacting with the code for the DC motors, it seems the maximum attainable speed is 500, which is relatively slow. However, we implemented a code that prevents the robotic car from crashing. When a user accelerates towards an obstacle, the robot stops, scans 180 deg away from the obstacle, and then moves back. In some cases, it scans and moves toward a direction devoid of obstacles.

We also installed an ultrasonic sensor to help avoid obstacles. The distance sensor is fastened to a servo motor to enable free rotation. This was particularly important because we implemented an algorithm that scans surrounding areas for obstacles and moves the robotic car in a direction that is devoid of obstacles.

Displayed here is the code defining the DC motors and other dependencies.

#include <Servo.h>
#include <AFMotor.h>
#define Echo A0
#define Trig A1
#define motor 10
#define Speed 500 //DC motor Speed
#define spoint 103

Displayed here is the code obstacle avoiding code

void Obstacle() {
  distance = ultrasonic();
  if (distance <= 12) {
    Stop();
    backward();
    delay(100);
    Stop();
    L = leftsee();
    servo.write(spoint);
    delay(800);
    R = rightsee();
    servo.write(spoint);
    if (L < R) {
      right();
      delay(500);
      Stop();
      delay(200);
    } else if (L > R) {
      left();
      delay(500);
      Stop();
      delay(200);
    }
  } else {
    forward();
  }
}

Aspects of the Project we’re proud of.

Our proudest achievement so far is the implementation of the machine learning module.

Also, the algorithm that checks for obstacles in a smart way and prevents users from crashing is a feat we’re most proud of. We believe this is implementation in real life could save lives by preventing vehicular accidents.

Aspects we can improve on in the future.

The most significant aspect of the project we believe would impact the world if worked on is the obstacle sensor that prevents the car from crashing. We believe if this is worked on on a larger scale, it could be implemented in cars to help reduce road accidents.

Regardless, we also believe we can  engineer a reverse the obstacle-sensing algorithm to create an algorithm that could detect cliffs and pot-holes, and dangerous empty spaces on roads to ultimately reduce road accidents.
User Testing

Project Update

Final Project Update

Hassan, Majid & Aaron.


CONCEPT

Our project is to create a remote-controlled car that can be controlled using hand gestures, specifically by tracking the user’s hand position. We will achieve this by integrating a P5JS tracking system into the car, which will interpret the user’s hand gestures and translate them into commands that control the car’s movements.

IMPLEMENTATION

To implement this project, we will first build the remote-controlled car using an Arduino Uno board and other necessary components. We will then integrate the P5JS system, which will detect the user’s hand position and translate it into movement commands for the car. We have two options for detecting user’s hand position, either PoseNet or Teachable Machine. The camera tracking system will be programmed to interpret specific hand gestures, such as moving the hand forward or backward to move the car in those directions.

POTENTIAL CHALLENGES

One potential challenge we may face during the implementation is accurately interpreting the user’s hand gestures. The camera tracking system may require experimentation and programming adjustments to ensure that it interprets the user’s hand movements accurately. Also testing will be required to see if PoseNet performs better or Teachable Machine. Responsiveness will also be a factor as we would want the control to be fluid for the user. Additionally, ensuring the car responds correctly to the interpreted movement commands may also present a challenge, in terms of the physical construction of the cars and the variability of the motors.


Update

We were able able to come up with two car concept designs, but this was the best we decided to move ahead with. We believe we might need a motor driver, which we will connect to the Arduino Uno board to make controls possible.

1.

2.

3.

When we get the code to control the car right and time is on our side, we will update the car model to an acrylic body. We also plan to use a vacuum former to create a body for the car.

Serial Control

1 & 3

Something that uses only one sensor on Arduino and makes the ellipse in p5 move on the horizontal axis, in the middle of the screen and nothing on Arduino is controlled by p5.
Taking the gravity wind example (https://editor.p5js.org/aaronsherwood/sketches/I7iQrNCul) and make it so every time the ball bounces one led lights up and then turns off, and you can control the wind from one analog sensor

2

Using a slider to control the LED brightness from p5

Arduino Code

int ledPin = 2; // connect LED to pin 9
int brightness = 0;

void setup() {
  Serial.begin(9600); // start serial communication
  pinMode(ledPin, OUTPUT); // set LED pin as an output
}

void loop() {
  // read incoming serial data
  if (Serial.available() > 0) {
    brightness = Serial.read(); // read the incoming value
    brightness = constrain(brightness, 0, 255); // constrain the value between 0 and 255
    analogWrite(ledPin, brightness); // set the LED brightness
  }
  delay(10); // wait a short time before repeating the loop
}

P5.js code

let slider; // slider to control LED brightness
let serial;

function setup() {
  serial = new p5.SerialPort();
  
  serial.open("COM3");
  
  createCanvas(400, 400); // create a canvas
  slider = createSlider(0, 255, 0); // create a slider
  slider.position(50, 50); // set the position of the slider
}

function draw() {
  background(220); // clear the canvas

  let val = slider.value(); // get the slider value
  text("LED Brightness: " + val, 50, 50); // display the brightness value

  // send data to Arduino over serial
  if (frameCount % 10 == 0) { // limit the rate of sending data to avoid overloading the serial port
    serial.write(val); // send the slider value over serial
  }
}


Music with Distance

Concept.

How would playing the piano with the feet at an arcade center look on a small scale? That was how I arrived at this mini-project. To make it easier for any user, I specifically picked notes (of Fur Elise) in ascending order of distance (cm).

Implementation.

The distance instrument works simply by moving an obstacle in front of an ultrasonic sensor at an interval of 1cm. This was implemented using if-else statements.

Tools Used.

The project features an ultrasonic sensor, a buzzer, jumper wires, a 10k ohm resistor, and a switch.

Challenges

Some challenges I encountered while undertaking this project involved difficulty in figuring out the specific notes to make up the music used. Once that was figured out, all the was left was to provide the best if-else condition statement to control the notes.


Code

/*Assignment

Author: Aaron Wajah
Concept: Making Fur Elise melody with arduino
Date: 11-04-2023

*/


// Define pins for ultrasonic sensor, switch, and buzzer.
const int trigPin = 10;
const int echoPin = 11;
const int switchPin = 2;
const int buzzerPin = 8;

// Define variables
long duration;
int distance;
int switchState = LOW;
int prevswitchState=0;

bool buttonPressed=false;

//defining notes for melody. 
const int notes[] = { 659, 622, 659, 622, 659, 494, 587, 523, 440};

const int quarterNote = 250;
// Define durations for each note (in quarter notes)
const int durations[] = { 4, 8, 8, 4, 8, 8, 4, 8, 8 };


void setup() {
  // Initialize serial communication
  Serial.begin(9600);

  // Set pins as input/output
  pinMode(trigPin, OUTPUT);
  pinMode(echoPin, INPUT);
  pinMode(switchPin, INPUT_PULLUP); // Use internal pull-up resistor
  pinMode(buzzerPin, OUTPUT);
}

void loop() {
  // Read switch state
  switchState = digitalRead(switchPin);

  // Only take a measurement if switch is pressed
  if (switchState == HIGH ) {
    

    int duration =  quarterNote*1.2;

    // Send a pulse to trigger the sensor
    digitalWrite(trigPin, LOW);
    delayMicroseconds(2);
    digitalWrite(trigPin, HIGH);
    delayMicroseconds(10);
    digitalWrite(trigPin, LOW);

    // Measure the duration of the echo pulse
    duration = pulseIn(echoPin, HIGH);

    // Calculate distance in centimeters
    distance = duration / 58;

    // Print distance to serial monitor
    Serial.print("Distance: ");
    Serial.print(distance);
    Serial.println(" cm");


    if(distance==2){
      tone(buzzerPin, notes[0], duration);
      delay(duration * 1.3);
    }
    if(distance==3){
      tone(buzzerPin, notes[1], duration);
      delay(duration * 1.3);
    }
    if(distance==4){
      tone(buzzerPin, notes[2], duration);
      delay(duration * 1.3);
    }
    if(distance==5){
      tone(buzzerPin, notes[3], duration);
      delay(duration * 1.3);
    }
    if(distance==6){
      tone(buzzerPin, notes[4], duration);
      delay(duration * 1.3);
    }
    if(distance==7){
      tone(buzzerPin, notes[5], duration);
      delay(duration * 1.3);
    }
    if(distance==8){
      tone(buzzerPin, notes[6], duration);
      delay(duration * 1.3);
    }
    if(distance==9){
      tone(buzzerPin, notes[7], duration);
      delay(duration * 1.3);
    }
    if(distance==10){
      tone(buzzerPin, notes[8], duration);
      delay(duration * 1.3);
    }
    
    noTone(8);
  
  }
  
  // Wait before taking another measurement
  delay(500);
}


Traffic Control with Photosensor.


Concept.

The concept for this project is pretty simple. How can traffic be regulated in a smart, optimized way such that when there are more cars and fewer pedestrians, the traffic light stays green for longer? In an advanced way, could we have sensors that could calculate traffic and find an optimized way to control them? That was how I came up with this project. The photoresist represents traffic: the light turns green when more cars are stuck in traffic. Pedestrians, on the other hand, can utilize the switch to inform the system of their intention to cross. When the switch is turned on, the traffic turns red.


Process.

The project features two LEDs, a photoresist to check the number of traffic, a switch, jumper wires, and four 10K ohms resistors. The photoresistor keeps track of the amount of traffic (the higher the traffic), the higher the resistance, which results in the traffic light turning green.

Challenges

One of the challenges I was faced with was designing a code that would ensure one of the lights stayed on until a condition was met. It took me a while to figure out that the “switch” statement in javascript would be the most convenient way forward. That aside, figuring out how to connect the photoresistor after appropriately connecting the LEDs and the switch proved difficult. I got to a point where I assumed the photoresistor was faulty. However, it started working after I dismantled everything and reconnected the circuit differently.

Overall, this project challenged me to think more creatively, and it also helped me gain a better understanding of coming up with appropriate Arduino circuits.


Diary Switch

Concept

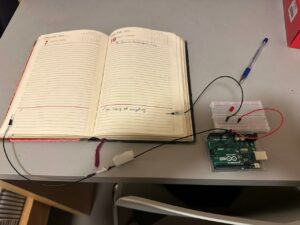
The concept for this switch is derived from the idea of bookmarks. In this case, when you close a book, there is a light indicator. I made this as a motivation to write poems in an orderly manner before sleeping every night.

Circuit

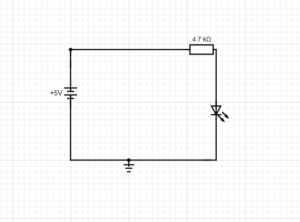
The switch makes use of a simple circuit that introduces an opened circuit when a book is opened and a closed circuit when the book is closed. See below for circuit diagram.

Remarks

The assignment gave me a keen understanding of how the Arduino breadboard works as I needed to come up with a way to separate the circuit without removing wires from the Arduino Uno board. Overall, challenges I faced was coming up with a creative switch idea.


The Outer Experience

Click  “The Outer Experience Here” to experience in fullscreen.

The central concept of this project was derived from galaxy features(rotation about a center point, rotation about an object’s axis, etc.).

The main goal is to achieve an experience for anyone to experience how space feels like. The project includes certain extraterrestrial bodies such as the sun, Jupiter and its moons, and other creative gas liked spherical structures.

How it Works

The project works by moving around using the mouse together with W,S,A,D  keys on the user front. Technically, this is achieved by implementing the cam feature in p5.js with sophisticated math only @ “morejpeg” on youtube could help me with.

The project also features Jupiter and its moons, the sun, and other spherical galaxy planet-liked structures. These implementations were made possible using “sphere,” “rotate,” “texture,” and “translate” keywords in p5.js. The technical achievement I am most proud of is randomly distributing star-liked structures in space.

Also, I think the decision to create a big sphere to house all the stars and other planetary bodies was a smart decision. The choice of music also makes the experience a calming one I believe.

Problems

Generally, working in 3D involves so much math and analysis, and that took an enormous amount of my time. Thus, the main problem I encountered was using math to implement the camera in 3D.

That aside, randomly distributing stars in the void was a challenging task because they constantly kept randomly rotating in the void. Finding the exact position to place a text for User control proved difficult because I simply couldn’t locate the default camera location in the void.


References

morejpeg, (2023, Jan)”Coding First Person Camera Controls in 10 Minutes.” Youtube:https://youtu.be/0b9WPrc0H2w

Midterm Project

Concept

I recently made a website whose theme is based on galaxies and its accompanying features. ie Gravity, rotation about a center etc. I draw inspiration from that idea to create a shooting game, one that obviously features a protagonist’s spaceship shooting enemies.

Resources: https://drive.google.com/drive/folders/1XpSZpyi1ZLYHNcuS6oSnQvXkh0091LMh?usp=sharing

I anticipate adding a feature that will animated ellipses that imitate the movement of stars in the galaxy; so far, I think that is the task that may prove difficult.

Generative Text_Aaron

Concept

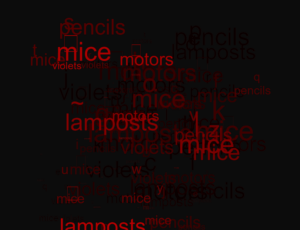
The idea for this code was to generate a random text/ character on the canvas using noise feature. the canvas color becomes darker and darker with each word generated and printed on the screen. I was inspired by the idea of dots disappearing from my computer screen as I worked on a data visualization project I had given up on.

Implementation

The concept was implemented using p5.js. Key technical implementations includes preload and noise feature.

Challenges

Some of the challenges I faced was randomizing the position of both the word and character on the screen; I couldn’t solve it.