Now that it’s *actually* completed, I can post the actual documentation! Introducing my final project: “StarScape”.
Concept:
For my midterm project, I made a retro game, so this time I wanted to make something more artsy, i.e. focused more on the display and visuals, rather than having a linear progression of events that have an end-goal. Personally, my favorite type of interactive art installations are the ones that make use of lights (some very primitive part of my brain still goes “Wow” like a child when I see lights turn on and off). Especially inspired by N O W I S W H E N W E A R E (the stars), I wanted to make a piece that simulates the stars and has a corresponding display of lights.
The interaction is relatively straightforward: the user presses the Arcade buttons, which will trigger a corresponding movement on the screen and a light sequence on the RGB strip.
Implementation:
Hardware:
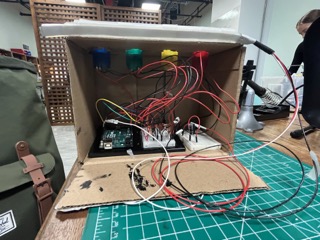
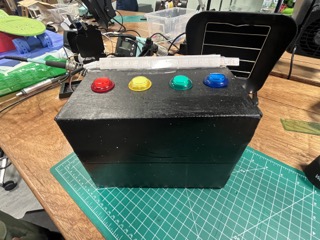
Four arcade LED buttons, and a NeoPixel RGB Strip
Software:
For this project, I used p5.js and the Arduino IDE.
In the p5.js code, there is a Galaxy object that contains all the particles (and has the methods that trigger the changes). Everytime the code detects that the user has pressed a button on the Arduino, the repective method for that button is called. Each method (jitterParticles, jitterParticlesCloser, moveParticlesInHeart, moveParticlesInSpiral) does two things: move the particles around, and change their colors.
The p5.js code is scattered across three files:
particle.js:
// Reference: https://p5js.org/examples/simulate-particles.html


// this class describes the properties of a single particle.
class Particle {
// setting the co-ordinates, radius and the
// speed of a particle in both the co-ordinates axes.
  constructor(x, y, particleColor, strokeColor){
    // this.x = random(-rangeBuffer, width + rangeBuffer);
    // this.y = random(-rangeBuffer, height + rangeBuffer);
    this.particleColor = particleColor;
    this.strokeColor = strokeColor;
    this.x = x;
    this.y = y;
    this.r = random(1,5);
    this.xSpeed = random(-2,2);
    this.ySpeed = random(-1,1.5);
  }

// creation of a particle.
  createParticle() {
    noStroke();
    fill(this.particleColor);
    circle(this.x,this.y,this.r);
  }

// setting the particle in motion.
  moveParticle() {
    if(this.x < 0 || this.x > width)
      this.xSpeed*=-1;
    if(this.y < 0 || this.y > height)
      this.ySpeed*=-1;
    this.x+=this.xSpeed;
    this.y+=this.ySpeed;
  }

// this function creates the connections(lines)
// between particles which are less than a certain distance apart
  joinParticles(particles) {
    particles.forEach(element =>{
      let dis = dist(this.x,this.y,element.x,element.y);
      if(dis<85) {
        stroke(this.strokeColor);
        line(this.x,this.y,element.x,element.y);
      }
    });
  }

  //make the particle move in a specific direction
  moveInDirection(xMovement, yMovement) {
    this.x += xMovement;
    this.y += yMovement;
  }

}
galaxy.js:
let jitterAmount = 5; //the distance particles jitter
let jitterIterations = 5; // Number of jitter iterations

//variables for the particles colors
let galaxyColor = "rgba(200,169,169,0.5)"; //White
let galaxyStroke = "rgba(255,255,255,0.04)";
let heartColor = "rgba(255, 100, 100, 0.5)"; //Pink
let heartStroke = "rgba(255, 150, 150, 0.04)";
let spiralColor = "rgba(184, 134, 11, 0.5)"; // Dark Golden
let spiralStroke = "rgba(255, 215, 0, 0.04)";
let convergenceColor = "rgba(100, 149, 237, 0.5)"; // Blue
let convergenceStroke = "rgba(173, 216, 230, 0.04)";
let scatterColor = "rgba(60, 179, 113, 0.5)"; // Green color
let scatterStroke = "rgba(173, 255, 47, 0.04)";

// function that calculates the center of the particle cluster
function calculateCenter(particleArray) {
  let centerX = 0;
  let centerY = 0;
  for (let i = 0; i < particleArray.length; i++) {
    centerX += particleArray[i].x;
    centerY += particleArray[i].y;
  }

  centerX /= particleArray.length;
  centerY /= particleArray.length;

  return [centerX, centerY];
}

class Galaxy {
  constructor() {
    this.num = 350; //number of particles in the galaxy
    this.rotationSpeed = 0.002;
    this.radius = max(width / 2, height / 2);
    this.particles = [];
    this.centerX = 0;
    this.centerY = 0;
    this.beforeMovement = [];

    // initialize the particles to be scattered across the canvas in a circular distribution
    for (let i = 0; i < this.num; i++) {
      let angle = random(TWO_PI); //generate a random angle btwn 0 and 2π radians
      let r = sqrt(random()) * this.radius; // random radius (limited to the MAXRADIUS of the distribution)
      //calculate the x and y coordinates for the particle based on polar coordinates (angle and radius), converting them to Cartesian coordinates
      let particleX = width / 2 + r * cos(angle);
      let particleY = height / 2 + r * sin(angle);
      //add the particle to the array
      this.particles.push(
        new Particle(
          particleX,
          particleY,
          galaxyColor,
          galaxyStroke,
          "rgba(255,255,255,0.04)"
        )
      );
    }

    let center = calculateCenter(this.particles);
    this.centerX = center[0];
    this.centerY = center[1];
  }

  //move the entire cluster in a specific direction
  moveGalaxy(xMovement, yMovement) {
    for (let i = 0; i < this.particles.length; i++) {
      this.particles[i].moveInDirection(xMovement, yMovement);
    }
  }

  moveGalaxyRandom() {
    for (let i = 0; i < this.particles.length; i++) {
      // Generate random movement for each particle
      let xMovement = random(-2, 2); // Random movement along the x-axis
      let yMovement = random(-2, 2); // Random movement along the y-axis
      this.particles[i].moveInDirection(xMovement, yMovement);
    }
  }

  //move the entire galaxy downwards
  moveGalaxyDownwards() {
    let iterations = 0;
    let prevPositions = [];
    function moveDown(particleArray) {
      if (iterations < 30) {
        // Adjust the number of iterations as needed
        for (let i = 0; i < particleArray.length; i++) {
          if (iterations == 0) {
            prevPositions.push([particleArray[i].x, particleArray[i].y]);
          }
          particleArray[i].y += 2; // Move particles downwards
        }
        iterations++;

        setTimeout(() => moveDown(particleArray), 10);
      }
    }

    moveDown(this.particles);
    this.returnToOriginalPositions(prevPositions);
  }

  //return the particles to the position that they were in before a certain position was enacted
  returnToOriginalPositions() {
    for (let i = 0; i < this.particles.length; i++) {
      let direction = createVector(
        this.beforeMovement[i][0] - this.particles[i].x,
        this.beforeMovement[i][1] - this.particles[i].y
      );
      this.particles[i].x += direction.x * 0.1;
      this.particles[i].y += direction.y * 0.1;
    }
  }

  //rotate the galaxy
  // Function to rotate the galaxy by a given rotation speed
  rotateGalaxy(rotationSpeed) {
    // Loop through all particles in the galaxy
    for (let i = 0; i < this.particles.length; i++) {
      // Calculate the angle between the particle's position and the center of the canvas
      let angle = atan2(
        this.particles[i].y - height / 2, // Y-component distance from the center of the canvas
        this.particles[i].x - width / 2 // X-component distance from the center of the canvas
      );

      // Add the rotation speed to the angle to rotate the particle
      angle += rotationSpeed;

      // Calculate the distance from the particle to the center of the canvas
      let radius = dist(
        width / 2, // X-coordinate of the center of the canvas
        height / 2, // Y-coordinate of the center of the canvas
        this.particles[i].x, // X-coordinate of the particle
        this.particles[i].y // Y-coordinate of the particle
      );

      // Update the particle's position based on the new angle and radius
      this.particles[i].x = width / 2 + radius * cos(angle);
      this.particles[i].y = height / 2 + radius * sin(angle);
    }

    // Calculate the new center of the galaxy based on the updated particle positions
    let center = calculateCenter(this.particles);

    // Update the center X and Y coordinates of the galaxy
    this.centerX = center[0];
    this.centerY = center[1];
  }

  // Function to jitter (move randomly) particles within a given limit
  jitterParticles() {
    let iterations = 0; // Variable to track the number of iterations for jittering
    let prevPositions = []; // Array to store previous positions of particles

    // Inner function to perform the actual jittering of particle positions recursively
    function jitter(particleArray) {
      if (iterations < 10) {
        // Perform jittering for 10 iterations
        for (let i = 0; i < particleArray.length; i++) {
          // Store the previous positions of particles before jittering
          prevPositions.push([particleArray[i].x, particleArray[i].y]);

          // Move particles randomly within a specific range (jitterAmount)
          particleArray[i].x += random(-jitterAmount, jitterAmount) * 4;
          particleArray[i].y += random(-jitterAmount, jitterAmount) * 4;

          // On the first iteration, randomly change the color of some particles
          if (iterations == 0) {
            let changeColor = random(0, 1);
            if (changeColor > 0.5) {
              particleArray[i].particleColor = scatterColor; // Change particle color
              particleArray[i].strokeColor = scatterStroke; // Change stroke color
            } else if (changeColor < 0.3) {
              particleArray[i].particleColor = galaxyColor; // Restore particle color
              particleArray[i].strokeColor = galaxyStroke; // Restore stroke color
            }
          }
        }

        iterations++; // Increment the iteration count
        // Use setTimeout to call the jitter function recursively after a delay of 10 milliseconds
        setTimeout(() => jitter(particleArray), 10);
      }
    }

    // Start the jittering process for the current set of particles
    jitter(this.particles);

    // Save the positions of particles before the movement for reference
    this.beforeMovement = prevPositions;

    // Calculate the new center of the particle set after jittering
    let center = calculateCenter(this.particles);

    // Update the center X and Y coordinates of the particle set
    this.centerX = center[0];
    this.centerY = center[1];
  }

  // Function to jitter particles upwards within a given limit
  jitterParticlesUpwards() {
    let iterations = 0; // Variable to track the number of iterations for jittering upwards

    // Inner function to perform the upward jittering of particle positions recursively
    function jitterUpwards(particleArray) {
      if (iterations < jitterIterations) {
        // Perform upward jittering for a specified number of iterations
        for (let i = 0; i < particleArray.length; i++) {
          // Move particles randomly within a specific range horizontally (x-axis)
          // Move particles upwards by adjusting the y-coordinate (subtracting from y-axis)
          particleArray[i].x += random(-jitterAmount, jitterAmount) * 4;
          particleArray[i].y -= random(0, jitterAmount) * 4; // Adjusting y coordinate to move particles upwards
        }

        iterations++; // Increment the iteration count
        // Use setTimeout to call the jitterUpwards function recursively after a delay of 10 milliseconds (adjustable)
        setTimeout(() => jitterUpwards(particleArray), 10); // Adjust timeout as needed for speed
      }
    }

    // Start the upward jittering process for the current set of particles
    jitterUpwards(this.particles);
  }

  jitterParticlesCloser() {
    let iterations = 0;
    let prevPositions = [];
    function jitterCloser(particleArray) {
      if (iterations < jitterIterations) {
        for (let i = 0; i < particleArray.length; i++) {
          prevPositions.push([particleArray[i].x, particleArray[i].y]);
          let xOffset = random(-jitterAmount, jitterAmount) * 0.4;
          let yOffset = random(-jitterAmount, jitterAmount) * 0.4;

          particleArray[i].x += xOffset * 0.5; // Adjust x-coordinate to bring particles closer
          particleArray[i].y += yOffset * 0.5; // Adjust y-coordinate to bring particles closer
        }
        iterations++;
        setTimeout(() => jitterCloser(particleArray), 10); // Adjust timeout for speed of jittering
      }
    }

    jitterCloser(this.particles);
    this.beforeMovement = prevPositions;
  }

  jitterParticlesTowardsCenter() {
    let iterations = 0;
    let totalIterations = 7;
    let jitterAmnt = 5;
    const convergenceRate = 0.05; // Rate at which particles converge towards the center
    // console.log("woooo big function");
    function jitter(particleArray, centralY, centralX) {
      // console.log("woooo function");
      if (iterations < totalIterations) {
        // console.log("woooo iterations");
        for (let i = 0; i < particleArray.length; i++) {
          // Calculate distance to the center
          const distanceX = centralX - particleArray[i].x;
          const distanceY = centralY - particleArray[i].y;

          // Move particles closer together
          particleArray[i].x += random(-jitterAmnt, jitterAmnt) * 6;
          particleArray[i].y += random(-jitterAmnt, jitterAmnt) * 6;

          // Move particles towards the center
          particleArray[i].x += distanceX * convergenceRate;
          particleArray[i].y += distanceY * convergenceRate;

          if (iterations == 0) {
            let changeColor = random(0, 1);
            if (changeColor > 0.5) {
              particleArray[i].particleColor = convergenceColor;
              particleArray[i].strokeColor = convergenceStroke;
            }
          }
        }
        iterations++;
        setTimeout(() => jitter(particleArray, centralX, centralY), 0.5); // Adjust timeout as needed for speed
      }
    }

    jitter(this.particles, this.centerX, this.centerY);
  }

  explodeParticles() {
    let iterations = 0;
    const explodeIterations = 30; // Adjust the number of iterations for the explosion

    function explode(particleArray) {
      if (iterations < explodeIterations) {
        // Calculate the center of the galaxy (average position of all particles)
        let centerX = 0;
        let centerY = 0;

        for (let i = 0; i < particleArray.length; i++) {
          centerX += particleArray[i].x;
          centerY += particleArray[i].y;
        }

        centerX /= particleArray.length;
        centerY /= particleArray.length;

        for (let i = 0; i < particleArray.length; i++) {
          // Move particles away from the center of the galaxy
          let deltaX = (particleArray[i].x - centerX) / 15;
          let deltaY = (particleArray[i].y - centerY) / 15;

          // Adjust the particles' positions
          particleArray[i].x += deltaX * 0.1; // Adjust the factor to control the speed of explosion
          particleArray[i].y += deltaY * 0.1; // Adjust the factor to control the speed of explosion
        }

        iterations++;
        setTimeout(() => explode(particleArray), 10); // Adjust timeout as needed
      }
    }

    explode(this.particles);
  }

  moveParticlesInHeart() {
    let iterations = 0;
    let prevPositions = [];
    let heartIterations = 30;

    function moveTowardsHeart(particleArray, heartParticles) {
      if (iterations < heartIterations) {
        for (let i = 0; i < heartParticles.length; i++) {
          prevPositions.push([particleArray[i].x, particleArray[i].y]);

          // Calculate the movement towards the heart shape
          let targetX = heartParticles[i].x;
          let targetY = heartParticles[i].y;

          // Update particle positions towards the heart shape
          particleArray[i].x += (targetX - particleArray[i].x) * 0.4; // Adjust the animation speed as needed
          particleArray[i].y += (targetY - particleArray[i].y) * 0.4; // Adjust the animation speed as needed

          particleArray[i].particleColor = heartColor; // Change the color to red during animation
          particleArray[i].strokeColor = heartStroke; // Change the stroke color to blue during animation
        }

        iterations++;
        setTimeout(() => moveTowardsHeart(particleArray, heartParticles), 10); // Adjust timeout as needed for speed
      }
    }

    let heartParticles = []; // Define heart shape particles here

    // Calculate heart shape particles as before
    let spacing = 15; // Adjust this for the heart shape

    for (let angle = 0; angle < TWO_PI; angle += 0.1) {
      // Calculate x and y coordinates for the heart shape using mathematical functions
      let x = 16 * pow(sin(angle), 3);
      let y = -(
        (
          13 * cos(angle) - // First circular pattern
          5 * cos(2 * angle) - // Second circular pattern with twice the frequency
          2 * cos(3 * angle) - // Third circular pattern with three times the frequency
          cos(4 * angle)
        ) // Fourth circular pattern with four times the frequency
      );

      // Scale the coordinates by a spacing factor
      x *= spacing;
      y *= spacing;

      // Shift the heart shape to the center of the canvas
      x += width / 2;
      y += height / 2;

      // Store the calculated x and y coordinates as a vector in the heartParticles array
      heartParticles.push(createVector(x, y));
    }

    moveTowardsHeart(this.particles, heartParticles);

    this.beforeMovement = prevPositions;
    let center = calculateCenter(this.particles);
    this.centerX = center[0];
    this.centerY = center[1];
  }

  moveParticlesInSpiral() {
    let iterations = 0;
    let prevPositions = [];
    let spiralIterations = 35;

    function moveTowardsSpiral(particleArray, spiralParticles) {
      if (iterations < spiralIterations) {
        for (let i = 0; i < spiralParticles.length; i++) {
          prevPositions.push([particleArray[i].x, particleArray[i].y]);

          // Calculate the movement towards the spiral shape
          let targetX = spiralParticles[i].x;
          let targetY = spiralParticles[i].y;

          // Update particle positions towards the spiral shape
          particleArray[i].x += (targetX - particleArray[i].x) * 0.4; // Adjust the animation speed as needed
          particleArray[i].y += (targetY - particleArray[i].y) * 0.4; // Adjust the animation speed as needed

          particleArray[i].particleColor = spiralColor; // Change the color to red during animation
          particleArray[i].strokeColor = spiralStroke;
        }

        iterations++;
        setTimeout(() => moveTowardsSpiral(particleArray, spiralParticles), 10); // Adjust timeout as needed for speed
      }
    }

    let spiralParticles = []; // Define spiral shape particles here

    // Calculate spiral shape particles
    let spacing = 10; // Adjust this for the spiral shape
    for (let angle = 0; angle < 6 * PI; angle += 0.1) {
       // Calculate x and y coordinates for the spiral shape using trigonometric functions
      let x = angle * cos(angle) * spacing + width / 2;
      let y = angle * sin(angle) * spacing + height / 2;
      spiralParticles.push(createVector(x, y));
    }

    moveTowardsSpiral(this.particles, spiralParticles);

    this.beforeMovement = prevPositions;
    let center = calculateCenter(this.particles);
    this.centerX = center[0];
    this.centerY = center[1];
  }

  //function to actually draw the galaxy
  drawGalaxy() {
    for (let i = 0; i < this.particles.length; i++) {
      this.particles[i].createParticle(); // Create a single particle
      this.particles[i].joinParticles(this.particles.slice(i)); // Join the created particle with others
    }
  }
}
sketch.js:
//background music source: https://freesound.org/people/Seth_Makes_Sounds/sounds/701610/

let numParticles = 200;
let nightParticles;
let portConnected = false;
let showStartScreen = true;
let font, font2;
let bgMusic;

//variables to store data from Arduino board
let redAction = 0;
let blueAction = 0;
let yellowAction = 0;
let greenAction = 0;

//flags to check if the action was performed
let redActionPerformed = false;
let yellowActionPerformed = false;
let greenActionPerformed = false;
let blueActionPerformed = false;

let lastInteractionTime = 0;
const idleTimeThreshold = 60000;

let amp;


//start screen for user
function startScreen() {
  textFont(font);
  textSize(80);
  fill("white");
  let message = "StarScape";
  // console.log(width, height);
  let textW = textWidth(message);
  let textH = textAscent() + textDescent();


  let centerX = width / 2;
  let centerY = height / 2;

  // Set text alignment to center and display the text
  textAlign(CENTER, CENTER);
  text(message, centerX, centerY);

  textFont(font2);
  textSize(20);

  let captionX = centerX;
  let captionY = centerY + 80;

  text("Click anywhere to begin. Click again to restart.", captionX, captionY);
}

function preload() {
  soundFormats("mp3", "ogg");
  bgMusic = loadSound("/sounds/bgMusic2.mp3");
  font = loadFont("fonts/NewYork.otf");
  font2 = loadFont("fonts/AppleGaramond-LightItalic.ttf");
}

function setup() {
  //responsive canvas set to the dimensions of the window
  createCanvas(windowWidth, windowHeight);
  //initialize particles
  nightParticles = new Galaxy();
  //loop the music
  bgMusic.loop();
  amp = new p5.Amplitude();
}

function draw() {
  background("#0f0f0f");

  if (showStartScreen) {
    startScreen();
  } else {
    //if red button pressed, particles jitter + scatter
    if (redAction && !redActionPerformed) {
      nightParticles.jitterParticles();
      redActionPerformed = true;
    //if yellow button is pressed, particles cluster together
    } else if (yellowAction && !yellowActionPerformed) {
      nightParticles.jitterParticlesTowardsCenter();
      yellowActionPerformed = true;
    //if the green button is pressed, particles form a heart
    } else if (greenAction && !greenActionPerformed) {
      nightParticles.moveParticlesInHeart();
      greenActionPerformed = true;
    // if blue button, the particles form a spiral
    } else if (blueAction && !blueActionPerformed) {
      nightParticles.moveParticlesInSpiral();
      blueActionPerformed = true;
    }

    //the particles are continuously rotating, with a speed proportional to the amplitude of the music
    let vol = amp.getLevel();
    let pSpeed = map(vol, 0, 1, 0, 0.005);
    nightParticles.rotateGalaxy(pSpeed);
    nightParticles.drawGalaxy();
  }
}

function readSerial(data) {
  ////////////////////////////////////
  //READ FROM ARDUINO HERE
  ////////////////////////////////////

  if (data != null) {
    // make sure there is actually a message
    // split the message
    let fromArduino = split(trim(data), ",");
    // console.log(fromArduino);
    // if the right length, then proceed
    if (fromArduino.length == 4) {
      // only store values here
      // do everything with those values in the main draw loop

      // We take the string we get from Arduino and explicitly
      // convert it to a number by using int()
      redAction = int(fromArduino[0]);
      yellowAction = int(fromArduino[1]);
      greenAction = int(fromArduino[2]);
      blueAction = int(fromArduino[3]);

      //reset the actionsPerformed to false everytime data is read from the arduino
      redActionPerformed = false;
      yellowActionPerformed = false;
      greenActionPerformed = false;
      blueActionPerformed = false;
    }

    //////////////////////////////////
    //SEND TO ARDUINO HERE (handshake)
    //////////////////////////////////
    let sendToArduino = "\n";
    writeSerial(sendToArduino);
  }
}

function mousePressed() {
  //first, connect the port
  if (!portConnected) {
    setUpSerial();
    portConnected = true;
  } else {
    //after port is connected, use mouse press to start (and restart)
    showStartScreen = !showStartScreen;
    //if the game is restarting, create a new instance of Galaxy class
    if (showStartScreen) {
      nightParticles = new Galaxy();
    }
  }
}
The Arduino code sets up the serial connection with the p5.js sketch, and then reads the data from the buttons. After detecting a button press, it sends it to the sketch. After sending it to the sketch, it triggers a light sequence on the strip. The code in the Arduino IDE:
#include <Adafruit_NeoPixel.h>
#include <avr/power.h>


unsigned long previousMillis = 0;
const long interval =250;


#define PIN_NEO_PIXEL 10  // Arduino pin that connects to NeoPixel
#define NUM_PIXELS 13    // The number of LEDs (pixels) on NeoPixel

#define DELAY_INTERVAL 250  // 250ms pause between each pixel

int arcadeBtnRed = 5;
// int arcadeLEDRed = 13;
int arcadeBtnYellow = 4;
// int arcadeLEDRed = 13;
int arcadeBtnGreen = 3;
int arcadeBtnBlue = 2;

int neoPixelPin = 10;

int redAction = 0;
int blueAction = 0;
int yellowAction = 0;
int greenAction = 0;


Adafruit_NeoPixel NeoPixel(NUM_PIXELS, PIN_NEO_PIXEL, NEO_GRB + NEO_KHZ800);

// Adafruit_NeoPixel strip = Adafruit_NeoPixel(24, neoPixelPin, NEO_RGBW + NEO_KHZ800);

void heart(){
  NeoPixel.clear();

  // unsigned long currentMillis = millis();
  // turn pixels to green one by one with delay between each pixel
  for (int pixel = 0; pixel < NUM_PIXELS; pixel++) {           // for each pixel
    NeoPixel.setPixelColor(pixel, NeoPixel.Color(255, 50, 150));  // Pink color: Red=255, Green=50, Blue=150
    NeoPixel.show();                                           // send the updated pixel colors to the NeoPixel hardware.

    delay(60);  // pause between each pixel
  }
}


void spiral() {
  NeoPixel.clear();
  int centerPixel = NUM_PIXELS / 2;  // Center of the LED strip
  int startPixel = 0;  // Starting pixel

  for (int i = 0; i < NUM_PIXELS / 2; i++) {
    NeoPixel.setPixelColor(startPixel + i, NeoPixel.Color(255, 165, 0)); // Set color to golden (RGB: 255, 215, 0)
    NeoPixel.setPixelColor(NUM_PIXELS - 1 - i, NeoPixel.Color(255, 165, 0)); // Set color to golden (RGB: 255, 215, 0)

    NeoPixel.show();
    delay(100); // Adjust the delay to control the speed of the spiral

    // Fade out the previously lit LEDs
    NeoPixel.setPixelColor(startPixel + i, NeoPixel.Color(0, 0, 0)); // Turn off the LED
    NeoPixel.setPixelColor(NUM_PIXELS - 1 - i, NeoPixel.Color(0, 0, 0)); // Turn off the LED
  }
}


void jitterIllusion() {
  NeoPixel.clear();
  for (int i = 0; i < 50; i++) {  // Repeat the jitter effect multiple times
    for (int pixel = 0; pixel < NUM_PIXELS; pixel++) { // Loop through each pixel
      // Set a random shade of green for each pixel
      NeoPixel.setPixelColor(pixel, NeoPixel.Color(0, random(256), 0)); // Random green shades (RGB: 0, random value, 0)
    }

    NeoPixel.show(); // Show the updated colors
    delay(50); // Adjust the delay to control the speed of the jitter illusion
  }
}

void gentleWaves() {
  NeoPixel.clear();
  int duration = 5000; // Duration of the wave effect in milliseconds
  int waves = 5; // Number of waves to display

  for (int i = 0; i < duration; i += 50) { // Time loop
    float phaseShift = (float)i / duration * 2 * PI * waves; // Phase shift based on time for wave effect

    for (int pixel = 0; pixel < NUM_PIXELS; pixel++) { // Loop through each pixel
      // Calculate a blue value based on a sine wave to create a gentle wave effect
      int blueValue = (sin(phaseShift + (float)pixel / NUM_PIXELS * 2 * PI) + 1) * 128; // Adjust the amplitude and offset as needed

      NeoPixel.setPixelColor(pixel, NeoPixel.Color(0, 0, blueValue)); // Set the pixel color with varying shades of blue
    }

    NeoPixel.show(); // Show the updated colors
    delay(50); // Adjust the delay to control the speed of the gentle waves
  }
}

void allWhite() {
  NeoPixel.clear();
  for (int pixel = 0; pixel < NUM_PIXELS; pixel++) {
    NeoPixel.setPixelColor(pixel, NeoPixel.Color(40, 40, 40));  // Set all pixels to white (RGB: 255, 255, 255)
  }
  NeoPixel.show();  // Show the updated pixel colors
}


void setup() {
  // put your setup code here, to run once:
  Serial.begin(9600);
  // pinMode(LED_BUILTIN, OUTPUT);
  pinMode(arcadeBtnRed, INPUT);
  pinMode(arcadeBtnYellow, INPUT);
  pinMode(arcadeBtnBlue, INPUT);
  pinMode(arcadeBtnGreen, INPUT);
  // pinMode(arcadeLEDRed, OUTPUT);

  NeoPixel.begin();  // INITIALIZE NeoPixel strip object (REQUIRED)
  // NeoPixel.clear();
  // strip.begin();
  // strip.show();
  // start the handshake
  while (Serial.available() <= 0) {
    // digitalWrite(LED_BUILTIN, HIGH);  // on/blink while waiting for serial data
    Serial.println("0,0,0,0");        // send a starting message
    delay(300);                       // wait 1/3 second
    // digitalWrite(LED_BUILTIN, LOW);
    // delay(50);
  }
}

void loop() {

  while (Serial.available()) {
    if (Serial.read() == '\n') {
      redAction = digitalRead(arcadeBtnRed);
      delay(5);
      blueAction = digitalRead(arcadeBtnBlue);
      delay(5);
      greenAction = digitalRead(arcadeBtnGreen);
      delay(5);
      yellowAction = digitalRead(arcadeBtnYellow);

      Serial.print(redAction);
      Serial.print(',');
      Serial.print(yellowAction);
      Serial.print(',');
      Serial.print(greenAction);
      Serial.print(',');
      Serial.println(blueAction);
    }
  }

  if (redAction) {
    jitterIllusion();
  } else if (yellowAction) {
    gentleWaves();
  } else if (greenAction) {
    heart();
  } else if (blueAction) {
    spiral();
  } else {
    allWhite();
  }
}
What I’m particularly proud of
I’m proud of the methods in the galaxy class… it took me a while to figure out how to code the movement of the particles in a way that looks satisfying. I’m also proud of the overall aesthetics (most people’s first reactions were to comment on how the sketch *looked* before they even interacted with it).
Reflections and Future Improvements
I love the idea of my piece, but, in its current scope I don’t think its full potential has been realized. I think the concept would be much more impactful if there were much more lights, or if it was designed to be within an art installation where the lights are all around the user (similar to Andrew’s piece). If I were given the opportunity to expand the piece to be as such, it would be closer to the original thing I envisioned. Regardless, I’m happy with how it turned out and though its small, I think it still captures the essence of what I wanted to do.