Concept
The idea I had for my game came to me while I was watching a skit by a stand-up comedian on the absurdity of big tech companies. he likened the monopolies that the big tech firms have on our lives to the level of mastery a chess grandmaster has. At the same time, we, normal human beings, are trapped as newbies (“noobs”). this gave me the idea to make a satirical chess game where the capitalist big tech companies have complete, overarching control while providing the player the illusion of choice. Still, whatever happens, the big tech always wins. or you pay. the concept at first was to make a fully-fledged chess game with tweaked rules which allowed an eventual win for the capitalist side. but that was beyond the scope of my project so instead, I modified it to a simpler and more absurd version.
Process
To start, I drew a storyboard kind of thing on my iPad to make sure I had all my plans noted down. I decided to include two different game states; the start screen and the game screen. I went about populating the game screen first, using some maths to make a chessboard. after that, I made the start screen and added buttons and text. then I added the game state conditional statement which allowed the console to load the screen procedurally. the images came next. At first, I was going to make an array and generate the chess pieces by push() and pop() but then a friend suggest I add only queen and king pieces for the capitalist side and give only 3 pieces to the player. For this, I instead chose to make the opposite side into a single png and load in the player pieces separately.
After this, I chose to generate popups with promotional messages. to achieve this, i created a class for all the messages. i also created a class to make the highlighted areas for the chess pieces. the final aspect was to create the death animation for the king. i took inspiration from youtube and tried adding an animation for the king to be sliced in half. but instead i decided on an explosion gif image and an explosion sound for added effect.

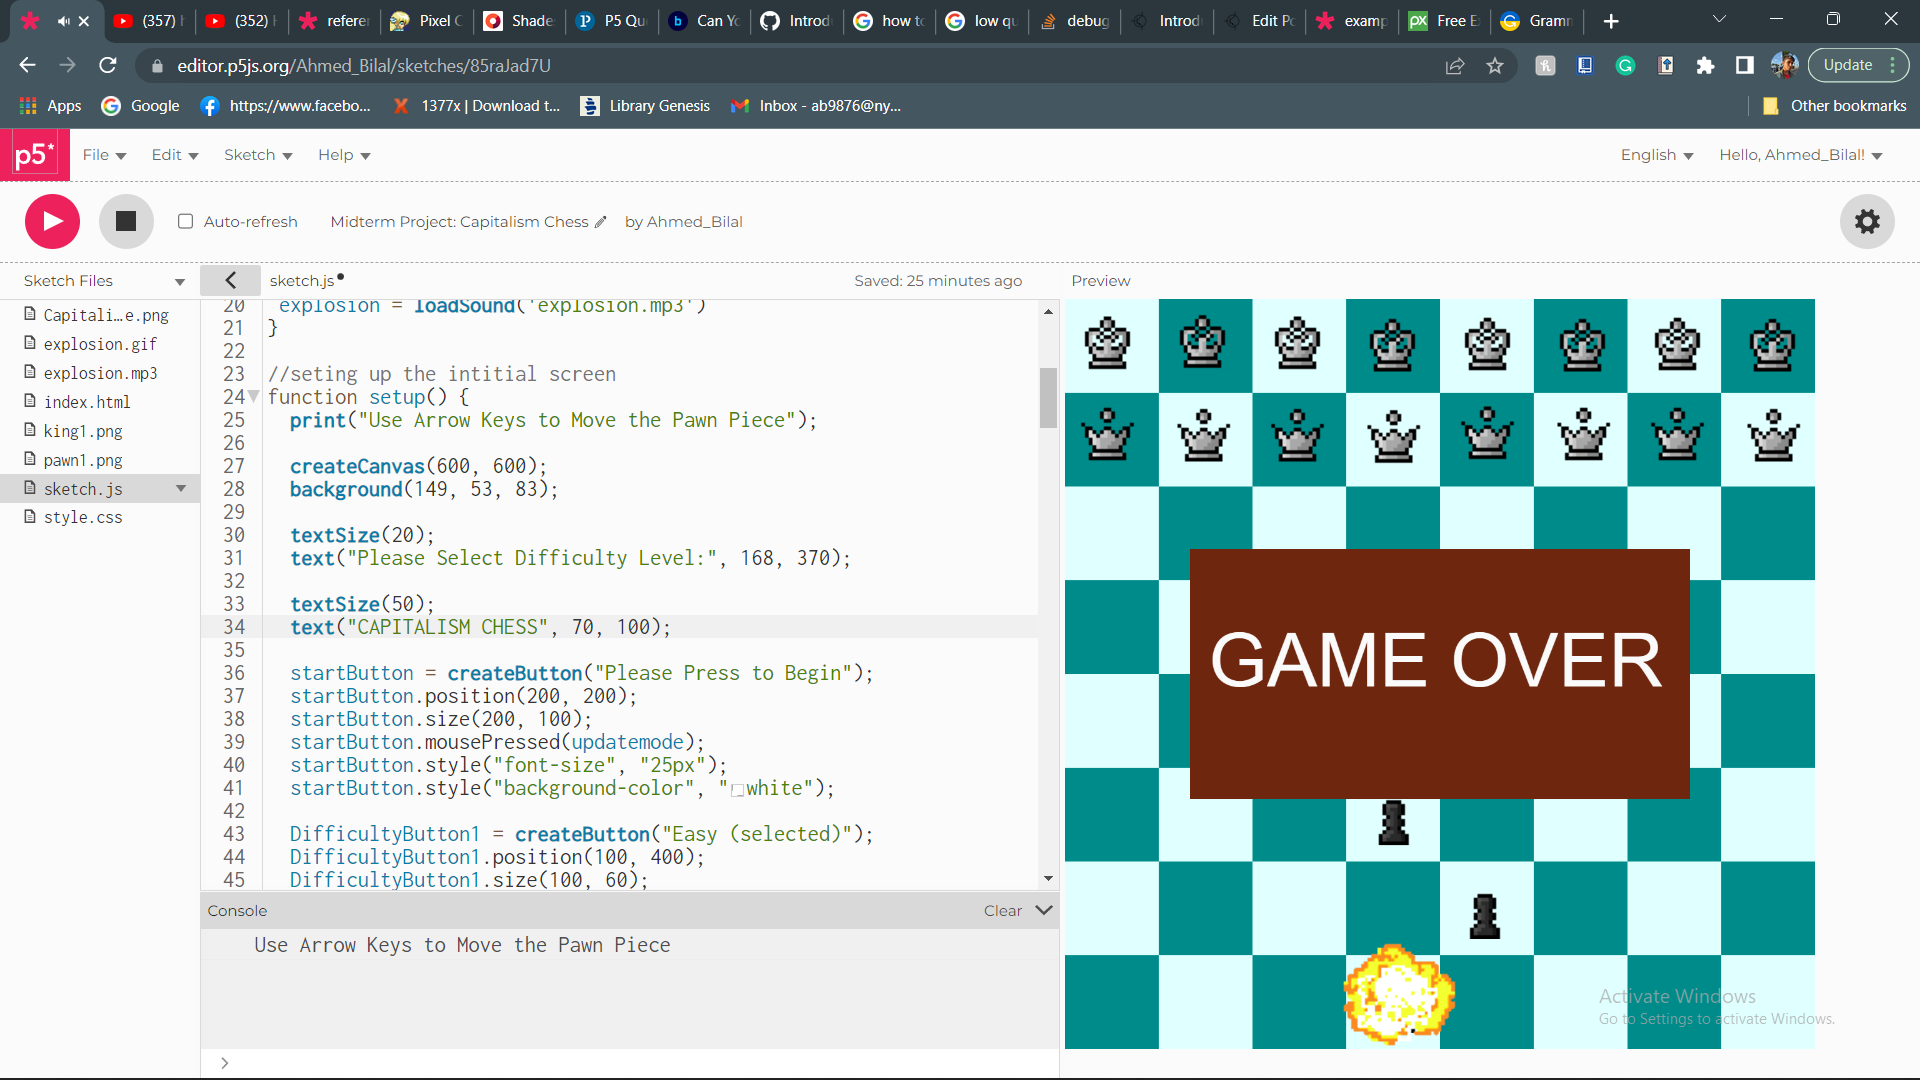
Initially, I wanted to add a separate game state for the ending screen with more cheeky ‘buy our stuff’ remarks from the capitalist side but decided instead for a simple, crude game over. partially because I wanted to reduce the complexity of the code and partially because I appreciated the crude, absurdly low quality aesthetic that it presented juxtaposed with the seemingly shiny image that people have of big tech companies.
let mode = 0;
let startButton;
let imgCapitalist;
let imgPlayerPawn1;
let imgPlayerPawn2;
let HighlightPosX;
let pawn1y = 470;
let KillShotX = 252.5;
let KillShotY = 27.5;
let collision = false;
let explosion;

//loading all the image assets
function preload() {
  imgCapitalistSide = loadImage("CapitalistSide.png");
  imgPlayerPawn1 = loadImage("pawn1.png");
  imgPlayerPawn2 = loadImage("pawn1.png");
  imgPlayerKing = loadImage("king1.png");
  imgExplosion = loadImage("explosion.gif");
 explosion = loadSound('explosion.mp3')
}

//seting up the intitial screen
function setup() {
  print("Use Arrow Keys to Move the Pawn Piece");

  createCanvas(600, 600);
  background(149, 53, 83);

  textSize(20);
  text("Please Select Difficulty Level:", 168, 370);

  textSize(50);
  text("CAPITALISM CHESS", 70, 100);

  startButton = createButton("Please Press to Begin");
  startButton.position(200, 200);
  startButton.size(200, 100);
  startButton.mousePressed(updatemode);
  startButton.style("font-size", "25px");
  startButton.style("background-color", "white");

  DifficultyButton1 = createButton("Easy (selected)");
  DifficultyButton1.position(100, 400);
  DifficultyButton1.size(100, 60);
  DifficultyButton1.mousePressed(eraseMessage);
  DifficultyButton1.style("font-size", "15px");
  DifficultyButton1.style("background-color", "white");

  DifficultyButton2 = createButton("Easy Premium 🔒");
  DifficultyButton2.position(250, 400);
  DifficultyButton2.size(100, 60);
  DifficultyButton2.mousePressed(promoMessage);
  DifficultyButton2.style("font-size", "15px");
  DifficultyButton2.style("background-color", "white");

  DifficultyButton3 = createButton("Easy Premium Plus+ 🔒");
  DifficultyButton3.position(400, 400);
  DifficultyButton3.size(100, 60);
  DifficultyButton3.mousePressed(promoMessage);
  DifficultyButton3.style("font-size", "13px");
  DifficultyButton3.style("background-color", "white");

  highlight = new highlightedarea();
  DisplayMessage = new PromoMessage();
}

//this function will display the message for the locked modes
function promoMessage() {
  DisplayMessage.createMessage2();
}

function eraseMessage() {
  DisplayMessage.eraseMessage();
}

function draw() {
  //this if statement is based on the condition mode = 1, the game mode is start mode

  if (mode == 1) {
    noStroke();
    startButton.hide();
    DifficultyButton1.hide();
    DifficultyButton2.hide();
    DifficultyButton3.hide();

    let SquareSize = width / 8;
    let squareNum = 0;
    for (let columny = 0; columny < height; columny += SquareSize) {
      squareNum++;

      //by adding squarenum+1 here i can add the value for the boxes in the y-axis

      for (let rowx = 0; rowx < width; rowx += SquareSize) {
        squareNum++;

        //by adding squarenum+1 i was able to add the box values in the x-axis

        if (squareNum % 2 == 0) {
          fill(224, 255, 255);
        } else {
          fill(0, 139, 139);
        }
        rect(rowx, columny, SquareSize, SquareSize);
      }
    }
    //here we can add all our sprites and maths because elsewhere doesnt work lol because it is being overwritten by the grid-making function

    image(imgCapitalistSide, 0, 0);
    image(imgPlayerPawn1, 242, pawn1y);
    image(imgPlayerPawn2, 315, 470);
    image(imgPlayerKing, 244, 545);

    if (
      mouseIsPressed == true &&
      mouseX > 225 &&
      mouseX < 300 &&
      mouseY > 75 * 6 &&
      mouseY < 75 * 7
    ) {
      HighlightPosX = 225;
      highlight.create(24);
      // HighlightState= !HighlightState ;
    } else {
      if (
        mouseIsPressed == true &&
        mouseX > 300 &&
        mouseX < 375 &&
        mouseY > 75 * 6 &&
        mouseY < 75 * 7
      ) {
        HighlightPosX = 300;
        highlight.create();
      } else {
        if (mouseIsPressed == true && mouseY > 450) {
          DisplayMessage.createMessage1();
        }
      }
    }

    // these statements deal with teh mechanics of the bomb released at the opponent side

    if (pawn1y < 470) {
      fill(204, 85, 0);
      circle(KillShotX, KillShotY, 20);
      if (collision == false) {
        KillShotX = KillShotX - 5;
        KillShotY = KillShotY + 5;
      }
    }
    if (KillShotX < 0) {
      collision = true;
    }
    if (collision == true) {
      KillShotX = KillShotX + 5;
      KillShotY = KillShotY + 5;
    }
    if (KillShotX > 252 && KillShotY > 552) {
      image(imgExplosion, 165, 450);
      fill(110, 38, 14);
      rect(100, 200, 400, 200);
      fill(250, 250, 250);
      textSize(60);
      text("GAME OVER", 115, 310);
      explosion.play()
    }
  }
}

//making classes for the messages in the pop up windows/rectangles
class PromoMessage {
  constructor() {
    this.a = mouseX;
    this.b = mouseY;
  }
  createMessage1() {
    fill(0, 0, 0);
    rect(mouseX, mouseY, 350, 60);
    fill(300, 300, 300);
    textSize(20);
    text("Join Chess Premium for More Pieces", mouseX + 7, mouseY + 40);
  }
  createMessage2() {
    fill(0, 0, 0);
    rect(45, 480, 510, 100);
    fill(300, 300, 300);
    textSize(23);
    text("You Are Not Subscribed to our Premium Plan", 70, 510);
    textSize(24);
    text("Join Now to Get 2% Off for the Next 2 Months", 55, 550);
  }
  eraseMessage() {
    noStroke();
    fill(150);
    rect(44, 479, 515, 105);
  }
}

//class was made for the highlights that pop up to show legal moves available
class highlightedarea {
  constructor(HighlightPosX) {
    this.x = HighlightPosX;
  }

  create() {
    fill(0, 139, 250);
    rect(HighlightPosX, 300, 75, 150);
  }
}

//function added to make the pawn move to intended position via arrow keys. it can go forward and backwards
function keyPressed() {
  if (keyCode == UP_ARROW) {
    pawn1y = pawn1y - 75;
  } else {
    if (keyCode == DOWN_ARROW) pawn1y = 470;
  }
}

//this function updates the game mode from the intro screen to game screen
function updatemode() {
  mode++;
}
Problems
As expected I ran into many problems while working on this project. so many that I would probably end up running out of space if I tried listing them here:,(
but here are the three main ones:
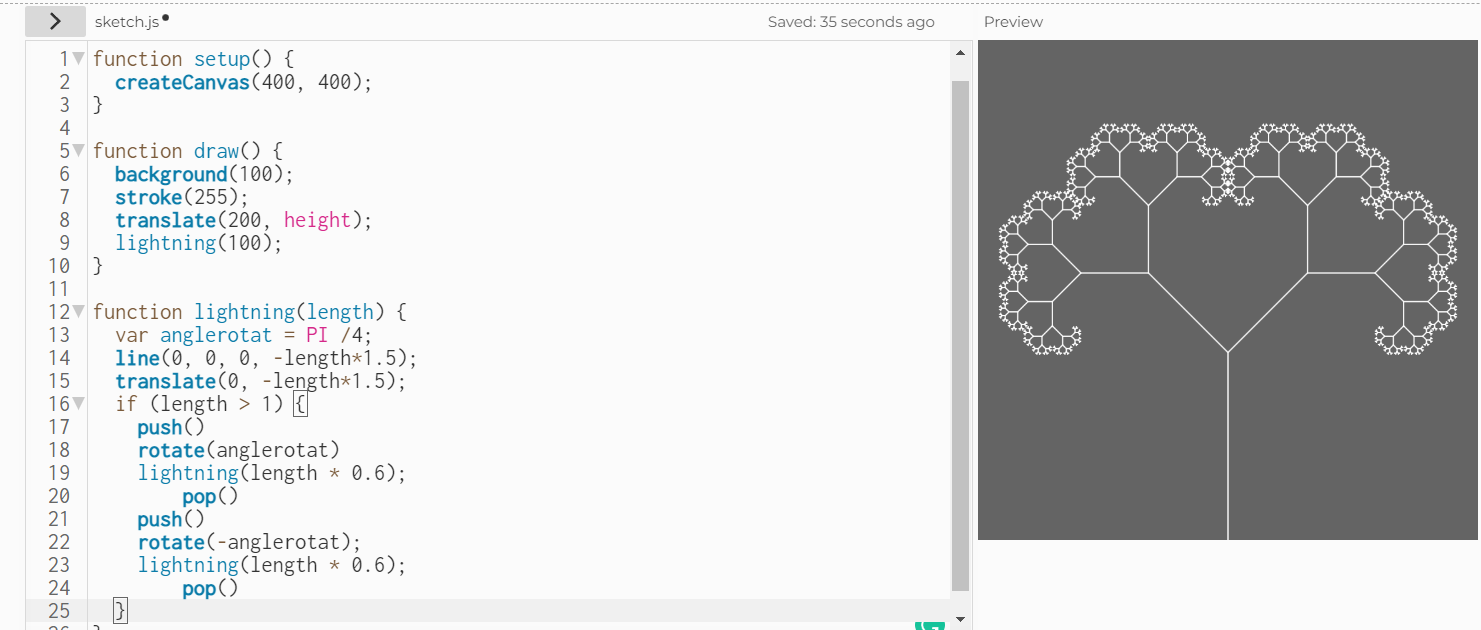
- the first problem I ran into was with the initialization of the board itself. I could not manage to make the boxes render in a grid pattern, instead, they were rendering in columns which weren’t ideal. I realized it was because I had been not accounting for the fact that after every row, the values were resetting and the same values were being put again into the loop causing it to render the same pattern over and over again. to work around this I simply added a digit to the value of the subsequent row to offset the answer by 1. it caused the whole pattern to shift by one to the left and made a checkered pattern that I was looking for
- the second problem I ran into was that the highlights for the possible moves for the player were not showing up. I tried creating it by rendering a rectangle with a mouse click after the game started but that would reset the background. to combat this I decided to create a class for the highlight as it was not only easier to assign it to different positions but also allowed me to render it on top of the checkered background
- another problem I faced was that the kill shot element in the last portion of the game would not bounce but stick instead to the wall and fall to -y infinity. the problem was caused by the if statement I used which stated if x was less than 0 (the edge of the canvas) it would start adding 5 to the x variable instead of subtracting it. what I did not realize was that it sent the loop into an endless repetition since by adding 5 it ended the loop and subtracted 5 again and entered the loop again. to combat this I added a conditional statement that split the event into two states (one in which the condition was false and once when it was true). this allowed the loop to run separately and exhibit bouncing behavior
Reflection:
despite it being a tedious game to make, I really enjoyed creating a little narrative piece with absurdist elements. the coding aspect allowed me to explore way outside of what we had covered in class and forced me to think out of the box to solve problems that I had not experienced before. for this assignment, I forced myself to take as little coding input as I could from outside sources (as in using other people’s solutions) and create my workaround. it caused me to take much more time and made it harder but gave me the freedom to experiment on my own. in the future I would like to make a similar game, with a similar theme, but more streamlined and with more functionality. I feel more confident in my ability to make such projects thanks to the experience I gained from this exercise.