Final Project: Fortune Teller 🔮

Fortune Teller

Video demonstration 1

Video demonstration 2

Concept

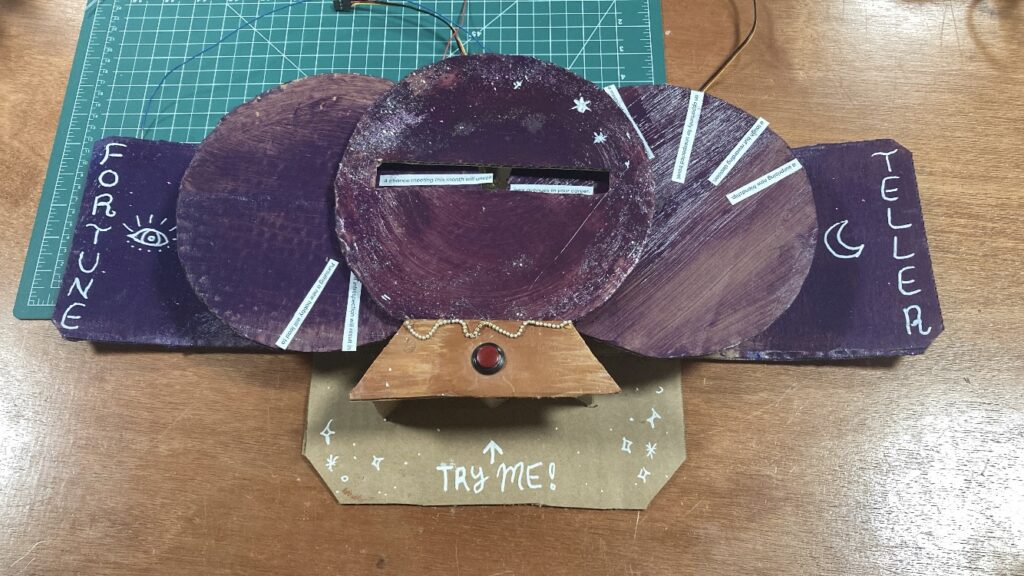
For my final project, I was initially inspired to create a fortune teller by my favorite book series, The Raven Cycle, in which the main character is from a family of psychics. The interface went through many iterations to become what it is now. First, I thought it would be a telephone interface, in which the user would “call” different numbers to get different predictions. Then, I thought I would make a “Magic 8 Ball” type object with a digital screen to display the various predictions. Finally, I settled on an entirely non digital display because I wanted the “whimsical” feel of hand painted cardboard. A conversation with Professor Shiloh further encouraged me to go with this option, as when I shared my idea for having “wheels” that would rotate to display the predictions, he suggested that the predictions could be split up into sentence beginnings and endings, which would allow for many more combinations.

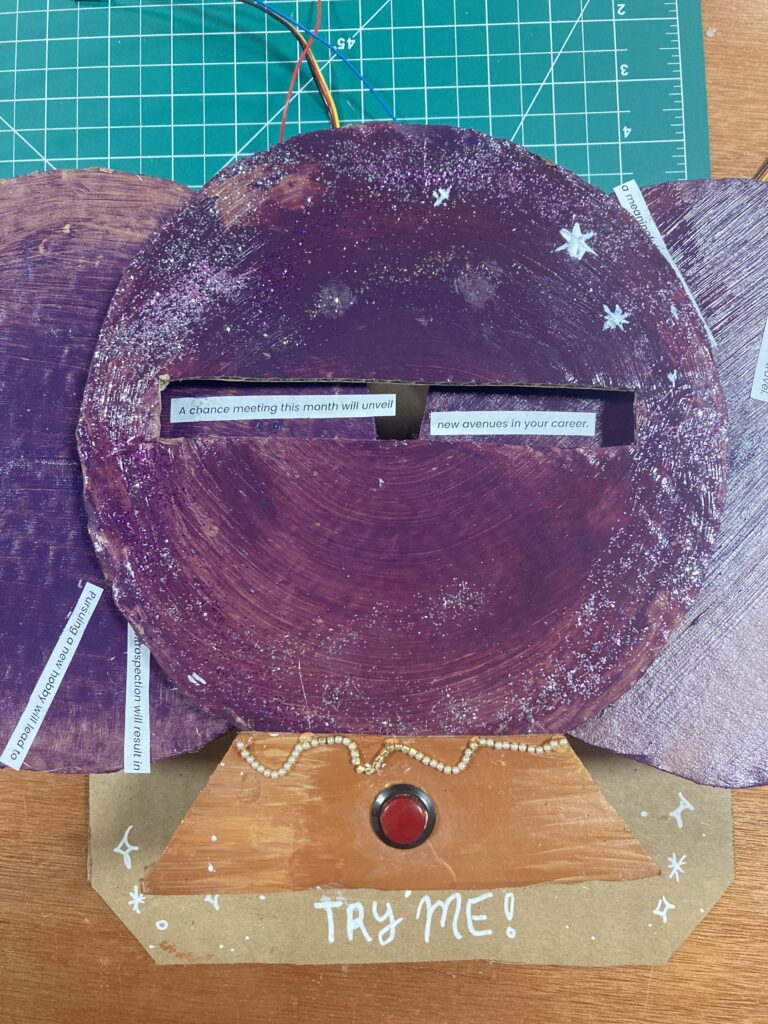
Thus, my final design consisted of two wheels attached to servo motors. When the user presses a button, the servos would choose two random angles to rotate to from an array of predetermined angles. The angle of rotation would then determine which sentence beginning and ending showed through the display slot. With the help of Chat GPT, I generated 6 sentence beginnings and endings that can all combine together to form 36 coherent predictions regarding relationships, the future, and self improvement.

Interaction Design & User Testing

The interaction between the user and the fortune teller is quite straightforward — the user pushes a button and receives a fortune. During my user-testing, I was pleasantly surprised to see that people enjoyed receiving different fortunes, and would press the button many times to see new fortunes. They also related the fortunes to their own lives, which reminded me of why humans enjoy things like astrology and fortune cookies. Even if we do not actually believe in their accuracy, it is still fun to apply these vague predictions to our current situations, and I think this is what motivated people to have a sustained interaction with my project. Furthermore, I think the fact that you can see the wheels spinning lends intrigue to the interaction. I think the simplicity of the interaction turned out to be its strength, as people quickly figured out what to do and did not need any explanation from me.

User Testing Video 1

User Testing Video 2

Arduino Code:

My code consisted of three main mechanisms, one for detecting button state, one for choosing a random angle for each of the servo motors, and one for moving the servos smoothly to the chosen angle. One of the most difficult part of this assignment for me was understanding the logic behind each of these mechanisms, as I had never used state detection in any of my previous projects.

1. Button State: If the current button state is different than the previous button state AND it is high, meaning that the user has pressed the button, then the subsequent actions of choosing a random angle and moving the servos will take place.

2. Angle Selection: A random angle is chosen from an array of angles. The code will keep searching for a new angle until it is different from the previous angle, thus preventing an occurrence of the same 2 angles in a row. This is repeated for both servos.

3. Moving Servo: The for loop is for detecting if the previous angle is larger than or smaller than the current angle, and for smoothly incrementing the servo degree by degreee (either adding 1 or subtracting 1) to reach that angle. I did this after I found that not using the for loop resulted in extremely jerky movements.

Full code:

// Include Servo library
#include <Servo.h>

// Initialize servo object
Servo servoL;  // left servo
Servo servoR;  // right servo

// Variables for pins
const int servoPinL = 11;
const int servoPinR = 9;
const int buttonPin = 7;

// Set last button state to LOW
int lastButtonState = HIGH;

// Set last angle index to 0, aka the first angle in the array
int lastAngleIndexL = 0;
int newAngleIndexL;

int lastAngleIndexR = 0;
int newAngleIndexR;


// Array of angles for servo motor to choose from
int angles[] = { 10, 35, 63, 94, 123, 159 };

// 10, 35, 63, 94, 123, 159
// Calculate size of angles[] array, needed for random()
int sizeAngles = sizeof(angles) / sizeof(angles[0]);

void setup() {
  Serial.begin(9600);

  servoL.attach(servoPinL);
  servoR.attach(servoPinR);
  pinMode(buttonPin, INPUT_PULLUP);

  // Initialize servos at the first angle in angles[] array
  servoL.write(angles[lastAngleIndexL]);
  servoR.write(angles[lastAngleIndexR]);

  // Initialize random number generator
  randomSeed(analogRead(0));
}

void loop() {
  int currentButtonState = digitalRead(buttonPin);
  delay(15);

  if (lastButtonState != currentButtonState) {
    if (currentButtonState == LOW) {

      //// LEFT SERVO ////
      do {
        // generate a new random angle index
        newAngleIndexL = random(sizeAngles);
        // keep looking for a new random angle until it is different from the last
      } while (newAngleIndexL == lastAngleIndexL);

      // decide which way to turn
      if (angles[lastAngleIndexL] < angles[newAngleIndexL]) {
        for (int pos = angles[lastAngleIndexL]; pos < angles[newAngleIndexL]; pos++)
          servoL.write(pos);
        delay(100);
      } else {
        // go in other direction, pos--
        for (int pos = angles[lastAngleIndexL]; pos > angles[newAngleIndexL]; pos--)
          servoL.write(pos);
        delay(100);
      }

      Serial.print("Left Servo Angle: ");
      Serial.println(angles[newAngleIndexL]);

      //update the lastAngleIndex to show that we are now here
      lastAngleIndexL = newAngleIndexL;

      //// RIGHT SERVO ////
      do {
        // generate a new random angle index
        newAngleIndexR = random(sizeAngles);
        // keep looking for a new random angle until it is different from the last
      } while (newAngleIndexR == lastAngleIndexR);

      // decide which way to turn
      if (angles[lastAngleIndexR] < angles[newAngleIndexR]) {
        for (int pos = angles[lastAngleIndexR]; pos < angles[newAngleIndexR]; pos++)
          servoR.write(pos);
        delay(100);
      } else {
        // go in other direction, pos--
        for (int pos = angles[lastAngleIndexR]; pos > angles[newAngleIndexR]; pos--)
          servoR.write(pos);
        delay(100);
      }

      Serial.print("Right Servo Angle: ");
      Serial.println(angles[newAngleIndexR]);

      //update the lastAngleIndex to show that we are now here
      lastAngleIndexR = newAngleIndexR;
    }

    // update the button state
    lastButtonState = currentButtonState;
  }
}

I did not have any p5.js code or serial communication as I was granted an exception to do my whole project in Arduino.

Parts I am proud of:

The most frustrating part of my project was the interaction between the Arduino code and the physical cardboard construction, especially since the angles of rotation were integral to the whole concept working. First, I tried to draw the angles on the cardboard and try to write the code so that the angles I determined would cause the predictions to show through. This proved unsatisfactory and I had to reduce the number of wedges from 10 to 6, and eventually I wrote another program using the Knob servo example so that I could decide the angles based on which area showed through the display slot as I turned the knob, instead of deciding the angles first.

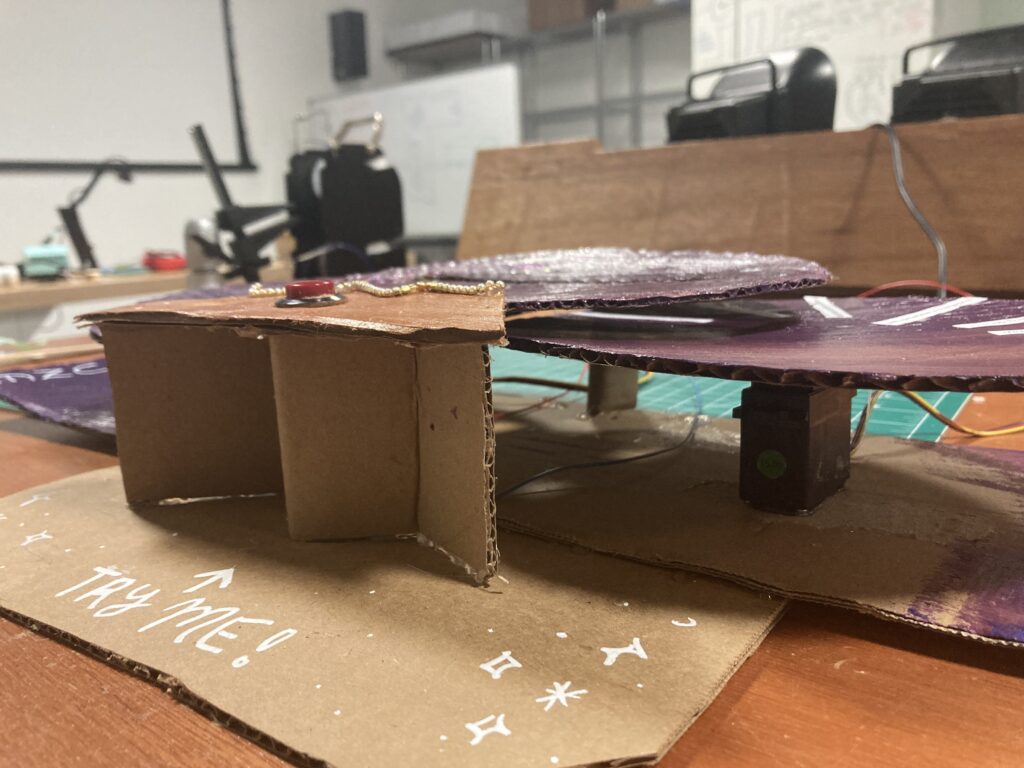
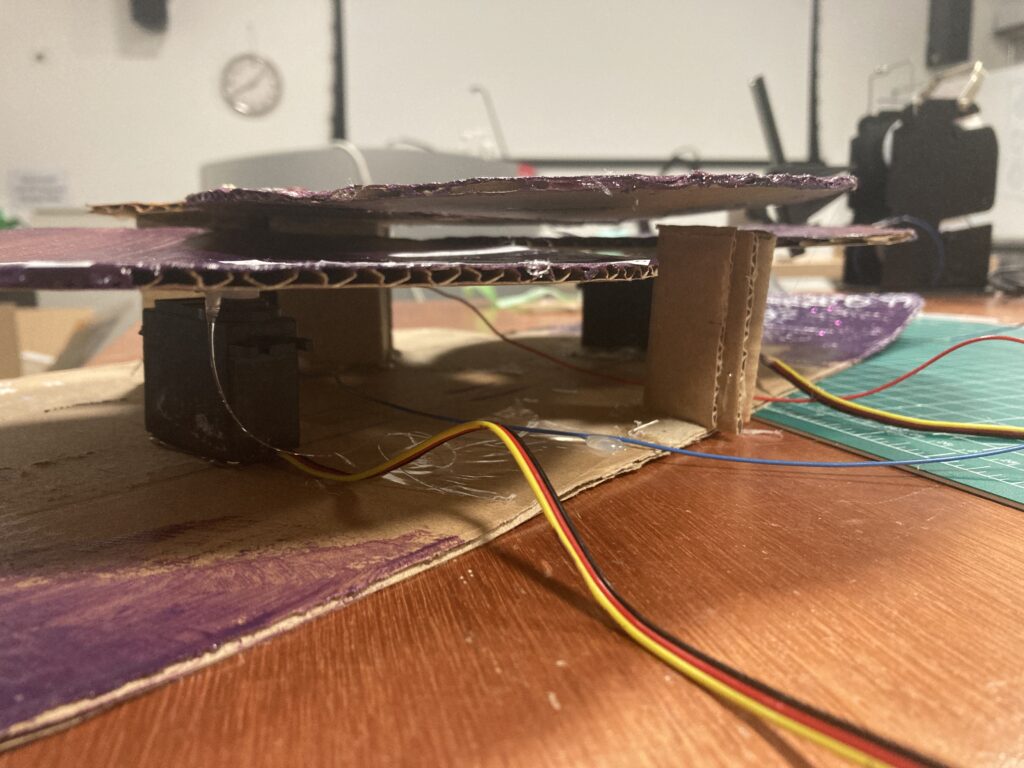
Additionally, the servo motors were very jittery and unstable at times, which made testing my concept an arduous process, as I had to continually disassemble both the cardboard slot and the motors to achieve an optimal setup. Thus, I am most proud of overcoming all these difficulties along the road, and making a (relatively) stable physical product with a form that serves its function well. I am also happy with the cardboard construction techniques I used, such as supporting my structure with triangle wedges:

Future Improvement:

If I were to do this project again, I would precisely measure and calculate everything before construction so I could have space for more predictions like I originally planned. Also, currently the wheels will turn erratically or the servo motors will vibrate at random times, and I still do not know why. An area for future improvement would be to eradicate these bugs, although they could be interpreted as divine psychic interference :).

Resource:

Arduino Servo Knob & Sweep Examples 

ChatGPT to come up with sentences

Week 12 – Final Project Proposal/Design Documentation

Psychic Hotline Fortune Teller

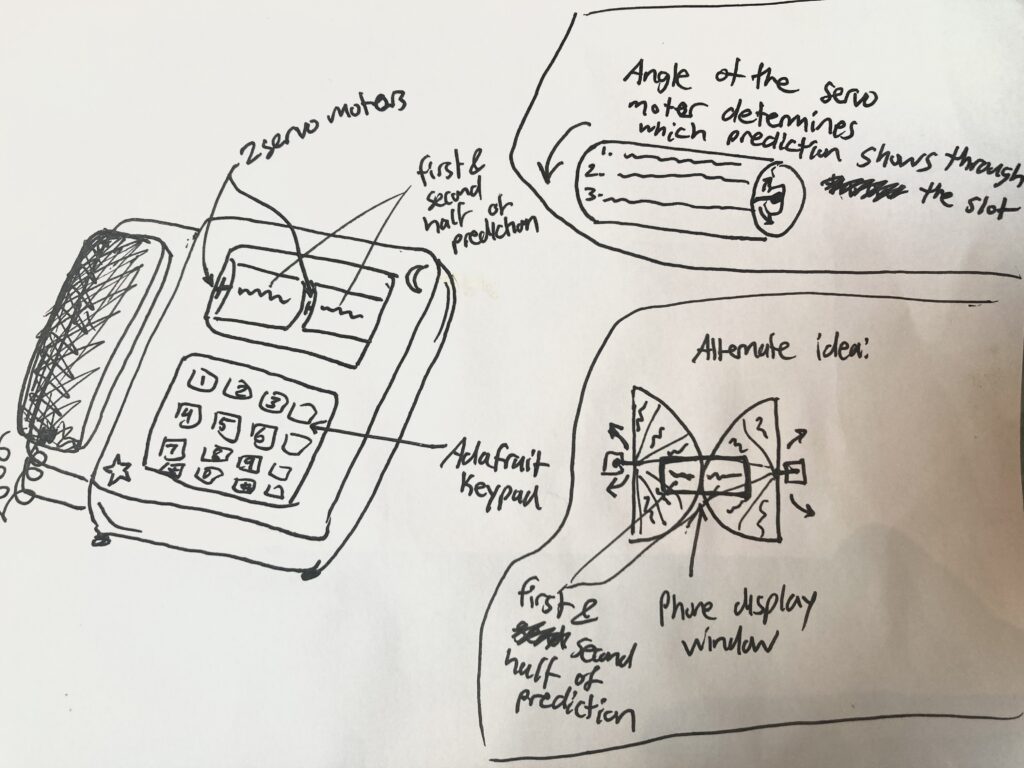
My final project will be a “fortune teller” machine, where users can inquire into 3 categories: relationships, the future, and yes/no questions. The fortune teller will resemble an landline telephone, where users can dial various phone numbers to receive different fortunes on a slot-machine-like cardboard display. The concept is basically that of a Magic 8 ball, but with more specific predictions and a “psychic” aesthetic.

This is how I visualize the project to work:

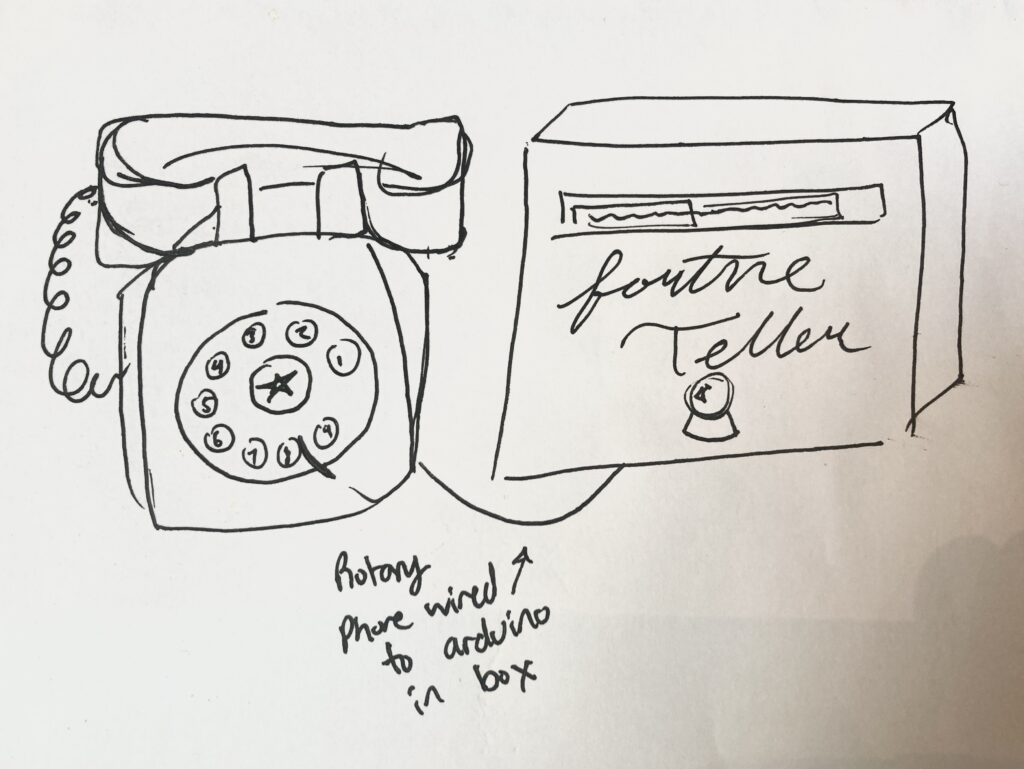
Another option is to make the display and phone interface separately, to allow for more flexibility. The phone could still be powered by the Adafruit Trellis keypad, or if I have the time and resources, Professor Shiloh’s rotary phone could be connected to Arduino to add a novel tactile experience for the user.


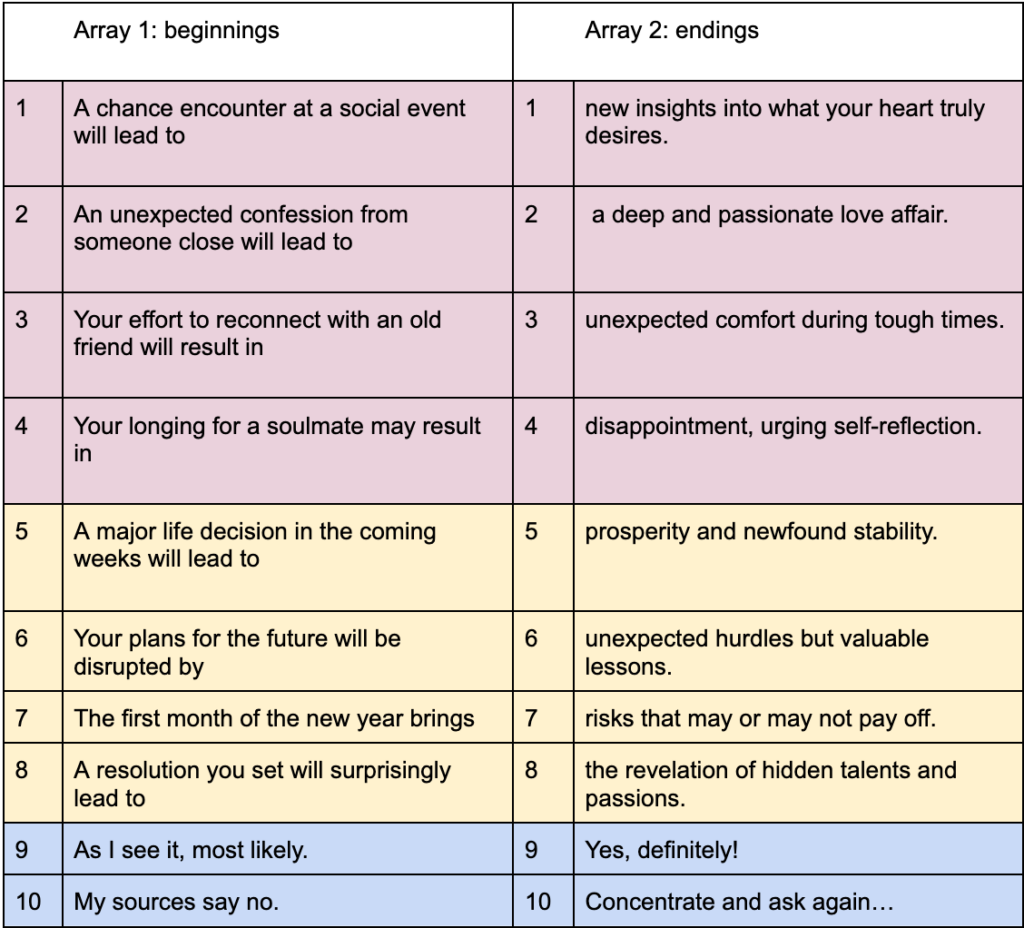
To fully utilize servo motors’ 180-degree rotation and the limited physical space I will have to write the fortunes, I was inspired by Professor Shiloh’s suggestion to have sentence beginnings and endings. These will mix and match to result in a total of 16 possible fortunes for “relationship” inquires, 16 possible fortunes for “future” inquires, and 4 answers to yes/no questions. I now realize that it might not be possible to have 4 answers, because for yes/no questions one of the rolls must be blank, to avoid the display showing “As I see it, most likely Yes, Definitely!”, which would be confusing. I used ChatGPT to help me generate some sentence beginnings and endings, and picked my favorites:

The input to Arduino will be the number sequence the user punches in on the keypad, and the output will be a randomized combination of 2 servo rotation angles to produce 1 sentence.

*Note: my project does not have P5 integration because Professor Shiloh approved an exception.

Week 11 – Reading Reflection

Design Meets Disability

This reading, about how designing for disabilities can change the way we think of design, was extremely well structured and raised many thoughts. Firstly, it was interesting to observe how the evolution of glasses from being perceived as a medical device to a fashion accessory mirrored my personal journey with glasses. I have needed to wear glasses since third grade, and in the first few years I greatly resented them and preferred how I looked without them. My eyes progressively got worse every year, and so I always had to update my glasses. In high school, something shifted and I did not mind much how I looked with glasses anymore, and I began to look forward to the opportunity to get new glasses. As the reading stated, it is having the choice between different options that empowers the consumer to “accessorize” their image. The fact that the accessory is needed to enable human function does not take away from its worth as a fashion statement. Last year I got a new pair of golden framed glasses, and that was the first time I felt happy to be wearing them, as one of my favorite book characters also wears golden framed glasses.

The reading brought up the question of if it is possible to “appropriate” things like eyewear, or in the future, hearing aids and prostheses. Personally, I find it just a tad bit annoying when people wear non-prescription glasses just for the looks, because they have the privilege of not actually needing them to see. In the future, if development in the design of hearing aids follows the trajectory of that of glasses, will people start sporting “hearwear” even if they do not have hearing loss? And how would this be received by Deaf communities? While there is no “community” of people with glasses, there are deaf communities with their own cultures, and so the two situations are not really comparable. And then, what about prostheses?

I also felt that the principle presented in the reading of achieving positive image without invisibility was especially powerful, as it reminded me of discourses within queer history about how the goal should not be to assimilate (into heteronormative culture) in order to gain acceptance, but to have the freedom of visibility without receiving harm for it.

Week 11 – Final Project Idea

Final Project Idea

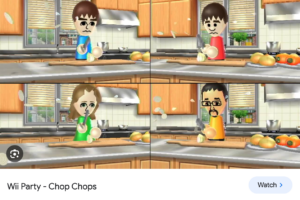
I have two ideas in consideration for my final project. The first is a physical recreation of the onion-chopping mini-game from Wii Party. When I was a kid, my friends and I would always play Wii Board Game Island, and this was one of my favorite mini-games. The user moves their Wii remote down in a chopping motion, and whoever “chops” the most number of times within the time limit wins.

For an Arduino/P5 recreation, I am imagining a chopping board covered in foil, and a knife made out of metal or wood covered in foil/copper tape, so that whenever the knife comes into contact with the chopping board, a switch is activated (similar to our “creative switch” assignment). There would be two players and two chopping boards hooked up to different pins on the Arduino, and these pins would send signals to the P5 screen, which would be a scoreboard. Every time the switch activates (a person chops once), their score would increase by one. The p5 program would also be running a stopwatch for one minute and beep when the minute is up. One issue is that I don’t know what I would use as the thing to be chopped, because unless I use real knives, which would be too dangerous, it would be impossible to actually cut through much. An alternative is to simply not have any object to be chopped, and to simply erect a picture of the Wii Game next to my setup so that people understand the concept.

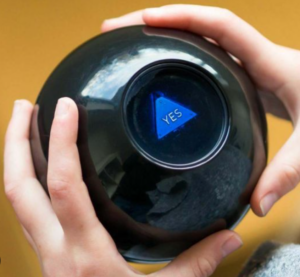
My second idea is to make a “psychic hotline”, which would kind of be like these Magic 8 balls,

except that it would be a cardboard phone that is hollow inside, to allow for a servo motor and an attached spinning wheel. The phone buttons would be Arduino buttons, and depending on the last button that the user presses, the spinning wheel would rotate until the designated psychic message shows through a cutout in the cardboard. The whimsy of this project would mostly be the aesthetic and the intricacies of cardboard construction, which I have been enjoying in making my previous projects. P5 would function as a backdrop with twinkling stars, instruct users on which number to dial for which type of psychic question (love, career, self-improvement, etc.) and provide error messages if the user has not inputted the correct phone number. The limitation of this project is that there would only be a few interactions before the user gets bored, because the spinning wheel can only accommodate so many messages.

Week 11 – Serial Communication Exercises

Serial Communication Exercises

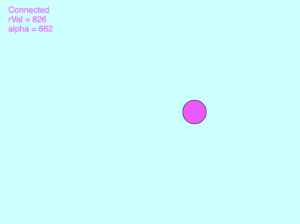
  1. Make something that uses only one sensor on Arduino and makes the ellipse in p5 move on the horizontal axis, in the middle of the screen, and nothing on Arduino is controlled by p5:

I kept the Arduino and p5 code from the handshake example intact, and added this line of code in p5 to take the value obtained from the potentiometer to control the x-position of the circle.

// draw a circle, alpha value controls the x-position of the circle
circle(map(alpha, 0, 1023, 0, 640), 240, 50)

2. Make something that controls the LED brightness from p5:

Again using the Arduino and p5 code from the handshake example, I added some code to the “keyPressed” function in p5, so that different values would be sent to the “left” LED in Arduino, changing its brightness.

function keyPressed() {
  
  // set up connection with p5:
  if (key == " ") {
    setUpSerial();
  }
  
  //control the brightness of the LED by sending different values to "left"
  if (key == "1"){
    left = 10;
  }
  
  if (key == "2"){
    left = 100;
  }
  
  if(key == "3"){
    left = 255;
  }
}

Exercise 2 P5 code

3. Take the gravity wind example and make it so every time the ball bounces one led lights up and then turns off, and you can control the wind from one analog sensor:

Video demonstration

I transplanted all the code of the gravity wind example into the handshake example, and then added two bits of code to complete the assignment. The first part sends either a “1” or a “0” to the “left” LED in Arduino to turn on and off the LED when the ball bounces.

//send value to "left" LED in arduino 
   // depending on y-position of ball 
  
  // if y-position is greater than 330, light up the LED
  if(position.y >= 330){
    left = 1;
  }
  
  // if y-position is greater than 335, turn off the LED
  if(position.y <= 335){
    left = 0;
  }

The second bit maps the potentiometer values to 1 and -1, allowing the user to control the wind by turning the potentiometer.

//control wind with potentiometer
wind.x = map(alpha, 0, 1023, -1, 1);

Exercise 3 P5 code


Resources:

Izah and Zion’s code helped me in completing this assignment.

Week 10 – Musical Instrument

Cat Composer

By Sneheel & Angela

Concept:

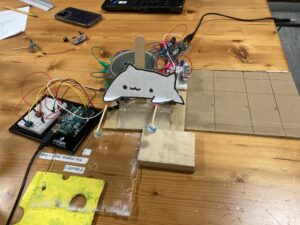
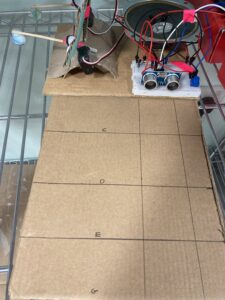
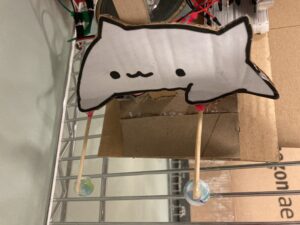
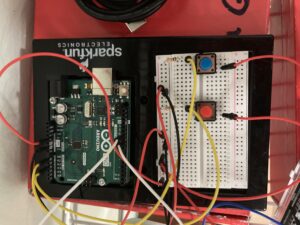
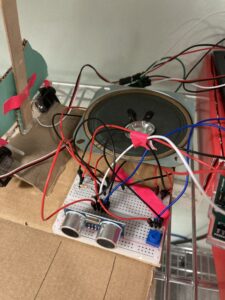
While working on this project, we went over several ideas on how we would make an instrument. One thing we discovered in our ideation process was that both of us had previously made projects that centrally involved cats. Thus, with some more tinkering around – we came up with “The Cat Composer”! The Cat Composer is an all in one musical instrument that can play a variety of simple tunes such as “Hot Cross Buns” and “Mary Had a Little Lamb”. It consists of 2 switches to control 2 beat-making servo motors, a distance sensor to control the notes (C, D, E, and G), and a turning potentiometer to toggle between octaves. Additionally, we incorporated a speaker from the IM Lab inventory to make a better sound than the provided buzzer. This instrument is best played with two people, one to play percussion/toggle between octaves, and one to play the notes.

However, with a bit of practice it is completely possible to play it by oneself! Note: In order for the distance sensor to receive a steady input and play the correct notes, it is best to play not with one’s hands, but with a larger piece of material.

Demonstration Video

Code & Highlights:

The toughest part in the coding process was to ensure that the distance sensor worked exactly as we intended. For example, an issue that we ran into early was the abrupt changing of tune at the border values. Since the sensor isn’t accurate to the exact cm. It would then fluctuate between two tunes. We corrected this by instead using a 5-value moving average. This makes transitions significantly smoother (and the experience much more enjoyable!!)

unsigned int measureDistance() {
  const int numReadings = 5;  // Number of readings to average
  const int maxChange = 150;   // Maximum acceptable change in cm between readings
  static unsigned int lastAverage = 0;  // Store the last valid average distance
  unsigned long totalDuration = 0;


  for (int i = 0; i < numReadings; i++) {
    digitalWrite(trigPin, LOW);
    delayMicroseconds(2);
    digitalWrite(trigPin, HIGH);
    delayMicroseconds(10);
    digitalWrite(trigPin, LOW);


    totalDuration += pulseIn(echoPin, HIGH);
    delay(10); // Short delay between readings
  }


  unsigned int currentAverage = (totalDuration / numReadings) * 0.034 / 2;


  // Check if the change from the last average is within the expected range
  if (abs((int)currentAverage - (int)lastAverage) <= maxChange || lastAverage == 0) {
    lastAverage = currentAverage;  // Update the last valid average
    return currentAverage;
  } else {
    return lastAverage;  // Return the last valid average if the current reading is an outlier
  }
}

Room for improvement:

We can improve our project significantly given more time!

Firstly, we would love the diversify the sounds our project can generate. In our research we discovered that instead of simply using tone() we could perhaps use some other sound generating function. We would love to try this!

Regarding the hardware implementation, the provided potentiometer is too hard to turn and often messes with the wiring. Instead we would love to use a better/larger potentiometer that allows us better access.

Similarly, another change we would like to do is to use a single Arduino Board and breadboard rather than our current 2 board solution. This will make the project more cohesive. Even though this seems easy enough to implement, we let our current design be as of now to simplify our approach.

Lastly, the ultrasonic distance sensor often gives outlier readings. As discussed in the highlight section, we tried our best to resolve this issue, however it still persists. We have some more ideas to remedy this. But we believe that given the scope of this project this was unnecessary. However, we would love to do this in the future.

Reading Reflection – Week 10

A Brief Rant on the Future of Interaction Design

Watching the video of Microsoft’s Productivity Vision mainly invoked one emotion in me: apprehension. I quite agree with the author that taking “Pictures Under Glass”, magnifying them, making them 3D, and making them part of all household appliances/human interactions really is not the answer. The author comments on how our hands do so many wonderful things, like grabbing, sensing texture, and feeding us information that we take for granted. There are many more things that our brains also do, actions which would be stifled by the Vision Of The Future. For example, in the video clip, the woman arrives in an airport in Germany, taps her glasses, and immediately hears a translated version of everything around her. Firstly, phones already do this kind of work, so transferring to glasses is the sort of “meaningless step up from the status quo” the author refers to. Secondly, if someone were to go through a foreign country with all relevant information perfectly translated and projected in a hologram in front of them in real time, they would lose so much of the experience of traveling — asking what a word means, sharing a laugh over some funny mispronunciation, finding an amazing spot after getting lost, etc. It seems like these future technologies are designed to minimize mistakes, whether by finishing your sentence for you, or telling you exactly what is in your fridge, when we actually learn a lot from our mistakes. Okay, maybe it would be useful to know when something in your fridge has gone bad, but we are already able to do that with our senses of smell, touch, taste, and sight, again proving the author’s point.

Responses: A Brief Rant on the Future of Interaction Design

The paragraph that stood out to me most from this reading was:

“We’ve almost given up on the body already. We sit at a desk while working, and sit on a couch while playing, and even sit while transporting ourselves between the two. We’ve had to invent this peculiar concept of artificial “exercise” to keep our bodies from atrophying altogether… Why do you want this future? Why would this be a good thing?”

This reminded me of a reading about how the education system is not designed to encourage learning and creativity. Kids naturally learn through moving their bodies, and yet after a certain age, all knowledge is expected to be obtained by sitting at a desk, only engaging the senses of sight and hearing. The ironic thing was, I was doing this reading, learning about the failings of sitting and reading to learn by sitting and reading.

I think the author’s suggestion for truly revolutionary kinesthetic interfaces might alleviate this problem. I don’t know what form it would take, but it sounds like a good opportunity to introduce natural curiosity and bodily feedback back into our daily lives and learning processes.

Week 9 – Digital and Analog Input/Output

Cutie Cat

Cat video

Concept:
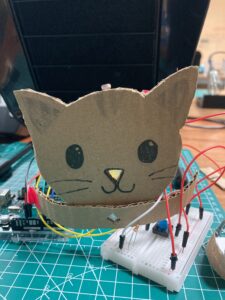
Ever since coming to the Abu Dhabi campus with its abundance of cats, I have noticed that some of them close their eyes in a very cute manner when you pet them, so I wanted to simulate this adorable interaction.

As I did not have the resources or knowledge to make an eye-closing movement, I decided to have the cat’s nose become brighter when you pet it. The photoresistor was perfect for this, because during our in class exercise, I noticed that, as move your hand closer to it, the value drops in a predictable manner. Thus, I wrote some code that made the LED increase in brightness when you move your hand closer to the cats head. Since we needed to have a digital input/output as well, I made a blue gemstone for my cat’s collar that is activated by pressing the blue button.

Highlight:
I am quite happy with how this project turned out, especially the cardboard portion. The tool training enabled me to use the Exacto knife, and by cutting out the cat’s nose and putting a few layers of tape over the back of the hole, I was able to conceal the LED while still allowing it to emit a glow. I was also able to create reliable electrical connections (better than the ones for my candle last time) by using a foil + tape technique, where I placed two bits of foil separated by a gap on a piece of tape and used it to secure the wire ends to the cardboard.

Challenges:
I wanted the light to become incrementally brighter as I moved my hand closer to the cat, so I set three brightness values for when sensorValue is above 700, between 400 and 700, and below 400. However, there is an unsolved bug in which this incrementation does not actually reflect the LED’s brightness. The LED only increments between two levels. When sensorValue is below 400, the LED is still the same brightness as for when sensorValue is between 400 – 700.

analogWrite(yellowLED, brightness);  // set the brightness of yellow LED

  if (sensorValue < 400) {
    brightness = 255;
    delay(1);  // incrementation of brightness not working
  }

  if (400 < sensorValue < 700) {
    brightness = 100;
    delay(1);
  }

  if (sensorValue > 700) {
    brightness = 25;
    delay(1);
  }

Reflection and improvement:
If I were to do this homework again, I would like to successfully implement the incrementation above, and maybe program even more segments so that the brightness of the nose increases smoothly as you move your hand towards the cat, as if it is delighted to see you. I think there may be some way to do this using the fade example, but I could not figure out how, as of now.

Update:

After talking to my classmate, I now know how to program the LED to make it smoothly fade brighter as your hand moves closer:

// set the brightness of yellow LED
  analogWrite(yellowLED, brightness);  

  // set brightness equal to max sensorValue minus the currently received sensorValues
  // the less the sensorValue (the closer your hand is), the higher the brightness
  brightness = 870 - sensorValue; 
  Serial.println(brightness);

Reading Reflection – Week 9

Physical Computing’s Greatest Hits (and misses)

This reading called me out from the first example, because I was thinking about making some sort of theramin-like instrument for my final project. However, it is true that “non-original” does not equal “bad”, and the themes here provide plenty of room for one’s own unique twist. The examples provided were inspiring, and I appreciated how simple interactions (such as stepping on a square) were made engaging by the conceit behind them (learning how to salsa dance). This reading was a great illustration of how the conceptual and emotional aspects of a project are just as important as the technical aspect, and how different concepts can transform the same interaction. After this reading, I have some more ideas on how I could take these themes and make them more unique.

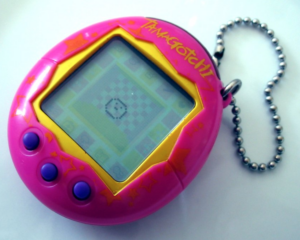
I was thinking it might be interesting to make an “instrument” based on photoresistors which would change the volume of different instrumental tracks (ex. piano, violin, flute), allowing people to “compose” a song by bringing in those tracks. The tracks would only play certain chords so that the composition remains harmonious. Another idea I have is to make a little “pocket pet”, similar to Tamagotchi, that would react to the user’s caresses and pats. However, instead of a “common” pet like a dog or cat, perhaps it could be an endangered species.

Making Interactive Art: Set the Stage, Then Shut Up and Listen

My biggest takeaway from this reading was the quotation, “Your task in designing an interactive artwork is to give your audience the basic context, then get out of their way”. I think this is holds true not only for interactive art but for everything we perceive in life. It almost always benefits us to not enter into things with one set vision about how things must be, and to be open to surprises that happen along the way. As someone who has written and produced songs, I know it is hard to let go of control, but there is only so much you can control, and some of my favorite reactions to my songs are from people who interpreted their own message from it. It is also important to realize that there is no way to please everyone with your art, and just because it is not for one person does not mean that it is inherently flawed.

Week 8 – Unusual Switch

The Unbirthday Candle

Video of the Unbirthday Candle in action

Concept

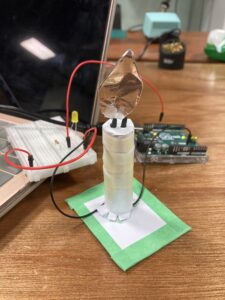
When the assignment of making a switch that doesn’t need the use of one’s hands was introduced, I first thought of other body parts that could be used to trigger a switch. Then, I realized that touch is not even needed — a switch could be triggered by blowing! Initially, I wanted to make some sort of fan or windmill that would bring the two ends of the wire together and complete the circuit, but when I was browsing through the IM Lab materials closet, the idea of a candle came to me. A folded piece of foil is attached to the end of one wire, and when one blows on it, the foil swings around and comes into contact with the end of another wire, making the LED light up. I thought it was kind of funny that blowing on the candle caused the LED to light up (since, traditionally, one blows on a candle to put out the light), so I named this candle the “Unbirthday Candle” after the unbirthday celebration from Disney’s Alice In Wonderland film.

via GIPHY

Highlight
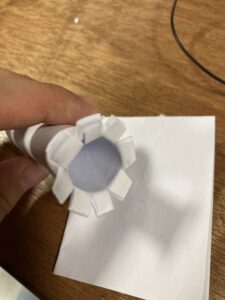
A highlight of my design is how the bottom of the candle is attached to the piece of paper I used as a base. I quickly discovered that just taping a tube of paper to another paper was not stable, so I made both the candle and the base thicker by folding the paper a few times. Then, I fanned out the bottom of the candle to create a wider surface that I could then attach to the base, and cut slots for the two wires to be fed through. With these slots, and the holes on top of the candle, it was relatively easy to make adjustments to how much wire I wanted sticking out. 

Reflection
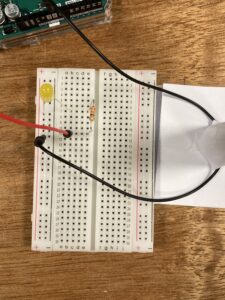
This assignment was very helpful in terms of making me more comfortable with how a breadboard works. Initially, I set up the circuit by copying the image in the lecture notes, like so:

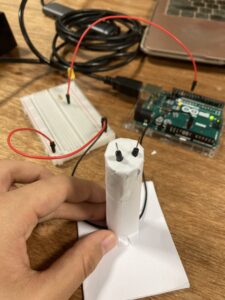
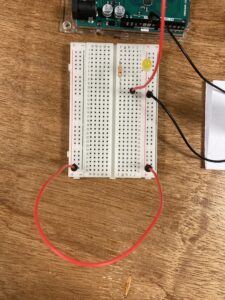
However, after a while, it became clear that it was rather awkward to have the two black wires be so far from the candle. It was hard to adjust them to the desired length. Thus, I used an additional red wire to connect the two power strips so I could freely experiment with different circuit configurations, and eventually settled on the one below, which gives both wires easy access to the slots in my candle.

Ideas for future work or improvements
An improvement could be made by somehow stuffing the inside of the candle with paper or adhesive material, so that the black part of the wire can be completely concealed within the tube. This would make for a more “realistic” looking candle. I would also place a small tube of foil within the two layers of foil that make up my “flame” so that the foil can only rotate, not tilt side to side. Currently, sometimes, the switch does not work because the flame will tilt too much and not connect with the other wire when blown.