Final Project | Dungeon Escapist

Game Description

Dungeon Escapist is a single-player game where players take control of an adventurer and delve through a dungeon. By using a physical controller that reacts with tilting, players can move their character, collect coins, and reach the exit before the time runs out!

Check out DUNGEON ESCAPIST Here!

Project Inspiration

Dungeon Escapist is a game heavily inspired by older titles such as Adventure (1980), with interactive elements from The Legend of Zelda: Breath of the Wild (2017). This game is also a direct sequel to my previous IM game: Pyro Dancer.

Escapist (adjective)

relating to avoiding an unpleasant or boring life by thinking, reading, etc. –Cambridge Dictionary

Unlike the previous game, however, Dungeon Escapist focuses more on problem-solving rather than player reaction. The main character, an adventurer, wishes to gain riches! He began to look around the Adventurer’s Guild to see if there were commissions. Noticing the dungeon-clearing request, our protagonist sets off to explore the uncharted areas in hopes of bathing in fame and fortune.

Gameplay Images

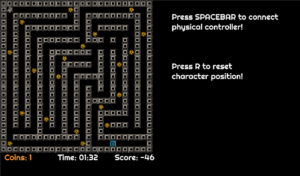
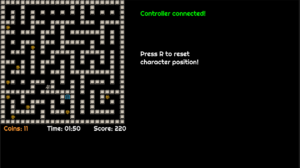
Main Menu Screen

Game Screen with different maps

Gameplay Videos

How the Game Works

The game is built using the p5 Play library. The dungeon (or maze) is an array of sprites. The library can then construct these using their built-in sprite and tiling system. Because of this, the game is able to have three distinct maps easily.

// Print the sensor data to the serial monitor
//currentDirection, X, Y, Z
Serial.print(currentDirection);
Serial.print(",");
Serial.print("X:");
Serial.print(x);
Serial.print(",");
Serial.print("Y:");
Serial.print(y);
Serial.print(",");
Serial.print("Z:");
Serial.println(z);

Arduino sends out a message consisting of a number, the controllerDirection, alongside XYZ information to the Serial Output. The number listed in controllerDirection is read by p5 and moves are made based on that.

//Serial Library function
function readSerial(data) {
  ////////////////////////////////////
  //READ FROM ARDUINO HERE
  ////////////////////////////////////

  if (data != null) {
    //Only run when there is a Serial message
    let fromArduino = split(trim(data), ",");
    if (fromArduino.length == 4) {
      controllerDirection = int(fromArduino[0]);
    }
  }
}

// Then....

//UP
    if (
      controllerDirection == 12 &&
      isOpen(avatar.x, avatar.y - 1, currentMap) &&
      gameState == 1
    )

Then, inside the game, a function called isOpen() checks whether the space in the array next to the player is free. If it is and the controllerDirection is specific to that direction, the character will move infinitely towards that direction until it hits a wall. This simplicity of the character movement is something I am proud of.

function isOpen(x, y, mapName) {
  //Function to check whether the tile is empty to allow moving
  let i = floor(x);
  let j = floor(y);
  let tile = mapName[j][i];
  if (tile == "." || tile == "x" || tile == "h") {
    return true;
  } else {
    return false;
  }
}

Two major issues that I found to be painful while developing the game are figuring out the scoring system and gameState. It took me a few hours to solve why using multiple game states would crash the game. Ultimately, it all comes down to checking the game state before changing to another one.

The scoring system depends on the game time and coins picked. I wanted to make it such that the longer the player spends solving the dungeon, the less score they get, whereas the coins, act as a score multiplier. I found out that instead of immediately running the timer, I can make it run after the player has collected at least one coin.

User Testing & Feedback

During the production phase (2 & 4 May 2024), the game was tested by several users (thank you). Here are some of the issues that the game encountered:

The first thing I noticed was how players were confused about what to do with the physical controller. To combat this confusion, I decided to add a tutorial screen after the title screen. It also specifically mentions to “tilt” the physical controller for more legibility.

Notable things that I observed were in particular how long it took for players to solve the maze. Originally, I thought it would take <1 minute.
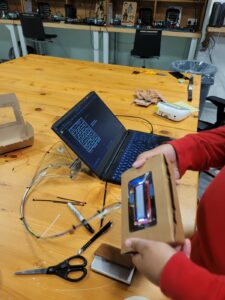
Initial User Testing.

However. given the time it takes for the player to figure out the control scheme, solve the maze, and discover things, the time averages around 4 minutes. The scoring system, which is dependent on the time and coins, has then been adjusted to give leniency to the players.

Another notable issue was player sprite color. Because it looks very similar to the walls, the color has been adjusted for better visibility as well.

I also found out that people kept referring to this game to how similar it is to a mobile game called Tomb of the Mask, a hit mobile game, due to their style.

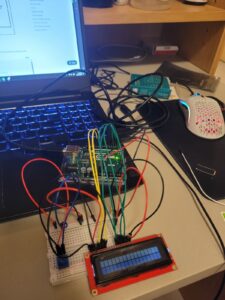
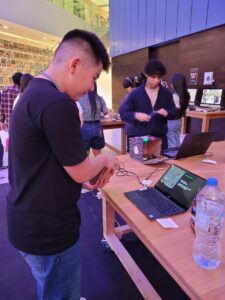
Production Images
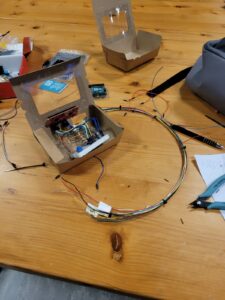
From prototypes to actual product

Future Improvements
  • I originally wanted to make the physical controller pretty. However, by the time I finished the whole game, another project was waiting for me. I will try to see what I can do before the IM Show just to make things a bit more pretty.
  • Scoreboards. I wanted to implement scoreboards so players could compare their scores. However, this was quite difficult to implement. So I’ll try to see what I can do in the meantime.
I.M. Show Reaction!

Many thanks to everyone who played Dungeon Escapist and managed to finish the level! Here are some thoughts, reactions, and comments about the game:

“I was confused with the controls in the beginning … It is quite difficult!” -A professor

“Pretty cool.” -I.M Senior

“It’s difficult to control in the beginning. But once you get the hang of it, it gets easier.” -A lost engineer

“Cool game. The UI/UX can be improved though” -An I.M Professor

I am glad that Dungeon Escapist captured the attention of many. I noticed that the game is ‘easier’ to grasp for younger audiences, whereas the controls and movement of the game are a barricade for adult audiences. By observing the human-machine interaction, I gathered so many insights on how to improve the game. While the difficulty might need to be adjusted, specifically in the map design, I believe the skill ceiling from mastering the physical controller of Dungeon Escapist makes it enjoyable and rewarding.

Resources Used

Assets

Home · Kenney

Royalty Free 8-Bit Background Music Downloads | FStudios (fesliyanstudios.com)

Artstation

Tutorials

How to Use Gyroscopes on the Arduino – Ultimate Guide to the Arduino #43 (youtube.com)

Yes, you can make a Gyroscope using #arduino (youtube.com)

Coding Challenge #66: JavaScript Countdown Timer (youtube.com)

p5play: Using tiles, tilesets, and making pixelated background images with Photoshop (youtube.com)

Week 12 | Design for Everyone

I had the chance to take a class that studies disability within a musical context earlier this semester. One of the ongoing debates is to consider the definition of disability itself. Is disability a medicalized condition, or is it a social construct? Think of it, how many of us can do handwriting with both hands, probably not much. Intriguing isn’t it?

Speaking of hands, when it comes to design, I would like to point out one of the most commonly used appliances: a computer mouse.

Best computer mouse in 2024, tried and tested | CNN Underscored

Pullin mentioned in the book that an accessible design tends to be made universal, equipped with redundant features that help the majority and those in need. However, this approach to a universal and simpler design might give some drawbacks.

In the picture above, the right mouse is commonly referred as an ambidextrous mouse, which translates to both hands. This type of mouse is designed to fit in everyone’s hands. The mouse on the left, however, can only be used by a right-handed person.

What makes the mouse on the left is its design to be ergonomic. The ambidextrous mouse design, although is used by everyone, tends to nudge the user to ‘claw’ grip the mouse. Prolonged usage of a mouse might cause more harm than good. The ergonomic mouse is designed to prevent this from happening (Logitech). As a designer, it is important to notice these issues and make a decision about whether to provide accessibility for everyone or create a design for specific audiences.

Final Project Progress | GyroMaze

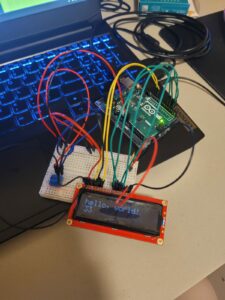
For my final project, I have locked in on the idea of using a gyroscope device to control a ball inside a maze. Since then, I’ve successfully booked the equipment I need from Arts Booking and made considerable progress for my project.

~~The Maze~~

I utilized the p5 play library to help me build the game managers. I loaded two sprites: a cube and a black tile. The cube acts as the player, whereas the tile serves as the wall for the maze. These can be changed at any time.

let map = 
    [
    "@@@@@@@@@",
    "@   @   @",
    "@@@ @ @ @",
    "@@@   @ @",
    "@@@@@   @",
    "@@@@@@@@@",
    ];

new Tiles(map, 0.5, 0.5, 1, 1); //Those are the coordinates so that they start a bit right and not super too the edge of the windowWidth & windowHeight


Within the short period between the previous class, I was able to fully build the maze system complete with a character controller. The Tiles() function can read any list consisting of strings. Those strings are made out of @ and ‘SPACES’ to mark walls and empty space. Next, I made a separate list called map that has the layout of the whole maze. Hence, with this system, I can create as many mazes as I need to and easily implement a map randomizer for the final product.

if (kb.pressed('up') && isOpen(avatar.x, avatar.y-1)) {
    //SMOOTH MOVEMENT USING VECTOR
    avatar.moveTo(createVector(avatar.x, avatar.y-1), .1)
    
    //avatar.y--;

The character moves by a simple UP, DOWN, LEFT, RIGHT checking alongside isOpen() function. The function checks whether there is a ‘SPACE’ within the map. If there is, it returns true, which means the player can walk through it. If not, then there is a wall and the player cannot move through it.

~~The Physical Controller~~

The module that I booked from Equipments Center is a generic GY-85 sensor that comes with three features: an accelerometer, gyroscope, and magnetometer.

Help, it’s broken! (nope) Continue reading “Final Project Progress | GyroMaze”

Week 11 Reading | A Century’s Solution on the Future of Interaction Design

Victor ‘ranted’ in his post to remind us how our current definition of interactivity is limited to glassy touch screens that do not utilize our touch senses to their full potential. He argues that texture, the ‘feel’ of things is not accompanied within these slidy screens.

Although he does not include solutions and was writing the article purely to raise awareness, I believe he asked important questions. One idea that I am fond of is to think of these designs as tools that react to our hands.

Elon Musk Uses Iron Man-inspired Holographic 3-D User, 42% OFF

Tony Stark in his lab. Disney Marvel.

Hiro Hamada microbots presentation Big hero 6 1080p

Hiro presenting nanobots. Disney.

Imagine this: a breed between nanobots from Disney’s Big Hero 6 and holograms used by Tony Stark in his research lab. The hologram can sketch schematics in thin air, and then magically materialize from the nanobots. It would become an interactive object, that can be touched, felt, scrubbed, and molded only limited by the user’s imagination.

Any sufficiently advanced technology is indistinguishable from magic. – Arthur c. clarke

Although it may still take centuries away with dozens of research, prototypes, and testing before we can commercially mass produce this kind of technology, perhaps we can pick a point or two from Victor’s argument to take the current developments into an alternative shape and features.

Week 11 | Mr. Problematico

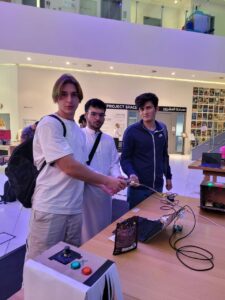
Push the button, it screams. Turn the knob, and it screams even louder. For this week, we decided to create a sound/musical instrument that is controlled by a button and potentiometer.

Concept

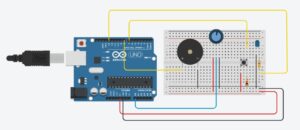
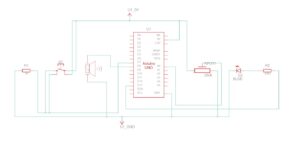
We decided to call our machine “Mr.Problematico” because of the issues we encountered while building this machine. The premise is simple: We have a potentiometer that controls the pitch and a button that plays/stops the music.

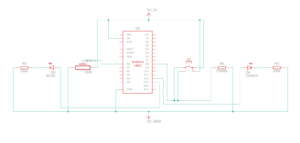
Demo & Schematics

How it works

In the code, we mapped the potentiometer to 20 different notes. Then, we created an if-else statement, which plays a music function playMusic, whenever the button is pressed and does not play the music whenever it is not pressed.

In the music function, we played the note based on the value received by the potentiometer (value) and turned on the light as well.

 // Map the potentiomenter values according to the list length.
  int note = map(pontValue, 0, 1023, 1, 21);

  // If button is pressed, then play a sound according to the potentiometer.
  if (buttonState == HIGH) {
    playMusic(note);
    //Serial.print("HIGH \n");
  }

  else if (buttonState == LOW) {
    //Serial.print("LOW \n");
  }
}

//Play the tune, wait a specific time and light the LED according to the 
//arrays of melodies and duration. In other words, the LED and the sounds generated are synchronized. 

void playMusic(int value) {
  int noteDuration = 1000 / noteDurations[value];
  digitalWrite(13, HIGH);
  tone(8, melody[value], noteDuration);
  digitalWrite(13, LOW);
  delay(noteDuration);
}
Closing Remarks

During our building time, we spent a lot of hours trying to figure out why our machine decided to stop very long when we executed the music function. After some consultation, the delay function delays the whole machine rather than the code line. We tried to play and go around trying to fix this weird delay. We figured out that by missing a resistor to the button that messed up the whole circuit, before eventually creating the machine above. It was not completely the code’s fault but rather our miss information.

We’re quite proud of this project. Looking forward to the final project!.


Week 11 | Final Project Ideas – GryoMaze

In my final project, I wanted to create a maze game called GyroMaze. It would be a single-player game, where the player controls the ball with a physical input and drives it from the start to finish point.

Concept & Inspiration

I am super inspired by the gyroscope shrine from Nintendo’s Legend of Zelda: Breath of the Wild, where the player uses the Switch’s gyroscope feature to control the maze and drive the ball around.

However, unlike the video game, the player in GryoMaze would control the ball rather than the maze itself. The concept is similar, turn around the gyroscope device and drive the ball around.

Implementations & Things that would help me

I have been always curious about gyro scopes ever since I started the physical part of this class. For this project, I believe attaching the gyro device to a glove and letting the player control the ball from it would be super awesome!

In my midtern, I utilized p5 play to make the endless runner game Pyro Dancer. Likewise, this project would also use the same library due to its extensive features that would help me a lot (I am looking at you, physics >:) ).

I have also been exploring other options regarding gyro scope. But for now, this game seems very doable for me and intriguing. I also have checked the materials that I would require such as LCD Screens, Gyro Acceloremeters, etc. and booked the on Arts Booking system.

Notes

There are a few concerns that I am aware of. Mostly, I am also working on another class final project and the timings are conflicting with this class, so I will try my best to accomodate both projects.

Using gyro scopes would probably involve a lot of maths, so I will mostly require consulting with the professor or IM Lab assistants to see how feasible my idea is. Regardless, I’m very excited for this final project because it is an idea that i’ve been eager to build!

Resources

6 DOF IMU (3 axis accelerometer, 3 axis gyroscope), Arduino, OpenGL, Python, complementary filter (youtube.com)

How To Make DIY Arduino Gesture Control Robot At Home (youtube.com) (GLOVE INSPO)

How to Use Gyroscopes on the Arduino – Ultimate Guide to the Arduino #43 (youtube.com)

Week 10 | Beyond Ideas

I started picking up my first console when I was around four years old. It was Nintendo’s Gameboy Advance console. To this day, I still remember my first time inserting the cartridges, booting up the machine, and blasting hours and hours into Pokémon FireRed. The feeling of being immersed into an alternate world despite it being on a screen a few inches wide, and with few buttons to press, still blows my mind.

Nintendo-Game-Boy-Advance-Purple-FL

Gameboy Advance. Nintendo.

Even if it’s just 8 buttons, the console opened a rift to a new reality

Igoe clarifies that interactivity should be a gateway to endless possibilities rather than a fixated destination. Similarly, the console’s interactiveness only goes as far as the buttons and screen, yet game developers utilize those mechanics to propel the user one step closer to experiencing the Kanto Region (Pokémon FireRed’s world).

Video games, to me, are a new type of art–a premature one that is. Unlike paintings, books, or movies, it is a medium of art that takes shape by the user, rather than the author. Plus, because of how young they are, there is still room for the medium to grow.

I was thinking about how physical computing machines mentioned in Igoe’s post are not commercialized. Because these are new ideas, they still require rigorous testing and adjustments to fit our society. Yet, video game console challenges this idea. Floor dances, gloves, VR headsets, all these new devices are the pillars of future technologies. Hence, is it not better for us to embrace it as soon as possible?

Week 10 | The Knob and The Bob

Throughout the Eid break, I tried to review the concepts that we have gone through so far. My goal for this assignment is not to create fancy circuitry but rather to design something from the back of my mind and understand what it does, how, and why.

I spent quite a time figuring out TinkerCAD, which is a program that really helps me to visualize and simulate my board before physically building it. I found this YouTube playlist that taught the program really well.

Concept

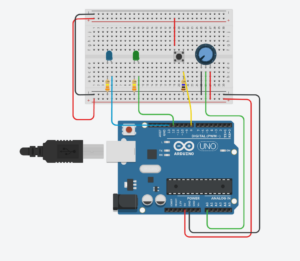
I want to light up two lights with a button and a knob. Because the knob is an analog input, there is a value that can be used there. So, I decided to make one LED blink in a specific amount of time decided by the knob, whereas the other LED is a simple on-off.

Schematic
How it Works

The code is separated for both green and blue LED.

In the code, I made a variable called sensorValue, which reads the signal from the knob. These values are then used to create blinking effect using delay for the blue light.

// Read Potentiometer Value
  sensorValue = analogRead(A0);
  // Turn the LED On
  digitalWrite(LED_BUILTIN, HIGH);
  // Pause program for <sensorValue> miliseconds
  delay(sensorValue); // Wait for sensorValue millisecond(s)
  // Turn the LED Off
  digitalWrite(LED_BUILTIN, LOW);
  // Pause program for <sensorValue> miliseconds
  delay(sensorValue); // Wait for sensorValue millisecond(s)
Demo
End Remarks

I am really proud of this whole assignment. It is not perfect, as in the video, the green LED sometimes does not turn off despite the button being pressed.

Nevertheless, while it may seem simple in the beginning, I was very confused by the whole arrangement of things. But, I did my best to actually sit down, take my time, and learn how these components work and interact with each other and reinforce my knowledge on Arduino itself.

Week 9 | Blinking Light

I was quite busy this week with assignments from other classes that took more time than I had anticipated. Alas, I was quite idea-blocked on what to do for this unusual switch assignment.

Originally, I wanted to see if I could use sound sensors to turn on / off LEDs. However, the IM Lab does not have a sound sensor as of yet. So, I opted for photoresistors.

Exploring the examples provided by Arduino IDE, I found out the fading feature of LED. While it is not an inbuilt feature, by adding delays per update to the LED, we can simulate fading lights.

So, I figured what if I could combine both photoresistors’ outputs with fading light? Well, this is what I made:

I wanted to have some kind of if statements that go beyond what I have here. In my head, I wanted it so that each certain range of photoresistor would give different signals to the light: blinking, full on, full off, etc. However, they are more difficult to implement than I had imagined them.

//PIN NUMBERS
const int ledPin = 9;
const int ldrPin = A0;
int brightness = 0;  // how bright the LED is
int fadeAmount = 5;  // how many points to fade the LED by

void setup() {
  pinMode(ledPin, OUTPUT); // The input from LDR will be returned to LEd
  pinMode(ldrPin, INPUT); // This is the input, if we obstruct, it will return a signal 
}

void loop() {
  int ldrStatus = analogRead(ldrPin);
  Serial.println(int(ldrStatus));

  analogWrite(ledPin, brightness); //TURN ON LED 

  brightness = brightness + fadeAmount; // Change LED Brightness

  if ((ldrStatus <= 600) && (brightness <= 0 || brightness >= 255)){
    fadeAmount = -fadeAmount;
  }

  delay(30);
}

For future projects, I hope I have more time and energy to explore the technicalities of Arduino itself. Maybe I could pair the light with an alarm? So that when the sun is up, I can have strobing lights burning into my eyes. It is 2 AM right now, and I am exhausted 🙁

Resources:

The Basics of Arduino: Adjusting LED Brightness (deviceplus.com)

How to Use a Photoresistor (or Photocell) – Arduino Tutorial : 4 Steps (with Pictures) – Instructables

Week 8a | The Cost of Beauty

Can we make beautiful and functional things? Should functionality precede aesthetics? These are the questions that Norman tries to tackle in his article by also incorporating human responses–emotions in object designs.

Really Cool, Weird, Fun, Unusual, Innovative and Awesome Chairs 2024

The Chair Institute

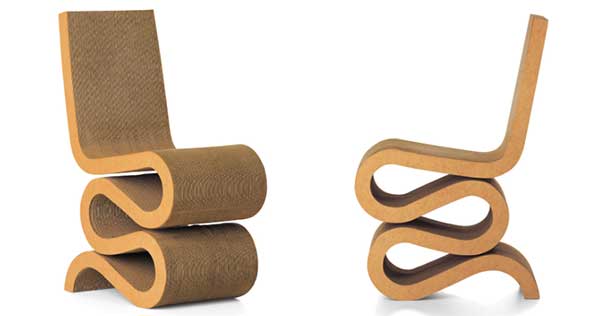
I presented the image above because it is ‘catchy’. In my opinion, the chair above is a redundant object. Most people would agree that a chair’s sole purpose is to provide seating. A well-designed chair, instead, would give a comfortable seating experience for the user. It is made out of hard material, unadjustable, and unwelcoming. The chair above lacks those usabilities.

Aesthetics matter. It influences the user’s reaction, hence, its experience with the object.

I reflect the P01 feature within the spacecraft. NASA thought that such a feature was redundant. Why would you add a button that would never be pressed? (Spoiler: it backfired). Redundant features, if done correctly, would heighten the design. Think about the chairs you would encounter in the library. They are amazing. The chairs have adjustable armrests, heights, recline, and even headrests. These features and adjustability are the perfect pieces that create comfort for any user, in any kind of situation, whether they require focus, or just to nap after work. Would I still use them if they don’t have these features? I doubt it at all.