
#####LINK TO THE GAME#####
#####CODE OF THE GAME#####
(Unfortunately my p5 seems down for no reason;
Project is temporarily hosted on GitHub)
intro
First of all, as the game design documentation in my progress report has included the essence of my project at large, I would try to focus more on the improvements and specificities I made in this second stage of developing my NEXT-GEN-SOMATIC-MOTION-SENSING-SPACE-SHOOTING-ACTION game, Motion Ship.
tech and concept DEVELOPMENT
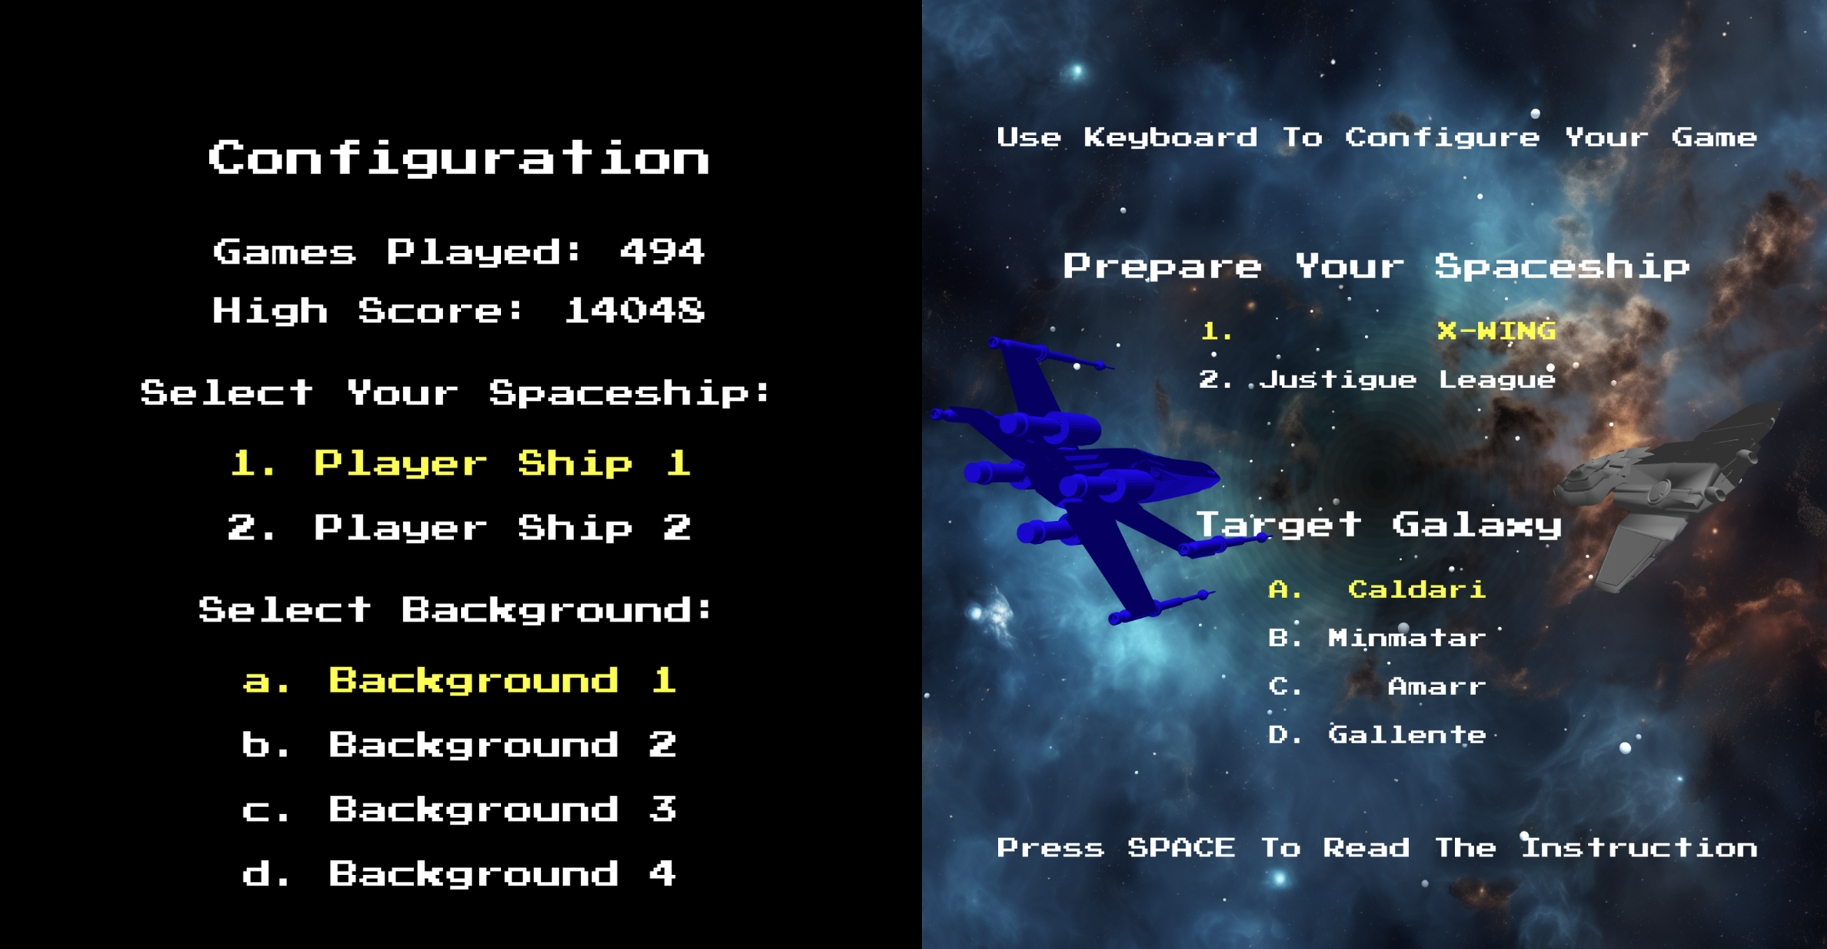
When it comes to the development of the project, I would say that there are two parts to the story: 1. To realize and polish my initial vision; 2. To make decisions in terms of removing elements from the plan or adding flavors to it (e.g., removing the audio level & mouse control to reduce the complexity of commands to only head motion and keyboard inputs).
1. Interactive Experience
As the centerpiece of the game, the realization of the concept of ‘controlling the spaceship with the player’s head motion’ was my primary objective. Although at the end of the first stage, I had achieved the basic mapping relationship between the head position detected by the ML model and the displayed position of the player spaceship in the game, there were still several awkward shortcomings, including:
- The ship respawns itself every frame in the head position directly instead of moving towards it smoothly. This was later tackled by introducing the smooth-approaching logic I used in my first project.
- The ship’s motion responsiveness to the head motion was too ‘authentic’, leading to the player’s having to literally move drastically in order to control the ship instead of intuitively directing the ship with slight movements. This was tackled by adding factors of motion sensitivity to the mapping relationship.
- The ship appeared to be ‘translating’ in space (although in terms of programming, it is), instead of reflecting the aerodynamic behavior of real aircraft. Thus, rotations in all three axes were introduced to simulate such effects.
update(headPos) {
  if (this.toDestroy === false) {
    // Update position based on head movement (-1 to 1 mapped to screen space)
    let targetX = map(headPos.x, -1, 1, -width, width);
    let targetY = map(headPos.y, -1, 1, -height * 1.5, height * 1.5);
    this.x += (targetX - this.x) * 0.15;
    this.y += (targetY - this.y) * 0.15;

    // Constrain the postion within the gaming zone (2.87 approx. 3 calculated from triangular perspective: fovy = 0.5, camZ = 800, shipZ = 280)
    this.x = constrain(this.x, -gamingZone.width / 3, gamingZone.width / 3);
    this.y = constrain(this.y, -gamingZone.height / 3, gamingZone.height / 3);

    // Update rotation based on head movement
    this.rotationX = map(-headPos.y, -1, 1, -PI / 3, PI / 3);
    this.rotationY = map(headPos.x, -1, 1, -PI / 10, PI / 10);
    this.rotationZ = map(headPos.x, -1, 1, -PI / 1.25, PI / 1.25);

    // Tactic engine reset
    if (this.tacticEngineOn === true) {
      let currentTime = millis();
      if (this.model === assets.models.playerShip1) {
        this.health = 100;
      } else {
        this.energy = 100;
      }
      if (currentTime - this.tacticEngineStart > 15000) {
        this.tacticEngineOn = false;
        if (this.model === assets.models.playerShip1) {
          this.health = 100;
        } else {
          this.energy = 100;
        }
      }
    }
2. Gameplay Aspect & UI
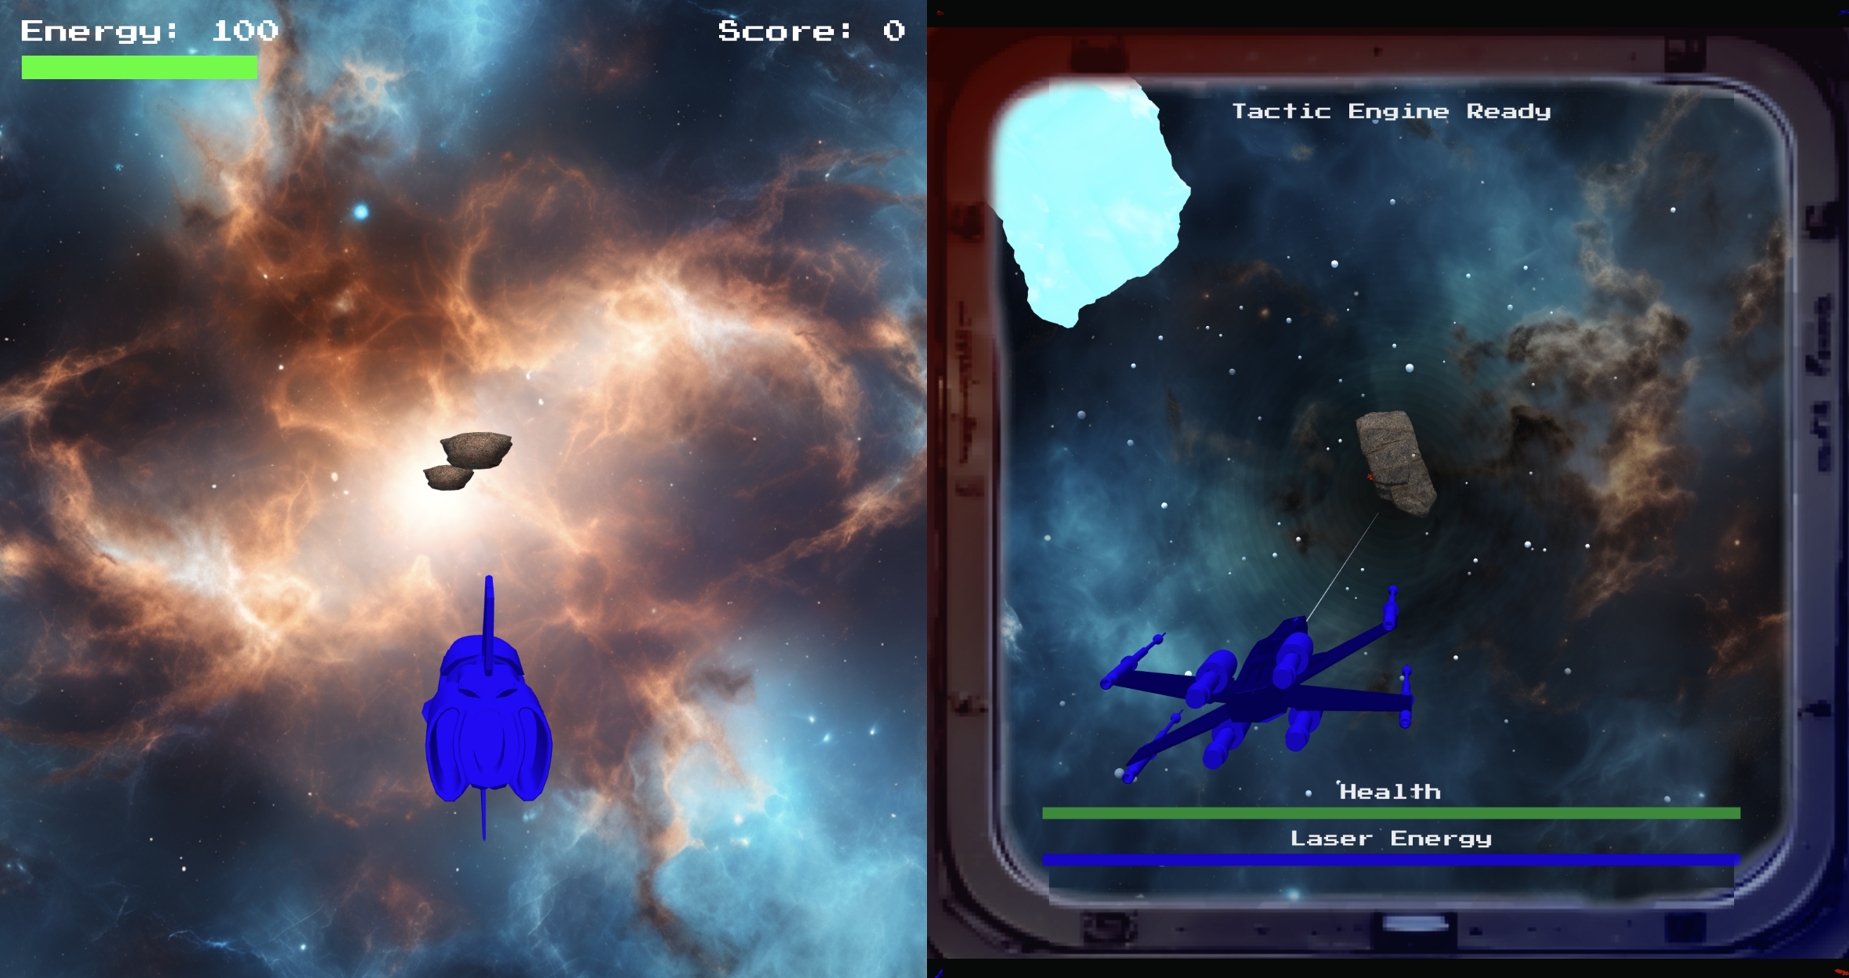
One major awkwardness I spotted then was that when the canvas aspect followed the window, the 3D spatial relationships between the objects and the visual distortion tended to be uncontrollable – for example, an enemyship could seem on the laser trajectory of the player when in the distance, but in fact it was an illusion introduced by perspectives. As a result, I devised several mechanisms to smooth out the experience, including:
- Define a definite gaming zone with constant aspect (1:1) on the window (regardless of whether the window is in vertical or landscape aspects).
- Trigonometrically calculate and confine the objects in the 3D space in relation to the camera position.
- Enlarge the collision box & the speed of the lasers fired to reduce difficulty when hitting moving enemies.
On top of that, other improvements besides the gaming zone include allowing enemy ships to launch lasers, incorporating different meteoroid models, displaying pilot logs and other info on the margin out of the gaming zone, displaying laser and health bar within the gaming zone, etc.
3. Visual Effects
To further improve the immersiveness of the gameplay, I made four major changes:
- Space dust randomly generates and flies towards the player’s ship, creating a sense of speed (compared to the insufficient indication of speed when there were only enemies and obstacles flying slowly towards the player).
class SpaceDust { constructor(maxParticles = 50) { this.maxParticles = maxParticles; this.particles = []; this.spawnRate = 2; // Number of particles to spawn each frame this.initParticles(); } // Initializes the particles array with empty particles. initParticles() { for (let i = 0; i < this.maxParticles; i++) { this.particles.push(this.createParticle()); } } /* Creates a single dust particle with random properties. @returns {Object} A particle with position, velocity, size, and lifespan. */ createParticle() { return { pos: createVector(random(-gamingZone.width / 2, gamingZone.width / 2), random(-gamingZone.height / 2, gamingZone.height / 2), -random(1000, 1500)), vel: createVector(0, 0, random(80, 100)), // random Z speed size: random(2, 4), lifespan: random(50, 200) // Frames the particle will live }; } // Updates all particles: moves them forward and resets them if necessary. update() { for (let i = 0; i < this.maxParticles; i++) { let p = this.particles[i]; p.pos.add(p.vel); p.lifespan --; // If the particle has passed the player or its lifespan ended, reset it if (p.pos.z > 300 || p.lifespan <= 0) { this.particles[i] = this.createParticle(); } } } // Renders all particles onto the screen. render() { push(); // Enable additive blending for a glowing effect blendMode(ADD); for (let p of this.particles) { push(); translate(p.pos.x, p.pos.y, p.pos.z); noStroke(); fill(255, 255, 255, map(p.lifespan, 0, 200, 50, 255)); // Fade out based on lifespan sphere(p.size); pop(); } blendMode(BLEND); // Reset to default blending pop(); } } - Vignette effect in the background to create depth instead of having all the objects floating on a plane.
loadBackgroundWithVignette(key, path) { loadImage(path, (img) => { const vignettedImg = this.applyVignette(img); this.textures[key] = vignettedImg; }); } applyVignette(img) { // Create a graphics buffer the same size as the image let gfx = createGraphics(img.width, img.height); gfx.clear(); // Parameters for the vignette let centerX = img.width / 2; let centerY = img.height / 2; let maxDiameter = max(img.width, img.height) * 1.25; gfx.noFill(); gfx.background(0, 0, 0, 0); // Ensure transparency gfx.blendMode(BLEND); // Draw multiple concentric ellipses to create a radial gradient for (let r = maxDiameter / 2; r > 0; r -= 20) { // Adjust alpha based on radius let alpha = map(r, 0, maxDiameter / 2, 40, 0); // intensity: darkest part = 50, larger the darker gfx.noStroke(); gfx.fill(0, 0, 0, alpha); gfx.ellipse(centerX, centerY, r, r); } // Convert gfx (p5.Graphics) to p5.Image let vignetteImage = gfx.get(); // Create a copy of the original image to avoid modifying it directly let processedImg = img.get(); // Blend the vignette image onto the processed image using MULTIPLY mode processedImg.blend(vignetteImage, 0, 0, vignetteImage.width, vignetteImage.height, 0, 0, processedImg.width, processedImg.height, MULTIPLY); return processedImg; } - Parallax effect of the background to increase the responsiveness of environment to the player’s motion.
class Background { constructor(texture) { this.texture = texture; this.xOffset = 0; this.yOffset = 0; this.playerPreviousX = null; this.playerPreviousY = null; this.parallaxFactor = 250; // Adjust for parallax strength } update(playerX, playerY) { let playerMovementX = playerX - this.playerPreviousX; let playerMovementY = playerY - this.playerPreviousY; // Calculate the background offset this.xOffset += playerMovementX * this.parallaxFactor; this.yOffset += playerMovementY * this.parallaxFactor; this.playerPreviousX = playerX; this.playerPreviousY = playerY; } render() { push(); translate(-this.xOffset, -this.yOffset, -5000); // Positioned far in the background noStroke(); texture(this.texture); // Render a large plane to cover the background area plane(width * 7.5, height * 7.5); pop(); } } - The windshield (although only frames) around the gaming zone to enhance the sense of an FPP piloting experience.
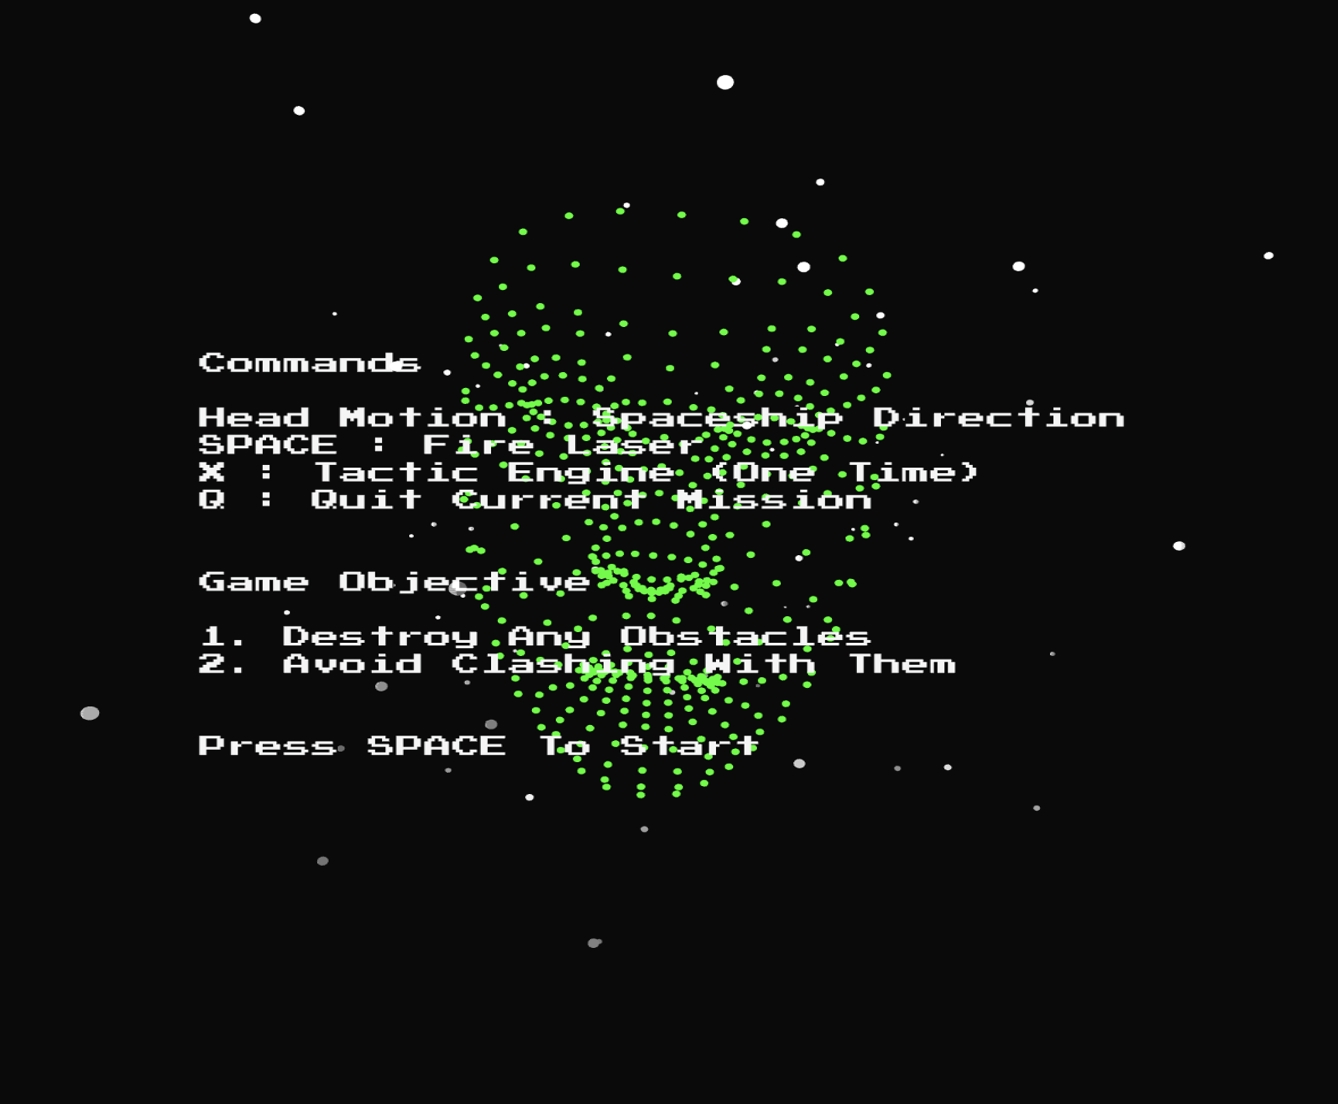
4. Game Flow
After hearing feedback from several friends, I decided to add an instruction page before entering the gameplay to make life easier for the players.
In addition, I also enabled the player to restart the game immediately instead of having to restart from scratch or reconfigure the game.
5. Storytelling
Last but not least, one of the most illuminating takeaways from developing this project is to recognize and accommodate the gap between a developer’s understanding/assumption and the players’ ‘infinite’ possibilities to approach the product. For example, displaying the variable names on the screen or using them in the instructions seems to be clear enough for me during the development, while a player may not have enough experience or interest to distinguish and follow.
Therefore, I replaced the variable names with terms of more meaning within the space action worldview to create more intuitive guidelines for the player with the aid of visual indications.
SOme words, in hindsight
It is true that there is no ‘perfection’ in terms of finishing a project – at this point, I still have many ideas to add to the game if regarding it as a game to publish or so, including level design, more value balance, more storytelling, enemy and obstacle varieties, bosses, more tactic engines (special skills of each ship), more consistent aesthetics, and so on. On the other hand, I found myself quite satisfied with this current presentation – in terms of me utilizing wheels and knowledge learned in the process, trying to think not only from a developer perspective, and establishing a coherent storytelling through a product, etc. And it made me more excited to get into the physical programming.