Assignment 7 – Music Box! (by Jheel and Linda)

For this project, Jheel came up with this really cool idea of a music box. The basic concept is that the music box will play music when exposed to light and pause when it’s dark. To achieve this, we used a photoresistor as the analog sensor to detect light and a button as the digital sensor for manual control over music playback. 

Please find the demonstration here

Components and Setup

To make it achieve the soothing effect of a music box, we also adjusted the appearance and the speaker.

  • Adafruit Arduino Music Maker Shield: This allows us to play music files from an SD card, controlled via the Arduino. By downloading the corresponding library, we ensured smooth playback.
  • Speaker Attachment: We initially tried a buzzer, but it produced a harsh, mechanical sound that didn’t match our desired soothing effect. We switched to a consumable speaker from the IM lab, which provided a richer and more pleasant sound. We connected the speaker to the Music Maker Shield for optimal sound quality.
  • Circuit with Photoresistor: We programmed the photoresistor to detect light levels, pausing music playback when it’s dark and resuming when light is detected.
  • Push Button: We added a push button to switch between multiple music files, allowing users to vary their listening experience.
  • Prototyping Shield and Battery: To make the setup compact enough to fit inside the box, we transitioned from a breadboard to a prototyping shield. Adding a battery also made the setup portable, enhancing usability.

Code

Please find the Github Link here

Challenges

One major challenge was achieving the desired sound quality. As tested in class, the initial buzzer didn’t deliver the calm, melodic experience we wanted, so switching to a consumable speaker improved the overall audio quality. There was wiring & compatibility issue with the speaker, thus we have to fix it by adjusting the breadboard. 

Since traditional music boxes are often crafted from wood, we used our recent woodworking skills to create an elegant wooden enclosure. We sourced templates for the box online and used a laser cutter (ofc with the help of lab asisstants) to make a precise, polished exterior.

After a few rounds of trial and error with different templates, we arrived at a design that worked well for housing the components. To personalize it further, we designed an engraving for the top using Adobe Illustrator and laser-cut the design, adding a refined aesthetic touch.

After laser-cutting the box and engraving the design, we assembled all the components inside. The transition from breadboard to prototyping shield and the compact battery setup allowed everything to fit neatly within the box.

A Brief Rant on the Future of Interaction Design

In A Brief Rant on the Future of Interaction Design, Bret Victor argues that most interaction design today isn’t meaningful enough. He believes designers focus too much on making things look nice on screens rather than creating tools that help people think or solve real problems. This stood out to me because I agree that design should do more than just look good—it should make our lives easier or allow us to do more.

As someone studying computer science and interested in interactive media, I think Victor’s ideas are important. He makes me want to focus on designing tools that actually help users accomplish things rather than just looking nice. His views remind me that good design should be about creating real benefits for people, not just entertainment or convenience.

The responses to A Brief Rant on the Future of Interaction Design show different views. Some people agree with Victor and think design should be more useful, while others say his ideas are too difficult to make real. One response I read pointed out that many companies prefer simple screen designs because they make money more easily. This made me think about the challenges of aiming high in design while facing real-life limits, like budgets or technology.

These responses remind me that good design is a balance between what’s possible and what’s ideal. While Victor’s ideas are inspiring, they also show the need for practical solutions. Moving forward, I want to think more about how to push for meaningful design within real-world limits.

Reading Reflection – Week #10

Reading Bret Victor’s “rant” on the future of interaction design sparked a myriad of thoughts for me. His critique of touchscreens and how we are moving away from hands-on interaction is surprisingly relevant even though the article was written more than a decade ago.

One of the most striking points was Victor’s emphasis on the importance of hand as the true measure of a tool’s capability. I’d never thought of it this way: our hands not only manipulate objects, but they also shape our understanding of the physical world. If we’re constantly tapping and swiping on flat screens, are we limiting our brains as well as our bodies? It reminds me of the difference between learning something hands-on, like playing an instrument, versus passively watching a video. Both activities are valuable, but one engages the whole body and mind in a way that feels essential. The fact that modern-day children are learning to use touchscreens before they can tie their shoes is impressive, but is it the progress we need? It is, in fact, totally possible to avoid sacrificing our innate capabilities for the sake of innovation. But if we keep focusing on screen-based interactions, we might be undermining our potential to use our hands — and by extension, our creativity.

Even though Victor doesn’t provide specific answers or solutions in these articles,  I think he calls for more exploration into technologies that can genuinely integrate our physical abilities. For me, reading these pieces was an important reminder that it is technology that adapts to human nature, not the other way around — something to keep in mind as an aspiring interaction designer.

Assignment 7 – Music Box! (by Jheel and Linda)

For this assignment, our task was to create a musical instrument using Arduino (involving at least one digital and one analog sensor).

Inspiration

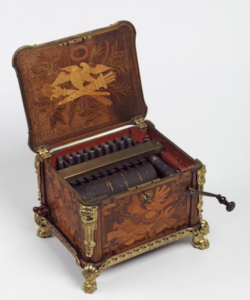
While initially brainstorming ideas for this project I thought a lot about conventional musical instruments (like the piano and guitar) and about recreating them in some way. But in the end, I decided that I wanted to do something more personal and unique. I suddenly remembered how I’ve always loved music boxes (since I was a kid) and found them really cute. If you don’t know what a music box is, it’s basically a small, nicely decorated box that plays music when you open it. Many of them also involve twisting a handle multiple times in order to get the music to play. Also, the resulting music is usually just a soft and soothing instrumental song.

So, for this project, we decided to make a simple version of a music box!

Concept

 The basic concept of this project is that the music box will play music when exposed to light and pause when it’s dark. To achieve this, we used a photoresistor as the analog sensor to detect light and a button as the digital sensor to be able to switch between songs. For simplicity, we used three tracks that keep rotating among each other every time the button is pressed.

Implementation

Components and Setup

To bring this vision to life, we used:

  • Adafruit Arduino Music Maker Shield: This allows us to play music files from an SD card, controlled via the Arduino. By downloading the corresponding library and integrating the shield on the Arduino, we ensured smooth playback of direct mp3 files.
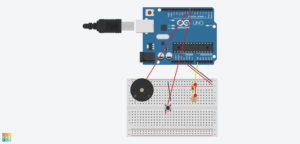
  • Speaker Attachment: We initially thought we could use a buzzer, but we realized it produced a harsh, mechanical sound that didn’t match our desired soothing effect. We then switched to a consumable speaker from the IM lab, which provided a richer and more pleasant sound. We connected the speaker to the Music Maker Shield for optimal sound quality.
  • Circuit with Photoresistor: We programmed the photoresistor to detect light levels, pausing music playback when it’s dark and resuming when light is detected.
  • Push Button: We added a push button to switch between multiple music files, allowing users to vary their listening experience.
  • Prototyping Shield and Battery: To make the setup compact enough to fit inside the box, we transitioned from a breadboard to a prototyping shield. Adding a battery also made the setup portable, enhancing usability.
Crafting the Wooden Box

Since traditional music boxes are often crafted from wood, we decided to make an elegant wooden enclosure for the circuit. We sourced templates for the box online and used a laser cutter (with the help of lab assistants of course) to neatly cut the different pieces of the box, which could then be glued together to create a polished exterior.

 After a few rounds of trial and error with different templates, we arrived at a design that worked well for housing the components. To personalize it further, we designed a music-themed engraving for the top using Adobe Illustrator and laser-cut the design, adding a refined aesthetic touch.

Code

Github URL

Here’s some of the code that’s responsible for switching between songs:

// Check if button was pressed
  int buttonState = digitalRead(buttonPin);
  Serial.println(buttonState); // Prints the button state for debugging
  Serial.println(songs[songIndex]);

  if (buttonState == 1 && lastButtonState == 0) {  // Button press detected
    // musicPlayer.pausePlaying(true);
    musicPlayer.stopPlaying();
    delay(50);  // Debounce delay
    songIndex = (songIndex + 1) % 3;  // Move to the next song in the array
    musicPlayer.startPlayingFile(songs[songIndex]);  // Play the next song
    // Serial.println(songs[songIndex]);
    
  }
  lastButtonState = buttonState;

  // File is playing in the background
  if (musicPlayer.stopped()) {
    musicPlayer.startPlayingFile(songs[songIndex]);
  }


Challenges

One major challenge was achieving the desired sound quality. As tested in class, the initial buzzer didn’t deliver the calm, melodic experience we wanted, so switching to a consumable speaker improved the overall audio quality. We occasionally encountered malfunctions, likely due to wiring or compatibility issues with the speaker, and are continuing to troubleshoot these.

Final Assembly

After laser-cutting the box and engraving the design, we assembled all the components inside. The transition from breadboard to prototyping shield and the compact battery setup allowed everything to fit neatly within the box.
Reflections and Further Improvements

In the end, we were pretty happy with the modernized feel of the music box that combines traditional charm with interactive technology. By responding to light, the music box offers a unique, customizable listening experience that blends classic design with new-age tech.

Further improvements could include adding more sound files and testing different speakers to improve sound quality. We could even attempt to make it like a traditional music box with a rotating handle on the side and maybe even some visual rotating elements.

Assignment 10: If fairies played the piano 🧚‍♀️ (Musical Instrument)

Concept

Aysha and I designed a musical instrument that merges digital and analog elements to create an interactive, light-based piano. Our idea centers around a glowing wand that functions as a control interface. When moved over the keys, the wand activates notes from the C major scale (C, D, E, F, and G) like magic, and the brightness of its glow determines the octave. We integrated a potentiometer to adjust brightness, allowing users to easily shift the octave up or down. Additionally, we added a switch to toggle the instrument off, which prevents accidental note activation—particularly useful to avoid unintended sounds from ambient light sources like flashlights.

Details

To bring our vision to life, we used five photoresistors to detect light from the wand and mapped each sensor’s range to specific notes (C, D, E, F, and G) and their octave scales. By setting sensor thresholds from a default minimum to a maximum value that a flashlight might produce, we could dynamically adjust the octave based on the brightness the photoresistor detects. Essentially, the brighter the wand, the higher the octave, allowing for an expressive range in tone.

For the wand itself, we created a purple glow using an RGB LED, giving the instrument an ethereal fairy-like visual quality. A potentiometer is attached to the LED to control brightness, making it easy for users to adjust the octaves.

Demo

(peep Aysha’s amazing vocals)


Code snippet

To vary the brightness of the RGB LED we used a potentiometer. By using the sensor reading from the potentiometer, we used it as a percentage and fed it through a setColor function (from here) similar to how the alpha parameter does in an RGBA function. This way we can vary the intensity of each of the red, green, and blue LEDs in the RGB LED to control the overall brightness of the purple color.

void  loop() {
  // reading sensor value from potentiometer
  sensorVal = analogRead(potPin);
  brightness = (double)sensorVal / 1023;
  Serial.println(brightness);
  
  setColor(170, 0, 255, brightness); // purple color
}

// function from (https://projecthub.arduino.cc/semsemharaz/interfacing-rgb-led-with-arduino-b59902)
void setColor(int redValue, int greenValue,  int blueValue, double brightValue) {
  analogWrite(redPin, (double) redValue * brightValue);
  analogWrite(greenPin,  (double) greenValue  * brightValue);
  analogWrite(bluePin, (double) blueValue  * brightValue);
}

Code

Wand Code

Keyboard Code

Circuit illustration

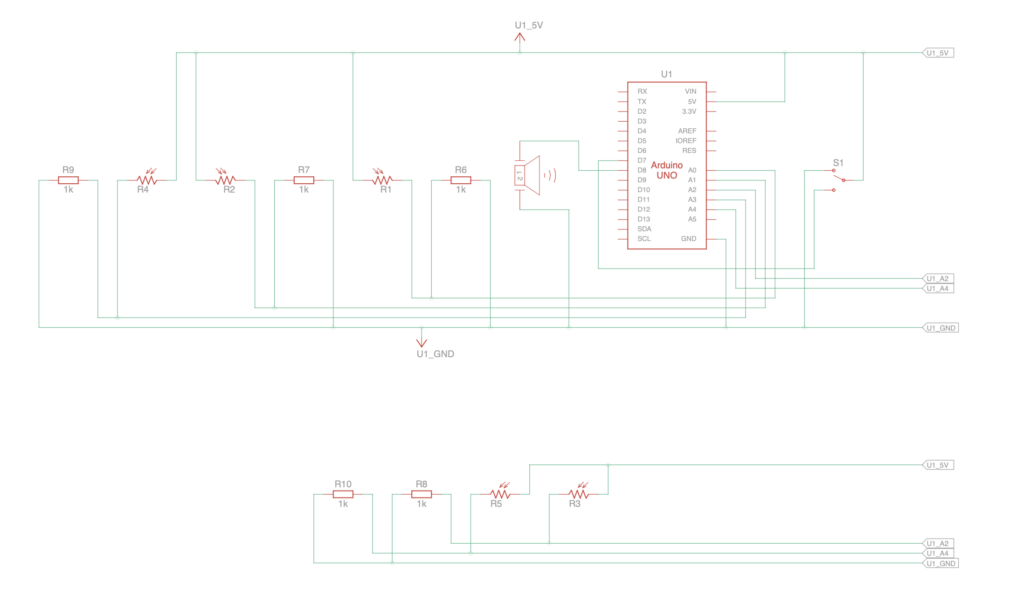
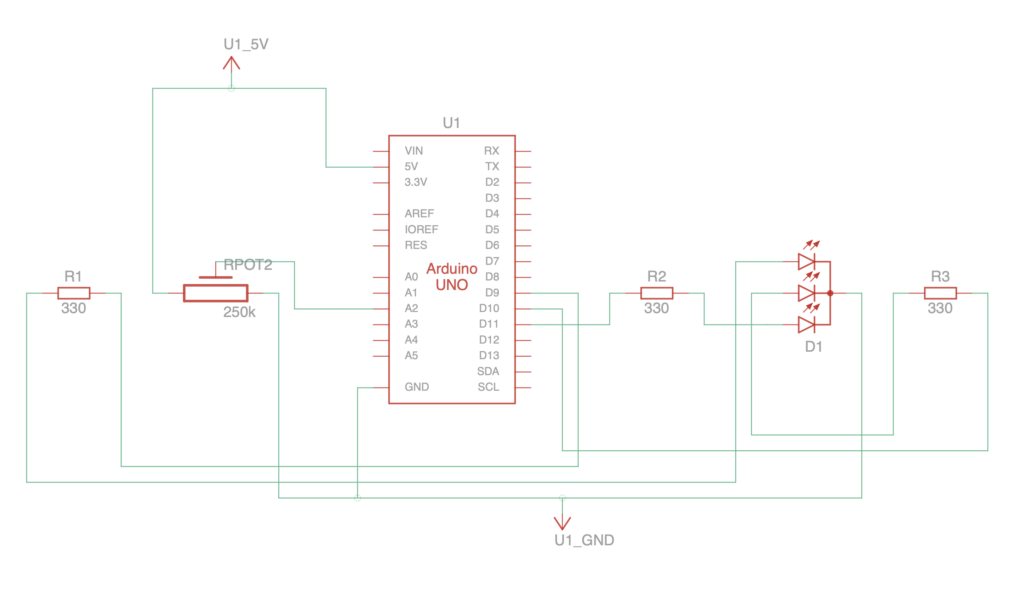
Schematics

Keyboard:

Wand:

Reflection

This was a really fun project to make! I think in the future if we had more space we could have added more photoresistors to act as more keyboard keys and thus have more notes that are playable, or add a second wand which allows two fairies to play the piano!

Reading Reflection 10: A Brief Rant on the Future of Interaction Design

After reading Bret Victor’s rant on how technology is growing and how the future is illustrated as filled with fingers swiping on a screen, a phenomenon he calls “picture under glass”, I found myself thinking of how the current events could look like for the future.

Yes there is the image of a developed future with advanced technologies everywhere. But seeing how the internet and its trend culture affects the development people’s preferences, maybe the future isn’t set to just be about advanced technologies.

Take the digicam trend right now: people are going back to using digicams over their iPhone cameras to get that aesthetic retro look to their photos. Then there is also that Y2K fashion trend. Again and again, people are finding things from ‘back then’ interesting and bringing it back to its peak.

I personally like this part about society; finding the joy in things that other people used to enjoy in another era of time, that may have been long forgotten.

Reading Response 7

A Brief Rant on the Future of Interaction Design

In A Brief Rant on the Future of Interaction Design, Bret Victor questions why so many modern interfaces are stuck in the world of touchscreens and flat gestures, like tapping and swiping. He’s frustrated by how much these designs ignore our hands’ full potential—hands that can feel, manipulate, and explore in so many ways. Victor argues that truly forward-thinking design would tap into all those physical abilities instead of confining us to “pictures under glass.”

I found myself agreeing with Victor. His critique of touchscreens as limiting felt spot-on, especially when he pointed out how little variety there is in most of our interactions with technology. Tapping a flat screen is easy, sure, but is it really the best we can do? I think he’s right that we’re missing out on richer, more engaging ways to interact with digital content, ways that could make technology feel more natural and even enjoyable.

What grabbed me most was Victor’s emphasis on designing for our full physical range. It made me think about how much more immersive technology could be if it didn’t just stop at the screen. Victor’s vision feels like a reminder to keep pushing for designs that feel human, not just efficient, and to reimagine what “interaction” could mean beyond the usual taps and swipes.

Assignment 8 – Musical Instrument – Radio Perhaps? (Updated)

Concept

After playing with different songs from the GitHub folder, we have decided to include several of them at the same time into our interpretation of a musical instrument. One way to do so would be to switch between three songs back and forth, creating a version of a radio with changing stations. Three classical compositions were chosen: Ode to Joy, Fur Elise, and Badinerie. However, this idea could be realised simply with two digital switches, so we decided to push it further by adding photoresistors that would allow us to work with a spectrum of values.

In what ways can a melody be altered while playing? Its volume or playback speed can be changed – as such, we decided to take values from one photoresistor to set up how loud the song was playing, and the other to set up the speed. A combination of all these electrical components helped us to create an advanced version of a radio, resembling a music player that allows to modify certain qualities of the sound.

Highlight of the code

:^)

Demonstration

IMG_9132

Reflection

Although we did not expect this idea to be so complex, we have faced serious difficulties in implementing the functions of switches – the audio kept repeating itself without any response to the change of digital or analog values. After troubleshooting the whole code using Serial.print(), we decided to ask the professor for help in order to finally tackle the issue.

Update

After a week of troubleshooting, changing the Arduino code and circuit, we still couldn’t figure out a way for project to work as we intended. Therefore, we introduced new idea of a player that will reflect the mood of the room based on its lightning. So we integrated photoresistor and a button. Based on how lighted the setting was, if moderate to highly lighted, the piezo buzzer would play major melody (happy), and if lighting was low, minor melody (sad) was played. The button was used to stop the play of the melody completely. When the button is pressed, melody is silenced.

Here is a link to the Arduino code.

We think the most complex part with working on this new idea, just like it was on the previous one was working with buttons, since it had to stop the play of the melody. We could finally resolve this by introducing boolean variables and setting them throughout the code.

void loop() {
  int lightValue = analogRead(lightPin);
  buttonState = digitalRead(buttonPin);

// checking if button is pressed
  if (buttonState == LOW && lastbuttonstate == HIGH) { 
    isPlaying = false;
    noTone(buzzerPin); // stop playing when button is pressed
  }
  lastbuttonstate = buttonState;

  if (!isPlaying) {
    if (lightValue > 600) {
      playMelody(melody1, duration1, melody1Length); //playing happy melody when sensor value is higher than 600
    } else {
      playMelody(melody2, duration2, melody2Length); //playing sad melody when sensor value is lower than 600
    }
  }

  delay(100);
}

void playMelody(int melody[], int duration[], int length) {
  isPlaying = true; // setting playing state of the melody
  for (int i = 0; i < length; i++) {
    if (digitalRead(buttonPin) == LOW) { 
      noTone(buzzerPin);
      isPlaying = false;
      return;
    }
    tone(buzzerPin, melody[i], duration[i]);
    delay(duration[i] * 1.3); //adding delay between notes
  }
  isPlaying = false; 
}

Here is the video of how it works:

IMG_9268

Week 10: Musical Instrument – Radio Perhaps?

Concept:

After playing with different songs from the GitHub folder, we have decided to include several of them at the same time into our interpretation of a musical instrument. One way to do so would be to switch between three songs back and forth, creating a version of a radio with changing stations. Three classical compositions were chosen: Ode to Joy, Fur Elise, and Badinerie. However, this idea could be realised simply with two digital switches, so we decided to push it further by adding photoresistors that would allow us to work with a spectrum of values.

In what ways can a melody be altered while playing? Its volume or playback speed can be changed – as such, we decided to take values from one photoresistor to set up how loud the song was playing, and the other to set up the speed. A combination of all these electrical components helped us to create an advanced version of a radio, resembling a music player that allows to modify certain qualities of the sound.

Highlight of the code:

:^)

Demonstration:

IMG_9132

Update

After a week of troubleshooting, changing the Arduino code and circuit, we still couldn’t figure out a way for project to work as we intended. Therefore, we introduced new idea of a player that will reflect the mood of the room based on its lightning. So we integrated photoresistor and a button. Based on how lighted the setting was, if moderate to highly lighted, the piezo buzzer would play major melody (happy), and if lighting was low, minor melody (sad) was played. The button was used to stop the play of the melody completely. When the button is pressed, melody is silenced.

Here is a link to the Arduino code.

We think the most complex part with working on this new idea, just like it was on the previous one was working with buttons, since it had to stop the play of the melody. We could finally resolve this by introducing boolean variables and setting them throughout the code.

void loop() {
  int lightValue = analogRead(lightPin);
  buttonState = digitalRead(buttonPin);
// checking if button is pressed
  if (buttonState == LOW && lastbuttonstate == HIGH) { 
    isPlaying = false;
    noTone(buzzerPin); // stop playing when button is pressed
  }
  lastbuttonstate = buttonState;
  if (!isPlaying) {
    if (lightValue > 600) {
      playMelody(melody1, duration1, melody1Length); //playing happy melody when sensor value is higher than 600
    } else {
      playMelody(melody2, duration2, melody2Length); //playing sad melody when sensor value is lower than 600
    }
  }
  delay(100);
}
void playMelody(int melody[], int duration[], int length) {
  isPlaying = true; // setting playing state of the melody
  for (int i = 0; i < length; i++) {
    if (digitalRead(buttonPin) == LOW) { 
      noTone(buzzerPin);
      isPlaying = false;
      return;
    }
    tone(buzzerPin, melody[i], duration[i]);
    delay(duration[i] * 1.3); //adding delay between notes
  }
  isPlaying = false; 
}


Here is the video of how it works:

IMG_9268

Reflection:

Although we did not expect this idea to be so complex, we have faced serious difficulties in implementing the functions of switches – the audio kept repeating itself without any response to the change of digital or analog values. After troubleshooting the whole code using Serial.print(), we decided to ask the professor for help in order to finally tackle the issue.

Reading reflection: Hands but more than hands

I think it’s fascinating to reflect on how much progress we’ve made in terms of integrating hand-detection technology into everyday devices, which feel quite seamless and intuitive. Hands were and still are the primary means of interaction across so many devices. It’s almost second nature to use gestures to navigate or manipulate digital spaces, and hand-based interactions are practically embedded into our muscle memory. I remember being impressed by Apple’s raise to wake function, where the device responds to being picked up or set down. This interaction, though subtle, demonstrates the extent to which technology can now “read” our intentions through physical movement alone. It creates a natural, almost invisible interaction layer that feels practical in the sense that it anticipates the user’s needs without requiring a button press. 

Also I love how he just writes a response to the comments. Looking back at the early days of blogging, it’s amazing to see how it created a platform for public discourse and enabled personal voices to connect. Blogging sparked what was perhaps the first truly global online community, which also reminds me of the previous discussion of how designers should stand in the shoes of the users when building the interactions. Many of the interactive and social principles of that era laid the groundwork for today’s principles of interactive art.