The final product for you convenience is here: https://youtu.be/62UTvttGflo
Concept:
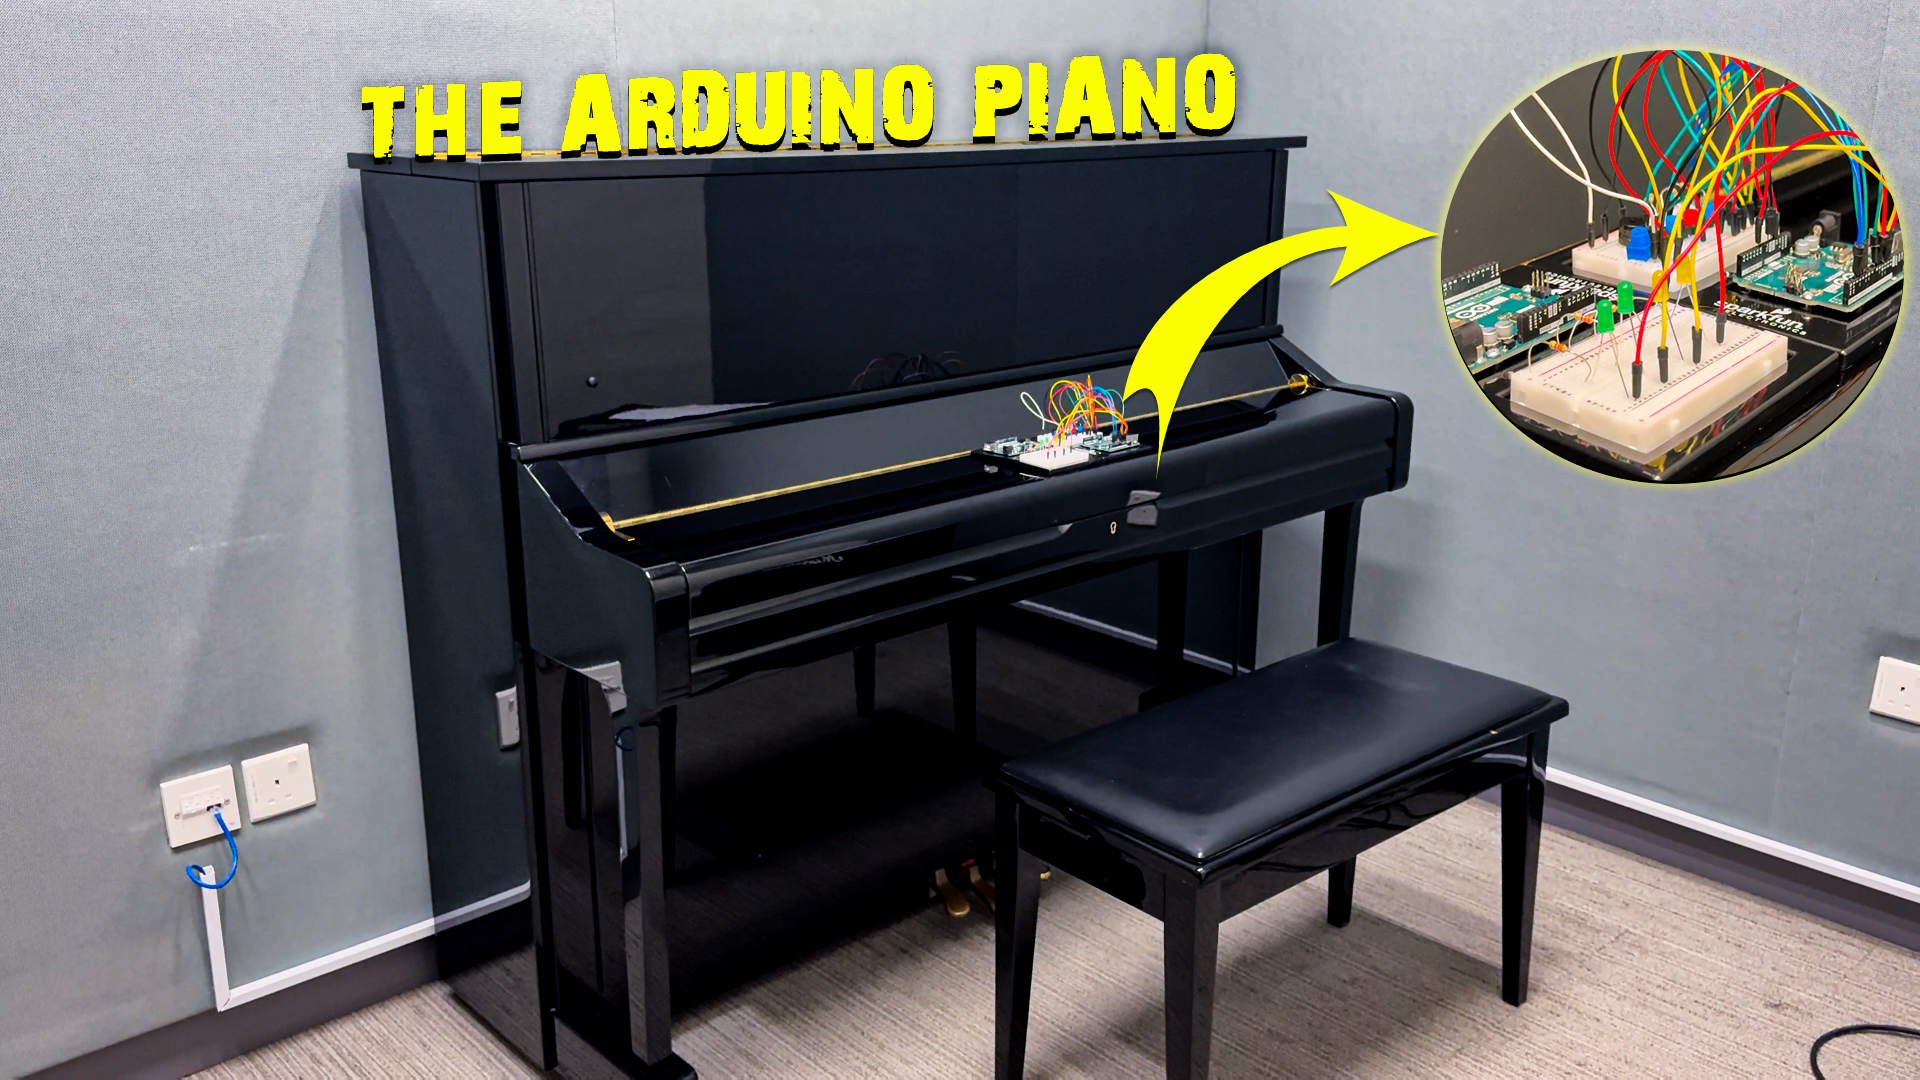
The motivation behind our project was to create a unique piano-like instrument using Arduino circuits. By utilizing two breadboards, we had a larger workspace, allowing for a more complex setup. We incorporated a potentiometer as a frequency controller—adjusting it changes the pitch of the sounds produced, making the instrument tunable. To enhance the experience, we added synchronized LED lights, creating a visual element that complements the sound. This combination of light and music adds a fun, interactive touch to the project. Here’s the project cover:
The tools used for this project were: The potentiometer, Piezo Speaker, LEDs, 10k & 330 ohm resistors, push buttons and jump wires.
Execution:
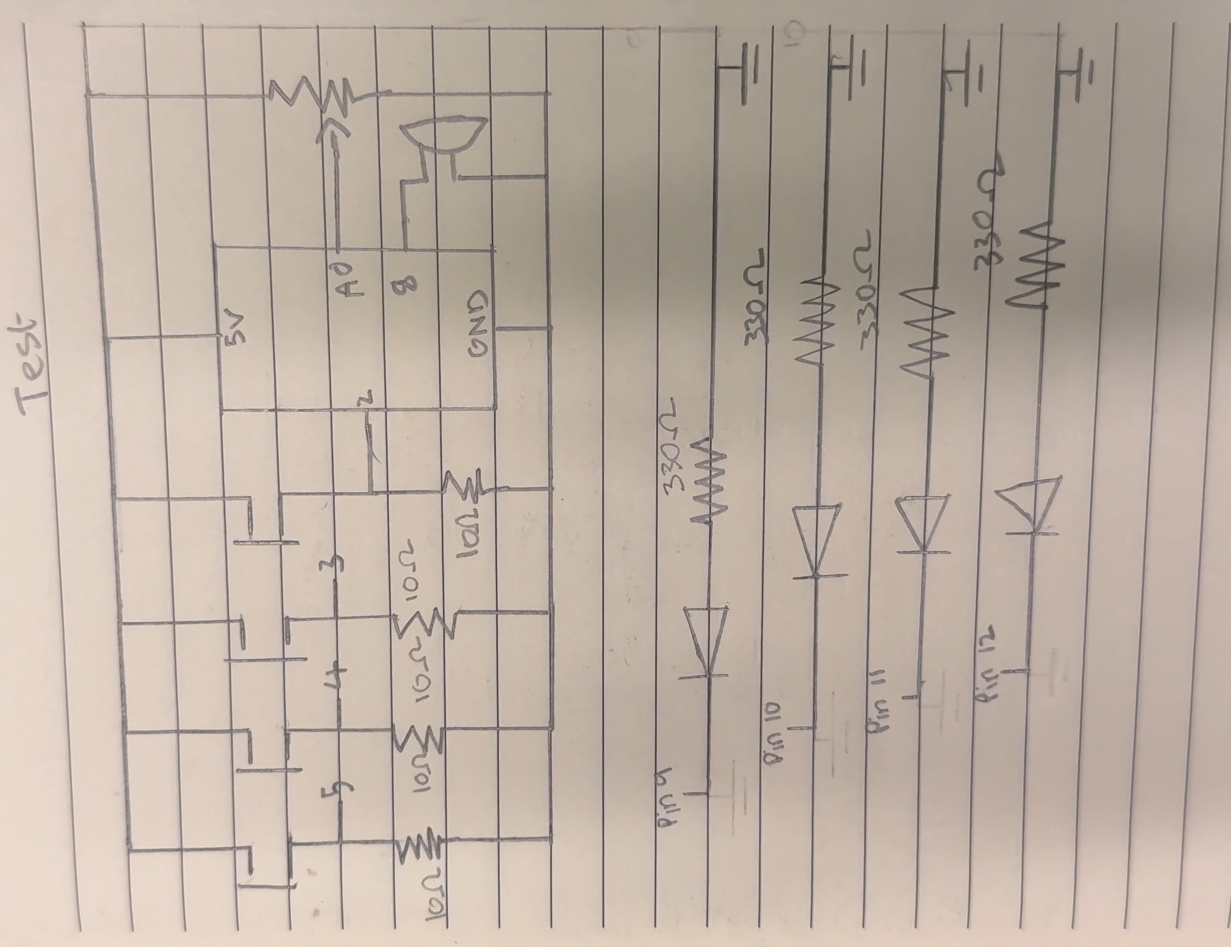
The following was the schematic for our project, which served as the foundation that allowed us to successfully execute this project:
The following Arduino code snippet brought our project to life, controlling both sound and light to create an interactive musical experience:
void setup() {
  // Set button and LED pins as inputs and outputs
  for (int i = 0; i < 4; i++) {
    pinMode(buttonPins[i], INPUT);       // Button pins as input
    pinMode(ledPins[i], OUTPUT);         // LED pins as output
  }
  pinMode(piezoPin, OUTPUT);             // Speaker pin as output
}

void loop() {
  int potValue = analogRead(potPin);                    // Read potentiometer value
  int pitchAdjust = map(potValue, 0, 1023, -100, 100);  // Map pot value to pitch adjustment range

  // Check each button for presses
  for (int i = 0; i < 4; i++) {
    if (digitalRead(buttonPins[i]) == HIGH) {         // If button is pressed
      int adjustedFreq = notes[i] + pitchAdjust;      // Adjust note frequency based on potentiometer
      tone(piezoPin, adjustedFreq);                   // Play the adjusted note
      digitalWrite(ledPins[i], HIGH);                 // Turn on the corresponding LED
      delay(200);                                     // Delay to avoid rapid flashing
      noTone(piezoPin);                               // Stop the sound
      digitalWrite(ledPins[i], LOW);                  // Turn off the LED
    }
  }
}
Finally, the final project can be found here: https://youtu.be/62UTvttGflo
Reflection:
Although our project may seem simple, we encountered several challenges during its development. Initially, we accidentally placed the digital pins incorrectly, preventing the project from functioning as expected. After hours of troubleshooting, we sought help to identify the issue. This experience turned into a valuable teamwork activity, helping us grow as students and problem-solvers. I view challenges like these as opportunities to build skills I can apply to future projects, including my final one. To enhance this project further, I would improve its visual design and sound quality to make it more appealing to a wider audience. That’s all for now!


