Concept
Aysha and I designed a musical instrument that merges digital and analog elements to create an interactive, light-based piano. Our idea centers around a glowing wand that functions as a control interface. When moved over the keys, the wand activates notes from the C major scale (C, D, E, F, and G) like magic, and the brightness of its glow determines the octave. We integrated a potentiometer to adjust brightness, allowing users to easily shift the octave up or down. Additionally, we added a switch to toggle the instrument off, which prevents accidental note activation—particularly useful to avoid unintended sounds from ambient light sources like flashlights.
Details
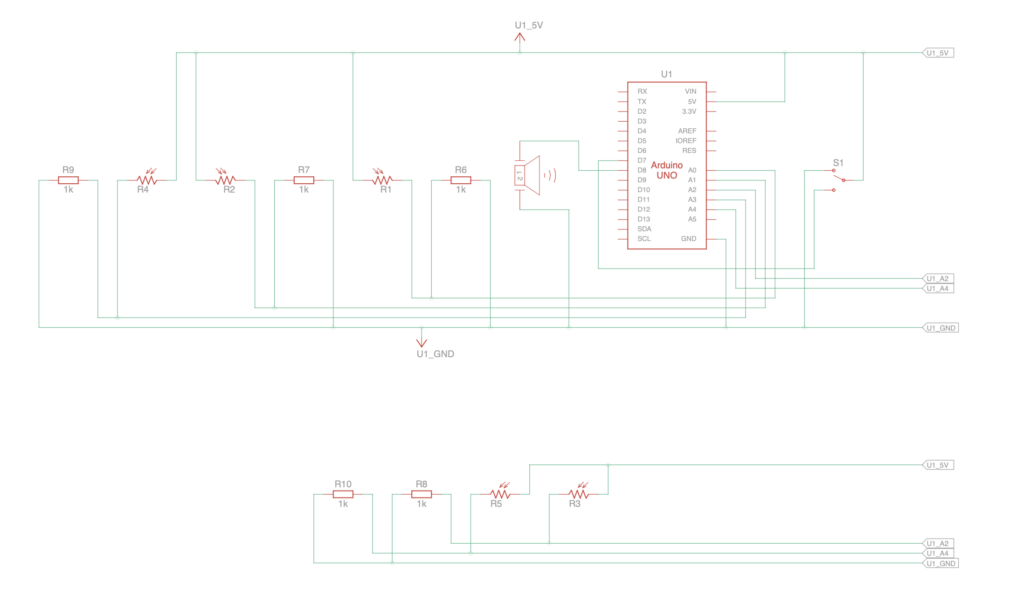
To bring our vision to life, we used five photoresistors to detect light from the wand and mapped each sensor’s range to specific notes (C, D, E, F, and G) and their octave scales. By setting sensor thresholds from a default minimum to a maximum value that a flashlight might produce, we could dynamically adjust the octave based on the brightness the photoresistor detects. Essentially, the brighter the wand, the higher the octave, allowing for an expressive range in tone.
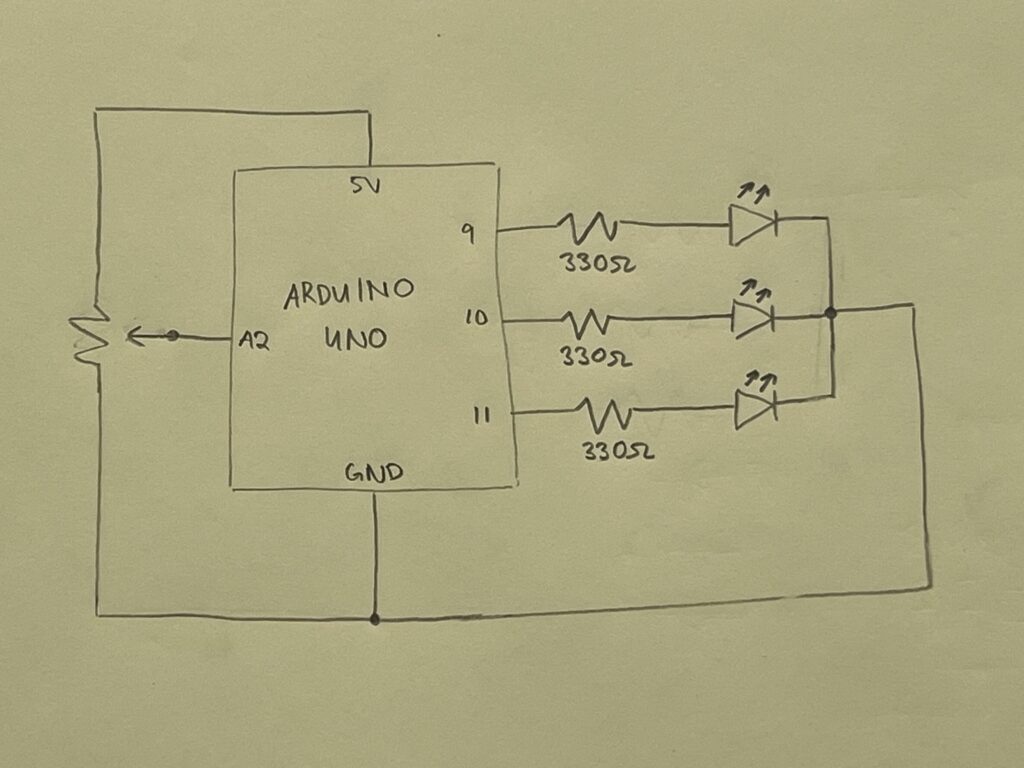
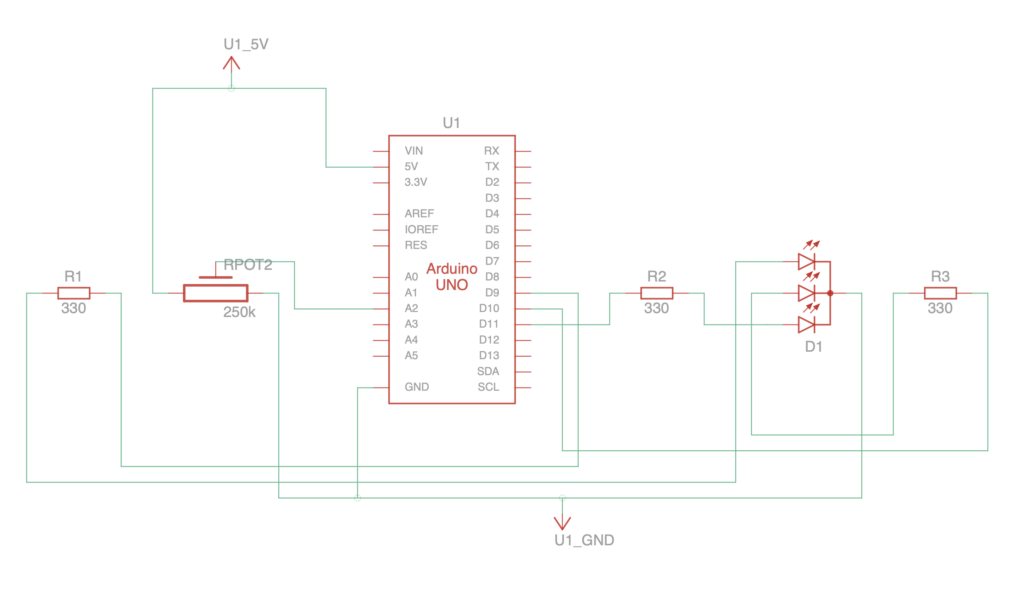
For the wand itself, we created a purple glow using an RGB LED, giving the instrument an ethereal fairy-like visual quality. A potentiometer is attached to the LED to control brightness, making it easy for users to adjust the octaves.
Demo
(peep Aysha’s amazing vocals)
Code snippet
To vary the brightness of the RGB LED we used a potentiometer. By using the sensor reading from the potentiometer, we used it as a percentage and fed it through a setColor function (from here) similar to how the alpha parameter does in an RGBA function. This way we can vary the intensity of each of the red, green, and blue LEDs in the RGB LED to control the overall brightness of the purple color.
void  loop() {
  // reading sensor value from potentiometer
  sensorVal = analogRead(potPin);
  brightness = (double)sensorVal / 1023;
  Serial.println(brightness);

  setColor(170, 0, 255, brightness); // purple color
}

// function from (https://projecthub.arduino.cc/semsemharaz/interfacing-rgb-led-with-arduino-b59902)
void setColor(int redValue, int greenValue,  int blueValue, double brightValue) {
  analogWrite(redPin, (double) redValue * brightValue);
  analogWrite(greenPin,  (double) greenValue  * brightValue);
  analogWrite(bluePin, (double) blueValue  * brightValue);
}
Code
Circuit illustration
Schematics
Keyboard:
Wand:
Reflection
This was a really fun project to make! I think in the future if we had more space we could have added more photoresistors to act as more keyboard keys and thus have more notes that are playable, or add a second wand which allows two fairies to play the piano!


