Concept & Inspiration.
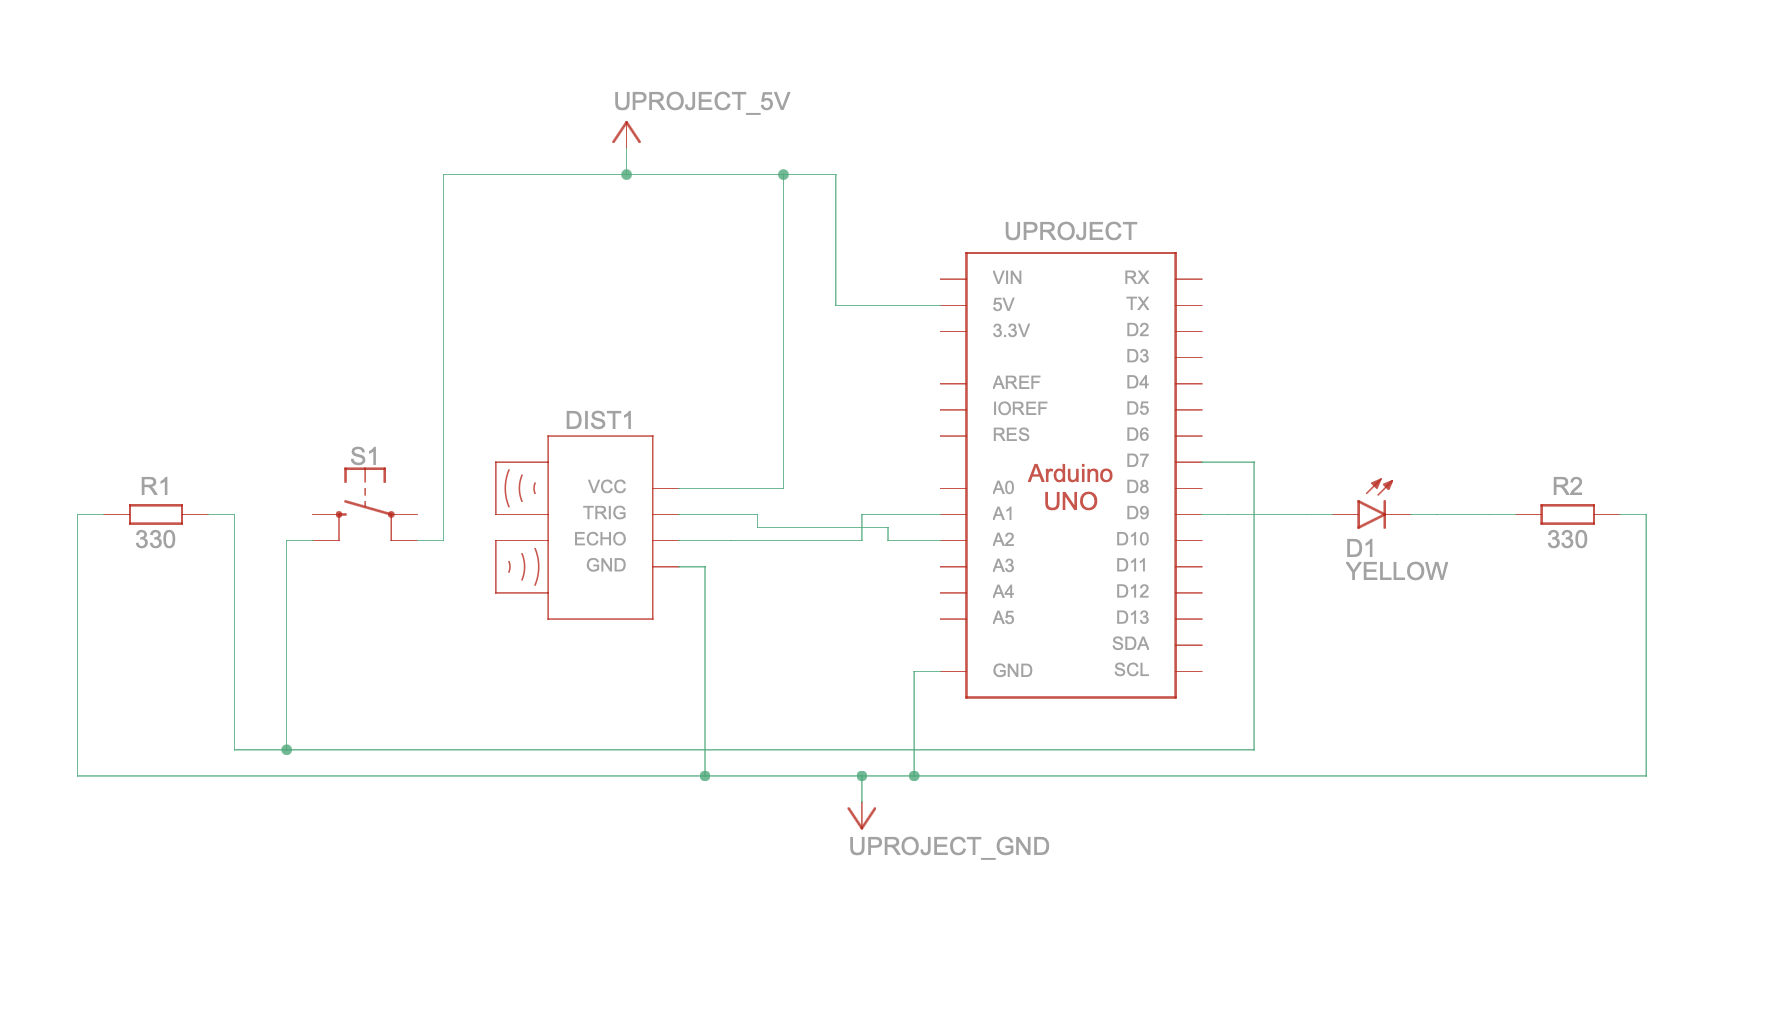
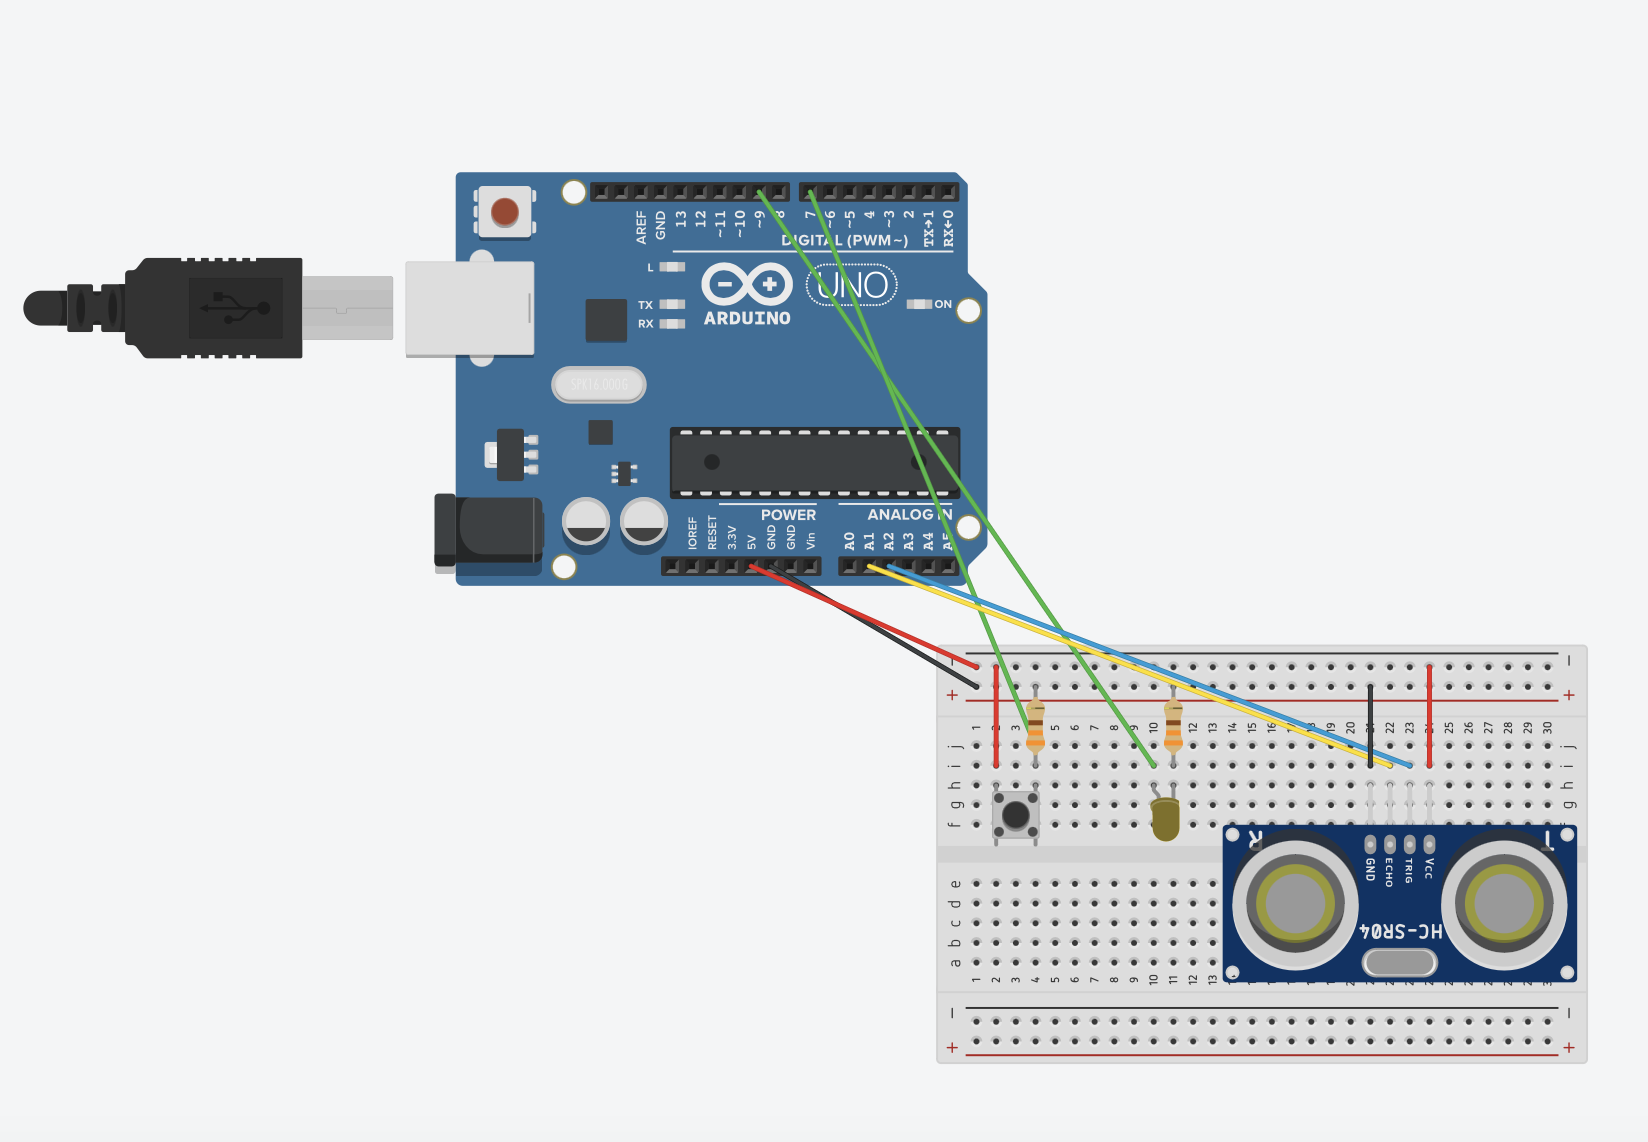
For this project, I decided to practice what has been covered in the class so far but also try to implement a new sensor. My choice fell upon the most bulky of all sensors in our kit – the ultrasonic distance sensor. By following the tutorial on YouTube, I built my Arduino with a yellow LED light and a button switch.
I got inspiration from final scene of the animated film Inside Out 2, when the emotions gathered together to hug the tree of the Self and “calm down” Riley.
When an object is close to the sensor for at least 10 centimetres, the LED lights up and becomes brighter as the object moves closer. However, when the button is pressed and released, the LED is turned off and it will not react to the object until the button is pressed again.
Highlights.
According to the guidelines of the task, I got information from two sensors – digital (the button switch) and analogue (the ultrasonic sensor). In order to make the button turn on and off, and the LED change the intensity according to the distance from the object, I implemented Boolean functions into my code. I also had to manipulate with delay() function to make the brightness change a bit smoother.
void loop() {
int currentButtonState = digitalRead(buttonPin);

if (currentButtonState == LOW && previousButtonState == HIGH) {
ledState = !ledState;
delay(50);
}
previousButtonState = currentButtonState;

digitalWrite(trigPin, LOW);
delay(20);
digitalWrite(trigPin, HIGH);
delay(20);
digitalWrite(trigPin, LOW);

duration = pulseIn(echoPin, HIGH);
distance = duration * 0.034 / 2;

int brightness = 0;

if (ledState) {
if (distance <= 10) {
brightness = map(distance, 0, 10, 255, 0);
} else {
brightness = 0;
}
} else {
brightness = 0;
}

analogWrite(ledPin, brightness);
delay(10);
}
Embedded Sketch.


