For this pr0ject, the task was to get information from at least one analog sensor and at least one digital sensor (switch), and use this information to control at least two LEDs, one in a digital fashion and the other in an analog fashion, in some creative way.
Inspiration
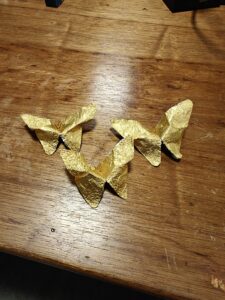
My project was inspired by a few of my favorite things. Firstly, I’ve always loved butterflies and origami, and I often find myself folding little origami butterflies from random bits of paper I find lying around. Adding on to that, my all time favorite chocolate is Ferrero Rocher, and sometimes, after enjoying one, I fold the shiny gold wrapper into a butterfly. They look beautiful, with the gold and shimmer giving them an extra touch.
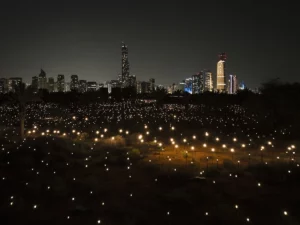
I wanted this project to feel personal, so I thought, why not bring these gold butterflies to life? It’s a fun “best out of waste” idea that lets me reuse something in a creative way. I was also inspired by the 2023 Abu Dhabi art installation Pulse Island by Rafael Lozano-Hemmer. It basically consists of an array of over 4,000 Edison lightbulbs that illuminate the plant life of Lulu Island. Each lightbulb glimmers to the rhythm of the heartbeat of a different participant. The way this piece interacts with people’s heartbeats was fascinating and sparked the idea of making something that reacts to simple sensor inputs.
Concept
For this project, I created three butterflies from Ferrero Rocher wrappers. I placed a yellow LED on each butterfly, intending to bring them to life in a way that responds to a person’s heartbeat. Using a pulse sensor, the setup detects the person’s heart rate, sending analog input to the LEDs. This means the yellow lights on each butterfly will pulse in sync with the person’s heartbeat, with the intensity of the lights varying based on the heart rate’s intensity (BPM value). Also, a blue LED is used to indicate when the setup is active, turning on and off with a button that acts as a digital switch. When the button is pressed, the blue LED lights up, showing that the butterflies are ready to respond to the heartbeat input.
The overall blinking effect of the LEDs gives each butterfly a sense of “life,” as if they are fluttering gently in time with the person’s pulse.
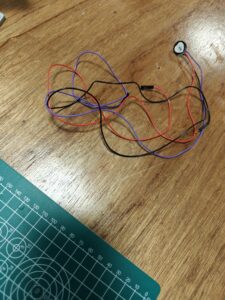
Here’s what the butterflies and pulse sensor looked like:

Implementation
For this project, I used an Arduino UNO board, a pulse sensor, three yellow LEDs (connected in parallel), one blue LED, one push button, two 330-ohm resistors, and one 10K-ohm resistor. The setup is designed to illuminate the yellow LEDs in sync with a person’s heartbeat and control the blue LED as an indicator of the system’s state.
The push button acts as a digital input, turning the setup on or off. When the button is pressed, the blue LED is activated (handled through digitalWrite) to indicate that the system is running. Meanwhile, the pulse sensor detects the user’s heart rate, sending the analog data to control the brightness of the yellow LEDs. The brightness/intensity is mapped to the person’s beats per minute (BPM). Also, the yellow LEDs pulse in sync with the heart rate (they glow every time a heartbeat is detected), creating a visual heartbeat effect. The code initializes and configures the pulse sensor to read the heartbeat, and then it uses a map function to translate the BPM into a suitable brightness level for the LEDs. The analogWrite function is used to control the intensity of the yellow LEDs based on the BPM.
For the pulse sensor, I used the PulseSensorPlayground library, which simplifies the integration of heart rate monitoring by providing functions to read and interpret heartbeat data easily.
I also created a custom delay function to avoid the blocking nature of the regular delay() function. Normally, delay() pauses all processes in the Arduino, which would prevent the button presses from being detected during the delay period. My custom delay function allows for non-blocking delays, so the button state can still be read while waiting.
Here’s some of the code (which controls the mapping of pulse rate to LED brightness and makes the LEDs beat in sync with the person’s heartbeat) that I am proud of:
// Checks if the setup is active
  if (flag == true){
    digitalWrite(digitalLED, HIGH); // Turns on the blue LED to indicate active state
    if (pulseSensor.sawStartOfBeat()) {            // Constantly test to see if "a beat happened".
      int myBPM = pulseSensor.getBeatsPerMinute();  // Calls function on our pulseSensor object that returns BPM as an "int".
                                                    // "myBPM" hold this BPM value now.
      Serial.println("♥  A HeartBeat Happened ! "); // If test is "true", print a message "a heartbeat happened".
      Serial.print("BPM: ");                        // Print phrase "BPM: "
      Serial.println(myBPM);                        // Print the value inside of myBPM.
      int val = map(myBPM, 0, 180,0, 255);          // Maps the BPM value to an LED brightness level
      Serial.print("val:");
      Serial.println(val);                          // Prints the mapped brightness value
      analogWrite(LED, val);                        // Sets the brightness of the yellow LED based on the BPM
      myDelay(100);                                 // Waits for 100 milliseconds
      analogWrite(LED, 0);                          // Turns off the yellow LED to create a pulsing effect
    }
  }
Schematic Circuit Diagram
Reflections and Further Improvements
I’m really happy with how this project turned out and how the concept came to life. It was really rewarding to incorporate elements that are personally meaningful to me, like the origami butterflies, and also to successfully learn how to use a new type of sensor.
In the future, I’d love to add sound to enhance the interactive aspect, maybe syncing gentle tones with the heartbeat to make the experience more immersive. I’d also like to expand the setup visually, adding more butterflies and refining the aesthetics to make the project even more captivating.


