For this assignment, I decided to release an update for the Antiprocrastination Iphone Case as I promised in my last week blogpost.
Concept
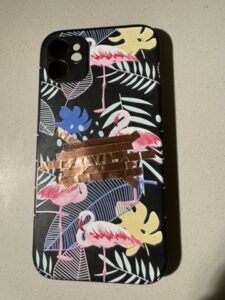
The shortage of the conductive fabric (could not find it in the IM Lab where it was supposed to be) made me find a new way to track the presense of the phone on the surface. This time, I used the conductive tape, which was not that convenient to use, but I experimented with a normal tape to attach it to the phone case and put together the wires.
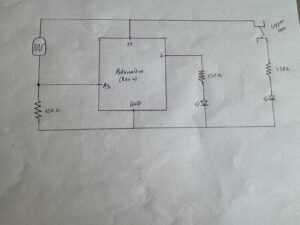
For my analog input, I decided to use the potentiometer that the professor showed us in class, but use it in an unusual way – track the movements in front of the tracking surface to enhance the phone protection. Whenever an object (hand in our case) is trying to touch the phone, the red led light turns on to signal the extraneous movements. Using the coding, I set the value of the potentiometer under which the led light would turn on. Moreover, I also added the analog output using the map() function that I used multiple times in p5.js to project the range of values of one object to another. Thus, the closer the hand to the phone, the brighter the red led light is. To achieve such an effect I needed to play with the values inside the map() function (as described in the comments for my code), and switch the order of the values for the led light.
Code
// pin definitions
const int potentiometerPin = A3;     // potentiometer
const int ledPin = 3;      // LED connected to analog-reading capable pin number 3

// the setup routine runs once when you press reset:
void setup() {
  // initialize serial communication at 9600 bits per second:
  Serial.begin(9600);

  // initialize
  pinMode(ledPin, OUTPUT);
}

// the loop routine runs over and over again forever:
void loop() {
  // read the input on analog pin
  int sensorValue = analogRead(potPin);

  // setting up the mapping so that would work as intended -
  // the closer the hand, the brighter the led. Putting the values 0 and 255 vice-versa for this
  // and limiting the values of the sensor from 500 to 825 (I put 825 intentionally, so that red led would be bright if the phone is removed from the wires)
  int ledBrightness = map(sensorValue, 500, 825, 255, 0);

  // print out the values we read to give more intuition: 1st for potentiometer and 2nd for led
  Serial.print("Potentiometer: ");
  Serial.print(sensorValue);
  Serial.print("   LED: ");
  Serial.println(ledBrightness);

  // setting the LED brightness
  analogWrite(ledPin, ledBrightness);

  delay(1);  // delay in between reads for stability
}
Schematic
Video
Reflection
For my first assignment, I did not use any code. Here, I needed to figure out the syntax and commands required to make things work. So far I find it pretty challenging to think in both dimensions – physical and digital, but it is also extremely interesting. Although I did not yet implement the sound effects as I wanted to when the phone was removed from the surface, I am happy with the result that I achieved, especially with how fast I managed to find the substitute for the conductive fabric.
I am looking forward to next week’s classes and assignments to further enhance my Arduino skills.


