Midterm Project: The “SpectroLoom”

Concept

For my midterm project, I thought of making something unique, which seemed like art for the casual viewers, but on closer inspection would be seen as a form of data. For this, I decided to make a circular spectrogram, i.e, visualizing sound in circular patterns. That’s when I saw an artwork on Vimeo, which visualized sound in a unique way:

Using FFT analysis, and the concept of rotating layers, I decided to recreate this artwork in my own style, and go beyond this artwork, thus, creating the SpectroLoom. I also decided that since most people sing along or hum to their favourite tunes, why not include them in the loop too?

At its core, SpectroLoom offers two distinct modes: “Eye of the Sound” and “Black Hole and the Star.” The former focuses solely on the auditory journey, presenting a circular spectrogram that spins and morphs in harmony with the music. The latter introduces a dual-layered experience, allowing users to sing along via microphone input, effectively merging their voice with the pre-loaded tracks, thus creating a sense of closeness with the song.

The Code/Science

Apart from FFT analysis, the project surprisingly used a lot of concepts related to “Relative Angular Velocity”, so that I could make the sketch behave in the way I want it to be. Using FFT analysis, I was able to get the amplitude of every frequency at any given point of time. I used these values to make a linear visualizer on a layer. The background canvas is rotating at an angular velocity of one revolution for the song’s duration in anti-clockwise direction, and the visualizing layer is rotating in the opposite direction (clockwise), making it seem that the linear visualizer is stationary because the Relative Angular Velocity is “Zero”. The other user layer, which have the user’s waveform is also doing the same, but uses the mic input as the input source for the FFT Analysis (and is only in the second mode).

Also, once the user finishes the song, they can again left click for restarting the same music. This is done by resetting the angle rotated by the layer to “Zero” after a complete revolution and clearing both song visualization layer and the User input layer.

// Visualizer screen drawing function for "Black Hole and the Star" mode
function drawBlackHoleAndStar() {
  if (song.isPlaying()) {
    background(0);

    // Get the frequency spectrum for the song
    let spectrumA = fft.analyze();
    let spectrumB = spectrumA.slice().reverse();
    spectrumB.splice(0, 40);

    blendAmount += colorBlendSpeed;
    if (blendAmount >= 1) {
      currentColor = targetColor;
      targetColor = color(random(255), random(255), random(255));
      blendAmount = 0;
    }

    let blendedColor = lerpColor(currentColor, targetColor, blendAmount);

    // Draw song visualizer
    push();
    translate(windowWidth / 2, windowHeight / 2);
    noFill();
    stroke(blendedColor);
    beginShape();
    for (let i = 0; i < spectrumB.length; i++) {
      let amp = spectrumB[i];
      let x = map(amp, 0, 256, -2, 2);
      let y = map(i, 0, spectrumB.length, 30, 215);
      vertex(x, y);
    }
    endShape();
    pop();

    layer.push();
    layer.translate(windowWidth / 2, windowHeight / 2);
    layer.rotate(radians(-currentAngle));
    layer.noFill();
    layer.colorMode(RGB);

    for (let i = 0; i < spectrumB.length; i++) {
      let amp = spectrumB[i];
      layer.strokeWeight(0.02 * amp);
      layer.stroke(amp, amp, 255 - amp, amp / 40);
      layer.line(0, i, 0, i);
    }
    layer.pop();
    
    var userSpectrum = micFFT.analyze()

    userLayer.push();
    userLayer.translate(windowWidth / 2, windowHeight / 2);
    userLayer.rotate(radians(-currentAngle));
    userLayer.noFill();
    userLayer.colorMode(RGB);

    for (let i = 0; i < userSpectrum.length; i++) {
      let amp = userSpectrum[i];
      userLayer.strokeWeight(0.02 * amp);
      userLayer.stroke(255 - amp, 100, 138, amp / 40);
      userLayer.line(0, i + 250, 0, i + 250); // Place the user imprint after the song imprint
    }

    userLayer.pop();

    push();
    translate(windowWidth / 2, windowHeight / 2);
    rotate(radians(currentAngle));
    imageMode(CENTER);
    image(layer, 0, 0);
    image(userLayer, 0, 0);
    pop();
  
    currentAngle += angularVelocity * deltaTime / 1000;

    if (currentAngle >= 360) {
      currentAngle = 0;
      
      userLayer.clear();
      layer.clear();
    }

    let level = amplitude.getLevel();
    createSparkles(level);

    drawSparkles();
  }
}

Also, there is the functionality for the user to restart too. The functionality was added via the back function. This brings the user back to the instruction screen.

function setup(){
...
  // Create back button
  backButton = createButton('Back');
  backButton.position(10, 10);
  backButton.mousePressed(goBackToInstruction);
  backButton.hide(); // Hide the button initially
...
}

// Function to handle returning to the instruction screen
function goBackToInstruction() {
  // Stop the song if it's playing
  if (song.isPlaying()) {
    song.stop();
  }
  
  // Reset the song to the beginning
  song.stop();
  
  // Clear all layers
  layer.clear();
  userLayer.clear();

  // Reset mode to instruction
  mode = "instruction";
  countdown = 4; // Reset countdown
  countdownStarted = false;

  // Show Go button again
  goButton.show();
  blackHoleButton.show();
  songSelect.show();
}

The user also has the option to save the imprint of their song via the “Save Canvas” button.

// Save canvas action
function saveCanvasAction() {
  if (mode === "visualizer") {
    saveCanvas('rotating_visualizer', 'png');    
  }
  if (mode === "blackhole") {
    saveCanvas('user_rotating_visualizer', 'png')
  }
}

Sketch

Full Screen Link: https://editor.p5js.org/adit_chopra_18/full/v5S-7c7sj

Problems Faced

Synchronizing Audio with Visualization:
    • Challenge: Ensuring that the visual elements accurately and responsively mirror the nuances of the audio was paramount. Variations in song durations and frequencies posed synchronization issues, especially when dynamically loading different tracks.
    • Solution: Implementing a flexible angular velocity calculation based on the song’s duration helped maintain synchronization. However, achieving perfect alignment across all tracks remains an area for refinement, potentially through more sophisticated time-frequency analysis techniques.
Handling Multiple Layers and Performance:
      • Challenge: Managing multiple graphics layers (layer, userLayer, tempLayer, etc.) while maintaining optimal performance was intricate. Rendering complex visualizations alongside real-time audio analysis strained computational resources, leading to potential lag or frame drops.
      • Solution: Optimizing the rendering pipeline by minimizing unnecessary redraws and leveraging efficient data structures can enhance performance. Additionally, exploring GPU acceleration or WebGL-based rendering might offer smoother visualizations.
Responsive Resizing with Layer Preservation:
    • Challenge: Preserving the state and content of various layers during window resizing was complex. Ensuring that visual elements scaled proportionally without distortion required meticulous calculations and adjustments.
    • Solution: The current approach of copying and scaling layers using temporary buffers serves as a workaround. However, implementing vector-based graphics or adaptive scaling algorithms could provide more seamless and distortion-free resizing.

Week 6: Midterm Project – Superimpose

# Jump To:


Update: Fixed the link, as it turns out, it was broken this entire time!
(wait, so you’re telling me that no one got to play my game? 🙁)


# Introduction & Project Concept

Hey everyone, welcome back! 👋

In this blog, I’ll be talking a little bit about my midterm project. Unfortunately (or fortunately, depending on how much you want them), this blog post isn’t going to be as detailed as my usual ones. Instead, it’ll just be a very cursory overview of a few parts of the project.

So, what is my project? Well, it’s a game where you control a character using your own body (pose detection), and you have to try to fit through the target pose cutouts, similar to the ones you see in cartoons when a character goes through a wall.
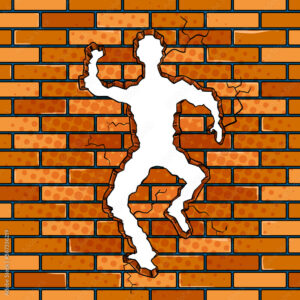
Human shaped hole in wall

Though, since the poses are detected using a webcam, it can be hard to get the distance and space required to detect the whole body (and also still clearly see the screen), so instead the cutouts are only for the upper body, which should make it accessible to and playable by more people.


# Implementation Details

## How it Works (in a Nutshell)

The core mechanic of the game is the player’s pose. Thankfully, this can be detected relatively easily with the help of ml5.js’s BodyPose, which after integrating, lets you know the locations of each of the keypoints. From the 2 models available (Movenet and BlazePose), I choose Movenet, and you can see the the keypoints it detects below.
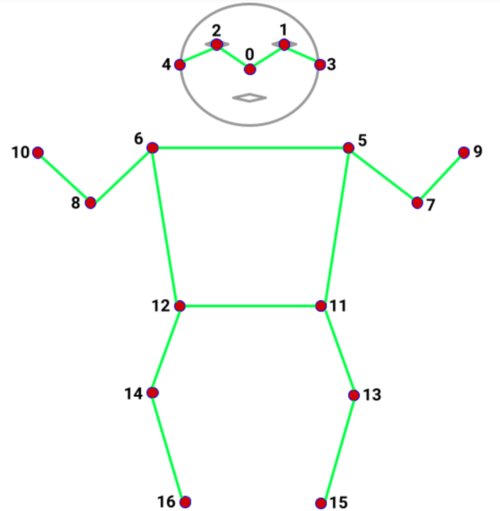
 

MoveNet keypoint diagram


Obviously, the keypoints the camera can’t see won’t be very accurate at all, but the model will still report them. Thankfully, it also reports its confidence, and so you can easily filter out the keypoints which don’t have a certain threshold confidence.

In terms of why I choose MoveNet, it’s because it is the newer model, and was built for faster recognition, which is important in a game like mine (you obviously don’t want players to notice or feel a lag in their movements, which makes it harder to control and less enjoyable) (though to be honest, BlazePose would work fine here too, it would just be a bit slower and laggier). Also, another one of the parameters I specified was the type (SINGLEPOSE_THUNDER), which means that it should only track 1 person, and with slightly higher accuracy.

Anyways, so we got our pose, and I drew it on the screen. Then, the player sees a target pose cutout (which was generated by creating a random pose, and erasing those pixels from the surface), and tries to match it (hopefully, you don’t wanna crash into it!). Once the target is close enough, we check if the player’s pose matches the target cutout’s pose. Now, since it’s nearly (or literally) impossible to match it exactly to the subpixel (in this case, 13 decimal places smaller than a pixel!), especially for every point, we just check whether the pose’s are close enough, by adding a bit of margin to point and checking if the keypoints are within that margin. If it matches, hurray! The player scores a point and the target disappears (only for another one to come out later… 😈, ahem 😇). Otherwise, the target still disappears, but instead of scoring a point, they lose a heart/life. If they’ve lost too many, the game ends.

That basically sums up the main game loop.

Now, this is all implemented in an OOP manner, so there are classes for each scene, and for any objects that would benefit from being a class. So, for scene management, I have an object/dictionary containing a reference to all the scene objects instantiated from their respective classes, and field that holds a reference to the current scene (or alternatively a variable that keeps track of the current scene’s name).

Similarly, I also have an object/dictionary containing all the sounds and images to be used (which get loaded in preload, like the pose detection model). Other than that, the rest is mostly similar to other p5.js projects.


## Some Stuff I Liked

This may seem small, but one of the parts I like is my random pose generation. Since it is, you know, a core part of the gameplay (the pose for the target cutouts), I had to get this done fairly well. While I initially thought of using random offsets from a set pose, or even a set of custom poses I did (which would save a lot of time), I knew this solution wouldn’t be the best, and would have several issues (for example, others will likely have a different height and body segment lengths, as well as from different distances and angles to the camera). Instead, my current solution accounts for most of that, and is made it from a system of constraints.

Basically, I first measure some key lengths from the player (such as the distance between the wrist and the elbow, elbow to the shoulder, shoulder to the hip, original y-value of nose, etc). Then I first start by generating random coordinates for the nose, which are in the center 25% (horizontally) of the screen, and within 25px or so (vertically) of the player’s original nose height (btw, so instead of generating several points for the head (eyes, ears, & nose), like the model outputs, I can just treat the nose as the center of the head, which is much simpler and surprisingly doesn’t have almost any drawback for my usecase, so I do that). After this, I get a random angle between -30 to 30 degrees for the shoulder midpoint, and then calculate the shoulders from there (taking into account the player’s shoulder to shoulder length, and nose to shoulder midpoint length). Similarly, I also calculate a random angle in a certain acceptable range, and use the user’s segment length to calculate the exact position. Now, I also want to ensure that no part goes offscreen, or even within 10% of the edges, so I wrap the generation of each part in a do… while loop, which ensures that if a certain part does get generated too close to the edge, it tries again, calculating new positions from new random but constrained values. Additionally, I also don’t want any of the points to be too close to each other (which could especially be an issue with the wrists, both to each other and to the head).

But what if it is literally impossible to satisfy all these constraints for a certain part? Then the program will just keep trying and trying again, forever, which we obviously don’t want. So I keep a track of the number of current attempts, and if it goes above a certain threshold (say 10), then I start from scratch, and return a completely brand new random pose, using recursion (hoping that the new system won’t run into similar situations too many times, which thankfully is the case, as it’s quite rare for it to retry). I also keep a track of the number of attempts for the completely new pose, and if it gets too high, then I just return the default pose (this is more so just to be extra safe, since thankfully, this is almost never going to happen, as there is an extreeeemeeellyyyy small chance that it bails out and fails trying to return a completely new pose, that many times).

So, that’s it! Despite being really quite simple, it’s pretty effective. You can see the code for it, and try it out in the sketch, below (it’s actually a bit unnerving and intriguing how we can associate actions and feelings, just by looking at random poses made with simple rules).


// Initialised with some default values (roughly my measurements)
let playerBodyInfo = {
	"nose y-value": 165,
	"nose-shoulder midpoint length": 50,
	"shoulder midpoint-hip midpoint length": 150,
	"shoulder-shoulder length": 90,
	"shoulder-elbow length": 70,
	"elbow-wrist length": 60
}

// lots of other code ... (not relevant for this)

// method within Game class
generateRandomPose(attempts = 0) {
	// Constraints / Ideas / Assumptions:
	//	- Nose should be in the middle 25% (horizontally) of the screen, and near the height of the player's nose originally (similar y-value)
	//	- 0 deg <= midpoint-shoulder-elbow angle (inside one) <= 180 deg (basically, the elbow should be outside the body, extending upwards)
	//	- 45 deg <= shoulder-elbow-wrist angle (inside one) <= 180 deg
	//	- All parts should be within the center 80% (the nose and shoulders don't need to be tested, since they can't reach there anyways)
	//	- Also, parts shouldn't be too close to each other (realistically the thing we need to check for is wrists to each other and the nose)
	//	- First generate nose position (center of head), then shoulders, then so on.

	let outerMargin = 0.1; // 10%, so points should be in the middle 80% of the detection area (webcam feed)
	let minX = webcamVideo.width * outerMargin
	let maxX = webcamVideo.width * (1 - outerMargin)
	let minY = webcamVideo.height * outerMargin
	let maxY = webcamVideo.height * (1 - outerMargin)
	let partAttempts, leftShoulderToElbowAngle, rightShoulderToElbowAngle, leftElbowToWristAngle, rightElbowToWristAngle

	// Initialised with some default values (roughly my measurements)
	let pose = {
		nose: {x: 320, y: 165},
		left_shoulder: {x: 275, y: 215},
		right_shoulder: {x: 365, y: 215},
		left_hip: {x: 295, y: 365},
		right_hip: {x: 345, y: 365},
		left_elbow: {x: 220, y: 255},
		right_elbow: {x: 420, y: 255},
		left_wrist: {x: 200, y: 200},
		right_wrist: {x: 440, y: 200}
	}

	// If it takes too many attempts to generate a pose, just give up and output the default pose
	if (attempts > 100) {
		print('Pose generation took too many attempts, returning default pose.')
		return pose
	}


	// Nose

	pose.nose.x = random(0.375, 0.625) * webcamVideo.width // center 25%
	pose.nose.y = random(-25, 25) + playerBodyInfo["nose y-value"] // y-value +- 25px of player's nose height


	// Shoulders

	let shoulderAngle = random(-PI/6, PI/6) // The angle from the nose to the shoulder's midpoint with origin below (think of a unit circle, but rotated clockwise 90 deg) (also equivalently, the angle from the left to right shoulder, on a normal unit circle). From -30 to 30 degrees
	let shoulderMidpoint = {
		x: pose.nose.x + sin(shoulderAngle) * playerBodyInfo["nose-shoulder midpoint length"],
		y: pose.nose.y + cos(shoulderAngle) * playerBodyInfo["nose-shoulder midpoint length"]
	}
	
	pose.left_shoulder.x = shoulderMidpoint.x - cos(shoulderAngle) * 0.5 * playerBodyInfo["shoulder-shoulder length"]
	pose.left_shoulder.y = shoulderMidpoint.y + sin(shoulderAngle) * 0.5 * playerBodyInfo["shoulder-shoulder length"]
	
	pose.right_shoulder.x = shoulderMidpoint.x + cos(shoulderAngle) * 0.5 * playerBodyInfo["shoulder-shoulder length"]
	pose.right_shoulder.y = shoulderMidpoint.y - sin(shoulderAngle) * 0.5 * playerBodyInfo["shoulder-shoulder length"]
	

	// Hips

	let hipMidpoint = { // The hip's midpoint is really just the shoulder's midpoint, but extended further, so we can calculate it in a similar fashion
		x: pose.nose.x + sin(shoulderAngle) * (playerBodyInfo["nose-shoulder midpoint length"] + playerBodyInfo["shoulder midpoint-hip midpoint length"] + 50*0), // [Nvm, disabled for now] Added 50 in the end, to ensure it's long enough (I'm not using the hips for accuracy or points, but rather just to draw the outline)
		y: pose.nose.y + cos(shoulderAngle) * (playerBodyInfo["nose-shoulder midpoint length"] + playerBodyInfo["shoulder midpoint-hip midpoint length"] + 50*0) // (as above ^)
	}
	
	pose.left_hip.x = hipMidpoint.x - cos(shoulderAngle) * 0.5 * playerBodyInfo["shoulder-shoulder length"]
	pose.left_hip.y = hipMidpoint.y + sin(shoulderAngle) * 0.5 * playerBodyInfo["shoulder-shoulder length"]
	
	pose.right_hip.x = hipMidpoint.x + cos(shoulderAngle) * 0.5 * playerBodyInfo["shoulder-shoulder length"]
	pose.right_hip.y = hipMidpoint.y - sin(shoulderAngle) * 0.5 * playerBodyInfo["shoulder-shoulder length"]
	

	// Elbows

	partAttempts = 0;
	do {
		if (++partAttempts > 10) return this.generateRandomPose(attempts + 1); // If it takes too many attempts to generate this part, just give up and start from scratch
		
		leftShoulderToElbowAngle = random(PI/2, 3 * PI/2) + shoulderAngle // From 90 to 270 (-90) degrees on a normal unit circle (basically 0 to 180 degrees, with the left half of a circle (imagine the unit circle rotated anticlockwise 90 deg))
		
		pose.left_elbow.x = pose.left_shoulder.x + cos(leftShoulderToElbowAngle) * playerBodyInfo["shoulder-elbow length"]
		pose.left_elbow.y = pose.left_shoulder.y - sin(leftShoulderToElbowAngle) * playerBodyInfo["shoulder-elbow length"]
		
	} while (
		minX > pose.left_elbow.x || pose.left_elbow.x > maxX || // Check if it's within the acceptable horizontal range
		minY > pose.left_elbow.y || pose.left_elbow.y > maxY // Check if it's within the acceptable verticle range
	);
	
	partAttempts = 0;
	do {
		if (++partAttempts > 10) return this.generateRandomPose(attempts + 1); // If it takes too many attempts to generate this part, just give up and start from scratch
		
		rightShoulderToElbowAngle = random(-PI/2, PI/2) + shoulderAngle // From 270 (-90) to 90 degrees on a normal unit circle (basically 0 to 180 degrees, with the right half of a circle)
		
		pose.right_elbow.x = pose.right_shoulder.x + cos(rightShoulderToElbowAngle) * playerBodyInfo["shoulder-elbow length"]
		pose.right_elbow.y = pose.right_shoulder.y - sin(rightShoulderToElbowAngle) * playerBodyInfo["shoulder-elbow length"]
	
	} while (
		minX > pose.right_elbow.x || pose.right_elbow.x > maxX || // Check if it's within the acceptable horizontal range
		minY > pose.right_elbow.y || pose.right_elbow.y > maxY // Check if it's within the acceptable verticle range
	);


	// Wrists

	partAttempts = 0;
	do {
		if (++partAttempts > 10) return this.generateRandomPose(attempts + 1); // If it takes too many attempts to generate this part, just give up and start from scratch
		
		leftElbowToWristAngle = random(1.25*PI, 2*PI) + leftShoulderToElbowAngle // random(PI/4, PI) // From 45 to 180 degrees on a normal unit circle. Will be rotated to account for the elbow's existing rotation 
	
		pose.left_wrist.x = pose.left_elbow.x + cos(leftElbowToWristAngle) * playerBodyInfo["elbow-wrist length"]
		pose.left_wrist.y = pose.left_elbow.y - sin(leftElbowToWristAngle) * playerBodyInfo["elbow-wrist length"]

	} while (
		minX > pose.left_wrist.x || pose.left_wrist.x > maxX || // Check if it's within the acceptable horizontal range
		minY > pose.left_wrist.y || pose.left_wrist.y > maxY || // Check if it's within the acceptable verticle range
		dist(pose.nose.x, pose.nose.y, pose.left_wrist.x, pose.left_wrist.y) < 50 // Check if the wrist is too close to the nose ); partAttempts = 0; do { if (++partAttempts > 10) return this.generateRandomPose(attempts + 1); // If it takes too many attempts to generate this part, just give up and start from scratch
		
		rightElbowToWristAngle = random(0, 3/4 * PI) + rightShoulderToElbowAngle // From 270 (-90) to 90 degrees on a normal unit circle (basically 0 to 180 degrees, with the right half of a circle)
	
		pose.right_wrist.x = pose.right_elbow.x + cos(rightElbowToWristAngle) * playerBodyInfo["elbow-wrist length"]
		pose.right_wrist.y = pose.right_elbow.y - sin(rightElbowToWristAngle) * playerBodyInfo["elbow-wrist length"]

	} while (
		minX > pose.right_wrist.x || pose.right_wrist.x > maxX || // Check if it's within the acceptable horizontal range
		minY > pose.right_wrist.y || pose.right_wrist.y > maxY || // Check if it's within the acceptable verticle range
		dist(pose.nose.x, pose.nose.y, pose.right_wrist.x, pose.right_wrist.y) < 50 || // Check if the wrist is too close to the nose
		dist(pose.left_wrist.x, pose.left_wrist.y, pose.right_wrist.x, pose.right_wrist.y) < 50 // Check if the wrist is too close to the other wrist
	);

	return pose;
}
 

(Click inside the sketch, then press any key to generate a new random pose)


Another part I liked was the illusion of perspective. So basically, I had to rush this project, so I thought, “Fine, I’ll do it in 2D, that’s much simpler”, and it is, but I still wanted that 3D perspective effect 😅. After playing around for a bit in a new temporary sketch, I found out that if I scale everything from the center, then the 2D sketch appears to have (a very basic, rudimentary, and probably physically inaccurate, but nonetheless, visible) perspective! While the best and fully implemented version is in the final game, you can see that temporary sketch below.

(Click inside the sketch, then press r to restart, or any other key to toggle between the first and second test (now basically just uncoloured vs coloured)… oh also, please, you know what I mean by “any other key”, so don’t press the power button or something 😂)


## Some Issues I Encountered

Oh boy oh boy, did I face several issues (as expected). Now, I can’t go over every issue I faced, so I’ll just mention a couple.

First one I’ll mention, is actually the random pose generator mentioned above! Yep, while I did end up getting it working (and well enough that I liked it and included it in my good parts section), and while it is conceptually pretty simple, it still took a fair bit of time (wayy longer than I thought it would, or even still think it needs to), and was a bit tricky, particularly with working out the angles and correct sin and cos transformations (oh, I messed up the signs more than once 😅). In fact, I actually made the sketch above to quickly test out my pose generation! I had written it all “blind” (aka without testing in between), and since it was fairly straightforward, I was confident it would work, but something nagged me to just try it once before the seeing it in the main game, and… yep, it didn’t work. *sighs*. I had to meticulously comment out and retry each portion and work back to a full solution, bit by bit. Fortunately it wasn’t too conceptually difficult (more time consuming than hard, but even the basic trig was a little rough tough at 3 AM), so I succeeded.

Another issue I faced was that the target cutouts, didn’t have any actual cutouts(!), which is, you know, a major issue. Again, I broke out a new temporary sketch to test out my logic, simplifying stuff and working things out. It turned out to be a simple issue of using the screen’s width instead of the webcam’s width, and a few other things. In case you’re wondering, yep, the screen and webcam not only have different resolutions, but also different aspect ratios! It was a bit of a pain initially to get it so they worked seamlessly together, but now I have. The reason behind this, is that some webcams (particularly those on laptops) give a 4:3 image for some reason, and since I need to run a machine learning model (MoveNet, for the poses), they usually reduce the resolution required (otherwise it would take a LOT longer to detect the pose, which would break the game). I wanted the game’s output on the other hand to be a crisp (scalable up or down but ideally) 1920×1080, 16:9 aspect ratio, hence the mismatch.

(It’s not really interactive (besides f for fullscreen), so don’t bother ;) )

Well anyways, that’s it for now (I think I might’ve made it a bit longer and more detailed than originally thought 😅), so without further ado, I present, my ✨midterm project✨! (I should really have a name for it, but I can’t decide 🤦‍♂️)

# Final Result – Midterm Project

While I would normally embed the sketch here, I think you should really open it full screen in a new tab, so follow this link.

# Additional Thoughts & Room for Improvement

With any project, there’s always room for improvement. But for this one specifically, there’s a huge room for improvement 😅 (mainly because I keep seeing new features to implement or ideas to improve it). As usual, there are a bunch of things I didn’t get time to implement or do, ranging from better graphics and polish, to levels and features. I particularly wanted to implement a character that actually goes ahead of you (that you are trying to catch) that “breaks” the walls (causes the cutouts), and also a level that took place in a top secret laboratory setting, where the character is actually stealing some top sneaky info, and so you have to stop them. I kind of really want to continue this and flesh it out (but I also know it’ll not be of much use, and besides, p5 isn’t the best platform to implement this idea, so why waste time here… so anyways *cuts to me working on this months into the future* 😅).   Well, I’m really glad you went through the entire post (and definitely didn’t skip till the final result), but regardless, thanks a lot for reading it (does anyone even read these, or am I just talking to myself? ._. ). Unfortunately, that’s all I’ve got time for, so we’ll have to end it here. Until next time, and enjoy your break!   https://media2.giphy.com/media/v1.Y2lkPTc5MGI3NjExd3B2ZGduZjBpYXNsa2F6bmxqZjg5dTFjbnE0bWR1czNiZ3FxYzc4OSZlcD12MV9pbnRlcm5hbF9naWZfYnlfaWQmY3Q9Zw/EbOLm8dEE2OrBh68H7/giphy.webp

(psst, do you know what time his watch shows? Ok, fine, it isn’t wearing one, but if it did, it would show) https://i.giphy.com/S8DcNuvt1FUy31LUH6.webp
Midterm Project

Concept and Inspiration:

I wanted to share the inspiration behind my game. It all started when I delved into the captivating world of folklore, specifically the stories of Sindbad the Sailor and Behula from Bangladeshi culture. Sindbad’s adventurous spirit, sailing through the vast oceans, I mean, who doesn’t love a good tale of adventure on the high seas?

Then there’s Behula, a fierce and determined woman who braves the ocean’s challenges to bring back her husband. Her journey is filled with trials and tribulations, showcasing strength, love, and resilience. These stories are so rich and deep, and I wanted to weave that essence into my game.

As I started to brainstorm, I thought, “Why not create a surfer game set against this backdrop?” The ocean is such a dynamic environment, and surfing adds an exciting twist. I wanted to capture the thrill of riding the waves while subtly nodding to these legendary tales.

Of course, I realized that not everyone might connect with the heavier themes of folklore, especially younger audiences. So, I decided to give the game a fun, cartoonish vibe. This way, it can appeal to all ages while still honoring those timeless stories. It’s all about adventure, overcoming challenges, and having a great time on the waves!

Code Explanation:

In my game, I’ve focused on creating an engaging surfing experience, and the wave mechanics play a crucial role in bringing that to life. There are some key elects that I would like to mention, especially how I generate those smooth, dynamic waves that define the gameplay.

1. Wave Creation

One of the standout features of my game is how I create the waves. I use a combination of beginShape() and endShape()to draw the wave’s outline:

beginShape();
let xOffset = waveXOffset;
for (let x = 0; x <= width; x += 10) {
    let y = map(noise(xOffset, yOffset), 0, 1, height / 2 - waveAmplitude, height / 2 + waveAmplitude);
    vertex(x, y);
    xOffset += waveFrequency;
}
endShape(CLOSE);
  • Creating Vertex Points: Inside this loop, I utilize the vertex() function to establish a series of points that define the wave’s shape. By iterating across the entire width of the canvas, I can create a flowing wave profile that enhances the surfing experience.
  • Using Perlin Noise: The magic happens with the noise() function. I chose Perlin noise because it generates smooth, natural variations, making the waves look more realistic. Unlike random values that can create jarring changes, Perlin noise ensures that the wave transitions are fluid, which adds to the game’s aesthetic appeal.
  • Mapping Values: I then use the map() function to rescale the noise output, allowing me to set the wave height within specific bounds. By centering the waves around the middle of the canvas (height / 2), I ensure they oscillate up and down, making the gameplay more visually engaging.2.

    2. Player Interaction with Waves

    The way the waves interact with the swimmer is equally important. I calculate the wave’s height and adjust the swimmer’s position accordingly:

    if (isJumping) {
        verticalVelocity += gravity;
        swimmerY += verticalVelocity;
        if (swimmerY >= waveY - swimmerHeight / 2) {
            swimmerY = waveY - swimmerHeight / 2;
            isJumping = false;
            verticalVelocity = 0;
        }
    } else {
        swimmerY = waveY - swimmerHeight / 2;
    }
    • Jump Mechanics: I implement a jumping mechanic where the swimmer’s vertical position changes based on gravity and jump forces. When the swimmer is in the air, I adjust their position based on the wave height, allowing them to ride the wave realistically.
    • Wave Height Adjustment: By ensuring the swimmer’s position is linked to the wave’s current height, I can create a seamless experience where the player feels like they are truly surfing on the waves.3. Window Resizing and Obstacles: 
      • The windowResized() function allows the canvas to resize dynamically if the window size changes, maintaining the game’s responsiveness.
        • Instantiation of Obstacles: Every time spawnObstacle() is called, a new instance of the Obstacle class is created and added to the obstacles array. This ensures that there are multiple obstacles on the screen for players to avoid, making the gameplay more challenging.
        • Continuous Challenge: By calling this function regularly within the main game loop (in the playGame function), I ensure that obstacles keep appearing as the player progresses. This continuous spawning simulates a moving ocean environment, where new challenges arise as players navigate the waves.
        • P5.js Sketch:

      Features  and Game Mechanics:

      • The game kicks off with an engaging start screen featuring the title “Surfer Game”, inviting players to click to begin their surfing.
      • Players control a lively surfer character using intuitive keyboard commands, specifically the spacebar to jump over incoming obstacles like sharks, enhancing the gameplay’s interactivity.
      • As players navigate through the waves, they encounter a dynamic wave system that adjusts in amplitude and frequency, creating a realistic surfing experience. This effect is achieved through Perlin noise, giving the waves a smooth, natural movement.
      • Collectible coins are scattered throughout the waves, adding an exciting layer of challenge. When the player collides with a coin, it disappears, contributing to the score, which is displayed on the screen.
      • The game includes a health mechanic where if the surfer collides with an obstacle, such as a shark, the game transitions to a “Game Over” state, prompting players to either restart or return to the main menu.
      • Upon reaching specific milestones, such as collecting a set number of coins, players are rewarded with a “Level Up” screen that highlights their achievements and encourages them to continue.
      • Players can easily restart the game after it ends by clicking anywhere on the screen, offering a seamless transition between attempts.

      Additional AudioVisual:

      • Sound effects enhance the immersive experience, with cheerful tunes playing when coins are collected and exciting sound bites when the surfer jumps over obstacles.
      • Background music plays continuously throughout the game, creating an engaging atmosphere. Players can enjoy a unique soundtrack that fits the theme of the game, enriching their adventure.
      • The graphics have a cartoonish style, making it appealing for all age groups while still paying homage to the folklore inspirations behind the game.

Reflection and Challenges

When I first set out to create a game, my vision was to develop something based on neuroscience, exploring complex concepts in an engaging way. However, as I delved deeper into that idea, I realized it was more challenging than I anticipated. I then pivoted to creating a 2048 game, but that also didn’t quite hit the mark for me. I felt it lacked the excitement needed to captivate players of all ages.

This experience taught me a valuable lesson: sometimes, taking a step back can provide clarity. Rather than getting bogged down in intricate designs, I opted for a simpler concept that would appeal to a wider audience. Thus, I decided to create an ocean-themed surfing game, inspired by folklore like Sindbad the Sailor and the tale of Behula from Bangladeshi culture.

I see a lot of potential for upgrading this game. Adding a storyline could further engage young players and introduce them to fascinating narratives from folklore. Additionally, I plan to enhance the wave mechanics by incorporating realistic gravity effects, making the surfing experience more immersive. These improvements could really elevate the gameplay and provide an enjoyable adventure for everyone.

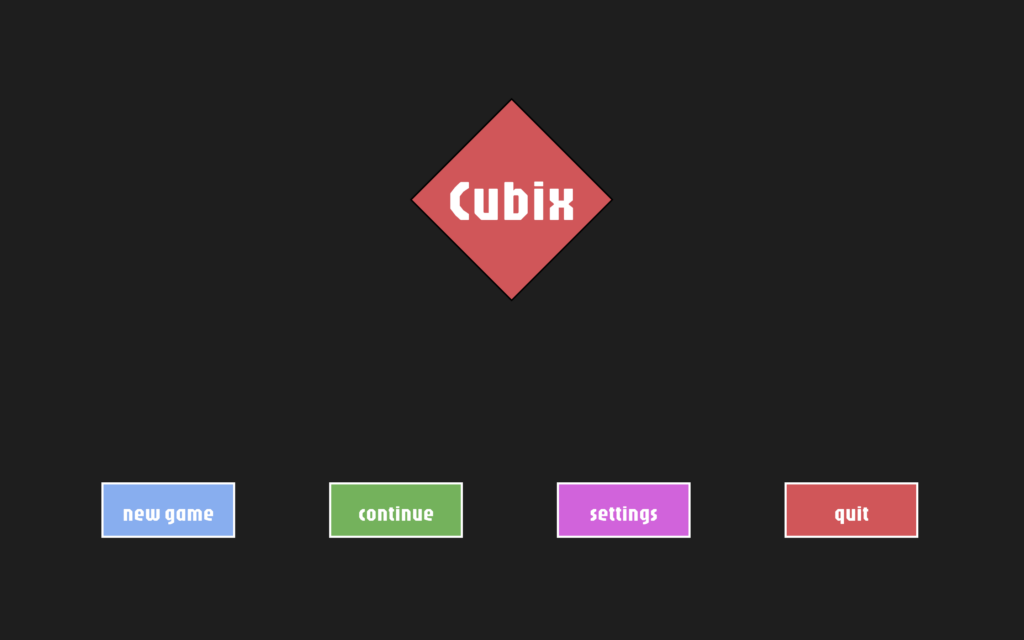
Midterm Project: “Cubix”

Sketch
http://165.232.166.95:5500
Concept
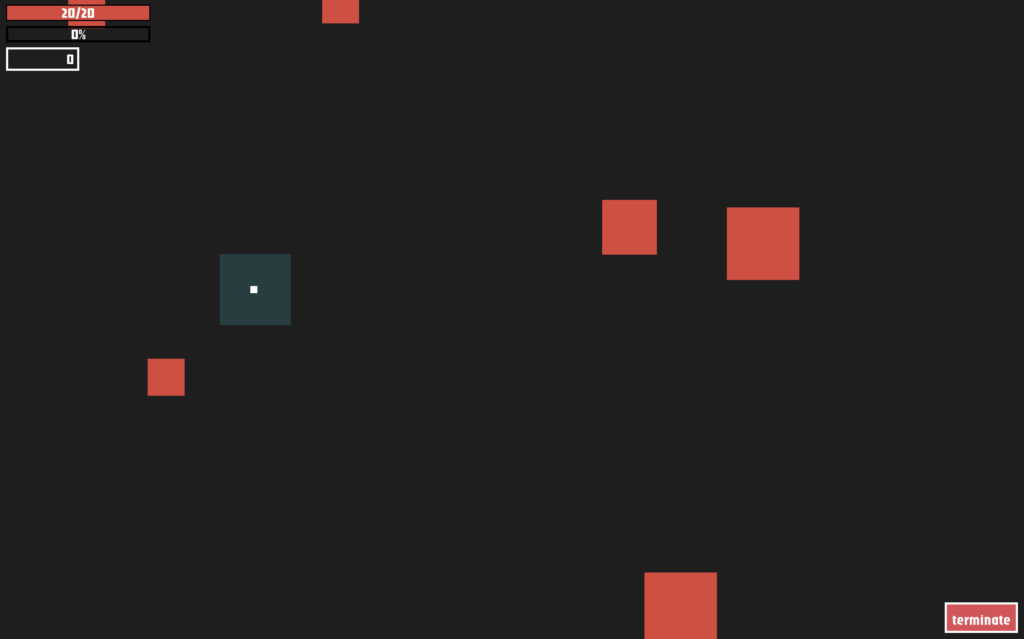
I decided to implement a clicker/incremental game with a unique twist, combining elements from popular titles like To The Core, Cookie Clicker, and Adventure Capitalist. The game revolves around hunting flying shapes using a cursor with an attached box (scope/aim). Players damage enemy shapes when they’re inside this box, earning resources to upgrade skills in a talent tree. The game also features levels for long-term progression and bonuses.

Game Mechanics and Achievements
The core gameplay involves killing enemies that appear on the screen using an aiming device attached to the cursor. Each enemy defeated rewards the player with experience and money. Leveling up releases resources, while money allows for upgrades in the talent tree. One of the most challenging and rewarding aspects of development was balancing the game’s economy. After extensive experimentation and research, I developed formulas that strike a balance between challenge and progression, ensuring the game is neither too easy nor too difficult. Here is the mathematical framework for the economics of the “Cubix” game.

Core Mechanics

Player Progression
The player’s power increases through two main avenues:
1. Killing mobs to gain experience and resources
2. Upgrading skills to become more effective at killing

Experience and Leveling
XP_{gained} = Base_{XP}  *  (1 + Level_{mob} * 0.1)
Where Base_{XP} is a constant value for each mob type, and Level_{mob} is the level of the mob killed.

The experience required to level up follows an exponential curve:
XP_{required} = 100 * 1.1^{Level_{player}}

This ensures that leveling becomes progressively more challenging.

Resource Generation

Resources (e.g., gold) dropped by mobs calculated similarly:
Gold_{dropped} = Base_{gold} * (1 + Level_{mob} * 0.15)

Skill Upgrades

Each skill has multiple levels, with increasing costs and effects. The cost to upgrade a skill follows this formula:
Cost_{upgrade} = Base_{cost} * 1.5^{Level_{skill}}

The effect of the skill (e.g., damage increase) is:
Effect_{skill} = Base_{effect} * (1 + Level_{skill} * 0.2)

Mob Scaling

To keep the game challenging, mob health and damage can scale with the player’s level:
Health_{mob} = Base_{health} * 1.2^{Level_{player}}
Damage_{mob} = Base_{damage} * 1.15^{Level_{player}}

A significant technical achievement is the implementation of local progress saving using localStorage. This feature required considerable effort but greatly enhances the player experience by allowing seamless continuation of gameplay across sessions.

class Storage {
    constructor() {
        this.spawnRate = [1000, 2000];
        this.spawnChances = [0.5, 0.3, 0.1];
        this.maxEnemies = 100;

        this.balance = 0;

        this.level = 0;
        this.xp = 0;

        this.damage = 20;
        this.hp = 20;
        this.regen = 1;
        this.interval = 1000;
        this.crit = 10;
        this.critChance = 0.12;
        this.armor = 0;

        this.skills = defaultSkills;

        this.scopeSize = 100;
    }

    getSkillEffect(id) {
        let skill = this.skills.find(skill => skill.id === id);
        if (skill.level === 0) {
            return 0;
        }
        return int(skill.baseEffect * (1 + skill.level * 0.2))
    }

    reset() {
        this.spawnRate = [1000, 2000];
        this.spawnChances = [0.5, 0.3, 0.1];
        this.maxEnemies = 100;

        this.balance = 0;

        this.level = 0;
        this.xp = 0;

        this.damage = 20;
        this.hp = 20;
        this.regen = 1;
        this.interval = 1000;
        this.crit = 10;
        this.critChance = 0.12;
        this.armor = 0;

        this.skills = defaultSkills;

        this.scopeSize = 100;

        this.save();
    }

    load() {
        let save = localStorage.getItem("save");
        if (!save) {
            this.save();
        } else {
            let data = JSON.parse(save);
            this.spawnRate = data.spawnRate;
            this.spawnChances = data.spawnChances;
            this.maxEnemies = data.maxEnemies;
            this.balance = data.balance;
            this.damage = data.damage;
            this.hp = data.hp;
            this.level = data.level;
            this.xp = data.xp;
            this.regen = data.regen;
            this.interval = data.interval;
            this.crit = data.crit;
            this.critChance = data.critChance;
            this.armor = data.armor;
            this.skills = data.skills;
            this.scopeSize = data.scopeSize
        }
    }

    save() {
        localStorage.setItem("save", JSON.stringify(this));
    }
}

Additionally, the game’s performance has been optimized to handle multiple moving elements without significant FPS drops, with only minor issues arising when enemy rotation was introduced (disabled for the FPS sake).

Design

Areas for Improvement and Challenges
While the project has made significant progress, there are several areas for future improvement. The settings button on the home screen is currently non-functional and needs to be implemented. Expanding the variety of enemies and introducing the ability to prestige levels are also planned enhancements that will add depth to the gameplay.

Also I encountered a significant scaling challenge when testing the game on devices with different screen sizes and resolutions. The game elements, including flying shapes, cursor box, and UI components, were not displaying consistently across various machines. To resolve this, I implemented a scaling solution using scale factor based on canvas size and baseWidth with baseHeight, that ensures optimal display across different screen sizes.

Any way one of the main challenges encountered was optimizing performance, particularly when adding rotation to the enemies. This issue highlighted the need for careful consideration of graphical elements and their impact on game performance. Moving forward, further optimization and potentially exploring alternative rendering techniques could help address these performance concerns and allow for more complex visual elements in the game.

Midterm Project – Serving Rush

Concept

When visiting different cafes, I often think how challenging it is for the waiters to keep in mind the orders of all people at the table – quite often they would place a dish your friend ordered in front of you instead, and then you will just exchange the plates by yourself. Not a big deal, right?  But visitors rarely think about the actual pressure in this kind of working environment – time, tastes, and preferences count for every customer.

I have decided to create a mini game that allows the player to experience how tricky it can actually be to serve the dishes during a rush hour. There is an extra challenge – the user is accompanying a table of two people on their first date, one of them is vegan and another loves meet. Will everything go as planned?

Sketch

https://editor.p5js.org/am13870/sketches/3_efwXDWQ

Highlight of the code

The most challenging part that I have managed to implement into my code was the functionality of the plates and the dishes on them. The falling dishes get attached to plate when caught by the user, and then the plate is dragged to the edge of the table. Vegetable-based dishes have to be dragged to the left, to Leonie, and meat-based dishes have to be dragged to the right, to Santi. If the player serves the dishes correctly, they get a tip – and I they don’t, they lose it.

Managing the interdependence of these objects was very tricky, but I have managed to defined specific functions within the classes so that everything appears and disappears when needed. Furthermore, setting up the winning and loosing conditions took time, so I have followed the guidelines from the class slides to add navigation through the screens.

  display() {
    image(plate2Patterned, this.x - this.radius, this.y - this.radius, this.radius * 2, this.radius * 2);

    // displaying the dish attached to the plate
    if (this.attachedShape) {
      this.attachedShape.x = this.x;
      this.attachedShape.y = this.y;
      this.attachedShape.display();
    }
  }

  mousePressed() {
    let d = dist(mouseX, mouseY, this.x, this.y);
    if (d < this.radius) {
      this.dragging = true;
      this.offsetX = this.x - mouseX;
    }
  }

  mouseReleased() {
    this.dragging = false;
  }

  attachShape(shape) {
    if (this.attachedShape === null) {
      this.attachedShape = shape;
    }
  }

  resolveShape() {
    if (this.attachedShape.type === 'vegetable' && this.x - this.radius <= 50) {
      score += 1;
    } else if (this.attachedShape.type === 'vegetable' && this.x + this.radius >= 750) {
      score -= 1;
    } else if (this.attachedShape.type === 'meat' && this.x + this.radius >= 750) {
      score += 1;
    } else if (this.attachedShape.type === 'meat' && this.x - this.radius <= 50) {
      score -= 1;
    }

    // removing the dish as it reaches the end
    this.attachedShape = null;
  }
}
Reflection

I have started the project by developing the “physics” part, so that all objects in a simplified style would move correctly. For example, the dishes were drawn as triangles and squares at first. After finalising this part, I have moved on to adding the detailed visuals – this was not the easiest part as well, but I enjoyed developing a certain aesthetic of the game.

I started the design stage by going back to the original reference for the game idea, the photograph by Nissa Snow, which depicts a long table with dishes on it. Using Adobe Illustrator, I have created the table for my game, adding and editing images of objects that follow an artistic, slightly random, almost incompatible aesthetic. Then I used Procreate to draw the introduction screen, the victory, and the loss slides that are shown depending on the outcome of the game. The illustrations were created in a minimalistic manner in order not to clash with clutteredness of the table.

Future improvements

To develop this mini game further, I would add more conditions for the player – for example, new sets of guests can come and go, their dietary preferences can change. This would require implementation of several more arrays and functions to set up the food preferences, and I think this is an interesting direction to dive into.

MIDTERM

CONCEPT:
For my midterm project, I decided to combine my two favorite things together, SpongeBob and my childhood game Geometry Dash (which was my first inspiration for the game).
I decided to be more creative and create my own version of geometry dash using Spongebob as my main theme. Furthermore, instead of jumping over obstacles, you have to jump over SpongeBob characters.
The main goal of the game is to score as many points as possible by avoiding colliding with an obstacle; it’s pretty simple. I also added a twist to it; there’s a feature where you can fuel up the power bar by gaining more points, which leads to a rocket mode effect where you can collect double points but instead of jumping, you’re flying. For the characters, I decided just to use png images online, which I will attach to the website at the bottom; however, to incorporate shapes and colour, I decided to use shapes and gradients to create the theme of the background, including the burgers and jellyfish. I also used a Spongebob font for the text to add more to the aesthetic. To organize my codes, because at some point it got messy, I decided to create multiple files, for functions and classes, which made it a lot easier as I knew where everything was and it was most helpful in debugging anything if there was an error.

HIGHLIGHT:
The code I’m most proud of is probably the jellyfish part of the game because it handles more than one thing like spawning, moving, and removing jellyfish, while also checking for player collisions. It also has conditional behavior since the jellyfish can only cause the game to end when the player is in rocket mode. I had to redo the code multiple times as there were a lot of errors in the beginning and I had to update multiple loops. Additionally, it depends on variables like `isRocketMode` and `gameOver` from other parts of the game, which makes it more complicated to manage since it must stay in sync with the overall game.
here is the code:

function updateJellyfishObstacles() {
  // Spawn new jellyfish obstacles at intervals
  if (frameCount % jellyfishInterval === 0 && jellyfishObstacles.length < maxJellyfish) {
    let jellyfishY = random(70, height - 80);
    let jellyfish = new Jellyfish();
    jellyfish.y = jellyfishY;
    jellyfishObstacles.push(jellyfish);
  }
   // Update jellyfish obstacles and handle rocket mode collisions
  for (let i = jellyfishObstacles.length - 1; i >= 0; i--) {
    jellyfishObstacles[i].move();
    jellyfishObstacles[i].show();
    
    // Remove off-screen jellyfish
    if (jellyfishObstacles[i].offScreen()) {
      jellyfishObstacles.splice(i, 1);
      continue; // Move to the next jellyfish
    }
    
    // Only trigger game over if the player hits a jellyfish while in rocket mode
    if (jellyfishObstacles[i].hits(player)) {
      if (isRocketMode) {
        deathSound.play();
        gameOver = true;
      }
      
    }
  }
}


IMPROVEMENTS:
In the future, I would probably like to add more elements to the game as it gets repetitive. Also, if I had more time I would fix this upside-down section of the game, as I feel like it looks odd in some sort of way, since the obstacles are upside down but not the player. Moreover, I would also improve the way the obstacles are shown in the game, as I fear they aren’t visually clear or hurt the eyes when you look at it too long, and it is because its moving fast, however, if its too slow, the game would be easier.

Here is the game:


REFRENCES:
https://www.jsdelivr.com/package/gh/bmoren/p5.collide2D. (my collide reaction HTML)
https://www.fontspace.com/category/spongebob (font)
https://www.pngegg.com/en/search?q=spongebob (all my images)

Midterm Project: Collect the Shells!

Concept.

As soon as I figured it out that I want my midterm project to be a mini-game, there was no other option but to make something I would really enjoy playing myself. The “treasure hunt” mini-game was something that I really liked playing online as a child. As a fan of Lilo & Stitch animated feature, I had little doubt about the decision to make this version of the game revolve around my favourite characters.

The backstory of the game is preparation for Lilo’s birthday celebration: Stitch has to collect shells in order to tinker a bracelet for her beloved friend, avoiding the dead fish bones on his way. The game uses timers (10 seconds to memorize the position of the bones & 4 minutes to collect the shells) as well as a counter for shells throughout the game.

I really wanted this game to be helpful to train memorisation, as I know it might be a struggle for quite a few nowadays (including me) to memorise information. I truly hope that the players will get immersed into this game and have the urge to play it over and over again, so it will turn out not only as a simplistic entertaining experience but also as a good exercise for the mind.

Highlights & Reflections.

The most challenging part of the code was to make the shells & fishes appear exactly on the sandbox grid, because I accidentally made the wrong starting positions for the grid itself at the very beginning, which I had to figure out only later on.

My favorite part was working on the sound effects and other UI-experience functions (such as the winning & losing signs). The particular part of the code I am proud of is working with timers for the first time, because there are many conditions to take into consideration when resetting both timers and making sure they do not overlap one onto another:

// CHECKING IF SECOND TIMER IS :00 // 
if (isHuntTimerActive && huntTimerValue === 0) {
stitchX = initialX;
stitchY = initialY;
showLosingSign = true;
isHuntTimerActive = false; // Stop the hunt timer
canMove = false; // Disable Stitch movement when timer hits 0
}

if (timerValue > 0) {
// CASE 1: TIMER IS STILL RUNNING (NEED TO SHOW FISH ICONS)
for (let i = 0; i < cols; i++) {
for (let j = 0; j < rows; j++) {
sandboxes[i][j].display();
}
}

for (let i = 0; i < fishes.length; i++) {
fishes[i].display();
checkFishCollision(fishes[i], i);
}

for (let i = 0; i < shells.length; i++) {
shells[i].display();
checkShellCollision(shells[i], i);
}
} else {
// CASE 2: TIMER IS :00, DRAW FISH ICONS BEHIND THE GRID
for (let i = 0; i < fishes.length; i++) {
fishes[i].display();
}

for (let i = 0; i < cols; i++) {
for (let j = 0; j < rows; j++) {
sandboxes[i][j].display();
}
}

// CHECK IF STITCH STUMBLES UPON THE FISH ICONS //

for (let i = 0; i < fishes.length; i++) {
checkFishCollision(fishes[i], i);
}

for (let i = 0; i < shells.length; i++) {
shells[i].display();
checkShellCollision(shells[i], i);
}
}

The Game.

Future improvements:

    • It would be nice to have the game in the full screen mode, but due to the presence of grid in the game, I didn’t manage to figure out how to achieve this without any distortions.
    • There is a minor bug in the game that I would like to fix in the future: it’s the fact that the randomly generated fish and shell icons can overlap and be drawn one on top of another, which makes it impossible for user to win the game. As for now, the suggestion is to simply restart the game.
    • Last but not least, I would like to have a higher resolution images in the game in the future. Honestly, I was a bit scared to upload high quality images as I had the game crashed over and over again at the beginning of my work on it. Nonetheless, I believe that in future I will find a way to make the resolution higher (by drawing specific images right in the p5 editor, e.g. the pop-up window with instructions).

MIDTERM

CONCEPT:

The idea for my project initially came from my nostalgia for Fruit Ninja.

Fruit Ninja Classic - Halfbrick

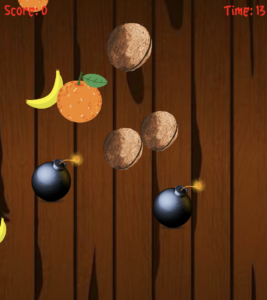
This was a game I enjoyed during my childhood, and I wanted to capture that excitement in my own way. I began by recreating the core mechanics: objects falling from above, mimicking the action of fruits being thrown up in Fruit Ninja. The player interacts by catching these items, with some scoring points and others, like the scorpions, leading to an instant loss. It took me a while to fine-tune these functions and get the timing, speed, and interactions to feel as responsive and engaging as the original game. At first, I struggled with the mechanics, as I wanted the motion and flow to feel natural and intuitive, just like in Fruit Ninja.

After a lot of trial and error, I was able to get the objects falling at varying speeds and from random positions, which gave the game a sense of unpredictability and challenge. I also added a cutting effect, just like in the game. This process helped me understand the importance of small details in game development, such as timing and object positioning. I also experimented with different speeds and sizes to make the game challenging yet enjoyable. The initial version was simple, but it felt exciting to see it come to life and mirror the familiar feeling of Fruit Ninja while incorporating my own twist. Here’s how it came out:

However, as I progressed, I realized that directly copying Fruit Ninja wouldn’t fully reflect my own creativity or bring anything new to the experience. This led me to reflect on my childhood memories. I recalled family trips to the desert in the UAE, where we would snack on dates and sweets under the open sky. I remembered the joy and the relaxed environment, but also my fear of scorpions, which were common in the desert. It struck me that this blend of joy and tension could provide a compelling twist to the game. I decided to adapt Fruit Ninja’s concept to incorporate elements of these desert trips. Instead of slicing fruits, the player would catch falling dates and sweets in a basket to score points, which was the cultural twist I wanted to add. Dates and traditional sweets, which are common in Emirati gatherings, served as the main items to catch, reflecting my childhood memories of trips to the desert with family. However, there was also a twist that added suspense to the game: scorpions. Just as scorpions are a real concern in the desert, they posed a threat in the game. If the player accidentally catches a scorpion, the game instantly ends, mirroring the risk and danger associated with encountering one in real life. To add more depth, I included power-ups like coins for extra points and clocks to extend the timer. These power-ups fall less frequently, requiring the player to remain alert and responsive. This combination of culturally inspired items, the risk of game-ending threats, and occasional rewards created a gameplay experience that balances fun and challenge. The game’s aesthetic, from the falling items to the traditional Arabic music, all contribute to the cultural theme. Overall, the game became not just a nostalgic tribute to Fruit Ninja but also a playful representation of a personal childhood experience infused with elements of Emirati culture.

HERES MY GAME:
LINK TO FULL SCREEN: https://editor.p5js.org/aaa10159/full/rZVaP6MKc

HIGHLIGHT OF MY CODE:

The gameplay mechanics involve the basket interacting dynamically with various falling items, including sweets, dates, scorpions, and power-ups. Each of these elements serves a unique purpose in the game. For example, catching sweets and dates earns points, catching a scorpion ends the game, and catching power-ups like coins or a clock offers bonuses that enhance the gameplay experience. Integrating these interactions smoothly required attention to detail and precision in coding, as I needed to ensure that each item type was recognized and handled correctly by the basket.

To handle collisions between the basket and the falling items, I implemented a collision detection method within the basket class. This method calculates the distance between the basket and each item, determining if they are close enough to be considered “caught.” If they are, the game then applies the appropriate action based on the type of item. This collision detection is crucial for the game’s functionality, as it allows the basket to interact with different items dynamically.

// Define the Basket class, which represents the player's basket in the game.
class Basket {
  // Constructor initializes the basket with an image and sets its position, size, and speed.
  constructor(img) {
    this.img = img;           // The image used to represent the basket.
    this.x = width / 2;       // Horizontal position, initially centered on the screen.
    this.y = height - 50;     // Vertical position, near the bottom of the screen.
    this.size = 150;          // Size of the basket, controls the width and height of the image.
    this.speed = 15;          // Movement speed of the basket, determining how fast it can move left or right.
  }

  // Method to control the movement of the basket using the left and right arrow keys.
  move() {
    // Move left if the left arrow;is pressed and the basket is within screen bounds.
    if (keyIsDown(LEFT_ARROW) && this.x > this.size / 2) {
      this.x -= this.speed;   // Update the x position by subtracting the speed.
    }
    // Move right if the right arrow is pressed and the basket is within screen bounds.
    if (keyIsDown(RIGHT_ARROW) && this.x < width - this.size / 2) {
      this.x += this.speed;   // Update the x position by adding the speed.
    }
  }

  // Method to display the basket on the screen.
  display() {
    // Draw the basket image at its current position with the specified size.
    image(this.img, this.x, this.y, this.size, this.size);
  }

  // Method to check if the basket catches an item (e.g., a date or power-up).
  catches(item) {
    // Calculate the distance between the basket's center and the item's center.
    let distance = dist(this.x, this.y, item.x, item.y);

    // Check if the distance is less than the sum of their radii.
    // If true, this means the basket has caught the item.
    return distance < this.size / 2 + item.size / 2;
  }
}

In this code, the ‘catches()’ function plays a central role. It calculates the distance between the basket and the center of each item. If this distance is smaller than the sum of their radii (half their sizes), it means the item is “caught” by the basket. This collision detection method is efficient and works well for circular objects, which is perfect for the various falling items in the game.

By using this approach, I was able to ensure that the basket can accurately catch power-ups, dates, and sweets, and also end the game when a scorpion is caught. It’s a simple yet effective way to handle interactions between the player and game objects, which is essential for my game. This method also ensures that players can control the basket smoothly, making it feel natural as they try to avoid scorpions and collect items to score points.

FUTURE IMPROVMENT:

One of the specific challenges I encountered was perfecting the basket’s interaction with falling items, particularly when it came to maintaining accuracy in collision detection. Initially, I found that the items would sometimes pass through the basket without registering a catch, which was frustrating. To resolve this, I adjusted the bounding boxes for each object and tuned the distance calculations in the ‘catches’ function. However, this process revealed another area for improvement: the scorpion’s animation. Currently, the scorpion is static, but animating it would add a dynamic and slightly intimidating effect, enhancing the player’s experience.

Another improvement I’d like to make involves expanding the game by introducing different game modes. Currently, the game focuses on catching dates and sweets while avoiding scorpions, but I envision adding modes with unique objectives and challenges. For instance, one mode could intensify the difficulty by increasing the speed of falling items, while another could introduce new types of falling objects that require different strategies to catch or avoid.

Additionally, I would like to explore a survival mode where players have to last as long as possible, with gradually increasing difficulty as more scorpions and fewer power ups appear over time. By adding these game modes, It would offer players more choices and variety, encouraging them to keep playing and exploring new strategies within the game. This would not only add depth to the gameplay but also align with my goal of making the game more engaging and enjoyable for a broader audience.


Midterm project | Ear Puzzle Experience

Interaction & Page design

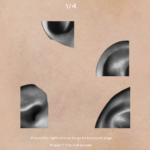
Each page is a separate function named as displayGamePage_. Users interact with my functions by clicking the mouse & the keys.

  1. Press the canva to enter the game stage;
  2. Click M to go back to main;
  3. Click on the right arrow to enter the next game page;
  4. Click F to enter full screen.

By having small design details, such as having the icon of the cursor also as a mouse, choosing the font & the background music, and having poetry about ears at the beginning and the end, the Ear Puzzle aims to strengthen the idea of deconstruction. Putting familiar yet unfamiliar objects to a space where users view it from an unusual perspective allows them to reflect on their own relationship with the objects.

Link to full screen.

Realization & Difficulties

The most difficult part about the code is, as what I expected, checking the WIN CONDITION. 

For this initial sketch I have, the page will allow the win condition but only by chances.

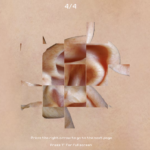
I thought the issue was on the rotation(). However, I tested the same rotation logic and it worked fine for the final work. Major reason could be that I tried to cut all the images in one function in the main js sketch. Even when the user wins, the refreshing of the next page does not follow up.

function startNewGame() {
  

  let imageIndex = gameIndex - 1; // initially gameIndex = 1
  let numPiecesOptions = [4];  // number of pieces per image
  numPieces = numPiecesOptions[imageIndex]; // an array containing the number of pieces for each image
  
  let img = images[imageIndex]; // access an element in the images array at the index specified by imageIndex
  pieces = [];
  correctRotation = 0;
    
  
/////////////////////////////////////////////maybe no need
  let pieceWidth = img.width / 2
  let pieceHeight = img.height / 2

  let scaledPieceWidth = width / 2
  let scaledPieceHeight = height / 2
/////////////////////////////////////////////maybe no need

  
  // create puzzle pieces with random rotations

  for (let x = 0; x < sqrt(numPieces); x++) {
    for (let y = 0; y < sqrt(numPieces); y++) {
      let imgSection = img.get(x * pieceWidth, y * pieceHeight, pieceWidth, pieceHeight);
      let scaledX = x * scaledPieceWidth;
      let scaledY = y * scaledPieceHeight;
      let piece = new PuzzlePiece(scaledX, scaledY, scaledPieceWidth, scaledPieceHeight, imgSection);
      pieces.push(piece);
    }
  }
}

Traumatized by the chaos, I decided to break down every variable so that they don’t overrun each other. Initially, I was using square root of puzzle-pieces as an indicator of the cut. For this new (also the final) implementation, I decided to use numbers.

I also gave up on making it a win/lose situation, meaning that users won’t enter the next page automatically as they get the rotation right. The game changes to an experience, and the users have to press the right arrow to enter the next page. Honestly I don’t think it changes the concept of my game since users are still able to play with the rotation, and their eyes will tell them if it’s correct or no.

Some small issues including not being able to add the sound effect I want or not being able to avoid collision between the image and the text. Something I wanna fix in the future. Though full screen stretches the image, I still think it’s important to have it because I changed it into an experience.


Assignment 6: Midterm Project (More Keychains?!)

Sketch

Link to full screen!

Screenshots

Concept

The concept originated from my obsession with keychains. I love having silly little knicknacks dangling off the zippers on my bag, or making jingling noises as i move my house keys. I wanted to encapsulate this experience so that’s why I decided to base my midterm on this idea.

In this game, users are free to decorate their bag with any of the keychains provided. They can move the keychains around to their liking to place anywhere on their bag, while also being able to rotate the keychain to best fit their preferred orientation. And note how the keychain jingles when it’s moved!

There is also a bonus feature in which the user can get one randomly generated special keychain to add to the collection!

Code, Problems, and Favorites
  • I really enjoyed illustrating some of the keychain designs (including the keychain hook) by hand on PowerPoint
  • Using an array with the file names for my keychain images, and using a loop to run through the array to quickly load all of the images made it so much easier.
function preload() {
  
  // array of image names
  let imageNames = [
    "/images/strawberryChain.png",
    "/images/carrotChain.png",
    "/images/tomatoChain.png",
    "/images/specialChain.png",
    "/images/specialChain1.png",
    "/images/specialChain2.png",
    "/images/specialChain3.png",
  ];

  // load images and sound
  for (i = 0; i < imageNames.length; i++) {
    let newChain = new Keychain(
      loadImage(imageNames[i]),
      random(40 + 40, 320 - 40),
      random(150 + 50, 500 - 130),
      70
    );
    chains.push(newChain);
  }
}
  • I used a lot of Classes in my project and I’m honestly glad I did because it made my code so much neater (albeit still messy, but it’s good enough!). I made a class for my keychains, the bag, and the background scenes depending on the game state. This way, my sketch file is less populated!
  • I had a lot of troubles trying to figure out how to rotate the keychains on click, but I managed to figure it out by adding an angle attribute to my Keychain class.
function mousePressed() {
  for (let chain of chains) {
    
    // checks if mouse is over keychain
    if (chain.isMouseOver() && gameState != "end") {
      
      // tilt the keychain when clicked
      i = 10;
      if (chain.angle > -90) {
        chain.angle -= i;
      } else {
        chain.angle = 90;
      }
...
  • In terms of the design, I was sure I wanted to include pinks and purples, and the whole idea of ‘decorating/personalizing’ reminded me of GirlsGoGames (GGG), an old online gaming website that I used to play when I was younger. And this is what inspired my overall design layout, style, and color palette!

For the Future

As much as I am proud of the final outcome, I still have areas of the project that I would like to improve on.

Firstly, the png images of the keychains, after resizing, looks very pixelated, so in the future I would consider this when illustrating and implementing images.

Second, there seems to be some glitch on the special keychain side. When a special keychain has been revealed, it takes the second mouse click for it to be able to be dragged, so it doesn’t drag on the first click. I’m still unsure as to how to fix this.

Third, as of right now, all of the keychains are presented when it hits the end game state. However, it would be better if I could somehow hide unselected keychains so that users can pick which keychains they want to use and which they don’t. Perhaps I could use selection statements to see if the keychains are not position on the area of the bag, then they should not be shown when it hits the end game state.

Final Thoughts

I really love how this project turned out; it’s fun, it’s cool, and it’s pink!