
Concept
With the assignment being to create an unusual switch that doesn’t require the use of the hands, I struggled a bit to come up with an idea. After seeing an example in class (the one using foil mustache that completes a circuit when smiling), I wanted to use some kind of an action using the a body part to complete a circuit as well. So I came up with the idea to use the action of waving. When you wave, the forearm and the upper arm usually makes contact, and I used this point of contact as my unusual switch. Hence the name: Wave to Say Hi!
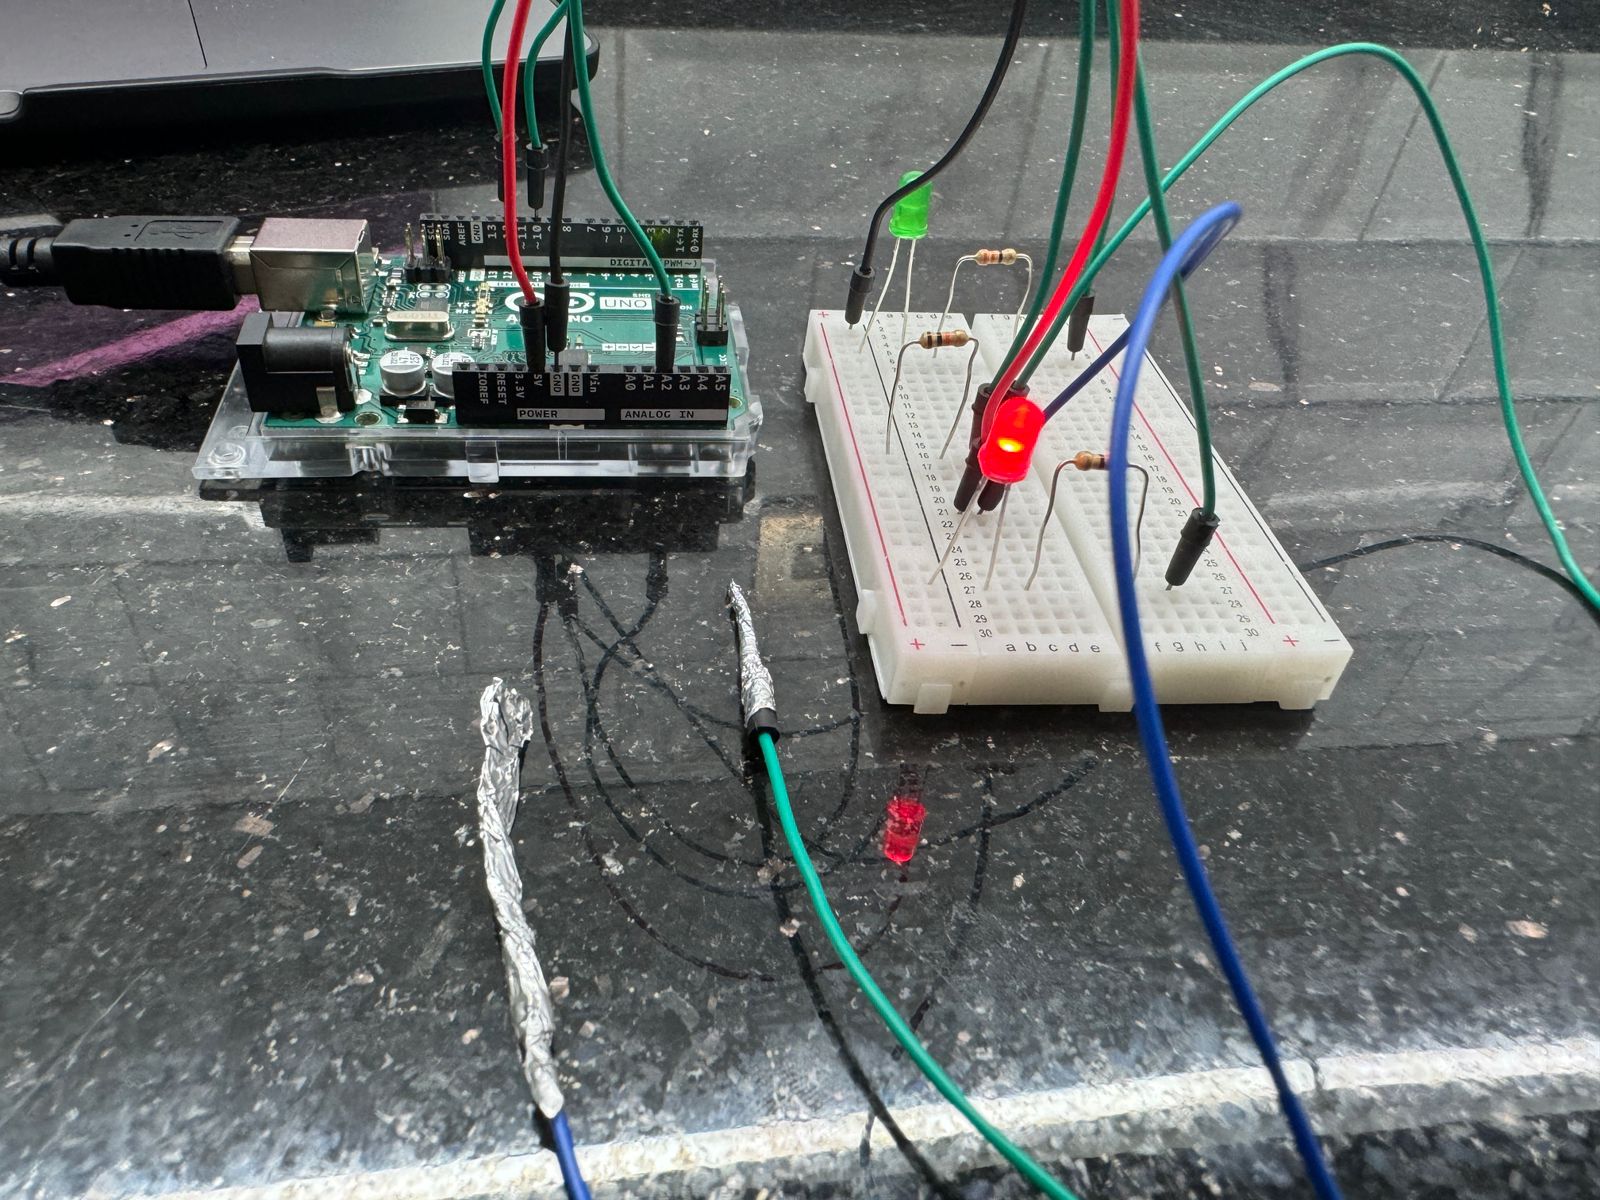
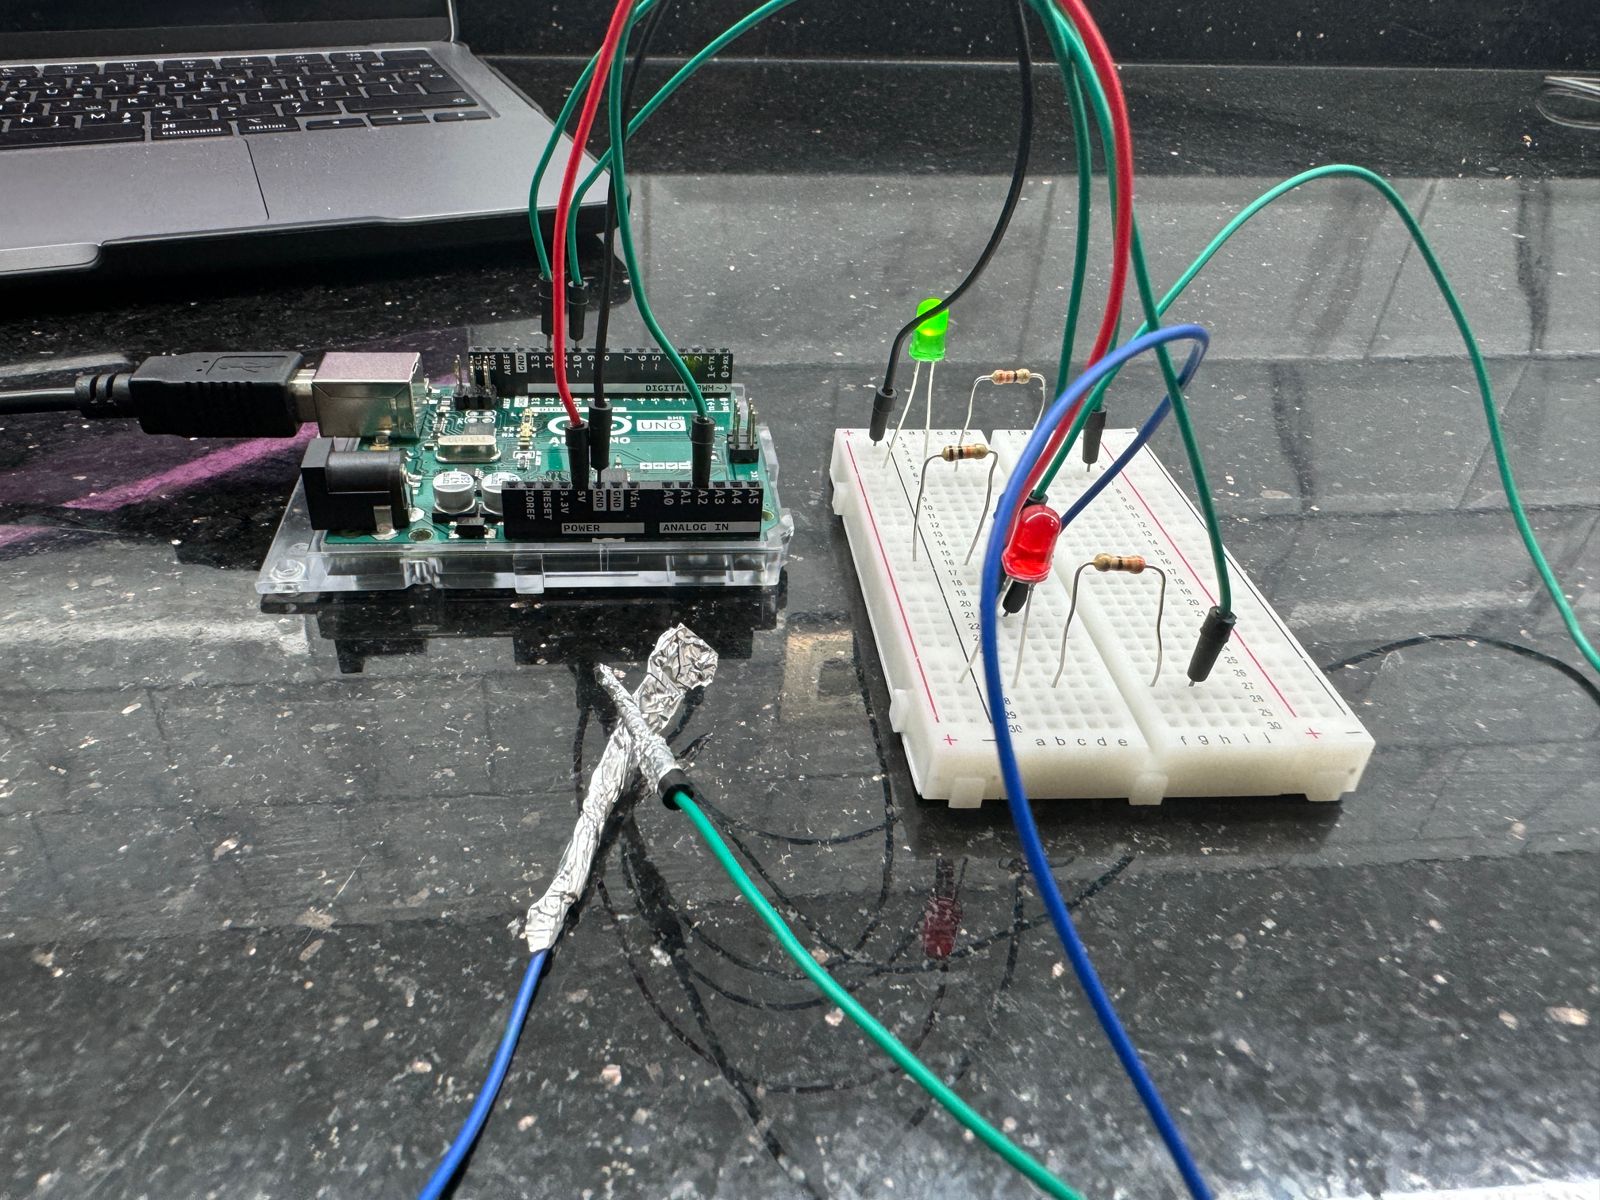
Photos and Videos
Code Snippet
void setup() {
  // initialize input and output
  pinMode(12, OUTPUT);
  pinMode(10, OUTPUT);
  pinMode(A2, INPUT);
}

void loop() {
  // variale declarations
  int greenLED = 12;
  int redLED = 10;
  int buttonState = digitalRead(A2);

  if (buttonState == HIGH){
    // if waving hi, green light ON, red light OFF
    digitalWrite(greenLED, HIGH);
    digitalWrite(redLED, LOW);
  }
  else {
    // if not waving hi, green light OFF, red light ON
    digitalWrite(greenLED, LOW);
    digitalWrite(redLED, HIGH);
  }

}
Circuit Illustration
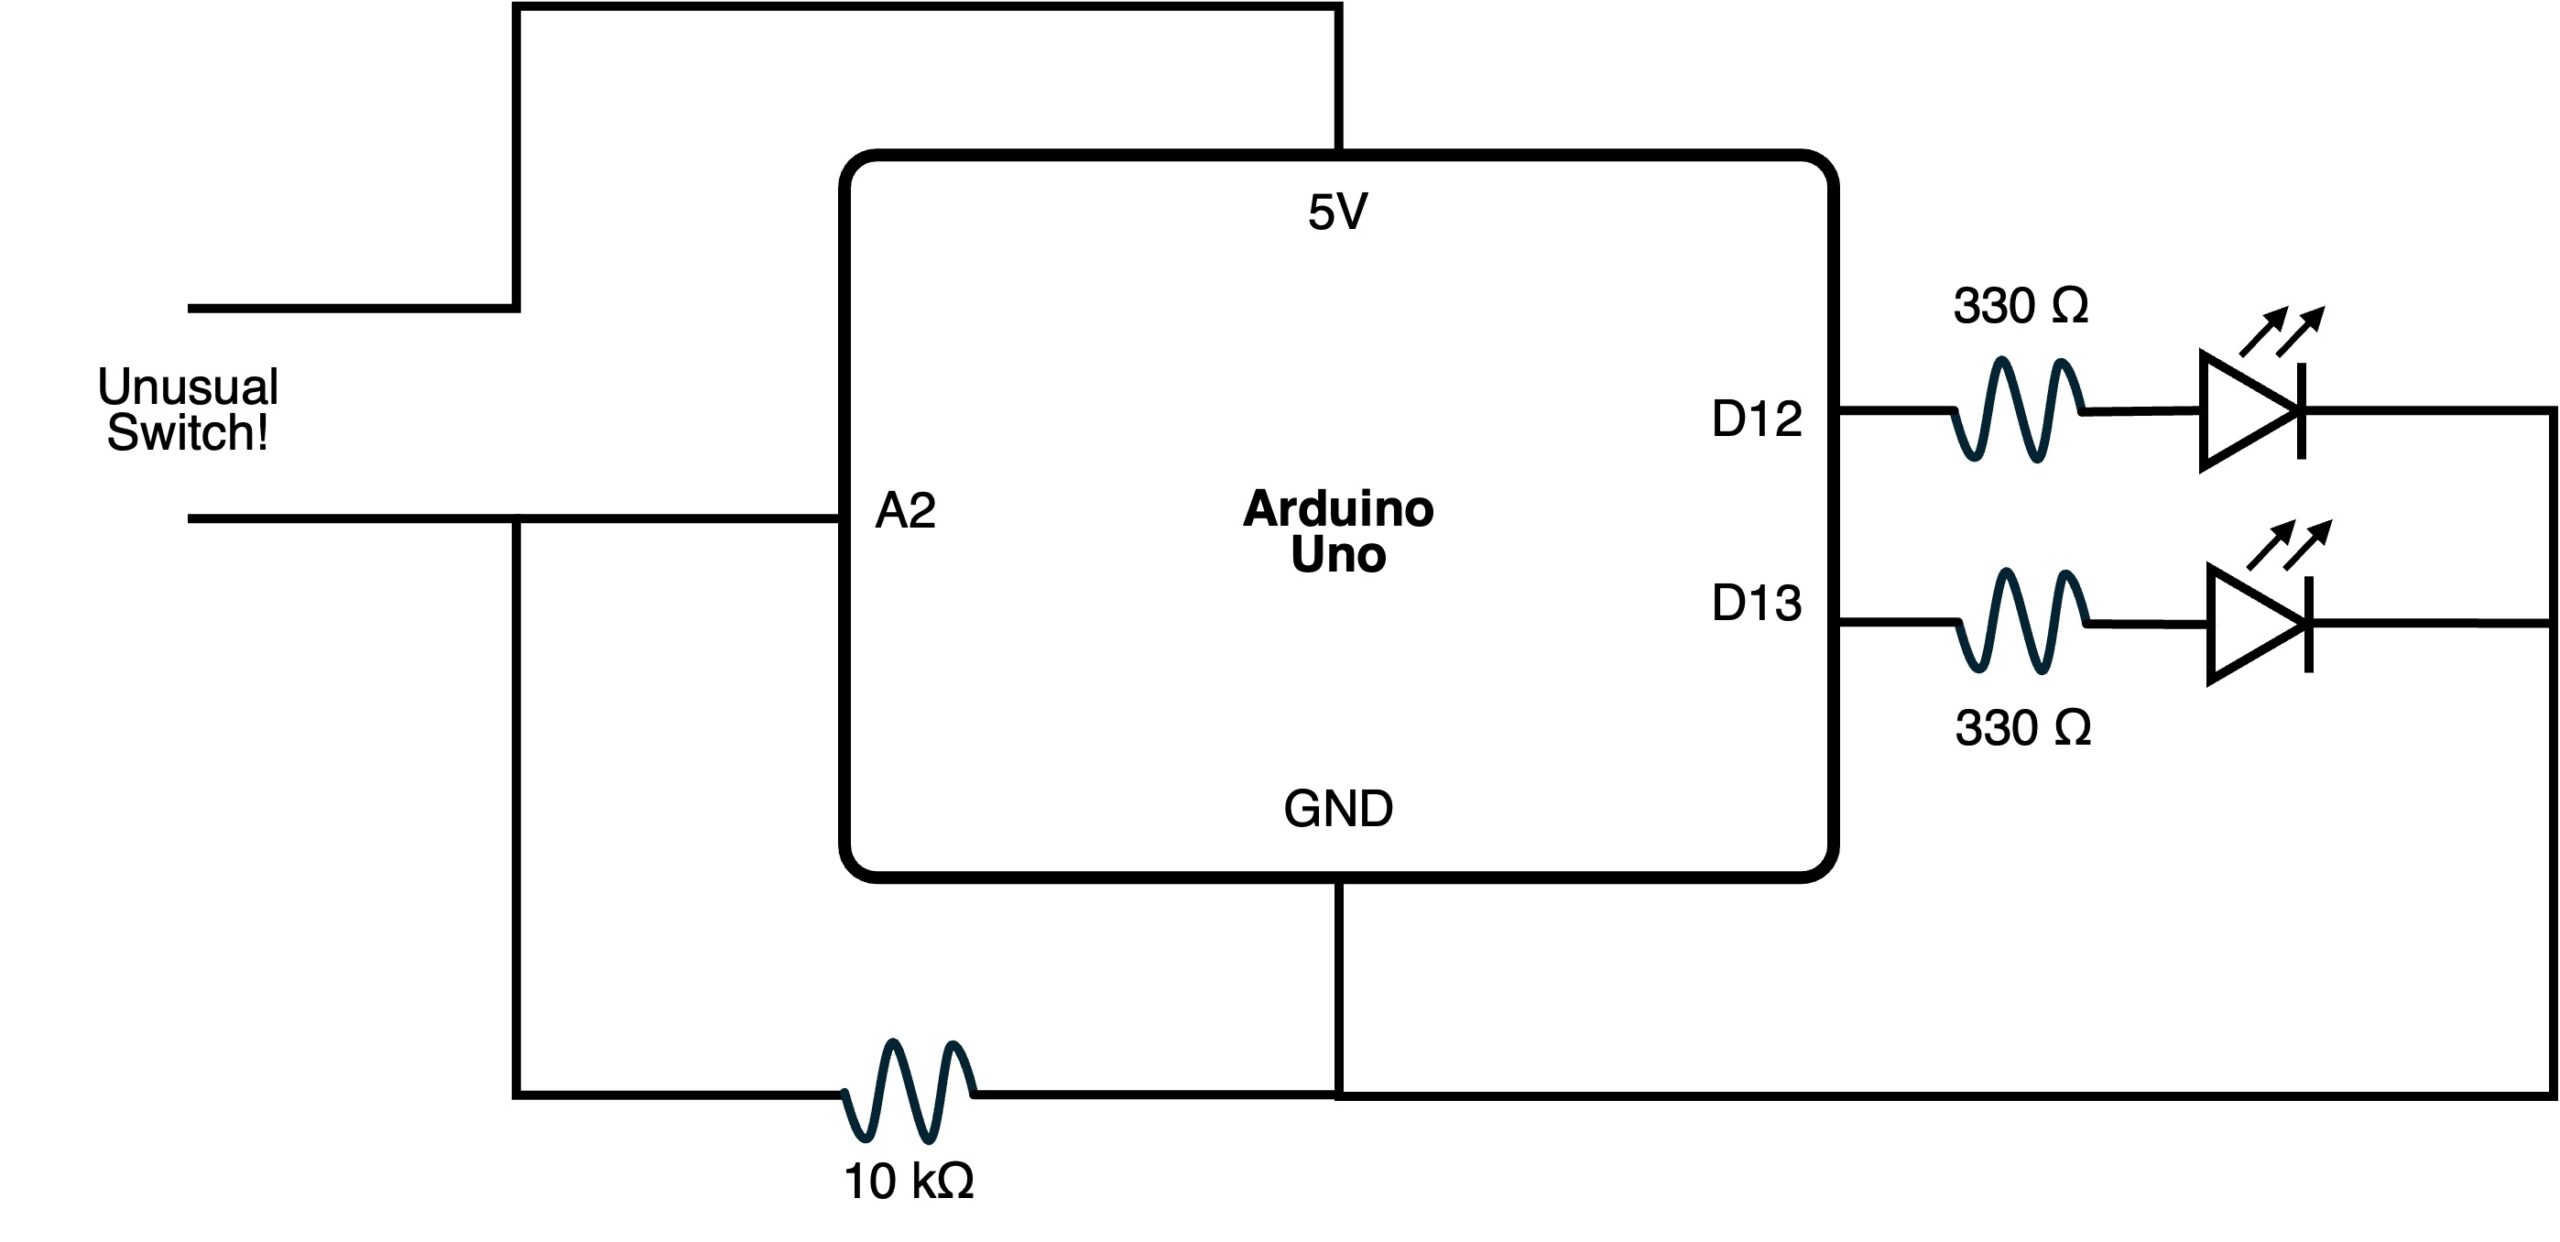
(Circuit illustration done on PowerPoint)
Arduino Setup
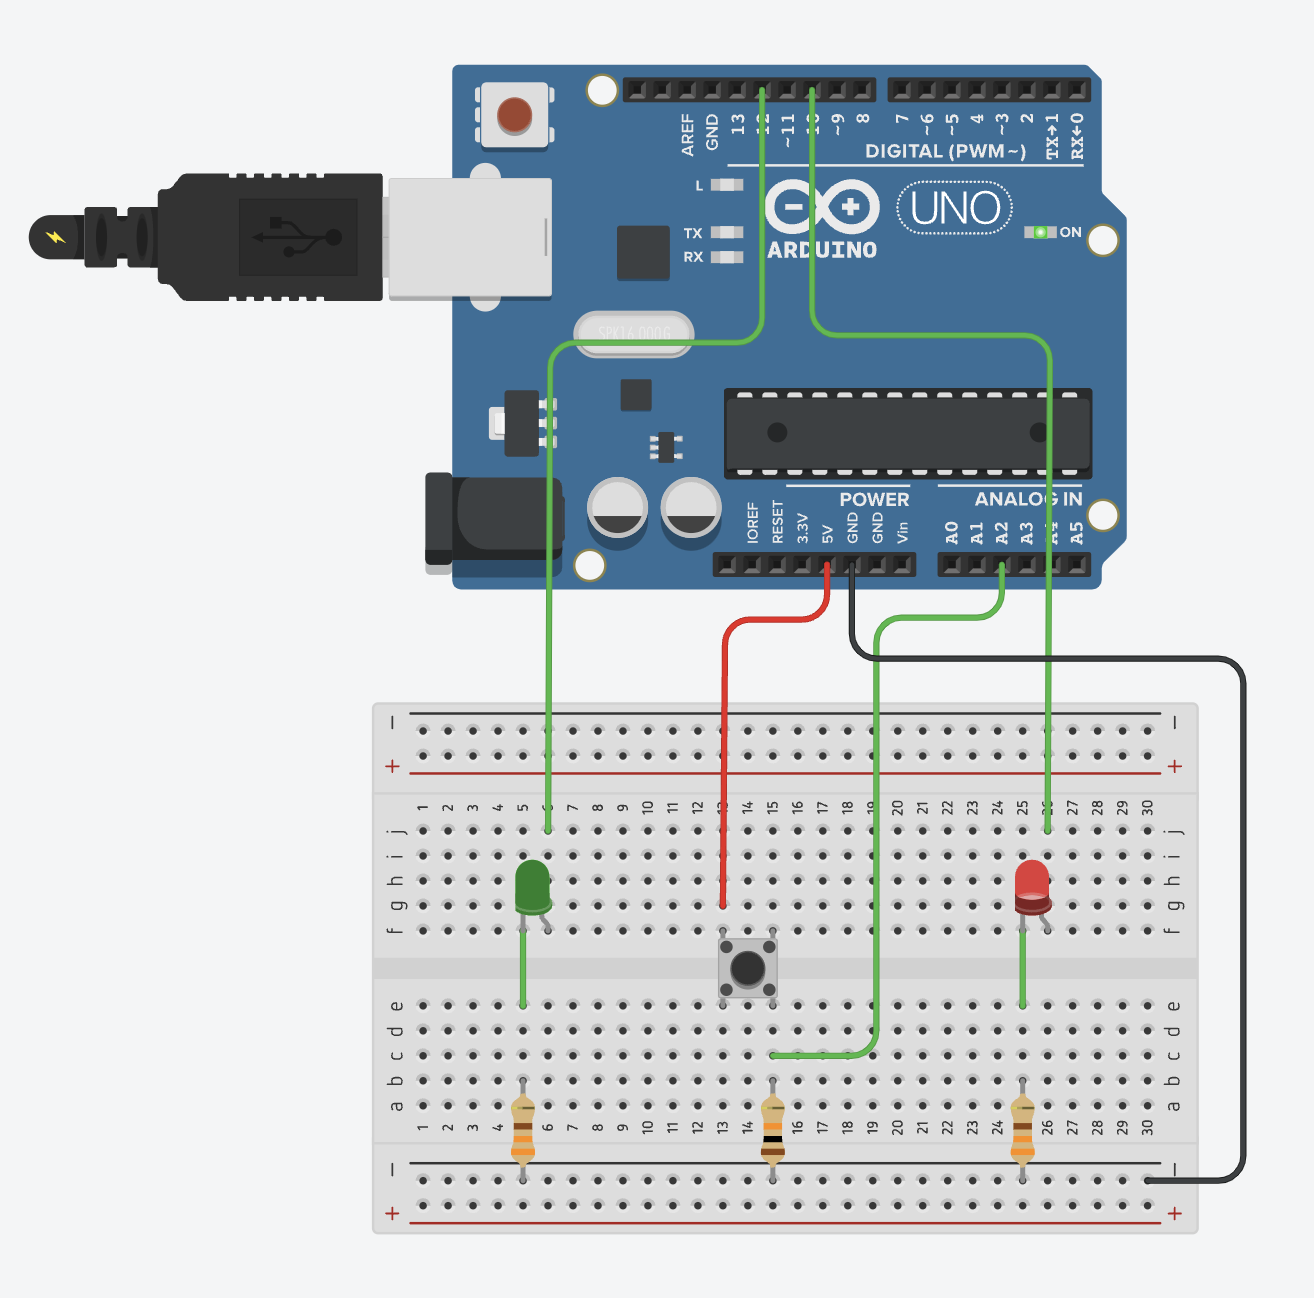
(I used the website Tinkercad to make the above Arduino circuit diagram.)
For this project I used two LEDs: red and green. I connected the two LEDs to the pins D10 and D12 respectively, and hence used them as outputs in my code. For the analog input, I had my unusual switch (which would be in place of the push button switch in the diagram) making a connection between 5V and the pin A2.
Code
Reflection
I was happy with how I incorporated two outputs into my circuit, but for my input, I’d like to try using a sensor instead of a ‘switch’ in the future.