# Jump To:
# Introduction & Conception
Hey everyone, welcome back from your break! 👋
(I know, I know, I wish it was longer too… but hope you had a relaxing and wonderful break!)
This week’s practical assignment was to create a creative/unusual switch. I immediately got a few ideas in my head, but the one I ended up going with, was a “looking at” detector! (or rather, a very crude head rotation detector 😅). I wanted to activate something something just by looking at / facing it.
So I built a simple circuit with 3 LEDs, that could indicate the rotation of my head (where I was facing). I now remember that initially, I also wanted to extend this concept by having a multiple screen setup, and then automatically closing or blacking out the screens I wasn’t facing towards, saving energy. I also had one where it would automatically dispense food or something when I turned my head, building the ultimate “automated-eating-while-working-solution” (which would probably result in a montage of hilarious fails too) 😂. However, I somehow totally forgot about these, and only remembered while writing this blog post right now (and it’s too late to implement them now, probably for the better 😅). But argh man, those would have made for a much more interesting blog :/… oh well.
# Implementation
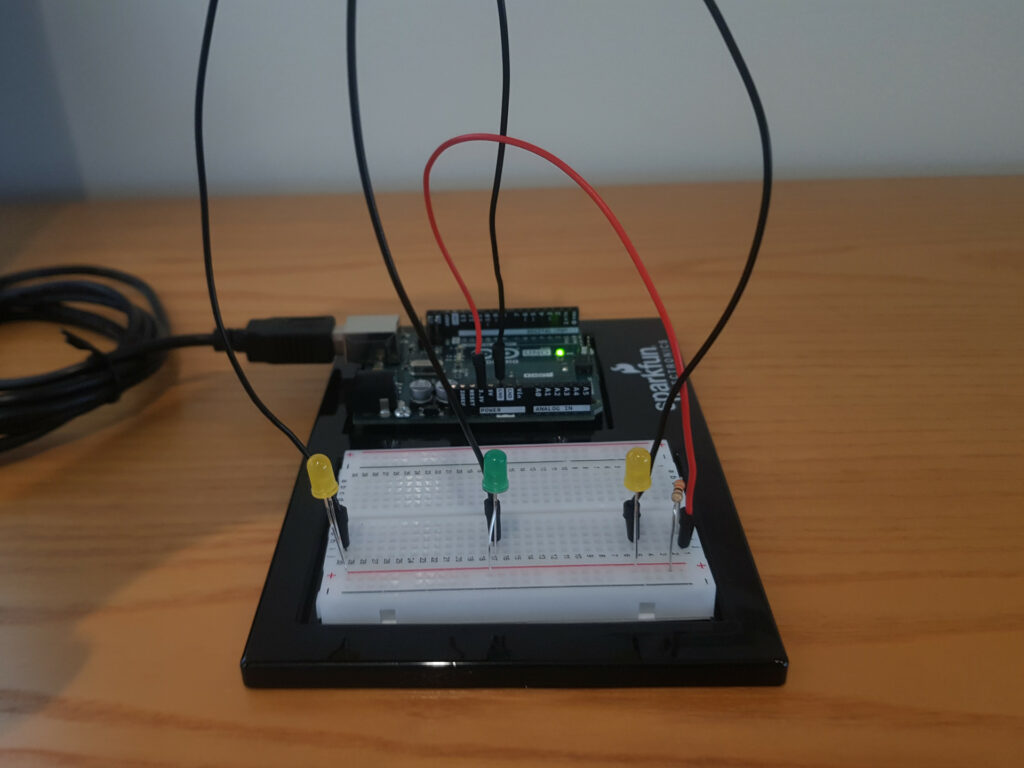
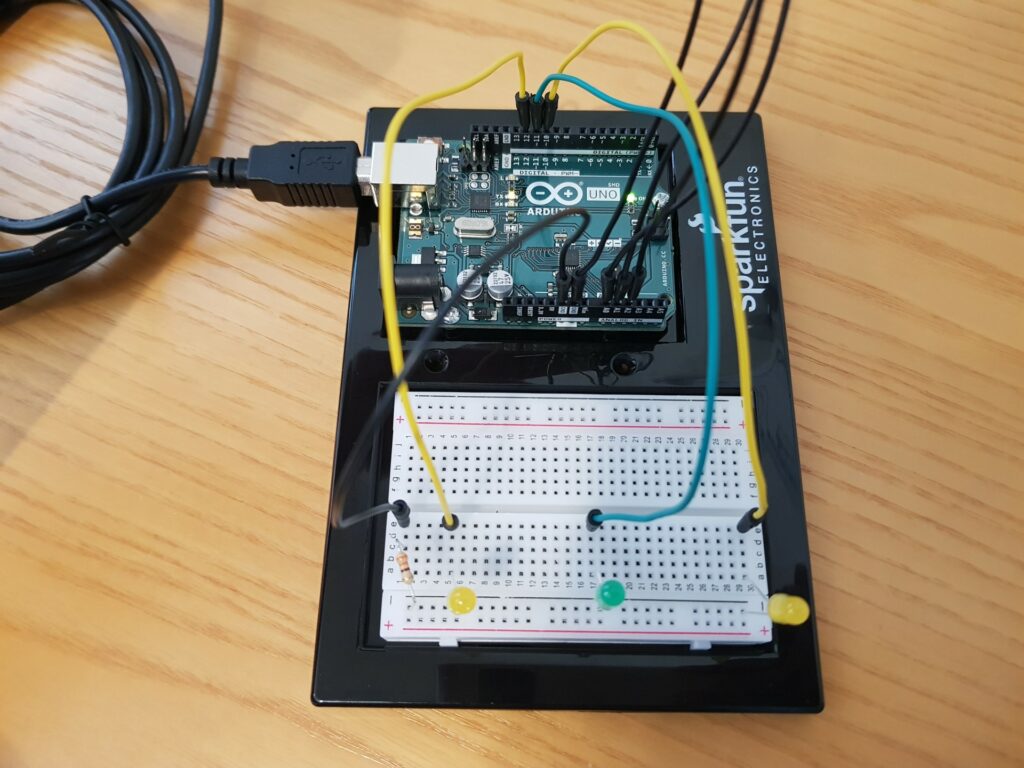
I first started by connecting 3 LEDs on a breadboard, to 3 resistors which connect to the Arduino’s 3.3V. Then I realised that I could use just 1 resistor, and so wired 3.3V to the resistor, and the resistor to the positive rail of the breadboard. Then I had a wire for each LED’s cathode (the shorter pin, the one that connects to ground), and could now activate any individual LED by connecting the Arduino’s ground wire to the LED’s ground wire! All that was left now was the simply connect ground to a hat (with some tape and foil) and a flag sticking out, and have a foil flag/square for each LED, and success!

This circuit is so simple in fact, that it doesn’t even need the Arduino! Literally the only thing the Arduino is doing here is providing power, which can easily be replaced with a battery. However, when I looked at the requirements again, it says we have to use digitalRead :/… Ah man, ok I’ll need to integrate it.
At first I really wanted to keep the simplicity as much as I could, and basically just try the Arduino pins as ground, so there would be almost no difference in the circuit, but we could detect which LED is being lit up. Unfortunately, I read that this is quite a bad idea as the Arduino isn’t well suited for that, so I had to double the number of wires, to separate the switch part from the lighting part. The circuit now still works in a very similar way, it’s just that when I try now connect 2 wires (meaning my head has turned to a certain position), the Arduino detects the switch is activated, and then powers the corresponding LED. Same functionality, but with including the Arduino and its digitalRead and digitalWrite functions. Oh also, I used “INPUT_PULLUP” instead of “INPUT” for the pinMode, as I didn’t want to add another 3 resistors 😅 (so the readings are flipped (as there’s no “INPUT_PULLDOWN” on most of the Arduino boards), 1 for inactive and 0 for active, but this isn’t an issue).
 Code:
Code:
const int rightLED = 10;
const int centerLED = 11;
const int leftLED = 12;

const int rightSwitch = A0;
const int centerSwitch = A1;
const int leftSwitch = A2;

void setup() {
  // Initialize serial communication at 9600 bits per second:
  Serial.begin(9600);

  // Inputs (set to INPUT_PULLUP instead of INPUT so that it automatically pulls up the value, saving me from adding 3 resistors 😅)
  pinMode(rightSwitch, INPUT_PULLUP);
  pinMode(centerSwitch, INPUT_PULLUP);
  pinMode(leftSwitch, INPUT_PULLUP);

  // Outputs
  pinMode(rightLED, OUTPUT);
  pinMode(centerLED, OUTPUT);
  pinMode(leftLED, OUTPUT);
}

void loop() {
  // Read the input pins
  int rightState = digitalRead(rightSwitch);
  int centerState = digitalRead(centerSwitch);
  int leftState = digitalRead(leftSwitch);

  // Power the correct LED
  digitalWrite(rightLED, rightState == 0 ? HIGH : LOW)
  digitalWrite(centerLED, centerState == 0 ? HIGH : LOW)
  digitalWrite(leftLED, leftState == 0 ? HIGH : LOW)


  // Print out the states
  Serial.print(rightState);
  Serial.print(',');
  Serial.print(centerState);
  Serial.print(',');
  Serial.println(leftState);

  delay(1);  // Short delay between reads for stability
}
# Final Result

# Additional Thoughts & Room for Improvement
I initially wanted to use a
Well, unfortunately that’s it for today (yea, this was a very short blog), so until next time!
