Week 8 Assignment: Head Switch

Concept:


Final results for you convenience: https://youtu.be/6M-4nbYk2Is


Initially, the idea of using a switch that didn’t require hands felt challenging to execute. However, after some contemplation, the thought process shifted: if not manually, perhaps turning on the switch wirelessly would be ideal. My initial idea was to see if I could use my laptop to turn on the light with a clap. This, however, didn’t work for two main reasons: 1) it still required using my hands, and 2) the claps were too soft, as sound is typically best detected in a controlled setting. I then considered if I could control the light by turning my head left or right. Once this idea settled, the execution began.

Design and Execution:

The following schematic represents the electrical connection for the Arduino Uno board:

Schematic image painfully made using photoshop.

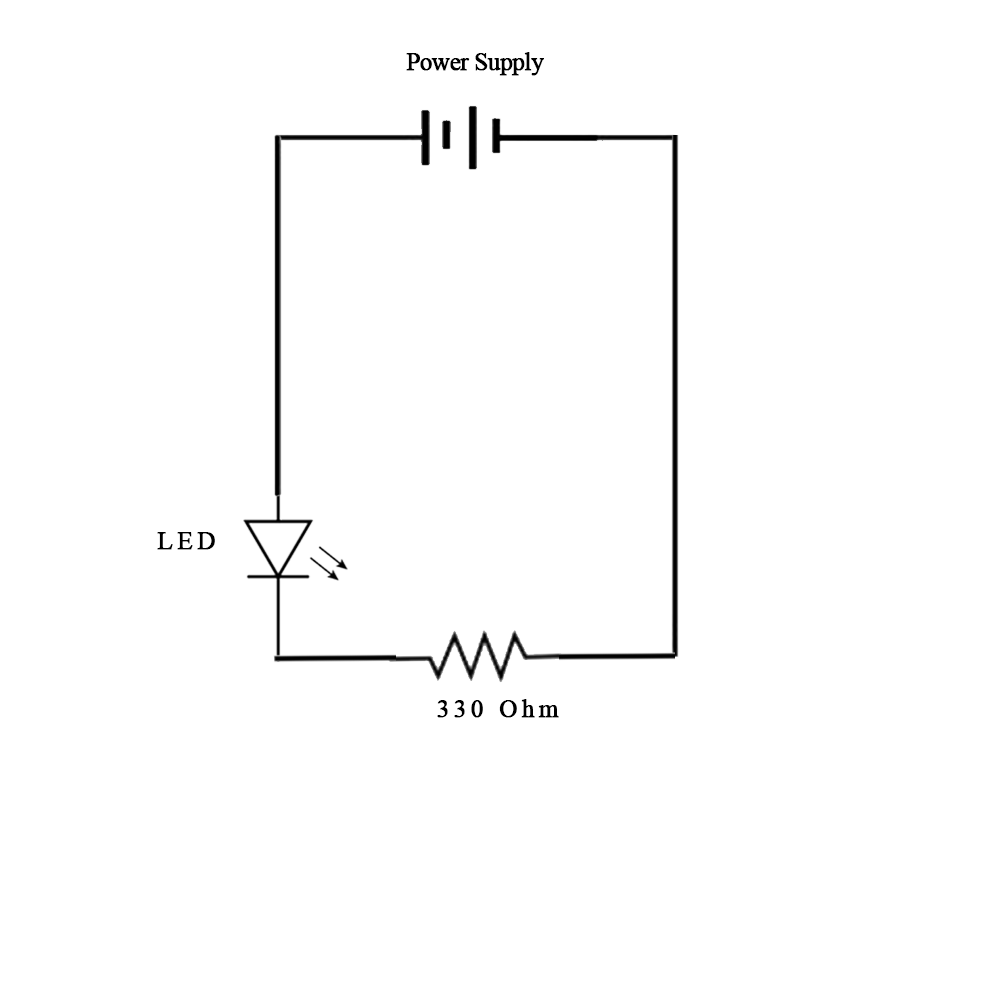
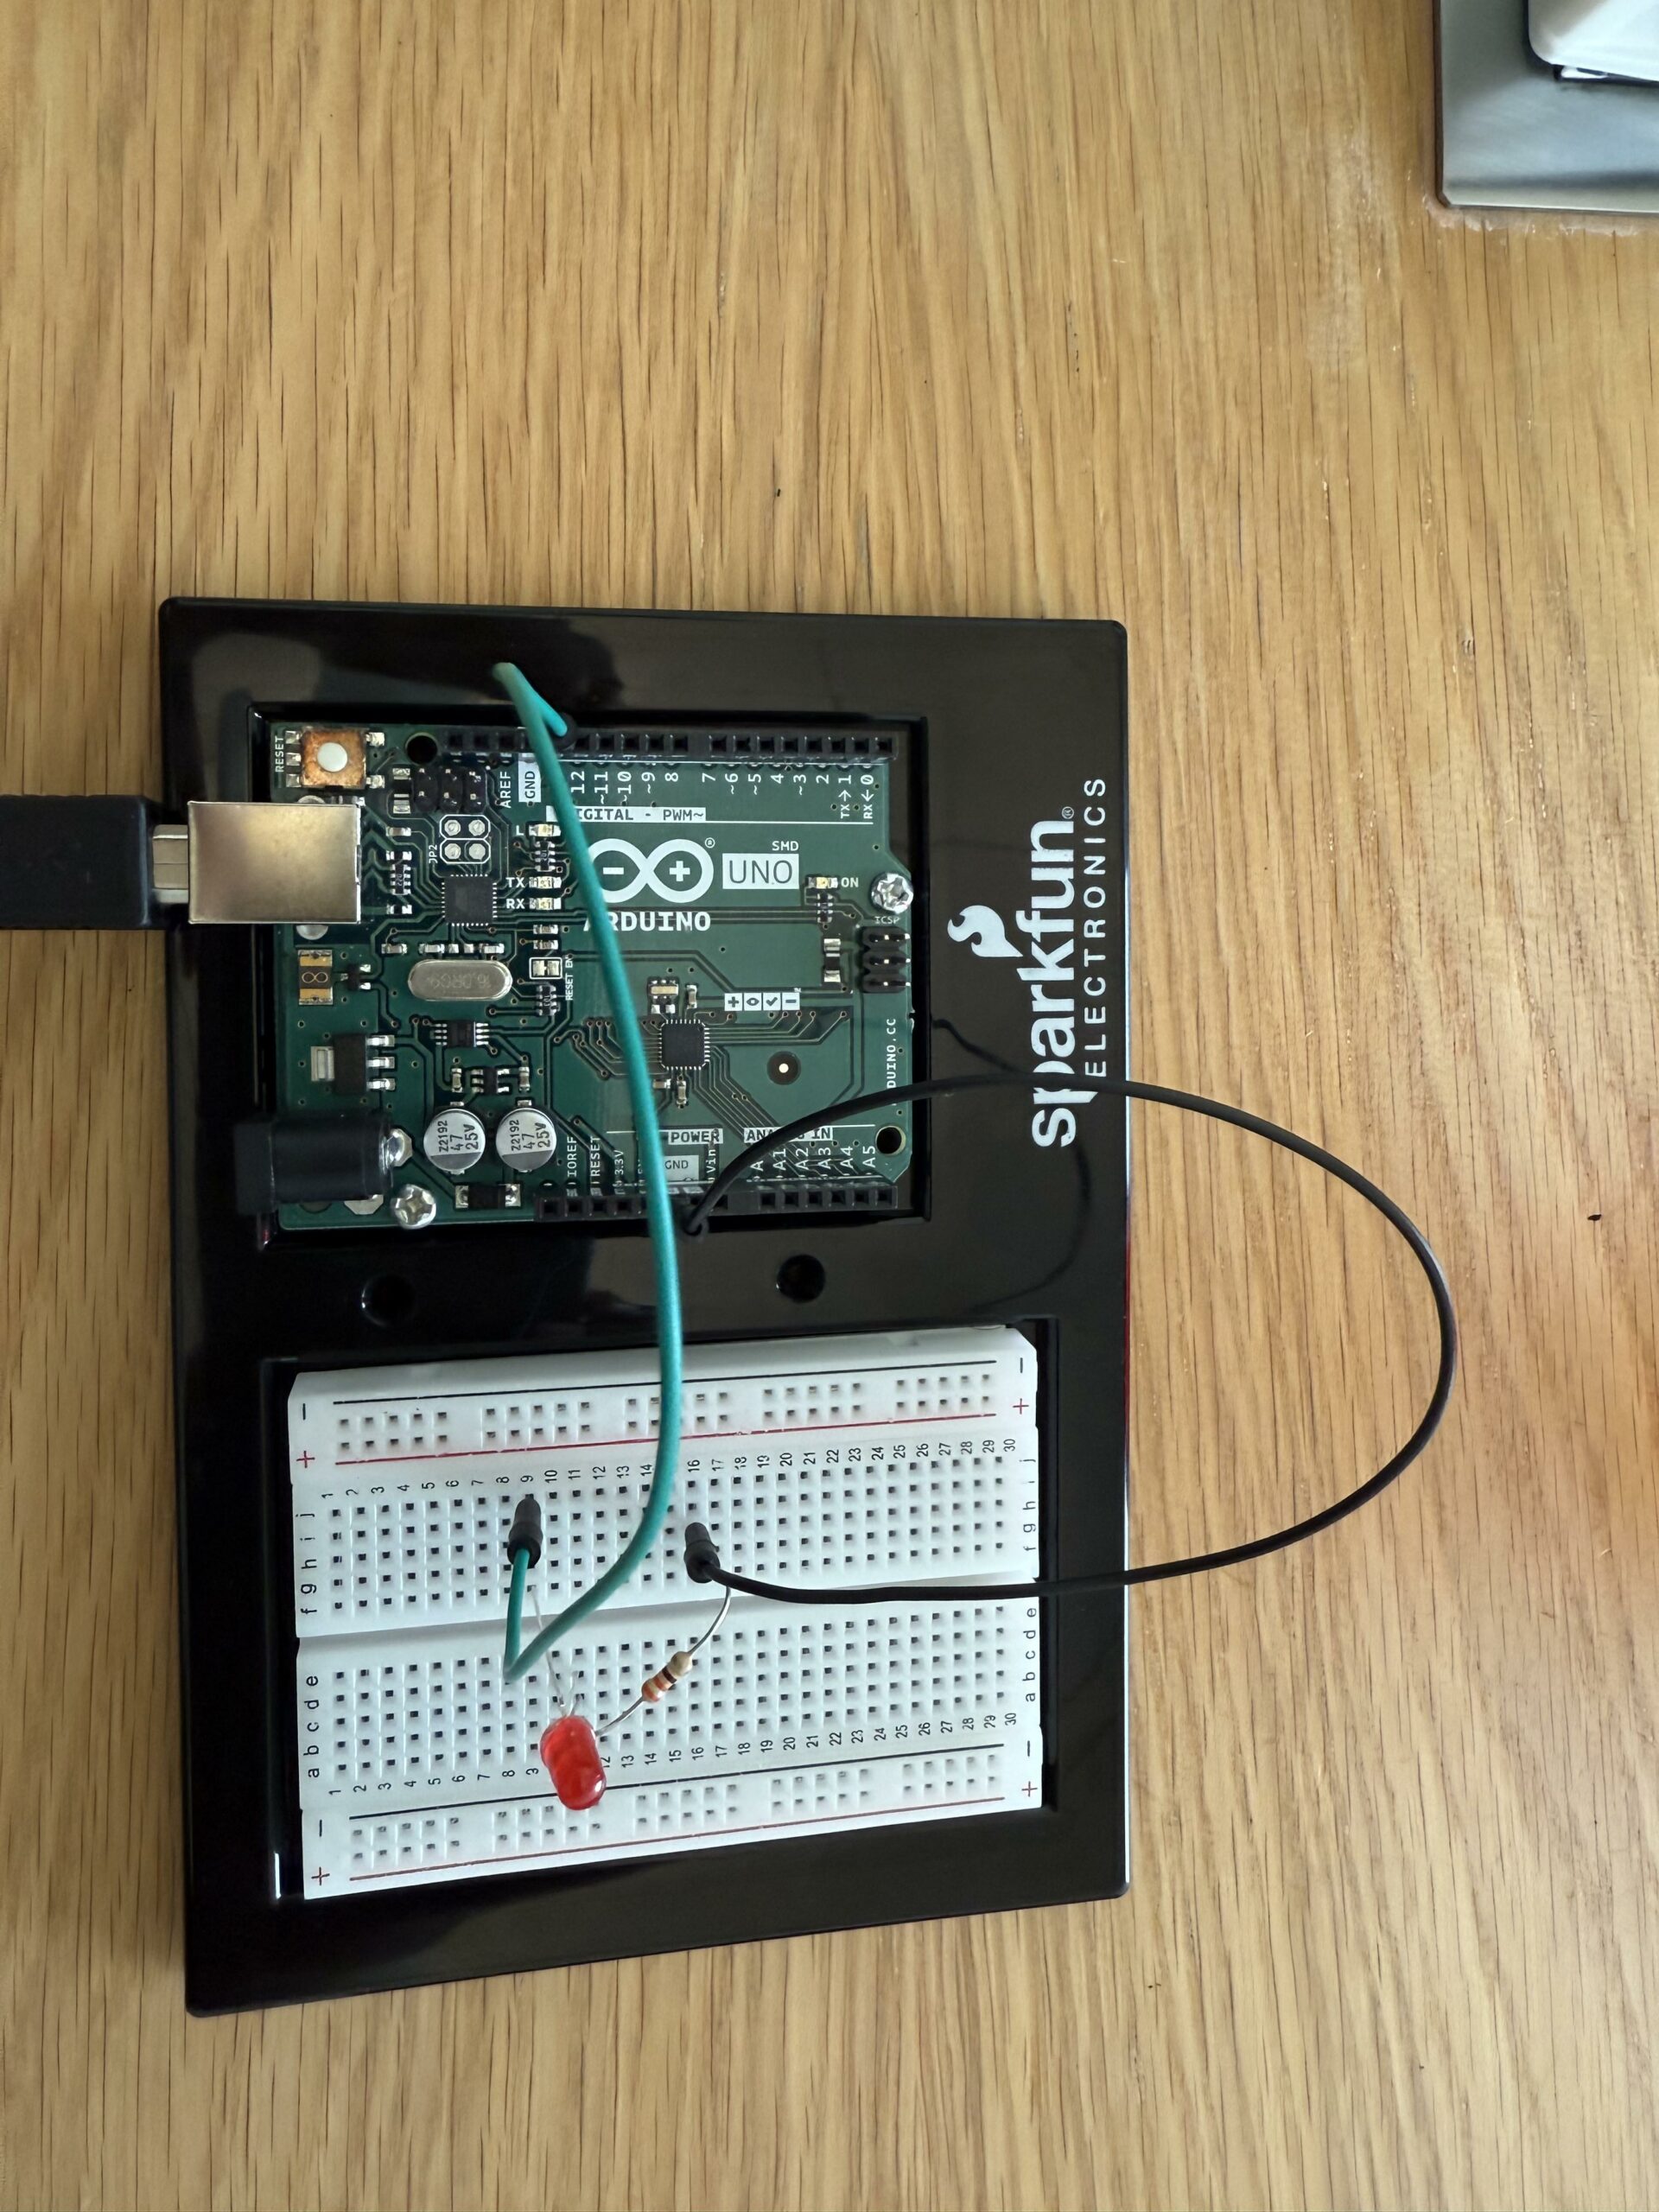
The final connection represented by the image above can be found from the image below:

Connection Image for the head switch LED control

Finally, the magic that brought everything together was not only the Arduino code but also a Python script, with a bit of help from everyone’s favorite chatbot. The following code was used in the Arduino IDE:

Plain text
Copy to clipboard
Open code in new window
EnlighterJS 3 Syntax Highlighter
const int ledPin = 13; // Pin connected to the LED
void setup() {
Serial.begin(9600); // Initialize serial communication
pinMode(ledPin, OUTPUT); // Set the LED pin as output
}
void loop() {
if (Serial.available() > 0) { // Check if data is available on the serial port
char command = Serial.read(); // Read the incoming byte
if (command == '1') {
digitalWrite(ledPin, HIGH); // Turn LED on
} else if (command == '0') {
digitalWrite(ledPin, LOW); // Turn LED off
}
}
}
const int ledPin = 13; // Pin connected to the LED void setup() { Serial.begin(9600); // Initialize serial communication pinMode(ledPin, OUTPUT); // Set the LED pin as output } void loop() { if (Serial.available() > 0) { // Check if data is available on the serial port char command = Serial.read(); // Read the incoming byte if (command == '1') { digitalWrite(ledPin, HIGH); // Turn LED on } else if (command == '0') { digitalWrite(ledPin, LOW); // Turn LED off } } }
const int ledPin = 13;  // Pin connected to the LED

void setup() {
  Serial.begin(9600);       // Initialize serial communication
  pinMode(ledPin, OUTPUT);  // Set the LED pin as output
}

void loop() {
  if (Serial.available() > 0) {  // Check if data is available on the serial port
    char command = Serial.read();  // Read the incoming byte

    if (command == '1') {
      digitalWrite(ledPin, HIGH);  // Turn LED on
    } else if (command == '0') {
      digitalWrite(ledPin, LOW);   // Turn LED off
    }
  }
}

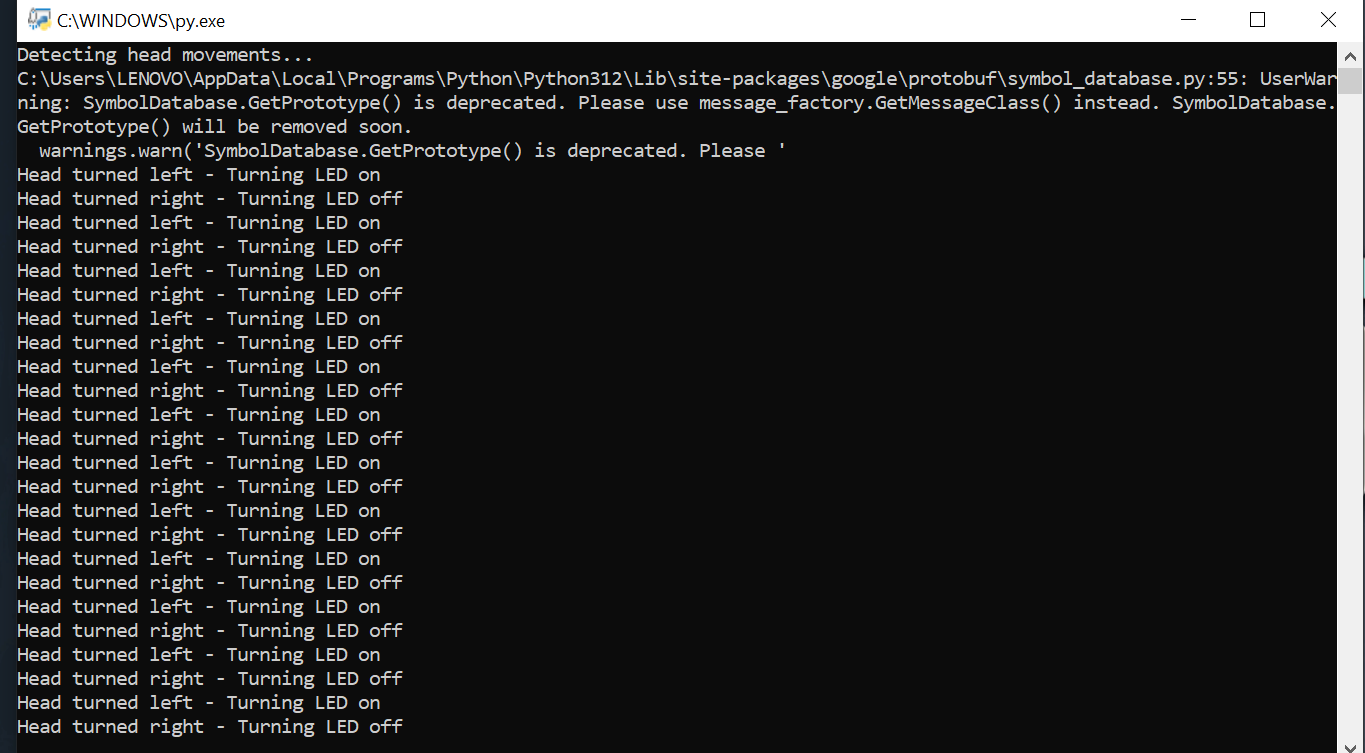
I then ran the Python code in my terminal, which activated the camera. Head tracking began, and from that point, turning my head to the left switched the light on, while turning it to the right switched it off. The following portion of the code made this possible:

Plain text
Copy to clipboard
Open code in new window
EnlighterJS 3 Syntax Highlighter
while True:
# Capture a frame from the camera
ret, frame = cap.read()
if not ret:
break
# Convert frame to RGB
rgb_frame = cv2.cvtColor(frame, cv2.COLOR_BGR2RGB)
# Process the frame with Mediapipe
results = face_mesh.process(rgb_frame)
# If a face is detected, analyze head direction
if results.multi_face_landmarks:
landmarks = results.multi_face_landmarks[0].landmark
direction = calculate_turn_direction(landmarks)
if direction < LEFT_THRESHOLD and not led_on:
print("Head turned left - Turning LED on")
arduino.write(b'1') # Send signal to Arduino to turn LED on
led_on = True
elif direction > RIGHT_THRESHOLD and led_on:
print("Head turned right - Turning LED off")
arduino.write(b'0') # Send signal to Arduino to turn LED off
led_on = False
# Display the frame (optional)
cv2.imshow("Head Movement Detection", frame)
if cv2.waitKey(1) & 0xFF == ord('q'):
break
while True: # Capture a frame from the camera ret, frame = cap.read() if not ret: break # Convert frame to RGB rgb_frame = cv2.cvtColor(frame, cv2.COLOR_BGR2RGB) # Process the frame with Mediapipe results = face_mesh.process(rgb_frame) # If a face is detected, analyze head direction if results.multi_face_landmarks: landmarks = results.multi_face_landmarks[0].landmark direction = calculate_turn_direction(landmarks) if direction < LEFT_THRESHOLD and not led_on: print("Head turned left - Turning LED on") arduino.write(b'1') # Send signal to Arduino to turn LED on led_on = True elif direction > RIGHT_THRESHOLD and led_on: print("Head turned right - Turning LED off") arduino.write(b'0') # Send signal to Arduino to turn LED off led_on = False # Display the frame (optional) cv2.imshow("Head Movement Detection", frame) if cv2.waitKey(1) & 0xFF == ord('q'): break
while True:
       # Capture a frame from the camera
       ret, frame = cap.read()
       if not ret:
           break

       # Convert frame to RGB
       rgb_frame = cv2.cvtColor(frame, cv2.COLOR_BGR2RGB)

       # Process the frame with Mediapipe
       results = face_mesh.process(rgb_frame)

       # If a face is detected, analyze head direction
       if results.multi_face_landmarks:
           landmarks = results.multi_face_landmarks[0].landmark
           direction = calculate_turn_direction(landmarks)

           if direction < LEFT_THRESHOLD and not led_on:
               print("Head turned left - Turning LED on")
               arduino.write(b'1')  # Send signal to Arduino to turn LED on
               led_on = True

           elif direction > RIGHT_THRESHOLD and led_on:
               print("Head turned right - Turning LED off")
               arduino.write(b'0')  # Send signal to Arduino to turn LED off
               led_on = False

       # Display the frame (optional)
       cv2.imshow("Head Movement Detection", frame)
       if cv2.waitKey(1) & 0xFF == ord('q'):
           break


Final Project:

Have a look at how the final project turned out in this short YouTube video:

https://youtu.be/6M-4nbYk2Is

Here is a progress of what happens when the user turns their head left and right:

Progress of head turns
Final Thoughts & Reflection:

This homework exercise was both fun and enjoyable. It pushed me to learn Arduino while thinking creatively about solving problems. Throughout the project, I kept considering how it might be integrated into my final project. So, instead of making this exercise long and complex, I approached it as a potential feature for the final project. That’s where I envision improvements and a broader application of this single project. That’s all for now!

Leave a Reply