
# Jump To:
# Introduction & Inspiration
Hey everyone, welcome back! 👋
Earlier in class, the professor showed us the Bloom app (by Brian Eno & Peter Chilvers), which I found really calming & elegant, with its simple and easy to understand function and interface. While thinking about it again at home that day, I remembered a few things I saw a while ago, that mainly related to the music that was coming out. One of them was ProjectJDM‘s videos (most notably his famous rainbow pendulum wave) and CodeCraftedPhysics‘s videos (such as this one). So, for this week’s project, I’d thought it been interesting to try and make something similar to the rainbow pendulum wave, also called, a polyrhymtic spiral (polyrhythm, due to the sound structure, and spiral, due to, it well, making spirals).
# Implementation
To start off, I began by just making some points along a line (plain and simple, without any classes for now).
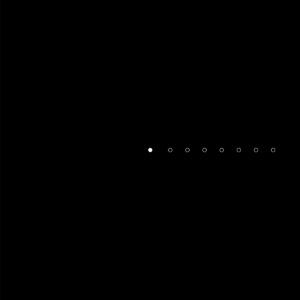
translate(width/2, height/2)

circle(0, 0, 10) // Center circle, filled (just for reference)
let n = 7 // Number of circles
for (let i = 0; i < n; i++) {
  circle(width/15 + i*4*width/(10*n), 0, 10) // Outer dots, outlined
}
I’m just drawing a few circles in a straight line in a loop. The spacing is a bit interesting, as width/15 is the offset from the center, and then the formula i*4*width/(10*n) increments the spacing for each index, mainly by dividing the width by the number of dots (I wrote it as a much simpler but slightly longer equation before, but now I can’t undo it 😅. Besides, I ended up redoing spacing anyways).
The logic for the spacing is as follows. We want points along a line, that have a margin from the center and edges of the screen. So we take the width and subtract a margin * 2 from it. Then we divide up the remaining space by the number of points we want to draw.
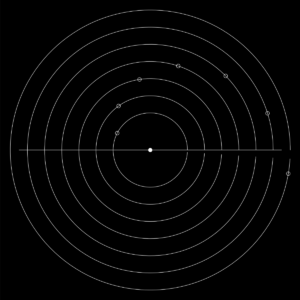
Then I changed it to using polar coordinates instead. You should be familiar with polar coordinates and some circle stuff by now (you did read my blog last week right 🤨? It explains some of this), which will come in handy as some of the logic is similar to last week’s work. I position the small circles along larger circles (rings) with differing radii, and then we can move them around in a circle, similar to how we drew the line last week. So now the drawing code is
translate(width/2, height/2)
background(0)

fill(255)
noStroke()
circle(0, 0, 10) // Draw the center circle (filled), just for reference

noFill();
stroke(255)

let n = 7 // Number of rings and dots
let angle = TWO_PI // Angle to draw dots at
let r = 0
for (let i = 0; i < n; i++) {
  r = width/15 + i*4*width/(10*n) // Radius of each ring
  arc(0, 0, 2*r, 2*r, PI, TWO_PI); // Draw the ring
  circle(cos(angle) * r, sin(angle) * r, 10) // Draw the outer dots (outlined)
}
And we get:
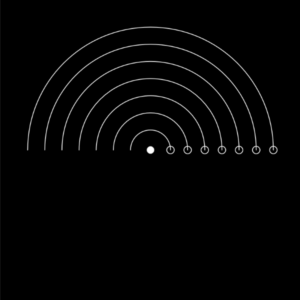
And we got a pretty close structure already!
I then played around with the spacing a bit, and ended up using a different equation altogether (same concept and method as original, but I didn’t condense it).
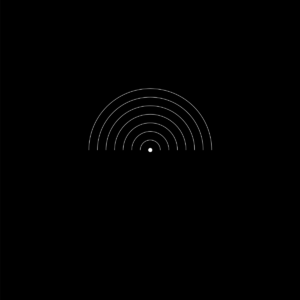
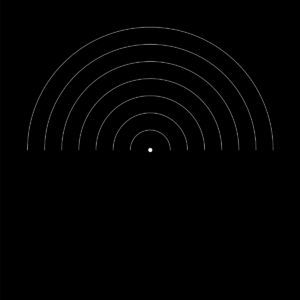
Now, I changed the arcs to be nearly full circles instead (wasn’t sure yet, so you’ll see a lot of screenshots with a gap in the right side, that was intentional to help me note something). Also, now that I had some of the basics of the project down, I switched to using Object Oriented Programming, and made a class for the rings and another for the dots, as well as added a simple line to the center of the screen. I could then animate the dots across the screen by changing their angle. Now, instead of assigning them all the same angle (which would result in a straight line of dots traveling along a circle), I made each dot have a different velocity, and then incremented their angle by that velocity, giving us staggered dots!
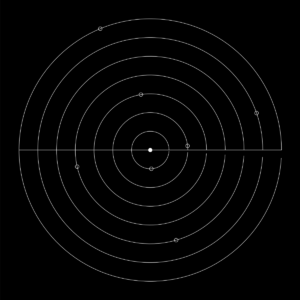
The cool thing about the velocity, is that I calculated in such a way that I could control exactly when all the dots came back together again (which is just incredibly cool to see and hear).
Now, I wanted to highlight the ring whose dot has touched the line. I first just tried checking whether the dot’s y position was zero, but that didn’t really work, because a dot could easily skip past it based on it’s velocity and starting angle (and in fact, often did). This was a similar issue with using the angle instead. I then gave a bit of margin (so instead of checking whether angle == 2 Π, I checked whether the difference was less than a certain amount. This seemed to work! (ring highlighted in red, for now, and oh, I also added a trail effect, by doing background(0, 8), a trick I love using).
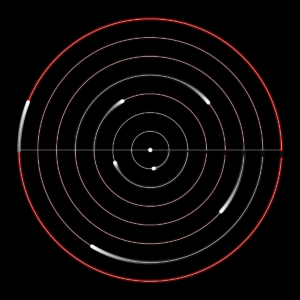
But unfortunately, not really… It spammed a lot.

I could try adjusting the tolerance/margin, but I knew that was a losing battle (as the lower it is, the fewer false triggers I’ll receive, but also the fewer actual triggers, due to missing it, and vice versa).
So then, I came up with a new method. I would calculate the dot’s position before, now, and after one iteration, and check to see when it was closest to the line. If it was closest to the line now, and was further away before, and would be further away later, then this meant we could trigger the collision. It looked something like this:
class Dot {

  // ...

  hasCollided() {
    let differenceBefore = abs(sin(this.angle - this.velocity));
    let differenceNow = abs(sin(this.angle));
    let differenceAhead = abs(sin(this.angle + this.velocity));

    // check if the dot is closest to the line
    if (differenceNow < differenceBefore && differenceNow < differenceAhead) {
      return true;
    } else {
      return false;
    }
Aaand, it worked!
After that, I added colors to the rings. I wanted a solution that would dynamically scale with the number of dots, and so what I did was divided up hue (360 degrees) by the number of dots, and used that for the HSL colour (so, similar to the dot’s spacing, but for colour) (also, gosh, isn’t HSL so much better?). I added this line to the loop let ringColour = color(i * 360 / numRings, 100, 80) (and oh, changed the spacing to let radius = gap + (width/2 - 2*gap) * i/(numRings-1) 😅, which is much more understandable).
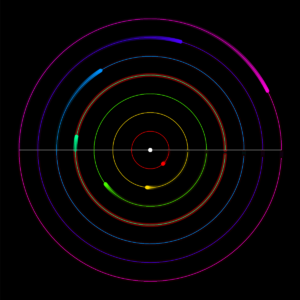
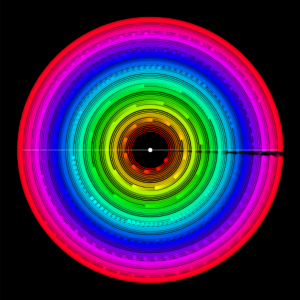
Then I changed the highlight to the ring’s colour, and tried something out. I increased the ring amount to something much higher (I think 21), and got this cool result.
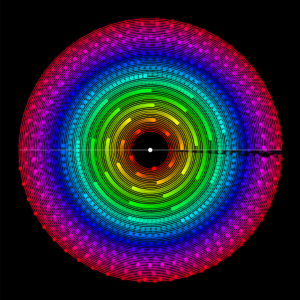
Refining it a bit more (changing the background call’s opacity), and we get an even more beautiful result! (though it’s hard to tell when the dots collide, as it’s now just a continuous line)
## Sound & Additional Thoughts
Then, I wanted to add some sound (you know, like the MAIN reason I even wanted to make this?). This was a challenge (and took a good chunk of time). Not the actual code for the playing the sound, no that was relatively simple, as I just had to create a new PolySynth (since I wanted to play MIDI notes instead of manual hard coded files, to also scale with the number of rings) with polySynth = new p5.PolySynth(), and then played a sound every time a collision happened (with the sound being based on the ring’s index). No no, the hard part was choosing what sounds to play.
I noticed that p5’s PolySynth accepted MIDI names and notes, but whenever I tried using the numbers, it didn’t really sound as it was supposed to (according to the translation tables). So I created a new rough sketch and explored in there. So basically, MIDI notes first have a character (one A, A#, B, C, C#, D, D#, E, F, F#, G, G#) (though keep it mind it usually starts from C, I don’t why p5 choose to start from A, at least from what I heard), and then a number from 0-8. I eventually created a converter that takes a number and outputs a MIDI note (with the slight help of an AI, though just because I was too tired at this time), and, it worked! Or, worked? Or, well, idk.
Ok, so it worked as intended, but it didn’t really sound nice at all, and nothing like the original video (though to be fair, he is a proper skilled artist, but still). Changing around some of the note assignment did help (I then started the notes from A4 (since I realised that you can’t even hear the first few notes, and some sound pretty terrible, so I restricted the range), and went to every 2nd or 3th note instead), but it still didn’t really sound like how I wanted to. I also tried playing with reverb, etc, but I’m probably missing a key component (yea, who could’ve guessed that a good sounding composition probably has more than just playing some notes in ascending order 😅). I could also just upload some files manually and use those (eg. from Hyperplexed’s CodePen (he also made a great video on it), which would make it sound nice, but that wouldn’t scale with the number of rings, and also feels a bit like cheating (idk why I enjoy making things harder for myself 🤷♂️). Well, at least it looks nice… sometimes.
Unfortunately, that about wraps up all the time I had, so we’re gonna have to end it here. As usual, there’s a lot I couldn’t add (like being to drag a slider to control the rings, and click on them to add dots, which was like, the entire reason for decoupling the dots from the rings (making separate classes, etc), so all that work was for nothing…), and even more I couldn’t write on here (especially about the sound), but that’s it for today, and I’ll catchup you next time! (right? You will read my next posts too right? please? 🥺😅)
Anyways, then, after much ado (😂), I present, my Polyrythmic spiral!
# Final Result
Controls:
- Umm… nothing. Just listen to the peaceful and serene music… (just kidding, its doesn’t sound very nice yet 🙁 ).
- You could however, adjust the number of rings and the gap between them, by opening the sketch and changing the parameters (found at the top).
- Technically, you could also change anything in the sketch, if you get into the code (you could even turn it into a something random, like a giraffe. I don’t know why you would, but you could).
Nice! For the notes you could try using notes from specific chord or scale. Here’s an example https://editor.p5js.org/mangtronix/sketches/yuuG8zW7t