Pulse-Scape
An Interactive Experience
By Aysha AlMheiri :))
Pulse-Scape’s concept is one that revolves around integrating humanness, the arts, and technology. Detecting heart beat from the pulse-sensor, I wanted to use my project, Pulse-Scape, to serve as a bridge between the physical and the digital world, helping curate an intimate, colorful, and abstract art piece as a result. This interactive and dynamic experience created using P5JS as a canvas for the art to come to life showcases the ways in which our humanness, shown through our heart beat, can make art come to life through technology. The integration of 3 different potentiometers that correspond to different RGB values helps make this experience even more personal by allowing for users to choose specific colors for their art. The experience has different modes: Flow, Wild, and Spots, further personalizing the experience to users’ art style. Therefore, it is through all of this did Pulse-Scape get crafted into an immersive experience where users engage with the essence of human emotion through visual art, color, and technology, just how I envisioned it to be.
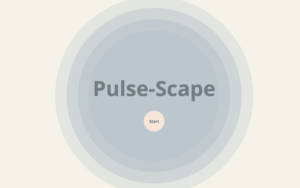
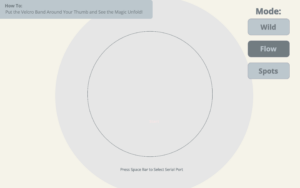
Screenshots of Interface on P5:
Pulse-Scape in Action
Initial User-Testing:
Show-Case:
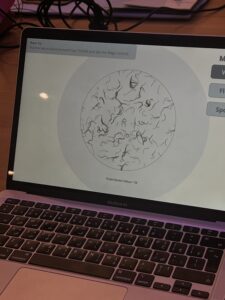
Example of art that Pulse-Scape can generate:
Implementation:
For the project, the main form of interaction design being implemented is pulse detection data from the pulse sensor and the 3 potentiometers that correspond to the R, G, and B values respectively. The potentiometers are responsible for changing the colors of the particles and perlin noise within the circular boundary, helping create a more personalized experience for users. Using data from the pulse sensor, dynamic flow fields appear within a circular boundary, which moves and oscillates based on the value being taken from the pulse sensor. Users can change the style of flow fields, depending on their moods or feelings in the current moment.
The Arduino component of my final project is mainly responsible for collecting data from the pulse sensor in order to move it to P5. The first component is for the particles and perlin noise to appear and move based on the data collected from the pulse sensor. The second component is using potentiometers to create a personalized color using specific amounts of R, G, and B values that users see fit to create a customized and colorful visualization based on pulse sensor data for the users to curate. The Arduino code can be seen below:
const int pulseSensorPin = A0; //Pulse sensor value connected to A0
const int potPin1 = A1;  // Potentiometer connected to A1
const int potPin2 = A2;  // Potentiometer connected to A2
const int potPin3 = A3;  // Potentiometer connected to A3

// Setup runs once
void setup() {
  Serial.begin(9600);
}

void loop() {
  int pulseSensorValue = analogRead(pulseSensorPin);

// Read values from potentiometers and maps it out to the color scale
  int redValue = map(analogRead(potPin1), 0, 1023, 0, 255);
  int greenValue = map(analogRead(potPin2), 0, 1023, 0, 255);
  int blueValue = map(analogRead(potPin3), 0, 1023, 0, 255);


// Send color component values and pulse sensor value to P5
  Serial.print(pulseSensorValue/8);
   Serial.print(',');
  Serial.print(redValue);
  Serial.print(',');
  Serial.print(greenValue);
  Serial.print(',');
  Serial.println(blueValue);

  delay (800);
}
P5, on the other hand, is the main display for my final project. It is where perlin noise and particles are displayed to showcase data from the pulse sensor. It is also in P5 where different modes are available to cater to different style preferences of users in order to personalize their experience. I did this by playing around with the code and multiplying different variables with the pulse sensor value to get different displays. The different styles of art being formulated by the pulse sensor is complimented with the different displays of color within the circle drawn in the center of the canvas. Given the fact that it is the main part of the project and was the part that took me the most time, the aspect of P5 that I am particularly proud of is the display of the particles, which can be found below.
//One of the Three Modes, this is the Flow mode
function mode1(){
 background(245,243,233,5);

// Displays pulse sensor value or prompt to select serial port
  if (!serialActive) {
    textStyle(NORMAL);
    strokeWeight(1);
    noStroke();
    textSize(18);
    textFont('Open Sans');
   fill('#727C81');
    text("Press Space Bar to Select Serial Port", windowWidth / 2 + 8 , windowHeight/ 2 + 368);
  }
//Display Sensor Value
  else {
    textStyle(NORMAL);
    strokeWeight(1);
    noStroke();
    textSize(18);
    textFont('Open Sans');
    fill('#727C81');
    text('Pulse Sensor Value = ' + str(pulseSensorValue),  windowWidth / 2 + 8 , windowHeight/ 2 + 368);
  }

//Instruction Header on the Top Left Corner of Canvas
  fill(188, 199, 205);
  rect(-8, 0, 740, 90, 10);
  fill('#727C81');
  textSize(21);
  textStyle(BOLD);
  text('How To:', 65, 35);
  textStyle(NORMAL);
  text('Put the Velcro Band Around Your Thumb and See the Magic Unfold!', 355, 65)

// Draws circular boundary for particles to stay within
  stroke('#727C81');
  noFill();
  strokeWeight(1);
  ellipse(windowWidth / 2, windowHeight / 2, boundaryRadius * 4);

// Continuously add new particles with random positions within the cirlce
  for (let i = 0; i < 5; i++) {
    particles.push(createVector(random(width), random(height)));
}

// Assigns the current particles to currentParticle variable, this repeats for each particle
  for (let i = particles.length - 1; i >= 0; i--) {
    let currentParticle = particles[i];

//If pulse sensor value is NOT zero, create flow fields
  if (pulseSensorValue !== 0) {
    //Calculates perlin noise for the current particles on dispaly
      let perlinNoise = noise(currentParticle.x * noiseScale, currentParticle.y * noiseScale, frameCount * noiseScale);
    //Maps perlin noise value to angle in order to create some kind of osscilations
      let noiseAngle = TAU * perlinNoise;
    // Create a movement vector based on Perlin noise angle, scaled by particleSpeed
      let noiseVector = createVector(cos(noiseAngle), sin(noiseAngle)).mult(particleSpeed);
  // Calculates the center of the canvas for the vectors
      let canvasCenter = createVector(width / 2, height / 2);
  // Calculates the distance between the current particle's postion on the canvas and the center of the canvas
      let distanceToCenter = p5.Vector.dist(currentParticle, canvasCenter);
  // Creates a vector that points from current particle position to center of the canvas and sets magnitude (length) of vector to 150, which is the boundary radius to effectively scale the vector to be within the circular boundary
      let boundaryVector = p5.Vector.sub(canvasCenter, currentParticle).setMag(boundaryRadius*2);
 // Move the particle towards the boundary if it's outside, modulate movement with pulse value
      if (distanceToCenter > boundaryRadius*2) {
        currentParticle.add(boundaryVector.mult(1 + pulseSensorValue));
      }
  // Update the position of the current particle by adding the noise-based movement vector
    currentParticle.add(noiseVector);
  // Remove particles that go off the canvas
    if (!onCanvas(currentParticle)) {
        particles.splice(i, 1);
      }
  //If particles are in the boundary,
    else {
        strokeWeight(2);
        stroke(redValue, greenValue, blueValue);
      // Draw particle as a point
        point(currentParticle.x, currentParticle.y);
      }
    }
  }
The main form of communication between Arduino and P5 is unidirectional, meaning that communication comes from only one direction. In my case, data is taken from Arduino and reflected on P5. As mentioned above, the Arduino collects data from both the pulse sensor and 3 potentiometers, which are processed as needed, and then transmitted serially to the computer running P5. This data, once transported to the computer, P5 receives it, interprets it, and then displays it through particles, oscillations, and perlin noise in the sketch itself. Using this one-way flow of information, the system remains simple but efficient, embodying the concept I initially intended for my final project.
The aspect of the project that I am particularly proud of is the flow field I created using noise and particles. This is because I had to restudy the presentations and look through youtube videos to understand how to implement the flow fields in the way I envisioned them to be. It was initially quite difficult to implement as I was still a beginner when it came to the technicalities of flow fields, noise, and particles but through practice and trial and error, I was able to overcome this challenge and was able to manipulate the particles and flow fields to be constrained within a circular boundary to create a simple, dynamic, and aesthetically pleasing interface for users to experience. In terms of areas of improvement, I believe that I could have added more interactivity in P5JS to create a more comprehensive interactive experience for users. For example, by adding a feature where particles within the circle will disperse when users click within the it would add more depth to the interactivity of the experience and make it more engaging for users who are experiencing it. I could have also added some form of wearable device, such as a glove or a bracelet, that the pulse sensor is attached to in order to improve user-experience and better the interactive experience as a whole. This is because it clearly shows users how to navigate the experience with no direct instructions, which is why it creates a more engaging, personal, and interactive experience for users. Reflecting on the process of creating my final project, I am really proud of the outcome and how far I have come with both P5 and Arduino. I am genuinely happy that I was able to create something that combined my interest of bringing out the humanness of human nature, through detecting the heart beat from users’ fingers, and integrating it into a form of technology to create an overall interactive experience for users to engage with.
I also want to say that I am incredibly proud of everyone and that I am really happy with how far we have all come. Congrats and have a great summer!
With love, Aysha ⋆。°✩


