
Concept: Interactive Musical Garden is an innovative interactive art installation that marries technology with natural aesthetics. It incorporates ultrasonic sensors embedded with 3D-printed transparent roses, allowing each rose to respond to user interaction by lighting up, playing music, and spawning a digital flower on a p5.js canvas. This project aims to create a communal yet personalized musical and visual experience where each interaction contributes to a growing digital garden.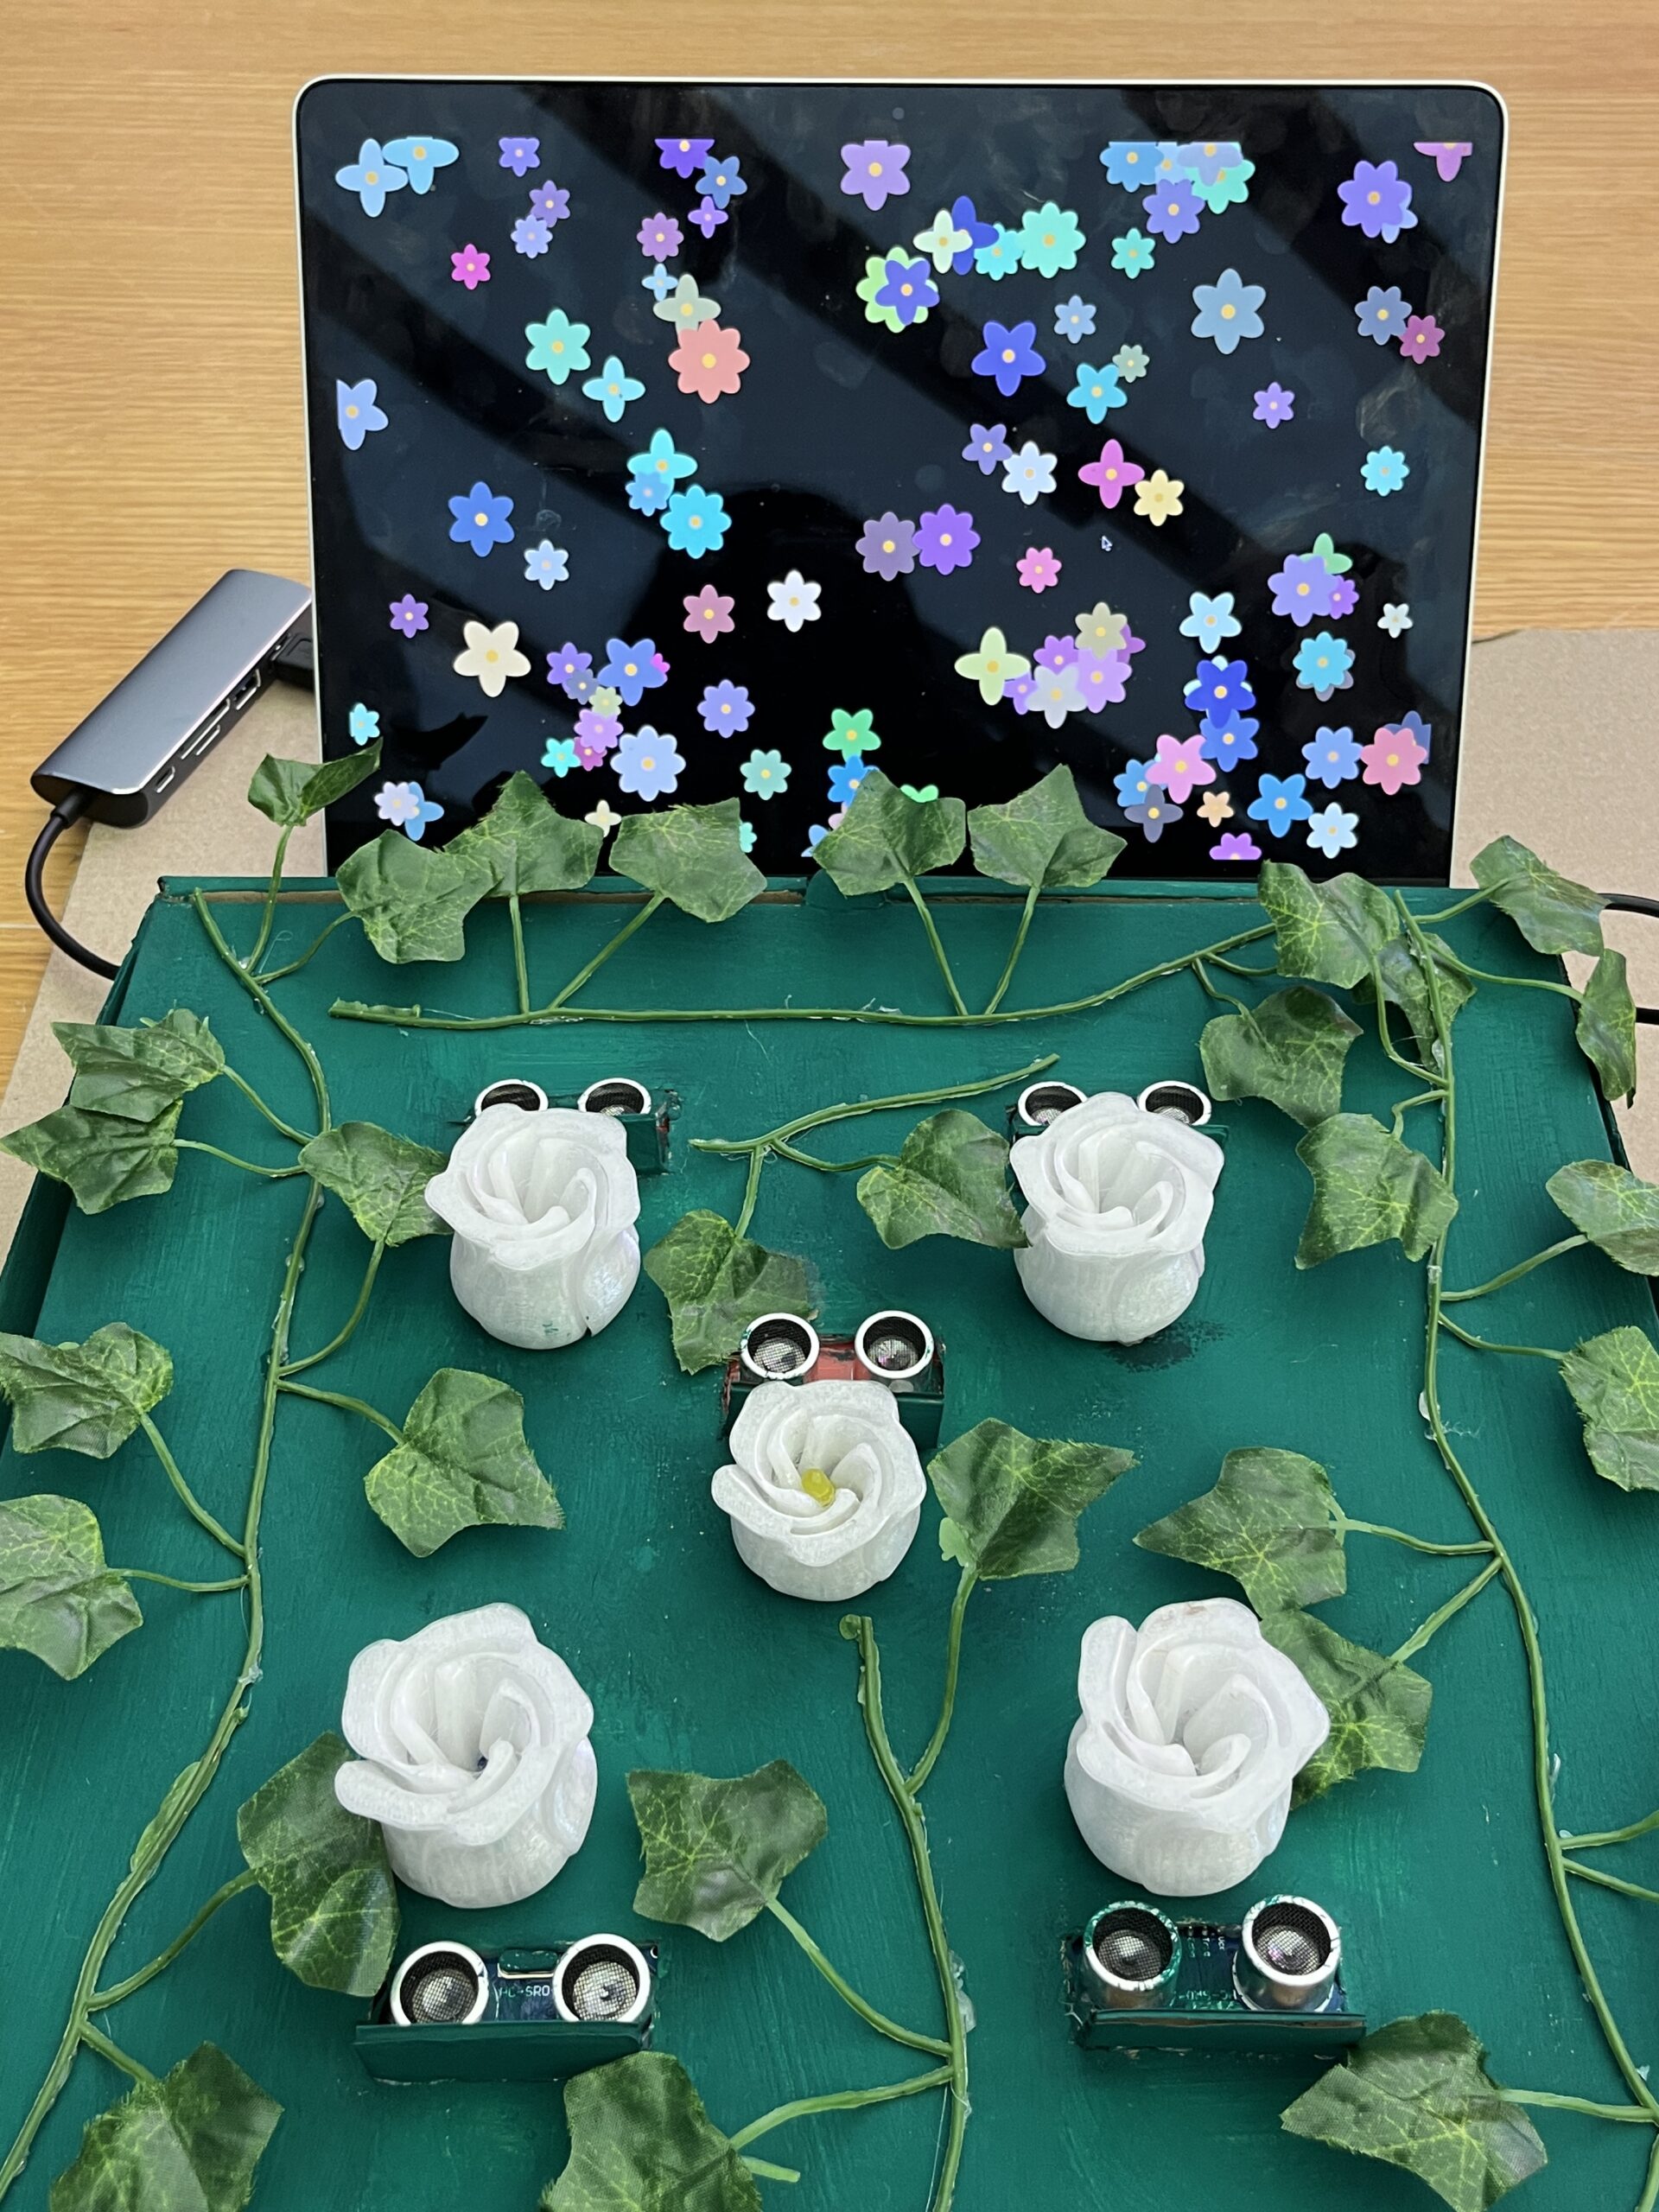
Arduino Code Overview: The Arduino code controls the ultrasonic sensors and LEDs. It reads the distance measurements from the sensors and turns on an LED if an object (e.g., a user’s hand) is detected within a specified range. It also sends a signal to the p5.js application via serial communication when a flower should be spawned.
#include <Arduino.h>

// Define pins for the ultrasonic sensors and LEDs
#define NUM_SENSORS 5
int trigPins[NUM_SENSORS] = {2, 3, 4, 5, 6};
int echoPins[NUM_SENSORS] = {7, 8, 9, 10, 11};
int ledPins[NUM_SENSORS] = {12, 13, A0, A1, A2};

// Function to measure distance
long readDistance(int triggerPin, int echoPin) {
    digitalWrite(triggerPin, LOW);
    delayMicroseconds(2);
    digitalWrite(triggerPin, HIGH);
    delayMicroseconds(10);
    digitalWrite(triggerPin, LOW);
    long duration = pulseIn(echoPin, HIGH);
    return duration * 0.034 / 2; // Convert to distance in cm
}

void setup() {
    Serial.begin(9600);
    for (int i = 0; i < NUM_SENSORS; i++) {
        pinMode(trigPins[i], OUTPUT);
        pinMode(echoPins[i], INPUT);
        pinMode(ledPins[i], OUTPUT);
    }
}

void loop() {
    for (int i = 0; i < NUM_SENSORS; i++) {
        long distance = readDistance(trigPins[i], echoPins[i]);
        if (distance < 20) {
            digitalWrite(ledPins[i], HIGH);
            Serial.print("Bloom ");
            Serial.println(i + 1); // Send sensor number to p5.js
        } else {
            digitalWrite(ledPins[i], LOW);
        }
    }
    delay(100); // Debouncing
}
p5.js Code Overview: The p5.js application runs in a web browser and uses the serial communication data to create flowers on the screen each time a sensor is triggered. It also manages the playback of sound for each interaction.
// Define the Flower class for visual representation
class Flower {
    constructor(x, y) {
        this.x = x;
        this.y = y;
        this.size = 5;
        this.growthRate = random(0.05, 0.2);
        this.fullSize = random(30, 70);
        this.petals = floor(random(4, 9));
        this.petalSize = this.fullSize / 2;
        this.color = [random(100, 255), random(100, 255), random(100, 255)];
    }

    grow() {
        if (this.size < this.fullSize) {
            this.size += this.growthRate;
        }
    }

    show() {
        push();
        translate(this.x, this.y);
        noStroke();
        fill(this.color[0], this.color[1], this.color[2]);
        for (let i = 0; i < this.petals; i++) {
            rotate(TWO_PI / this.petals);
            ellipse(0, this.size / 4, this.petalSize, this.size);
        }
        fill(255, 204, 0);
        ellipse(0, 0, this.size / 4, this.size / 4);
        pop();
    }
}

let flowers = [];
let serial;
let flowerSound;

function preload() {
    flowerSound = loadSound('bells.wav');
}

function setup() {
    let canvas = createCanvas(windowWidth, windowHeight);
    canvas.style('display', 'block');
    background(0);

    serial = new p5.SerialPort();
    serial.open('/dev/tty.usbmodem1101');
    serial.on('data', serialEvent);
}

function draw() {
    background(0);
    flowers.forEach(flower => {
        flower.grow();
        flower.show();
    });
}

function serialEvent() {
    let data = serial.readStringUntil('\n').trim();
    if (data.startsWith("Bloom")) {
        let parts = data.split(" ");
        if (parts.length === 2) {
            let index = parseInt(parts[1]) - 1;
            if (!isNaN(index) && index >= 0 && index < 5) {
                createFlower();
            }
        }
    }
}

function createFlower() {
    let x = random(width);
    let y = random(height);
    let flower = new Flower(x, y);
    flowers.push(flower);
    playSound();
}

function playSound() {
    if (flowerSound.isPlaying()) {
        flowerSound.stop();
    }
    flowerSound.play();
}

function keyPressed() {
    if (key === 'f' || key === 'F') {
        let fs = fullscreen();
        fullscreen(!fs);
    }
}

function windowResized() {
    resizeCanvas(windowWidth, windowHeight);
}
How the Code Works:
Serial Communication: p5.js uses the p5.serialport library to establish a serial connection with the Arduino. This connection allows it to receive data (like sensor triggers) from the Arduino.
Flower Generation: When a “Bloom” command is received via serial (indicating that a sensor was triggered), p5.js generates a digital flower at a random location on the canvas.
Sound Playback: Simultaneously with the flower generation, a sound file is played to provide auditory feedback, making the experience more immersive.
Planning the Interaction Flow:
Detection: A user places their hand over one of the 3D-printed roses.
Sensor Activation: The corresponding ultrasonic sensor detects the presence based on the distance and triggers a response.
LED Feedback: The LED beneath the detected rose lights up, providing immediate visual feedback.
Visual and Auditory Display: The user sees a new flower appearing on the screen and hears a sound, linking their physical interaction with a digital outcome.
Acknowledgements: Special thanks to Stefania for helping me with the idea and the implementation and to my fiancé for helping me setup a beautiful garden using a pizza box 🙂