
Concept : This project is a creative exploration into the realm of music and interactivity. Inspired by the dynamic role of a DJ, we have created a turntable that allows users to listen two globally popular songs: “Despacito” by Luis Fonsi and Daddy Yankee, and the “Mario Theme Song” by Koji Kondo for Nintendo. The project aims to provide a simple yet enjoyable experience, blending Western and Eastern musical influences.
Objective: The primary objective is to design an interactive turntable that allows the user to play and switch between two distinct songs using a digital switch and an analog potentiometer, emulating the experience of a DJ.
Components we used:
Arduino UNO
Potentiometer (Analog Sensor)
Push Button (Digital Sensor)
Miniature Speaker
10k Ohms Resistor
Implemented Code with comments:
#include "pitches.h"

#define BUZZER_PIN 9
#define POTENTIOMETER_PIN A0
#define BUTTON_PIN 7

// Melody for the first song
int melody1[] = {
  NOTE_D4, NOTE_CS4, NOTE_B3, NOTE_FS3, NOTE_FS3, NOTE_FS3, NOTE_FS3, NOTE_FS3,
  NOTE_FS3, NOTE_B3, NOTE_B3, NOTE_B3, NOTE_A3, NOTE_B3, NOTE_G3, NOTE_G3, NOTE_G3, NOTE_G3, NOTE_G3,
  NOTE_G3, NOTE_B3, NOTE_B3, NOTE_B3, NOTE_B3, NOTE_CS4, NOTE_D4, NOTE_A3, NOTE_A3, NOTE_A3, NOTE_A3, NOTE_A3,
  NOTE_A3, NOTE_D4, NOTE_D4, NOTE_D4, NOTE_D4, NOTE_E4, NOTE_E4, NOTE_CS4
};

// Note durations for the first song
int noteDurations1[] = {
  4,4,8,8,16,16,16,16,
  16,16,16,8,16,8,16/3,16,16,16,16,
  16,16,16,16,8,16,8,16/3,16,16,16,16,
  16,16,16,16,8,16,8,16/3
};

// Melody for the second song
int melody2[] = {
  NOTE_E4, NOTE_E4, NOTE_E4, NOTE_C4, NOTE_E4, NOTE_G4, NOTE_G3, NOTE_C4, NOTE_G3, NOTE_E3, NOTE_A3, NOTE_B3, NOTE_AS3, NOTE_A3,NOTE_G3,NOTE_E4,NOTE_G4,NOTE_A4,NOTE_F4,NOTE_G4,NOTE_E4,NOTE_C4,NOTE_D4,NOTE_B3,NOTE_C4
};

// Note durations for the second song
int noteDurations2[] = {
  16,8,8,16,8,4,4,16/3,16/3,16/3,8,8,16,8,32/3,32/3,32/3,8,16,8,8,16,16,16/3,8
};

// Flag to indicate if a song is currently playing
bool songPlaying = false;
// Variable to store the previous state of the button
bool lastButtonState = false;

// Setup function to initialize the pins
void setup() {
  // Set the buzzer pin as output
  pinMode(BUZZER_PIN, OUTPUT);
  // Set the button pin as input with internal pull-up resistor enabled
  pinMode(BUTTON_PIN, INPUT_PULLUP);
}

// Loop function to continuously check for button presses and play melodies
void loop() {
  // Read the current state of the button
  bool buttonState = digitalRead(BUTTON_PIN);

  // Check if the button is pressed and it was not pressed in the previous loop iteration
  if (buttonState == LOW && lastButtonState == HIGH) {
    // Toggle the song playing state
    songPlaying = !songPlaying;

    // Start or stop playing the selected song
    if (songPlaying) {
      // If the potentiometer value is less than 512, play the first melody; otherwise, play the second melody
      if (analogRead(POTENTIOMETER_PIN) < 512) {
        playMelody(melody1, noteDurations1, sizeof(melody1) / sizeof(int));
      } else {
        playMelody(melody2, noteDurations2, sizeof(melody2) / sizeof(int));
      }
    } else {
      // If the song was playing, stop playing it
      noTone(BUZZER_PIN);
    }
  }

  // Update the last button state for the next iteration
  lastButtonState = buttonState;
}

// Function to play a melody
void playMelody(int melody[], int noteDurations[], int size) {
  // Iterate over each note in the melody
  for (int thisNote = 0; thisNote < size; thisNote++) {
    // Calculate the duration of the current note
    int noteDuration = 1000 / noteDurations[thisNote];
    // Play the current note on the buzzer pin
    tone(BUZZER_PIN, melody[thisNote], noteDuration);
    // Wait for the duration of the note
    delay(noteDuration * 2);
    // Stop playing the note
    noTone(BUZZER_PIN);
    // Add a short pause between notes
    delay(noteDuration * 0.1);
  }
}
Code Logic:
The code begins by defining the pin numbers for the buzzer, potentiometer, and button. The buzzer pin is where the speaker is connected, the potentiometer pin is where the potentiometer (for selecting songs) is connected, and the button pin is where the push button (for controlling song playback) is connected.
- In the
setup()function, the buzzer pin is set as an output, and the button pin is set as an input with an internal pull-up resistor enabled. This configuration ensures that the button pin reads HIGH when the button is not pressed and LOW when it is pressed. Moreover two melodies are defined (melody1andmelody2), each represented as an array of note frequencies. Corresponding to each melody, two arrays (noteDurations1andnoteDurations2) define the duration of each note in the melodies.
- In the
loop()function, the code continuously checks the state of the button. When the button transitions from HIGH to LOW (indicating a button press), the code toggles thesongPlayingvariable to start or stop playing the selected song. IfsongPlayingis true, the code reads the potentiometer value to determine which melody to play. If the potentiometer value is less than 512, it playsmelody1; otherwise, it playsmelody2. IfsongPlayingis false, it stops playing the melody by callingnoTone()on the buzzer pin. - The
playMelody()function is responsible for playing a melody. It takes as input the melody array, note duration array, and the size of the melody. Inside the function, it iterates over each note in the melody, calculates the duration of the note, plays the note usingtone(), adds a short delay between notes, and then stops playing the note usingnoTone().
Video Demonstration:
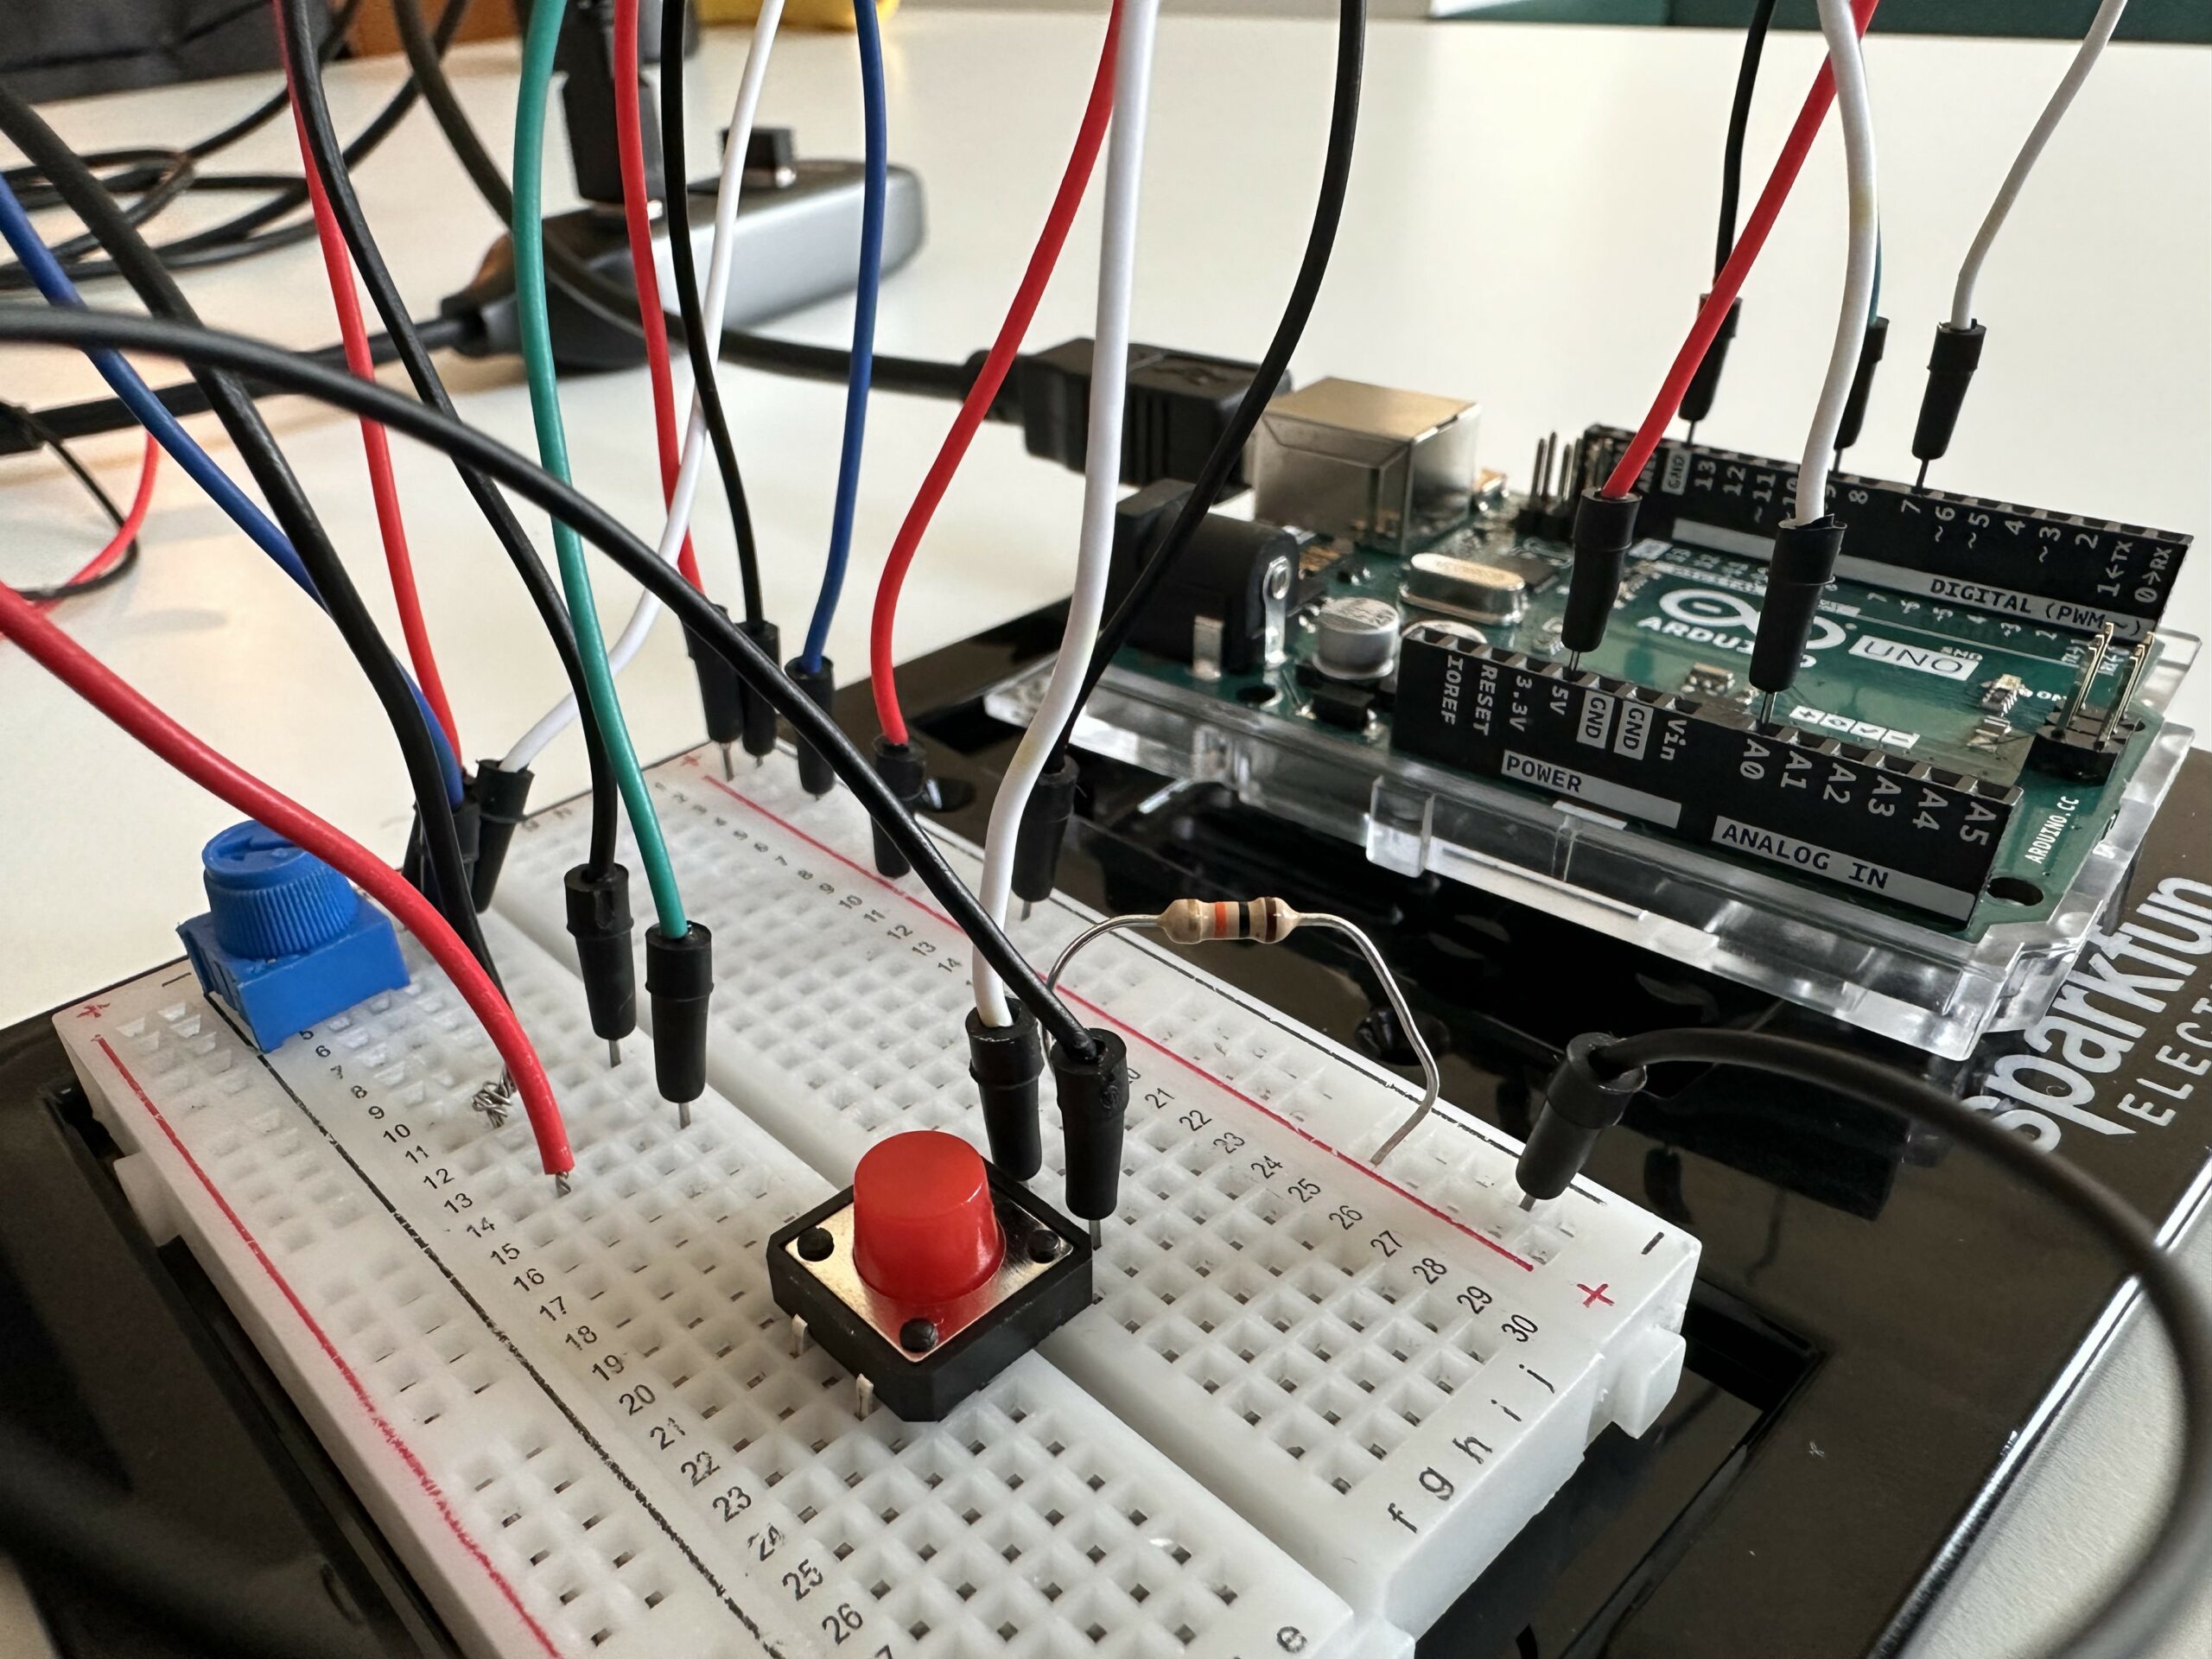
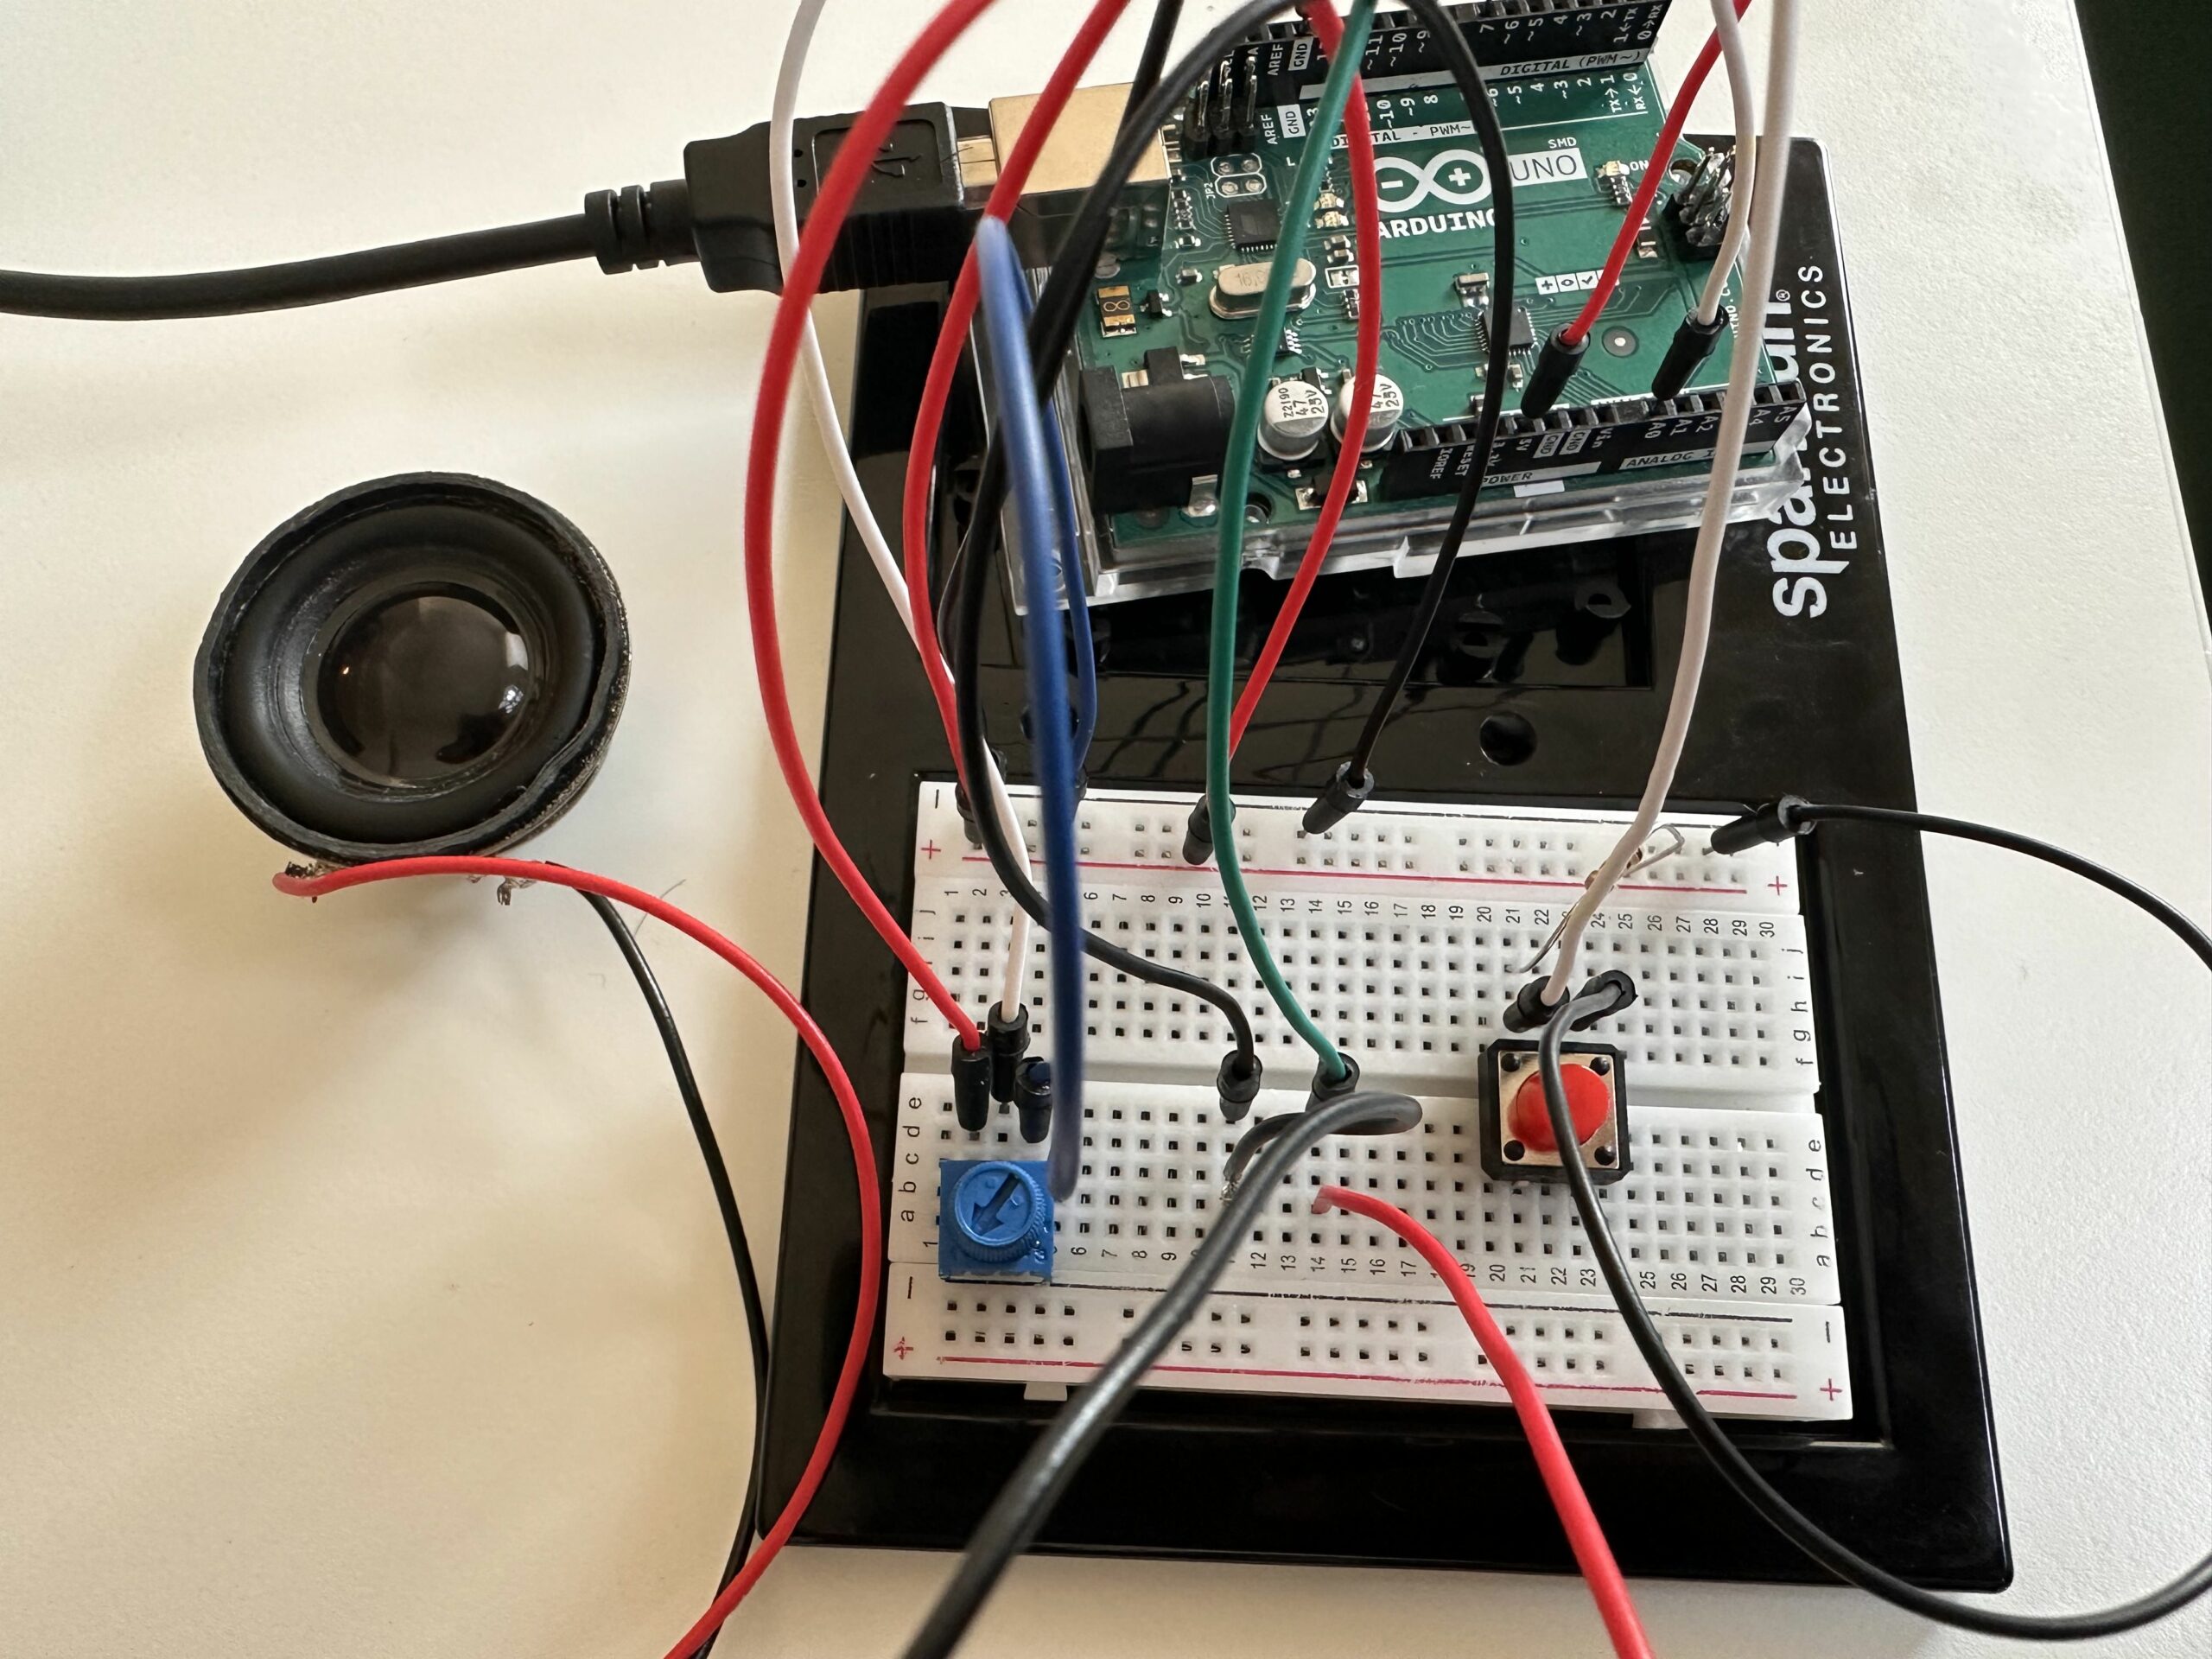
Images of the circuit:
Schematics Sketch:
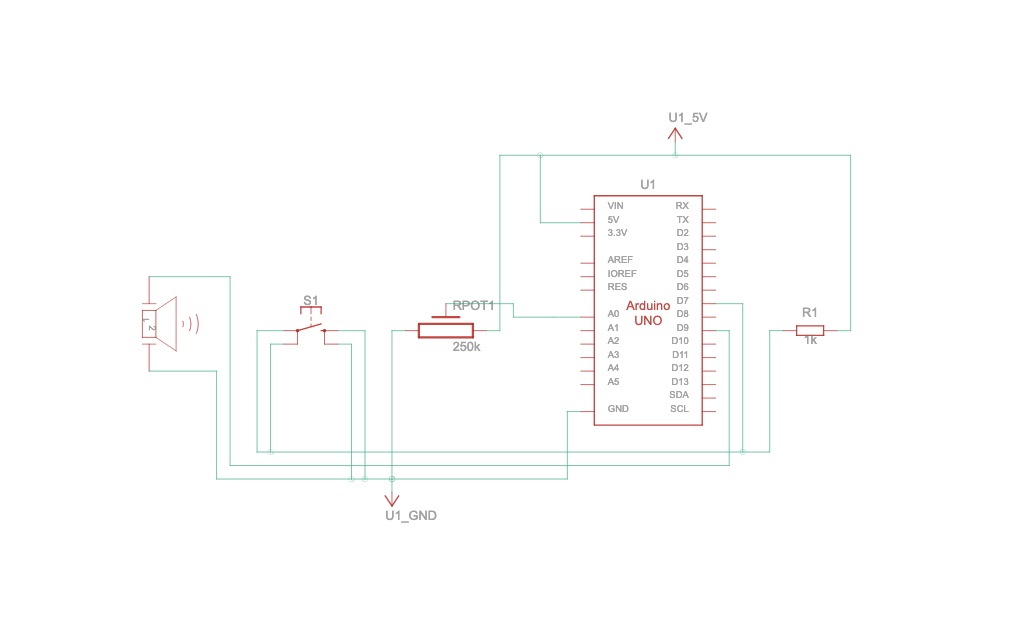 Circuit connections from above Schematics diagram.
1) Potentiometer Connections: The potentiometer is crucial for song selection and control. It has three pins: two for power and one for the signal. The outer pins are connected to the 5V and GND (ground) terminals on the Arduino to provide it with power. The middle pin, which is the wiper, is connected to the analog input A0 on the Arduino. As the user turns the knob of the potentiometer, the resistance changes, and the Arduino reads this as an analog value, allowing the user to blend between the two songs.
2) Button Connections: A push button is used to start or stop the song playback. One side of the button is connected to the digital pin 2 on the Arduino. The other side is connected to the GND terminal on the breadboard. A pull-up resistor is not necessary as the Arduino’s internal pull-up resistor is used in the code to avoid floating values when the button is not pressed.
3) Speaker Connections: The speaker, which outputs the sound, has two wires. The positive wire is connected to digital pin 8 on the Arduino. This pin is set up in the code to deliver a pulse-width modulation (PWM) signal that creates the audio tones for the songs. The negative wire from the speaker is connected directly to the GND terminal on the breadboard to complete the circuit.
4) Power Connections: The breadboard’s power rail is used to distribute the 5V and GND connections to the potentiometer and the button. Wires run from the 5V and GND pins on the Arduino to the power rail on the breadboard.
With this setup, the user interacts with the button and potentiometer to control the playback of “Despacito” and the “Mario Theme Song”. The code on the Arduino processes the input signals and triggers the speaker to play the appropriate song based on the state of the button and the value from the potentiometer.
What does the Analog and Digital Sensor do in this circuit? – Schematics:
The code and circuit are structured to respond to the interactions with the potentiometer and the push button:
1) Button Press: Initiates the playback of “Despacito” or stops the current song.
2) Potentiometer Rotation: Facilitates the blending from “Despacito” to the “Mario Theme Song.” and vice versa.
The user must press the button to start playing “Despacito.” They can then rotate the potentiometer to initiate the “Mario Theme Song” by pressing the button again. This interaction can be repeated to switch between the two songs.
Challenges & Reflections:
1) Connecting the buzzer, potentiometer, and push button to the Arduino board together proved to be trickier than anticipated. We encountered issues with loose connections, incorrect wiring, and misplacing the digital pin assignments. Later then, we carefully reviewed the circuit diagram and schematics to double-checked each wiring connection, additionally we also referenced the Arduino documentation and class slides to ensure we understood the purpose and functionality of each sensor working nature.
2) When testing the circuit, we noticed inconsistencies in melody playback. Some notes were not playing correctly, and there were unexpected pauses between notes and some notes are repeating itself. To troubleshoot this issue, we reviewed the code related to melody playback and examined the arrays containing note pitches and durations. We adjusted the timing parameters and experimented with different delay values to ensure smooth transitions between notes.
Future Improvements:
1) To create a vibrant atmosphere that mimics a mini club, we aim to incorporate LEDs that flash in sync with the music notes.
2) To provide a more DJ-like experience, we intend to program more songs and add a crossfade effect, allowing one song to ease into the other as the potentiometer is turned, instead of multiple switches.