
Project Concept:
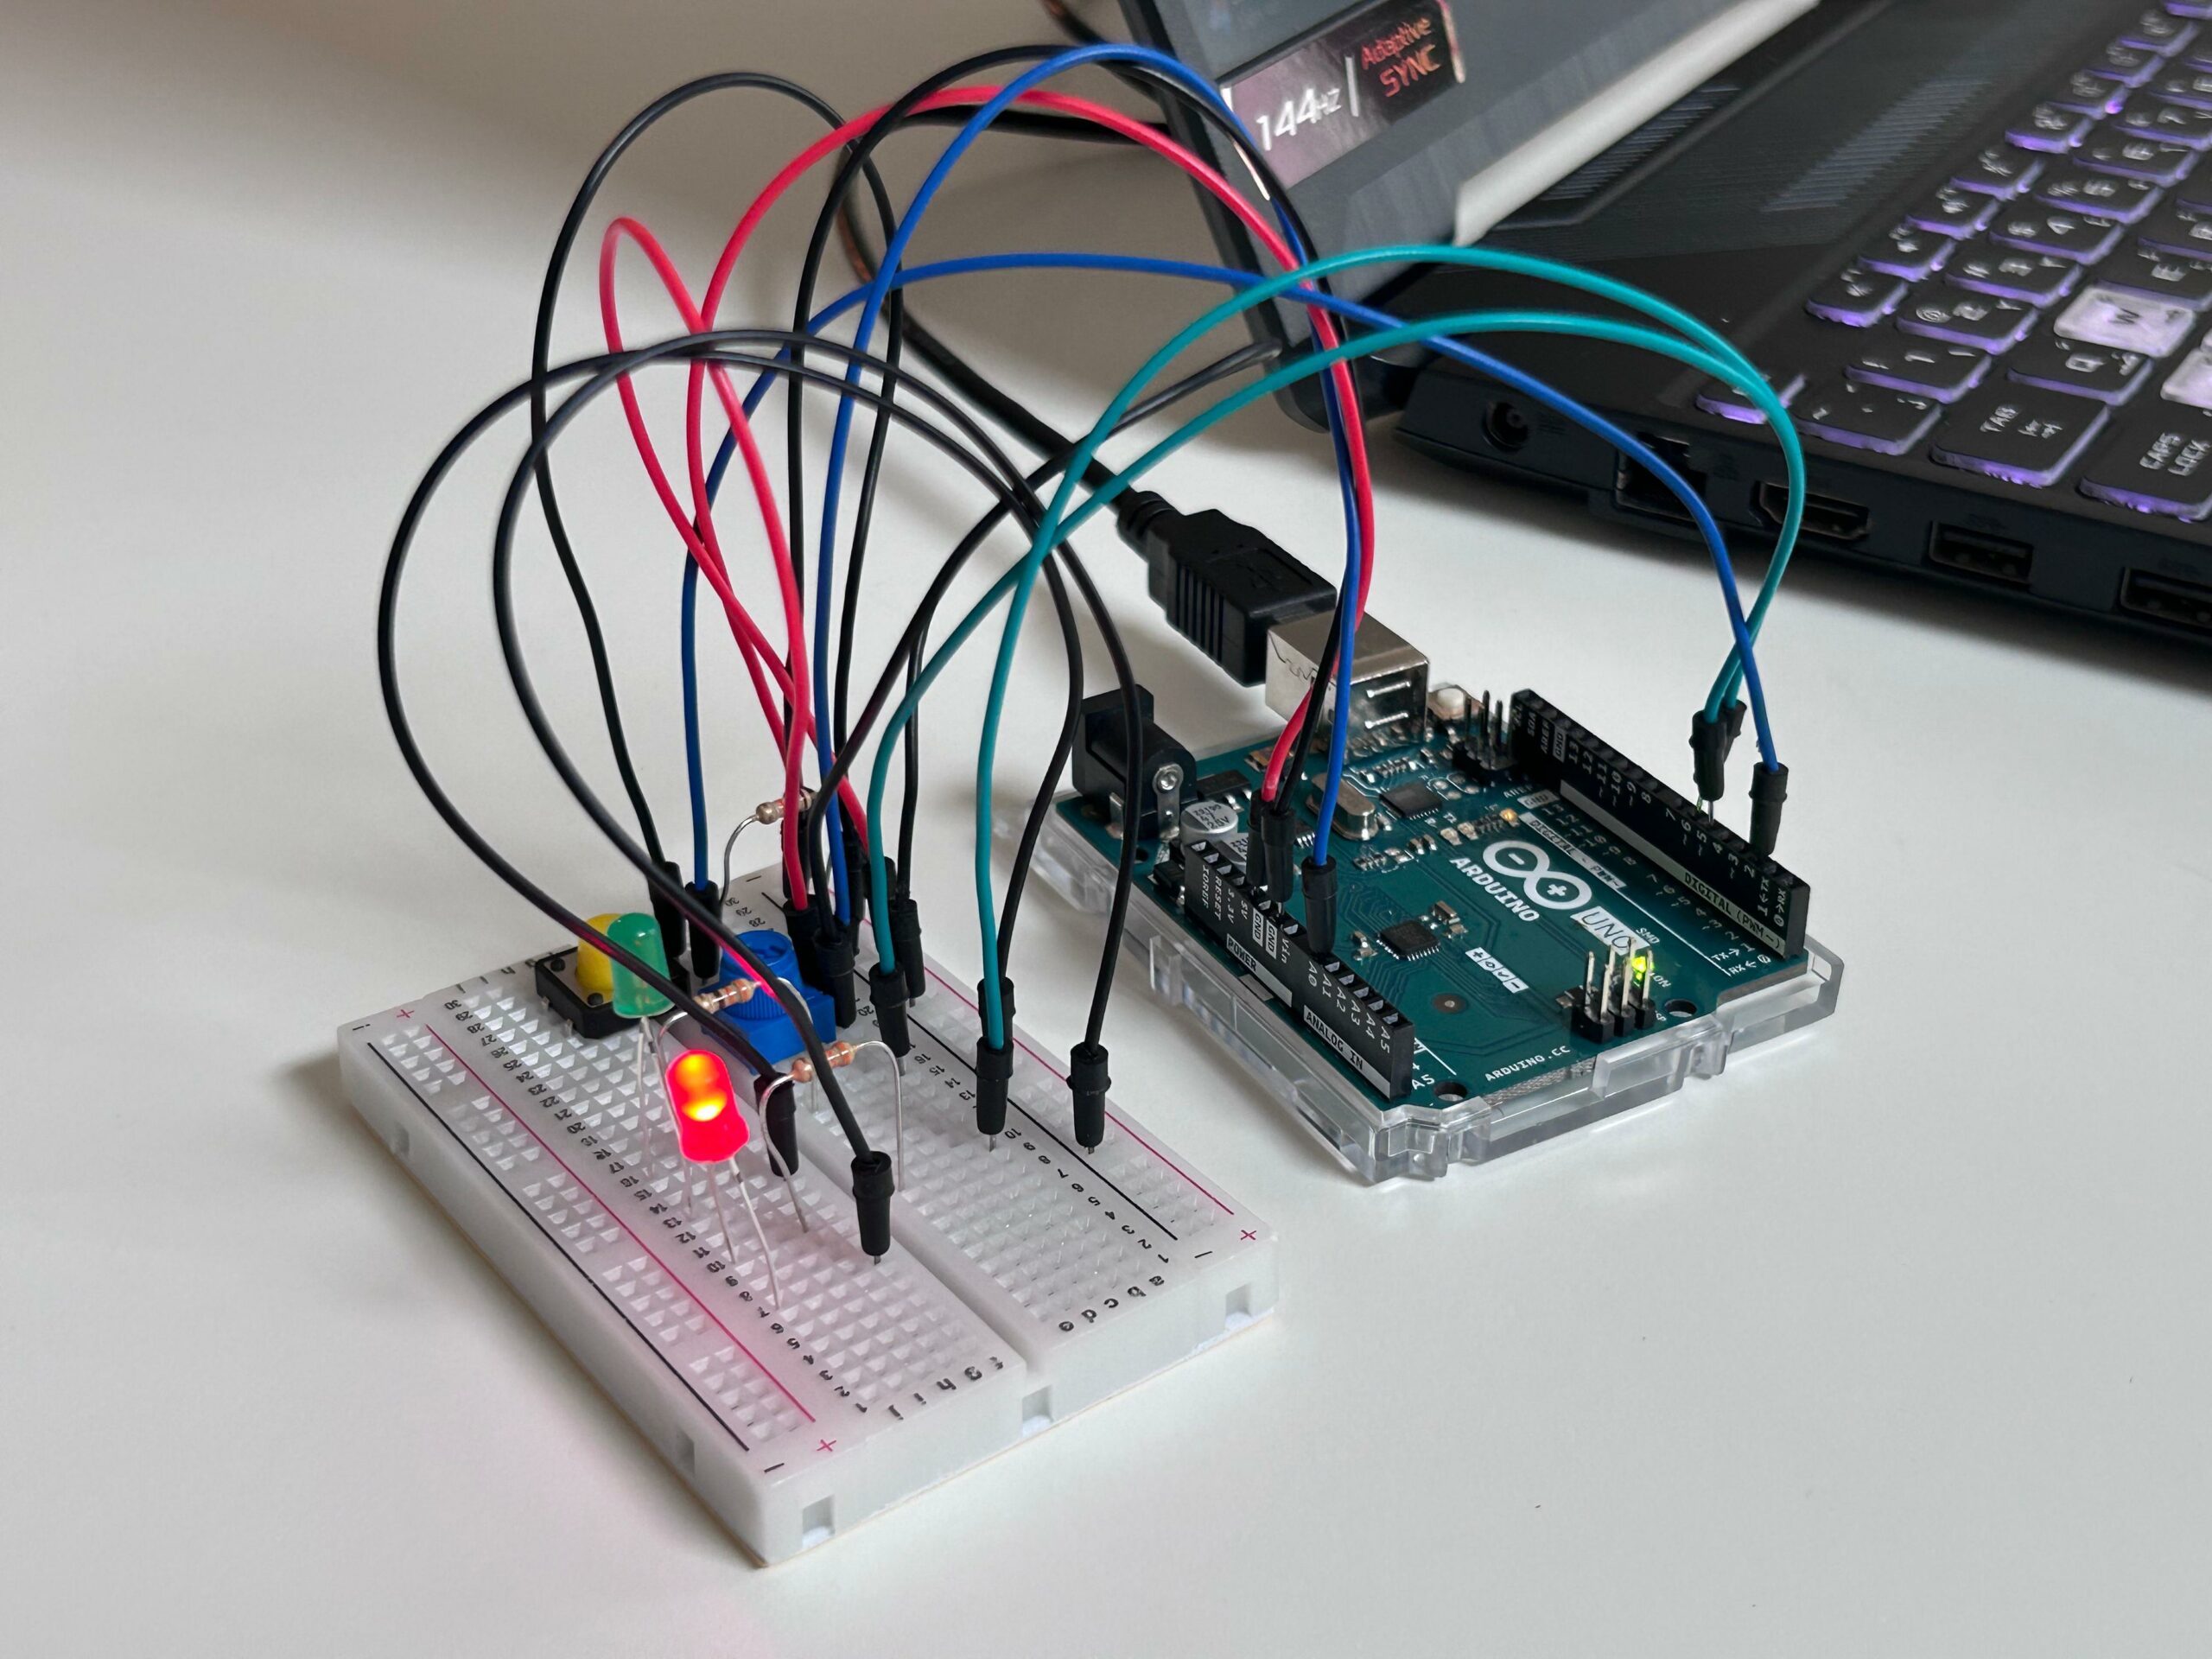
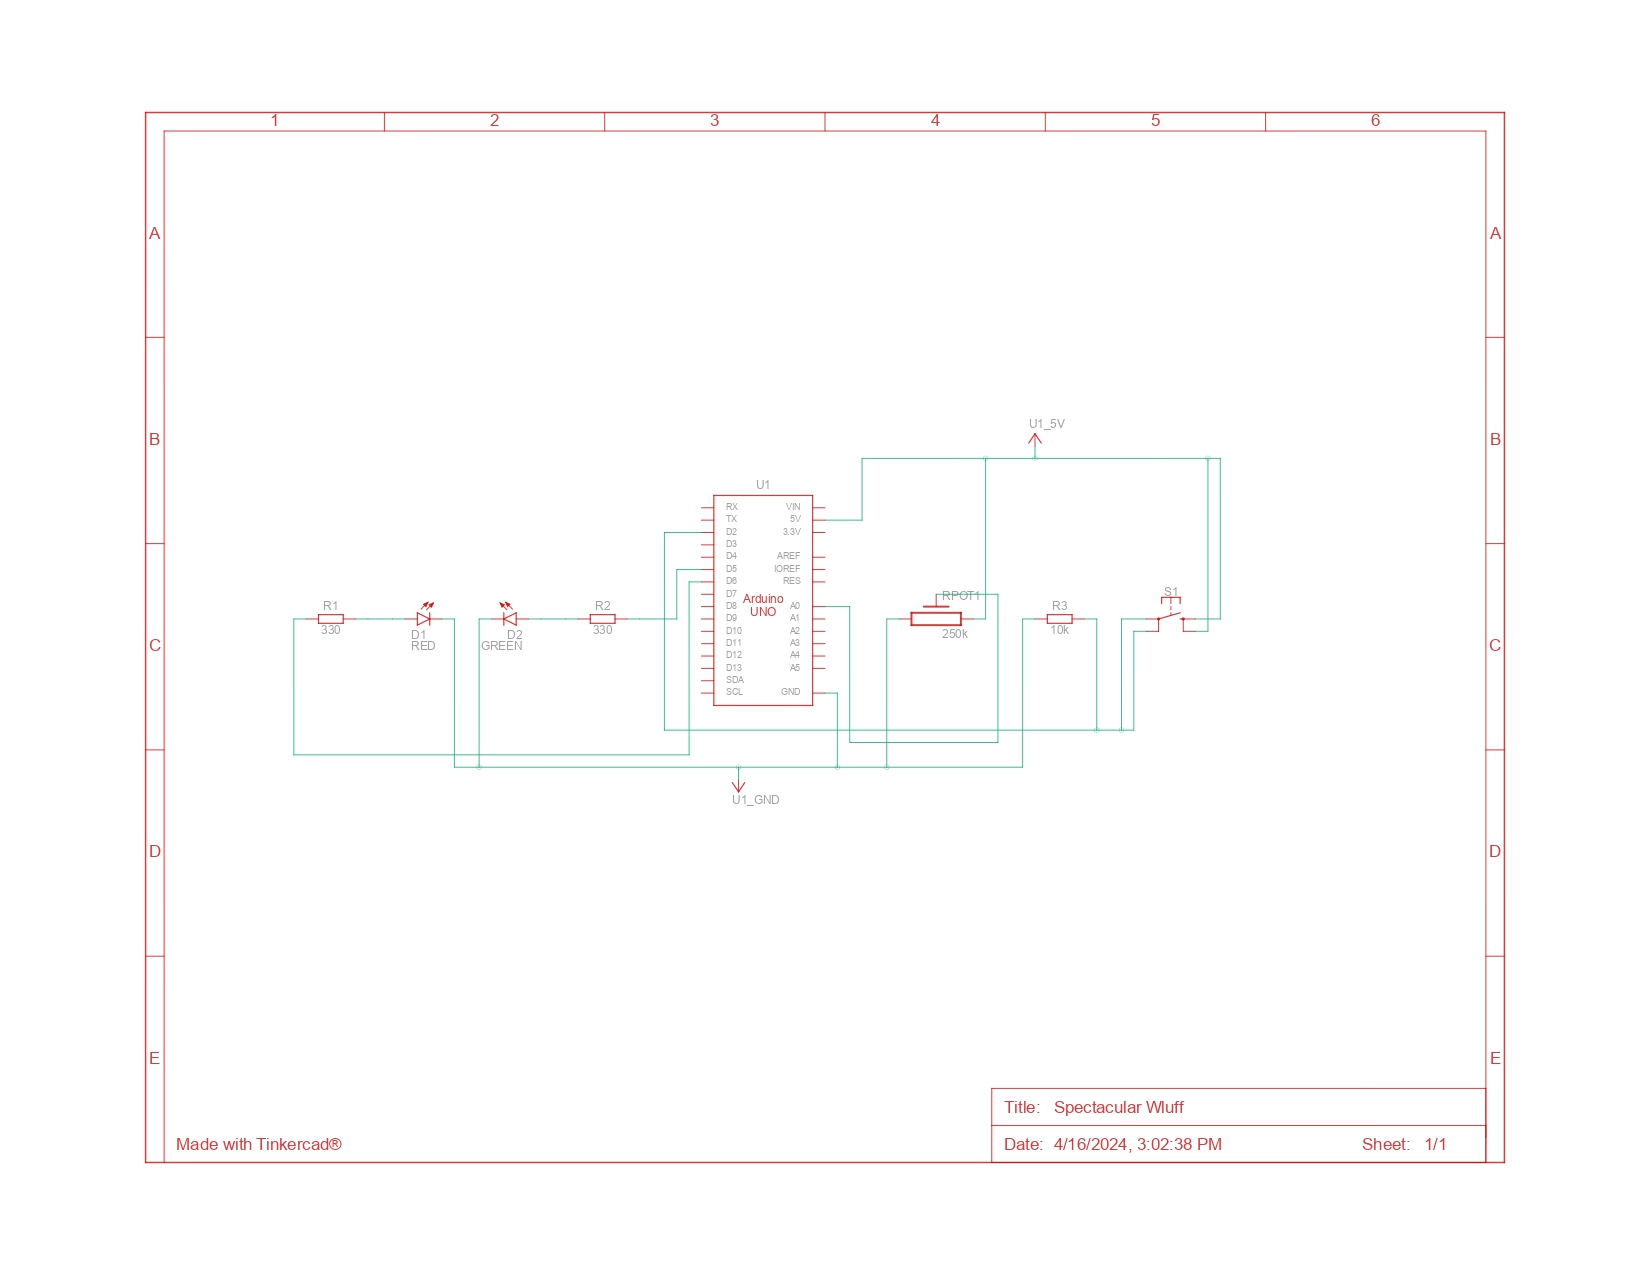
Drawing inspiration from everyday objects and interactions, this assignment presents a simple light switch and dimmer found in most houses around the world. I’m reimagining these familiar components in a playful and interactive way using Arduino and LEDs. The dynamics consists of a modern twist on traditional controls, where pressing a button toggles the red LED while turning a knob adjusts the brightness of the green LED.
Materials:
- Arduino Uno board
- Jumper wires
- Green LED
- Red LED
- Two 330 ohm resistors
- One 10k ohm resistor
- Push button
- Potentiometer
Implementation:
The circuit reflects the simplicity and functionality of a traditional light switch and dimmer. The push button acts as the on/off switch for the red LED, providing tactile feedback similar to pressing a light switch. Meanwhile, the potentiometer emulates the rotary dial of a dimmer, allowing users to adjust the brightness of the green LED by turning the knob.
Schematics:
Code:
const int SENSOR_PIN = A0; // Analog input pin for sensor controlling red LED brightness
const int CONTROL_PIN = 2; // Digital input pin for control button to switch LED colors
const int RED_LED = 5;  // Digital output pin for LED (red)
const int GREEN_LED = 6;  // Digital output pin for LED (green)

int redBrightness = 0; // Red LED brightness controlled by sensor
bool buttonPressed = false; // Button state
int colorIndex = 0; // Index of current color

void setup() {
  pinMode(SENSOR_PIN, INPUT);
  pinMode(CONTROL_PIN, INPUT_PULLUP);
  pinMode(RED_LED, OUTPUT);
  pinMode(GREEN_LED, OUTPUT);
}

void loop() {
  // Read sensor value to control brightness of red LED
  redBrightness = analogRead(SENSOR_PIN) / 4; // Divide by 4 to map 0-1023 to 0-255

  // Set the brightness of the red LED
  analogWrite(RED_LED, redBrightness);

  // Check control button state
  if (digitalRead(CONTROL_PIN) == LOW) {
    if (!buttonPressed) {
      // Toggle color index
      colorIndex = (colorIndex + 1) % 2;
      buttonPressed = true;

      // Turn on green LED when button is pressed
      digitalWrite(GREEN_LED, HIGH);
    }
  } else {
    buttonPressed = false;
    // Turn off green LED when button is released
    digitalWrite(GREEN_LED, LOW);
  }
}
Video Demonstration:
Reflection and Improvements:
Finally, I’m satisfied with the project outcome, as it bridges the gap between simplicity and innovation, reimagining everyday objects in a playful and interactive manner while showcasing the creative potential of Arduino-based projects. Some improvements are as follow:
- Experiment with different button and knob designs to enhance user experience and aesthetic appeal.
- Integrate additional sensors, such as light sensors or temperature sensors, to create more dynamic lighting effects and automation capabilities.