
Throughout the Eid break, I tried to review the concepts that we have gone through so far. My goal for this assignment is not to create fancy circuitry but rather to design something from the back of my mind and understand what it does, how, and why.
I spent quite a time figuring out TinkerCAD, which is a program that really helps me to visualize and simulate my board before physically building it. I found this YouTube playlist that taught the program really well.
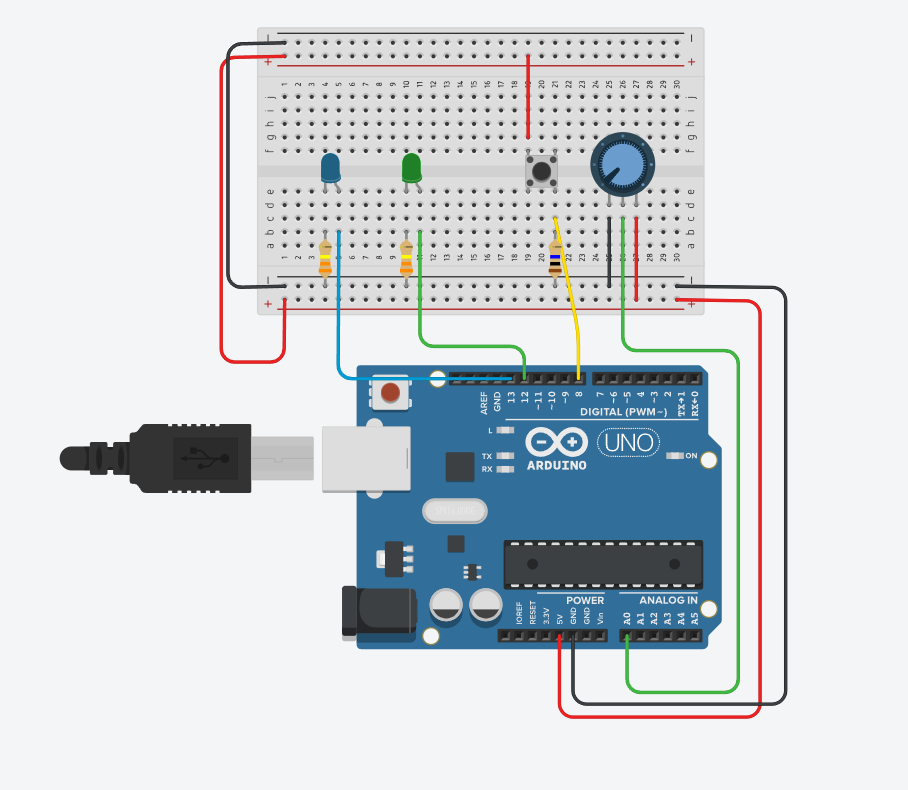
Concept
I want to light up two lights with a button and a knob. Because the knob is an analog input, there is a value that can be used there. So, I decided to make one LED blink in a specific amount of time decided by the knob, whereas the other LED is a simple on-off.
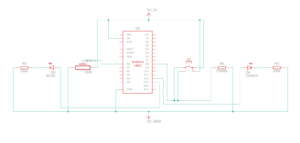
Schematic
 How it Works

The code is separated for both green and blue LED.
In the code, I made a variable called sensorValue, which reads the signal from the knob. These values are then used to create blinking effect using delay for the blue light.
// Read Potentiometer Value
  sensorValue = analogRead(A0);
  // Turn the LED On
  digitalWrite(LED_BUILTIN, HIGH);
  // Pause program for <sensorValue> miliseconds
  delay(sensorValue); // Wait for sensorValue millisecond(s)
  // Turn the LED Off
  digitalWrite(LED_BUILTIN, LOW);
  // Pause program for <sensorValue> miliseconds
  delay(sensorValue); // Wait for sensorValue millisecond(s)
Demo
End Remarks
I am really proud of this whole assignment. It is not perfect, as in the video, the green LED sometimes does not turn off despite the button being pressed.
Nevertheless, while it may seem simple in the beginning, I was very confused by the whole arrangement of things. But, I did my best to actually sit down, take my time, and learn how these components work and interact with each other and reinforce my knowledge on Arduino itself.