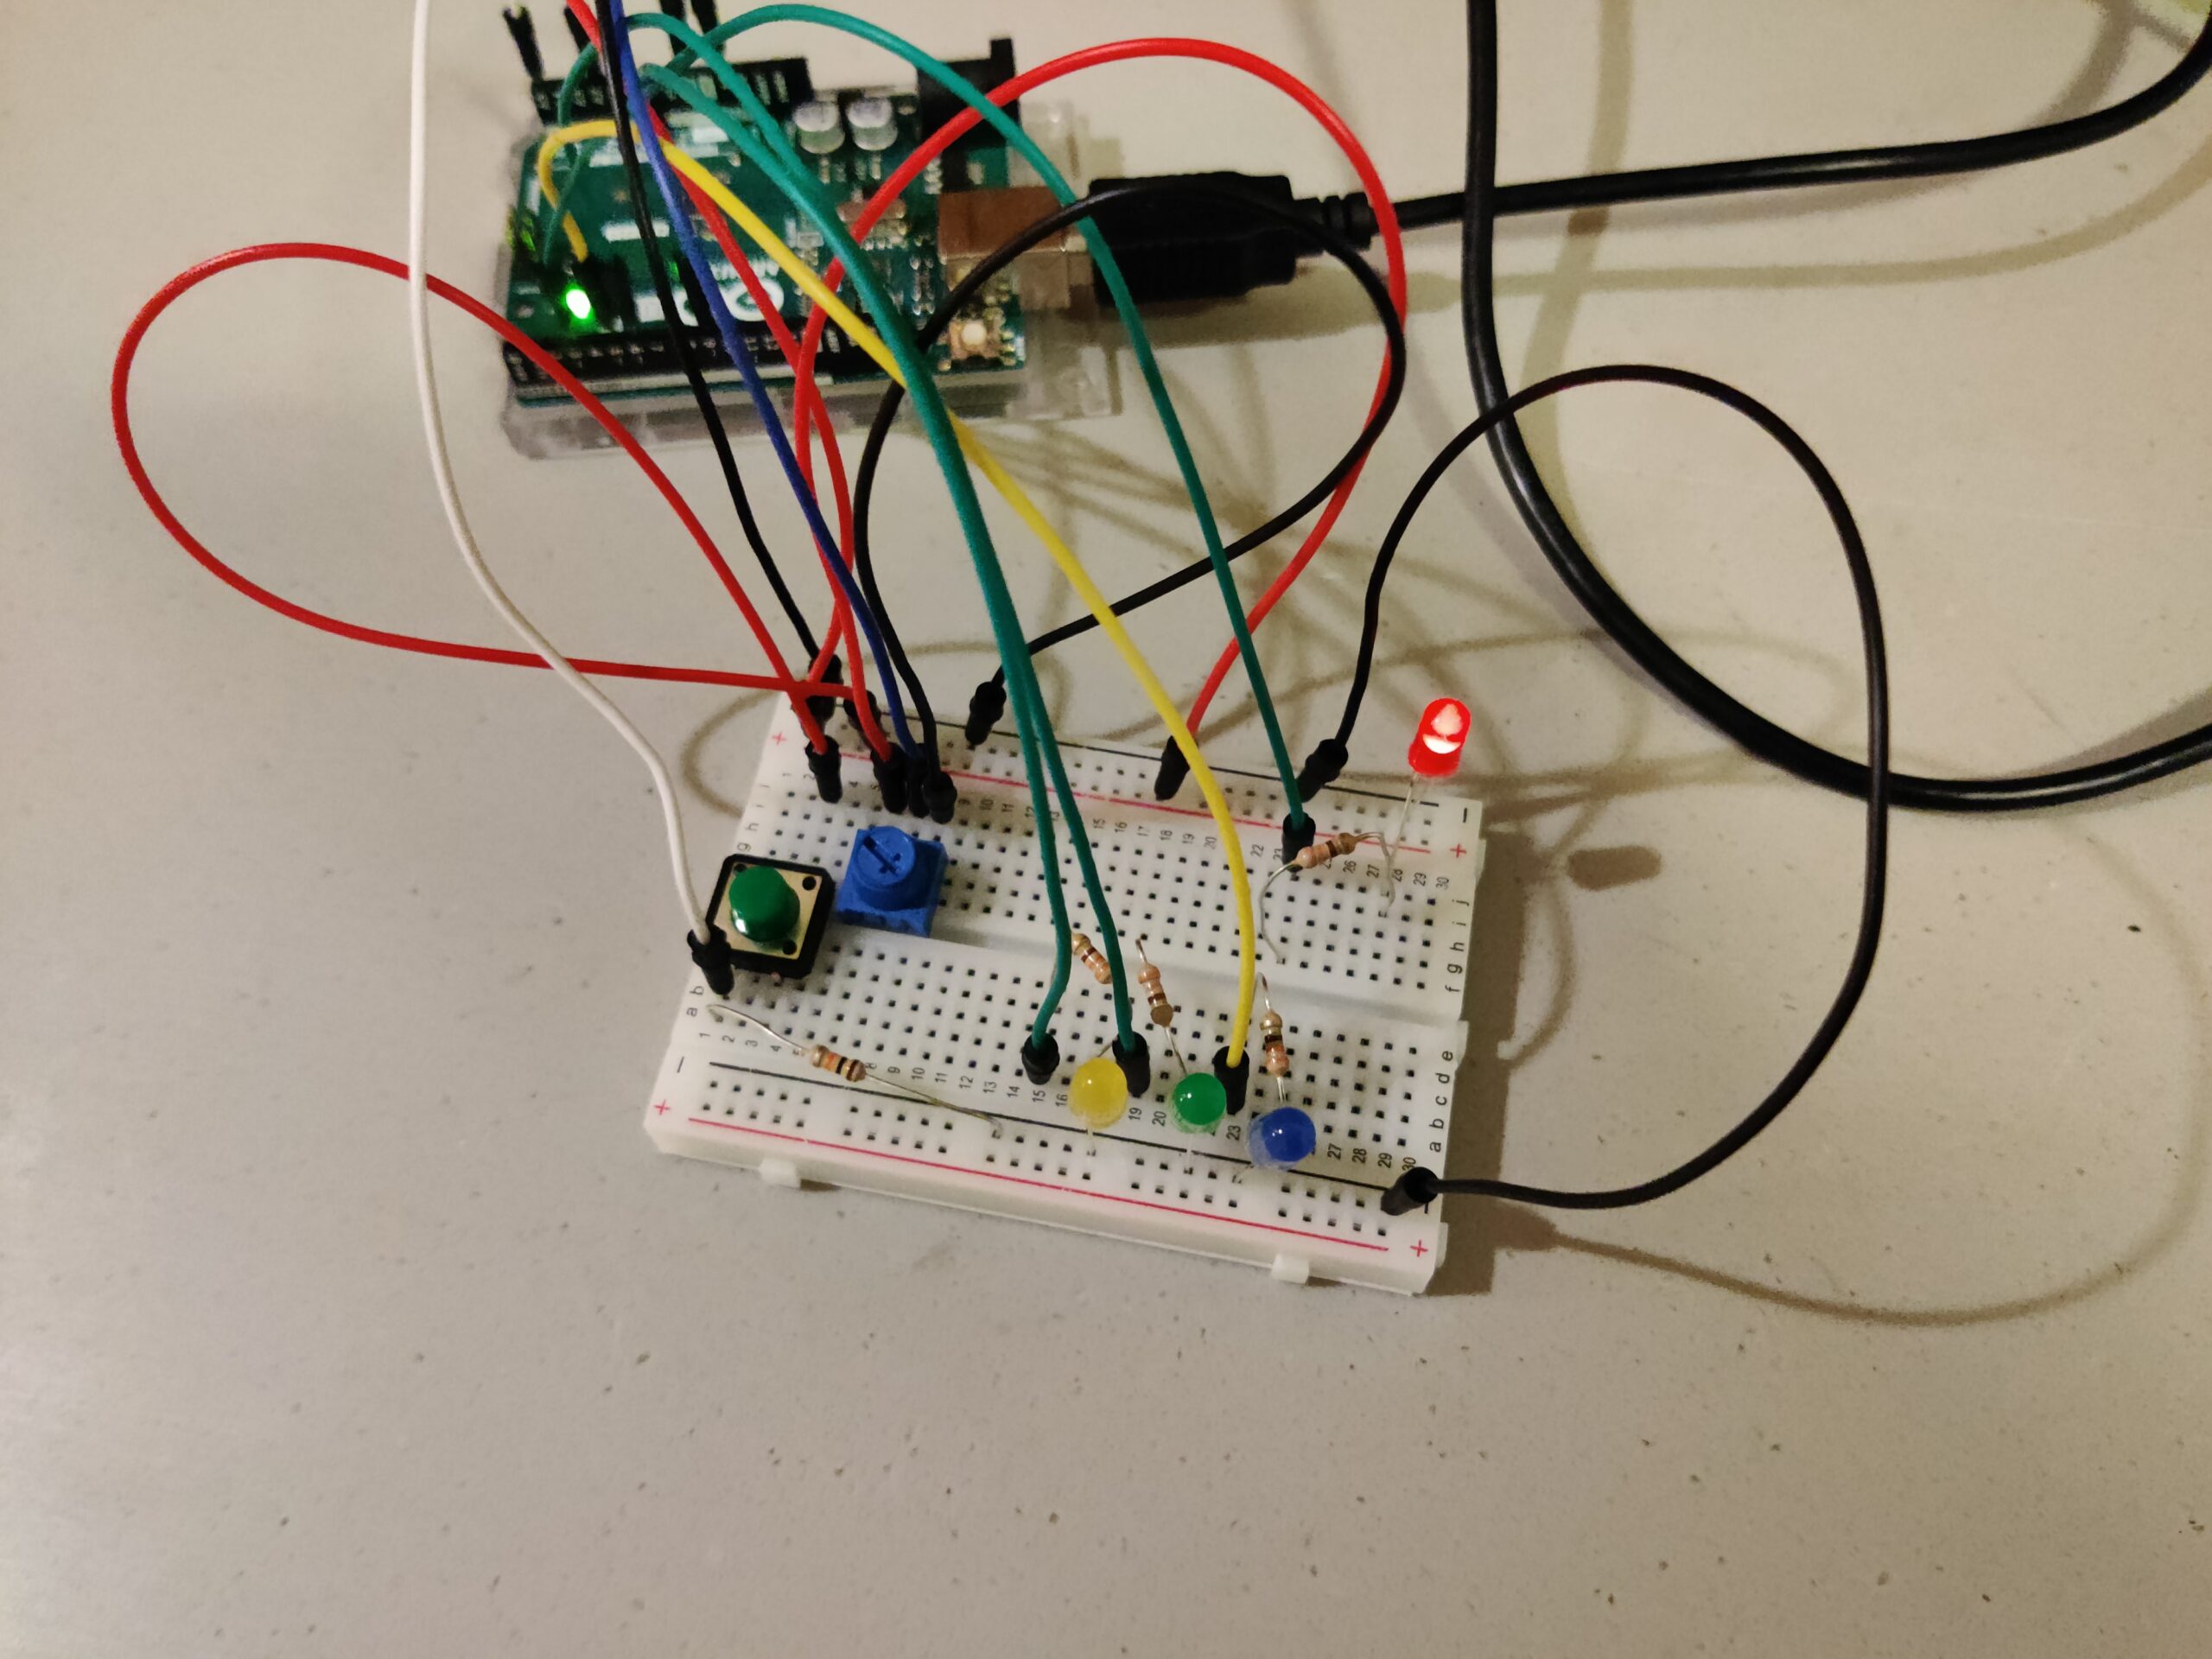
I came up with the idea of this assignment while playing around with the potentiometer. It has a wide range of values it can provide and I wanted to utilize the potential of its variability and precision.
There are 4 LEDs – red, yellow, green and blue – that light up as the values generated by the variable resistor change. The potentiometer is the analog sensor here, but provides functionality of both an analog and a digital sensor. The purely digital sensor here is the green button.
The potentiometer values are supplied to the digital output pins and control the brightness of the LEDs. The value range of the potentiometer is also split into 4 equal segments, so that each LED only has a quarter of the full range of brightness it can take. The splitting also allows to switch the LED as the value changes, meaning for (0, 256] range of the potentiometer reading, one LED lights up with (0, 1/4] of its brightness range. Same logic applies to the other LEDs in a successive fashion.
The green button (digital sensor) allows to change the sequence of LEDs that light up with certain values of the potentiometer. For instance, if initially the red LED has the lowest quarter of values, the switch sets that lowest range to the next LED in succession, which would be the yellow one, and every LED gets the position of the next one, hence in this example the red one would get the highest range of values and be the brightest if turned on. The video of how the system works is attached below.
The main code responsible for the button and the value switches is provided below. The relatively challenging part was figuring out a way to make the switch between what values which LED gets, and I ended up with an array structure for efficiency.
if (buttonState == HIGH){
    if (swapped == 0){
    switchState += 1;
    switchState = switchState % 4;
    }
    swapped = 1;
  }
  else{
    swapped = 0;
  }

  if (sensorValue > 0 && sensorValue <= 256){
    analogWrite(leds[switchState], sensorValue/4);
    digitalWrite(leds[(switchState+1)%4], LOW);
    digitalWrite(leds[(switchState+2)%4], LOW);
    digitalWrite(leds[(switchState+3)%4], LOW);
    //speed = 2000;
  }
  else if(sensorValue > 256 && sensorValue <= 512){
    digitalWrite(leds[switchState], LOW);
    analogWrite(leds[(switchState+1)%4], sensorValue/4);
    digitalWrite(leds[(switchState+2)%4], LOW);
    digitalWrite(leds[(switchState+3)%4], LOW);
    //speed = 1000;
  }
  else if(sensorValue > 512 && sensorValue <= 768){
    digitalWrite(leds[switchState], LOW);
    digitalWrite(leds[(switchState+1)%4], LOW);
    analogWrite(leds[(switchState+2)%4], sensorValue/4);
    digitalWrite(leds[(switchState+3)%4], LOW);
    //speed = 500;
  }
  else if(sensorValue > 768 && sensorValue <= 1023){
    digitalWrite(leds[switchState], LOW);
    digitalWrite(leds[(switchState+1)%4], LOW);
    digitalWrite(leds[(switchState+2)%4], LOW);
    analogWrite(leds[(switchState+3)%4], sensorValue/4);
    //speed = 250;
  }
  else{
    digitalWrite(red, LOW);
    digitalWrite(yellow, LOW);
    digitalWrite(green, LOW);
    digitalWrite(blue, LOW);
    //speed = 0;
  }
For improvements, I could add more variability into what the button does, possibly incorporate flickering rate for different potentiometer readings to make the transitions more clear. I also could optimize the code and make it more reusable so that when new functionality or LEDs are added, it does not take much code to incorporate.