
The Switch itself
Before going into the background, let’s look at the switch itself:
Concept
A switch to be controlled by a body part other than the hand is not completely out of the realm of imagination, but it is quite difficult to imagine, especially for a circuit based on an Arduino. When I went to collect the copper strip from the IM lab, I got the idea of taping it to my forehead. And that’s how Sleep-Snitcher 3000 was born.
Conceptually, it is a tongue-in-cheek detector of whether a student is sleeping in class. When a student’s forehead is on the table, the LED lights up. This may also be the right place to add a disclaimer that the maker of this project does not advocate the use of this in schools or other educational institutions. It is meant to only be a fun and slightly satirical project.
Design
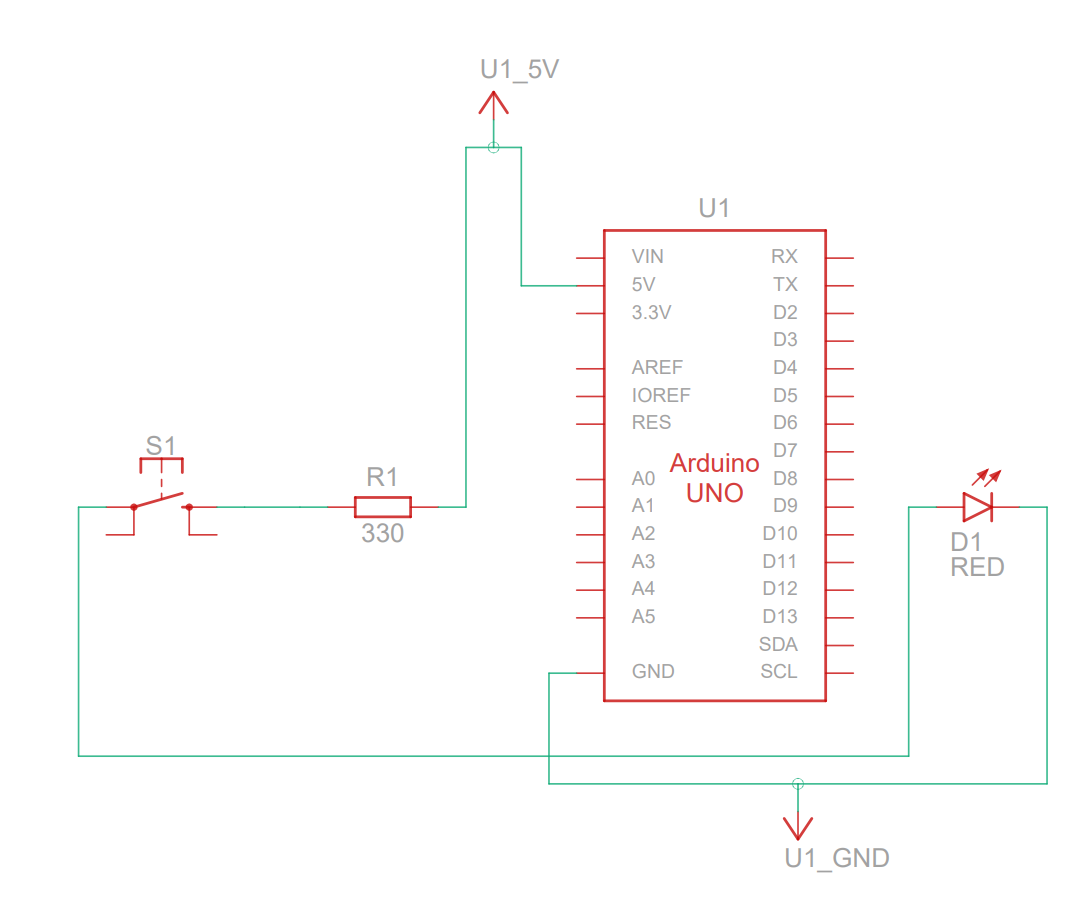 Figure 1: Circuit Diagram
The circuit is pretty simple. After this is all that the assignment actually requires. The above is a slightly confusing diagram from Tinkercad that shows the circuit design.
The 5V DC power output pin is used to keep the resistor and one terminal of what is technically a push-button switch live. When my forehead is on the table, it connects the two terminals of the “push-button switch” and thus lights up the LED, whose anode is connected to the the switch and cathode to GND (ground).
Materials
- Arduino Uno Rev3 SMD x1
- Jumper wires x5
- 330Ω carbon resistor x1
- Breadboard with 400 contacts x1
- Basic Red 620nm LED x1
- Aluminum Foil x1 A4 sheet (courtesy of Indian by Nature!)
- Copper Tape x10 inches
- Paper Bag x1
Implementation
At first, I was planning to connect one terminal to an aluminum foil sheet on the table and the other to my forehead. This came with a major problem: the wires were just too short. Besides, a hypothetical customer of this product wouldn’t want to connect and disconnect themselves from a circuit repeatedly. Then I remembered that in push-button switches, the button itself is usually not a terminal of the switch but acts as a wire bridging the two terminals. So, I came up with the following split-terminal design using aluminum sheets.
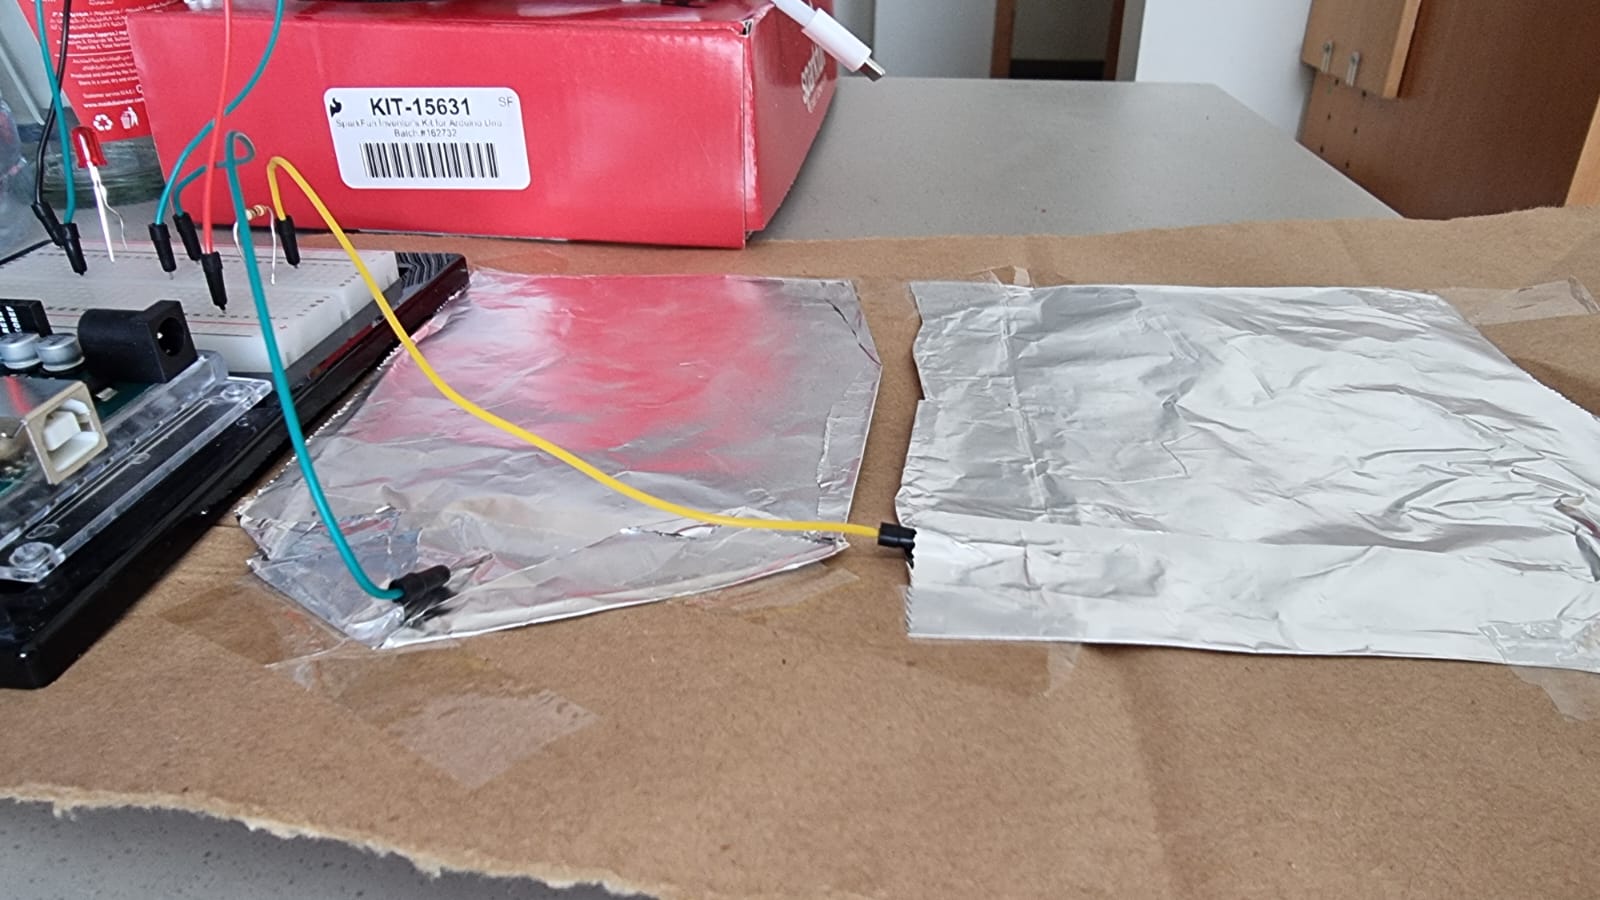 Figure 2: Switch terminals (the green terminal is +ve and the yellow terminal is -ve)
The copper strip simply goes across the forehead and that’s pretty much it.
And finally, the breadboard components were obtained from the Sparkfun kit we were provided, and the Arduino was connected to a laptop for power supply.
Reflections
This turned out to be more fun and simpler than I thought it would be. This was my first experience with Arduino outside of our class, but it felt nice to directly apply the concepts that were drilled into us by both high school physics and FOS. Also, the switch was surprisingly consistent, as I had expected that the circuit would be interrupted by a layer of insulating aluminum oxide. All in all, it was a fun project, with a fun concept.
Use of Generative AI
Generative AI (OpenAI ChatGPT 3.5) was used to name the project (the original name was A Student’s Nightmare) and to generate the disclaimer at the end of the video.