Overview
In this assignment, I was tasked with designing a unique switch that doesn’t use hands for activation. I embraced the challenge with creativity, creating two distinct switches: a water detection switch and a bicep flexion switch.
Switch 1: Water Detection System with Visual Indicator
Concept
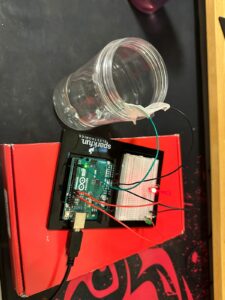
The concept behind this water detection system is rooted in the fundamental principle of electrical conductivity in water. Utilizing a simple circuit design with an Arduino, the project aims to detect the presence or absence of water through basic electronic components. When water connects two strategically placed wires, it completes a circuit, allowing current to flow, which the Arduino interprets to trigger a visual signal.
Inspiration
The inspiration for this project came from the need to monitor water levels or detect water presence in various situations, such as checking if a plant needs watering or preventing overflow in tanks.
Image
Components Used
- Arduino Uno
- Green LED
- Red LED
- 330Ω Resistors (2)
- Jumper Wires
- Breadboard
How It Works
- I connected the anode of each LED (green and red) through a 330Ω resistor to digital pins 13 and 12 on the Arduino, respectively. The cathodes were connected to the ground (GND).
- I prepared two wires as water sensors by stripping a small section of insulation off each end. One wire was connected to digital pin 2 on the Arduino, and the other wire was connected to GND. These wires were then placed close to each other but not touching, ready to be submerged in water.
- I wrote and uploaded the code to the Arduino that checks the electrical connection between the sensor wires. If water is present (completing the circuit), the green LED turns on. If the circuit is open (no water detected), the red LED illuminates.
Video
Switch 2: Bicep Switch
Concept
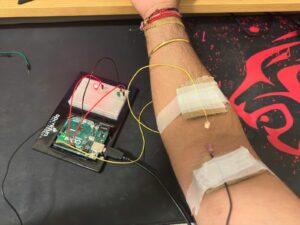
The goal was to create a device that could detect muscle flexion, particularly of the bicep, and provide immediate visual feedback.
The circuit setup and the code used are the same as the water detection switch.
Image
Components Used
- Arduino Uno
- Green LED
- Red LED
- 330Ω Resistors (2)
- Jumper Wires
- Breadboard
- Cardboard Pieces
- Copper Tape
How It Works
When the bicep is flexed, the circuit completes, and the green LED lights up, indicating muscle activity. Conversely, when the muscle relaxes, the circuit breaks and the red LED turns on, indicating that the muscle is at rest.
Video


