Midterm Assignment – A Blast to the Past!

My Midterm Assignment can be described in the following way: “A computer geeks dream”. Jokes aside, this is an Idea I have had on mind for a long time and I decided that this is the right time for me to make it reality. Let’s dive deep into it:

Ideation:

As the midterm assignment was approaching I was a little bit scared of what I should do. I heard people around me all say they are going to make a game or some visual artistic piece but I wanted to do something different. Then I realized, what is my first experience with computers and technology? The answer was clear and simple: WINDOWS XP (My first computer with a Pentium 3 and 1GB of ram Is one I will always remember)

Concept

The concept was pretty simple. Make a small Windows XP emulator that will include the original icons and sounds as well as display the infamous windows errors which don’t make sense (for example: Keyboard not found: Press some button – like how am I supposed to press a button on the keyboard if it’s disconnected???). Before Explaining the technical side, I will let you explore the project a little bit.

Execution

This assignment was done in a way that was very thought of and self reflective based on the readings we have done for the class in the past month. It is focused on human centered design as well as it incorporates many techniques like the obviousness of the design and the “lack of need for instructions”. It starts of simple with a power button which is familiar to everyone as well as the whole windows ecosystem which is easy to figure out. The icons have been made draggable, blue when clicked and with the original click sound, just like a real windows XP. For organization purposes they have been divided in different classes, as shown below:

class Icon {
  constructor(image, label, x, y, width, height) {
    this.image = image;
    this.label = label;
    this.x = x;
    this.y = y;
    this.width = width;
    this.height = height;
    this.isHighlighted = false;
    this.isDragging = false; // New property to track dragging state
    this.offsetX = 0; // Offset between mouse and icon x position during drag
    this.offsetY = 0; // Offset between mouse and icon y position during drag
    this.clickCount = 0;
  }

  draw() {
    push();
    if (this.isHighlighted || this.isDragging) {
      tint(0, 0, 255); // Tint for highlight
      fill("blue"); // Color for highlighted text
    } else {
      noTint();
      fill(255); // Default text color
    }

    image(this.image, this.x, this.y, this.width, this.height);
    text(this.label, this.x, this.y + this.height + 10); // Adjust text position below the icon
    pop();
  }

  contains(px, py) {
    return (
      px >= this.x &&
      px <= this.x + this.width &&
      py >= this.y &&
      py <= this.y + this.height
    );
  }

  click() {
    if (this.contains(mouseX, mouseY)) {
      this.isHighlighted = true;
      clickSound.play();

      // Check if the current icon is the last clicked icon
      if (lastIconClicked === this.label) {
        this.clickCount++; // Increment only if the same icon is clicked consecutively
      } else {
        // Reset all icons' click counts if a different icon is clicked
        icons.forEach((icon) => (icon.clickCount = 0));
        this.clickCount = 1;
        lastIconClicked = this.label; // Update the last clicked icon label
      }

      console.log(
        `Clicked on Icon: ${this.label}, Click Count: ${this.clickCount}`
      );

      // Check if the icon is clicked two times in a row
      if (this.clickCount % 2 == 0 && this.label === "midterm.exe") {
        errorImageLogic();
        this.clickCount = 0; // Reset click count after opening the icon
      } else if (this.clickCount % 2 == 0 && this.label === "My Computer") {
        myComputerLogic();
        this.clickCount = 0; // Reset click count after opening the icon
      } else if (this.clickCount % 2 == 0 && this.label === "Recycle Bin") {
        recycleBinLogic();
        this.clickCount = 0; // Reset click count after opening the icon
      } else if (this.clickCount == 1 && this.label === "errorImage") {
        spawnErrorImages();
        this.clickCount = 0; // Reset click count after spawning error images
      }
    } else {
      this.isHighlighted = false;
    }
  }

  mousePressed() {
    if (this.contains(mouseX, mouseY)) {
      this.isDragging = true;
      this.offsetX = this.x - mouseX;
      this.offsetY = this.y - mouseY;
    }
  }

  mouseReleased() {
    this.isDragging = false;
  }

  mouseDragged() {
    if (this.isDragging) {
      this.x = mouseX + this.offsetX;
      this.y = mouseY + this.offsetY;
    }
  }
}

Shown above is the class for the Icons which makes it easy to add them or take them away.

class Window {
  constructor(image, width, height) {
    this.image = image;
    this.width = width;
    this.height = height;
    this.x = 50;
    this.y = 50;
    this.closeButtonSize = 50; // Size of the close button
  }

  draw() {
    image(this.image, this.x, this.y, this.width, this.height);
  }

  clicked(mx, my) {
    // Check if close button is clicked
    if (
      mx > this.x + this.width - this.closeButtonSize &&
      mx < this.x + this.width &&
      my > this.y &&
      my < this.y + this.closeButtonSize
    ) {
      clickSound.play();
      specialWindow = null; // Close the window
    }

    // Check if the bottom half of the window is clicked
    if (
      this.image === errorImage &&
      mx >= this.x &&
      mx <= this.x + this.width &&
      my >= this.y + this.height / 2 &&
      my <= this.y + this.height
    ) {
      errorShouldSpawn = true;
      // Logic for clicking the bottom half of the error window
      for (let i = 0; i < 40; i++) {
        setTimeout(() => {
          spawnErrorImages();
        }, i * 100); // spawn more error windows over time
      }

      // Transition to blue screen after 2 seconds
      setTimeout(() => {
        loop();
        currentState = State.BLUE_SCREEN;
      }, 4000);
    }
  }
}

Shown above is the code for the Window class which displays the windows where the icons are clicked and also controls the behavior of the error prompts.

Challenges and closing statement

The main challenges included the clicking of the buttons and dragging them around as well as the behavior of the error messages shown.

Special thanks to Pi and Professor Aaron Sherwood for the help throughout the whole execution of the project. You guys really motivated me to make my childhood dream come true. If you showed this to 5 year old Darko and said he made that he would literally be so excited.

At the same time, thank YOU as a reader for “wasting” 5 minutes of your day to appreciate my work. Remember to put a smile on your face and appreciate very day as much as you can. Spread love with your family, friends, professors and even strangers cause you never know what tomorrow brings.

Darko Loves You <3

Stay Safe!

MidTerm Project – Khalifa Alshamsi

Concept and Gameplay

“UFO Escape” transports players into the role of a UFO pilot tasked with the critical mission of avoiding collision with perilously floating rocks in space. The game unfolds across a dynamic background that transitions from the tranquility of space to the adrenaline-pumping danger zone filled with obstacles. Players must use the arrow keys to maneuver their spacecraft, navigating the challenging asteroid field. Each successful dodge rewards the player with points, elevating the stakes and the satisfaction derived from setting new high scores.

Technical Achievements and Design Decisions

In my opinion, one of the game’s standout features is its seamless integration of visual and auditory elements to create an immersive experience, which was the vibe I was going for. The use of distinct background images for different game states — a peaceful space scene for the menu and game over screens and a more in-the-field backdrop for gameplay.

// Displays the space background image only during menu and game over states but displays a different image during gameplay
if (gameState === "MENU" || gameState === "GAME OVER") {
  background(bgImage);
} else if (gameState === "PLAYING") {
  background(gameplayBgImage);
}

The transition between these states is goofy because of its old-school UFO soundtrack that loops during gameplay. This adds a layer of nostalgia that brings me back to the old free online games I used to play growing up in school using the school computers. The soundtrack then abruptly halts upon the game’s end, marking the player’s failure and the game’s conclusion.

Another area of pride would be collision detection, which not only ensures that the game is playable but also maintains a level of difficulty that is engaging without being frustrating, but it was highly frustrating to tune it properly to respond.

// Function to detect collision with obstacles
collidesWith(obstacle) {
  let closestX = constrain(obstacle.x, this.x - this.width / 3, this.x + this.width / 3);
  let closestY = constrain(obstacle.y, this.y - this.height / 3, this.y + this.height / 3);
  let distanceX = obstacle.x - closestX;
  let distanceY = obstacle.y - closestY;
  let distanceSquared = (distanceX * distanceX) + (distanceY * distanceY);
  return distanceSquared < (obstacle.radius * obstacle.radius); // Checks if distance is less than obstacle radius
}

The game accurately determines collisions by calculating the closest points between the UFO and the incoming asteroids. This method considers the actual positions and dimensions of both objects, offering a realistic and, for the most part, precise detection mechanism that enhances the player’s experience.

Areas for Improvement and Challenges

While “UFO Escape” is the first game I got to create, and I am extremely proud of it, certain aspects remain ripe for enhancement. The collision detection system, though effective, could be refined to accommodate the irregular shapes of the rocks more accurately.

Another challenge faced during development was ensuring the game’s performance remained smooth despite the increasing number of obstacles. This issue kept bugging the game, making the rocks not properly collide with the UFO ship. This issue was largely mitigated through optimization techniques, such as removing off-screen obstacles from the array to free up resources.

Conclusion

“UFO Escape” embodies the spirit of classic arcade games, but I would say with a bit more graphics. Its development journey was filled with learning opportunities, from refining collision detection algorithms so many times that I lost count to creating an engaging user interface.

Sketch:

Script:

// Variables for game assets
let bgImage; // Variable to hold the background image for menu and game over screens
let bgMusic; // Variable to hold the background music for gameplay
let player; // Player object
let obstacles = []; // Array to store obstacles
let gameSpeed = 6; // Speed at which obstacles move
let score = 0; // Player's score
let gameState = "MENU"; // Initial game state; that is "MENU", "PLAYING", or "GAME OVER"
let rockImage; // Variable to hold the rock image

// Preload function to load game assets before the game starts
function preload() {
  bgImage = loadImage('space.png'); // Loads the background image
    gameplayBgImage = loadImage('gameplay.jpg'); // Loads the gameplay background image
  bgMusic = loadSound('gameplaysound.mp3'); // Loads the background music
  rockImage = loadImage('rock-2.png'); // Loads the rock image
}

// The setup function to initialize the game
function setup() {
  createCanvas(400, 600); // Size of the game canvas
  player = new Player(); // Initializes the player object
  textAlign(CENTER, CENTER); // Setting text alignment for drawing text
}

// Draw function called repeatedly to render the game
function draw() {
  // Displays the space background image only during menu and game over states but displays a different image during gameplay
  if (gameState === "MENU" || gameState === "GAME OVER") {
    background(bgImage);
  } else if (gameState === "PLAYING") {
    background(gameplayBgImage);
  }

  // Handles game state transitions
  if (gameState === "MENU") {
    drawMenu();
  } else if (gameState === "PLAYING") {
    if (!bgMusic.isPlaying()) {
      bgMusic.loop(); // Looping the background music during gameplay
    }
    playGame();
  } else if (gameState === "GAME OVER") {
    bgMusic.stop(); // Stops the music on game over
    drawGameOver();
  }
}

// Function to display the game menu
function drawMenu() {
  fill(255,0 ,0);
  textSize(24);
  text("UFO Escape", width / 2, height / 2.5);
  textSize(16);
  fill(255);
  text("Avoid the rocks!\nUse ARROW KEYS to move\nPress ENTER to start", width / 2, height / 2);
}

// Function to handle gameplay logic
function playGame() {
  fill(255);
  textSize(16);
  text(`Score: ${score}`, width / 2, 30);

  player.show(); // Displays the player
  player.move(); // Moves the player based on key inputs

  // Adding a new obstacle at intervals
  if (frameCount % 120 == 0) {
    obstacles.push(new Obstacle());
  }

  // Updates and displays obstacles
  for (let i = obstacles.length - 1; i >= 0; i--) {
    obstacles[i].show();
    obstacles[i].update();
    // Checks for collisions
    if (player.collidesWith(obstacles[i])) {
      gameState = "GAME OVER";
    }
    // Removes obstacles that have moved off the screen and increment score
    if (obstacles[i].y > height) {
      obstacles.splice(i, 1);
      score++;
    }
  }
}

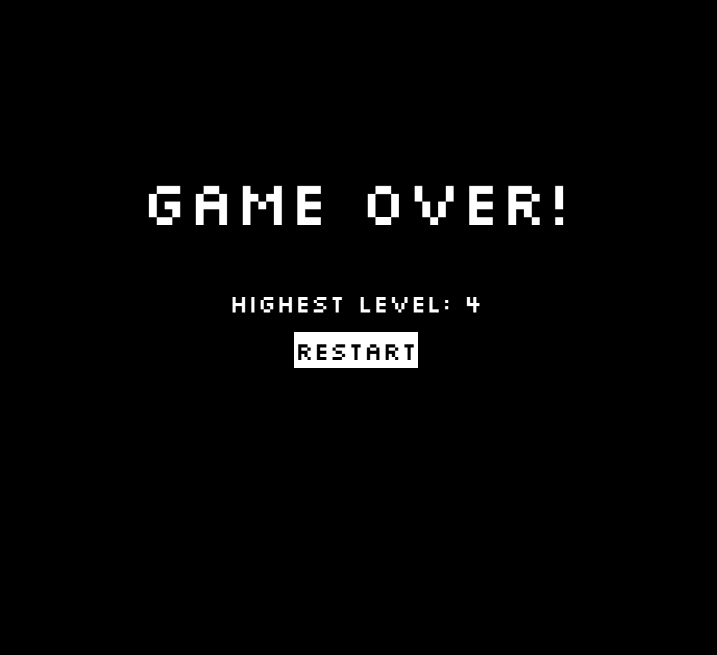
// Function to display the game over screen
function drawGameOver() {
  fill(255, 0, 0);
  textSize(32);
  text("Game Over", width / 2, height / 2);
  textSize(16);
  fill(255);
  text("Press ENTER to restart", width / 2, height / 2 + 40);
}

// Function to handle key presses
function keyPressed() {
  // Starts the game or restart after game over when ENTER is pressed
  if (keyCode === ENTER || keyCode === RETURN) {
    if (gameState === "MENU" || gameState === "GAME OVER") {
      gameState = "PLAYING";
      resetGame();
    }
  }
}

// Function to reset the game to its initial state
function resetGame() {
  obstacles = []; // Clear existing obstacles
  score = 0; // Reset score
  player = new Player(); // Reinitialize the player
}

// Player class
class Player {
  constructor() {
    this.width = 60; // Width of the UFO
    this.height = 30; // Height of the UFO
    this.x = width / 2; // Starting x position
    this.y = height - 100; // Starting y position
  }

  // Function to display the UFO
  show() {
    fill(255); // Sets color to white
    rectMode(CENTER);
    rect(this.x, this.y, this.width, this.height, 20); // Draws the UFO's body
    fill(255, 0, 0); // Sets the glass color to red
    arc(this.x, this.y - this.height / 4, this.width / 2, this.height / 1, PI, 0, CHORD); // Draws the glass
  }

  // Function to move the player based on arrow key inputs
  move() {
    if (keyIsDown(LEFT_ARROW)) {
      this.x -= 5; // Moves left
    }
    if (keyIsDown(RIGHT_ARROW)) {
      this.x += 5; // Moves right
    }
    if (keyIsDown(UP_ARROW)) {
      this.y -= 5; // Moves up
    }
    if (keyIsDown(DOWN_ARROW)) {
      this.y += 5; // Moves down
    }
    this.x = constrain(this.x, 0, width); // Keeps player within horizontal bounds
    this.y = constrain(this.y, 0, height); // Keep player within vertical bounds
    //This is only so the player cannot exist the canvas
  }

  // Function to detect collision with obstacles
  collidesWith(obstacle) {
    let closestX = constrain(obstacle.x, this.x - this.width / 3, this.x + this.width / 3);
    let closestY = constrain(obstacle.y, this.y - this.height / 3, this.y + this.height / 3);
    let distanceX = obstacle.x - closestX;
    let distanceY = obstacle.y - closestY;
    let distanceSquared = (distanceX * distanceX) + (distanceY * distanceY);
    return distanceSquared < (obstacle.radius * obstacle.radius); // Checks if distance is less than obstacle radius
  }
}

// Obstacle class
class Obstacle {
  constructor() {
    this.radius = random(15, 30); // Random radius for obstacle
    this.x = random(this.radius, width - this.radius); // Random x position
    this.y = -this.radius; // Starts off-screen so it looks like its coming towards you
  }

  // Function to display the rocks
  show() {
    image(rockImage, this.x, this.y, this.radius * 2, this.radius * 2); // Draws them as a circle
  }

  // Function to update obstacles position
  update() {
    this.y += gameSpeed; // Moves obstacles down the screen
  }
}


Midterm Project – “Ice&Glasses” by Marcos Hernández

Introduction

I think I might have liked challenges since I was a kid, and the idea of trying to do something different and challenging was very compelling.

During the weeks that passed in the I.M. lab, even though some of my works seemed a bit lacking in art, I was mostly focused on the technicality of things. For example, in one assignment I was experimenting with using the mouse as a medium of interactivity, and in the other I was experimenting with the concept of “gravity and physics”. When I noticed that what I was trying to do was possible, then I focused myself on delivering the best I could in terms of what I had learned so far. Thus, presenting “Ice&Glasses”, an interactable piece of art, and also a game that focuses on delivering the player with a good auditory and visual experience with the use of nostalgic-like art and a heavy focus on the use of the mouse.

Full-screen link:  Ice&Glasses in fullscreen

Concept and Inspiration

As mentioned, thanks to the experimentation I did in previous assignments, I came to the realization that, most likely, everything that I imagined was possible to apply to it, but obviously, it would require a lot of time to apply.

The whole concept of the game is not inspired in reality by other mediums, but rather by something that came into my mind while I was doing Assignment #4, in which I wanted to simulate some diamonds falling as to represent some data; in reality, it looked more like ice cubes… Sadly, that simulation was an illusion since it only took into account some distance and then stopped when it reached it.

When I thought about ice cubes, I had a weird realization. When I thought about ice cubes, the first things that came to mind were ice cubes and glasses. I searched for it on Google and came across this A.I. picture:

oil painting of two empty transparent cups on a table

After seeing this, I knew what I wanted to do.

With this idea in my mind, I wanted to actually create the illusion of physics and proper gravity in the game with the use of ice cubes and cup glasses. I had the code; it was only a matter of experimenting enough to find a way to implement this without causing massive slowdowns in the computer due to the amount of “if” conditions it would require.

The code

a. Overview
In summary, it is a lot of code.

It is easily the largest code I have ever created at the moment, and I am really proud of the outcome. Some of the highlights are the following:

1. It has a system to use the mouse without it going too spammy.

function mouseReleased() {
  if (mouse.called == 1) {
    mouse.called = 0;
    if (cubes[mouse.grabbing] == null) {
    } else {
      cubes[mouse.grabbing].isgrabbed = 0;
    }
  }

  //Allows to exit the game and avoid array issues.
  mouse.grabbing = "nothing";
}

2. A collision system.

function checkCollision(i, c) {
  //Check collition in X axis.
  if (
    cubes[i].y + cubes[i].h > cubes[c].y &&
    cubes[i].y < cubes[c].y + cubes[c].h
  ) {
    if (cubes[i].type == "ice") {
      if (cubes[i].insidecup == 1) {
        if (
          cubes[i].x < cubes[c].x &&
          cubes[i].x > cubes[c].x - 25 &&
          cubes[c].type == "glass"
        ) {
          cubes[i].hit_x_r();
        }
        if (
          cubes[i].x + cubes[i].w > cubes[c].x + cubes[c].w &&
          cubes[i].x + cubes[i].w < cubes[c].x + cubes[c].w + 25 &&
          cubes[c].type == "glass"
        ) {
          cubes[i].hit_x_l();
        }
        if (
          cubes[i].x + cubes[i].w > cubes[c].x &&
          cubes[i].x + cubes[i].w < cubes[c].x + 8 &&
          cubes[c].type == "ice"
        ) {
          cubes[i].hit_x_l();
        }
        if (
          cubes[i].x < cubes[c].x + cubes[c].w &&
          cubes[i].x > cubes[c].x + cubes[c].w - 8 &&
          cubes[c].type == "ice"
        ) {
          cubes[i].hit_x_r();
        }
      } else if (cubes[i].type == "ice" && cubes[i].insidecup == 0) {
        if (cubes[c].type == "ice") {
          if (
            cubes[i].x + cubes[i].w >= cubes[c].x &&
            cubes[i].x + cubes[i].w <= cubes[c].x + 25
          ) {
            cubes[c].hit_x_r();
          } else if (
            cubes[i].x <= cubes[c].x + cubes[c].w &&
            cubes[i].x >= cubes[c].x + cubes[c].w - 25
          ) {
            cubes[c].hit_x_l();
          }
        } else if (cubes[c].type == "glass") {
          if (
            cubes[i].x + cubes[i].w >= cubes[c].x &&
            cubes[i].x + cubes[i].w <= cubes[c].x + 15
          ) {
            cubes[c].hit_x_r();
          } else if (
            cubes[i].x <= cubes[c].x + cubes[c].w &&
            cubes[i].x >= cubes[c].x + cubes[c].w - 15
          ) {
            cubes[c].hit_x_l();
          }
        }
      }
    }

    if (cubes[i].type == "glass") {
      if (cubes[c].type == "ice") {
        if (
          cubes[i].x + cubes[i].w >= cubes[c].x - 3 &&
          cubes[i].x + cubes[i].w <= cubes[c].x + 10 &&
          cubes[c].insidecup == 0
        ) {
          cubes[c].hit_x_r();
        } else if (
          cubes[i].x <= cubes[c].x + cubes[c].w + 3 &&
          cubes[i].x >= cubes[c].x + cubes[c].w - 10 &&
          cubes[c].insidecup == 0
        ) {
          cubes[c].hit_x_l();
        }
      } else if (cubes[c].type == "glass") {
        if (
          cubes[i].x + cubes[i].w >= cubes[c].x - 3 &&
          cubes[i].x + cubes[i].w <= cubes[c].x + 40 &&
          cubes[c].isgrabbed == 0 &&
          cubes[c].insidecup == 0
        ) {
          cubes[c].hit_x_r();
        } else if (
          cubes[i].x <= cubes[c].x + cubes[c].w + 3 &&
          cubes[i].x >= cubes[c].x + cubes[c].w - 40 &&
          cubes[c].isgrabbed == 0 &&
          cubes[c].insidecup == 0
        ) {
          cubes[c].hit_x_l();
        }
      }
    }
  }

  //Check collition in Y axis.
  if (
    cubes[i].x <= cubes[c].x + cubes[c].w &&
    cubes[i].x + cubes[i].w >= cubes[c].x
  ) {
    if (cubes[i].type == "ice") {
      if (
        cubes[i].y + cubes[i].h > cubes[c].y &&
        cubes[i].y + cubes[i].h < cubes[c].y + 15
      ) {
        cubes[c].hit_y_d();
      }
      if (cubes[c].type == "ice") {
        if (
          cubes[i].y > cubes[c].y &&
          cubes[i].y < cubes[c].y + cubes[c].h + 1
        ) {
          //To avoid any issues with clipping, this makes sure that every block that is inside the cup that is above it, it will share the "inside of" property.
          index2 = cubes.indexOf(cubes[c]);
          index3 = cubes.indexOf(cubes[i]);

          if (index2 > -1) {
            if (cubes[index2].insidecup == 1) {
              cubes[index3].insidecup = 1;
            }
          }

          cubes[c].hit_y_u();
        }
      }
      if (cubes[c].type == "glass") {
        if (
          cubes[i].y + 45 > cubes[c].y + cubes[c].h &&
          cubes[i].y < cubes[c].y + cubes[c].h &&
          cubes[c].x + cubes[c].w > cubes[i].x + 10 &&
          cubes[c].x < cubes[i].x + cubes[i].w - 10 &&
          cubes[c].insidecup == 0
        ) {
          cubes[c].hit_y_u();
        }
      }
    }
    if (cubes[i].type == "glass") {
      if (
        cubes[i].y + cubes[i].h > cubes[c].y &&
        cubes[i].y + cubes[i].h < cubes[c].y + 15 &&
        cubes[c].insidecup == 0 &&
        cubes[c].type == "ice"
      ) {
        cubes[c].hit_y_d();
      }
      if (cubes[c].type == "ice") {
        if (
          cubes[c].y > cubes[i].y &&
          cubes[c].y + cubes[c].h < cubes[i].y + cubes[i].h - 90 &&
          cubes[c].x + cubes[c].w > cubes[i].x + 25 &&
          cubes[c].x < cubes[i].x + cubes[i].w - 25 &&
          cubes[c].insidecup == 0
        ) {
          //Find who cube index is inside. Also, this is really necessary to fix a bug with the cubes going out of the glass cup.
          index2 = cubes.indexOf(cubes[c]);

          if (index2 > -1) {
            cubes[index2].insidecup = 1;
          }
        } else if (
          ((cubes[c].y > cubes[i].y - 20 && cubes[c].y < cubes[i].y - 2) ||
            (cubes[c].y > cubes[i].y + cubes[i].h + 1 &&
              cubes[c].y < cubes[i].y + cubes[i].h + 10)) &&
          cubes[c].insidecup == 1
        ) {
          //Find who cube index is outside. Also, this is really necessary to fix a bug with the cubes going out of the glass cup.
          index2 = cubes.indexOf(cubes[c]);

          if (index2 > -1) {
            cubes[index2].insidecup = 0;
          }
        }

        if (
          cubes[i].y + cubes[i].h > cubes[c].y &&
          cubes[i].y + cubes[i].h - 30 < cubes[c].y + cubes[c].h &&
          cubes[c].insidecup == 1
        ) {
          cubes[c].hit_y_u();
        }
      }

      if (cubes[c].type == "glass") {
        if (
          cubes[c].y + cubes[c].h > cubes[i].y &&
          cubes[c].y + cubes[c].h < cubes[i].y + 150
        ) {
          cubes[c].hit_y_u();
        }
      }
    }
  }

  //Check collition with table.
  if (
    cubes[c].y + cubes[c].h > scenario_table.y &&
    cubes[c].y + cubes[c].h < scenario_table.y + 60 &&
    cubes[c].x + cubes[c].w > scenario_table.x &&
    cubes[c].x < scenario_table.x + scenario_table.w
  ) {
    cubes[c].hit_y_u();
  } else {
    cubes[c].tempy = 1000; //Send to deletion.
  }
}

3. A gravity and acceleration system.

function Gravity(i) {
  if (cubes[i].y + cubes[i].h < cubes[i].tempy) {
    cubes[i].gravity();
  }
}

The function is the following in Cubes.js:

gravity() {
  //14 seems more than enough to simulate gravity and acceleration.
  if (this.acceleration < 14) {
    this.acceleration++;
  }
  this.y += this.acceleration;
}

4. A code that helps keeps variety in the ice cubes (that means, from a single .png have different outcomes like different sizes and angles)

display() {
    //Push() and pop() isolates the figure properties.
    push();
    if (this.type == "ice") {
      //Different rotations for the same cube.
      if (this.rotated == 0) {
        translate(this.x, this.y);
        rotate(0);
      } else if (this.rotated == 1) {
        translate(this.x + 30, this.y + 2);
        rotate(90);
      } else if (this.rotated == 2) {
        translate(this.x + 30, this.y + 30);
        rotate(180);
      } else if (this.rotated == 3) {
        translate(this.x - 2, this.y + 30);
        rotate(270);
      }
      image(cubeimg, 0, 0, this.w, this.h);
    }

b. The separation of classes

The code is divided into the following way:

  • Cubes.js (Has the logic for the ice cubes and glasses).
  • Levels.js (Originally started as a set of levels, it is now a set of rules established in order to ensure that there are gameplay elements).
  • Menu.js (It contains the start menu, tutorial, credits, selections, information and winning or losing screens).
  • UI.js (It is the information the player will not only see but be able to interact with. For example, it displays how many ice cubes are left and an icon of a door to return to the start menu).
  • Scenario.js (it has the code that allows the display of the scenario and the logic of the spawners).
  • Mouse.js (Created with the sole purpose of allowing a better use of the mouse and its events, like also allowing to store data in its class).

I also divided the graphics and sounds into their respective folders, since there were a lot of them.

c. Difficulties

The collision system took a lot of time, easily around 10 hours, and I discovered a good method by just accident since I was still trying to make it in the way of finding the distance between two objects, when in reality, the best possible solution in this case is just to continuously apply force in specific directions according to whether an object is nearby or trying to clip through it. Not only that, but using the mouse as a medium to drag other objects and still be able to display physics was very complicated.

The graphics

This is one of the parts that were actually very fast to do, maybe either to already having the idea in my mind or due to having experience in using tools such as GIMP for photo editing.

Since I wanted to capture the essence of nostalgia (like in the crayon.ai image), I had to actually go in my way to “downgrade” some images I found on Google. Here are some screenshots of the process I went through in creating these images:

Here I was just starting

A bit more of progress.

The “ice cubes”

Some of the layouts

After I finished editing all these images, since I would look very bad in full screen due to the realism of these images, I applied a filter to make them more “nostalgic.”

The process was very similar to the rest of the images.

As an important note, the ice cubes are made yellow in order to stand out even more with the glass cups, as in to allow the best possible user engagement possible by using intuition.

The sound & music

Most of the sounds I obtained accomplished their purpose, but some of them were a bit delayed; thus, I had to use a tool called “Audacity” to cut some of the delay to allow the best possible feedback for the user.

Also, the music choice was still the same, although I decided to go with the second proposed option from my report, since it reflected a more nostalgic and calming ambient:

A problem… Where is the gameplay?

Indeed, there was only one problem: Where is the gameplay? I had only created an interactable piece of art, but it really conveyed gameplay elements. For the user, it was like there was gameplay, but it could not be seen anywhere; thus, I had to come up with a solution: Divide the game between “normal” gameplay and “sandbox,” which is more of what I envisioned.

In the normal mode, the player has the established challenges of aligning the cubes and the glass cups in a visible red highlight, under a time limit, and without losing any object. The sandbox mode is just complete freedom, and there are no penalties. Also, the player has the ability to use the keyboard in order to spawn more objects quicker or to delete all of them in an instant.

Trying to figure out the gameplay.

Improvements and Conclusion

I wanted to improve the collisions a bit more and add more effects for images, but due to time constraints, it was not possible. Also, the challenges could vary more; for example, move the ice cubes to the glass cup while avoiding the red-highlighted zones that will make you lose the game immediately.

Still, I am really proud of my work, and this allowed me to have more confidence in my skills as a programmer, and also as an artist, since I had to come up with proper solutions to create the best outcome possible, while also maintaining a good (possibly thoughtful) experience for the user.

Extra content

If you want to see some progress, here are some old versions of the midterm:

Have a good day! And thanks for reading my midterm report.

Midterm Project – Tank Game

Inspiration

I remember one of the game I played when I was a child having a small arcade handle. There was a specific tank game that I remember to be really difficult to even reach the fifth level because of the small screen and the aggressive attack from the enemies. Below is an image of the game I mentioned:Therefore, I want to replicate this game as my midterm project using p5.js.

Character design:

There are only 2 types of characters in the game: the Player and the Enemies. As similar to the inspiration game, I made the player to have the exact design. It has 2 rows and a body and a head to shoot the bullets. The layout and the head position will change based on the key arrows. Below is the illustration:Next is the enemy design. Instead of having the same enemy design, I made the enemies to have a plus sign. This is because the enemies will not move from the their position. However, I want to make it more difficult to win, so I made the enemies to have the ability to change the shooting direction based on the player’s position.

Below is the code snippet for the changing of enemies’ shooting direction:

//change the bullet direction based on the player's position
for (let i = 0; i < enemiesList.length; i++) {
  if (player.y == int(enemiesList[i].y)) {
    if (player.x < enemiesList[i].x) {
      enemiesList[i].direction = 3;
    } else {
      enemiesList[i].direction = 1;
    }
  }
  if (player.x == int(enemiesList[i].x)) {
    if (player.y < enemiesList[i].y) {
      enemiesList[i].direction = 0;
    } else {
      enemiesList[i].direction = 2;
    }
  }
}

Game structure:

Initially, the first thing the user will see is the Main game page. The page includes a “Start” button and a button for instruction. It looks like below:

The player can use the arrow keys to move around and use the space bar to shoot at the enemies. The game goal is not to obtain to highest score but to survive as long as possible. Below is the main screen game, it includes player, enemies and level information:

Finally, if the player’s character is hit by the enemy’s bullet, it will display the “Game Over” screen and display the highest level achieved:

Below is the code snippet for the Player, Enemy and Bullet objects:

class Player {
  constructor(x, y, w) {
    this.x = x;
    this.y = y;
    this.w = w;
    this.direction = 0;
    this.layout = 1;
  }
}

class Enemy {
  constructor(x, y, w) {
    this.x = x;
    this.y = y;
    this.w = w;
    this.direction = int(random(3));
  }
}

class Bullet{
  constructor(x, y, w, direction, rectWidth, colorCode){
    this.x = x;
    this.y = y;
    this.w = w;
    this.direction = direction;
    this.rectWidth = rectWidth;
    this.colorCode = colorCode;
  }
}

Design and Sounds:

Since this is similar to an arcade game, I chose and the characters’ design to be built up from blocks of squares. Because of this, I chose to the fonts to have the similar effect, made up from different squares. I uploaded a font file from the Google Fonts (Silk).

For sound, there are 4 different sound effects. The first one is the background music that will play in throughout the game play experience. The second one is the shooting sound when the user hits the space bar. The third one is when the enemy is hit by the bullet. Lastly, there is a losing sound effect if the player is hit.

Below is the code snippet for all the sounds used:

sound = loadSound("sound/shoot.wav");
hit = loadSound("sound/hit.mp3");
bgSound = loadSound("sound/bg.mp3");
loseSound = loadSound("sound/lose.mp3");

Obstacles and Improvements:

It is really difficult to know the exact position of the characters to control when they are hit. Currently it only works partially. This means that even though the system recognizes that the player is hit, it takes a bit of time for the screen to change. My thought is that my math for coordinate checking is wrong. However, I tried to changes the coordinates multiple times but it does not seem to work.

Another thing that is really difficult to do is the enemies are spawned overlap with the player’s position. Sometimes, this make an immediate lose game because the user does not have enough time to move. I tried to but conditions but it does not seem to work.

For improvements, I want to make the enemies to be more interactive. I want them to move around according to the player’s position and shoot towards them. The current version only target the player partially.

Game link:

Fullscreen link

Midterm Project – NewJeans’ Escape

Concept

Something I always love talking about is my obsession with music. I love collecting cassette tapes, vinyl records, and CDs. I ensure everyone knows about this because I find it so cool. Among the thousands of artists I listen to, only a couple stick out, and among these artists is NewJeans, a group that is made up of 5 members. in 2023’s July, NewJeans made a comeback after almost six months of releasing no music. With that came my all-time favorite music video of theirs, where they collaborated with Cartoon Network’s PowerPuffGirls, called NewJeans by NewJeans. This song is a testament to the creativity and unique musical style that NewJeans is known for. Its distinctive arrangement and innovative lyrics, along with the exciting collaboration, made “New Jeans” another successful hit for the group.

In this music video, there’s a particular scene where the girls are turned into a video game. When I heard that I would be able to make a game-like sketch for my midterm project, my mind immediately went to that scene. Of course, at first, I wanted to make more of something that resembles one of my favorite arcade games, Dance Dance Revolution, but after I spent countless hours trying my hardest to make it work, I just stumbled into too many obstacles that made me realize that I would not have the time to figure it out. So, I went back to my previous idea: To use the concept from the music video. However, I wanted to get creative with the structure of it. I decided to go with a “Choose your Character” title screen, which seemed to be the most crucial part for me. Then for the actual playing part, I wanted their song to be a part of it, so I made it so that the player could win solely by surviving the flying obstacles for the entirety of the song.

Check out the music video!!


This is the part of the music video I was inspired by:


Design

Since the character designs were already avaliable, I did not have a hard time picking the character design. However, I could not find a high quality PNG of the charactes so I had to retrce it but it was not challenging at all.

Challenges

Putting NewJeans’ Escape together forced me to face many challenges:
  1. The “Choose Your Character” Disaster: This was primarily the most significant part of the whole game for me. I was really passionate about this, and I would not continue if it had not worked. After countless hours of searching online and watching useless YouTube videos, I turned to ChatGPT, who taught me to use an Index, which I am very, very proud of myself for getting the hang of. I used the mouseClicked(); function to check the position of the mouse and which character it corresponds to and I stored that character into a variable i named “characterIndex” which displays in the ‘play’ state and once the player chooses the character, the game state will change to ‘play’.

I’m very proud of myself for getting it figured out.

// Function to handle mouse clicks
function mouseClicked() {
  if (gameState === "start") {
    // Check if mouse click is on a character
    for (let i = 0; i < 5; i++) {
      if (mouseX > (width / 5) * i && mouseX < (width / 5) * (i + 1)) {
        characterIndex = i; // Set selected character
        gameState = "play"; // Change game state to play
        break;
      }
    }
  }


2. The Time Loss Incident: “I just wanted a timer to be displayed at the top right of the screen. Is that too much to ask?” said Rashed as he was on the brink of quitting. Having a timer that would countdown with the song, for some reason, was not cooperating with what I wanted to do. I wanted to directly connect it to the music to have it automatically calculate when the music would start and countdown till its end, but I could not figure it out. I decided to code the timer separately instead of figuring that out and that’s what I did. It turns out this was the most straightforward way, and I wish I had thought of this before where I had two variables, “timeLeft” and “long duration,” which both equal 108 (The duration of the song in seconds), and had them decrease by the current time of the song.

Very proud of myself for not giving up.

// Display remaining time
timeLeft = songDuration - song.currentTime();
let minutes = Math.floor(timeLeft / 60);
let seconds = Math.floor(timeLeft % 60);
let timeString = nf(minutes, 2) + ":" + nf(seconds, 2);
textAlign(RIGHT);
text("Time: " + timeString, width - 10, 30);


3. The Collision Colliding Collision: The only thing I wanted was for when the objects hit the player, lives would decrease, but in so many tries, for some reason, it would not work well. No matter hoe many times I try, nothing would work. until I found the miracle of the dist(); function. The function calculates the distance between two points. The coordinates(obj.x + 75, obj.y + 50) represent the center of the current object (adjusted for its size, this was torture). The coordinates(80, characterY + 30) represent the center of the character (adjusted for its size, torture part. 2). This means that if the distance is less than 30 pixels (which represents a collision radius), it means the object and the character have collided.


objects.push(createObject());
 }
 for (let obj of objects) {
 obj.x -= objectSpeed; // Move object from right to left
 // Draw the object (evil bunny)
 image(evilBunny, obj.x, obj.y, 150, 100);

 // Check collision with character
 if (dist(obj.x + 75, obj.y + 50, 80, characterY + 30) < 30) { 
   lives--; // If collision happens, decrease lives
   objects.splice(objects.indexOf(obj), 1); // Remove object


The Game

FullScreen Link


Overall

I am very, very proud of myself and very happy with how this turned out. I hope to continue working on my skills, and one day, I could code a rhythm game.

Midterm Project: Greenhaven

Inspiration

I grew up in a village without a park, a place where families, friends, and pets gather to enjoy nature and each other’s company. To experience the joy of a park, I had to travel to nearby villages or cities. This sparked my love for parks and inspired my midterm project: creating a virtual park. My goal is to recreate the sense of community and fun found in a park, from children playing on swings to people walking their dogs and old friends catching up. This project is my way of bringing the park experience to those who, like me, have always admired it from afar.

Concept

My project begins with a start screen that warmly welcomes users to the virtual park experience, featuring a “Start” button that leads them into the park scene upon interaction. The journey into the virtual park commences with a meticulously designed background, setting the stage for the vibrant park life that unfolds.

Central to the park are two swings, each with figures seated and in motion, bringing a dynamic element of playfulness. These swings, animated to sway, add a lively atmosphere to the park scene. Adding to the ambiance is a bird, animated using a sprite sheet to simulate realistic motion. A click from the user sends the bird flying off the canvas, illustrating the interactive nature of this digital environment.

Music enriches the park experience through a jukebox feature. Clicking on the jukebox transitions the scene from the park to a Radio view, magnifying the jukebox and revealing its controls. The jukebox offers three buttons: one to stop the music, providing users control over the ambiance, and two others to navigate through the playlist, enhancing the immersive experience with auditory choices.

The park’s inhabitants include a sprite-sheet-based man, whom users can direct around the park. Movement is thoughtfully restricted, and the character is scaled dynamically to create a depth effect, simulating closer or further distance from the viewer as he moves vertically across the screen. This effect adds a layer of realism to the virtual exploration. A girl performing yoga serves as another point of interest. Her form transitions every 2 seconds.

Full Screen Canvas:

https://editor.p5js.org/gg2713/full/9wcrgqffm

Code I’m Proud of:

This code is my favorite part of the project because it encapsulates a significant learning curve and represents a turning point in the development process. Mastering the use of the lerp function for scaling the swing wasn’t straightforward; it took a considerable amount of time and experimentation to get right. However, once I figured it out, everything else seemed to fall into place more easily.


// Oscillate the scale between 0.5 and 1.2 to simulate forward and backward motion
  this.swingScale = lerp(0.4, 0.7, (sin(this.angle) + 1) / 2);
  this.angle += this.angleVelocity;
}

display() {
  // Swing frame
  stroke(139, 69, 19); 
  strokeWeight(10); 
// Left side of the frame
  line(this.x -50, this.y - this.frameHeight, this.x -50, this.y); 
  // Right side of the frame
  line(this.x + 50, this.y - this.frameHeight, this.x+ 50, this.y); 
// Top of the frame
  line(this.x -50, this.y - this.frameHeight, this.x +50, this.y - this.frameHeight); 

// Start a new drawing state
  push(); 
// Translate to the position of the swing seat
  translate(this.x, this.y-15); 
// Apply scale transformation
  scale(this.swingScale); 
  fill(160, 82, 45); 
// Seat
  rect(0, 0, this.width, this.height); 
  pop(); 
  
// Swing ropes 
  stroke(160, 82, 45); 
// Scale the stroke weight to simulate depth
  strokeWeight(2 * this.swingScale); 
// Left rope
  line(this.x-20, this.y - this.frameHeight, this.x -20 * this.swingScale, this.y - this.height/2-10 * this.swingScale); 
 // Right rope
  line(this.x + this.width/2, this.y - this.frameHeight, this.x + this.width/2 * this.swingScale, this.y-10 - this.height/2 * this.swingScale);
  if (this.figure) {
    this.figure.display();
  }
}

Another piece of code that I take great pride in is the function for handling mouse interactions, specifically the logic that enables switching between scenes. Although the code now appears straightforward, reaching this level of simplicity and effectiveness was a journey marked by significant effort and learning. Here’s the code:

function mousePressed() {
  
  if (scene === 'start') {
    // Check if the Start button is clicked
    if (mouseX >= width / 2 - 50 && mouseX <= width / 2 + 50 &&
        mouseY >= height / 2+180 && mouseY <= height / 2 + 250) {
      scene = 'park'; // Change the scene to the park
    }
  } else if (scene === 'park') {
    radio.click(mouseX, mouseY);
    // Check if the bird is clicked
    if (mouseX >= bird.x && mouseX <= bird.x + 64 && mouseY >= bird.y && mouseY <= bird.y + 64) {
      bird.fly(); // Make the bird fly
    }
  } else if (scene === 'radio') {
    if (mouseX >= 10 && mouseX <= 110 && mouseY >= height - 60 && mouseY <= height - 10) {
      scene = 'park'; 
      radio.isClicked = false;
    }
  
    if (mouseX > 523 && mouseX < 578 && mouseY > 372 && mouseY < 407) {
      radio.stopSong(); 
    }
    

    if (mouseX > 611 && mouseX <667 &&
        mouseY > 372 && mouseY < 407) {
      radio.changeSong();
    }
  }
  
}

Key Challenges Faced 

  1. Swing Depth Effect: One of the initial challenges was to create a depth effect for the swings. My first approach involved altering the coordinates, which did not yield the desired outcome. Eventually, the use of the lerp function for scaling the swings provided the solution.
  2. Scene Transitions: Transitioning between scenes (start to park, park to radio) was difficult. It took numerous trials to manage application states effectively for smooth transitions.
  3. Jukebox Functionality: The jukebox component was a multifaceted challenge. Initially, assembling its structure and design was time-intensive, requiring attention to detail to accurately represent its features. Beyond its appearance, integrating interactive functions, such as changing songs and stopping playback through radio buttons, added another layer of complexity.
  4. Animating a Running Girl: I wanted to incorporate a running girl to the park. However I was not able to achieve smooth transitions between frames. The frames for the running motion changed too abruptly, leading to an unnatural appearance.

Future Aspects:

The journey of crafting the virtual park has been incredibly fulfilling, yet I see so much more potential for it. Right now, the park feels a bit too quiet for my liking; it’s missing the hustle and bustle of daily park life. I’m dreaming of adding animations of families spreading out picnic blankets, kids chasing each other around, and elderly couples enjoying quiet conversations on benches. These little touches, I believe, will truly breathe life into the park.

One of my initial ambitions was to animate a girl running through the park. Sadly, getting her movement just right turned out to be trickier than I expected, and I had to set that idea aside. But, it’s still something I’m passionate about tackling. Seeing the project come to life has been incredibly rewarding, and it’s only fueled my desire to dive back in and add even more depth and interaction to this virtual space. The feedback has been heartening, and honestly, I can’t wait to get started on bringing these new ideas to life. The virtual park project isn’t just a task for me; it’s a passion project that I’m excited to develop further.

REFERENCES:

https://intro.nyuadim.com/author/mk7592/


Midterm Project – Inkling of Life

For the midterm project, my inspiration was the “Bounce” game. The game play is similar to the original Bounce game: the character moves and tries to avoid the dangers. I wanted to challenge myself, so the whole game is built using “Vector” shapes. I went through Daniel Shifman’s THE NATURE OF CODE book’s first chapter, “Vector,” and his videos on Vector on YouTube (1, 2, 3) to grasp the basic understanding of the vector shape. As I used vector for all the shapes, all the shapes were preplanned, and it took a good amount of time to figure out the exact configuration.

The game is designed with multiple screens, each offering a different part of the game experience. The game structure is as follows:

  1. Title Screen: Initially, the game will open to a title screen (scene 1), where players can see the game’s title and interact with inkdrop animations. I’ll include a play button and an options button, making sure to check for player interactions to navigate to other parts of the game.
  2. Game Play Screen: Moving onto this scene (Scene 2), I plan to have the main character move, attack, and be displayed on the screen. The gameplay will involve navigating through jump blocks, floors, jelbys (damage elements), and other elements, with the camera following the character to keep them in focus. I’ll implement a jumping function for character movement, and as players progress, they’ll encounter a moving door and health items that affect the character’s health, which will be displayed and updated on the screen. If the character’s position falls below a certain threshold, it’ll trigger a transition to the dead screen (scene 3), whereas reaching a higher position will lead to the winner screen (scene 4).
  3. Dead Screen: If the character dies (scene 3), I’ll display a game over screen where players can see their failure and have options to interact with, possibly to retry the level or go back to the main menu.
  4. Winner Screen: For those who conquer the levels (scene 4), I’ll cover the screen with a rectangle and display a winner message, indicating their success. This screen will also include interactions, possibly to proceed to the next level or return to the main menu, marking the `won` variable as true to track the player’s progress.
  5. Options Menu: Lastly, an options menu (scene 5) will be included to allow players to customize their game experience. I’ll handle this functionality through an `optionsStuff()` function, providing various settings for players to adjust according to their preferences.

The UML diagram:


I wanted to highlight the code for the floor design of the game. It was really challenging to find the sweet spot, as it could have made the game too easy or too hard. For this, I could not find any references. So I played the game itself to understand where to put the holes and hills.

//Normal Floors
function setupFloor() {
  floors.push(new Floor(-500, 0, 525, 600));   //0
  floors.push(new Floor(0, 500, 605, 100));    //1
  floors.push(new Floor(600, 425, 250, 400));  //2
  floors.push(new Floor(849, 325, 150, 500));  //3
  floors.push(new Floor(995, 500, 1000, 1000));//4
  floors.push(new Floor(1850, 375, 100, 500)); //5
  floors.push(new Floor(1950, 500, 300, 500)); //6
  floors.push(new Floor(2249, 370, 200, 500)); //7
  floors.push(new Floor(2448, 500, 200, 500)); //8
  floors.push(new Floor(2647, 240, 150, 500)); //9
  floors.push(new Floor(2796, 500, 450, 500)); //10
  floors.push(new Floor(3245, 400, 200, 500)); //11
  floors.push(new Floor(3444, 500, 400, 500)); //12 
  floors.push(new Floor(4050, 500, 500, 500)); //13
  floors.push(new Floor(4549, 380, 150, 500)); //14
  floors.push(new Floor(5050, 480, 100, 500)); //15
  floors.push(new Floor(5149, 500, 1000, 500));//16
  floors.push(new Floor(6148, 365, 200, 500)); //17
  floors.push(new Floor(6550, 400, 150, 500)); //18
  floors.push(new Floor(7100, 550, 900, 500)); //19
  floors.push(new Floor(7999, 150, 200, 500)); //20
  floors.push(new Floor(8198, 500, 880, 500)); //21
  floors.push(new Floor(8977, 400, 150, 500)); //22
  floors.push(new Floor(9126, 450, 570, 500)); //23
  floors.push(new Floor(9825, 0, 20, 700));    //24
  floors.push(new Floor(9844, 450, 900, 500)); //25
  floors.push(new Floor(9705, 0, 20, 300));    //26
  floors.push(new Floor(9687, 430, 175, 500)); //27
  //This One is Special
  floors.push(new Floor(9705, 200, 20, 150));   //28
}

function Floor(x, y, w, h) {
  this.pos = createVector(x, y);
  this.w = w;
  this.h = h;
  this.dis = function() {
    fill(100, 100, 100);
    rect(this.pos.x, this.pos.y, this.w, this.h);
  }
}

//Pipes
function PipeParts() {
  this.pos = createVector(0, 0);
  this.dis = function() {
    //Pipe1 down
    fill(100, 100, 100);
    rect(this.pos.x, this.pos.y, 180, 30);
    rect(this.pos.x + 300, this.pos.y, 140, 30);
    rect(this.pos.x + 439, this.pos.y, 20, 20);
    rect(this.pos.x + 459, this.pos.y, 20, 10);
    fill(220, 100);
    rect(this.pos.x + 180, this.pos.y, 120, 100);
    fill(250, 200);
    rect(this.pos.x + 270, this.pos.y + 10, 5, 35);
    rect(this.pos.x + 270, this.pos.y + 50, 5, 15);
    rect(this.pos.x + 200, this.pos.y + 70, 5, 15);
    rect(this.pos.x + 200, this.pos.y + 85, 15, 5);
    fill(100, 100, 100);
    rect(this.pos.x + 170, this.pos.y, 20, 100);
    rect(this.pos.x + 290, this.pos.y + 0, 20, 100);
    rect(this.pos.x + 160, this.pos.y + 100, 160, 20);
    rect(this.pos.x + 156, this.pos.y + 103, 10, 14);
    rect(this.pos.x + 319, this.pos.y + 103, 5, 14);
    //Pipe2 up right
    //rect(this.pos.x + 9687,this.pos.y + 430,175,30);
    //rect(this.pos.x + 9825,this.pos.y + 200,20,500)
    fill(220, 50);
    rect(this.pos.x + 9725, this.pos.y, 100, 430);
    fill(250, 200);
    rect(this.pos.x + 9735, this.pos.y + 300, 5, 20);
    rect(this.pos.x + 9735, this.pos.y + 330, 5, 10);
    rect(this.pos.x + 9810, this.pos.y + 400, 5, 20);
    rect(this.pos.x + 9800, this.pos.y + 417, 15, 5);
    rect(this.pos.x + 9735, this.pos.y + 50, 5, 50);
    rect(this.pos.x + 9735, this.pos.y + 120, 5, 20);
  }
}

function movingDoor() {
  if (triggers[3].triggering() && floors[28].pos.y < 300) {
    floors[28].pos.y += 2;
  } else if (floors[28].pos.y > 200) {
    floors[28].pos.y += -2;
  }
  if (triggers[4].triggeredy()) {
    chars[0].pos.y += -6.5;
    triggers[4].trigged = true;
  }
}


I had the chance to do play testing with 3 users due to time constraints. The most common feedback was that I should have added sound effects for the damages. Two of the users felt the level was hard considering it’s the first and only level. They liked the vector animation for the jumps and movements.

As I played along to create the game, I lost sight of the difficulty. I should have play-tested while designing the floors. I wanted to make the game have infinite levels. Unfortunately, I could not finish it. The current gameplay is limited to only 1 level. In the future, I want to make the floors and scene more generative. Based on the feedback, I also want to improve the sound.

Midterm Project – Stefania Petre

Approximately ten years ago, a solider has fallen: they took down Flappy Bird. A game which combines simplicity and effectiveness. For my Midterm Project, I have decided to make my own version of it called Flappy Falcon. For this, I needed the code, some pictures and sounds.

The idea behind it is that I wanted to create the NYUAD version of the game, which would have the iconic colors of the University and our mascott.

Code: The code was pretty easy to make because we have already learnt everything that I had to do for it in class. I had to make adjustments along the way, as for some reason the pipes were the hardest thing to code because I faced some issues with them along the way:

– the falcon wouldn’t pass the pipes;

-the moment the falcon would touch the pipes even so slightly it would be game over ;

Pictures: In regards to the media, I came across another problem: the falcon wouldn’t upload and it was showing me an error. After some minutes of thinking of a solution, I got it to work.

Sounds: For the sounds I have uploaded a bird background noise, which signifies the falcon, but another classmate of mine interpreted it as the bird sounds that we hear everyday on campus (thanks sm).

//Flappy Falcon Game
//by Stefania Petre for Introduction Into Interactive Media

let bird;
let pipes = [];
let gameStarted = false;
let score = 0;
let startButton;
let backgroundImage;
let flappySound;
let birdImage;

function preload() {
  backgroundImage = loadImage("background.png"); 
  flappySound = loadSound("sound.mp3"); 
  birdImage = loadImage("bird.png"); 
}

function setup() {
  createCanvas(400, 600);
  bird = new Bird();
  startButton = createButton("Start");
  startButton.position(width / 2.2, height / 1.9);
  startButton.mousePressed(startGame);
}

function draw() {
  if (gameStarted) {
    playGame();
  } else {
    showStartScreen();
  }
}

function playGame() {
  background(94, 38, 163);

  bird.update();
  bird.show();

  updateAndShowPipes();

  showScore();
}

function updateAndShowPipes() {
  for (let i = pipes.length - 1; i >= 0; i--) {
    pipes[i].update();
    pipes[i].show();

    if (pipes[i].hits(bird)) {
      gameOver();
    }

    if (pipes[i].passes(bird)) {
      score++;
    }

    if (pipes[i].offscreen()) {
      pipes.splice(i, 1);
    }
  }

  if (frameCount % 100 === 0) {
    pipes.push(new Pipe());
  }
}

function showScore() {
  textSize(32);
  fill(255);
  text(score, width / 2, 50);
}

function showStartScreen() {
  image(backgroundImage, 0, 0, width, height);
  textSize(32);
  fill(255);
  textAlign(CENTER, CENTER);
  text("Flappy Falcon", width / 2, height / 3);
  textSize(16);
  text("Press Start to Experience Nostalgia!", width / 2, height / 2.2);
  score = 0;
}

function keyPressed() {
  if (key === " " && gameStarted) {
    bird.jump();
  }
}

function startGame() {
  gameStarted = true;
  pipes = [];
  startButton.hide();
  flappySound.play();
}

function gameOver() {
  gameStarted = false;
  startButton.show();
}

class Bird {
  constructor() {
    this.y = height / 2;
    this.x = 64;
    this.gravity = 0.6;
    this.lift = -15;
    this.velocity = 0;
    this.size = 50;
  }

  show() {
    image(birdImage, this.x, this.y, this.size, this.size); // Draw the bird image
  }

  update() {
    this.velocity += this.gravity;
    this.velocity *= 0.9;
    this.y += this.velocity;

    this.y = constrain(this.y, 0, height);
  }

  jump() {
    this.velocity += this.lift;
  }
}

class Pipe {
  constructor() {
    this.spacing = 200; // Increased gap between pipes
    this.top = random(height - this.spacing);
    this.bottom = height - (this.top + this.spacing);
    this.x = width;
    this.w = 40;
    this.speed = 2;
    this.passed = false;
  }

  show() {
    fill(0); // Set color to black
    rect(this.x, 0, this.w, this.top);
    rect(this.x, height - this.bottom, this.w, this.bottom);
  }

  update() {
    this.x -= this.speed;
  }

  offscreen() {
    return this.x < -this.w;
  }

  hits(bird) {
    return (
      bird.x + bird.size / 2 > this.x &&
      bird.x - bird.size / 2 < this.x + this.w &&
      (bird.y - bird.size / 2 < this.top ||
        bird.y + bird.size / 2 > height - this.bottom)
    );
  }

  passes(bird) {
    if (this.x < bird.x && !this.passed) {
      this.passed = true;
      return true;
    }
    return false;
  }
}

Overall, I completed every single requirement for the game which I would say I am happy about!

Midterm Project Beatly

My midterm project is centered around an idea of a digital drum kit. As a drummer, I sometimes want to test new beats and patterns when I am not around a physical kit, and in such times I like to use the “musicca” website(https://www.musicca.com/drums), and this is the website that I got the inspiration for my project from. Each sound on the drum kit is tied to a specific key and the digital drum kit is played just like a physical one would, by combining sequences of keys corresponding to the notes. I have found all the essential sounds for each key from the website “freesound” (https://freesound.org/), including the cheering sound.
Next, I made the project more visual so that besides the audio feedback, users can also get a visual feedback corresponding to the sound that has been played. For that I have implemented circle waves of different color, each corresponding to a certain drum/cymbal, that arise from the center of the drum/cymbal that has been played and propagate across the screen. To mark a milestone in the user’s drumming session, after a certain number of notes played, a crowd cheers for you and colorful confetti pop up. This was the hardest part of the project as besides using the relevant classes and finding information on how to implement it, I had to make sure the timing and duration of the confetti was precise and simultaneous with the cheer sound. The implementation of that tricky part is the following.

if (counter%60 == 0 && counter !=0) { //60 bets till cheer
isDisplaying = 1; //bool for confetti
start = millis(); //timer start
interval = 0; //should be 5 seconds
isCheering = 1; //cheer sound bool
if (isCheering == 1 && cheer.isPlaying()==false){
cheer.play();
isCheering = 0; //so it does not loop again
print("isCheering is:" + isCheering);
}
}
if (isDisplaying == 1){
for (let i = 0; i < confetti.length; i++) {
if (interval < 5000){ confetti[i].confettiDisplay(); finish = millis(); interval = finish - start; } else{ isDisplaying = 0; }

if (confetti[i].y > height) {
confetti[i] = new Confetti(random(0, width), random(-height, 0), random(-1, 1)); //generate confetti instead of the ones that have disappeared
print("in the if");
}
}

The starting page contains instructions to which key produces which sound, but it is always fun to experiment if you do not know the names of the drums and cymbals! For the main page, I have cut the background off of the drum image and placed it on a stage surrounded by people – a choice to justify the cheering and confetti. Here is the photo of the background stage I used.

To play the drums, the user clicks on the “Start” button and after the user is done he can click “Restart”, so that the new user can play the drums. Restarting simply erases the counter for how many notes have been played and places the user back on the intro screen. I chose not to include any background music as the rhythm of the background music would interfere with and limit what the user wants to play. To enter or exit fullscreen, the user needs to press the “F” key.
In the future, I would like to implement more artistic waves that propogate from the circles or have a music choice that the user can play into. For improvements, the fullscreen mode needs to be improved to fit the actual full size of the screen.

Berry Berry Game (Midterm project)


Introduction 

From the original idea of a “Hot Pursuit” driving game to “Berry Berry,” a fruit-chopping score-based game. This change draws attention to the difficulties faced in creating the Hot Pursuit game and how those difficulties influenced the idea and creation of Berry Berry. These strategies which include using sounds, images, object-oriented programming to produce an interesting gameplay experience.

The concept

The initial game concept focused on a high speed chase, where players navigated a vehicle to avoid or crash through obstacles such as roadblocks and cones. The primary goal was to create a thrilling experience, reminiscent of classic arcade racing games, where players would dodge obstacles at increasing speeds.

Challenges

Obstacle Identification: A significant challenge arose in dynamically generating and identifying obstacles on the road. The process involved incrementing obstacles in the game’s road image, which proved to be complex and cumbersome for real-time gameplay.

Gameplay Complexity: The mechanics of avoiding or interacting with obstacles from the downloaded image introduced a difficulty in balancing gameplay, making unenjoyable to the audience similarly with the Dino Game in google chrome.

Berry Berry

I shifted the idea due to the challenges with the Hot pursuit game, the development focus shifted towards creating a more straightforward and universally enjoyable game. This shift led to the conception of “Berry Berry,” a fruit-chopping game inspired by Fruit Ninja. The idea behind Berry Berry is straightforward: fruits fall from the top of the screen, and the player slices them with a knife controlled by the cursor. Every chop that is successful earns points, but a fruit that is missed counts against the player. The game is over when five fruits are lost, which ups the difficulty and motivates players to get better at accuracy and reaction times. The creation of my game utilizes OOP to manage game elements and interactions efficiently. Both fruits and the knife are defined as objects, each with properties, and methods such as updating positions and detect when intersecting with the fruit. A method within the fruit objects checks for intersections with the knife object. When a collision is detected, it triggers a chopping action, accompanied by the chopping sound effect to enhance the gameplay experience.

The switch from Hot Pursuit to Berry Berry was for both, me and the player. for me it was time consuming to identify every obsticle in the road image. For the players, it might not catch everyone’s interests considering it is a car game and not everyone likes cars. So I ended up choosing to create a game that anyone can enjoy and gain scores in it. My goals for developing Berry Berry more is to create a scoreboard to save the players scores, and to create a more eye catching interface in the game and more levels to it.

https://editor.p5js.org/Lemarri/full/LkIJrWVCd

function Fruit() {
  this.x = random(width);
  this.y = 0;
  this.speed = 3 + score / 20;
  this.sliced = false;

  this.update = function() {
    this.y += this.speed;
    if (dist(mouseX, mouseY, this.x, this.y) < 50 && mouseIsPressed && gameState === 'playing') {
      this.sliced = true;
      score++;
      chopSound.play();
    }
  };