Reflection week 8a

To begin with, having been in the Spanish National Table tennis team and competed at a worldwide level the mental classes that we took usually talked a lot about fear and anxiety. Every time I worked with pressure, my coach always said, “Pressure is a privilege,” and I agree with him 100%. “Anxiety focuses your mind, reducing distractions,” is a very powerful remark from the writing that resonates with my experiences. True, paralysis and fear can result from excessive anxiety. Although anxiety is sometimes misinterpreted negatively, when it is present in the right levels, it encourages self-improvement, ambition, survival, and guard against overconfidence. The key is to manage our anxiety such that it doesn’t become an impediment and improves our performance. While difficult to master, striking this balance is essential for successful performance.


Secondly, the piece clarified something I had not realized before: our emotional condition affects how much bad design we can tolerate. Everyday annoyances like traffic lights and slow computer loads can cause anger when under pressure or strain. On the other hand, when we’re at ease, we’re more understanding of these shortcomings. This finding makes me wonder how our emotional states affect how good a design seems to us. It emphasizes the subjectivity of experiences, which is in line with a current perspective on user experience. Even in situations that are objectively pleasant, a person’s mood can have a significant impact on how they interpret an experience. This thought connects with the reading we read a few weeks ago. This realization highlights the value of designing with empathy by recognizing that users’ emotional states at any one time can have a big impact on how they interact with and feel about a design. Designers may build more robust, user-centered solutions that accommodate a greater range of emotional states and events by taking into account the user’s emotional context.

A question that I wonder is the following: What effects does the design of commonplace technology take from the idea that “attractive things work better”? How does this affect the user experience?


When we consider Margaret Hamilton’s tale, we see not just the incredible achievements of women in STEM fields, but also the significance of these stories in empowering young girls. It is imperative that girls hear stories like this in order for them to understand that they, too, can be excellent in industries that have historically been controlled by males. By introducing them to the accomplishments of trailblazers such as Hamilton, we can spark an interest in science and technology and contribute to closing the gender gap in these sectors. These tales act as historical lessons as well as hope-filled reminders of possibilities for the coming generation.

Which approaches can mentors and educators use to make sure that curricula honor and appreciate the accomplishments of women in science and technology, like Hamilton?

Reading Reflection: Week 8

I have always questioned the relationship between aesthetics and usability/functionality. In many of the designs that exist, I feel like people value the appearance more than the functionality of the design. Therefore, some designs failed to fulfill the purpose they were supposed to serve. In this case, although the design adds color and taste to the environment, I feel like they are not useful since they do not satisfy the role they should.

Donald A. Norman in his writing said “Although poor design is never excusable, when people are in a relaxed situation, the pleasant pleasurable aspects of the design will make them more tolerant of difficulties and problems in the interface” (page 5-6). Although I prioritize functionality over aesthetics, I found myself agreeing with what the author said. When my emotions are chill and I am in a relaxed situation, I become more tolerant and easygoing about designs that do not satisfy my needs. Whether or not I am pleased with the usability of the design, if I am in a “good mood” I forget about the the poor design and am convinced that it is a good design. Therefore, the mood of a person plays a big role in determining the quality of the design.

Similarly, when I am in a bad mood, small issues with the design seem big and they irritate me. Just as the author said, good human-centered designs are especially important in stressful situations and designers must find ways to create designs that will not make the users want to stop using them.

In all, I realized that there are a lot of factors that we have to consider when designing. Following up with previous readings, human emotion is a factor that greatly affects the quality and usability of designs. Due to the fluctuation in human emotion, I found the designer’s job very difficult and I wonder what other factors designers consider before releasing the design to the public.

W8 Reading Reflections

Norman’s book delves into the relationship between aesthetics and user-usability in design. As he delves into such a relationship, we come to understand the importance of merging both aesthetics and usability when designing projects, ensuring that one element is not prioritized over the other. What I found really interesting is that in his discussion of the relationship between both aesthetics and usability, he brings up the concept of affect and emotion. Although some might find this cliche, we tend to forget how much a design’s aesthetic or look can impact our reactions or emotions. We can find pleasure while looking at a design, filling us with a sense of comfort. However, there are times when a design can make us strongly uncomfortable. This, in a sense, showcases the extent in which you can use design to ‘manipulate’ or bring out certain emotions in people. That being said, I believe that the author’s message of going beyond mere aesthetics and emphasizing both design and functionality when creating any project is important and is something I am definitely taking with me as we go through the second part of the semester. 

Hamilton’s legacy as a pioneer in the field of software engineering created what we know today as the Apollo mission. It was really exciting to see how software developed to what it is today, especially given that its beginnings came from one of the most ambitious human projects at the time. However, something I reflected on a lot after reading this was the importance of user-experience and usability. Hamilton warned others about PO1 and the dangers that would ensue if touched by astronauts. They touched it anyway and data was lost. This reminded me of two things: Norman’s emphasis on usability and functionality in design, and the ways in which we can utilize design and aesthetics to ensure errors do not occur. Although many might say that a better solution would be utilizing code to ensure errors do not happen, I truly believe that with a combination of design, we can ensure that errors do not occur. This can be through certain design choices, emotional language, specific color and text choices. All of these things, although many might not admit it, have an impact on the ways people perceive something, which can ultimately help ensure human errors do not occur when a design is utilized. 

MIDTERM PROJECT – Music Emotions and words

Concept:

My project takes inspiration from one of the psychology study that I recently came across, which discussed how many emotions people feel when they hear a particular sound, they distilled them into 13 distinct feelings. Although I had a different concept when I started working on my midterm project, I thought it would be interesting to incorporate this idea somehow. So I tried to translate this into a digital canvas of P5js. The user encounters random sounds and is prompted to articulate the emotions/feelings about that song. I planned to create something that interconnects the sound and the sentiment that is felt from it. And then also allows users to interact with the words by implementing some transitions to the words they entered.
Link to my project: https://editor.p5js.org/ib2419/full/DcHdGgor5

How does it work:

As I described a bit about my project above, aiming to engage users in exploring the relationship between sound and visual art.

  1.  It starts with the display of users encountering a main Menu page where the user is asked to click anywhere on the screen and describe the project.


2. When clicked,  an invisible grid of sound objects is displayed, each representing a distinct sound, and the display message of  ‘Click wherever you want to hear something‘. After the user clicks anywhere on the screen a sound object triggers the playback of its associated sound. Once a sound is selected, users are prompted to input ‘How would you describe the sound?’


3. And then initiating the generation of visual representations of the input. These visuals are created using bubbles or strokes, depending on the mode selected by the user. Additionally, an image – which displays the message about that type of song and why people feel that corresponds to the chosen sound is displayed alongside the generated visuals. Users can interact further by switching between bubble and stroke modes using the spacebar and returning to the main menu by pressing ‘R’.

Code that I am proud of:

One aspect I’m particularly proud of is the implementation of object-oriented programming (OOP) principles. By structuring the code into classes like soundBoard and bubbleArt, I aimed to encapsulate related functionality and data, fostering code modularity and reusability. This approach not only enhances the readability of the code but also facilitates easier maintenance and future expansion of the project.

Class for sound Board –  The ‘soundBoard’ class defines sound buttons with properties like index, position, and dimensions. Each button instance maintains an association between its index and a corresponding sound object. The ‘boxClicked’  method detects mouse clicks within button boundaries, facilitating user interaction. This class encapsulates functionality for managing interactive sound buttons, enhancing user experience through intuitive audio control.

// Class for sound button
class soundBoard {
  constructor(index, xstart, ystart, boxWidth, boxHeight) {
    this.index = index;
    this.xPos = xstart;
    this.yPos = ystart;
    this.boxWidth = boxWidth;
    this.boxHeight = boxHeight;
    this.soundIndex = this.index;
    this.sound = "";
  }

  // Check if the button is clicked
  boxClicked(mouseXPos, mouseYPos) {
    if (
      mouseXPos >= this.xPos &&
      mouseXPos <= this.xPos + this.boxWidth &&
      mouseYPos >= this.yPos &&
      mouseYPos <= this.yPos + this.boxHeight
    ) {
      return this.index;
    } else {
      return -1;
    }
  }
}

Class for bubbleArt –  I made a ‘bubbleArt’ class to facilitate the creation of bubble text with customizable parameters such as word, position, font size, and style. The ‘wordToBubble’ method converts the text into a series of points, enabling the creation of bubble-shaped characters. Using the ‘brush’ method, individual bubbles or strokes are drawn based on the chosen mode (bubbles or strokes). The ‘moveBubbles’ method adjusts the position of the bubbles based on mouse input, allowing for dynamic interaction with the text. Overall, the class encapsulates functionality for generating visually appealing and interactive bubble text elements within the application.

// Class for creating bubble text
class bubbleArt {
  constructor(
    word,
    xPos,
    yPos,
    fontsize,
    sampleFactor,
    sizeW,
    sizeH,
    mode,
    bubbleMode
  ) {
    this.word = word;
    this.posX = xPos;
    this.posY = yPos;
    this.fontSize = fontsize;
    this.samplefactor = sampleFactor;
    this.sizeW = sizeW;
    this.sizeH = sizeH;
    this.mode = mode;
    this.bubble = bubbleMode;
  }

  // Convert word to bubble text
  wordToBubble() {
    let points;
    points = font.textToPoints(this.word, this.xPos, this.yPos, this.fontSize, {
      sampleFactor: this.sampleFactor,
      simplifyThreshold: 0,
    });
    return points;
  }
  // Get bounding box for text
  boundBox() {
    return font.textBounds(this.word, this.xPos, this.yPos, this.fontSize);
  }

  // Draw bubble text
  drawPoints() {
    let points;
    points = this.wordToBubble();
    if (points) {
      for (let i = 0; i < points.length; i++) {
        this.brush(points[i].x * this.sizeW, points[i].y * this.sizeH);
      }
    }
  }

  // Draw individual bubbles or strokes
  brush(x, y) {

    for (let i = 0; i < 1; i++) {
      let posX = randomGaussian(0, 5);
      let posY = randomGaussian(0, 5);

      if (fontMode == "bubbles") {
        // Drawing bubbles
        let size = randomGaussian(5, 5);
        ellipse(x + posX, y + posY, size, size);
      } else {
        // Drawing lines
        let angle = random(TWO_PI);
        let lineLength = randomGaussian(5, 5);
        let endX = cos(angle) * lineLength + x + posX;
        let endY = sin(angle) * lineLength + y + posY;
        line(x + posX, y + posY, endX, endY);
      }
    }
  }
  
  // Move bubbles based on mouse position
  moveBubbles() {
    let bounds = this.boundBox();
    let adjustedSampleFactor = map(mouseY, 0, windowHeight, 0.1, 3); // Adjusting sampleFactor based on mouseY position
    translate(
      -bounds.x * this.sizeW - (bounds.w / 2) * this.sizeW + windowWidth / 2,
      -bounds.y * this.sizeH + 50 + windowHeight / 5
    );
    translateWidth = -(
      -bounds.x * this.sizeW -
      (bounds.w / 2) * this.sizeW +
      windowWidth / 2
    );
    translateHeight = -(-bounds.y * this.sizeH + 50 + windowHeight / 5);

    this.sampleFactor = adjustedSampleFactor; // Update sampleFactor
    this.drawPoints();
  }
}

Another highlight of the project is the integration of multimedia elements. Using preloaded assets and libraries like p5.js, I incorporated a diverse range of visual and sound files into the user experience (which was a hard task for me, I had to make sure that the files were not too heavy, and I was not aware of it before). Also while I was struggling in the start to create the sound objects for each button and associated them with their respective sound files. I was able to generate a grid layout for sound buttons by using nested loops to iterate over rows and columns. So it calculates the position of each button based on the current row and column, creating instances of the ‘soundBoard’ class and adding them to an array. I think that this approach organized the sound buttons systematically, and helped me establish the connection by assigning the sound files to the sound property of each sound object.

let index = 0;
 for (let row = 0; row < 3; row++) {
   for (let col = 0; col < 4; col++) {
     let xstart = col * boxWidth;
     let ystart = row * totalHeight;
     soundObjects.push(
       new soundBoard(index, xstart, ystart, boxWidth, boxHeight)
     );
     index++;
   }
 }

 soundObjects[0].sound = sound1; // Associate sound object 0 with sound1
 soundObjects[1].sound = sound2; // Associate sound object 1 with sound

One of the key design considerations that I wanted was the emphasis on user interaction and customization. And I was able to do it by providing users with control over sound playback and visual effects, the whole point was to personalize their experience and delve into the creative possibilities of the project.

Improvements:

While developing my sketch, I noticed that it lacked responsiveness. I realized that I relied heavily on fixed dimensions like ‘windowHeight’ and ‘windowWidth’, restricting how my visuals adapt to different screen sizes. This oversight should be addressed for future improvements to ensure a more adaptable layout. Additionally, I believe there’s room to enhance the interaction with the bubble art and lines. Currently, they serve as visual elements without meaningful interaction. In a previous project, I explored integrating them with sound generation, where mouse movements influenced the density of both sounds and visual elements. Exploring similar interactive possibilities could elevate the engagement level of the sketch. Moreover, I’m interested in learning how to integrate text directly with sound, rather than relying on images, which could further enrich the sound-visual part of my project.

Problems:

My main challenge was settling on a single idea for my project. Initially, I experimented with various concepts, aiming to recreate interactive art gifs that inspired me. After discussing ideas with friends, I finally settled on a concept. When I started making this project I encountered difficulty integrating object-oriented programming (OOP) principles into my project, so I opted to start with a simpler sketch using functions in different files. However, I faced hurdles when attempting to connect sounds with messages as I had envisioned. My original plan revolved around particle motion, which I learned about through tutorials. Later, I explored additional references to refine my understanding. Integrating user input functions proved problematic, with errors arising during execution, particularly with transitioning between different states such as ‘main Menu’, ‘sections’, ‘input’, and ‘display’.

Pictures of previous project displays:


References:

https://p5js.org/reference/#/p5/randomGaussian

https://youtu.be/E2UWkCp3zbo?si=kgW-z1VSCtkdoFNR

Midterm Project – “Wanderer” – Redha Al Hammad

For my midterm project I created a simple interactive piece which focuses on the importance of mindfulness, slowing down and taking a break. The piece features a character that can be controlled by the user to walk left and right with the arrow keys. By walking (or ‘wandering’), the user progresses through a series of different scenic environments ranging from grass fields to mountain ranges. The user is then prompted to ‘think’ at given points (improper functionality explained later) before finally returning home. I have sequenced the images (sourced from craftpix) to convey the passage of time with the exception of the last image which I edited in Lightroom to create a ‘blue hour’ color palette. The link to the sketch is below. For the best experience, open your window in full screen:

https://editor.p5js.org/redhaalhammad/sketches/H_1B-Ts-1

Edits for the final frame

In terms of technical application, I am happy that I was able to incorporate an intuitive transition from background to background for the user through my updateBackground functions. I found it challenging to wrap my head around how exactly to include this functionally. An issue that I had early on was that the background would always change to the next image regardless of whether the user walked off-screen to the left or right. I was able to resolve this by adding an else if statement and simply subtracting 1 rather than adding 1. I feel that doing so helped create an immersive environment for the user as it more accurately reflected the development of the character’s ‘wandering’ journey. The source code for the background transitions is included below:

function updateBackground() {
  // Cycle through the backgrounds
  currentBackground = (currentBackground % 14) + 1;
}
function updateBackground2() {
  // Cycle through the backgrounds
  currentBackground = (currentBackground % 14) - 1;
}

Building upon this, I feel that another strength of this project is its continuity which applies to both aesthetic and narrative. While I initially wanted a basic silhouette sprite sheet to make the experience more universal and relatable, the pixelated design style of the character matches with the similar style of the background images. Additionally, the visual aesthetic of the background images is consistent despite being sourced from different asset folders on craftpix. In terms of narrative, I was conscious, as mentioned previously, of sequencing the images to reflect both the passage of time but also a sense of space. While I do not repeat images (except for the scene of the character’s home), I consciously chose to include scenes featuring mountains as the character nears returning home in correspondence to the scene of the mountain which appears at the beginning of the journey. The intention behind this was to subtly present to the user that the journey is nearing its end as (based on the sequencing) they can infer that the character’s home is located near mountains.

Unfortunately, I have several issues in this project which I repeatedly tried to resolve but ultimately could not figure out. The first, which will be apparent to users unless they engage with the piece in the p5 editor while the window is in full screen, is that I could not properly situate my character and text into a fixed position relative to the backgrounds. This is likely due to the fact that I used ‘innerWidth’ and ‘innerHeight’ for the canvas dimensions with background images that do not take up this entire space. I tried to place the y-position of my character relative to the height of the images (using summer1 as a reference) but that did not accomplish the adaptive positioning that I wanted it to.

Another technical shortcoming was my inability to successfully add a simple audio track to help create a sense of atmosphere. Despite being a straightforward incorporation which I am familiar with, I was unable to successfully have an audio track play once. When the audio did play, it would be called to play every frame and eventually cause the sketch to crash. I looked to the examples provided in the class notes, researched the references on the p5 website and asked more experienced colleagues but could still not figure out how to do it.

Finally, an issue that I am deeply upset about was the lack of functionality in the ‘press ENTER to think’ prompt. To begin with, I was able to get the ‘think’ prompt to work momentarily. However, when it was working, my sprite sheet was not entirely functional as it would move across the screen without being animated. I suspect that the ‘keyPressed’/’keyCode’ functions were interfering with one another but I could figure out how to resolve it. I am especially upset that this element did not work as I feel that it would have elevated my project on many levels. First, it would have simply added another level of interactivity besides the basic movement, thus making the piece more engaging. Second, I feel that it very succinctly relates to the intention behind this work by prompting the user to physically stop progressing and to focus on the digital scenery in front of them. Moreover, the text which that appeared on-screen when this element was functional (still in the source code) added a much-needed personal touch and sense of character to the work which I feel is lacking currently.

Midterm – Sara Al Mehairi

Concept oVERVIEW

Amazon
Face in a Book
Teacher Superstore


I couldn’t recall the exact moment of picking up a copy of “Diary of a Wimpy Kid,” but it has simply always been a part of my childhood. First and foremost, allow me to introduce the author of this masterpiece, Jeff Kinney. Kinney’s unique style breaks the norms of traditional literature/books. Unlike typical novels, his books use a diary format with personal writing and illustrations. The use of lined paper, childlike font, and unconventional chapter structure sets his work apart and thats what makes it so memorable. (source)

That being said, Inspired by the “Diary of a Wimpy Kid” books, I wanted my project to bring back those nostalgic feelings, with simple drawings and everything in black & white. My goal was to involve the user in the diary and make the project interactive, allowing them to feel like they were part of the story. So, I titled it “Diary of an NYUAD Kid” to grasp that mix of memories & relatable experiences. In creating my project, I initially planned to develop four games inspired by various elements of the “Diary of a Wimpy Kid” series, with an NYUAD twist. However, I narrowed down my focus to three main games: “Elevator Rush,” “Cheese Touch,” and “My Diary.”

Game Details

1. Menu

Despite my initial attempts, I encountered challenges in embedding the menu screen above. At some point, I managed to make it work with a few bugs, but ultimately, it didn’t function as intended (discussed in detail in another section below). Further, the design of the main menu page draws inspiration from the cover page of the “Diary of a Wimpy Kid” books. Clicking the “i” button reveals instructions for each game.

2. Elevator Rush

Elevator Rush” is a game born from the frustration of waiting for elevators, especially during busy times like the 10-minute rush between classes in the C2 Building. You know, maybe the delays are intentional to nudge students towards taking the stairs, was this their plan all along? In the game, you control the elevator using the UP & DOWN keys, hurrying to pick up students so they’re not late for class. Every time a passenger gets picked up, a sound plays to signify success. The background music is the classic “elevator music” sourced from YouTube. With every student you pick up, you earn one point, but if you miss a student, you lose a point. To add difficulty, students appear and disappear quickly, and they are NOT patient. The game ends when the time runs out or if your score drops to -3. Upon game over, a screen pops up with the option to click to restart.

3. Cheese Touch

In the “Cheese Touch” game, inspired by the popular game played at Westmore Middle School in “Diary of a Wimpy Kid,” players aim to gather as many candies as possible while avoiding the dreaded Cheese Touch. In the original story, having the Cheese Touch makes someone a social outcast until they pass it on to someone else by touching them (source). Using the LEFT and RIGHT keys, the player must navigate the area while trying to gather candies and avoid the Cheese Touch. Additionally, when a player successfully collects candy, a cheerful audio plays to signify their success (+1 point). Conversely, if a player encounters the Cheese Touch, a sticky audio plays to indicate their loss (-1 point). The game continues until the time runs out or if a player’s score drops to -3, indicating they’ve had too many encounters with the Cheese Touch. Upon game over, a screen pops up with the option to click to restart.

4. My Diary

In the final somewhat game, titled “My Diary,” I wanted to capture the idea of doodling and scribbling found in “Diary of a Wimpy Kid.” This option allows users to paint on a canvas using colors inspired by the books. They can also change the brush size, erase the canvas, and save their artwork as a PNG file. To enhance the experience, each button plays a sound when clicked. Moreover, the save button triggers a different audio to signify that the image has been saved successfully. To further simulate the feel of real paper, I incorporated the sound of scribbles each time the user draws on the canvas. The main idea behind this “game” was to use audio cues to create a realistic experience for the users. Below are some of the images I have saved during the debugging process:

Visuals, Audios, & Resources

1. Menu


Background: by me using Procreate
Penguin Logo source

2. Elevator Rush


Background music source
Remaining audio source
Background: by me using Procreate, inspired by NYUAD
Characters: Diary of a Wimpy Kid

Chatgpt debugging: draw function (passenger spawn interval, passenger spawn, time) & Passenger class

3. Cheese Touch


Audio source
Cheese image source
Candy image source
Face image source
Game over image:
by me using Procreate

Chatgpt debugging: obstacle & candy detection, draw function, audio errors (replay/pause)

4. My Diary


All audio source
Background: by me using Procreate
Colors: inspired by the “Diary of a Wimpy Kid” books

Chatgpt debugging: button effect & draw function

Challenges & Areas of improvement

One of my biggest challenges was attempting to merge all three games into a single JavaScript file, given that I have worked on them separately.  Despite my best attempts, the complexities of combining multiple game modes within one file led to organizational/functional issues that remained unresolved. At some point it functioned with some issues, but my attempts to fix these problems led to further complications.

function draw() {
  if (scene == "main") {
    drawMenu();
  } else if (scene == "game 1") {
    drawGame1();
  } else if (scene == "game 2") {
    drawGame2();
  } else if (scene == "game 3") {
    drawGame3();
  }
}

For “Elevator Rush,” I encountered several challenges, particularly in managing the spawning of passengers at specific intervals and ensuring they appeared on random floors, excluding the floor where the elevator was located (it did not look visually appealing, as if the passenger was already in the elevator, caused some quick flashes). Implementing this required generating random floor numbers while avoiding duplication with the elevator’s current floor. Additionally, I had to adjust the spawn intervals to  balance between keeping the game challenging and preventing overwhelming/underwhelming spawns.

//spawn passengers
  if (millis() - lastSpawnTime > spawnInterval) {
    let floorToSpawn = floor(random(4));
    if (floorToSpawn !== currentFloor) {
      passengers.push(new Passenger(floorToSpawn));
      lastSpawnTime = millis();
    }
  }

Another challenge came about when measuring the game screen and drawing assets in Procreate. Despite using Procreate’s grid assist feature, ensuring the correct proportions for each floor was pretty tricky. Moreover, this caused the elevator to appear either too small or too large on certain floors, hence I adjusted the elevator’s dimensions until it fit within each floor’s layout.

//draw elevator
    let elevatorWidth = 55; 
    let elevatorHeight = floorHeight - 2; 
    let elevatorX = width / 2; 
    image(elevatorImage, elevatorX - elevatorWidth / 2, elevatorY - elevatorHeight / 2, elevatorWidth, elevatorHeight);

As for “Cheese Touch,” one of the challenges was precisely detecting the cheese touch and candy, which relied heavily on precise x and y coordinate calculations, leading to many trials & errors to create accurate collision detection.

collects(candy) {
  return (
    this.x < candy.x + candy.w &&
    this.x + this.w > candy.x &&
    this.y < candy.y + candy.h &&
    this.y + this.h > candy.y
  );
}

hits(obstacle) {
  return (
    this.x < obstacle.x + obstacle.w &&
    this.x + this.w > obstacle.x &&
    this.y < obstacle.y + obstacle.h &&
    this.y + this.h > obstacle.y
  );
}

Additionally, initial attempts to use a notepad background encountered a persistent issue where the screen froze upon game restart attempts, despite multiple efforts to solve the problem through redraws. This issue likely stemmed from an error in managing the background image or memory management concerns. Consequently, I resorted to using a white background instead.


Overall, I faced many challenges and made some mistakes along the way. Looking back, I realize there are ways I could have done better. For example, I worked on each game mode separately, but when I tried to put them all together, they didn’t work well. Perhaps it wasn’t the best idea to start working in separate JavaScript files. In terms of the games, I also could have added extra obstacles to make each game more challenging (due to the simplicity, I resorted to creating more than one game.). For instance, in the “Cheese Touch” game, I could have added bonus elements that had power-ups. And in all the games, I could have included a leaderboard, using CSV files, to track score.

Conclusion

All in all, developing this project based on “Diary of a Wimpy Kid” presented a lot of challenges…integrating the menu screen with other screens was difficult, and attempts to merge all games into one JavaScript file were unfortunately unsuccessful. However, I managed to incorporate at least one shape, one image, one sound, on-screen text, and Object-Oriented Programming into the project. The menu screen initially provided instructions when the “i” button was clicked, but there were issues directing to the games (yet, each game did have a start & restart option). After completing each game experience, a restart option was available by clicking the screen without restarting the sketch, except for the last game, where users needed to click “erase.” Safe to say that I’m proud of my project, the visuals, and the menu design for being accurate & fulfilling my vision, especially in the elevator game, which initially seemed ambitious.

Midterm – ☆Psychedelic Rapture☆

Sketch

This sketch will work in fullscreen, here is the link: https://editor.p5js.org/alexnajm/full/D8FoFUtc6

Concept and Inspiration

For my midterm, I decided to create some sort of audio-reactive artwork. In other words, I wanted the artwork to be controlled by the preloaded sounds.

Essentially, I created a playlist of 12 songs. I uploaded these songs and their matching cover images as well as the title and the artist. The idea is that the user can switch between songs with the left and right arrows keys, and the visuals in the background will change depending on which song is playing.

Here are the songs I picked:

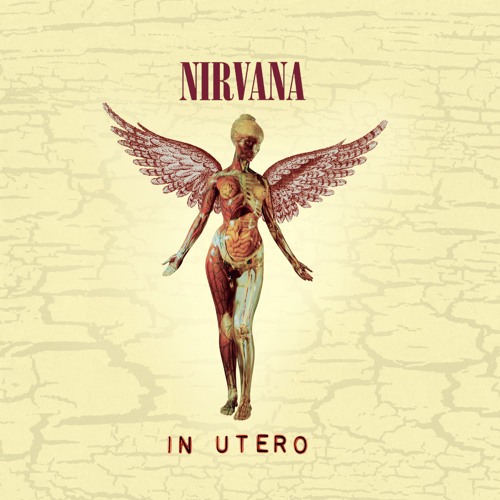
  1. Heart-Shaped Box – Nirvana
  2. Cool Colorado – La Femme
  3. Weak For Your Love – Thee Sacred Souls
  4. Spooky – Dusty Springfield
  5. Karma Police – Radiohead
  6. Buddy’s Rendezvous – Lana Del Rey
  7. Althea – Grateful Dead
  8. Naive – The Kooks
  9. Drink Before The War – Sinead O’Connor
  10. Right Down The Line – Sam Evian
  11. She – The Blaze
  12. Belong In The Sun – ¿Téo?

My inspiration comes from the feelings I get when I listen to music. Sometimes, I just lay in bed and close my eyes and I start feeling the energy of the music. So I simply wanted to create an artwork that matches visuals to music, in a way that the former are controlled by the latter.

How it Works, and Code Snippets

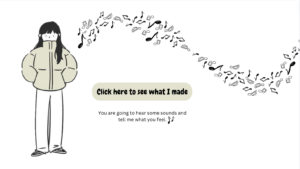
1) The sketch begins with a start page. It has brief instructions. The user must click to start.

function displayStartPage() {
  background(0);
  image(star2, -150, 200, 620, 620);
  image(star3, 800, 200, 520, 520);
  fill(255);
  textSize(32);
  textAlign(CENTER, CENTER);
  textFont(chosenFont);
  text(
    "Switch between songs\nwith the left and right arrows\n\n\n\nClick anywhere to start vibing!",
    width / 2,
    height / 2
  );
}

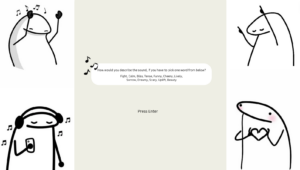
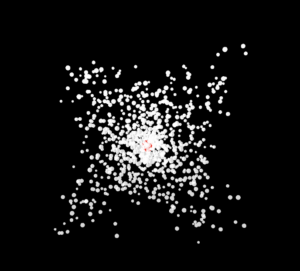
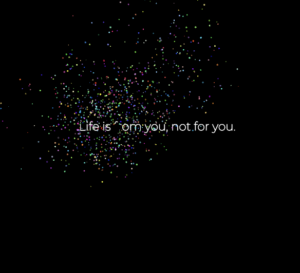
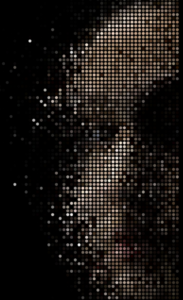
2) Once on the main page, the first song starts playing with the corresponding image, text, and visuals.

function mousePressed() {
  if (currentState === "startPage") {
    currentState = "mainPage";
    song1.play();
  }
}
function displayMainPage() {
  background(0);

  let colorPalette = [
    color(112, 2, 2),
    color(2, 34, 152),
    color(228, 121, 155),
    color(203, 172, 53),
    color(162, 227, 232),
    color(255),
    color(146, 111, 55),
    color(191, 66, 38),
    color(84, 45, 151),
    color(178, 157, 202),
    color(39, 100, 151),
    color(76, 128, 93),
  ]; // color palette array in order to change colors with every track

  let currentColor = colorPalette[displayedImages.currentIndex]; // setting the current color as the color with the current index, from the color palette array
  stroke(currentColor);
  fill(255, 0.5);

  //   getting the amplitude level of the playing song and mapping it to then plug into the shape
  let volume = amplitude.getLevel();
  let heightMultiplier = map(volume, 0, 1, -2, height * 1.5);

  //   Setting the melting lines in the background
  let lineSpacing = 3; // line spacing variable to set the distance between each line
  let noiseScale = 0.005; // noise scaling variable to determine the smoothness of the noise

  for (let y = 0; y < height; y += lineSpacing) {
    // for loop which draws the parallel lines with a spacing of 3
    beginShape();
    for (let x = 0; x <= width; x += 120) {
      // nested for loop that iterates the points along a horizontal line
      let noiseVal = noise((x + frameCount) * noiseScale, y * noiseScale); // noise value variable which calculates a perlin noise value for each vertex point -- the x-coordinate is adjusted with the noise scale and the frame count, they y-coordinate is only adjusted with the noise scale
      let meltingEffect = map(noiseVal, 0, 1, -heightMultiplier / 2, heightMultiplier / 2
      ); // the melting effect created by mapping the noise value, between 0 and 1, to a greater range in order to amplify the melting effect. The range is set according to the heightMultiplier defined above, so that the amplitude levels of the song control the movement.
      curveVertex(x + meltingEffect * 1.2, y + meltingEffect * 1.2); // adding a vertex at x + melting effect and y + melting effect (horizontal + vertical offset). The vertical position is therefore altered by the noise in order to create the dynamic effect
    }
    endShape();
  }

  //   display images
  displayedImages.display();
  amplitude.setInput(displayedImages.songs[displayedImages.currentIndex]);
}

I had a lot of fun creating this part, as I got to play around with the visuals and the amplitude. It took some time, but I think it was worth it.

3) The user can move to the next song by pressing the right arrow key, or to the previous song by pressing the left arrow key.

//   keyPressed function to allow the user to change between images 
function keyPressed() {
  if (currentState === "mainPage") {
    if (keyCode === RIGHT_ARROW) {
      displayedImages.nextImage();
    } else if (keyCode === LEFT_ARROW) {
      displayedImages.previousImage();
    }
  }
}

4) There are 12 songs. If the user is at the last song and presses the right arrow key, it will go back to the first song. If the user is at the first song and presses the left arrow key, it will go back to the twelfth song.

5) There is a “Track 1” button. If it is pressed, no matter on which song the user is, it will take them back to the first song. This is the “reset” button.

//   creating a button to return to track 1
  song1Button = createButton("Track 1");
  song1Button.position(1300, 20);
  song1Button.style("background-color", "0");
  song1Button.style("border", "none");
  song1Button.style("font-size", "20px");
  song1Button.style("color", "255");
  song1Button.mousePressed(index1);
  
  amplitude = new p5.Amplitude();
  frameRate(20);
}

// index1 function incorporated into the button function, in order to get the first image, text, and sound from the array

function index1() {
  if (currentState === "mainPage") {
    displayedImages.currentIndex = 0;
    displayedImages.updateImage();
    displayedImages.stopSongs();
    displayedImages.playCurrentSong();
    amplitude.setInput(displayedImages.songs[displayedImages.currentIndex]);
  }
}

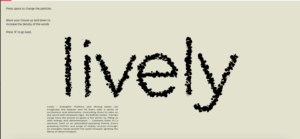
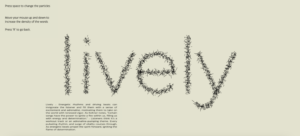
Other than these functions, I am really proud of the visuals. I have re-included the code snippet here:

 //   getting the amplitude level of the playing song and mapping it to then plug into the shape
  let volume = amplitude.getLevel();
  let heightMultiplier = map(volume, 0, 1, -2, height * 1.5);

  //   Setting the melting lines in the background
  let lineSpacing = 3; // line spacing variable to set the distance between each line
  let noiseScale = 0.005; // noise scaling variable to determine the smoothness of the noise

  for (let y = 0; y < height; y += lineSpacing) {
    // for loop which draws the parallel lines with a spacing of 3
    beginShape();
    for (let x = 0; x <= width; x += 120) {
      // nested for loop that iterates the points along a horizontal line
      let noiseVal = noise((x + frameCount) * noiseScale, y * noiseScale); // noise value variable which calculates a perlin noise value for each vertex point -- the x-coordinate is adjusted with the noise scale and the frame count, they y-coordinate is only adjusted with the noise scale
      let meltingEffect = map(noiseVal, 0, 1, -heightMultiplier / 2, heightMultiplier / 2
      ); // the melting effect created by mapping the noise value, between 0 and 1, to a greater range in order to amplify the melting effect. The range is set according to the heightMultiplier defined above, so that the amplitude levels of the song control the movement.
      curveVertex(x + meltingEffect * 1.2, y + meltingEffect * 1.2); // adding a vertex at x + melting effect and y + melting effect (horizontal + vertical offset). The vertical position is therefore altered by the noise in order to create the dynamic effect
    }
    endShape();
  }

  //   display images
  displayedImages.display();
  amplitude.setInput(displayedImages.songs[displayedImages.currentIndex]);
}

I used chatGPT to help me get the “melting” effect, which ultimately just turned into a dynamic effect. I used noise in order to create the movement, and then mapped it to a range set by the height multiplier (that includes the amplitude), which enabled the movement to be specific to the song currently playing.

Another part I am proud of is the functions inside my DisplayedImages class, which enabled the interaction of the user to switch between songs (and simultaneously with images and texts):

//   function to stop the previous song when going to the next one
  stopSongs(){
    this.songs.forEach(song => song.stop())
  }
  
//   function to play the current song
  playCurrentSong(){
    this.songs[this.currentIndex].play();
    amplitude.setInput(this.songs[this.currentIndex]); // this allows us to get the amplitude for the song that is currently playing
  }
  
//   function to update image and text to the current index, it was needed for the button I created, otherwise they wouldn't change
  updateImage() {
    this.currentImage = this.images[this.currentIndex];
    this.currentText = this.texts[this.currentIndex];
  }

  //   set what the next image, text, and song will be - also stops the current song and plays the next one
  nextImage() {
    this.songs[this.currentIndex].stop();
    this.currentIndex = (this.currentIndex + 1) % this.images.length;
    this.updateImage();
    this.currentImage = this.images[this.currentIndex];
    this.currentText = this.texts[this.currentIndex];
    this.songs[this.currentIndex].play();
  }

  //   set what the previous image, text, and sound will be - also stops the current song and plays the previous one
  previousImage() {
    this.songs[this.currentIndex].stop();
    this.currentIndex =
      (this.currentIndex - 1 + this.images.length) % this.images.length;
     this.updateImage();
    this.currentImage = this.images[this.currentIndex];
    this.currentText = this.texts[this.currentIndex];
    this.songs[this.currentIndex].play()
  }
}
Problems and Potential Improvement

The main problem I ran into was uploading the music. For some reason, when I uploaded the files, the sketch would be stuck on loading forever (and never actually load). I tried everything I could for a good three hours, and nothing worked. Eventually, I tried redownloading all the files from scratch, and through some weird manipulation it worked, thankfully. I am just sad that I lost so  much time on this when I could have added more things instead.

Another problem I ran into was when the “Track 1” button was pressed, the amplitude wouldn’t be extracted anymore, resulting in almost no movement in the visuals (and that was the same for every song playing). I ended up having to add the amplitude input in the class as well, under the playCurrentSong function.

As for improvement, I would have liked to extract the pixels from the images and have them create a gradient for the shape. I tried, but couldn’t really figure it out so I just opted with one color per song.

Something else I would like to add eventually is a pause button so that the user can pause/play the song currently playing.

Finally, I would also like to add a function so that when one song ends it automatically moves on to the next. Currently, when one song ends, it just ends. It doesn’t start over nor does it go to the next song, so no music plays. I think changing that could make the process smoother!

Conclusions

Overall, I really enjoyed creating this. It definitely wasn’t easy as there were a lot of new functions as well as elements we didn’t even talk about in class. When the sound wasn’t working it made me anxious and I honestly thought I would never finish this project. But I’m glad I figured it out, and I really did have fun making it and learning new things along the way. While there is a lot of room for improvement, I am quite proud of the way it looks!


Midterm Project: Dallah & Fenyan

For our midterm project, we were tasked with creating a game using what we learned, including a shape, image, sound, text, and OOP. Sticking to my cultural theme that I’ve been using for my assignments, I decided to create an Emarati twist on the classic XO game, calling it Dallah & Fenyan.

I started off by getting the images for the players from google, as well as the background audio. I ended up resizing the images to a square in Paint.NET to make it easier to incorporate in my game. The audio I downloaded from YouTube: https://www.youtube.com/watch?v=PN1nUDx5znA

The game contains multiple components, such as:

  • Board class to handle slots on the grid and check contents during gameplay.
  • drawBoard(), displayStartScreen(), and displayGameOver() functions to manage the visible parts of the game.
  • mousePressed(), checkWinner(), getWinner(), and restartGame() containing game logic to manage gameplay.

I’m proud of the getWinner() function because it took me the longest to write properly 🙁

function getWinner() {
  // Check rows, columns, and diagonals for a win
  for (let i = 0; i < 3; i++) {
    // Rows
    if (board.cells[i][0] === board.cells[i][1] && board.cells[i][1] === board.cells[i][2] && board.cells[i][0] !== '') {
      return board.cells[i][0];
    }
    // Columns
    if (board.cells[0][i] === board.cells[1][i] && board.cells[1][i] === board.cells[2][i] && board.cells[0][i] !== '') {
      return board.cells[0][i];
    }
  }
  // Diagonals
  if (board.cells[0][0] === board.cells[1][1] && board.cells[1][1] === board.cells[2][2] && board.cells[0][0] !== '') {
    return board.cells[0][0];
  }
  if (board.cells[0][2] === board.cells[1][1] && board.cells[1][1] === board.cells[2][0] && board.cells[0][2] !== '') {
    return board.cells[0][2];
  }
  return null; // No winner yet
}

Overall, this is the final outcome:

Looking to the future, I could definitely make it look more appealing, have some better design and animations, as well as audio during gameplay. I could also add a score counter to see how many times each player won the game.

Assignment 6: Imitation is Flattery

For my midterm project, I decided to recycle one of my weekly assignment’s idea. Instead of starting from scratch and making a half-done game or experience, I chose to work and improve on my previous work, which is Om-Nom-Nom! Of course, I’ll rename it and give credit to the creator, Pac-man, which Toru Iwatani designed. Now, it’s my turn to ATTEMPT in recreating this masterpiece and giving the users a real experience of Pac-Man.

Now in Week 6, I learnt a lot in the JavaScript language, from adding sprites to create animation to enabling computer vision to detect our facial features. Nothing too complex, I decided to use basic sprites of the Pac-Man avatar I found on the internet. I also decided to use a maze image from the internet for my game, but then I realised it wasn’t as easy as I thought.

I ended up creating a home screen for the game, and separate code just for the game. I didn’t, in fact, use sprites and just ended up creating my own ghosts and pacman avatar using shapes.

This technically isn’t an original idea, and yes I used tons of sources ranging from YouTube videos to ChatGPT, but I learned a lot from this lesson. Such as, how to make the blinking power-ups and how they increase the score. That’s a part of the code I’m actually proud of here. I’m also very content with the “button” situation I created here, where instead of using the code actually creating buttons, I just created a shape with text on it, and if the mouse if clicked within that shape, the screen changes.

function homescreen() {
  image(homepage,0,-45,width,height+85)
  
  stroke("white")
  strokeWeight("5")
  fill("red")
  rect(255,78,360,62,30,30,30,30)
  fill("white")
  noStroke()
  textSize(60)
  textStyle(BOLD)
  textFont('Courier New');
  text("HOW TO",330,125)
  
  fill("black")
  rect(713,349,40)
  
  fill("blue")
  stroke("white")
  strokeWeight("5")
  rect(305,450,260,62,30,30,30,30)
  fill("white")
  noStroke()
  textSize(65)
  textStyle(BOLD)
  textFont('Courier New');
  text("PLAY",350,500)
  
}


function draw() {
  
   gamestate = homescreen();
  
  if (mouseX > 255 && mouseX < 615 && mouseY > 78 && mouseY < 140) 
  { 
    stroke("white")
    strokeWeight("5")
    fill("blue")
    rect(255,78,360,62,30,30,30,30)
    fill("green")
    noStroke()
    textSize(60)
    textStyle(BOLD)
    textFont('Courier New');
    text("HOW TO",330,125)
    
  }
   if (mouseX > 305 && mouseX < 565 && mouseY > 450 && mouseY < 512) 
  { 
    fill("red")
    stroke("white")
    strokeWeight("5")
    rect(305,450,260,62,30,30,30,30)
    fill("green")
    noStroke()
    textSize(65)
    textStyle(BOLD)
    textFont('Courier New');
    text("PLAY",350,500)
    
  } 
}


  function mouseClicked() //when the mouse is clicked 
{ 
  if (mouseX > 255 && mouseX < 615 && mouseY > 78 && mouseY < 140) 
  {
    gamestate = howTo();
  }
  
  if (mouseX > 305 && mouseX < 565 && mouseY > 450 && mouseY < 512) 
  {
    gamestate = drawMaze();
  }
}

Another part of my code I really like is how I made my pac-man actually change direction according to the key pressed. Such as, when I press the UP key, the character faces upward.

class Pacman {
  constructor(x, y, diameter) {
    this.x = x;
    this.y = y;
    this.d = diameter;
  }
  
  show() {
    fill(220, 220, 50);
    let theta = PI/3*sq(sin(thetaoff))
    if(speedY < 0) {
    arc(this.x, this.y, this.d, this.d, -theta - PI/6, theta + 7*PI/6); 
      } else if(speedY > 0) {
          arc(this.x, this.y, this.d, this.d, -7*PI/6 - theta, theta + PI/6);
      } else if(speedX < 0){
          arc(this.x, this.y, this.d, this.d, theta + PI, -theta + PI);
      } else if(speedX > 0){
          arc(this.x, this.y, this.d, this.d, theta, -theta);
      } else {
          if(dir == 0) {
            arc(this.x, this.y, this.d, this.d, -theta - PI/6, theta + 7*PI/6); 
          } else if(dir == 1) {
              arc(this.x, this.y, this.d, this.d, -7*PI/6 - theta, theta + PI/6);
          } else if(dir == 2){
              arc(this.x, this.y, this.d, this.d, theta + PI, -theta + PI);
          } else if(dir == 3){
              arc(this.x, this.y, this.d, this.d, theta, -theta);
          } else {
              arc(this.x, this.y, this.d, this.d, theta, -theta);
          }
      }
    thetaoff += 0.1;
  }
  
  move() {
    checkNeighbors(this.x, this.y, neighbors);
    if(this.y % w == 0 && this.x % w == 0) {
      if(neighbors[3] || neighbors[1]) {
        speedX = 0;   
      }
      if(neighbors[0] || neighbors[2]) {
        speedY = 0;   
      }
      if(dir == 2 && neighbors[3] == false){
        speedX = -w/10;
        speedY = 0;
      } 
      if(dir == 3 && neighbors[1] == false){
        speedX = w/10;
        speedY = 0;
      } 
      if(dir == 0 && neighbors[0] == false){
        speedY = -w/10;
        speedX = 0;
        } 
      if(dir == 1 && neighbors[2] == false) {
        speedY = w/10;
        speedX = 0;
      }
  }
      this.x += speedX;
      this.y += speedY;
    //looping the pacman through the canvas
    if(this.x < - w/2) {
      this.x = width + w/2;
    }
    if(this.x > width + w/2) {
      this.x = -w/2;
    }
    if(this.y < - w/2) {
      this.y = height + w/2;
    }
    if(this.y > height + w/2) {
      this.y = -w/2;
    }
  } 
}

A problem I ran into was integrating the sprites. I wasn’t sure how to use a loop, just like how we did with that one “walking” animation we did in class, hence I opted to use basic shapes like circles and used mathematical logic to get the proper shape and animation for the pacman and ghosts.

Overall, I think this a big improvement compared to the weekly assignment I submitted, but I do intend on improving this.

Rama’s Midterm: Tetris

The Idea

For my Midterm I had my take on the Tetris game which I’ve been a fan of for years. I want to maintain the arcade/video game feel to it so I kept that in mind while creating my game. It consists of various components including shapes, grids, timers, and user input handling. The game aims to control the falling tetrominoes, rotating and moving them to form complete horizontal lines to clear rows. Once 5 rows have been cleared, the game levels up and the tetrominoes fall faster giving the player less time to find a good fit to clear the rows.

How It Works and Highlights

The project leverages object-oriented programming principles to organize code into manageable classes such as Tetris, Timer, and T-Grid. This modular approach enhances code readability and maintainability. The game mechanics are well-implemented, with smooth tetromino movement, collision detection, and row-clearing functionality. The user interface is intuitive, providing clear visual feedback through colorful shapes and text. The inclusion of background music and sound effects enhances the overall gaming experience. I created the background image and the first-page using elements on Canva.

displayGrid(pg, x, y, w, h, pallette) {
    var nx = this.tGrid.nx;
    var ny = this.tGrid.ny;
    var cw = w / nx;
    var ch = h / ny;
    
    // Render background
    for (var gy = 0; gy < ny; gy++) {
        for (var gx = 0; gx < nx; gx++) {
            var cx = x + gx * cw;
            var cy = y + gy * ch;
            pg.stroke(210);
            if ((gx & 1) == 1) {
                pg.fill(250);
            } else {
                pg.fill(240);
            }
            pg.rect(cx, cy, cw, ch);
        }
    }
    
    // Render foreground (tetrominoes)
    for (var gy = 0; gy < ny; gy++) {
        for (var gx = 0; gx < nx; gx++) {
            var cx = x + gx * cw;
            var cy = y + gy * ch;
            var valGrid = this.tGrid.getGridVal(gx, gy);
            if (valGrid > 0) {
                pg.stroke(0);
                var rgb = pallette[valGrid % pallette.length];
                pg.fill(rgb[0], rgb[1], rgb[2]);
                pg.rect(cx, cy, cw, ch);
            }
        }
    }
    
    // Render active tetromino shape
    var ks = this.tGrid.shapeSize;
    var kr = ceil(this.tGrid.shapeSize / 2.0);
    for (var ky = 0; ky < ks; ky++) {
        for (var kx = 0; kx < ks; kx++) {
            var gx = this.tGrid.sx + kx - kr;
            var gy = this.tGrid.sy + ky - kr;
            var cx = x + gx * cw;
            var cy = y + gy * ch;
            var valShape = this.tGrid.getShapeVal(kx, ky);
            if (valShape != 0) {
                pg.stroke(0);
                var rgb = pallette[valShape % pallette.length];
                pg.fill(rgb[0], rgb[1], rgb[2]);
                pg.rect(cx, cy, cw, ch);
            }
        }
    }
}

One really cool part of the code is how it draws the game grid. It splits the screen into smaller squares to represent each cell of the grid. Then, it fills these squares with colors to show the background, the falling shapes, and the shapes that have already landed. It does this by going through each cell of the grid and deciding what color it should be based on the game’s state. This method makes sure everything looks neat and organized on the screen, giving players a clear view of the game.

Areas for Improvement and Challenges

One area for improvement could be enhancing the visual appeal of the game by adding animations for tetromino movements and row clearing. Additionally, implementing more advanced gameplay features such as different game modes, power-ups, or multiplayer functionality could increase player engagement. Some challenges were adding a sound effect once every tetromino lands but I had several issues with it, also I was not able to get the tetromino count to stop once the game was over.

Design Inspiration

I took inspiration from EA’s Tetris mobile app game, here’s how it looks:

And here’s mine:

Credits

Sound Track: https://www.youtube.com/watch?v=NmCCQxVBfyM

Main Menu page: https://www.canva.com/

Code :https://www.youtube.com/@easywebsify

Additional Code Assistance: Chat GPT.

Final Sketch