Reading Response – Week #2 Redha Al Hammad

The main point from this lecture that stood out to me was the balance between randomness and order which has been central to the development of interactive art over time.

Prior to learning about the technical process behind coding, I never considered that conceptualization and randomness can coexist within the same work. I was vaguely aware of algorithmically generated art, especially with the rise of AI generated images in the past few years, and I had been exposed to contemporary art which puts conceptualization at the forefront. However, the merging of the two is something relatively new to me and definitely an avenue which I would like to explore in the future to expand the scope of my personal work beyond traditional photographic practices.

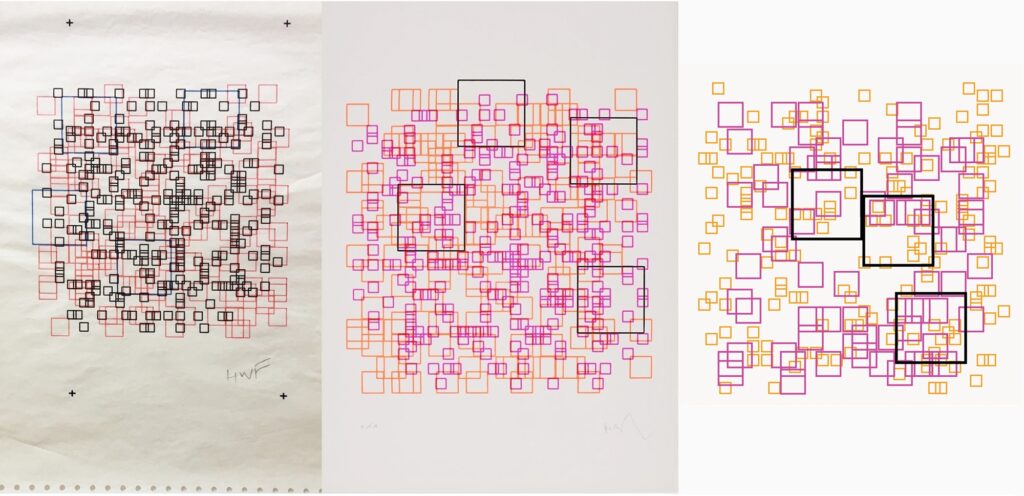
One of the examples of this presented in the reading was a project by Reas entitled Chronograph in which he algorithmically generated visuals to be projected onto the New World Center in Miami. What stood out to me from this work was the intentionality behind it as the visuals were created using images of the neighborhood surrounding the center and later manipulated and collaged through coding. This defied my preconceived notion of digital, coded art to be nothing more than a display of technique and skill as it offered a very tangible ‘why’ to the decision making process behind the work. I have included it below.

Another point which stood out to me from the lecture was the effectiveness of simplicity. This became apparent to me as Reas did a live demo of a very basic Commodore 64 program. Despite only using two basic symbols, Reas’ introduction of randomness allowed the program to produce an interesting visual. As someone who is inexperienced in coding, I would like to combine the aforementioned intentionality with the effective simplicity of this C64 program in order to get the most out of my work.

Reading Response – Shereena AlNuaimi

In his Eyeo lecture, Casey Reas explores the relationship between art and chance, emphasizing how order and chaos interact in creative expression. He presents the idea of “controlled randomness,” in which artists set guidelines while leaving room for unexpected outcomes, providing a novel viewpoint on the process of creating art. Reas presents the idea of “ordered randomness” to show how artists may retain control while offering unpredictability in response to worries that digital art is stifling artistic creativity. In addition to promoting investigation into digital art and coding, this conversation challenges preconceptions and heightens appreciation for the deliberate use of unpredictability in creative expression. It also improves awareness of the link between order and chaos in art.

Furthermore, he highlights how programming languages become vital to the creation of art, drawing connections between code determinism, creative expression, and controlled unpredictability. This point of view encourages a deeper exploration of the creative possibilities inherent in code by showing how straightforward code may result in patterns that are both visually pleasing and meaningful artistically. These insights provides a new previously untapped avenues for artists to explore the interplay of chance, intention, and order, greatly expanding their artistic canvas.

Week 2 – Reading Reflection: Casey Reas

The implementation of algorithms showcased in the video intrigued me, particularly the simulations where algorithms breathe life into meaningful constructs. Witnessing the utilization of body and tissue geometries to craft clothing was especially striking, demonstrating the fusion of art and technology in multiple ways.

The portrayal of randomness in Reas’s presentation was particularly interesting to me. Each pattern, stemming from a singular algorithm, unfolded into multiple distinct artworks with subtle alterations in speed or character selection. This showed us the ways in which randomness has the capability in generating diverse artistic expressions, raising questions about the nature of creativity in algorithmic art.

However, in a previous course I  attended the debate of when does an algorithm is allowed to be credited for the work it creates popped a lot. Especially when AI can generate images using solely a prompt. Of course, in Reas’s case it is completely different due to the fact that code is being used as a tool, but, what does it mean for artists now when using a prompt?

Assignment 2 – Living in Chaos

Looking into Computer Graphics and Art, two artist’s style caught my eye. It is specifically Charles Fritchie and Robert Morriss  where their style consisted of free form lines and a sense of chaos, blending circles and lines – some straight and some aren’t. (Page, 32)

The concept of this code is to tell the tale of how we as humans have become entrapped in a fast-paced life of constantly having to work that sometimes it is hard to break free of that mindset. The circles, which eventually aren’t visible represent us, and the lines represent every aspect of our work lives – assignments, jobs, social life, etc.

As a person who is new to p5.js I found that it was easier for me to start coding without an initial concept but a loose inspiration, it took me quite a bit of time because I wanted to implement some of the ideas we learned in class, the code ended up being simple however very impactful.

function setup() {
  createCanvas(600, 600);
  background(255);
  noFill();
  stroke(0);
  frameRate(4);
}

function draw() {
  for (let i = 0; i < 10; i++) {
    let x1 = random(width);
    let y1 = random(height);
    let x2 = random(width);
    let y2 = random(height);
    line(x1, y1, x2, y2);
  }

  ellipse(mouseX, mouseY, 20, 20);
}

function keyPressed() {
  background(255);
}


Week 2 Reading Response: Casey Reas

I found Casey Reas’ talk on Chance Operations highly interesting. As a biologist, the part I myself found most interesting was Reas’ Tissue work, which was based on neuroscientist Valentino Baitenberg’s Vehicles: Experiments in Synthetic Psychology and On the Texture of Brains, books that have become hallmarks in conceiving emergent behaviors from even simple sense-response loops in cybernetics, like a vehicle moving towards the nearest light source. I found it interesting how the different ways of wiring the sensory and motor “neurons” had an impact mainly on the vehicles’ behavior on approaching the light source and beyond. I also loved how he was able to create pretty good-looking artwork just from tracing the random paths of these vehicles, though I realize that he probably had to run it several times more than the number of prints in order to get the most aesthetically consistent results.

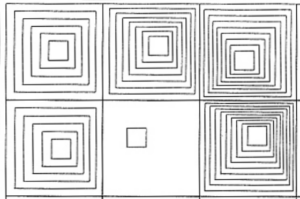
Another part that I found interesting was Rosalind Kraus’ scathing review of modernist grid art, a review that Reas unexpectedly cherished. I skimmed over Kraus’ original article (which is 15 pages long) and found that a lot of the seemingly negative aspects of grid art were less coincidental and more deliberate. This is especially true for the complaint about grids being temporally removed from all art preceding it. As Reas mentions in his talk, a lot of modern, postwar art was born from the feelings of despair against both modern science and historical traditions, both of which had combined into the vitriol that fuelled the World Wars. Thus, it only makes sense that art produced in this period similarly reject the traditions that art was built on, becoming abstract to the highest degree in the form of grids.

Assignment 1: Self-Portrait

Overview
For my first assignment, I was tasked with creating a self-portrait using p5 code. I used the different shape functions available within p5 to draw my portrait, such as: ellipses for the face and body, rectangles for the glasses, ghitra, and part of the tarboosha, triangles for the nose and other part of the tarboosha, and a curve for the mouth. I used a picture of myself from Flag Day as a reference image.

Code Highlight
I do not particularly favor any part of my code in specific, but if I had to choose one part, I’d choose the glasses, because it was more time consuming to align the different parts together:

// Draw Glasses
strokeWeight(3);
fill(GlassesColor);
rect(100, 90, 40, 25, 5);
rect(160, 90, 40, 25, 5);  
line(140, 98, 160, 98);
strokeWeight(1);

Reflection
This is an extremely basic drawing with no special functions or complexities. Looking to the future, I definitely have the ability to make a more accurate representation of myself while adding some interactive elements to make the portrait more fun.


Week 2 Assignment: Agar Plate

I got the idea for this assignment while working with bacterial cultures in the lab. The random generation of shapes we did in class kind of reminded me of how bacterial colonies form on agar plates. So, I started by just getting the color of the agar and the bacterial colonies right, similar to the image below.

Colonies of E. coli growing on agar plate. Colonies appear as off-white dots on the yellowish agar Fig.: E. coli growing on an agar plate

This is when I also started with experimenting with the randomGaussian() function instead of the regular random() function. This allowed the generation of random positions that were more concentrated towards a central position, basically forming what would be a “3D bell curve”, which usually represents biological growth better than true randomness. And adding translucency to the background gave the effect of some colonies gradually “dying” as new ones “grew”.

However, this alone didn’t look good enough. Off-white colonies on a yellowish background could only look somewhat interesting. That’s when I came across photos of microbial art and also remembered work I did in a class with bacteria that were engineered to be bioluminescent using a Green Fluorescent Protein (GFP) from jellyfish.
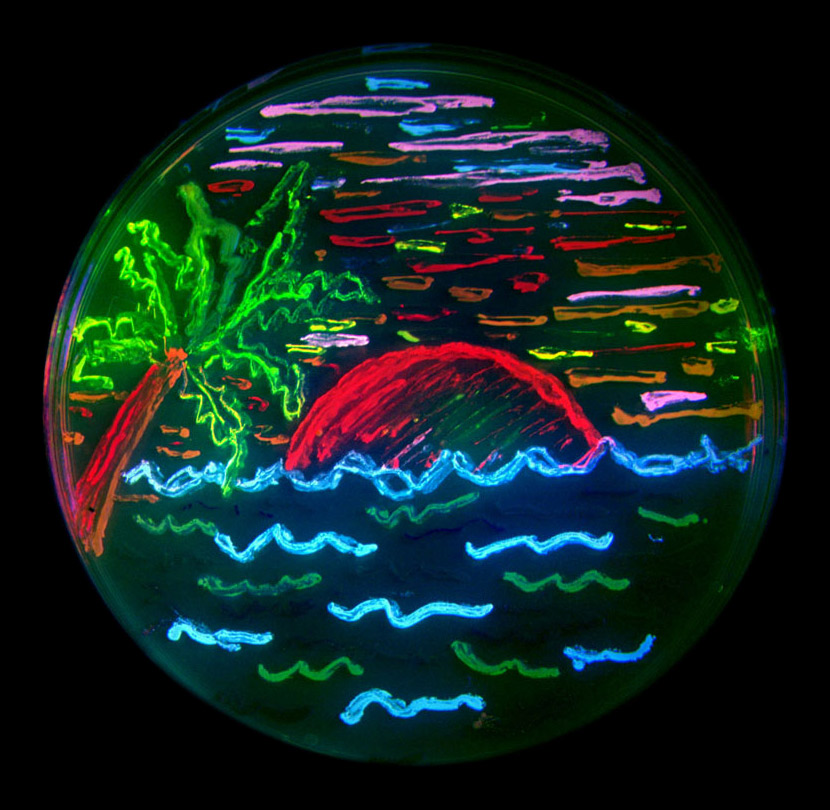
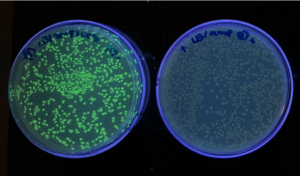
Microbial Art depicting a beach scene made with fluorescent bacteria2 plates growing E. coli bacteria. Colonies in plate on left express GFP in an LB/Ampicillin/Arabinose medium. Colonies growing in regular LB/Ampicillin medium do not express GFPFig.: (a) Microbial Art from the lab of Prof. Roger Tsien (discoverer of GFP)
(b) Plates with GFP-expressing bacteria under black light grown by me

I wanted to incorporate this in the assignment without losing out on the essence of the original appearance of the colonies. Fortunately, this was easy enough with just an if statement that changed the color variables, and a button that toggled the “UV blacklight” between on/off states.

Next, I wanted to add a bit of interactivity to the project, to allow a user to actually create some microbial art instead of having the colonies just randomly generate in a circle in the centre of the viewport. I decided to create discs that were meant to simulate carbohydrate-impregnated paper discs that can be added to agar plates. These special paper discs gradually diffuse the energy source into the agar, instead of the agar already having an energy source in it. In microbiology, this allows for experiments on how different microbes respond to different energy sources. In this project, it allowed me to easily localize the generation of colonies around multiple user-defined points.

I created a class for the discs, which would allow me to quickly generate them when a mouseClicked() event is triggered, while allowing its properties to be used as a basis for the randomGaussian() functions to generate the colonies. This was my first foray into OOP in JavaScript, and the differences from Python took me by surprise.

The next part was arguably the hardest. I wanted to give the user an option to freeze the plate in time and view their resulting artwork. In the lab, we perform a process called fixation that uses formaldehyde or glutaraldehyde to prevent further growth or death of cells, preserving them for as long as we need them, so it would be cool to give that option to the user too. However, including this feature in a way that did not interfere with the UV toggle was challenging. The easiest way to go about doing this is to use the noLoop() function which interrupts the draw() loop. But in that case, the user was stuck with their last UV setting, whether on or off, as that was also part of the draw loop. Instead, I settled on a compromise, using a multidimensional array to capture colony position and size information for every colony of every disk for the last 2 generations. This data was used to recreate the last 2 generations in the “fixed plate”. While this drastically cut down on the number of visible colonies, I was happy with this compromise as it still allowed to toggle between UV on/off states after the plate was fixed.

if (!fixed) {
    background(plateColor);
    // create arrays to store colony position and size information
    prevColonies = colonies;
    colonies = [];
    for (
      let d = 0, colonyX, colonyY, colonyR, colonySpecs;
      d < discs.length;
      d++
    ) {
      // discs
      fill(discColor);
      discs[d].display();
      // create sub-array to store specific info for each disc
      colonies.push([]);
      // bacterial colonies
      for (let i = 0; i < numColonies; i++) {
        // Gaussian random to ensure aggregation towards discs
        colonyX = randomGaussian(discs[d].x, spread);
        colonyY = randomGaussian(discs[d].y, spread);
        colonyR = random(2, 15);
        colonySpecs = { x: colonyX, y: colonyY, r: colonyR }; // dictionary containing colony info
        colonies[d].push(colonySpecs);
        stroke(colonyBorder);
        strokeWeight(3);
        fill(colonyColor);
        ellipse(colonyX, colonyY, colonyR);
      }
}

The finishing touches were just adding another button to clear the plate (basically a reset button that resets everything to setup state), tweaking the colors, adding conditions for when the discs could be placed (with warnings for when they couldn’t), and setting up simple counters that would very slowly increase the number of generated colonies and how spread out they were from the disc.

The final result can be seen below. Remember that you cannot interact with the plate when it is being irradiated with UV (that’s a skin cancer risk waiting to happen) or when it’s fixed (well, the bacteria are dead already).

Overall, I am very happy with this assignment. It feels like I found a creative way to present laboratory processes that I work with on a regular basis as a Biology major. If there were any changes I would like to make to it in the future, it would probably be in converting the bacteria to objects as well for easier manipulation. I would also like to include a feature to choose the agar and species growing on it, which can allow experimentation with various interesting colors, such as those produced by some bacteria on blood agar, or by various purple, blue, and other colored bacteria or fungi.

Reading Reflection – Week 2


Reas’ collaborative artwork with Ben Fry visualizing biology data from MIT.

The first thing about Casey Reas’ speech that caught my attention was his collaboration with Ben Fry, which focused on visualizing biology data from MIT and the way that proteins communicate back and forth – positive or negative signals within a cancer cell (randomness was used but in a slight manner). This example proved to me that an artwork truly becomes a piece of art when it is shaped by the story it holds, something to which we can relate.

Reas’ creation of conceptual vehicles influenced by anatomist Valentino Braitenberg.

Another project I found interesting was his creation of conceptual vehicles and software, each color-coded based on their wiring, which was influenced by anatomist Valentino Braitenberg’s hypothetical vehicles, whether inverse or positive, straight connection or cross-connection. A quote that then stood out to me was “a little bit of randomness and a lot of decision-making” (11:43), which showed the complexity in art that many see as “simple.”

Further in the video, the reference to random graphics reminded me of Skip Lists in Data Structures where the reliance is on a 50/50 chance serves as a technique to ensure efficient performance. This validates the deep integration of math, computer science, and physics in art. Further, Reas broke down the barriers between these disciplines, emphasizing how randomness, far from being blind, is a planned element that adds an unexpected dimension to the artistic output, an argument with which I completely agree!

Personally, this speech has solidified my belief in the interdisciplinary nature of art. The combination of several distinct disciplines showcased in the work Reas displayed challenged preconceptions that even I had about the simplicity of digital art. That being said, the speech left a question surrounding the impact of technological advancements on art: Is there ever a line to be drawn as to the art is no longer by the artist but rather a computer, and have we reached that age yet, especially with AI generative art, although different from the work displayed in the video?


Assignment 1 : Self-portrait | Aadil

Concept

I wanted to create a simple image of myself with some level of user interaction . I started off by trying to use basic shapes to create the eyes, ears, nose and mouth of the self portrait . I realized knowing the coordinates accurately would save a lot of time spent in trial and error , so I added a small piece of code to display the mouse coordinates at the bottom of the canvas . This was very useful and saved a lot of time in positioning the shapes. For user interaction , I implemented two types of backgrounds – day and night –  that switch when mouse is clicked.

The Embedded Sketch is below :


Highlight of Code I am Proud of 

The code for generating stars in a different random pattern every time the scene shifts to night is something that I thought was cool to implement .

 //What happens when mouse is clicked
function mouseClicked(){
  isDay=!isDay;
  //The following piece of code ensures that the stars are at new positions 
  //everytime the mouse is clicked
  Stars=[];
  for(let i=0;i<50;i++){
    let x= random(height);
    let y=random(width);
    Stars.push(createVector(x,y));
  }
}

.
.
.
//draw() function
//Stars
    fill(250);
    noStroke();
    for(let i=0;i<Stars.length;i++){
      let Star=Stars[i]; //Star is variable of type Vector
      ellipse(Star.x,Star.y,2,2)
    }

Another Implementation that I am proud of is the drawClouds() function that takes cloud coordinates and size as inputs and draws clouds accordingly .

function drawCloud(x, y, size) {
  fill(255);
  noStroke();
  ellipse(x, y, size, size * 0.7);
  ellipse(x + size * 0.5, y, size, size * 0.7);
  ellipse(x - size * 0.5, y, size, size * 0.7);
  ellipse(x, y + size * 0.3, size, size * 0.7);
}

Reflections and Ideas for Future Work

Overall, I think it turned out to be a good initial exercise with p5 and I got a simplistic self image using basic geometry which is what  I had envisioned while starting with the project  . In future projects, I would love to add animations and even more user interaction . Maybe different backgrounds could also be added and something about the portrait itself can be changed when the background changes .

I look forward to improving my skills and making more realistic images /graphics  .

Assignment 2: Emergent Flowers

Inspiration and Concept

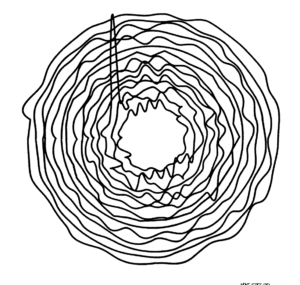
I was looking through some of the works in ProgrammInformation21_PI21 when I came across the sketch below. I immediately thought about the curves I used in last week’s assignment and how noise could be introduced to create this effect of slightly vibrating circles. Essentially, if I drew a circle with curves and then introduced controlled deviations in the vertices’ x and y-coordinates away from the perfect circular path, I would then be able to recreate this piece. In the process of conceptualizing the animation, I also imagined that drawing a curve in each frame would give the illusion of a blossoming flower and add some character and movement to the work. That latter thought effectively lingered in my mind and I found myself experimenting with symmetry, eventually creating an expanding flower animation.


Embedded Sketch

Implementation and Code Highlights

The animation was created by a for loop that creates the curves, nested within another that symmetrically partitions the curve lines to generate petal shapes. I used the Perlin noise() function to allow the curves to wiggle a bit utilizing the iterating variable in the nested for loop and an auxiliary control variable to set the x and y-coordinates in the noise space. This elicited the pattern of organic folds of a flower existing in nature. I referred to the way I created my hair in the last assignment and the examples of using Perlin noise in this article to create the curves. The number of partitions (petals) of the flower is determined by a number that is randomly generated from a finite set of integers. Additionally, the stroke color of each curve is also randomly generated. When set against a black backdrop, the eccentric fluctuations in stroke color produce a glowing effect, which I loved. The animation is replayed when the flower expands to the width of the canvas. Additionally, the animation is repeated with a different number of petals when the mouse is clicked for added interactivity.

// partition the circle based on the variable, petal_partitions_control, to create flower petal effect 
for (var j = 0; j < petal_partitions_control; j += 1 / petal_partitions_control) {
  beginShape(); // draw curves 
  for (var i = 0; i < 30; i++) {
    // map angle based on current partition iteration
    // inner loop implementation inspiration: https://genekogan.com/code/p5js-perlin-noise/
    var ang = map(i, 0, 30, j * PI, j * PI + PI / petal_partitions_control);
    // generate x and y coordinates using noise for organic shapes
    var x = radius * cos(ang) * noise(i * 0.1,  perlin_noise_control * 0.05);
    var y = radius * sin(ang) * noise(i * 0.1,  perlin_noise_control * 0.05);
    
    // draw curve
    curveVertex(x, y);
  }
  endShape();
}

The outer for loop, I would say, is the one I am most proud of as it creates the emergent pattern of flower petals. Admittedly, I do owe Casey Reas and his talk some credit for helping me get inspired to add the symmetry needed to pull this animation together.

Reflection and ideas for future work or improvements

I really enjoyed the process of expanding upon my earlier work and integrating the concepts we discussed in class in the making of this piece. I also loved the process of experimenting with different noise values and stumbling upon the often happy surprises that come with working with randomness and geometry. In the future, I would like to perhaps add more of these flower shapes and give the user some more control in defining the parameters that control the randomness behind the shape (by adding a slider, for example). Additionally, I would love to exploit the same concept to recreate other symmetric shapes – like butterflies – in nature.