
“The Art of Interactive Design” by Chris Crawford goes in-depth refining a buzzword – interactivity – that we might be using often without understanding all the intricacies of the interface that allows users to design dynamic interactions for the users. According to the author, it’s not just an additional layer of programming but its core aspect. This has also been true in my experience since I have worked on several projects and oftentimes it’s the interactive layer that makes a difference between a solid or lacking experience. For example, making everything user-friendly, and easy to understand but also dynamic enough so that the user does not get bored of repeating the same action again and again.
He makes a clear divide between interaction and reaction and how the cyclic nature of having two systems defines if something is interactable or not. While I understand his idea of having two actors, I don’t think that the branch example is only about having one actor. Even though it’s an inanimate object, it still plays a major role. The better distinction is that the branch while being an actor, is not necessarily something that can modify its behavior based on our (first actor’s) actions.
Nevertheless, in the following paragraphs, the author gets more concrete in his definition and I have to agree, that having two living organisms interact is much more authentic than any kind of computer interaction we are trying to imitate in real life.
The author further continues to define different levels of interaction and how it is a variable that might have different strengths based on how many components it has and how advanced they are (ability to think, speak, listen, etc). I would argue, however, that it is important to define individual aspects, since while something may be interactive based on all those definitions, a user (who is good at listening, speaking, and thinking) might still find something interactive to be lackluster based on their personal experience. For example, imagine an app that teaches you some skills. On paper it is quite interactive, the user listens, speaks, and inputs answers after deliberate thinking. The app, in turn, responds, speaks when needed, and analyzes answers. However, if the user is already fluent in such skills, this interaction component will seem trivial and more of a hassle unless the app is designed to be tailored to their fields of interest or their behavioral patterns.
I agree with his book example, (there is more of a reaction than interaction). However, some movies can indeed be interactive. For example, Black Mirror: Bandersnatch is a 2018 movie where users can make a choice based on which different scenarios will play out. Even here though, you can argue that this is not true interaction since those scenes have already been pre-shot and there is nothing an individual can do to change the script of those scenes.
His final consensus lies in differentiating user experience designer versus interactivity designer. The latter is less concerned about technical aspects but more about how a function makes the user feel. As such, there is the integration of “form with the function”.
All in all, the author was very forward-looking with his statements. Crawford emphasizes its core role in user experience, distinguishing between interaction and reaction. The science of interactivity has advanced a lot after writing this book, especially with the rise of VR where new definitions can be formed every day based on discoveries and new ways to create immersive experiences. Ultimately, his work serves as a good foundation in this ever-evolving field.
Month: February 2024
Eye of Sauron – Dachi Tarughishvili – Assignment 3
While looking for ideas for generative art I stumbled upon coding train’s playlist by Daniel Shiffman. It was super interesting to see just how many things you can create using simple idea of randomness and how you add different variables to generate seemingly organic patterns. The last video in the playlist was Polar Perlin Noise loops which intrigued me the most. I followed the tutorial and executed the default code which I started messing with to get some interesting results. For example, I changed z_offset and phase values to make the shape spin faster or with greater amplitude, additionally there is a slider to increase the randomness which visually translates to increasing speed. Once I saw the outline I was interesting in not just the changing of the shape but what would happen if background did not override it every time? That way a figure would slowly come to life as we let the code play out. Adding transparency to that aspect made the animation seem smoother and more organic. I changed the color to red and saw how it morphed into circle with spikes after changing amplitude to 10*(cos a + phase). It instantly reminded me of Eye of the Sauron from the Lord of the Rings. Thus I had a picture in mind and a rough plan to execute it. I added more shapes operated by same Perlin noise logic but with different parameters. For example, different phase, color, or shape entirely (latter being very important for the black vertical pupil in the middle of the eye). I then added arcs to imitate the Dark Tower.


I decided to change color (transparency) of the eye, as well as increase its shape if the volume is loud enough. After 6.8 seconds, the camera also begins to work and 0.4 seconds before audio ends, the inner pupil starts to expand. There is also transparency aspect (commented in code) which makes eye more transparent as it comes closer to the subject, the camera overlay is also semitransparent which gives it sort of slow motion effect using tint function.
I followed articles on web to get the capture feed. I had some difficulty with getting camera to work in sync with audio but in the end, simple boolean checks did the trick. Values for audio were just trial and error, as it was for eyesize scaling and volume levels. I am really happy with how it turned out, especially how the audio dialogue matches what is actually happening on screen. (Camera = seen, and death = engulfed in darkness by expanding inner pupil gradually).
I changed few colors and parameters to make it look like the source material and in the end got exactly what I wanted. Perhaps, this is most impressive part of whole code because this is where perlin noise eye animation takes space:
// draw outer shape
  stroke(255, 10, 0, alphaValue);
  noFill();
  beginShape();
  for (let a = 0; a < TWO_PI; a += 0.1) {
    let xoff = map(10 * cos(a + phase), -1, 1, 0, noiseMax);
    let yoff = map(sin(a + phase), -1, 1, 0, noiseMax);
    let r = map(noise(xoff, yoff, zoff), 0, 1, 100, 220) * (eyeSize / 20); // scale based on eyeSize
    let x = r * cos(a);
    let y = r * sin(a);
    vertex(x, y);
  }
  endShape(CLOSE);

  // orange glow for the first outer shape
  fill(255, orange, 0, alphaValue * 0.5); // lower transparency
  beginShape();
  for (let a = 0; a < TWO_PI; a += 0.1) {
    let xoff = map(8 * cos(a + phase), -1, 1, 0, noiseMax);
    let yoff = map(8 * sin(a + phase), -1, 1, 0, noiseMax);
    let r = map(noise(xoff, yoff, zoff), 0, 1, 0, size_t) * (eyeSize / 20); // Scale based on eyeSize
    let x = r * cos(a);
    let y = r * sin(a);
    vertex(x, y);
  }
  endShape(CLOSE);

  // second glow
  fill(255, 165, 0, alphaValue * 0.5);
  beginShape();
  for (let a = 0; a < TWO_PI; a += 0.1) {
    let xoff = map(10 * cos(a + phase + 1), -1, 1, 0, noiseMax); // different phase
    let yoff = map(10 * sin(a + phase + 1), -1, 1, 0, noiseMax);
    let r = map(noise(xoff, yoff, zoff), 0, 1, 50, 220) * (eyeSize / 20); // Scale based on eyeSize
    let x = r * cos(a);
    let y = r * sin(a);
    vertex(x, y);
  }
  endShape(CLOSE);

  // inner pupil black which is a vertical ellipse
  fill(0); // black
  beginShape();
  for (let a = 0; a < TWO_PI; a += 0.1) {
    let xoff = map(5 * cos(a + phase), -1, 1, 0, noiseMax);
    let yoff = map(5 * sin(a + phase), -1, 1, 0, noiseMax);
    let rx = map(noise(xoff, yoff, zoff), 0, 1, 5, 20) * (eyeSize / 20); // Scale based on eyeSize
    let ry = map(noise(yoff, xoff, zoff), 0, 1, 50, 120) * (eyeSize / 20); // Scale based on eyeSize
    let x = rx * cos(a);
    let y = ry * sin(a);
    vertex(x, y);
  }
  endShape(CLOSE);

  // update zoff and phase
  zoff += 0.008;
  phase += 0.008;
All in all, I had lots of fun working on this project and I am very happy with the results. Hope you like it too! Here is the final version: (I would highly suggest opening it on actual browser and giving it camera/microphone permissions for the full animation- https://editor.p5js.org/dt2307/full/krd4mZZqJ)
Assignment #3 – Click to spawn
For this assignment we had to use Object Oriented programming so I decided to combine classes, arrays and functions in a fun interactive way. It all started of with the idea of a moving car that was shown to us in class. I decided to replicate that with circles. It ended up looking pretty boring so I was looking for ideas of how I can make it fun, interactive with the user and at the same time look like an “art piece”.
What a better way to find inspiration than to look at Pi’s works (thank you Pi) where I noticed his particle work which spawns small particles in a circle and lets us as users disturb the harmony. My first complication was transforming the motion of the circles from a static one direction pathway to a rotation around the middle. In order to do that, I declared specific variables in the constructor like angle offset and circle radius. By defining the x and y positions using sin and cos i managed to get the drones going in a circle. It still seemed pretty simple so I added a little bit of noise to make the animation look a little bit randomized. It ended up looking pretty nice actually.
The challenge and code
Of course, like always Darko never thinks what he does is enough so he does extremely difficult things to sleep right. And guess what, that is what I did this time. Okay I’m maybe overreacting a little bit but I decided to make the circles spawn every time the mouse button is clicked and my code ended up looking like this:
let drones = []; // necessary global variables
let droneSpacing = 120;
let speed = 5;
let angle = 0;
let r, g, b;

function setup() {
  createCanvas(400, 400);
}

function draw() {
  background(0, 15);

  for (let i = 0; i < drones.length; i++) {
    drones[i].run(); //spawning the drones
    drones[i].runDriving(); //making the drones rotate
  }
}

function mousePressed() {
  drones.push(new Drones(drones.length)); // add drones when the mouse button is pressed
}

class Drones {
  constructor(angleOffset) {
    //construtor for each drone
    this.angleOffset = angleOffset;
    this.droneRadius = 50;
    this.noiseOffsetX = random(1000);
    this.noiseOffsetY = random(1000);
  }

  run() {
    this.spawnDrones();
  }

  spawnDrones() {
    let noiseX = noise(this.noiseOffsetX); //setting the noise offsets for x and y
    let noiseY = noise(this.noiseOffsetY);
    let x =
      width / 2 +
      cos(angle + this.angleOffset) * droneSpacing +
      map(noiseX, 0, 1, -5, 5); //updating the x position based on the angle, spacing and noise
    let y =
      height / 2 +
      sin(angle + this.angleOffset) * droneSpacing +
      map(noiseY, 0, 1, -5, 5); //updating the y position based on the angle, spacing and noise
    fill(random(255), random(255), random(255)); //randomizing fill colors
    circle(x, y, this.droneRadius);
  }

  runDriving() {
    this.driveDrones();
  }

  driveDrones() {
    angle += 0.007; // rotation speed
    this.noiseOffsetX += 30; // x and y noise
    this.noiseOffsetY += 30;
  }
}
Final Product
The final product can be seen below. Enjoy and have fun 🙂
Assignment 3- Arrays, and Object Oriented Programming
For this assignment, I wanted to push myself out of my comfort zone and create something a bit more complex than what I typically make. By using a combination of arrays and object oriented programming, I was able to create an art piece that combines animation and user interaction to create a piece of art. My main concept came about when I was looking for inspiration on the internet. I knew I wanted to do something ‘nature’ related as it is something I love. When I came across the user Drea007’s work of a 2D solar system (see reference link at the end of the sketch), I knew what trajectory my sketch was going to head to.
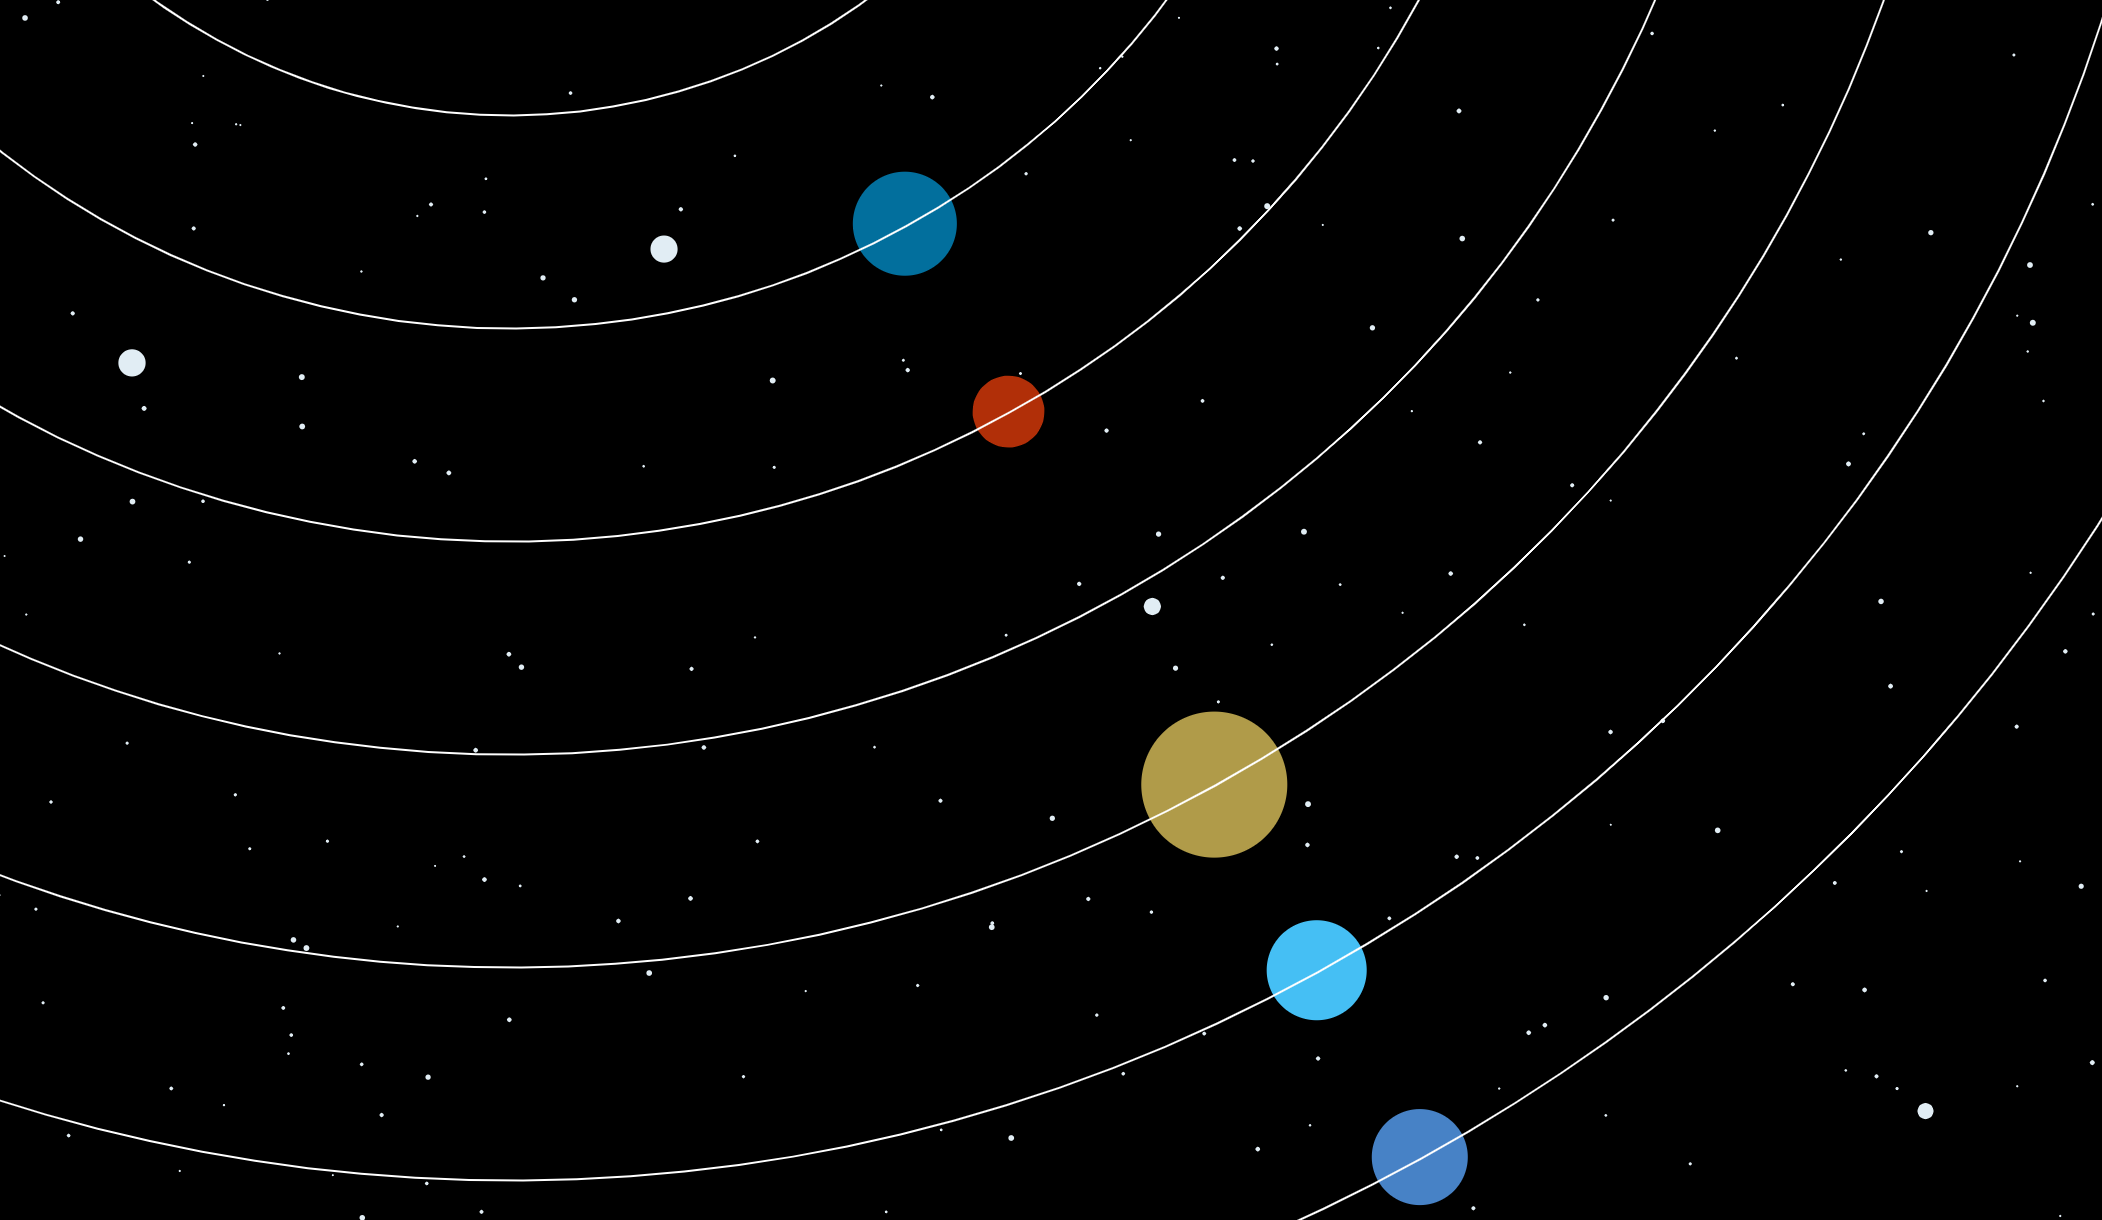
The image above was directly taken from Drea007’s sketch, which has been linked at the end of this post.
The main concept of the sketch was space, specifically the solar system. I wanted to emulate the ways in which the solar system worked but put a twist on it. Instead of the planets moving around the sun, as seen in Drea007’s work, I made them move around on their own in an unorganized way. Thus, I call this piece, ‘Cosmic Chaos’, due to the fact that the planets are moving around chaotically and in a non-synchronous manner.
The process of creating this sketch involved a lot of practicing the material, especially object oriented programming. Through practicing, I was able to better understand how object oriented programming works within a sketch. I will also say that I learned a lot about movement with this assignment, particularly mouse or pointer movements. What I mean by this is that I have learned how to integrate user interaction into my sketches in a different way than I am used to. Through utilizing the command, ‘mousePressed’, I was able to allow users to directly engage with the objects within the sketch. By employing this command, I was able to essentially manipulate the objects in the sketch to follow the movements of the mouse cursor. To do this though, I needed to understand how to integrate mathematical principles within my code and utilize them to my advantage. The ones I learned how to incorporate were ‘atan2’ and ‘sin’ and ‘cosine’. Understanding these mathematical concepts in the context of p5js, I was able to conceptualize and compute angles in my sketch, enhancing the responsiveness and flow of user interaction within my sketch. Due to this new found skill, this is the part of my code that I am most proud of.
You can see the code here:
function mousePressed() {
  // When mouse is pressed, make planets move towards mouse position
  for (let i = 0; i < planets.length; i++) {
    let dx = mouseX - planets[i].x;
    let dy = mouseY - planets[i].y;
    let angle = atan2(dy, dx);
    planets[i].xspeed = cos(angle) * 20;
    planets[i].yspeed = sin(angle) * 20;
  }
}
My final sketch:
In terms of difficulties, I was having a lot of trouble with navigating how to begin the sketch as a whole. I had an idea of what I wanted to do but never knew how to execute it. I was having trouble wrapping my head around using the different classes and functions at the beginning but started to get a hang of it when I practiced. It was only when this happened that I felt like my creativity was able to flow. Therefore, in a sense, this assignment forced me to explore animation styles and effects on a deeper level as I wanted to incorporate elements that I do not know much about. Although I keep saying this, I think by actually exploring different elements of p5js with this assignment, I was able to feel more comfortable doing more complex things with code, something I was hesitant with doing. I was able to add a combination of complex shapes, features, styles, and user interaction, creating something that is interactive yet complex at the same time. This really helped me overcome my misconception that a sketch can simultaneously be both complex and interactive for users. I really enjoyed this process and am really happy that I pushed myself out of my comfort zone by creating something complex yet interactive.
References:
https://editor.p5js.org/Drea007/sketches/5-vqHY3Te
Week 3 – Reading Reflection: Chris Crawford’s The Art Of Interactive Design
Chris Crawford’s The Art Of Interactive Design was such an informative yet highly entertaining read. Touching on the meaning of interactivity, Crawford gave his definition of interactivity in which it is measured, and not as he puts it “a Boolean property”.
The piece was mostly very understandable and very informative in terms of understanding interactivity and what makes something interactive, at least in Crawford’s eyes. However, it is important to keep in mind that human conversation and interaction with machines such as fridges are completely different. I strongly believe that interactivity with humans, and art forms can be measured on a scale but not interactivity with fridges as they are solely tools or means of entertainment. Moreover, I do agree that books, films, and dancing aren’t interactive with users in the slightest which is pretty obvious.
What was highly entertaining to me was the fact that as the example of books not being interactive, he dedicated an entire paragraph to show us an active example of how it doesn’t fit his criteria of interactivity. And, the questions at the end were hilarious.
The Art of Interactive Design – Am I really interacting with my fridge?
To begin with, this reading was really fun and it showed me another dimension of the word “interactivity” and what interactive media really means. I have always struggled explaining to my friends and family back home when describing my major: soo you work with computers? programming? robotics? but wait you also design?
-Well yeah I kind of do it all 🙂
Nevertheless let’s get back on the subject. I really agree with the authors description of interactivity, a combination of subtasks (listening, thinking, speaking) or all in all a conversation between two and more people/objects…
Since its start in 1980 and its peak in 1990, the word interactive has really changed a lot and at the same time used in the wrong way. Take a look at this advertisement:
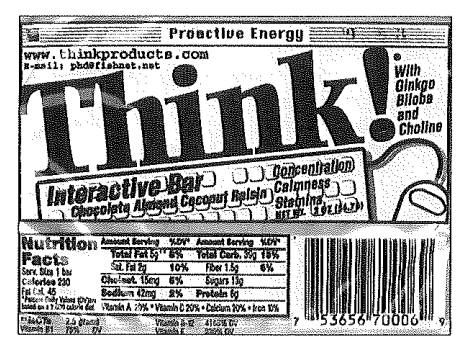
How can a chocolate almond coconut raisin bar be interactive? On the other side we have the fridge theory? – Is the opening and closing of the fridge while the light is turning on and off any kind of interaction.
To answer the question the author looks at interactivity as a combination of listening thinking and speaking and they all have to be present (none can be left out). On the scale of interactivity though we can have highly interactive, moderately interactive and so on. The fridge is a very low level interaction.
Important mention: things that are not interactive :
-Books
-Movies
-Dancing
-Performance art (or is it? I will let you think about it:)
Raya Tabassum: Reading Response 2
The first chapter of “The Art of Interactive Design” by Chris Crawford lays out the foundation for understanding what interaction is in the first place. On the other hand, Crawford distinguished between interaction and mere reaction by insisting on the two-way process of communication and stated that a cyclic process is necessary where two actors listen, think, and speak alternately. Crawford’s definition makes one start to question the extent to which the present technologies achieve real interaction versus offering sophisticated forms of reaction. For instance, if we look at voice-activated assistants or chatbots, how much do these systems actually engage in a listen-think-speak cycle, and how much is it just a pre-programmed set of responses to user input? The key question comes up here: can artificial intelligence, as it exists and will in all future products, actually ‘interact’ as Crawford has described interaction, or is it by necessity delegated to the simulation of interaction through a series of complex algorithms?
There are key lines of inquiry related to the ethics of designing for interaction. What, therefore, when the essence of interaction is meaningful exchange? How is it that designers ensure technologies really foster such positive interactions without the manipulation or exploitation of the user? This issue becomes very pertinent in the context of social media platforms in which interaction design can radically impact user behavior and mental health.
Moreover, Crawford’s focus on interaction as something cyclic challenges us to reason about user feedback loops in design. And his differentiation between interaction and reaction raises serious questions of how we categorize and value forms of digital engagement. This prompts us to critically reflect on whether, indeed, our daily engagements with technology are two-way interactions, that is, if as much as we respond to them, devices and platforms themselves also engage and respond to us—or whether, indeed, we are only responding to slick cues, designed by others.
I believe these questions are crucial for both designers and users as we navigate the increasingly complex landscape of interactive systems.
Reading Response – Week #3 Redha Al Hammad
The main point which stood out to me from this reading was the author’s definition of interactivity as clarified by the analogy of a conversation. I found the comparison of “input, process, output” to “listen, think, speak” to be effective in conveying interactivity today (especially since the piece was written two decades ago). On this same note, I found the mention of an interactive process requiring “two actors” to be interesting. As someone who grew up with digital technology, I subconsciously tend to either view it as a tool or an extension of myself and my actions – not as a separate active party that has the agency to “listen, think and speak” in conversation with me. I feel that the only time I consider technology’s agency is when it does not cooperate with my goal as a user as, for example, oftentimes when a website does not load or is difficult to use we place the blame on it and not the interaction itself.
Another point I found interesting was the misuse of interaction in varying different contexts. More specifically, the distinction between integration and reaction stood out to me as the author strongly claims that they have nothing to do with one another. However, I do feel that there is some element of reaction within interaction (on the human side at the very least). In the aforementioned example, a poorly constructed website will surely garner a specific reaction in the user and, in turn, will affect how they interact with it. As such, I feel that in certain cases, the two are interlinked and should not be considered entirely separate processes.
Assignment 3: State of Mind
Concept
The goal of this week’s assignment was to create a unique work of art through imagination and creativity. The original idea was to create a dynamic screensaver with a range of shapes that had different colors and speeds and interacted with the canvas and each other when they collided. However, this concept was disregarded because a more abstract art piece was needed.
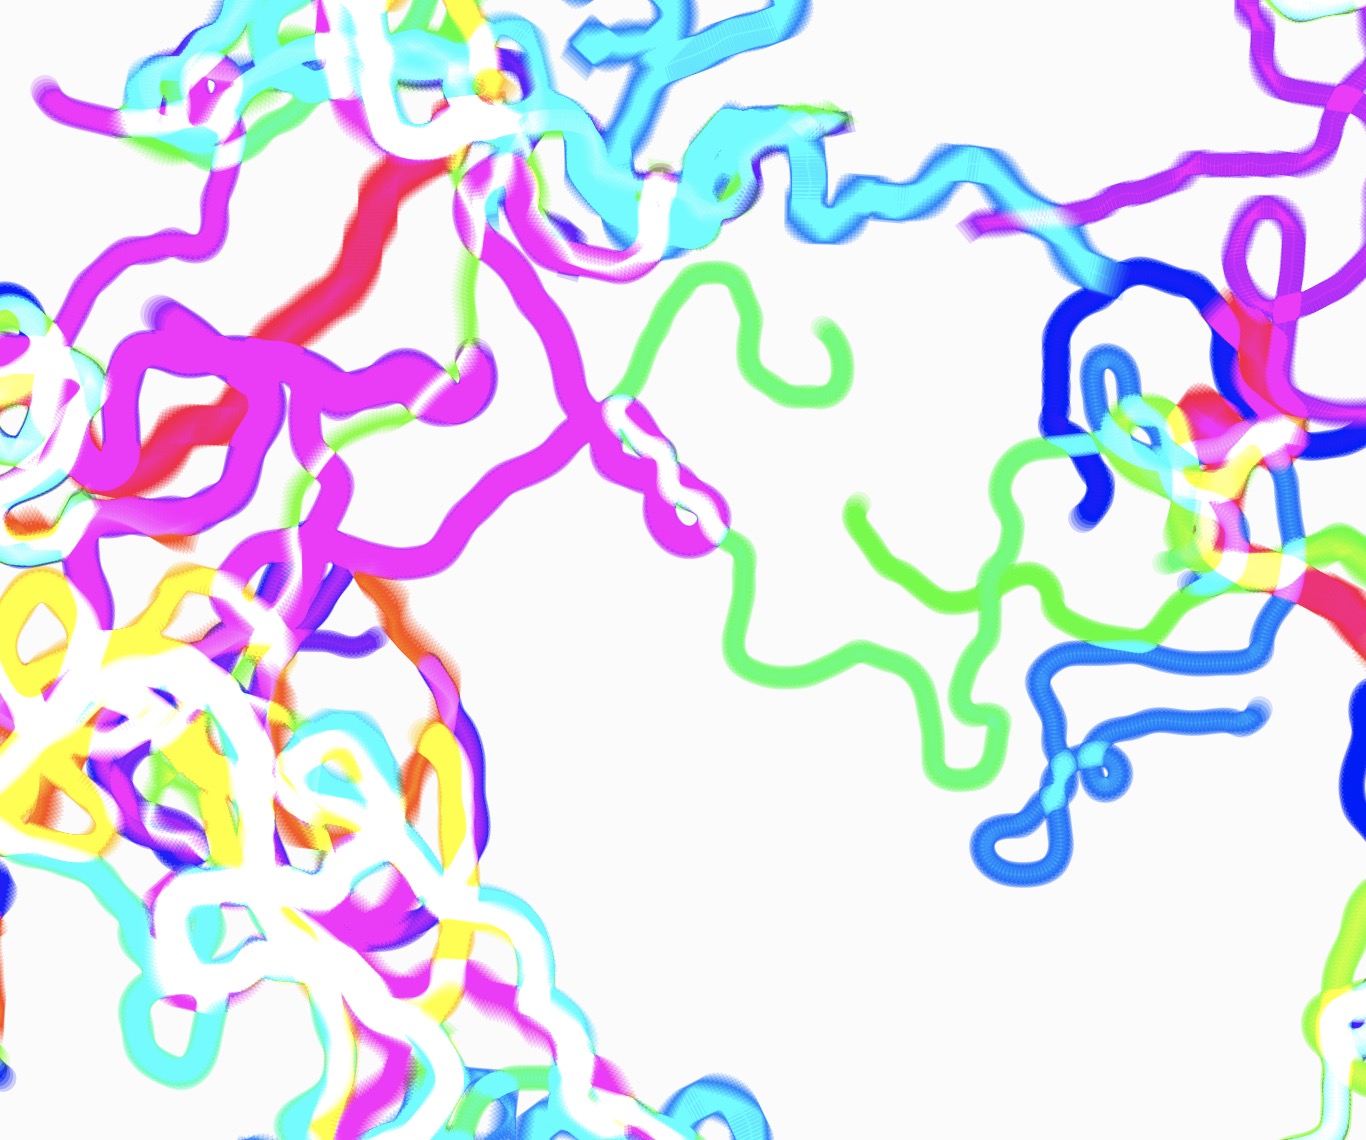
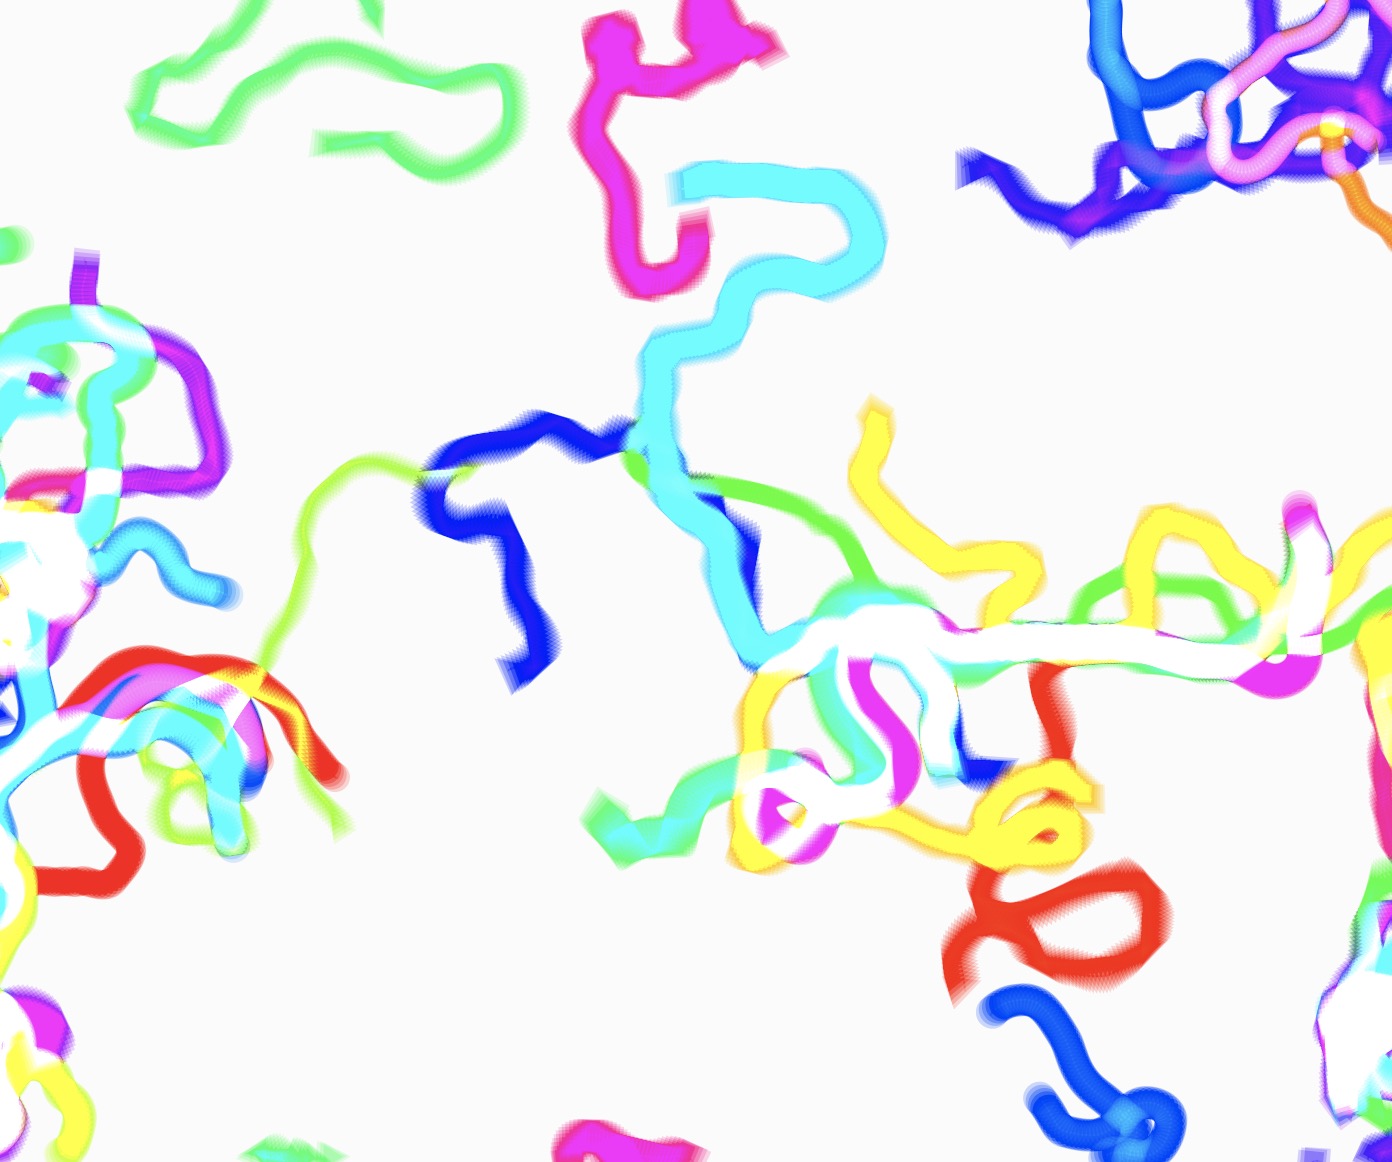
So I used the original code as the template, and the project developed into a complex particle-mimicking display of forms. These particles used the idea of flow fields to mimic more organic and natural motions, leaving behind a vibrant trail as they moved. The chaos of these trails of particles is a representation of my “State of Mind” while thinking of ideas for the assignment.
Sketches
Code
The particles’ motion is directed by a grid of vectors called the flow field. Perlin noise is used in its generation to provide a fluid, flowing transition between the grid’s vectors.
for (let i = 0; i < cols; i++) {
    for (let j = 0; j < rows; j++) {
      let index = i + j * cols;
      let angle = noise(i * 0.1, j * 0.1, zoff) * TWO_PI * 4;
      flowField[index] = p5.Vector.fromAngle(angle);
    }
  }
The snippet is in the draw() loop that creates the flow field. It simulates a natural flow by using Perlin noise to generate vectors with smoothly shifting angles.
The shapes follow the flow field vectors, which guide their movement. This interaction is encapsulated in the follow() method of the BaseShape class.
follow(flowField) {
  let x = floor(this.pos.x / resolution);
  let y = floor(this.pos.y / resolution);
  let index = x + y * cols;
  let force = flowField[index];
  this.vel.add(force);
  this.vel.limit(2);
}
The shape’s position (this.pos) is used to determine its current cell in the flow field grid by dividing by the resolution. The index in the flowField array corresponding to the shape’s current cell is calculated using x + y * cols.
The vector (force) at this index is retrieved from the flowField array and added to the shape’s velocity (this.vel), steering it in the direction of the flow. this.vel.limit(2) ensures that the shape’s velocity does not exceed a certain speed, maintaining smooth, natural movement.
The trail effect is created by not fully clearing the canvas on each frame, instead drawing a semi-transparent background over the previous frame. This technique allows shapes to leave a fading trail as they move.
background(0, 0.3);
The purpose of the resetAnimation() method is to reset the animation setup and clean the canvas. To restart the flow field pattern, it first uses clear() to remove any existing shapes from the canvas, resets the shapes array to its initial state, initializeShapes() method to add a new set of randomly placed shapes, and resets the zoff variable for flow field noise.
function resetAnimation() {
  clear();
  // Clear existing shapes
  shapes = [];
  // Repopulate with new shapes
  initializeShapes();
  // Reset the z-offset for flow field noise
  zoff = 0;

}
The resetAnimation() method is called when the frameCount has reached 500 frames. This helps to see how the flow field changes every time it restarts.
Full Code
// array for shapes
let shapes = [];
// declare flow field variable
let flowField;
let resolution = 20;
// 2d grid for flow field
let cols, rows;
// noise increment variable
let zoff = 0;
// make the sketch again after this value
let resetFrameCount = 500;


function setup() {
  createCanvas(800, 600);
  colorMode(HSB, 255);
  blendMode(ADD);
  cols = floor(width / resolution);
  rows = floor(height / resolution);
  flowField = new Array(cols * rows);
  initializeShapes();
}

function draw() {

  if (frameCount % resetFrameCount === 0) {
    resetAnimation();
  } else {
    background(0, 0.3);
  }

  // Flow field based on Perlin noise
  for (let i = 0; i < cols; i++) {
    for (let j = 0; j < rows; j++) {
      let index = i + j * cols;
      let angle = noise(i * 0.1, j * 0.1, zoff) * TWO_PI * 4;
      flowField[index] = p5.Vector.fromAngle(angle);
    }
  }

  // Increment zoff for the next frame's noise
  zoff += 0.01;

  // Update and display each shape
  // For each shape in the array, updates its position according to the flow field, moves it, displays its trail, and display it on the canvas.
  shapes.forEach(shape => {
    shape.follow(flowField);
    shape.update();
    shape.displayTrail();
    shape.display();
    shape.particleReset();
    shape.finish();
  });

}

function resetAnimation() {
  clear();
  // Clear existing shapes
  shapes = [];
  // Repopulate with new shapes
  initializeShapes();
  // Reset the z-offset for flow field noise
  zoff = 0;

}

// Initialized 30 number of shapes in random and at random positions
function initializeShapes() {
  for (let i = 0; i < 30; i++) {
    let x = random(width);
    let y = random(height);
    // Randomly choose between Circle, Square, or Triangle
    let type = floor(random(3));
    if (type === 0) shapes.push(new CircleShape(x, y));
    else if (type === 1) shapes.push(new SquareShape(x, y));
    else shapes.push(new TriangleShape(x, y));
  }
}

class BaseShape {
  constructor(x, y) {
    this.pos = createVector(x, y);
    this.vel = p5.Vector.random2D();
    this.size = random(10, 20);
    this.rotationSpeed = random(-0.05, 0.05);
    this.rotation = random(TWO_PI);
    this.color = color(random(255), 255, 255, 50);
    this.prevPos = this.pos.copy();
  }

  follow(flowField) {
    let x = floor(this.pos.x / resolution);
    let y = floor(this.pos.y / resolution);
    let index = x + y * cols;
    let force = flowField[index];
    this.vel.add(force);
    // Smoother movement so velocity is limited
    this.vel.limit(2);
  }

  update() {
    this.pos.add(this.vel);
    this.rotation += this.rotationSpeed;
  }

  display() {
    // Saves the current drawing state
    push();
    // Translates the drawing context to the shape's current position
    translate(this.pos.x, this.pos.y);
    // Rotates the shape's current rotation angle
    rotate(this.rotation);
    fill(this.color);
    noStroke();
  }

  displayTrail() {
    strokeWeight(1);
    // Creates a semi-transparent color for the trail. It uses the HSB
    let trailColor = color(hue(this.color), saturation(this.color), brightness(this.color), 20);
    stroke(trailColor);
    // Draws a line from the shape's current position to its previous position
    line(this.pos.x, this.pos.y, this.prevPos.x, this.prevPos.y);
  }

  finish() {
    this.updatePrev();
    pop();
  }

  updatePrev() {
    this.prevPos.x = this.pos.x;
    this.prevPos.y = this.pos.y;
  }

  particleReset() {
    if (this.pos.x > width) this.pos.x = 0;
    if (this.pos.x < 0) this.pos.x = width;
    if (this.pos.y > height) this.pos.y = 0;
    if (this.pos.y < 0) this.pos.y = height;
    this.updatePrev();
  }
}

class CircleShape extends BaseShape {
  display() {
    super.display();
    ellipse(0, 0, this.size);
    super.finish();
  }
}

class SquareShape extends BaseShape {
  display() {
    super.display();
    square(-this.size / 2, -this.size / 2, this.size);
    super.finish();
  }
}

class TriangleShape extends BaseShape {
  display() {
    super.display();
    triangle(
      -this.size / 2, this.size / 2,
      this.size / 2, this.size / 2,
      0, -this.size / 2
    );
    super.finish();
  }
}
Challenges
I spent a lot of time getting a grasp of noise functions and how to use them to mimic natural movements for my shapes and implement the flow field using Perlin noise. There was considerable time spent adjusting the noise-generating settings to produce a smooth, organic flow that seemed natural.
There was a small challenge to clear the canvas after a certain amount of frames. The logic of the code was fine however the previous shapes were not removed.
Reflections and Improvements
The overall experience was quite helpful. I learned to handle the different functions and classes using object-oriented programming concepts. It made it possible to use a modular. It even helped me to add more features to my code as I was creating my art piece.
I believe that there is one area of development where I could explore various noise offsets and scales to create even more varied flow fields. Playing around with these parameters might result in more complex and eye-catching visual effects.
References
I learned about flow fields through the resources provided to us. I discovered a YouTube channel, “The Coding Train“.
Assigment 3 – Functions, Arrays, and Object-Oriented Programming
Idea and Inspiration:
My piece of art aims to create an interactive garden where viewers can witness blossoming flowers and fluttering butterflies. I love nature and I wanted to make a tribute to gardens. At home, my mom and I spend hours working in the garden, it is our bonding time. This project is inspired by nature and the delight of immersing in the sensory experiences of a tranquil garden.
Code that I am proud of:
grow() {
  if (!this.fullGrown) {
    this.size += this.growthRate;
    if (this.size >= 90) {
      this.fullGrown = true;
followMouse() {
   if (mouseIsPressed) {
     let angle = atan2(mouseY - this.y, mouseX - this.x);
     this.vx = cos(angle) * 3;
     this.vy = sin(angle) * 3;
Sketch:
Difficulties:
First of all, it was complicated to get the classes in order. It was not working as they were all in random positions. I had to change the names to numbers so that it was in the correct order.
Secondly, I wanted the flower to expand. So I searched in the internet the function to do it. “https://editor.p5js.org/amcc/sketches/3ZLqytY_4”
Thirdly, I wanted to do something interactive with the MousePress option. These lines of code use the atan2() function to determine the angle between the butterfly’s current position and the location of the mouse pointer. Next, they calculate the velocity vector’s horizontal and vertical components using the trigonometric functions cos() and sin(). These results are scaled by a factor of three to determine the butterfly’s speed as it follows the mouse pointer.
followMouse() {
   if (mouseIsPressed) {
     let angle = atan2(mouseY - this.y, mouseX - this.x);
     this.vx = cos(angle) * 3;
     this.vy = sin(angle) * 3;
Improvements:
I am pretty proud of the work. I spend a lot of time figuring everything out. For improvements, I would like the butterflies to look more real. Adding stripes inside the body.
I think it would also be cool if the flowers after a certain amount of time they disappeared.