Click on the art to interact and create your own flower garden!
//Define the Flower class to represent each flower in the garden
class Flower {
  constructor(x, y) {
    this.x = x; //X position of the flower on the canvas
    this.y = y; //Y position of the flower on the canvas
    this.size = 5; //Initial size of the flower, to be grown over time
    this.growthRate = random(0.05, 0.2); //Random growth rate for dynamic visuals
    this.fullSize = random(30, 70); //Target size of the flower when fully grown
    this.petals = floor(random(4, 9)); //Number of petals, randomly chosen for variety
    this.petalSize = this.fullSize / 2; //Determines the size of each petal
    this.color = [random(100, 255), random(100, 255), random(100, 255)]; //RGB color of the petals, chosen randomly for diversity
  }

  //Method to simulate the growth of the flower
  grow() {
    //Increase the size of the flower until it reaches its full size
    if (this.size < this.fullSize) {
      this.size += this.growthRate; //Grow based on the predefined rate
    }
  }

  //Method to display the flower on the canvas
  show() {
    push(); //Save the current drawing state
    translate(this.x, this.y); //Move the drawing origin to the flower's location
    noStroke(); //Petals and center will not have an outline
    fill(this.color[0], this.color[1], this.color[2]); //Set the color for the petals

    //Draw each petal around the center
    for (let i = 0; i < this.petals; i++) {
      rotate(TWO_PI / this.petals); //Rotate the drawing context to evenly space petals
      ellipse(0, this.size / 4, this.petalSize, this.size); //Draw an ellipse for each petal
    }

    //Draw the flower's center
    fill(255, 204, 0); //Color for the center of the flower
    ellipse(0, 0, this.size / 4, this.size / 4); //Draw the center as a smaller ellipse

    pop(); //Restore the original drawing state
  }
}

let flowers = []; //Array to hold all the flower objects

function setup() {
  createCanvas(800, 600); //Set up the canvas
  background(0); //Initial background color
}

function draw() {
  background(0); //Clear the canvas at each frame to redraw updated flowers
  //Iterate through each flower in the array to update and display it
  for (let flower of flowers) {
    flower.grow(); //Simulate growth
    flower.show(); //Draw the flower on the canvas
  }
}

function mousePressed() {
  //Create a new Flower object at the mouse position when the canvas is clicked
  let flower = new Flower(mouseX, mouseY);
  flowers.push(flower); //Add the new flower to the array
}
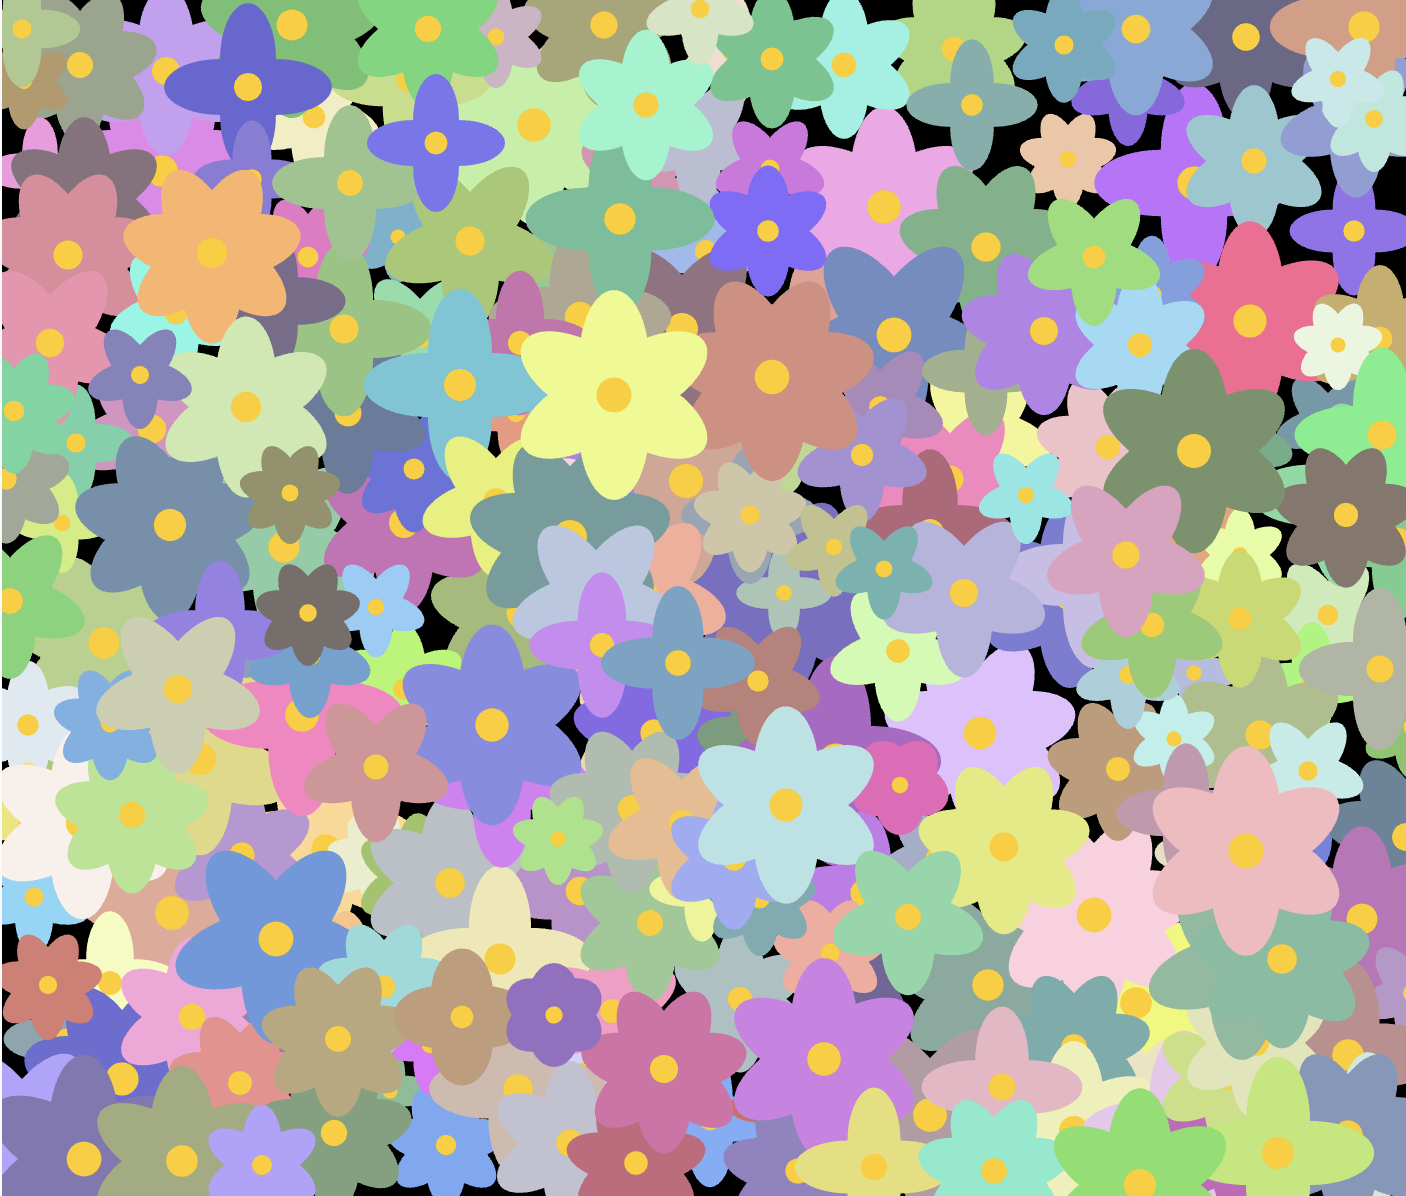
The title of this artwork is “The Flower Garden”. The overall concept of this generative art piece is to simulate a digital garden where flowers can spontaneously grow at locations chosen by the user. Each flower starts small and grows over time, with a unique number of petals and colors, creating a diverse and evolving garden scene. This interactive piece allows viewers to contribute to the creation of the artwork, making each experience unique.
Use of Arrays and Objects in OOP Arrays: The flowers array is used to store multiple instances of the Flower class, showcasing how arrays can manage collections of objects in an OOP context. Objects: Each flower is an instance of the Flower class, with its properties and behaviors encapsulated within the class. This demonstrates the use of objects to model real-world concepts (like flowers) with data (properties) and actions (methods).
I tried to create an interactive and visually appealing art, allowing both the creator and the viewer to explore the intersection of nature, art, and technology. The inspiration behind this artwork was the concept of similar virtual garden apps/games that allows users to have their garden, creating and nurturing the flowers in it. I tried to make a similar version of it with vivid colors and shapes. The part I most loved is how the flowers actually look – I think they’re very pretty and when they’re blooming it gives a calm and soothing feel to the viewer.
Here’s how it looks when the garden is full of flowers:
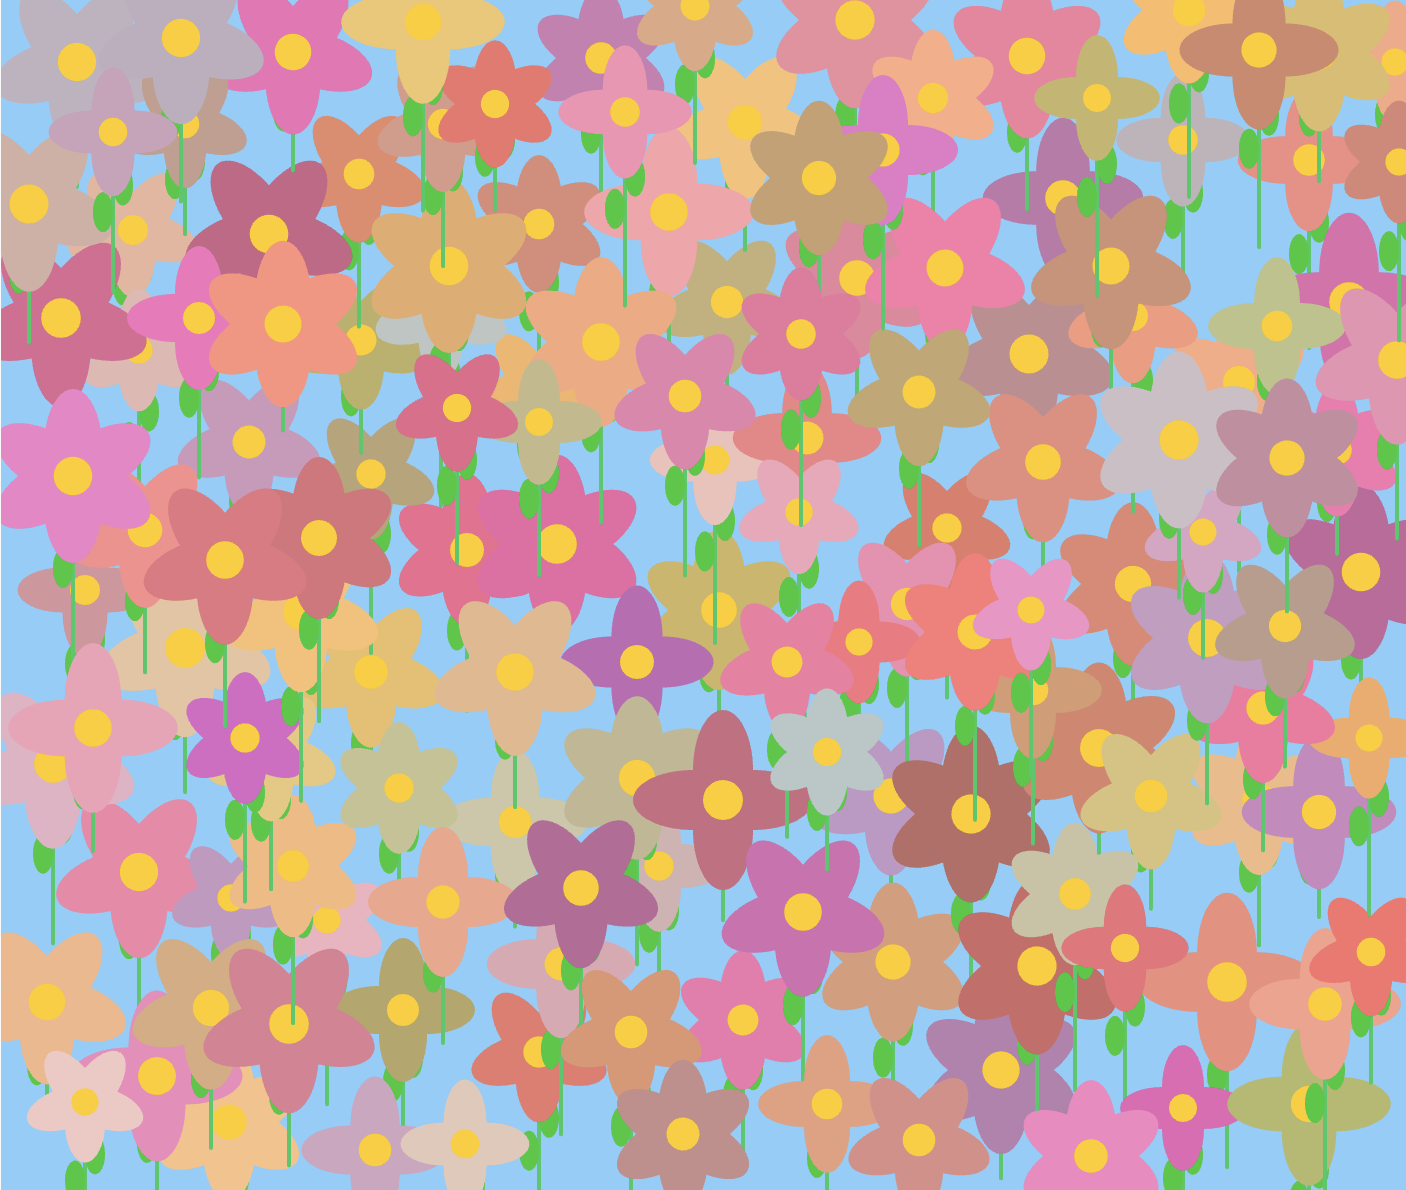
I made another one with some revisions(added stem and two leaves to each flower):
For this project, the goal was to apply the concepts learned in class, including loops, arrays, and Object-Oriented Programming (OOP), to create an interactive visual experience. The initial goal was to create a dynamic piece where a single spiral would be generated with each mouse click. However, I wanted to enhance user engagement by adding a feature that allows spirals to change color when clicked inside. So, I decided to use mouseDragged function to generate spirals and mouseClicked for spirals to change colour. Therefore, the application now produces multiple spirals during a single drag action across the screen. Furthermore, if a spiral is clicked, it temporarily changes color before reverting to its original hue.
To make the application more visually appealing, I attempted to introduce a feature where waves are generated whenever two spirals collide. I added a trailing effect to these waves, aiming to create a mesmerizing interaction between the spirals and the waves produced. Additionally, I implemented a functionality to clear the screen by pressing the ‘c’ key, allowing users to reset the canvas and start anew.
Sample
Embedded Canvas
Drag your mouse and see the magic.
Code
let spirals = [];

function setup() {
  createCanvas(800, 800);
  background(0);
}

function draw() {
  background(0, 25); // Semi-transparent background for a trail effect
  for (let i = 0; i < spirals.length; i++) {
    spirals[i].update();
    spirals[i].display();
    // Check for collision with other spirals
    for (let j = i + 1; j < spirals.length; j++) {
      if (spirals[i].collidesWith(spirals[j])) {
        createWaveBetween(spirals[i], spirals[j]);
      }
    }
  }
}

function mouseDragged() {
  let newSpiral = new Spiral(mouseX, mouseY);
  spirals.push(newSpiral);
}

// Function to chnage colour of the spiral after mouse ci clicked inside the spiral
function mouseClicked() {
  for (let i = 0; i < spirals.length; i++) {
    if (dist(mouseX, mouseY, spirals[i].pos.x, spirals[i].pos.y) < spirals[i].radius) {
      spirals[i].transform();

    }
  }
}

class Spiral {
  constructor(x, y) {
    this.pos = createVector(x, y);
    this.radius = random(5, 20);
    this.angle = 60;
    this.color = color(random(255), random(255), random(255), 100);
    this.transformed = false;
  }

  update() {
    this.angle += 0.05;
    this.radius += 0.5;
  }

  display() {
// Itsaves the current drawing style settings and transformations applied to the canvas
    push();
//   moves the origin to the position of the spiral
    translate(this.pos.x, this.pos.y);
    stroke(this.color);
    noFill();
    beginShape();
    for (let i = 0; i < this.angle; i += 0.1) {
//  Calculate the x and y coordinates of each vertex of the spiral
      let x = this.radius * cos(i);
      let y = this.radius * sin(i);
//  This function adds a vertex to the shape of the spiral
      vertex(x, y);
    }
    endShape();
    pop();
  }

  transform() {
    this.transformed = true;
    this.color = color(random(255), random(255), random(255), 100);
  }

  collidesWith(other) {
    let d = dist(this.pos.x, this.pos.y, other.pos.x, other.pos.y);
    return d < this.radius + other.radius;
  }
}

function createWaveBetween(spiral1, spiral2) {
// Calculates the start and end points of the line connecting the centers of the two spirals
  let startX = spiral1.pos.x + spiral1.radius * cos(spiral1.angle);
  let startY = spiral1.pos.y + spiral1.radius * sin(spiral1.angle);
  let endX = spiral2.pos.x + spiral2.radius * cos(spiral2.angle);
  let endY = spiral2.pos.y + spiral2.radius * sin(spiral2.angle);

  let wave = new HorizontalWave(startX, startY, endX, endY);
  wave.display();
}

class HorizontalWave {
  constructor(x1, y1, x2, y2) {
    this.start = createVector(x1, y1);
    this.end = createVector(x2, y2);
    this.amplitude = 20;
    this.frequency = 0.1;
    this.color = color(255);
  }

  display() {
    push();
    stroke(this.color);
    noFill();
    beginShape();
    for (let x = this.start.x; x < this.end.x; x += 5) {
      let y = this.start.y + this.amplitude * sin(this.frequency * x);
      vertex(x, y);
    }
    endShape();
// This function restores the drawing state that was saved with the most recent
    pop();
  }
}
Challenges & Reflections:
One of the significant challenges I encountered was the implementation of the wave generation when two spirals collide. The vision was to have the spirals transform into waves upon collision, with the spirals disappearing and the waves remaining on screen. However, I faced difficulties in realizing this feature due to my current level of understanding and technical limitations. This project has not only been a fun exploration of interactive graphics but also a valuable learning opportunity. I look forward to revisiting this project in the future, armed with more knowledge and experience, to incorporate the envisioned features and further enhance its interactivity and visual appeal.
References:
E. J. C. (2021, February 17). Excel – Adding and Graphing Sine Waves with Any Amplitude or Phase. YouTube. https://www.youtube.com/watch?v=2SdAtjoYEXo
The assignment was to create a generative artwork using Object-Oriented Programming in p5.js. So for this assignment I wanted to create a bubble generator, such that when a button is pressed, random bubbles generates and floats into different directions.
Inspiration
I got inspired by watching a Bubble Wall aquarium. It’s like a magical glass tank where bubbles pop up randomly, creating a beautiful display. So, I wanted to recreate that magic digitally by making bubbles appear randomly on the screen when you press a button.
A highlight of some code that you’re particularly proud of
function mouseClicked() {

  // Check if mouse click is within the box

  if (mouseX > width / 2 - 50 && mouseX < width / 2 + 50 && mouseY > height - 50 && mouseY < height) {

    // Add multiple bubbles to the array

    for (let i = 0; i < 50; i++) {

      //initialize
      let x = random(width);
      let y = height;
      let speedX = random(-5, 5);
      let speedY = random(-10, -5);
      let col = color(random(255), random(255), random(255));
      let size = random(20,60);

      //push it to the array
      bubbles.push(new Bubble(x, y, speedX, speedY, col, size));
    }
  }
Embedded sketch
Reflection and ideas for future work or improvements
For future improvements I want to add more life to the aquarium by adding fishes, plants etc. which will contain interactive elements in them
Chris Crawford challenges our initial understanding of interactivity with a discussion of various definitions of what interactivity is and what it is not. What I found notable in trying to define interactivity is that it is the listening, thinking and speaking between two actors, and not a reaction to an action of one of the actors. Crawford also establishes that interactivity is not two-sided, but rather it is a continuum, where we can establish high and low interactivity and bring an example of the fridge lights to distinguish between these levels.
Here, I disagree with the author’s choice to place the fridge at low interactivity. The fridge light has a very limited number of responses to out actions, meaning either turning on or off, which I would not call interactive. It rather reacts to our actions, just in more than one way. No matter how carefully the fridge “listens”, our how intense it “thinks”, its response is not going to vary unless it is broken in some way, which in turn will remove a component of interactivity and fail to fit in the definition provided in the reading.
However, I would like to further explore if interaction is any different from alternating reactions from two parties engaging in listening, thinking, and speaking. Ultimately, exploring the best forms of interactivity is essential for the user experience, therefore I believe these definitions are crucial for solving interactivity issues without faking it.
The task for this assignment was to implement an interactive visual experience using the concepts we learned last week, primarily object-oriented programming and arrays. For this assignment, I wanted to play with the visual perceptions of the audience. I wanted to create a very simple piece, but I also wanted to make it look like the piece has different underlying layers by incorporating a sense of depth. To give the illusion of 3D, I modified how shapes are displayed to include shading and perspective distortion. I introduced a z-axis movement illusion for the shapes. In the draw function, an interactive background changes hue based on mouse position, and shapes are updated and displayed with 3D effects.
The most challenging part was for me to figure out the static floral background and how to keep changing the hues to keep track of the depth of the newly created objects. Initially struggled a bit with the new z-axis movement.
In the provided text, Chris Crawford goes into the complexities of interactive media, attempting to create a specific definition while distinguishing its numerous manifestations.
In my opinion, there is a need for a broader appreciation of interactive media, which is often misunderstood as essentially superficial. However, I am confident that beyond its surface lurks great depth and importance.
Finally, I encourage for collaborative initiatives to help individuals and communities get a better knowledge of this fluid industry.
For this assignment, I decided to take my previous work and try and make it interactive. I have to admit that it took me longer than expected but I eventually got there.
First step was the code. I had to find a way in which I could create firstly a ball that was moving on the screen. After that, I just had to make a bunch of them and make them move in different directions.
I decided to make the colors of the circles random because I thought it might end up being colorful, which it did.
Regarding challenges I think that the constructor was the thing that took me longer but I eventually made it work.
Chris Crawford’s elucidation on interactivity, particularly his analogy of it as a conversation between users and systems, introduces a profound reevaluation of our engagement with digital interfaces. This perspective challenges the traditional view of interactivity as mere binary exchanges—inputs and outputs—by imbuing it with a relational, almost human-like quality. The notion that interactivity could harbor the depth and dynamism of a conversation compels us to reconsider the essence of our digital interactions. It suggests that these exchanges are not just about the transmission of information but about building a relationship, a dialogue that evolves with each interaction.
However, while Crawford’s analogy enriches our understanding of interactivity, it also raises several questions about its applicability in the real world. The portrayal of interactivity as a seamless conversation glosses over the inherent complexities and frictions present in human-computer interaction. Real-world interactivity is fraught with misunderstandings, misinterpretations, and a lack of feedback that can disrupt the ideal flow of conversation Crawford imagines. This discrepancy between the ideal and the real prompts a deeper inquiry into how we can design interactive systems that truly embody the conversational model Crawford proposes. Can systems be designed to understand and adapt to the nuanced feedback of users? How do we account for the diverse ways individuals interact with technology?
Moreover, Crawford’s perspective invites us to explore the ethical dimensions of designing interactive systems. If we conceive of interactivity as a conversation, then we must also consider the responsibilities inherent in facilitating these dialogues. How do we ensure that these conversations are inclusive, respectful, and enriching for all participants? In what ways might our interactive systems impose upon, rather than enhance, the autonomy of users?
In reflecting on Crawford’s work, I am both intrigued and skeptical. His vision for interactivity as a conversation between users and systems offers a compelling framework for understanding and enhancing our digital interactions. Yet, it also underscores the need for a critical examination of the assumptions underlying this analogy and the practical challenges of implementing it. As we continue to navigate the evolving landscape of interactive design, Crawford’s insights serve as both inspiration and provocation, urging us to think more deeply about the nature of our digital conversations and the worlds they create.
Reflection on “The Art of Interactive Design” by Chris Crawford:
After reading Crawford’s work, I found myself thinking about how interactivity is often misunderstood. Crawford compares interactivity to a conversation, where both parties listen, think, and speak. This analogy helped me understand that for interaction to be meaningful, both parties need to actively participate. Crawford also talks about how interactivity is often misused and misunderstood. (Pg 5, 6)
However, I had some questions about Crawford’s perspective. He criticizes traditional media like books and movies for not being interactive enough. But I believe these media still have value because they make us feel and think, even though they don’t interact with us directly. Crawford also seems biased towards interactive design over human factors engineering, which focuses on making tools more efficient for workers.
Another question that came up for me was about the limits of interactivity. Are there times when traditional media offer experiences that can’t be replaced by interactive designs? Overall, reading Crawford’s work made me rethink what interactivity means and how it affects design. It made me consider the importance of both form and function in design processes.
I was experimenting with the Circles class that we created in class and thought of some way of generating abstract art by using Circles to draw random lines on the Canvas . I came up with a simple algorithm to generate art :
1.Create random points 2.Draw a circle with random radiuses around the points (restricted random radiuses) 3.Wherever the center of circle is in another, invert the color 4.Make options to change the frame rate 5.Move the circles randomly by making their speeds random 6.Make sliders to change color 7.At the end draw the paths taken to create something random but intriguing
Each Circle on the canvas would have its own corresponding class ,Whenever a Circle would pass over another, it would change color . The user could also add circles by clicking on the canvas. Initially I had fixed the color to a black background and tried experimenting with different colors of circles and backgrounds . Then I thought – ” Why not create a slider to let the user choose what background color they want according to their preferences ?” This would solve the problem of selecting the best looking background and would add user interactivity as well .
Then came the question of art . What kind of final product would I want ?I wanted the art generated to be random but intriguing . I decided to draw the paths traced by the circle . This was done using a graphics buffer . The entire canvas is emptied but only the buffer remains when the simulation ends . I experimented a bit with the color of the trails generated by the circles and decided to make this color relative to the background(just like the fill color of the circles) . I also tried different strokeWeights for the trails and different alpha values for color to make them more or less transparent . at the end I stuck to using strokeWeight as 1 and alpha value as 150 .
Sketches
The following are some interesting sketches that I got by experimenting with color, and strokeWeights and Alpha values for the circle trails
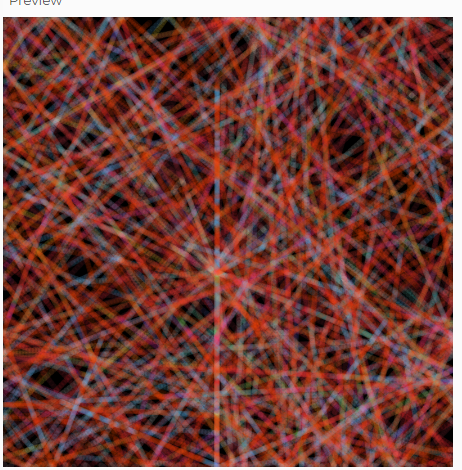
Stroke weight = 5
Alpha =50
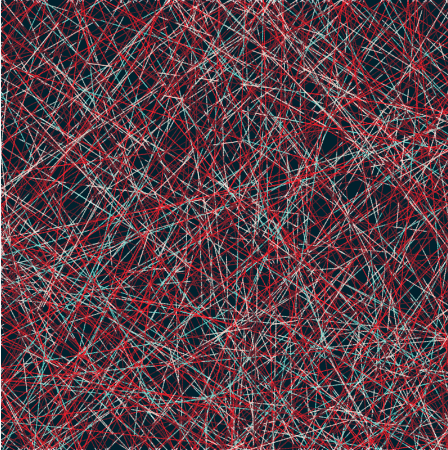
Default setting :
stroke weight =1
alpha = 150
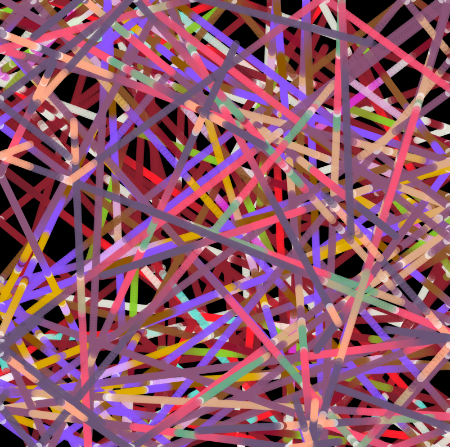
Stroke weight =7
alpha =150
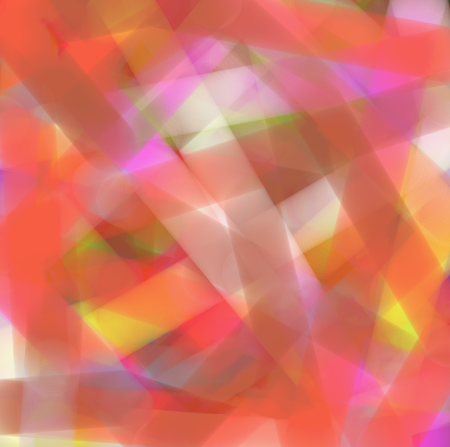
Stroke weight = 50
alpha =10
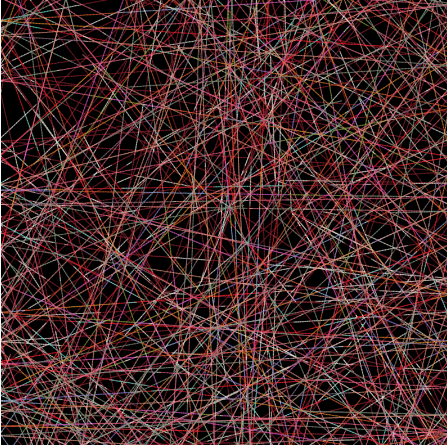
The kind of sketch that We can get from default setting is like follows:
Default setting drawing with Black Background
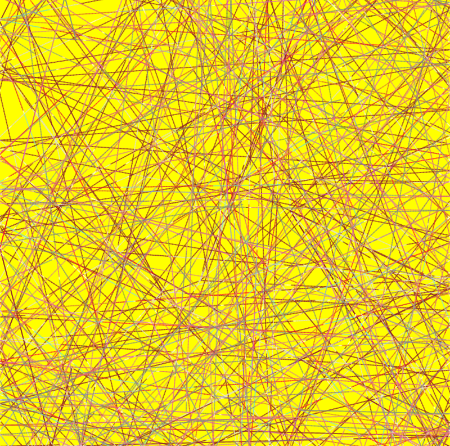
The background color can also be changed according to what the user wants :
Same image with yellow background
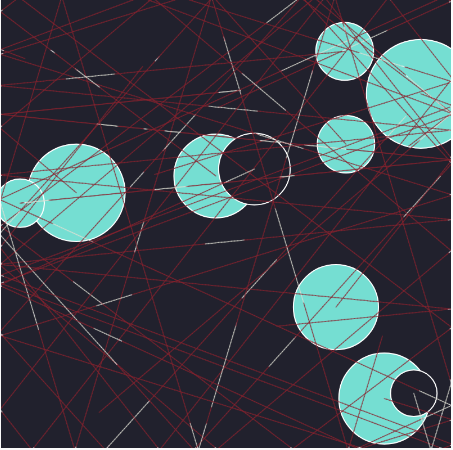
In short, there are a lot of variation that the user could decide on , the circles while drawing the lines are aesthetically pleasing too :
I had to make a decision of whether or not to display the trail lines when the circles are still there . At the end I decided to keep the trail lines . However, hiding them until the end requires changing just one if-else loop which I have indicated in the commented code .
Sketch
Below is the embedded sketch :
Try playing with the color values and clicking on the sketch to draw the circles before clicking on end simulation to get the web of lines . Ideally the sketch at the end looks best with a black background
Code that I am proud of
The Display() function of Circles Class is where the magic happens and this is the part of code that I am most proud of :
display() {
  stroke(255);
  strokeWeight(1);
  fill(150 - get(this.x,this.y)[0],255 - get(this.x,this.y)[1],255 -get(this.x,this.y)[2]); // inverting the color of fill from the color at the center of the circle
  circle(this.x,this.y,this.radius*2);
    // Draw a line segment from previous position to current position onto trails buffer

  trails.stroke(255 - get(this.x,this.y)[0],255 - get(this.x,this.y)[1],255 -get(this.x,this.y)[2] ,150);//writes to the trails buffer
   //alpha value is 150
    trails.strokeWeight(1);
    trails.line(this.prevX, this.prevY, this.x, this.y);


    // Store current position as previous position for next frame
    this.prevX = this.x;
    this.prevY = this.y;
}
The idea of using a graphics buffer called trails to make the trails was very useful . the fill() function in this class inverts the color of fill of the circle from the color of the background at the center of the circle . the trails.stroke and trails.strokeWeight command are at the essence of the final art piece (as illustrated in the picture gallery above) . Changing and experimenting with these values was a big part of this project .
Another part that I am proud of is creating the sliders for color and framerate and the end simulation button as it adds to the user interactivity of the sketch .
function setup() {
  createCanvas(400, 400);
  trails=createGraphics(400,400);
  backgroundColor = color(33, 33, 45); // Default background color

  //Sliders at the bottom of Canvas

  backgroundColorRedSlider = createSlider(0, 255, red(backgroundColor)); // Slider for the red component
  backgroundColorRedSlider.position(10, height + 30);
  backgroundColorRedSlider.style('width', '80px');
  let backgroundColorRedLabel = createDiv('Red');
  backgroundColorRedLabel.position(10, height + 10);
  backgroundColorRedLabel.style('color', '#FF5733'); // Custom color
  backgroundColorRedLabel.style('font-family', 'Arial, sans-serif'); // Custom font

  backgroundColorGreenSlider = createSlider(0, 255, green(backgroundColor)); // Slider for the green component
  backgroundColorGreenSlider.position(110, height + 30);
  backgroundColorGreenSlider.style('width', '80px');
  let backgroundColorGreenLabel = createDiv('Green');
  backgroundColorGreenLabel.position(110, height + 10);
  backgroundColorGreenLabel.style('color', '#156F25'); // Custom color
  backgroundColorGreenLabel.style('font-family', 'Arial, sans-serif'); // Custom font

  backgroundColorBlueSlider = createSlider(0, 255, blue(backgroundColor)); // Slider for the blue component
  backgroundColorBlueSlider.position(210, height + 30);
  backgroundColorBlueSlider.style('width', '80px');
  let backgroundColorBlueLabel = createDiv('Blue');
  backgroundColorBlueLabel.position(210, height + 10);
  backgroundColorBlueLabel.style('color', '#3366FF'); // Custom color
  backgroundColorBlueLabel.style('font-family', 'Arial, sans-serif'); // Custom font

  frameRateSlider = createSlider(10, 150, 70); // Min: 1, Max: 60, Starting value: 30
  frameRateSlider.position(10, height + 80);
  frameRateSlider.style('width', '80px');
  let frameRateLabel = createDiv('Frame Rate');
  frameRateLabel.position(10, height + 60);
  frameRateLabel.style('color', '#560F0F'); // Custom color
  frameRateLabel.style('font-family', 'Arial, sans-serif'); // Custom font

  frameRateSlider.position(10, height + 80);
  frameRateSlider.style('width', '80px');

  //End simulation button
  let endButton = createButton('End Simulation');
  endButton.position(10, height + 100);
  endButton.mousePressed(stopSimulation);
  endButton.style('font-family', 'Arial, sans-serif');
  endButton.style('background-color', '#FF5733');
  endButton.style('color', '#ffffff');
  endButton.style('border', 'none');
  endButton.style('padding', '5px 10px');
  endButton.style('border-radius', '5px');
  endButton.style('cursor', 'pointer');

  //Create all required Arrays
  speeds = generateSpeeds(num_of_circles);
  v = generateRandomPoints(num_of_circles); //10 points
  r = createRandomRadiuses(num_of_circles, 30, 20); //(length , max_radius ,min_radius)
  arr_circles = createArrayCircles(v, r); //Create array of Circle objects
}
Challenges and Further Ideas
One challenge was thinking about the various variables involved in this sketch and asking questions like- the number of default circles? The range of speed? The framerate? the Background color? How should the trail color relate to the background color? What should be the Stroke weights and alpha values for the trail color? Some of these do not have a right or wrong answer and much depends on user preferences . I factored in user input for some of these and determined the rest by experimenting with what looked good (even the variables determined by the user needed to have a default value that should look good to most people) .
While adding user interactivity solved some of these problems, there is scope for taking even more input from the user in the form of asking for alpha values or Stroke weights that would allow the user to use this as a tool for creating generative art .
I also had further ideas of changing the colors of the circles at the intersection (the part where they intersect) rather than changing colors based on the coordinates of the circles center . This would make the “drawing” part perhaps more visually appealing or could be made into an artwork of its own .
Overall Reflections
I am happy with the final result and with the variety of sketches that I got playing around with the transparency and color of the trails drawn by the circle. I learnt a lot about creating sliders and graphicBuffers . This project also taught me the power of OOP – one small change in the circles class affects the entire sketch in drastic ways . I was looking to implement something based on Perlin noise for the color of the circles if they are to change without any user input but eventually I just decided to stick to the slider mechanism . Replacing the user input with Perlin noise is something I look forward to experimenting with in future projects .