Even though we are studying “Interactive Media”, I didn’t ponder much about how interactivity should be defined until I read this article. Crawford’s definition, framing it as a cyclic process where two actors alternately listen, think, and speak, seemed interesting but not all-encompassing. His skepticism about labeling everything as interactive, especially in the context of books or movies, got me thinking. It nudged me to consider a spectrum of interactivity rather than a black-and-white definition.
Low interactivity, for me, could be akin to interacting with a traffic light. While it responds to user input (pressing the button to cross the street), the interaction is limited to a predefined set of responses (changing the signal). Medium interactivity might resemble using a smartphone. While navigating through apps, users can input commands, receive feedback, and customize settings. The smartphone’s interface allows for a degree of personalization and responsiveness to user actions, but it still operates within the confines of preprogrammed functionalities. High interactivity can be exemplified by AI LLM chatbots since their capacity to comprehend intricate language inputs, showcase contextual understanding, respond coherently, and even generate creative content reflects a higher level of engagement. They can generate human-like text and personalized responses yet still lack the consciousness of a human being. However, it is starting to get borderline difficult to differentiate their responses from genuine understanding with bots like Character.ai.
Furthermore, Crawford’s distinction between user interface design and interactivity design struck a chord. It made me reflect on projects where the interface might be visually appealing but lacks the holistic experience that interactivity design aims to achieve. It aligns with my belief that interactive design should engage users not just visually but also cognitively. True interactivity is like a dance of ideas, not a one-way street.
For this assignment, I wanted to create a simple yet appealing and interactive artwork. When the user clicks on the canvas, a few balls of random color appear. These balls move independently, colliding and combining with other balls to form a new ball with the additive color of the two original balls, gradually filling the canvas with a visually striking pattern. I wanted to experiment with the Additive color theory and show how simple colors can create unexpected results.
I created a BouncingBall Class so that each ball is an object with the same properties. The part of the code I am most proud of is initializing the speed and direction for the ball using random and the ternary operator.
constructor(x, y, color) {
    this.x = x;
    this.y = y;
    this.color = color;
    this.radius = 20;
    //vaying speed and direction
    this.speedX = random(2, 4) * (random() > 0.5 ? 1 : -1); //50% chance of true and false; If the result is true, assigns 1, otherwise, assigns -1
    this.speedY = random(2, 4) * (random() > 0.5 ? 1 : -1);
  }
Initially, only one ball was formed using each click, but to make it more interesting, I decided to create balls around the click location in a triangular formation. I used polar coordinates for this, similar to my previous assignment.
function mouseClicked() {
  let randomColor = color(random(255), random(255), random(255));
  //creating multiple balls around location
  let formationRadius = 60; //distance from click
  for (let angle = 0; angle < 360; angle += 120) { //3 balls at equal angles
    //polar coordinates for position
    let x = mouseX + cos(radians(angle)) * formationRadius;
    let y = mouseY + sin(radians(angle)) * formationRadius;
    let backgroundBall = new BouncingBall(x, y, randomColor);
    ball_array.push(backgroundBall);
  }
}
The only technical challenge I initially faced was making sure the two balls that collide create a new ball with their combined color and that the original balls disappear. The other challenge was to make it look aesthetically pleasing. This is why I decided to add the blurred trails for the balls.
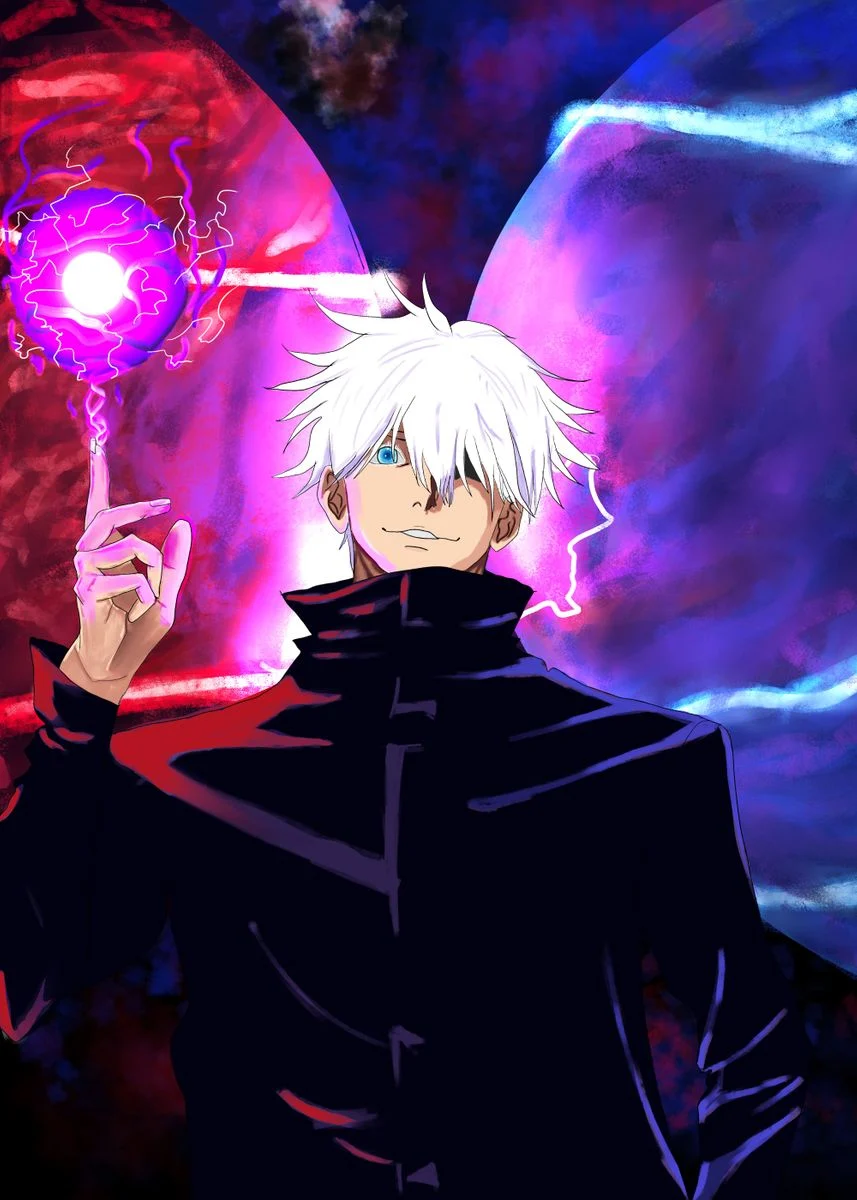
I also wanted to highlight that final result was inspired from my initial idea: red and blue balls combine to make a growing purple ball.
(click on screen)
This idea was inspired by the same anime character in my portrait from the first assignment.
Overall, I am satisfied with my final output. It might not be as unique as I wanted it to be since it was also inspired by previous assignments we did in class. However, it looks visually pleasing and was fun to make. I would like to improve the artwork by creating a pattern in the background using the combined colors.
Below is the p5 sketch, hover 👆 anywhere to interact with the robot.
In case p5js Editor website is down, below is the recording of working demo on YouTube.
TL;DR : Conceptualization
Pi’s Practicality Walker is an Inverse Kinematics powered procedurally animated simulation of a giant mechanical walker in p5.js. All the animations are not hard coded by Pi, but are calculated on the spot on demand. You can hover the mouse pointer to move around the body of the walker robot, and the leg movements will adjust to how it should be.
1) 🤔 Long-Winded Conceptualization
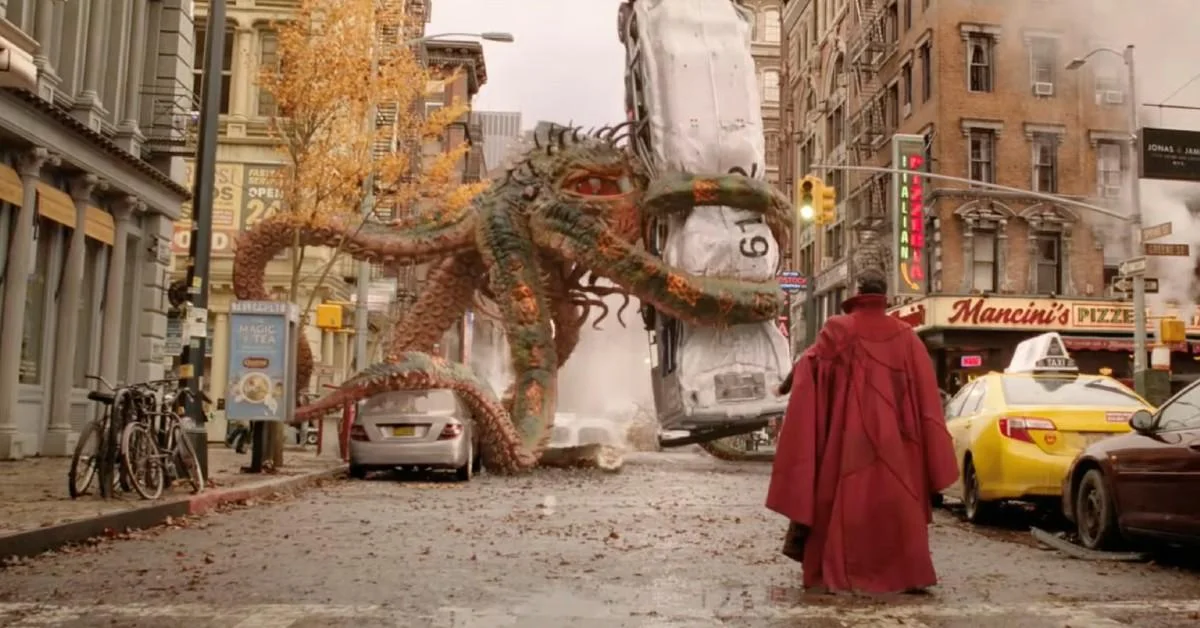
I was watching Doctor Strange in the Multiverse of Madness, and having a good time fantasizing myself deep in the movie…as Dr. Stephen StrangePi , the Sorcerer Engineer Supreme , the Master of the Mystic Arts Engineering Arts.
The only difference is that unlike Doctor Strange, I am the perfect boyfriend to all my ex-girlfriends.
And then I suddenly saw this delicious octopus.
In the class, we are learning Object Oriented Programming, and I am feeling the urge to write my own little mini game engine in p5js (in preparation for my midterm project). And I love mechanical things soooo sooo much. Hence, a giant mechanical octopus walking over the land, controllable with the mouse is a perfect idea.
Hence the piece “Pi’s Practicality Walker” is born.
To get such walking animation, Japanese Animation master Hayao Miyazaki will pour his heart and soul to his artwork and draw all the frames of the animation (that is 24 frames for 1 second of motion). But I am not Hayao Miyazaki.
But I am not Hayao Miyazaki.
~ Pi (2024)
Hence, I need to utilize my super lazy sneaky hacks to make this happen. Luckily, if you have a robotics background, the Inverse Kinematics and Procedural Animation techniques come in handy. Instead of going through the blood, sweat and tears of drawing/hard coding the animations, we can automatically generate animation in real-time to allow for a more diverse series of actions than would otherwise be tedious using predefined animations using these mathematical goodies.
2) ⚙️ Technical Plan of Attack & Implementation
The part of the code I am very proud of is of course, objectifying my octopus/spider 🕷️. Since they have a central body, which is composed of multiple legs, I can easily define the Mechanical Leg class, and the Body class as follows.
//This is the class for the individual legs
class MechanicalLeg {
  constructor(numSegments, segmentLength, isRightFacing = true) {
    this.numSegments = numSegments;
    this.segmentLength = segmentLength;
    this.isRightFacing = isRightFacing; // New parameter to determine the facing direction
    this.angleX = 0;
    this.angleY = 0;
    this.points = [];
    this.totalLength = this.segmentLength * (this.numSegments - 1);
  }

  update(targetX, targetY, canvasWidth, canvasHeight) {
    this.totalLength = this.segmentLength * (this.numSegments - 1);
    this.angleX = 0;
    this.angleY = 0;
    this.legLength = max(
      dist(targetX, targetY, canvasWidth / 2, canvasHeight / 2),
      2
    );

    let initialRotation = atan2(
      targetY - canvasHeight / 2,
      targetX - canvasWidth / 2
    );
    let rotation
// ... and so on
Then you just spawn the legs on the body, fulfilling the object and instance creation.
//Then, attach the legs to the body instance from the body class below
//Spider is walking and draggable
class SpiderBody {
  constructor(x, y) {
    this.position = createVector(x, y);
    this.baseY = y; // Base y-position to oscillate around
    this.dragging = false;
    this.dragOffset = createVector(0, 0);
    this.oscillationAmplitude = 30; // Amplitude of the up-and-down movement
    this.oscillationSpeed = 0.05; // Speed of the up-and-down movement
  }

  update() {
    this.position.x = mouseX - 50;
    // Apply a sin motion when not dragging
    this.position.y =
      mouseY +
      sin(frameCount * this.oscillationSpeed) * this.oscillationAmplitude;
  }
//...
As per project requirement, the arrays were used to hold the leg objects within the walker robot body instance.
// Line 436
function setup() {
  createCanvas(windowWidth, windowHeight);
  gaitHorizontalDistance = windowWidth / 0.7;
  spiderBody = new SpiderBody(width / 2, height / 2 + 100);
  // Initialize leg instances and add them to the legs array
  legs.push(new MechanicalLeg(4, 180, true)); // Right-facing leg
  legs.push(new MechanicalLeg(4, 180, false)); // Left-facing leg
  legs.push(new MechanicalLeg(5, 150, true)); // Another right-facing leg
  legs.push(new MechanicalLeg(5, 150, false)); // Another left-facing leg
  legs.push(new MechanicalLeg(4, 200, true)); // And so on...
  legs.push(new MechanicalLeg(4, 200, false));
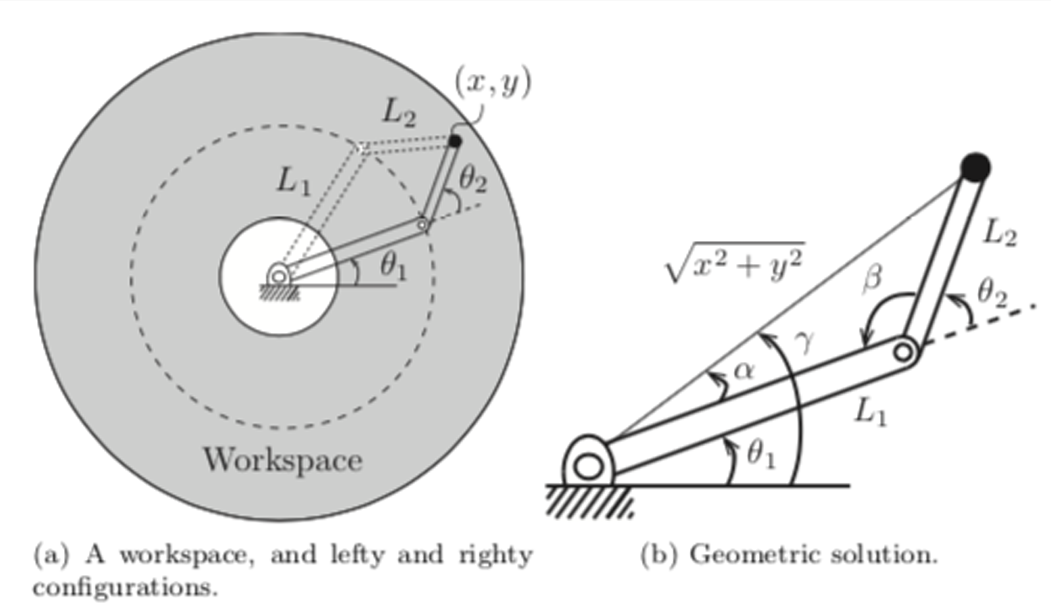
Now we have a giant machine with legs, and the code is reusable and modular, but it is not moving yet. Inverse Kinematics is the art of calculating the joint angles so that given a particular end-effector coordinate in 3D space, the robot knows which joint angles it should move to to get to that target point. Hence, the animations can be automated thsi way.
The key idea is to have an algorithm which will iteratively adjusts the angles of each segment to ensure the end effector reaches or points towards the target. The mathematics primarily involves trigonometry to calculate angles and positions of each segment in 2D space. The model I am using is below.
Step 1 : Initial Tangent Alignment
Step 2 : Desired Leg Length Calculation
Step 3 : Iterative Angle Adjustments
Initialize for all segments.
Iteratively adjust to stretch or contract the leg.
Incremental angle change:
Updatefor each segment.
Step 4 : Segment Position Calculation
Step 5 : Check Total Leg Length
The iterative process continues until the total length of the leg aligns with the desired length L, hence we keep checking. This is the stopping condition.
Step 6 : Rotation Adjustment
If the legs are at the back, we have to measure the angle in the mirrored way, so mirror the angles.
The formal definitions of funky symbols above are
Number of segments in the leg (numSegments).
Length of each segment (segmentLength).
Angle of theith segment.
Coordinates of the end of the ith segment.
Target coordinates (mouse position).
Width and height of the canvas (canvasWidth, canvasHeight).
Desired total length of the leg (legLength).
Initial rotation angle to point towards the target.
Total rotation angle of the leg.
Incremental angle change per iteration.
3) 🎨 Artistic Plan of Attack & Implementation
Once the robot is working, we enhance the aesthetics through adding a parallax grass, adding the previous swarms and gears, and playing a good old western slide guitar cowboy song and visualizing it through fast Fourier transform (FFT) in the style of Ryoichi Kurokawa .
4) 💪 Challenges
Again, no challenge. This was an enjoyable exercise.
5) 💡 Potential Improvements
To make the movements of the walker more realistic, as always, I could have used proportional–integral–derivative (PID) controllers. My current model goes with constant speed:
After reading this text, it seems to me that there are two views on interactivity. The first is the overused, underunderstood meaning of interaction or interactivity, which Crawford criticizes. In that definition, interactivity bases itself on the premise that any person or object coming into contact with another object forms an interaction. The “interactive” rug, for example, is fitting, because the child logically “interacts” with the rug. Yet, the rug doesn’t return anything. That is the same for the fallen tree. In fact, in those cases, humans act or react, but do not interact. The other meaning of interact, which Crawford defines, claims that both entities should “listen, think, and speak” (that is, literally or metaphorically). But even when the two entities are capable of doing so, it doesn’t mean that they are doing it well. So, can “bad” interactivity be disregarded as interactivity altogether? Though bad, doesn’t it warrant already that the interactivity is present?
Another point that follows is that of interactivity design. Based on the aforementioned definitions, it is interesting to think about the role of the interactive designer. The latter, in “interactivizing” their design, acts on a computer. But then, can that be called interaction? Or is the interaction merely the exchange between the viewer and the final design? I believe that in a lot of cases, yes, we can say that the designer creating the design forms an interaction with the computer, but are there cases in which one of the three components of interaction lack?
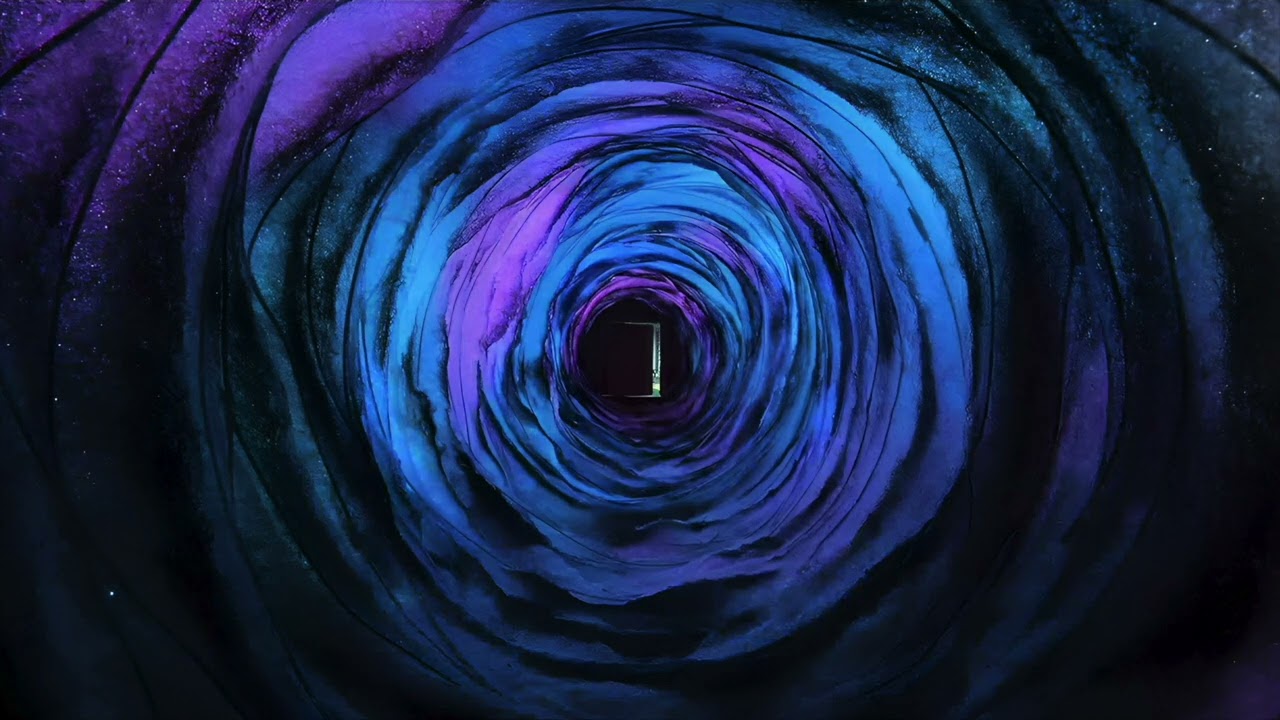
As a starting point, I decided to experiment with our class codes and test color palettes, and through that, I stumbled upon shades of blue and pink that immediately reminded me of a scene from the famous movie “Coraline.” With that in mind, I decided to recreate, or at least attempt to, the tunnel to the other world. In the movie, when Coraline is trying to escape the Other World, she notices that the tunnel feels longer each time she uses it, and steeper. That was my goal for this assignment, and using functions helped me achieve it.
Highlight
class RotatingPolygon {
  constructor(centerX, centerY, x, y) {
    this.centerX = centerX; //center x coordinate
    this.centerY = centerY; //center y coordinate
    this.x = x; //starting x coordinate
    this.y = y; //starting y coordinate
    this.angle = atan2(this.y - this.centerY, this.x - this.centerX); //calculate initial angle
    this.speed = random(0.01, 0.03); //set random rotation speed
    this.radius = dist(centerX-300, centerY-100, x+20, y-20); //calculate radius
    this.sides = int(random(5, 10)); //randomize number of sides for each polygon
  }
An aspect of the code that I take pride in is the usage of cosine, sine, tangent, and pi, along with the radius; they were very useful. Something new I learned was that atan() gives an angle value between -90 & 90, whereas atan2() gives an angle value between -180 & 180. I am also proud of how easy it has become to change the outcome with a simple adjustment, given that I have created a class for rotating polygons (I initially had circles/ellipses but that wasn’t accurate enough). Though I must admit that many of the elements have been the result of trial and error, and I am still exploring this very interesting idea of using OOP in creating graphics.
Reflection
Attempting to replicate the colors from the original scene was definitely challenging, especially since I had already included transparency/opacity components. I believe there is room for improvement in that aspect. In addition, it took some time to understand where and how to position all the shapes accordingly and in line with the original scene. Overall, I believe that I’ve created something worth sharing!
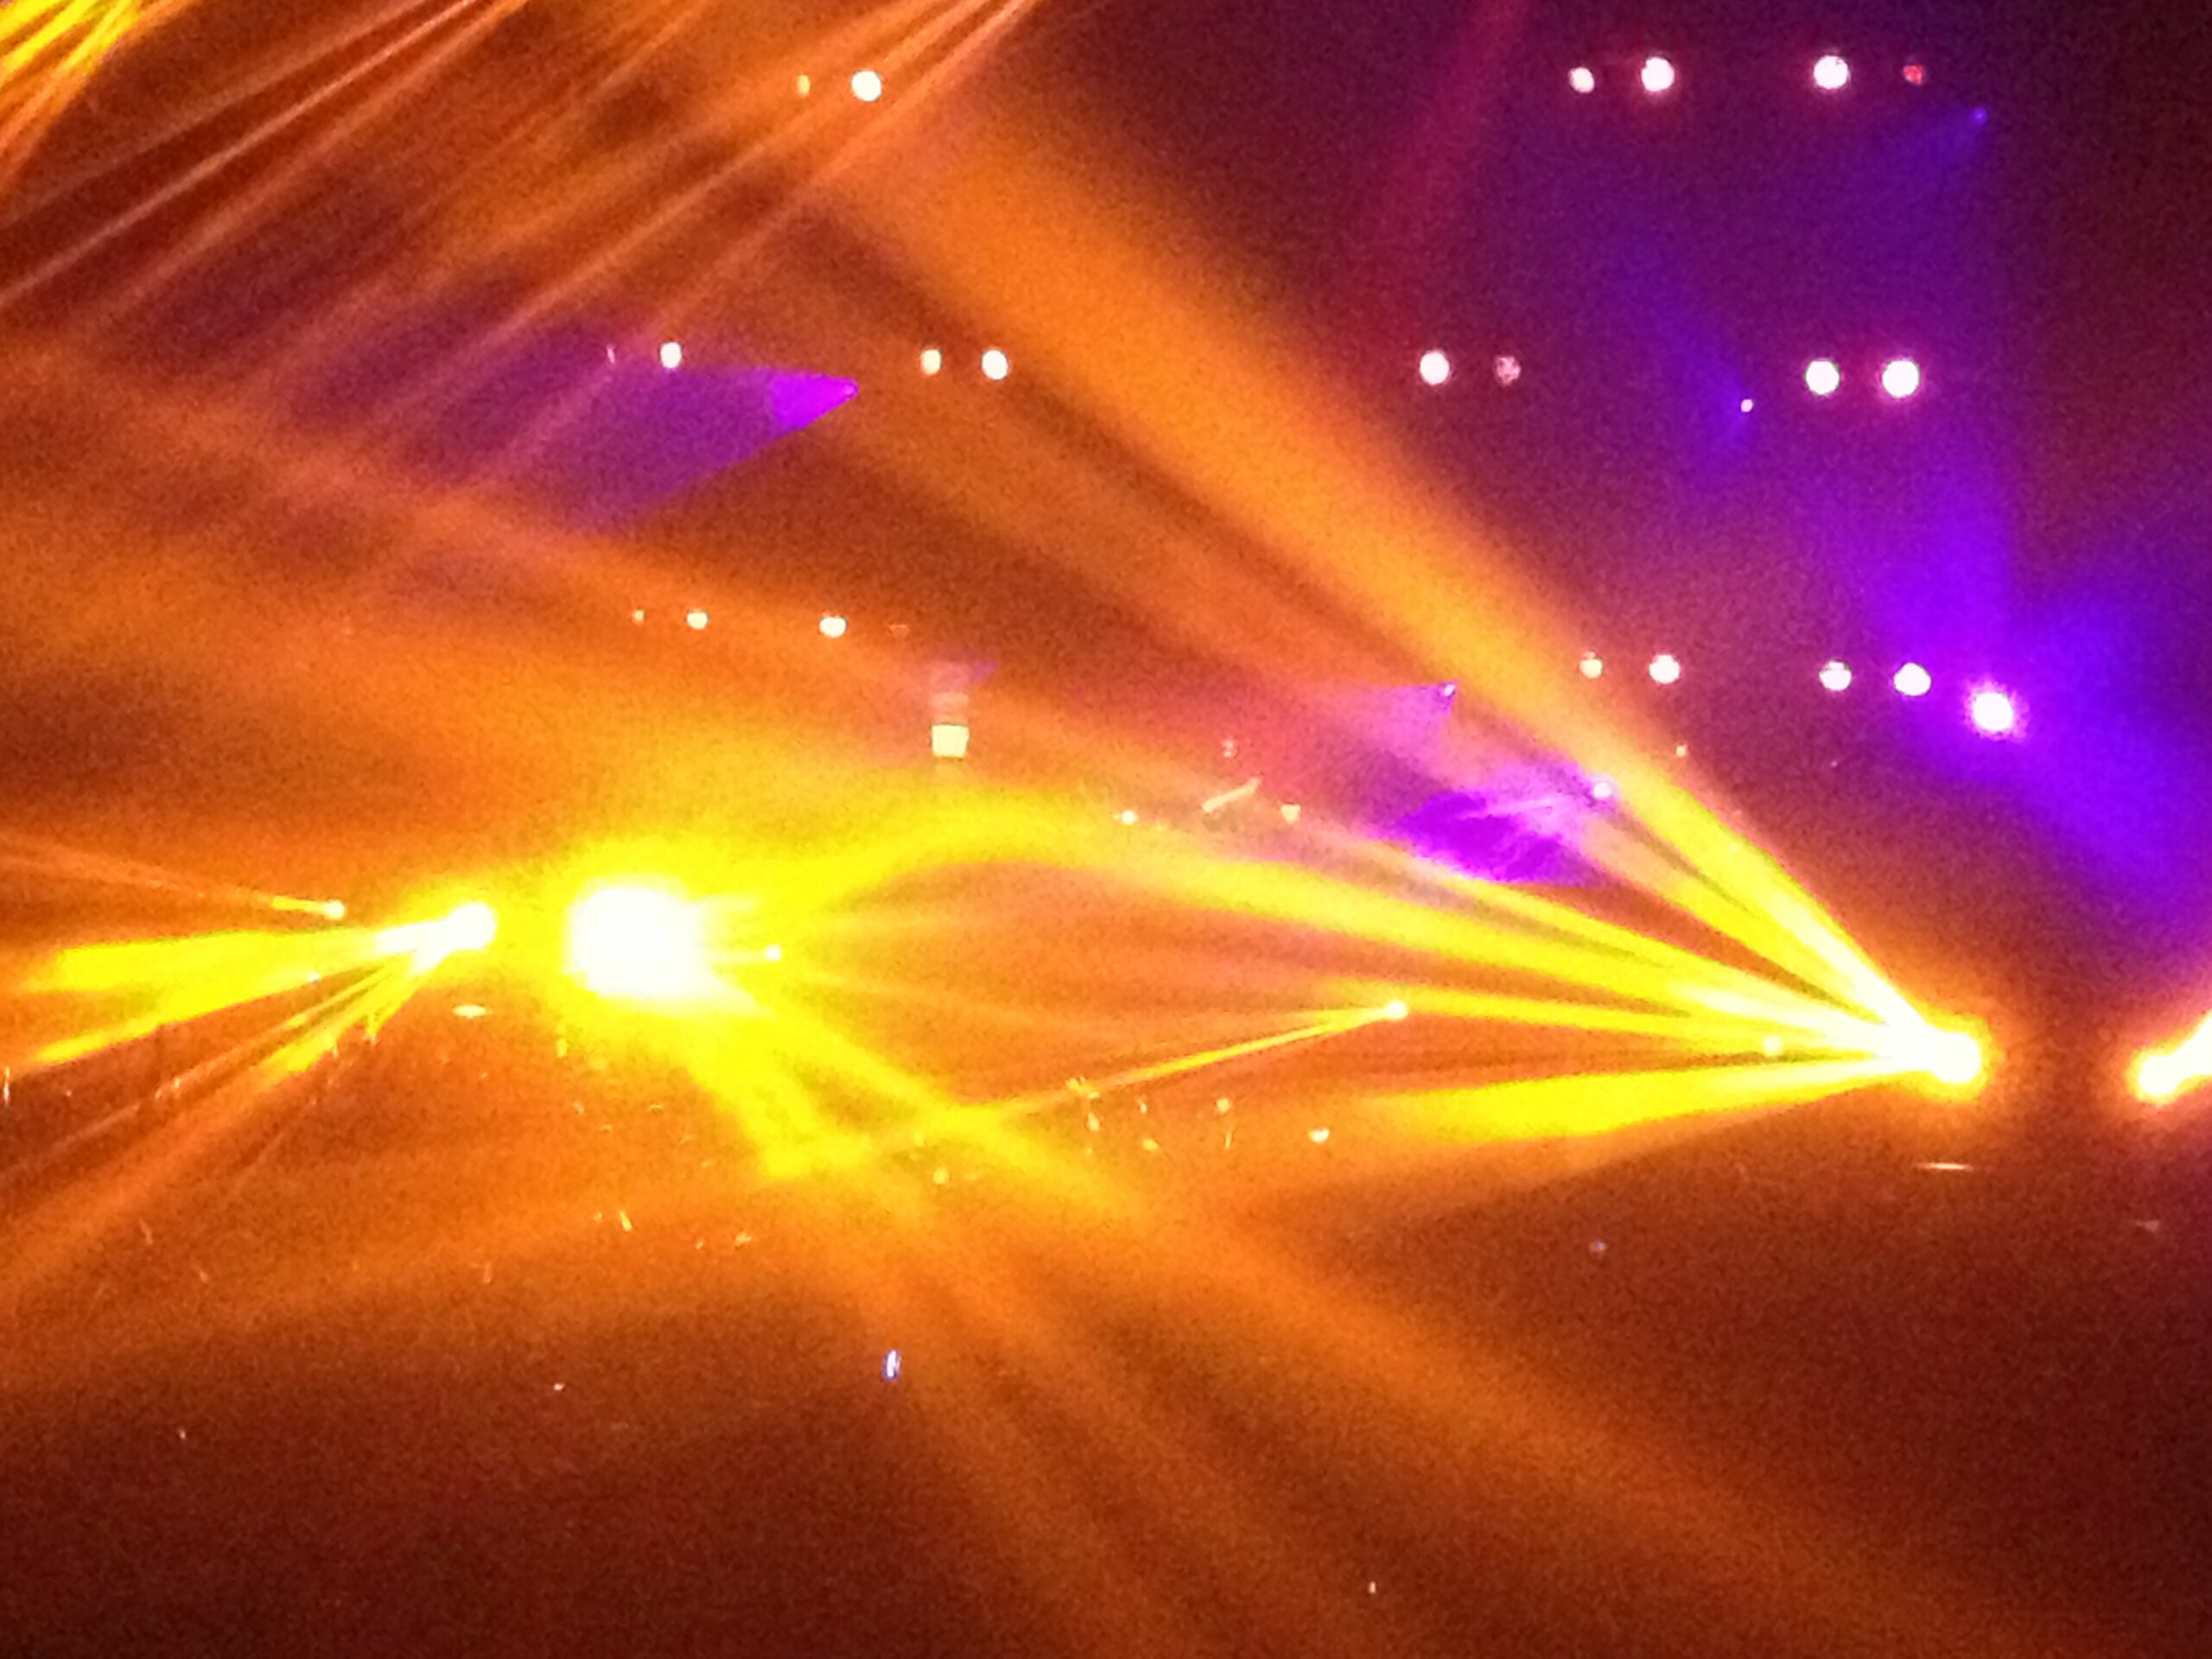
For this assignment, I wanted to create a visual experience inspired by orange, purple, pink, and yellow club lights:
I love how the lights all stem from one source, but I did not want to limit myself to that, so I thought I could create some sort of tridimensional effect with trailing that could better represent the “feeling” of experiencing those club lights.
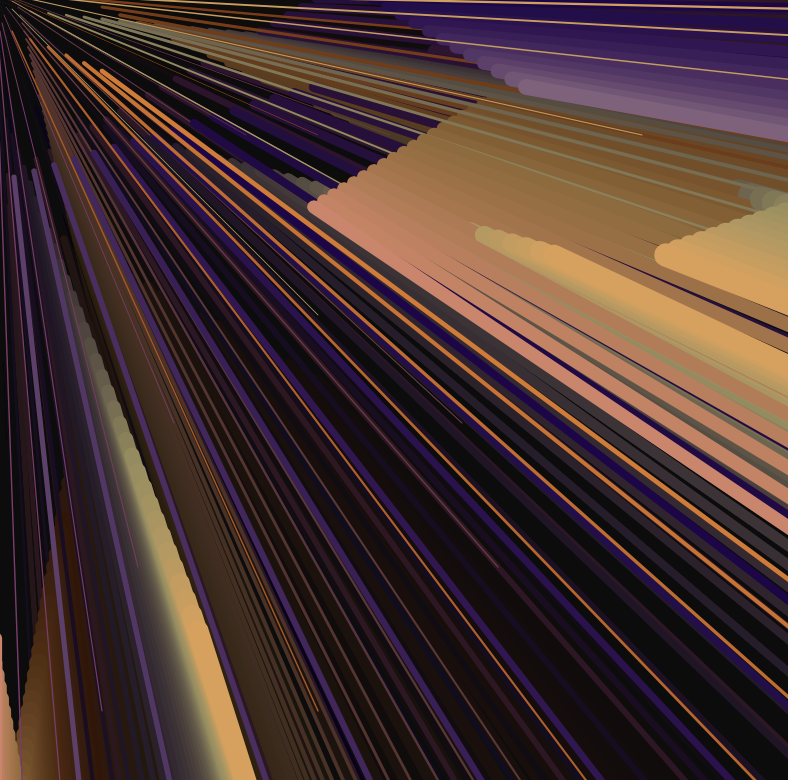
So I created a line class and made 10 lines (with bezier curves) that all begin at (0,0) with varying speeds. I also lowered the background alpha to 10, as transparency allows for trails, which I wanted in order to create this dynamic effect. I tried multiple shapes, but ended up opting for bezier curves. The points for the bezier curves all follow the same line, which is why there is no “curve” per se. However, the movement of the bezier curves looked much nicer than that of the lines, which is why I chose that. The bezier curves also emphasized the 3D effect better than the lines.
Every once in a while, then, the lines meet around the top corner, reproducing the effect of disco lights, before each going their own way once again:
For the colors, I created an array of five different colors which I then incorporated into a linear interpolation function in order to create a gradient:
With the help of ChatGPT, I set two data points, “this.currentColorIndex” and “this.nextColorIndex”. For the first, I randomized from the array so that the first color of each line varies. The second data point set the following color, incrementing the index of the previous “current” color by 1, ensuring that the “next” color that appears depends on the previous color.
this.currentColorIndex = floor(random(colors.length)); // set the starting color of each line as a random color from the "colors" array
this.nextColorIndex = (this.currentColorIndex + 1) % colors.length; // ensure the "next" color for each line depends on the initial randomized color
this.lerpAmount = 0; // begin with no interpolation
Then, in the display function inside the class, I set three variables: “currentColor”, “nextColor”, and “displayColor”, in which I set the data from above. The first two variables are then implemented in the third, which is itself incorporated in the stroke function. Altogether, this is what allows the lines to be displayed in the different colors.
display() {
  let currentColor = color(colors[this.currentColorIndex]); // setting the "current" color variable
  let nextColor = color(colors[this.nextColorIndex]); // setting the "next" color variable
  let displayColor = lerpColor(currentColor, nextColor, this.lerpAmount); // setting the "display" color variable
  stroke(displayColor);
  strokeWeight((this.x + this.y) / 40);
Finally, I created a last function called “updateColor” in which I set the linear interpolation amount and create an “if” function for it to reset (and hence for the colors to keep varying).
updateColor() {
    this.lerpAmount += 0.04; // linear interpolation amount to define the speed of the transition

    if (this.lerpAmount >= 1) { // when linear interpolation amount exceeds 1, reset it to 0
      this.lerpAmount = 0;
      this.currentColorIndex = this.nextColorIndex;
      this.nextColorIndex = (this.nextColorIndex + 1) % colors.length;
Overall, I really enjoyed creating this code. It was definitely hard as last week’s material was a bit dense, but it was good practice. I wanted to incorporate an “if mousePressed” function for the colors to change to a different color palette, but for some reason, it would lag after some time and the sketch would just freeze. That is something I would like to work on for another time, though!
Once, a very thirsty traveler came to the bar and asked, “Water!”
The bartender, raising an eyebrow, says “Sure, sire, would you like room temperature or icy chill water 🥛?”
“Uh, cold please”
“Do you lean towards distilled, mineral, or perhaps a sparkling variety?”
The traveler scratching his head says, “Just regular water is fine”.
The bartender goes “In terms of regular water, we have classic spring regular water or purified tap…”
Judging by Chris Crawford’s Interactive Design definition, this is an interactive process.
There are two actors – the bartender and the traveler
They actively listen to each other,
and think (Whether bartender thinks or not is debatable)
and speak
The only catch here is that this interactivity “did not solve the problem”. They did interact, there is flow of information between them, but the problem remains unsolved.
Just like how Crawford ranted about people in that day and age re-brands “The Same Old Stuff” as “New Interactive Technology” with hype and criticized how the “plays” ranks about a 0.01 on a 10-point Crawford Scale of Interactivity, I am also going to use this writing to rant about how his interactivity definition ranks pretty low (say around 3.14ish) on the 100-point Pi’s scale of Aesthetic Practicality. This definition of [Interactivity = “two actors” AND “listen” AND “think” AND “speak”] ought to be, at least expanded to be applicable.
Expanding the definition of Interactivity
Personally, when I encounter “Interactivity” I see it not as a “process” (unless you are dealing with human to human problems, where you have to Talk It Out Loud ™). Normally in the context of Human-Software Interactions, UI/UX design, interactivity is about how efficiently you can give the user the complete tutorial so that they can utilize the system with minimal guidance.
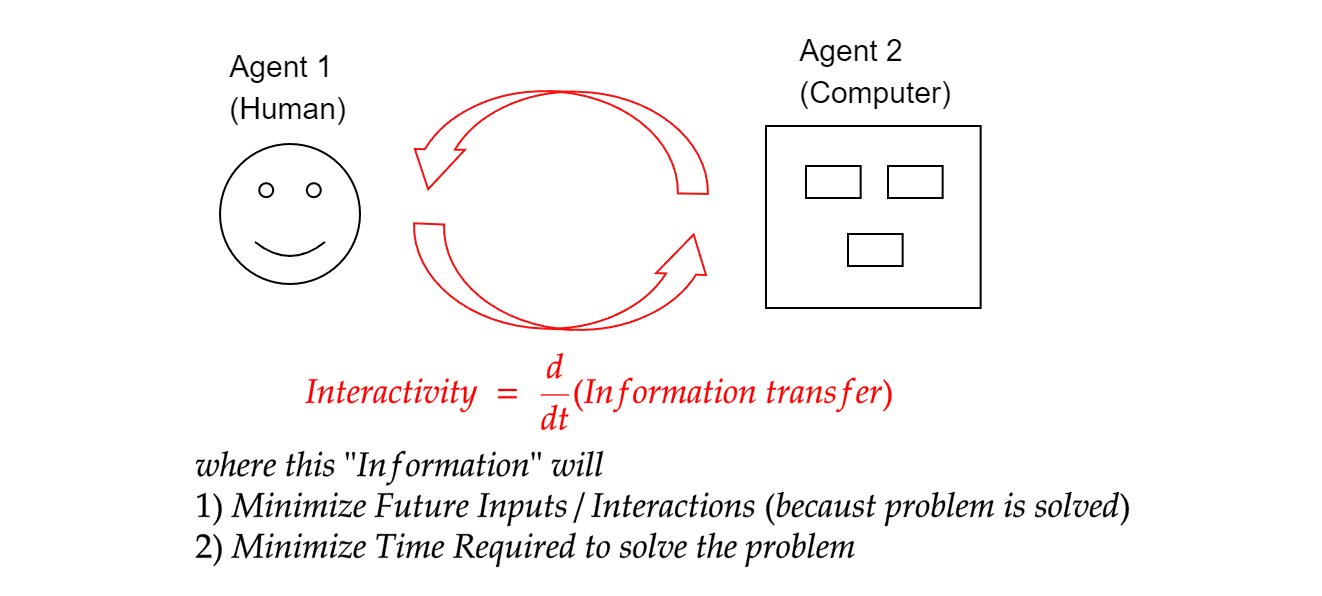
On more formal terms, if we ignore the video game industry (because by definition, games have to be interactive), I see interactivity as a measure of “the rate of transfer of information between two agents (i.e. Human-Computer), where this transferred information helps solve human problems using the computer with minimal input in minimal time.”just as in the diagram below.
Note that my definition explicitly states that the more interactive the system is,
the more time it saves and
the less guidance it needs to give the user in the future.
Otherwise if we go by Crawford’s definition, we fall into the danger of “Impractical Interactivity Deadlock Situation” where two parties keep on interacting without results, just like the bartender joke above.
In short, the holy grail of “Interactivity” is, ironically, to minimize more “interactivity” in the future. Because if you have to keep interacting… if you have to keep going to the bank because the bank customer service keeps tossing you back and forth with other departments and your credit card issue is still not solved, the “interactivity” is simply … not “interacting”.
In short, the holy grail of “Interactivity” is, ironically, to minimize more “interactivity” in the future.
~ Pi
Best Interactivity is Implicit Interactivity, change my mind
Personally, I agree with Crawford, that “Good Interactivity Design integrates form with function.” However, the only pebble in my shoe is that Crawford has the explicit “speak” component in his definition. In a well-designed software, you don’t necessarily have to explicitly speak. The good design speaks for itself, learning curve is so smooth such that the users enlightens themselves without any guidance and hitting F1 for user manuals.
There was a good old time in the UI design when “Skeuomorphism” – a user interface design which adds real-world design cues to virtual objects to make those objects more understandable.
This is the perfect marriage of form and function.
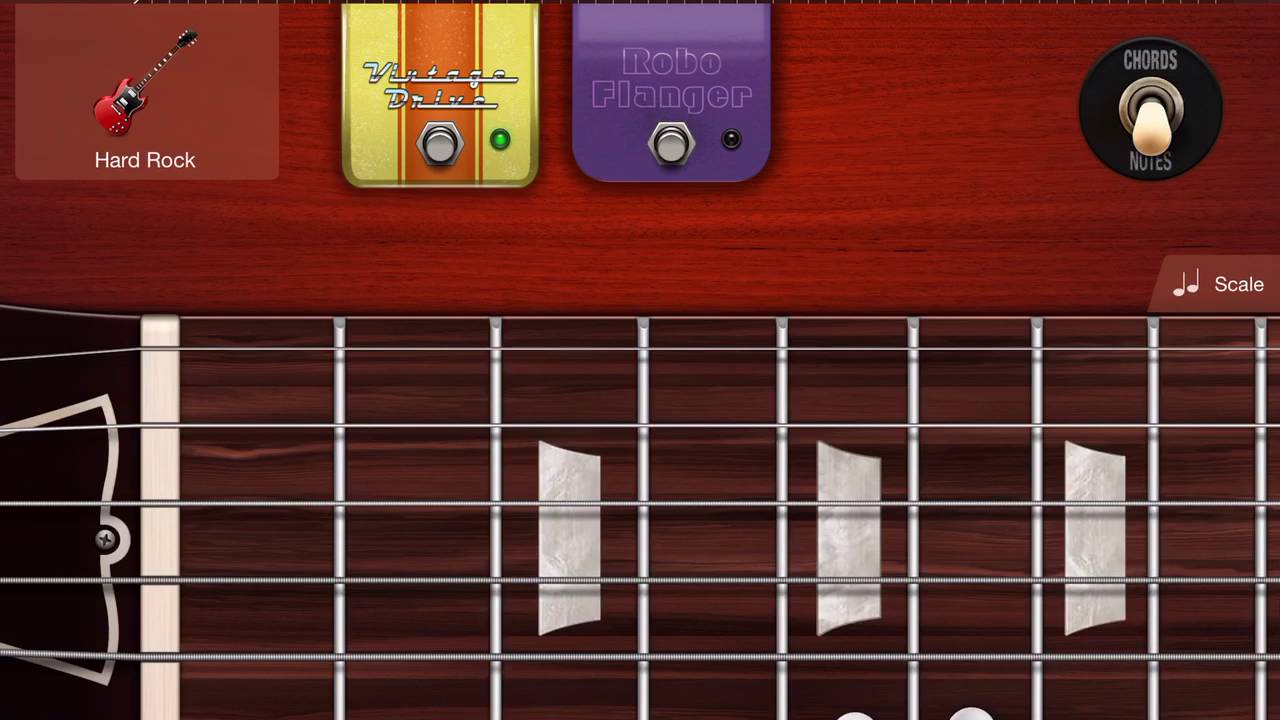
For instance, just look at the Garage Band guitar User Interface.
Super short, sweet and simple. Anyone who have intimately slid their fingers up the fretboard , do not need additional tutorial in order to play the Garage Band guitar. It is intuitive. There is no need to explicitly have the expanding speech bubble saying “In order to use the overdrive/flanger pedal, tap here.”
Also, the interface is just beauty in purest form 😌👌.
The design itself is already intuitive and interactive.
However, just like the average American marriage [source], after 8 years, the form and function got a divorce ☠️… and the entire world catches minimalism/flat design virus, to the extent that where intuition is murdered (Yes, I am looking at you, Material Design and Neumorphism).
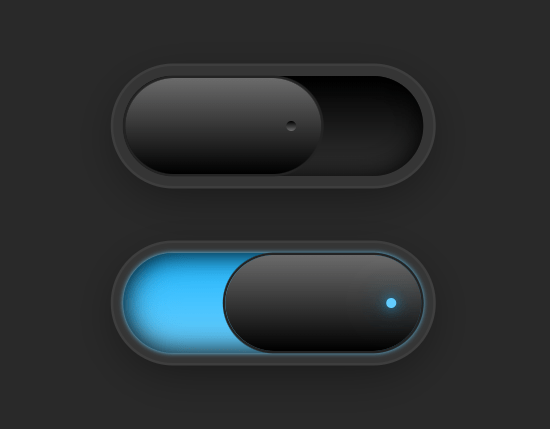
The best example of the such worst UI nightmare is the audio mute/unmute icons.
After years of experience during COVID, and after using Zoom countless professional settings, my dad still cannot tell whether the audio is muted or not just by looking at the button. (Does red color mean that it is already muted? Or I click the red and it will mute?)
Whereas a sensible, more intuitive audio on/off button will look more like this.
(Flip the switch, light means it is currently on, no light means it’s currently off… Everyone know this from interacting with other electronic gadgets, there is no need to specially train the user)
Hence, when you don’t have this auto intuition built into the original design, explicit interactivity (a.k.a. helper texts here and there, or your IT support guy) has to come in unnecessarily. This interactivity is just a bloat in the system, and a waste of space, and resources.
Well, as they say “Communication is key”, I appreciate the importance of interactivity in human-software interactions. However, in the context of Good software, such “talk-back” explicit Interactivity should be the last resort a good designer should fall back to.
A good doctor doesn’t easily prescribe antibiotics… this is supposed to be the last resort.
Hence, from the artistic engineer point of view…. When designing anything, intuitive function has to come first, then the form, and only then throw in the “explicit” when there is no other way out.
Perhaps, it is time we rebrand Crawford’s definition to Practically-Aesthetic-Interactivity(abbreviates to PAI? Hahaha, very punny Pi, very punny.), and we may be…. just may be… see better intuitive software in the future.
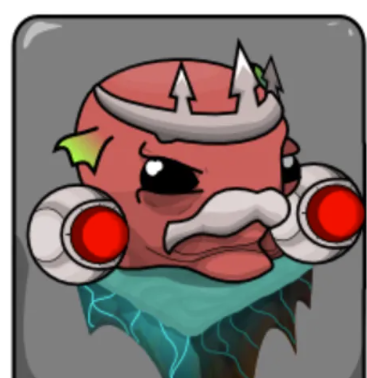
I was inspired by a game that I used to play a few years ago: Quadropus Rampage. In the game, the final boss, which I unfortunately still could not defeat, is a head that can shoot laser to attack. Here is an illustration:
Therefore, I wanted to make something similar and I went for the skull. Similar to the first assignment of making a portrait, I made the skull using simple shapes available in p5.js. Then, I transformed the code into the class Skull so that I can easily manipulate the size of the skull as well as its position.
Next, I added the laser shooting from the skull eyes. I created a laser function in the Skull class and draw a line from the skull’s eyes position to the mouse position. The skull will only shoot laser if the mouse is pressed. Below is the code for the Skull class:
Furthermore, I reused the Ball class in the previous class to make this as an interactive experience. Every time the skull successfully shoot down 1 ball, a new ball will appear and the background color will randomly change.
Also, since I wanted to add the scale much later on, I have to add it for every function I used which is quite time consuming. Therefore, I think for every class I will add a scale component just in case I want to change any dimension.
Reflection:
I want to add much more interactivity such as users can control the skull by mouse. Furthermore, I want to add obstacles and enemies to the game so that it can be more similar to the game that I played.
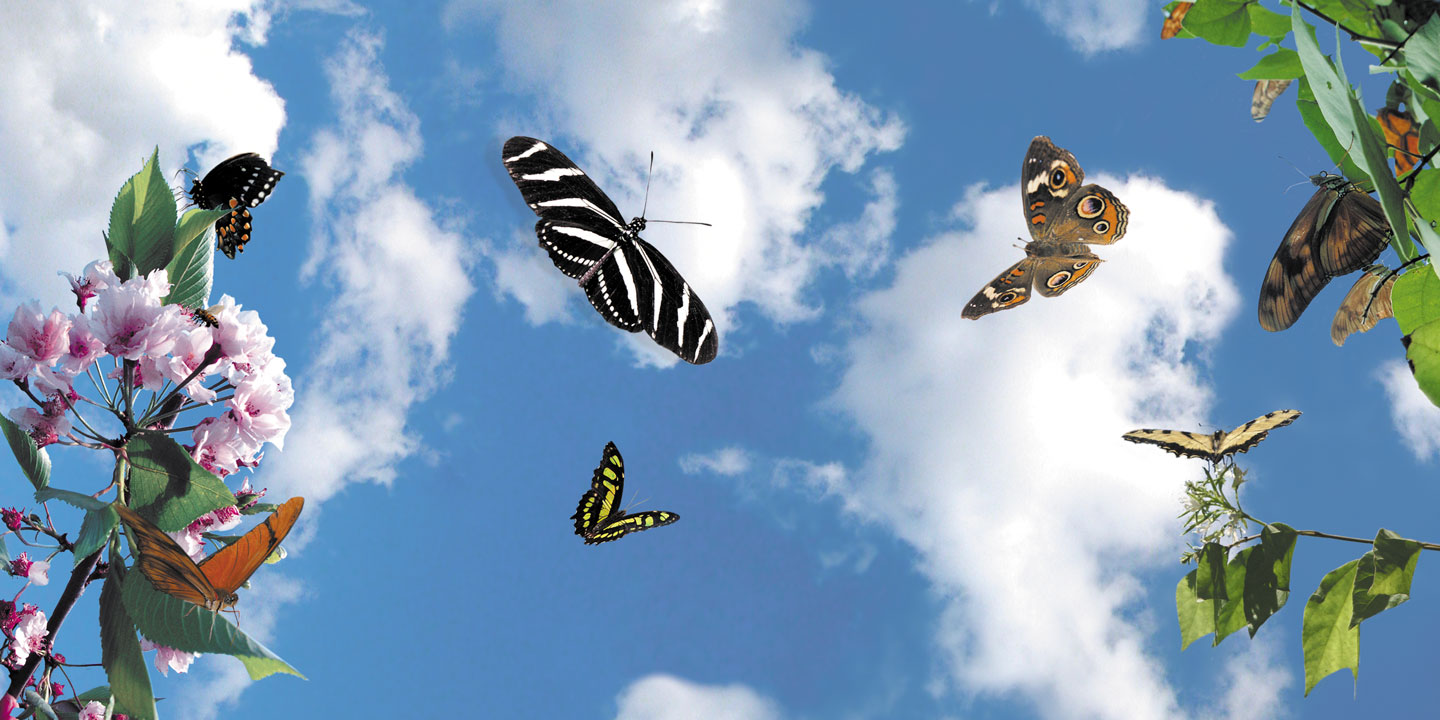
In this assignment, I developed a serene landscape populated by butterflies, clouds, and flowers, inviting viewers to immerse themselves in a tranquil virtual environment.
Key Elements:
– Butterflies: Colorful and graceful, the butterflies are the focal point of the scene. Programmed to flutter across the canvas, their movements are dynamic and captivating.
– Background: The canvas serves as a backdrop for the scene, featuring a gradient sky and soft, rolling clouds that drift lazily across the horizon.
– Flowers: Adding depth and detail to the landscape, flowers bloom sporadically, their vibrant colors contrasting against the lush greenery.
Conceptual Framework:
The project draws inspiration from the beauty and harmony found in the natural world. By combining artistic vision with computational techniques, the goal is to evoke a sense of wonder and serenity, inviting viewers to momentarily escape the confines of reality and immerse themselves in a digital oasis of creativity and beauty.
This assignment provided an opportunity to explore the intersection of art and technology, demonstrating how code can be used to create immersive digital experiences that transport viewers to captivating virtual worlds. Through careful design and implementation, the project aims to evoke a sense of wonder and appreciation for the beauty of nature in the digital realm.
code:
let butterflies = [];
let clouds = [];
let flowers = [];

function setup() {
  createCanvas(800, 600);

  // Create a flock of butterflies
  for (let i = 0; i < 10; i++) {
    let butterfly = new Butterfly(random(width), random(height));
    butterflies.push(butterfly);
  }

  // Create some clouds
  for (let i = 0; i < 5; i++) {
    let cloud = new Cloud(random(width), random(height));
    clouds.push(cloud);
  }

  // Create some flowers
  for (let i = 0; i < 20; i++) {
    let flower = new Flower(random(width), random(height));
    flowers.push(flower);
  }
}

function draw() {
  // Draw gradient sky background
  background(135, 206, 250); // Light blue
  for (let y = 0; y < height; y++) {
    let inter = map(y, 0, height, 0, 1);
    let c = lerpColor(color(135, 206, 250), color(255, 255, 255), inter);
    stroke(c);
    line(0, y, width, y);
  }

  // Display and update clouds
  for (let cloud of clouds) {
    cloud.display();
    cloud.update();
  }

  // Update and display each butterfly
  for (let i = 0; i < butterflies.length; i++) {
    butterflies[i].update();
    butterflies[i].display();
  }

  // Display flowers
  for (let flower of flowers) {
    flower.display();
  }
}

class Butterfly {
  constructor(x, y) {
    this.position = createVector(x, y);
    this.velocity = createVector(random(-1, 1), random(-1, 1));
    this.color = color(random(255), random(255), random(255));
    this.angle = random(TWO_PI);
    this.size = random(20, 40);
  }

  update() {
    // Update position
    this.position.add(this.velocity);

    // Change direction randomly
    if (random() < 0.01) {
      this.velocity.rotate(random(-PI / 4, PI / 4));
    }

    // Wrap around screen
    this.position.x = (this.position.x + width) % width;
    this.position.y = (this.position.y + height) % height;
  }

  display() {
    // Draw butterfly wings with pattern
    fill(this.color);
    noStroke();
    ellipse(this.position.x, this.position.y, this.size, this.size / 2);
    let wingOffset = this.size / 4;
    let wingSize = this.size / 2;
    push();
    translate(this.position.x, this.position.y);
    rotate(this.angle);
    fill(255, 100); // Semi-transparent white
    ellipse(-wingOffset, 0, wingSize, wingSize * 2);
    ellipse(wingOffset, 0, wingSize, wingSize * 2);
    fill(0, 100, 255); // Semi-transparent blue
    ellipse(-wingOffset, 0, wingSize / 2, wingSize);
    ellipse(wingOffset, 0, wingSize / 2, wingSize);
    pop();
  }
}

class Cloud {
  constructor(x, y) {
    this.position = createVector(x, y);
    this.velocity = createVector(random(-0.5, 0.5), 0);
    this.size = random(50, 100);
  }

  update() {
    this.position.add(this.velocity);
    if (this.position.x > width + this.size) {
      this.position.x = -this.size;
    }
    if (this.position.x < -this.size) {
      this.position.x = width + this.size;
    }
  }

  display() {
    noStroke();
    fill(255);
    ellipse(this.position.x, this.position.y, this.size * 1.5, this.size);
    ellipse(this.position.x - this.size / 3, this.position.y - this.size / 4, this.size, this.size * 0.8);
    ellipse(this.position.x + this.size / 3, this.position.y - this.size / 4, this.size, this.size * 0.8);
  }
}

class Flower {
  constructor(x, y) {
    this.position = createVector(x, y);
    this.size = random(10, 20);
    this.color = color(random(255), random(255), random(255));
  }

  display() {
    fill(this.color);
    noStroke();
    ellipse(this.position.x, this.position.y, this.size, this.size * 1.5);
    fill(255, 0, 0); // Red
    ellipse(this.position.x, this.position.y - this.size / 1.5, this.size * 0.8, this.size * 0.8);
  }
}
Reading Response:
The first chapter of “The Art of Interactive Design” presents a thorough and insightful exploration into the true essence of interactivity. The author, Chris Crawford, dismantles the common misuse and overuse of the term by defining interactivity as a cyclic process in which two actors alternately listen, think, and speak. This definition, grounded in the analogy of a conversation, strips away the ambiguity surrounding the concept and refocuses our attention on the quality of the engagement rather than mere action and reaction.
Crawford’s critical perspective on the buzzword nature of interactivity in the 1990s and the superficiality of its application to products and technologies drives home the importance of discernment when evaluating interactive experiences. His reference to the frenzied rat race for ‘new and improved’ interactivity, often without substance, highlights the need for more profound and meaningful interactions rather than mere novelty.
The conversation example between Fredegund and Gomer excellently illustrates Crawford’s definition of interactivity, emphasizing the importance of understanding and responding within the context of an exchange. Moreover, his critique of non-interactive activities, like books and movies, offers a clear boundary between passive and interactive experiences.
Crawford’s commentary on the degrees of interactivity is particularly thought-provoking. He challenges the binary view of interactivity as either present or absent, proposing instead a continuum where the depth and richness of the interactive experience can vary. This nuanced approach allows for a more sophisticated analysis of interactivity in various contexts, from refrigerator doors to video games.
In summary, Crawford’s elucidation on interactivity is not only eye-opening but also serves as a call to action for designers and users alike to aspire for deeper, more meaningful interactions. His insistence on the necessity of all three components of the interactive process (listening, thinking, and speaking) provides a clear framework for evaluating and designing interactive systems. The first chapter sets the stage for a deeper dive into the intricacies of interactivity design and its implications for technology and society.
For this project, I was super inspired by those amazing nights spent away from the city lights in the dessert, looking up at a sky full of stars. I wanted to try and capture a bit of that night sky with code.
I started by creating a bunch of twinkling stars using classes and arrays, which felt a bit like putting together a digital constellation. The funstarted when I played around with the `noise` and `sin` functions to make the stars change colors and gently pulse.
Adding a gradient background to mimic the night sky’s colors was a bit tricky at first, but once I got it, it really brought the whole scene together. The whole process was a lot of trial and error, but seeing the final result was totally worth it. It was a cool mix of creativity and coding.
Code:
let stars = [];

function setup() {
  createCanvas(600, 500);
  for (let i = 0; i < 100; i++) {
    stars.push(new Star());
  }
}

function draw() {
  // To set the gradient background from blue to black
  setGradient(0, 0, width, height, color(25, 25, 112), color(0), Y_AXIS);

  // Update and display each star
  for (let star of stars) {
    star.update();
    star.display();
  }
}

// Function to create a vertical gradient background
function setGradient(x, y, w, h, c1, c2, axis) {
  noFill();
  for (let i = y; i <= y + h; i++) {
    let inter = map(i, y, y + h, 0, 1);
    let c = lerpColor(c1, c2, inter);
    stroke(c);
    line(x, i, x + w, i);
  }
}

// Constant to specify vertical gradient
const Y_AXIS = 1;


class Star {
  constructor() {
    this.x = random(width);
    this.y = random(height);
    this.size = random(0.5, 3);
    this.t = random(TWO_PI);
    this.color = color(random(255), random(255), random(255), random(100, 255));
  }

  // Update the star's properties
  update() {
    this.t += 0.02;
    this.size = this.size + sin(this.t) * 0.5;
    // Randomly move the star
    this.x += random(-1, 1);
    this.y += random(-1, 1);

    // Change the star's color using Perlin noise for smooth transitions
    this.color = color(
      noise(this.t) * 255,
      noise(this.t + 5) * 255,
      noise(this.t + 10) * 255,
      random(100, 255)
    );
  }

  display() {
    noStroke();
    fill(this.color);
    ellipse(this.x, this.y, this.size);
  }
}
The provided code is designed to create a gradient background transitioning from a dark blue color to black. This effect is achieved by calling the `setGradient` function with specific parameters: the starting coordinates `(0, 0)`, the width and height of the canvas (`width`, `height`), the initial color (dark blue, defined by `color(25, 25, 112)`), the final color (black, defined by `color(0)`), and the direction of the gradient (`Y_AXIS`). This setup results in a vertical gradient that fills the entire canvas, creating a visually appealing background effect for graphics or visualizations.
Reading Response:
In the book “The Art of Interactive Design,” Chris Crawford explains that true interactivity is like having a good conversation. For something to be interactive, both sides need to listen, think, and then speak or react. He argues that many things we call interactive, such as books or movies, aren’t truly interactive because they don’t allow for this two-way communication. Crawford points out that simply pressing a button isn’t enough, there needs to be a deeper level of engagement where both the user and the system or product can exchange information and respond to each other in a meaningful way.
Crawford also criticizes how the word “interactive” is often used more for marketing than to describe a genuine interactive experience. He warns that this can lead to confusion and disappointment when the interaction isn’t as rich as expected. He urges designers and users to think more critically about what interactivity means and to seek out or create experiences that allow for a genuine conversation-like exchange, where both parties can learn and adapt from the interaction. The book challenges readers to look beyond the hype and to strive for genuine, quality interactivity in technology and design.