
USER TESTING:
My deliverable was still at a premature stage so I was unable to film a user-testing video, however I was able to get verbal feedback on my p5 program design (and so have adjusted my code accordingly). Initially, I had no text to indicate any sort of instructions or context, as I had thought the arrow buttons were enough to prompt users into action. However, my sister advised against this and suggested I include a phrase or 2 to provide basic information as to what my project is about – even more so since I did not have a start/ introductory screen. Another feedback I got was regarding the separate display screen for when the recommended playlist sounds – which was mentioned in the previous documentation. I was initially just planning to display the user’s chosen personalised cassette however my sister thought it to be too static, commenting that it was lacking flair. I starting brainstorming other potential display screens I could have but the one that resonated most with me was actually animating a rolling cassette tape, of course this would mean I had to create animations for all possible cassette tape designs.
Final project video: https://youtu.be/t_wIKjY5s1o
My final project concept is based off of my midterm project. In the previous midterm, I made a digital radio that played 2 meaningful songs. Each song displayed (what was supposed to be) a dynamic background of a personal memory associated with the songs. My final project builds off on this idea but with an added twist. You are able to customise your own cassette tape and based on your choices, it assembles a recommended playlist. There are 3 choices in each stage of customizing for the personalisation of your cassette and when finished, it plays a recommended playlist of 4 songs, each similar in genre. You can adjust the volume, use a skip function and reset the entire experience through physical means (buttons and potentiometer). Whilst my midterm involved a sense of personal intimacy, I tried to make this project evoke a more shared intimacy. Music is very personal to me and by sharing it with others, I am able to show a partial extension of my own identity which can be reciprocated by external users. Speaking from personal experience, it cements a bond quicker.
//arduino code:

int button1Pin = A2;
int button2Pin = A3;
int potentiometerPin = A0;

void setup() {
  // Start serial communication so we can send data
  // over the USB connection to our p5js sketch
  Serial.begin(9600);

  // We'll use the built-in LED as a status output.
  pinMode(LED_BUILTIN, OUTPUT);
}

void loop() {
  // Read button states and potentiometer value
  int button1State = digitalRead(button1Pin);
  int button2State = digitalRead(button2Pin);
  int potValue = analogRead(potentiometerPin);

  // Send data to p5.js
  Serial.print(button1State);
  Serial.print(",");
  Serial.print(button2State);
  Serial.print(",");
  Serial.println(potValue);

  delay(100); // Adjust delay as needed
}
This final project was so so painstakingly challenging and was such an arduous experience in general it took my soul and a chunk of hair by the time I was finished. Every portion of code had a bug and debugging it took a minimum of 1.5 hours (rarely as I wasn’t so lucky) and a maximum of 7 hours+. I will most likely never forget such an experience. The first portion – p5.js, was doable, yes there were countless debugging that was really frustrating but the cherry on the cake was the second portion – serial communication of the final project. The process of this entire final was tedious overall:
PROCESSES – ART STAGE:
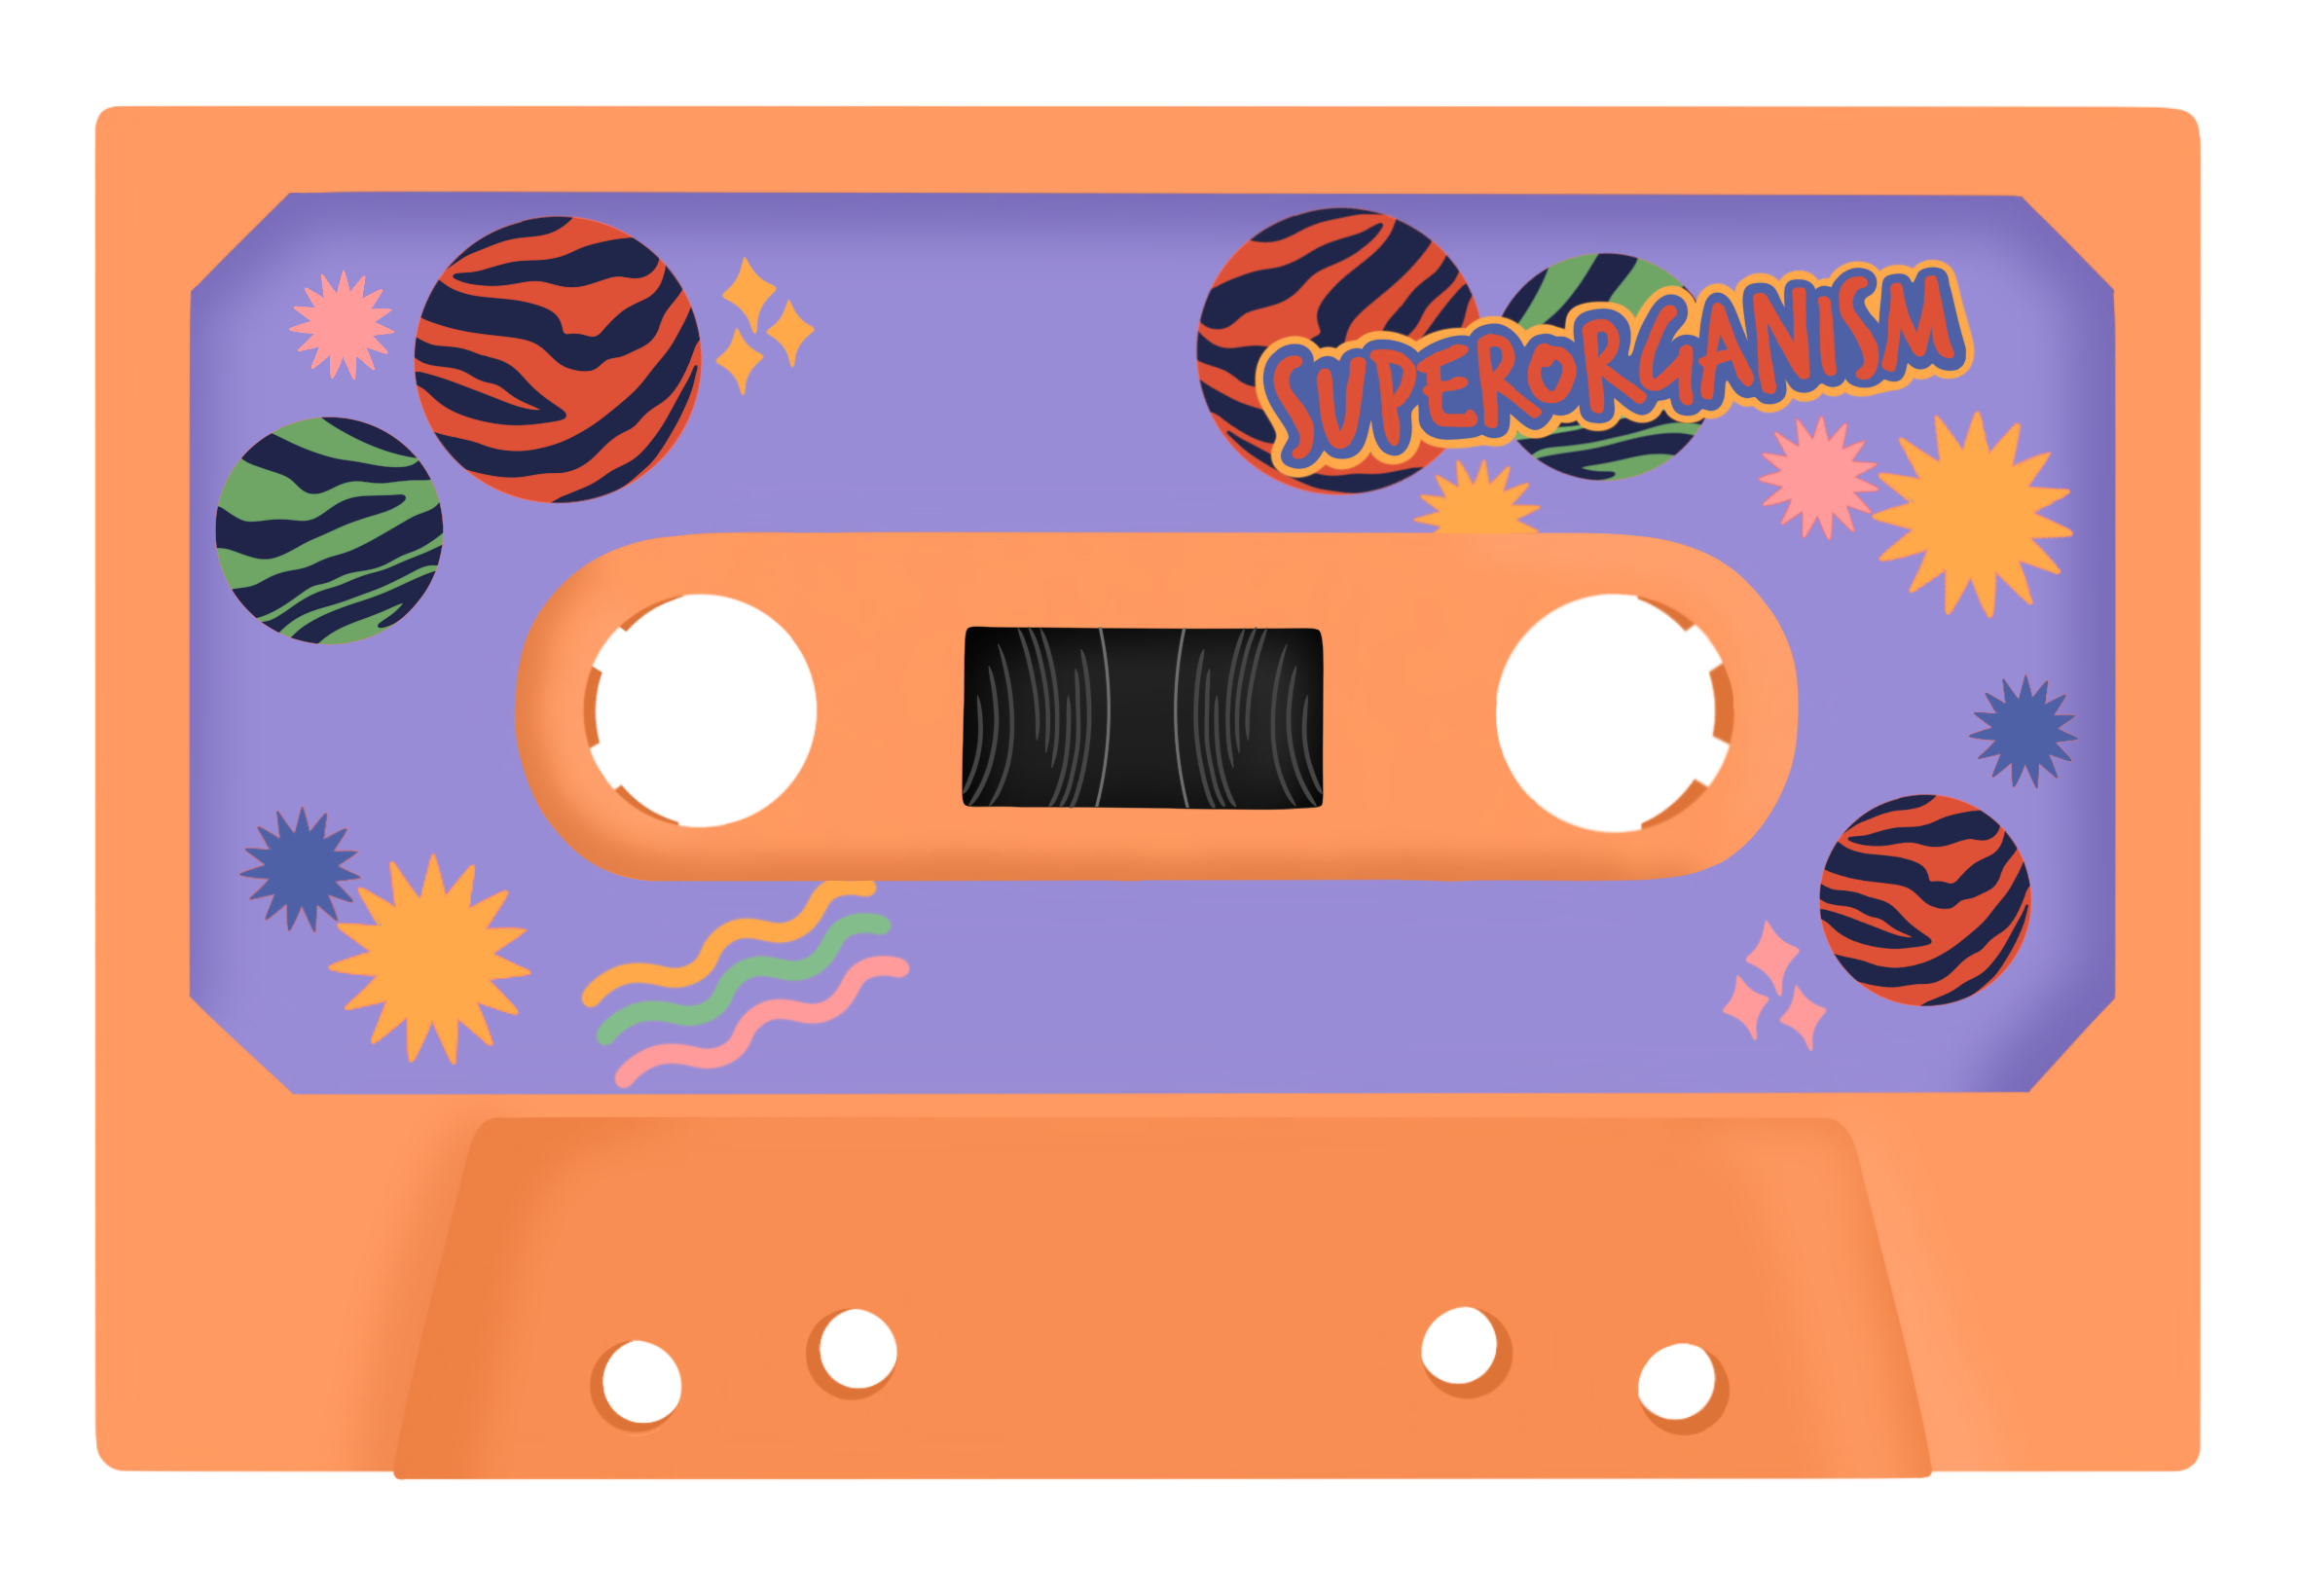
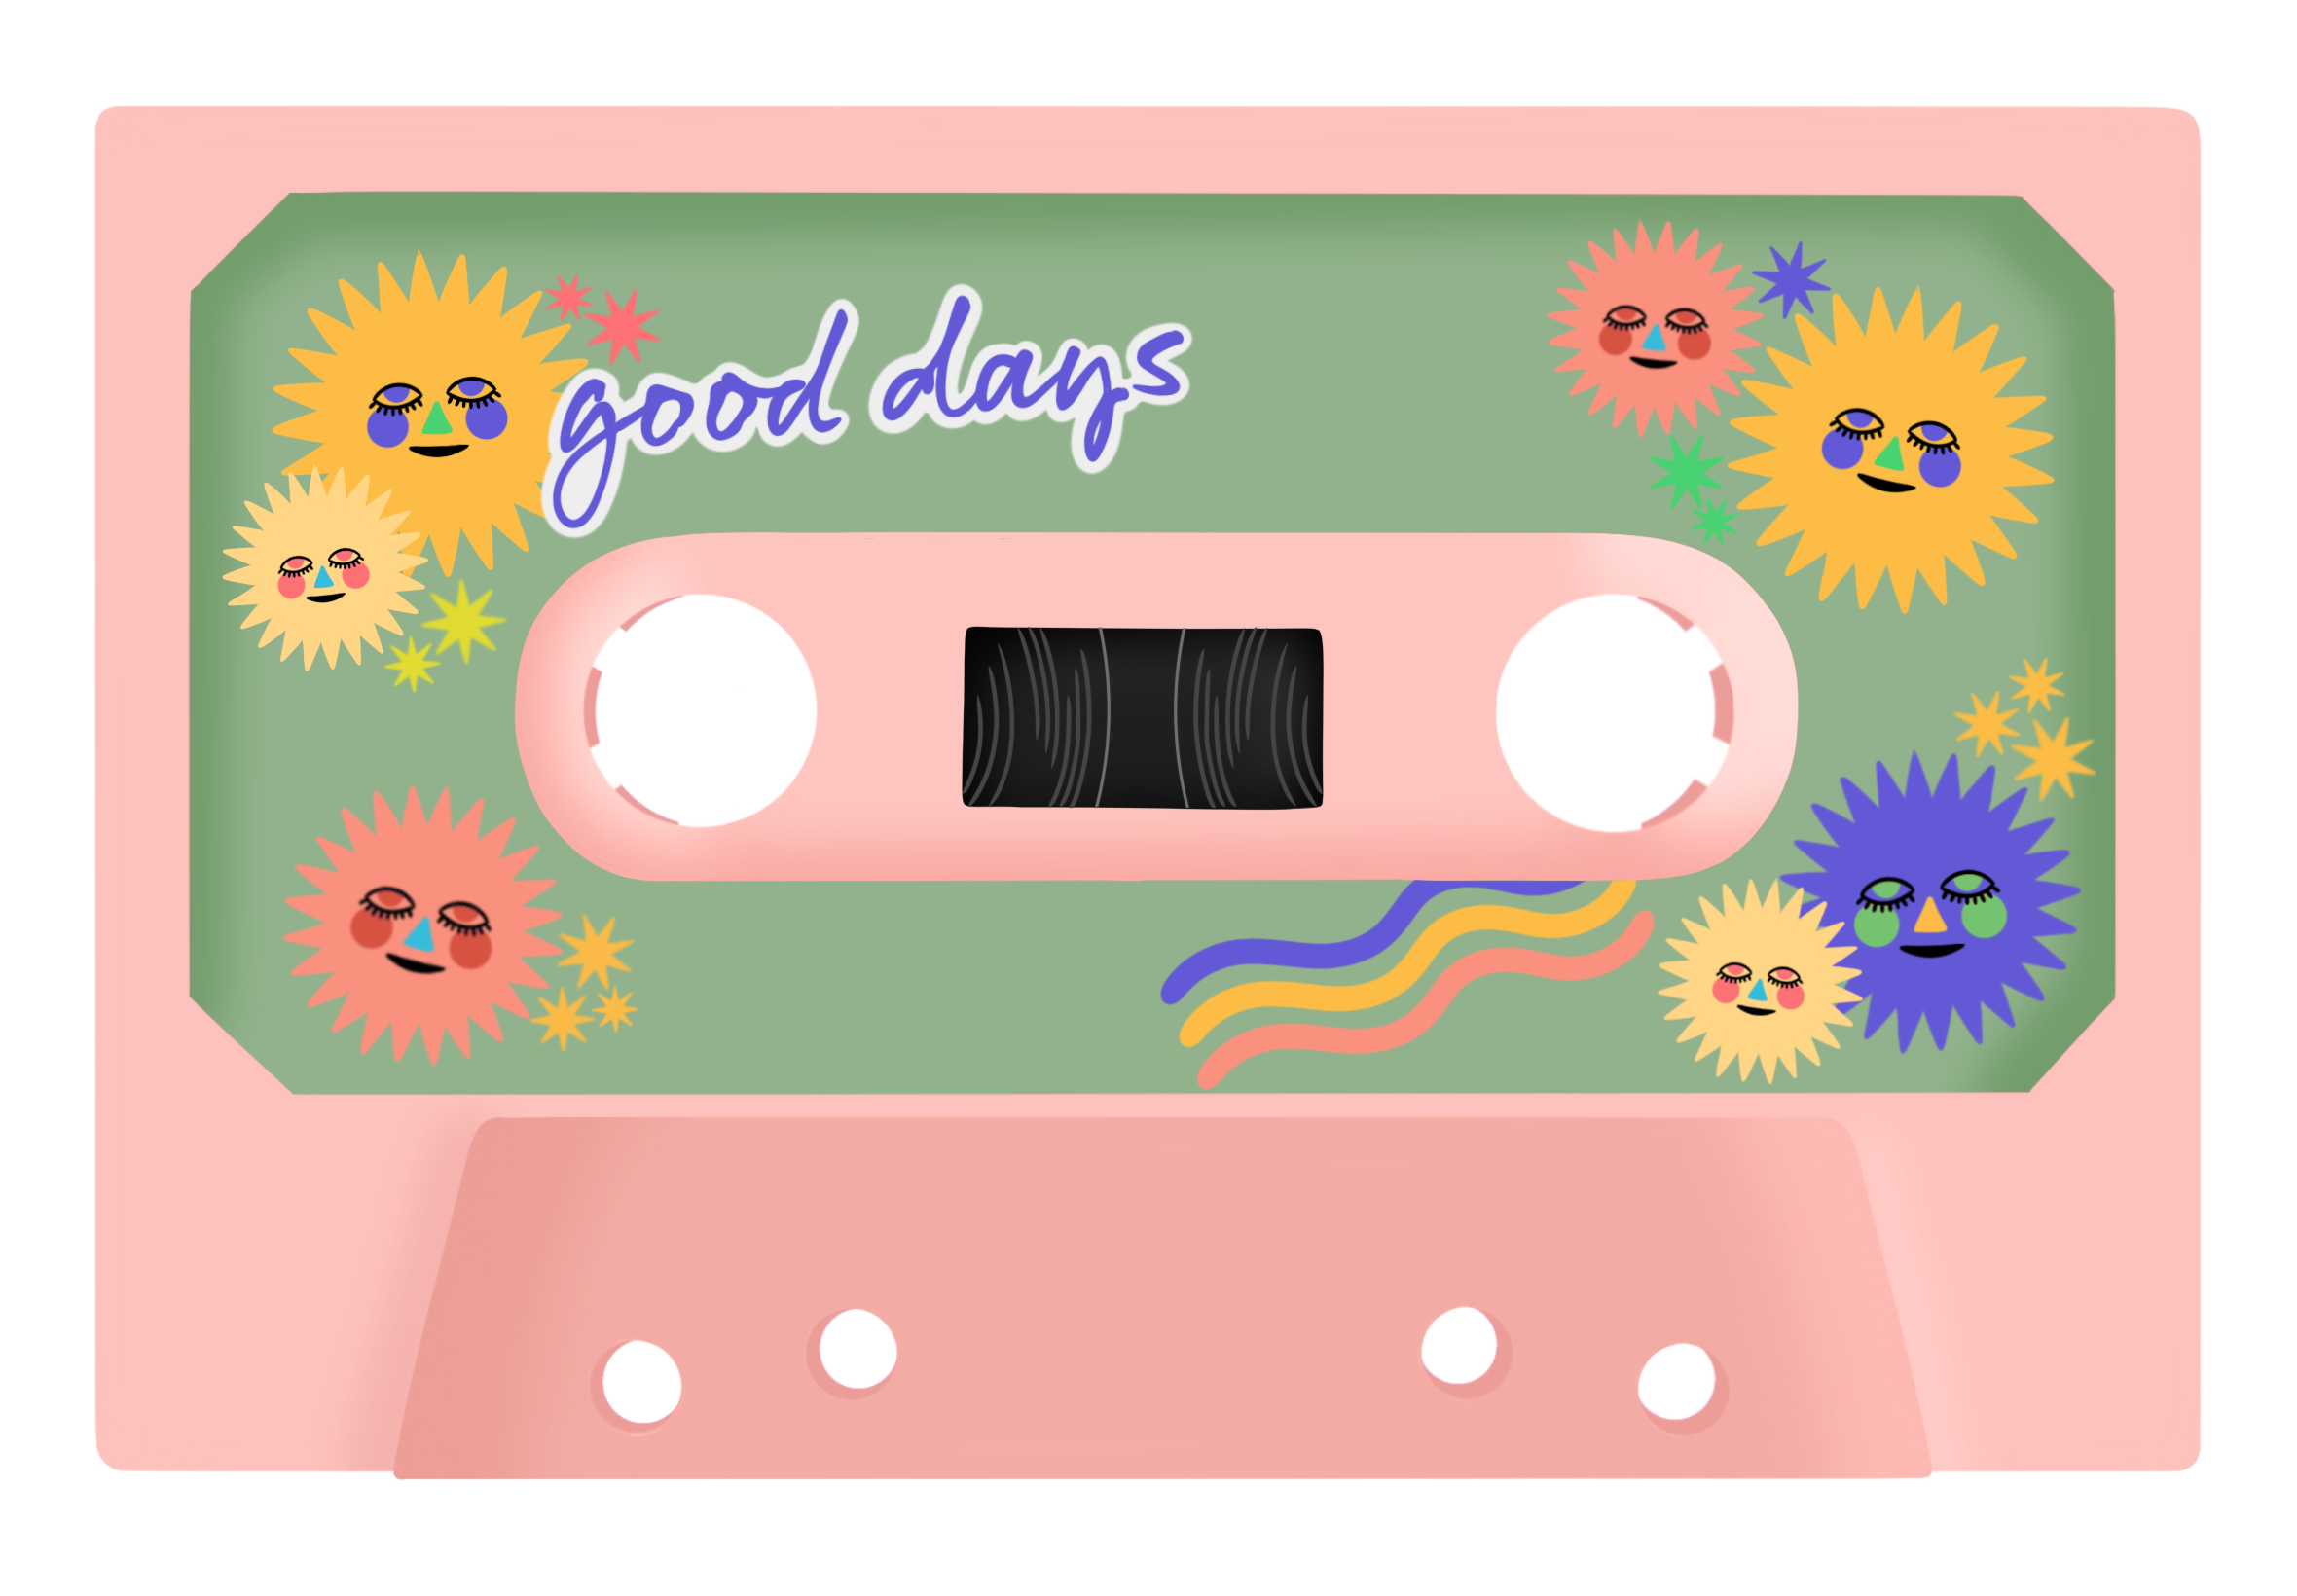
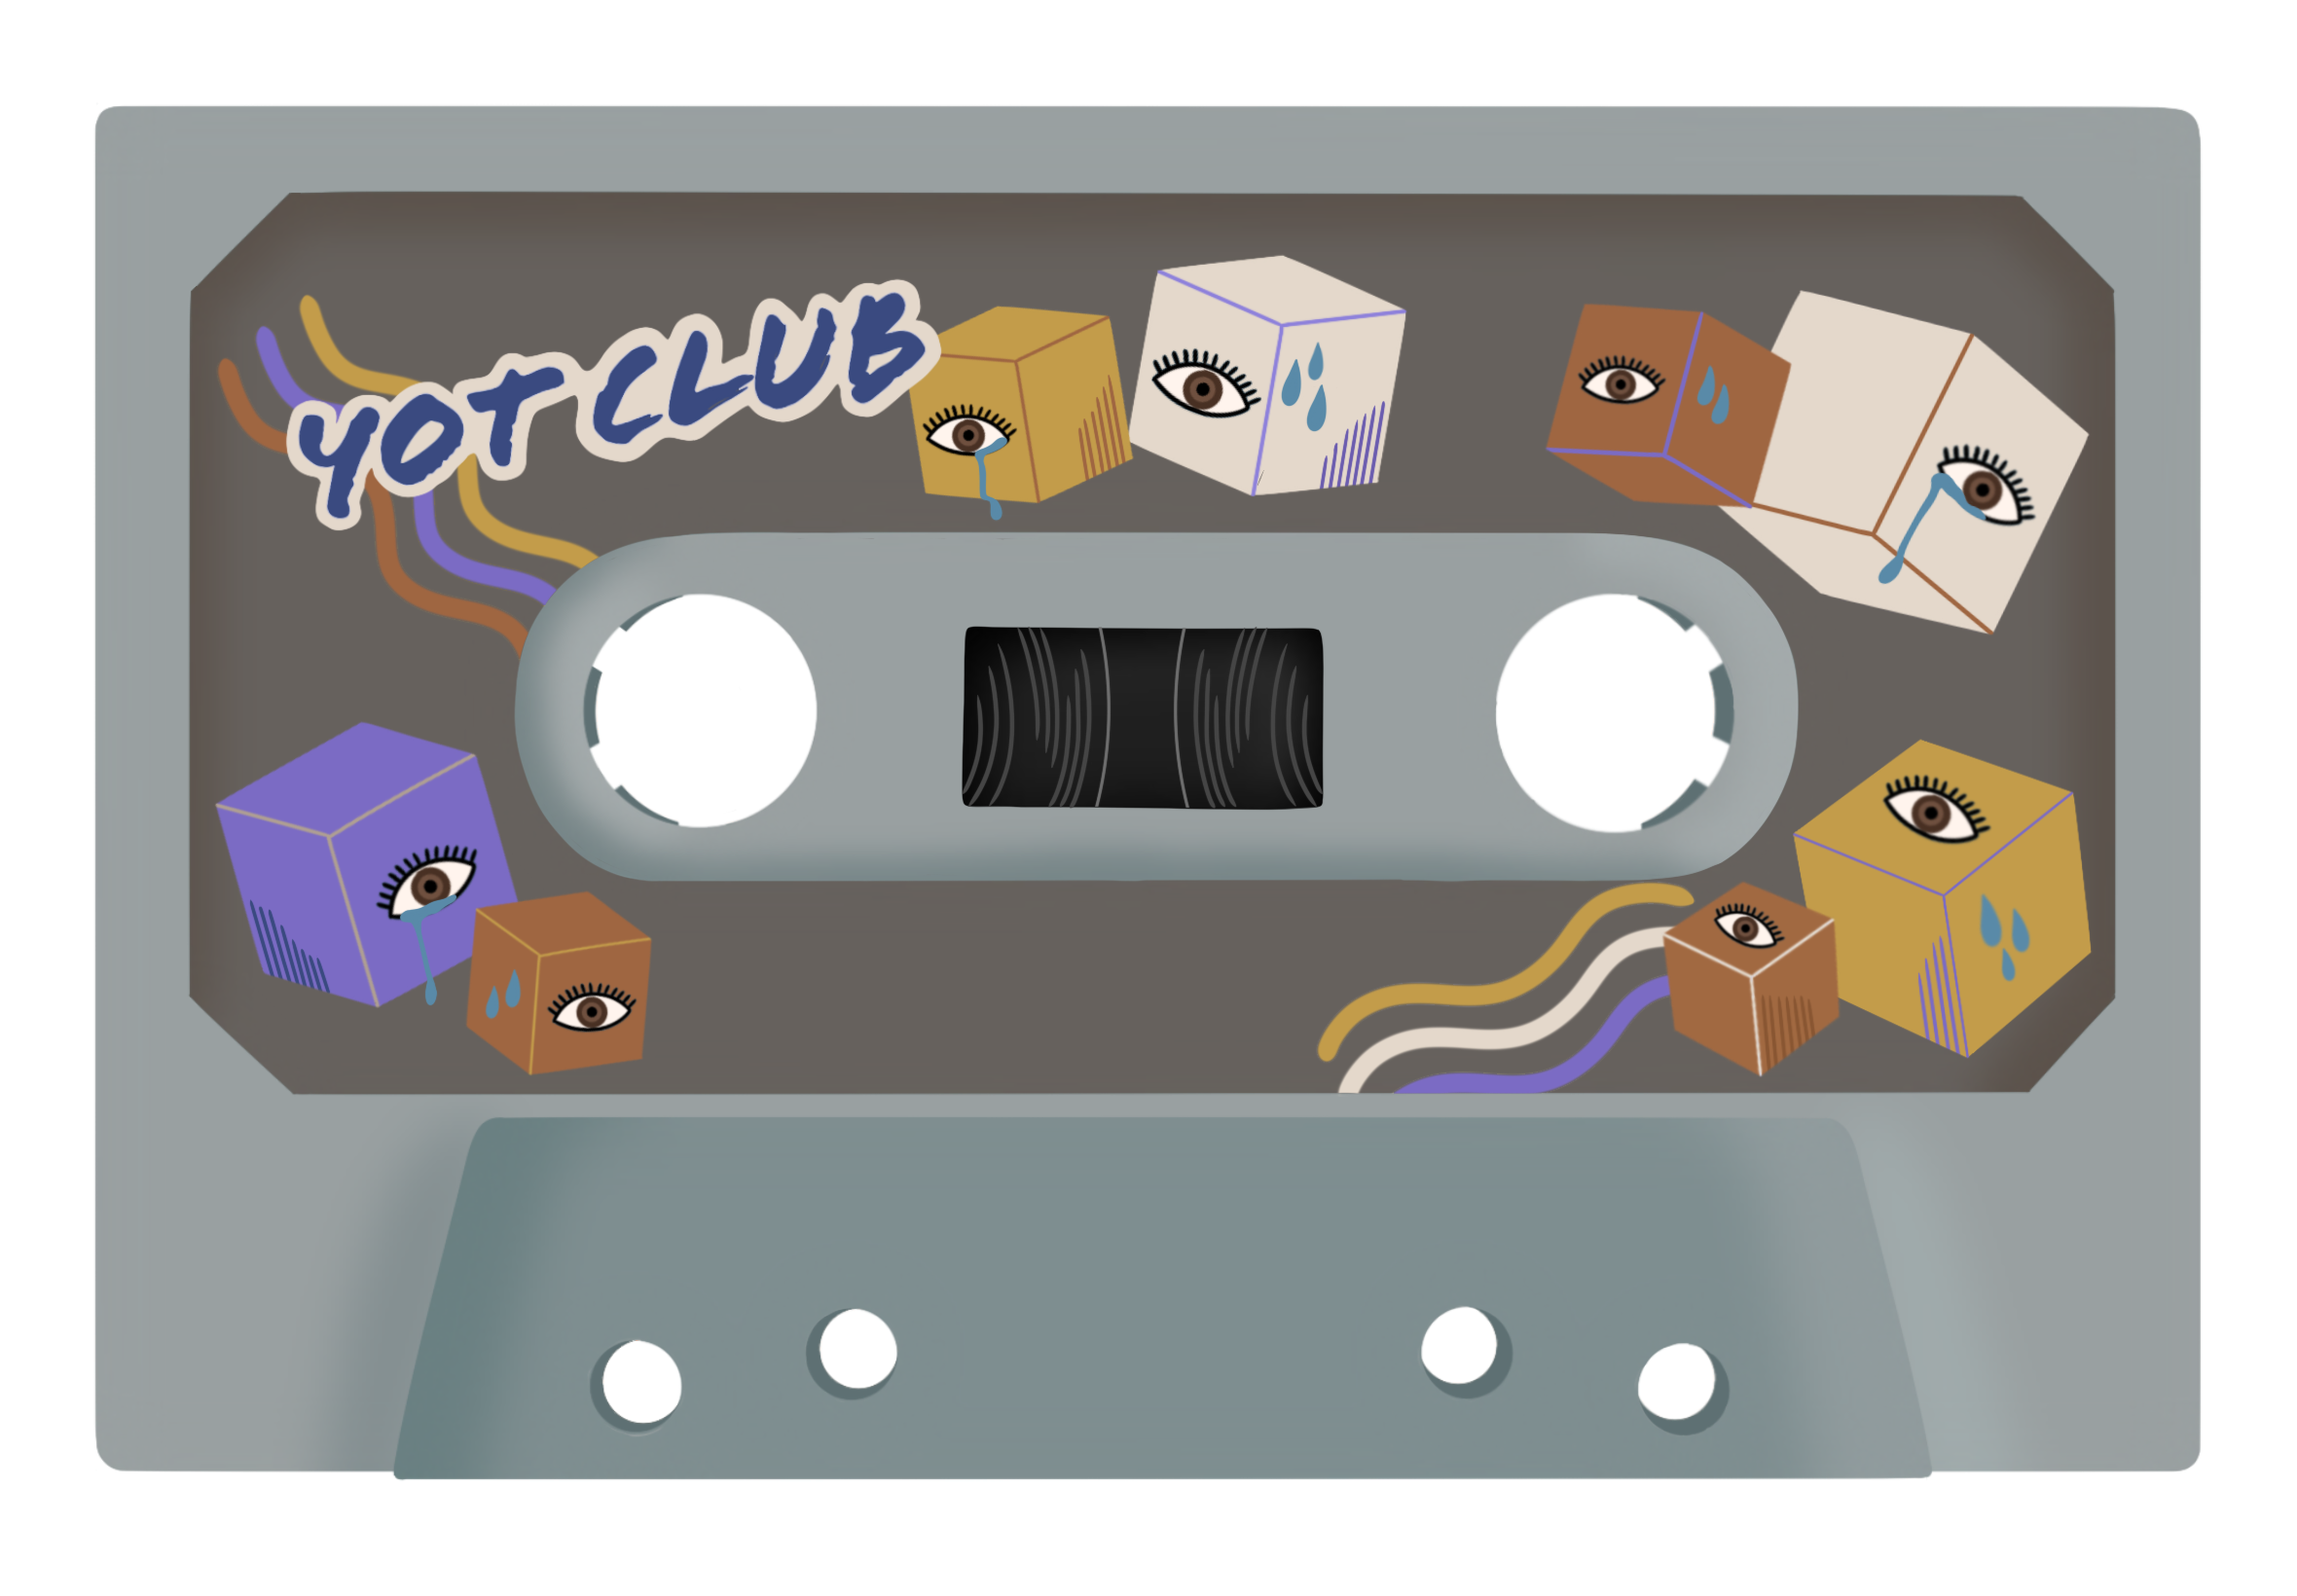
I first created 3 playlists of 4 songs. Then using pinterest inspirations of vintage cassette tapes, I drew each stage: cassette base, cassette sticker, cassette detail using procreate. I illustrated specific combinations of these cassettes to equate to a certain playlist and I drew the details to correspond with the overall music vibe and aesthetic: (see below: 1) result1, 2) result2, 3) result3). As mentioned in my user-testing documentation section, I wanted to create an animation of the cassette tape rolling when users entered the final stage: music playing. The only plausible way was to create a gif file containing such animation. Because there are 3 choices for each 3 stages and 3 different combinations users could select, it meant I had to create animations for a total of 27 cassettes, hence why it was so time consuming.
PROCESSES – P5.JS:
Essentially both coding experiences were one I do not want to remember… the endless bug fixes, the endless error messages on the console, it was just incredibly stressful. However the code that evoked the most stress and hence, I’m most proud of was attributing the corresponding gif files to every possible indices user could end up with – likewise with creating the cassette animations, there were 27 different combinations. This meant that the program had to store the index chosen at each stage and use this information to call upon a gif file with the corresponding index. This was one of those sections that took 7+ hours to debug and code. I didn’t know where to start and how, so, like I always did with previous assignments, I began researching and looking for codes that fulfilled similar instances on google. Then came the experimentation and checking using console.log. Through this I was able to learn syntax I had never encountered before and this acted as a sort of revelation for me. Here is the relevant code section:
//
const gifFilenameMap = { //attributing gif file pathway to user selected indices
//for cassetteBase[0]
  "0_0_0": "gifs/result1_prpl1.gif",
  "0_0_1": "gifs/result1_prpl2.gif",
  "0_0_2": "gifs/result1_prpl3.gif",
  "0_1_0": "gifs/result1_green1.gif",
  "0_1_1": "gifs/result1_green2.gif",
  "0_1_2": "gifs/result1_green3.gif",
  "0_2_0": "gifs/result1_grey1.gif",
  "0_2_1": "gifs/result1_grey2.gif",
  "0_2_2": "gifs/result1_grey3.gif",

//for cassetteBase[1]
  "1_0_0": "gifs/result2_prpl1.gif",
  "1_0_1": "gifs/result2_prpl2.gif",
  "1_0_2": "gifs/result2_prpl3.gif",
  "1_1_0": "gifs/result2_green1.gif",
  "1_1_1": "gifs/result2_green2.gif",
  "1_1_2": "gifs/result2_green3.gif",
  "1_2_0": "gifs/result2_grey1.gif",
  "1_2_1": "gifs/result2_grey2.gif",
  "1_2_2": "gifs/result2_grey3.gif",

//for cassetteBase[2]
  "2_0_0": "gifs/result3_prpl1.gif",
  "2_0_1": "gifs/result3_prpl2.gif",
  "2_0_2": "gifs/result3_prpl3.gif",
  "2_1_0": "gifs/result3_green1.gif",
  "2_1_1": "gifs/result3_green2.gif",
  "2_1_2": "gifs/result3_green3.gif",
  "2_2_0": "gifs/result3_grey1.gif",
  "2_2_1": "gifs/result3_grey2.gif",
  "2_2_2": "gifs/result3_grey3.gif",
};

//generates gif filename based on indices of selected cassette components
function generateGifFilename(baseIndex, stickerIndex, detailIndex) {
  return gifFilenameMap[`${baseIndex}_${stickerIndex}_${detailIndex}`]; //generating filename using map => e.g., 2_1_0
}

function determineResult() {
...
//generating filename (e.g., "1_2_3") based on indices of selected components
  const gifFilename = generateGifFilename(selectedBaseIndex, selectedStickerIndex, selectedDetailIndex);
  gifElement = createImg(gifFilename, "selectedGif"); // displaying selected gif on canvas
  gifElement.size(imageWidth, imageHeight);
  gifElement.position(imagePosition.x, imagePosition.y);
}
PROCESSES – ARDUINO + SERIAL COMMUNICATION:
Serial communication was one I had the most issues with. I used the existing serial communication code (in mang’s lecture notes) for both arduino and p5.js and altered it around my main piece of code however, problem 1) there seemed to be issues with p5.js and arduino exchanging data, hence it was impossible to know whether the physical wiring of the components on the breadboard was the problem or whether it was the code itself that was causing issues. 2) I continually experienced error messages stating that there was a network error hence I was unable to connect to a serial port. Both cases required patience, calmness and perseverance and through this it was engrained into me again the importance of console logging when debugging faulty code. At the start, I wasn’t able to understand the serial communication code that was provided but after the completion of my final project, everything kind of clicked into place.
Regarding attributing functions to the physical components: 2 push buttons and a potentiometer, I was also having major problems with applying my desired functions: play/pause, skip forward, skip backward, to the push buttons. Mapping the volume to the potentiometer value was really easy as something like it had already been done for the serial communication assignment. For the rest, it was a nightmare. I think it was the structure of the code and the specific manner in which I coded that caused so many breakdowns and errors. In the end I was incredibly short for time and so was forced to compensate and only code 1) resetToInitialState, 2) skip forward on loop. when coding for the function: resetToInitialState, 2 problems occurred: 1) gif image appearing over initial state, 2) sound continuing to play regardless of being set to its initial state. With extensive experimentation, I realised that creating new variables to keep track of the states of both the gif and sound was the most simplest and most rational solution – here is the relevant code:
let gifElement; (ADDED)

//within function determineResult()
if (gifElement) { (ADDED)
  gifElement.remove(); //remove existing gifElement if it exists
}

const gifFilename = generateGifFilename(selectedBaseIndex, selectedStickerIndex, selectedDetailIndex);
gifElement = createImg(gifFilename, "selectedGif"); // displaying selected gif on canvas (ADDED)
gifElement.size(imageWidth, imageHeight); (ADDED)
gifElement.position(imagePosition.x, imagePosition.y); (ADDED)

/////////////////////////////////////////////////////////////////////////////////////
let shouldPlayNextSound = true; //(ADDED)

//within function playNextSound()
if (shouldPlayNextSound) { //(ADDED)
  currentSoundIndex++; // increment sound index
  if (currentStage === 4 && currentSoundIndex >= result1.length) {
    determineResult();
    currentSoundIndex = 0; //reset to the beginning if end is reached
  }
}

//within function resetToInitialState()
shouldPlayNextSound = false; //disable skip function (ADDED)

//stopping all currently playing sounds
for (let i = 0; i < result1.length; i++) {
result1[i].stop();
}
for (let i = 0; i < result2.length; i++) {
result2[i].stop();
}
for (let i = 0; i < result3.length; i++) {
result3[i].stop();
}
shouldPlayNextSound = true; //enable skip function (ADDED)
FINAL REFLECTIONS + FUTURE IMPROVEMENTS:
Whilst it was the most nerve wrecking, anxiety inducing overall experience, since persisting bugs were fixed the day of the IM show, I was quite proud of what I have completed. Whilst the coding aspect of this project was beyond challenging, I can’t deny that it was lowkey fun at the same time – creating a project that involves my passion. To me, it certainly felt like a large leap in the level of difficulty, compared to my midterm project, and this was more so why I am proud of the finished result. For future improvements on the project, perhaps there could be a personality test which based on your selected answers allocates you to a specific design for each stage of the cassette customisation. This way the experience maintains for longer. I also think it builds more excitement and anticipation as to what cassette you’ll end up with. Improvements for the physical aspect of the project would be to build a radio with more extensive functions, like originally planned.
Regarding improvements for future IM projects, I am incredibly motivated to put thought into the building of an exterior because that, at the end of the day, is what can elevate user experience. Since it was my first time both showcasing and attending an IM show, I experienced somewhat of an epiphanous moment. In future classes I will be more mindful in creating a more immersive user experience that is able to appeal to a wider body of people, because whilst mine did have some sort of user experience, it was more so stagnant with limited interaction compared to the other projects that were showcased. Overall I think it was an excellent opportunity to understand the fundamentals of what Interactive Media embodies and it has further propelled my motivation to learn in depth creative coding.