Concpet:
I love baking, and I enjoy baking games. For my final project I decided to make a pie shop… Throughout my journey in Intro to IM, I made sure to always add a piece of me in every assignment and project. This final one is especially dear to me because I was able to finalize it after hard work. As well as being able to add my art in it (background and pie images). I think it goes well together and I’m proud of it.
FUN FACT: I have never had pie in my life!!!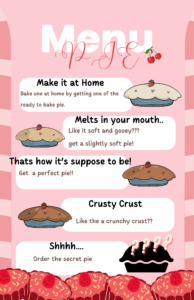
Highlight OF MY Code in P5.js:
-Function to check the correct match
function submitAnswer() {
  // Define the expected ranges for each statement
  const rawRange = [0, 200];
  const undercookedRange = [201, 400];
  const perfectRange = [401, 600];
  const overcookedRange = [601, 800];
  const burntRange = [801, 1023];

  let expectedRange;

  // Determine the expected range based on the current sentence
  switch (currentSentence) {
    case "I would like a raw pie to bake at home.":
      expectedRange = rawRange;
      break;
    case "I like my pie extremely soft.":
      expectedRange = undercookedRange;
      break;
    case "I want a perfect pie!":
      expectedRange = perfectRange;
      break;
    case "Crispy around the edges!!":
      expectedRange = overcookedRange;
      break;
    case "BURNT IT >:D":
      expectedRange = burntRange;
      break;
  }

  // Check if the current image range matches the expected range
  if (x >= expectedRange[0] && x <= expectedRange[1]) {
    // Increment the score for a correct match
    score++;

  ding.play();
-Different screen pages:
if (gameState === "start") {
  drawStartScreen();
} else if (gameState === "playing") {
  displayFoodImage();
  displayTimer();
  textSize(24);
  fill(255);
  text("Score: " + score, width - 100, 30);
} else if (gameState === "end") {
  // Display results in the end screen
  textSize(210);
  fill(255);
  text("Your Score: " + score, width / 2, height / 2);
  playAgainButton.show(); // Show the button on the end screen
}
else {
  // Draw other game elements here
  playAgainButton.hide(); // Hide the button if not in the end state
}
Arduino IDE Code:
int potPin = A0;      // Potentiometer connected to analog pin A0
int buttonPin = 2;    // Digital button connected to digital pin 2

void setup() {
  Serial.begin(9600); // Set the baud rate to the same value as in p5.js
  pinMode(buttonPin, INPUT_PULLUP); // Set the digital button pin as input with internal pull-up resistor
}

void loop() {
  int potValue = analogRead(potPin); // Read potentiometer value (0 to 1023)
  int buttonState = digitalRead(buttonPin); // Read button state (HIGH or LOW)
  Serial.print(potValue); // Send potentiometer value to p5.js
  Serial.print(',');
  Serial.println(buttonState); // Send button state to p5.js

  delay(550);
}
Components:
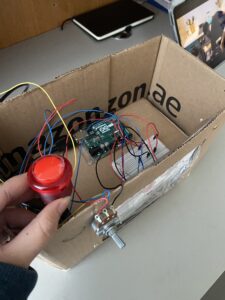
-LED Button
-Potentiometer
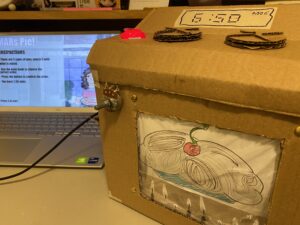
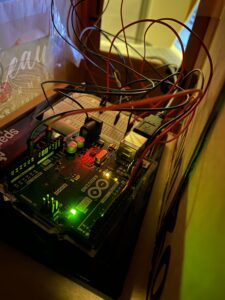
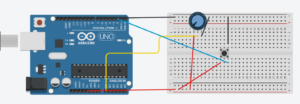
OveN Prototype and schematics:
User Testing:
Challenges:
- Many challenges were faced with the coding part.
- Button wasn’t working to confirm answers and also change the requests of the order.
- Sometimes the images controlled by the potentiometer would not show, or not change.
- I also had some issues with serial connection because of the wirings
Future Imporvements:
- I hoped to be able to make the game restart without having to exit full screen.
- Make the prototype a little prettier
- Fine-tune the difficulty level based on user feedback. Adjust timer durations, scoring mechanisms, or image recognition ranges to make the game challenging yet enjoyable.
- Introduce new challenges or power-ups to add variety to the gameplay.
- Ensure that the game is responsive and looks good on various screen sizes.

