
Concept
In the realm of electronics, my pursuit led me to create an LDR-controlled LED system using Arduino. The concept is rooted in a personal connection—recalling my younger self’s dependence on a night light for a good night’s sleep. This assignment aims to offer a modern solution by integrating an LDR-controlled LED system, bridging the gap between past comforts and present technology.
Required Hardware
• Arduino UNO
• Light sensor
• LED’s
• Resistor (330 ohms)
• Jumper wires
• Breadboard
• USB cable
• Computer with Arduino IDE installed
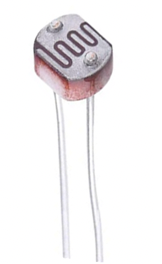
Light Sensor
Circuit Diagram
The circuit diagram was created using Tinker CAD and includes the Light sensor, LED’s, resistor, Arduino UNO, and breadboard.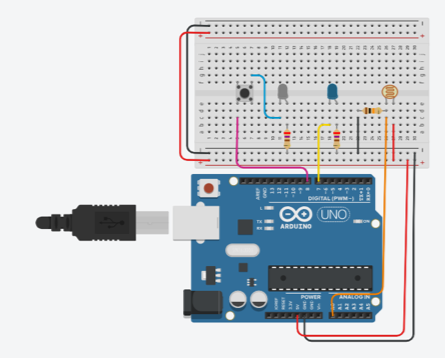
Setting Up the Components
The first step was assembling the components. The LDR was connected to the analog pin A0 on the Arduino, and a resistor was added to create a voltage divider for accurate readings. One LED was directly connected to pin 7, while the second LED was attached to pin 8 through a push button.
Coding the Logic
The Arduino code was crafted to read the analog value from the LDR and determine whether the ambient light was above or below a predefined threshold. If the light level fell below the threshold, both LEDs would illuminate, creating an aesthetically pleasing effect.
int ldrPin = A0;
int led1 = 7;
int led2 = 8;  // New LED pin
int threshold = 70;

void setup()
{
  Serial.begin(9600);
  pinMode(led1, OUTPUT);
  pinMode(led2, OUTPUT);  // Set the new LED pin as OUTPUT
}

void loop()
{
  int data = analogRead(ldrPin);
  Serial.println("");
  Serial.print("Light Sensor ");
  Serial.print("Value = ");
  Serial.print(data);

  if (data <= threshold)
  {
    digitalWrite(led1, HIGH);
    digitalWrite(led2, HIGH);  // Turn on the second LED
  }
  else
  {
    digitalWrite(led1, LOW);
    digitalWrite(led2, LOW);  // Turn off the second LED
  }
}
Hardware Implementation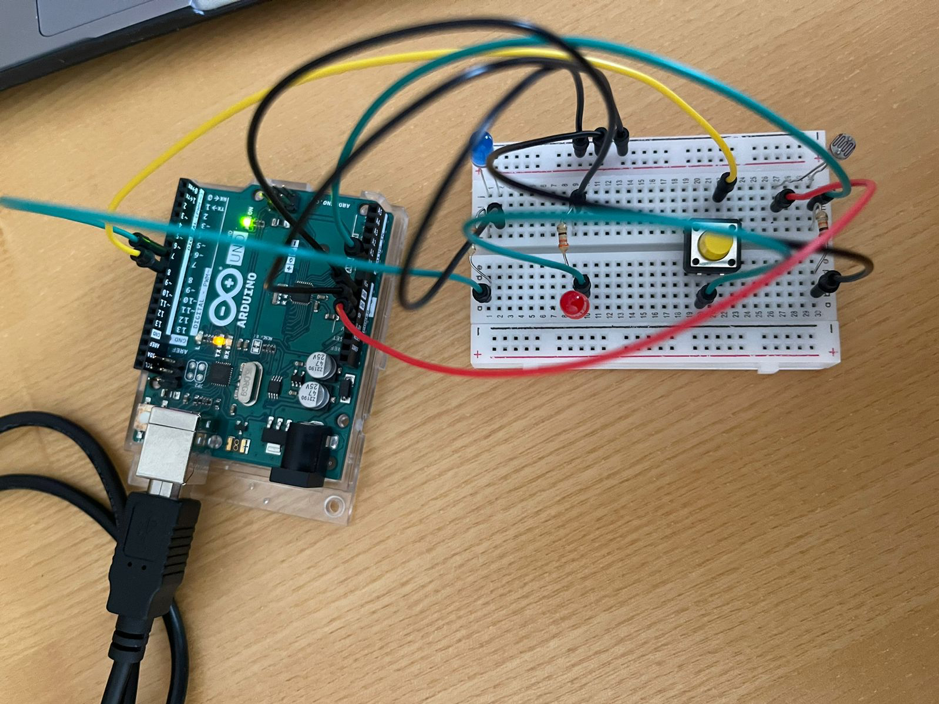
Video Illustration
Working Explanation and Conclusion:
Experimenting using electronics enables the combination of technology and creativity. With this assignment, I investigated the dynamic control of two LEDs using an Arduino, an LDR, and a button. This is an example of the limitless possibilities that exist when imagination and technology are combined, whether it is used as an instructional tool or as a decorative lighting solution. Also, it can be used as a dark sensor if anyone want to sleep in a very light like small bulb.