Week#5 Midterm Project

I wanted to make my midterm project really personal so as to motivate me to want to code and really push myself and the only topic that instantaneously came to mind was music. I am an avid music lover and have used music as a coping mechanism during times of (lowkey) depression and so I naturally garnered a really strong feeling about it. I decided to create my own version of the “coffee shop experience” which really struck a chord in me. My rendition of the “coffee shop”, as aforementioned, centers around music. A vintage radio with an on/off, skip and pause button, which necessitates user interaction, would play a sequence of 5(?) songs – more details listed below. Each song has their own uniquely specific background, each relating to a specific memory, and each background has an element of dynamicity. It’s important to note that the song title and artist name will be displayed on the radio for each song that plays.

Checklist:
1) create a radio using p5.js javascript.
(on/off button – when “on”, music plays, skip button, pause button)
(off button – sequence of songs randomizes + turns off music).
(make sure songs autoplay on loop)
2) (image and sound) – different songs(x5) have different backgrounds.
3) (list/arrays and on-screen text) – song title shows on display when song is playing.

Specific worries/ possible challenges:
1) keeping track of specific parts of codes:
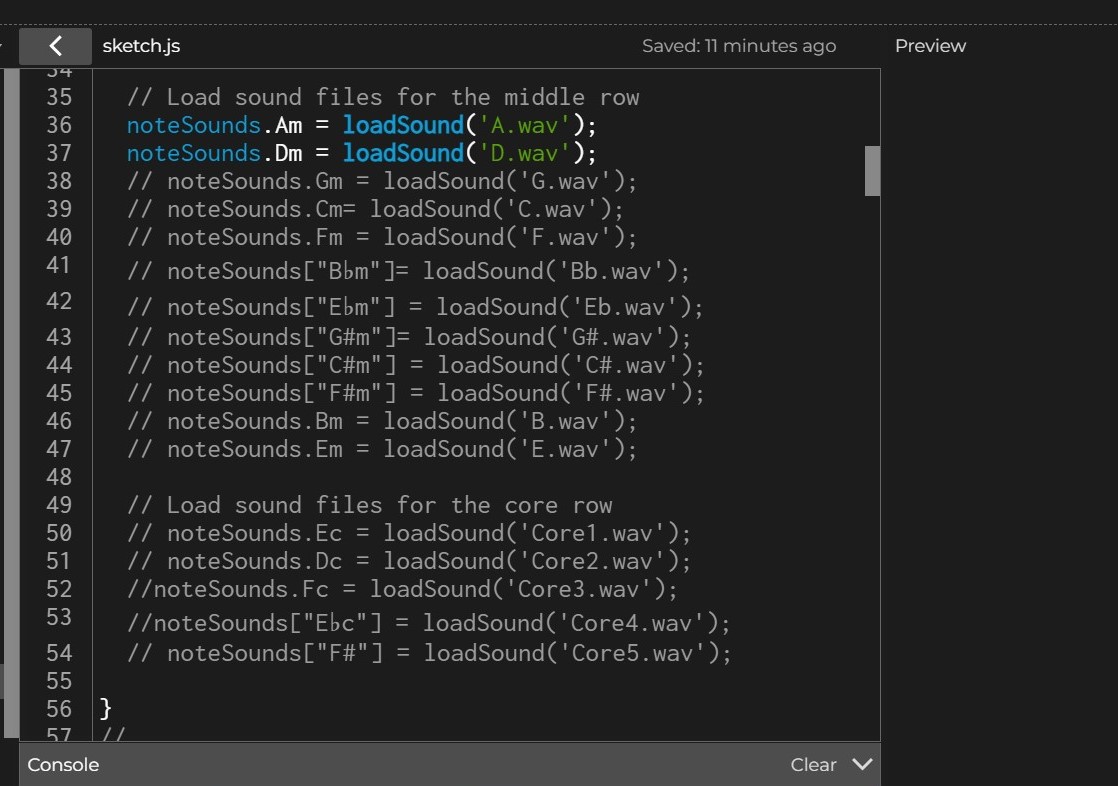
it’s absolutely imperative that my code is well organised and commented, more so for me since I’m in the process of establishing somewhat of a foundation in coding. Keeping track of variable names, classes, functions are most imperative. One solution could be to work on separate sketch.js files for specific parts (for example., backgrounds) specifically for code sections that will be encompassed in classes. Once I’ve made sure it works, I can always copy and paste it onto the main sketch.js file. I’ll also need to copy and paste regularly my main file code onto googledocs/ word doc just so that it’s easier for me to keep track and stay more organised – I find that the p5.js window size limits readability.

2) localising “click” function to specific shapes:
throughout my assignments where interactivity is present, I’ve used “click” functions that result in a change, but it has never been localised to a specific area. It was general and random, which hence enabled flexibility. Because of this, I am naturally worried of the complexity of the code. And with this follows a subsequent building anxiety: the numerous conditions (if/for loops) that majorly depend on how the user decides to interact. To me, this particular segment appears as a big knotted, balled up thread which I have to individually unpick and so at the moment seems incredibly daunting… Of course though nothing is impossible with an internet search (in-depth if necessary). According to my memory, the topic of localising the “click” function to specific shapes has been touched upon in one of the coding train videos. The same can be applied to the if and for loops.  Furthermore there is always the “coffee shop experience” example I can use for guidance or as a source of reference. 

Midterm Progress – Life Under the Sea


For the midterm, I initially had many ideas some were games, and others were experiences, However, the overarching concept that resonated with me the most was the idea of exploring the underwater world, as it has always been a significant source of inspiration for me. I envisioned creating an immersive underwater experience, inspired by my childhood favorite movie “Finding Nemo.”

The whole idea is to bring human experience to the fish world. As a result, I wanted to create a street feel life but under the sea. There fish can go shopping and view artworks in a museum.

I initially was trying to find a picture of already made imagined under the sea life, but I could not, so I had to create my own. Using vector-based images I created different layers of sea life and buildings to seem they are under the ocean using Adobe Illustrator.

More details on the midterm

I first created all the main layers I wanted. Then I tried to figure out the best way to implement it. I was initially worried about how I would figure the logic out but after I while I organized it so I had different functions and classes doing different things.

IMG_8096

Loading the images and sound was challenging because the P5js is case-sensitive. I honestly was struggling through the whole process of coding but I wanted it to work. The code has some bugs but the feel is there. I still have to figure out why the sound in P5js sounds different from when I play it on my computer, and how will the user view the artwork and the bags in the mall. There is still a lot of layers to be added and improved to make it even more interactive.

Reading Reflection – Week 5

Computer Vision for Artists and Designers

This article illustrates the historical development of computer vision techniques using notable examples, and then provides practical instruction to artists and designers on computer vision principles and optimizing their physical environment for the camera. I found it interesting how the development of technology always seems to welcome a process of democratization but also capitalization and surveillance with negative consequences. For example, before the advent of the printing press and similar technology for mass printing, only a select few people could print books. The ability to disseminate texts is a tool, but what people do with it can cause both positive and negative consequences — such as distributing hate speech or propaganda. Similarly, the ethics of computer vision, now that it is so democratized, is intriguing to contemplate.

Two example usages of computer vision particularly stood out to me, Krueger’s Videoplace, and Suicide Box by the Bureau of Inverse Technology. The concept behind Videoplace, that it involves the whole human body, is something that I think could be used to positively offset the fact that modern humans sit at screens all day. Would it be possible to make word processors or computer operating systems controlled by larger upper body movements, or even foot movements, like floor pianos, so that we can still move while doing our schoolwork/jobs? This line of thinking was inspired by the podcast Body Electric, exploring how the human body has changed in response to technology.

The Suicide Box also raised many questions for me. How did it know to only detect human vertical movement, and not if someone threw something from the bridge? How come the numbers of suicides it recorded were so much more than the officially recorded amount by the port authority? For a topic as emotionally charged and taboo as suicide, is it empowering to record data to bring awareness to the topic, or does it cause more harm than good (as 13 Reasons Why’s suicide depiction did)?

Overthinker-

As usual finding an idea for assignment 4 was a challenge of its own and as I was scrolling through instagram I saw a video about the overthinking brain and there it was, my generative text artwork. The mind is an amazing thing but the overthinking mind is an epitome as it lies to its owner and paralyses him in negativity.  So through my artwork I wanted to create a simulation of that but have the positive thoughts “win” and create a sense of peace and victory in the end.

This is what I came up with in the end:

First, I started off with a simple black background and positive and negative words just floating around and the negative words disappear when colliding with the positive to symbolize that we should not let the negative thoughts our head lies to us with win.

Highlight of code:

The mechanism of the colliding and disappearing is honestly what I’m most proud of because it took a lot of researching and trial and error but in the end it came out exactly how I envisioned it.

Initially, each word is represented as an object, complete with its position, velocity, and type. Using the dist() function, a foundational function in p5.js, the code assesses the distance between two word objects. If this distance is less than a specified threshold, it infers that the two words are overlapping or colliding. Given the creative intent, the code dictates that if either of the two colliding words is negative, it should be removed from the display. However, directly manipulating (like removing items from) an array while iterating over it can lead to skipped iterations or index out-of-bound errors. To circumvent this, the code first logs the indices of words slated for removal in a separate removalIndices array. Only after all overlap checks are completed does the code loop through removalIndices to remove the identified words from the main displayedWords array. This ensures a safe, error-free removal process. Such collision-detection methodologies are commonplace in game development and interactive visualizations.  Daniel Shiffman’s tutorials on The Coding Train on YouTube were extremely helpful in figuring all of this out, especially object collision pt1, object collision pt2, and  his video about adding and removing from arrays

// Update and display each word
for (let i = displayedWords.length - 1; i >= 0; i--) {
    displayedWords[i].display();
    displayedWords[i].move();

    // Count negative words
    if (displayedWords[i].wordType === "negative") negativeWordCount++;

    // Check for overlapping words
    for (let j = i - 1; j >= 0; j--) {
        if (dist(displayedWords[i].position.x, displayedWords[i].position.y, displayedWords[j].position.x, displayedWords[j].position.y) < 30) {
            if (displayedWords[i].wordType === "negative" || displayedWords[j].wordType === "negative") {
                if (displayedWords[i].wordType === "negative" && !removalIndices.includes(i)) {
                    removalIndices.push(i);
                }
                if (displayedWords[j].wordType === "negative" && !removalIndices.includes(j)) {
                    removalIndices.push(j);
                }
            }
        }
    }
}

// Remove words based on indices stored in removalIndices list
for (let index of removalIndices) {
    displayedWords.splice(index, 1);
}

However, I didn’t like how simple and plain it looked so I started thinking of what other things I could add and started building the mind of my dreams. First, the background was to plain so I made it into a gradient of black and added particles that symbolizes the other thoughts and memories that are present in the mind and that alone made it look better and more lively like a real mind. Then I moved on to the words themselves and decided I wanted to make them look more distinctive so I went ahead and changed their color palette making the positive words lighter and cheerful and the negative more dark and gloomy. After that I remembered the goal I wanted to have which was a sense of peace and victory that comes with letting the positive thoughts win and decided to represent that with a beautiful sun that appears (symbolizing the radiance and happiness one feels when we don’t believe the lies our mind tells us) once all the negative thoughts are whooshed away and is surrounded by a peaceful find filled with nothing but positive words floating around.

Reflection:

The journey was both challenging and rewarding. The task started simply: display positive and negative words on a canvas. But as the requirements grew more complex – making words move, detecting overlaps, and having words disappear based on specific conditions – the code had to evolve. There’s a beauty in the simplicity of the final visualization: negative words being “overpowered” and disappearing when they encounter other words, and the eventual appearance of the sun symbolizing the triumph of positivity. However, behind that simplicity was a series of problem-solving steps, from collision detection to safely modifying arrays during iteration. In the end i’m so happy with the end result and what I was able to come up with in the end and of course the message it conveys.

Ideas for Future Work and Improvements:
  1. Interactive Elements:
    • Allow users to add their own words to the positive and negative lists, personalizing the experience.
    • Let users click on words to manually remove them or promote them.
  2. Animations and Transitions:
    • Instead of immediately removing negative words, they could fade out or shrink, making the disappearance smoother.
  3. Sound Integration:
    • Add background music or sound effects, enhancing user engagement. For instance, a calming tune could play, with chimes or effects when words disappear or when the sun appears.
  4. Narrative or Storytelling:
    • The visualization could be part of a larger narrative or game where users have to actively combat negativity.
  5. Adaptive Challenges:
    • Introduce “boss words” that require more effort to remove.

Midterm Progress- Merhba, Alf Merhba

CONCEPT

Title translation: Welcome, a Thousand Welcome.

When I saw the coffee shop experience example, I was inspired to create an educational/cultural experience that has a fun aspect to it. The concept of this midterm project will be a dialect learning experience from which the user will be able to learn a few words in Darija the Moroccan dialect, in a fun way.

Here is a preliminary user guide for what I am referring to:

UI DESIGN:

Frame 1: WELCOME SCREEN

Press PLAY to start

Frame 2: INSTRUCTIONS SCREEN

Press arrow for next screen

FRAME 3: THE HOUSE

Hover the mouse and choose one of the six spaces

FRAME n: 1/6 space

Click on an object to hear the word for the object in Darija

Click on arrow to go back

LOOP

COMPLEX PARTS:

-SOUND RECORDINGS: I’ll be recording all the audio files for the objects. My goal is to at least have 10 recordings per space (6 spaces makes them 60 recordings in total). I’m anxious about managing all the files as well as how will I be able to incorporate all files into the project without making it too heavy and laggy. I’ll test it and in case it does not work, I’ll bring down the number to 4 recordings/space.

-SCENES MANAGEMENT: I have about 9 scenes in this project. The scene switching routine will be a lot of work. I started looking into libraries to help with this matter and found P5 Scene Manager  a library which may make my life much easier. Still looking into how it works.

-HOW TO INCLUDE TEXT: I want to include the English word of each object along with each object. I’m still brainstorming ways to make this possible.

Looking forward to see the result!

Midterm Progress- Wack-a-mole

After thinking for what felt like forever and hating a ton of games i tried to design an idea came to my mind, why not go old school and turn a physical game into a digital game and what’s better than using my favorite stress relief game “Wack-a-mole”, the game that generations have played, so why not give it a modern twist.

Description: A game where moles appear from various holes on a hill and the user must “whack” them by clicking on them. The aim is to get as many moles as possible within a certain time frame.

This is the inspo i want to recreate:

And this is the rough sketch i came up with so far:

I choose to leave the visuals till later and start off with what was frightening me the most at the time which was having the mole appear in exact random holes and for the mouse click to be able to detect it no matter where it’s touched which I was able to fix using a dist() function, ensuring precise and reliable click detection. However, other challenges remain such as making the game visually appealing to fit the inspo picture as much as possible and in general just look good and fun, adding the score, and as time gets closer to finish the game becomes harder yet remaining seamless.

Risks and ways to minimize them:

  1. Game becomes boring: The speed gets faster as time goes by

User Interaction Design:

The end result will have:

  1. Start Screen: Press “Start” to begin the game with instructions above.
  2. Gameplay: Moles pop up from holes at random intervals. The player clicks on them to score points. (I’m thinking of making the mouse be a mallet and have the mallet hit the moles but i’m not really sure how to do that)
  3. Timer at the bottom: A long 40 sec bar that runs down as time passes that changes color based on time left and in the last 10 second it will print the remaining time under
  4. Sound feedback: Every time a mole is hit a funny sound will play
  5. Difficulty increase:As the timer gets close to running out the moles will become faster at disappearing
  6. Scoring: Player earns points for each mole whacked.
  7. End Screen: Displays score when time runs out and an option to replay.


Midterm Progress Report #2 Drum Machine

The progress on the midterm so far has been quite significant. I have realized that understanding and utilizing the p5.sound library is more challenging than I initially thought. The language of audio, with terms related to sample rate and frequency, took me some time to grasp, and I’m still unsure if I fully understand it. At this point, I have created the layout for the drum machine, which is interactive and responds to user clicks. I have included three sections for hi-hat, clap, and bass samples in the “drums” p5.part using the addPhrase method. I tried adding more samples, but for some reason, the audio keeps getting distorted on my browser. I looked it up online, and it seems to be a common issue with p5.js on the Chrome browser, so I am attributing it to that for now. I might test it with a different browser later but for now I am happy with having three rows of drum beats.

Currently, I have two versions of my project to display. One version has a background canvas, while the other version uses individual PNG files of the drum parts instead of circles to give visual cue as to which specific drum phrase is triggered. I made 2 functions: drawMatrix() and canvasPressed() for updating the grid on the canvas for when users deselect and add a 16th note phrase to the drum loop.

Press space to hear the beat.(open the sketch link)

https://editor.p5js.org/Saiki/full/m6MkI9vMD

Drum Icon Version (you can de-select/add beats in this version)

https://editor.p5js.org/Saiki/sketches/Mtr3z9iJ8

I have encountered some difficulties when implementing OOP (Object-Oriented Programming) into my code. I attempted to use a class called “Pattern” to create different drum phrases. However, when working with p5.part and p5.phrase, it did not function properly.

Additionally, I still need to add a start screen to my drum machine. I have implemented a BPM (Beats Per Minute) control slider, which I will provide captions for to make its purpose more obvious. For now, I am content that my project is functional, and I will now focus on refining the details to create a cohesive experience.

Midterm progress

Concept

For my midterm, my ideas were all over the place. Eventually, I settled on the concept of creating the disco night project because I think it’s one of those projects with a lot of flexibility so you can be super creative with it.

I want to create a disco night where users have the option to select different characters to dance to different songs and possibly other features too that I might come up with during the coding process.

At first, I considered using sprites or GIFs of random characters dancing. However, I soon discovered that GIFs of real humans didn’t quite blend well with a 2D background, and it lacked the charm I was aiming for. So, I made a decision to bring to life the ultimate disco night with some of my favorite cartoon characters.

One aspect that initially concerned me was finding the right sprites for my chosen characters. As I scoured the internet for suitable sprites, I quickly realized that there were none available for the specific characters I wanted to feature in my project. This left me with two options: create my own sprites or opt for GIFs instead. After some experimentation, I found that using GIFs turned out to be a visually appealing choice that added the dynamic quality I was aiming for.

Iron Knock- Midterm Assignment Progress Report 2

So, Far…

During this week’s progress report on my midterm project, I focused on a crucial aspect: integrating sound into my steelpan simulation. To achieve this, I created a specialized “object” within my code to neatly organize the sound files for each note. This object, named “noteSounds” in the code, serves as a sort of playlist where I store all the distinct sounds I intend to use. Just like individual songs in a playlist, each sound file is stored separately for easy access.

To ensure precision and avoid any mix-up between notes, I carefully assigned notes to their respective rows on the steelpan. This separation of notes into rows played a key role in achieving accuracy. In essence, rather than directly assigning a sound to a note, I associated it with a specific position on the canvas.

The process involved loading these sound files before using them, much like preparing a playlist before listening to songs. When you click on a note, the code identifies which note you’ve clicked and plays the corresponding sound file. Think of it as striking a key on a piano to produce a sound.

Admittedly, grasping this concept and implementing it did consume a significant amount of time. However, breaking down my code and attaching sound to one row at a time proved to be an effective strategy. It allowed me to avoid overwhelming complexity and troubleshoot more efficiently.

One challenge I encountered was the limited availability of sound files for the steelpan notes on the website I initially used as a source. So, while I downloaded all the available files, they were incomplete and did not correctly represent the notes of the steelpan.

To overcome this, I reached out to a family member who is skilled in playing the steelpan. They played each note and sent me the sound files directly. This resourcefulness enabled me to continue progressing with my project.

For the outer row of notes, I have successfully integrated sound using the available sound files. However, for the middle and core rows, I’ve temporarily included placeholder values. These will be replaced once I receive the sound files from my uncle, who is assisting with this aspect.

Essentially the code works but, for the moment I have commented out the sound objects until the correct sound files are in my possession.

Future Additions:

Looking ahead, my future additions to the project include refining the instructions screen to ensure its functionality and user-friendliness. This should take approximately one day to complete. Subsequently, I will focus on enhancing the overall aesthetics of my project, bringing it closer to completion.

My ultimate goal is to create an engaging and immersive steelpan experience, reminiscent of Trinidad and Tobago’s renowned “Panorama” event, where Steelband compete passionately. I aspire to replicate this cultural experience within my sketch to offer users a genuine taste of the Trinidad and Tobago steelpan tradition.

Below is an embedded sketch of my work:

<iframe “width: 640px; height: 360px; overflow: hidden;” src=”https://editor.p5js.org/KhaleeqaAasiyah/full/pXR0hhpH4″>

Reading Response-Week#5

Computer Vision

I found the reading on “Computer Vision for Artists and Designers” to be quite interesting and informative. It introduced a variety of projects that piqued my curiosity. While I was familiar with the term “computer vision” before, this reading provided me with a better understanding of its scope and the various concepts it encompasses. One key takeaway from the reading was the realization that computer vision techniques can be used to gather real-time information about various aspects of human interactions, including identities, locations, gestures, facial expressions, gait characteristics, and gaze directions. What intrigued me the most was the accessibility of some of these techniques, which can be implemented by novice programmers in a relatively short time.

I didn’t notice biases in the reading and didn’t affect my beliefs on computer vision much. However, as I read the material, I couldn’t help but wonder about the connection between computer vision and virtual reality (VR). It just so happens that I am currently enrolled in a virtual reality research course, and the reading prompted me to explore this relationship further. Hence I searched online and most sources highlighted how computer vision plays a crucial role in AR and VR, particularly in areas such as object detection, gaze tracking, spatial mapping, gesture recognition, and real-time image processing. These applications not only enhance the immersion and interactivity of AR and VR experiences but also bridge the gap between the virtual and physical worlds. I was also able to make a connection between VR experience and one passage in the reading that particularly resonated with me was the description of the “Messa di Voce” project, which used whole-body vision-based interactions, speech analysis, and projection-based augmented reality to create an audiovisual performance. This project demonstrated the power of computer vision algorithms in tracking performers’ movements and analyzing audio signals to create real-time visualizations, which seem indispensable when it comes to creating a virtual reality experience. Overall, this reading expanded my understanding of computer vision and its wide-ranging applications in various fields, including the arts and virtual reality. It sparked my interest in exploring the intersection of computer vision and VR further and how these technologies can be harnessed to create more immersive and interactive virtual experiences that are safe and ethical for different age groups.