Whack-A-Mole-Land

One word “Finally”! This project was one of the worst ones I’ve worked on in a long time, I was met with error after error and pure confusion more than once.

But in the end and after millions of trial and error and hours in the lab this is my little baby and I couldn’t be happier and prouder of how it turned out:

Link to the full screen version (Zoom out to 60% or 75% for the best experience): https://editor.p5js.org/nourhane/full/vzSr13gm7

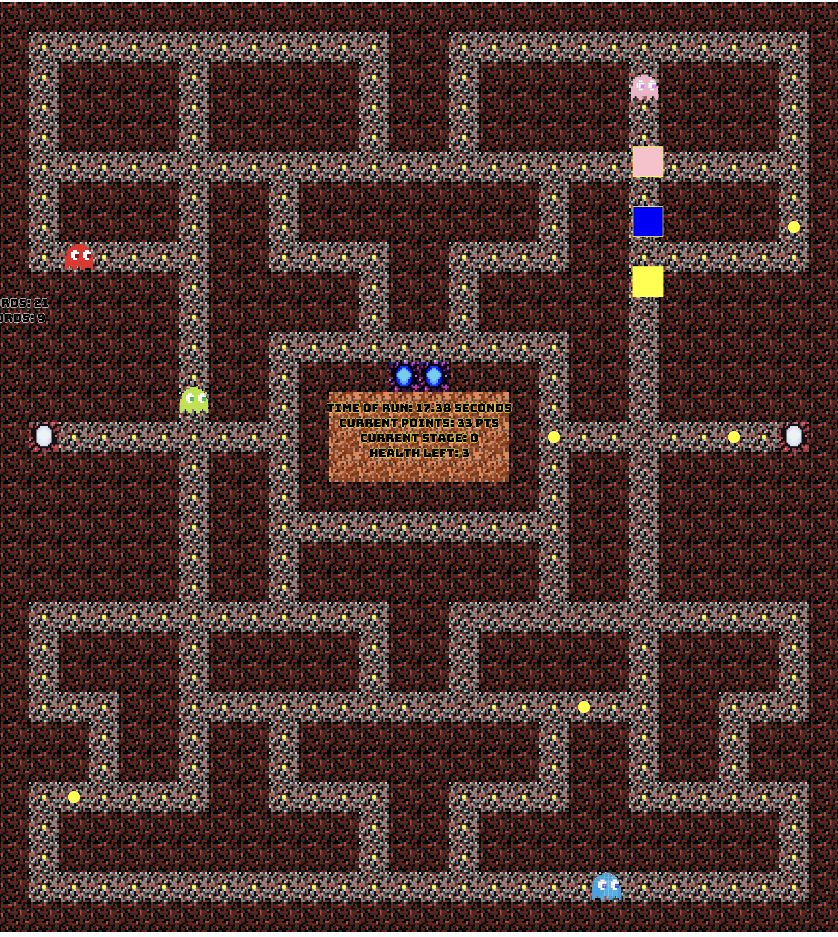
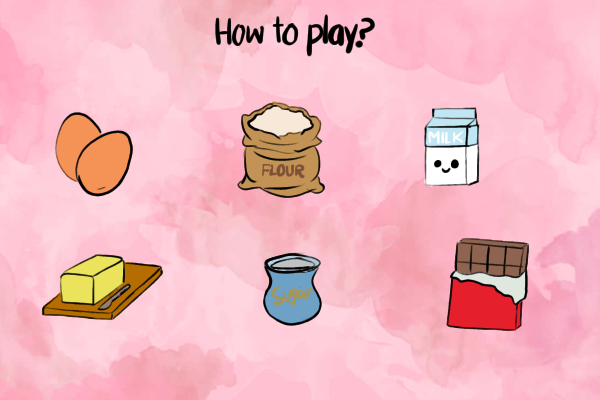
Whack-a-mole with a twist, I choose to focus a lot on the visuals of the game to make it reach the vision I had in mind but furthermore, I choose to add new features that the normal whack-a-mole didn’t have like bombs, and magic worms.

 Highlights:

The game begins at the main menu, inviting players to dive into the frenzied world of moles, bombs, and worms. Clicking on the screen transitions to an instruction page, which succinctly explains the game mechanics and objectives.

if (this.gameState === "mainMenu") {
    if (mouseY > height * 0.6) {
        this.gameState = "instructions";
    }
}

Moles sporadically appear from their designated holes, and the player must click on them to score points. However, there’s a twist! Occasionally, bombs disguised as moles pop up, and clicking them deducts lives. Additionally, friendly worms grace the screen, offering bonus points if clicked.

One of the features I’m particularly proud of is the random appearance logic of moles, bombs, and worms. It keeps players on their toes, ensuring every game session is unpredictable and challenging.

if (frameCount % 60 === 0 && game.gameState === "playing" && !game.paused) {
    let moleToShow = random(game.moles);
    moleToShow.visible = true;

    setTimeout(() => {
      if (!game.paused) {
        moleToShow.visible = false;
      }
    }, random(500, 1500));
  }

  if (frameCount % 80 === 0 && game.gameState === "playing" && !game.paused) {
    let showWorm = random() < 0.15; // 15% chance to show the worm
    if (showWorm) {
      game.worm.resetPosition();
      game.worm.visible = true;

      setTimeout(() => {
        if (!game.paused) {
          game.worm.visible = false;
        }
      }, random(500, 1500));
    }
  }
}

The game’s immersive experience is further enhanced with dynamic sound effects, creating an auditory feedback loop that’s satisfying and engaging.

Issues faced:

One of the main issues that took me hours to figure out was the score. It wasn’t increasing no matter how many times I clicked on the mole even though the mouse was telling me that it was clicked. I tired everything to fix it and used thousands and thousands of console.log statements to try and pin point the issue but nothing, looked on the internet, asked unix tutors, no one was able to figure it out, till it jumped to me “THE HAMMER, THAT’S THE ISSUE, IT’S NOT ALIGNED WITH THE MOUSE” at that moment I couldn’t feel happier but also dumber because it was such an easy fix yet i had to rake my mind and go crazy to find it.

Another main issue I had was with the sound, for some reason it kept giving me “undefined” and crashing my entire game and once again after hours of looking and console.loging, the issue was easy, I didn’t play the sound where it should. I was loading but not playing them in their respective spots (stupid right?)

Improvement:

In the end I’m so so so proud of it and couldn’t be happier with how it turned out. But no project or game is ever done, there always room for better and in this case they could be:

Game Dynamics: While the game offers a good mix of unpredictability with the random appearance of moles, bombs, and worms, adding more diverse game elements or increasing levels of difficulty could enhance the player’s experience. Introducing different types of moles with varying speeds, for instance, or adding power-ups and penalties, could make gameplay more dynamic and engaging.

User Interface and Graphics: The user interface, though functional, could benefit from a more refined design. Enhancing the graphics, smoothing out animations, and possibly introducing a thematic storyline could make the game more immersive. A more intuitive and interactive menu system could also be introduced, allowing players to adjust settings, view high scores, or access tutorials

Mobile Compatibility: Given the growing number of mobile gamers, optimizing the game for touch controls and ensuring it’s responsive to different screen sizes would be a significant improvement.

Conclusion:

However, considering my coding level and how far I got from the beginning and how much effort I put into it. Whack-a-mole Land is easily one of my favorite projects I worked on and I’m so proud of it and of myself as well.

Midterm Project – Peking Opera Village

Concept:

Link to the sketch: https://editor.p5js.org/Yupuuu/full/p-mvwnETP

This project takes its inspiration from the coffee shop example given by Professor Shiloh in class. My idea is to integrate some cultural elements into such an experience, Therefore, I decided to create an experience of a Peking Opera Village, in which users can listen to and learn about Peking Opera and hopefully can eventually appreciate it. The overall idea for this project is that the user enters the village through an arch and arrives at a traditional Peking Opera theater. Here, the users are able to see the main stage, some paintings on the wall, tables, tea and teapots, the opera information, and even play a little trivial game.

Design and Implementation:

The most significant design of the experience is the main stage. For this part, I wanted to create something like this:

Peking opera stage hi-res stock photography and images - Alamy

Recognizing the complexities of such a sophisticated design, I decided to make a simplified version of it. The simplified version consists of the use of both online images and primitive shapes of p5js. The essential elements that constitute a Chinese style stage remain, such as the yellow dragon and phoenix  patterns, the little fences, and the color of Chinese dark red. Combing these elements, I have created this stage for my project:

Particularly, I am proud of the lanterns swinging animation. This adds a bit fun to this static display of the stage. This is realized by the following code:

lantern.resize(55, 0);
 // the left lantern
 push();
 translate(690, 0);
 rotate(angle);
 image(lantern, -25, 0);
 pop();

 // the right lantern
 push();
 translate(780, 0);
 rotate(angle);
 image(lantern, -25, 0);
 pop();

 // the swing effect of the lantern
 angle += lan_speed;
 if (angle >= 10) {
   lan_speed = -lan_speed;
 } else if (angle <= -10) {
   lan_speed = -lan_speed;
 }

Moreover, whenever the user hovers their mouse onto an interactive object, the cursor will become a hand, indicating the interactivity. This explicitly navigates the user’s interaction in the scene without disturbing the holistic aesthetics of the setting. This is realized by the following code:

if (mouseX >= 28 && mouseX <= 48) {
      // back button
      if (mouseY >= 320 && mouseY <= 348) {
        cursor(HAND);
      }
    } else if (mouseX >= 200 && mouseX <= 838) {
      if (mouseY >= 0 && mouseY <= 418) {
        // stage
        cursor(HAND);
      }
      if (mouseX >= 755 && mouseX <= 805) {
        //paper on table
        if (mouseY >= 493 && mouseY <= 545) {
          cursor(HAND);
        }
      }
    } else if (mouseX >= 45 && mouseX <= 170) {
      //painting on the left
      if (mouseY >= 0 && mouseY <= 158) {
        cursor(HAND);
      }
    } else if (mouseX >= 900 && mouseX <= 1050) {
      // opera today
      if (mouseY >= 10 && mouseY <= 105) {
        cursor(HAND);
      }
    } else {
      cursor(ARROW);
    }

Another interesting part of my project is the little trivia challenge for the user. They can click on the paper on one of the table in the main scene, and it will show them the challenge. To complete the challenge, the user will have to read the Opera Today on the wall to get some information about the opera clip I chose. Then, the user will be asked three questions about the information of the opera. Currently, there is not scoring or reward system with this challenge. This just adds some interactivity to the experience.

Reflections:

For this project, I think the overall output is satisfactory. However, it is clear that to truly replicate an experience in a Peking Opera theater need a lot work than this. Due to the limit of time, I wasn’t able to duplicate all the details. If time allows, for example, I would add some audience, waiters, ect, to make the environment more lively and realistic. Moreover, I could add more sounds, like crowd sounds, to make the soundscape of the experience more realistic. Lastly, I could improve the challenge to make it record score and have a reward system. But this indeed need a lot more efforts and time.

One problem I ran into and was not completely solved is the lagging of the character when moving. As the program progresses, the opera singer on stage’s motion will become more and more lagging. I suspect that the problem is due to the huge memory the program is taking when running for a long time. I tried remove(), but this didn’t work as expected. Then I used clear() whenever the scene changes; this works a bit, but not perfectly. So far, I am not sure how I can solve this problem.

Midterm- Life Under the Sea

Concept:

For my midterm, I envisioned creating an immersive underwater experience, inspired by my childhood favorite movie “Finding Nemo.” The whole idea is to bring human interaction to the fish world. As a result, I wanted to create a street feel life but under the sea. There fish can go shopping and view artworks in a museum.

I created the whole atmosphere from scratch. I combined vector-based images for the background and other objects using Illustrator. I saved the files as PNG and then added them to P5JS.

Highlight:

The code was the most challenging part mainly for creating layers and buttons to click on. I started the process of implementation by trying to figure out all the variables I needed for each part. Then I loaded all the images and audio I wanted to use for the project. After that, I began to find the logic for moving from one scene to the next. I created a class called experience manager where I give instructions on what to display in the layers when a specific button is clicked. This class is a boolean. As a result, when a specific variable is set to be true it will be visible on the screen: the sound, the images, and the buttons.

// class to manage which slide to display.
class ExperienceManager {
  constructor() {
    this.onHome = true;
    this.onStreet = false;
    this.onMall = false;
    this.onMuseum = false;
  }
  display() {
    if (this.onHome) {
      image(HomeImg, 0, 0, 500, 500);
      SoundWaves.play();
      SoundMall.stop();
      SoundMuseum.stop();
      fishObj = new ClickedObj(fish, 215, 320, 90, 90);
      // Call the textGraphics function
      Title("Life Under the Sea", width / 2, 90, 30);
      // Call the instruction box function
      drawInstructionBox(110, 130, 280, 180, 23);
      this.onStreet = false;
      this.onMall = false;
      this.onMuseum = false;
    } else if (this.onStreet) {
      SoundWaves.play();
      SoundMall.stop();
      SoundMuseum.stop();
      image(seaSt, 0, 0, 500, 500);
      arrowStObj = new ClickedObj(arrow, 10, 20, 25, 25);
      mallObj = new ClickedObj(malltrn, 25, 320, 150, 150);
      museumObj = new ClickedObj(museumtrn, 38, 190, 110, 110);
      this.onHome = false;
      this.onMall = false;
      this.onMuseum = false;
    } else if (this.onMall) {
      //     hide clicks
      SoundMall.play();
      SoundMuseum.stop();
      SoundWaves.stop();
      fishObj.x = -100;
      museumObj.x = -100;
      // bags on click display
      image(mall, 0, 0, 500, 500);
      arrowMallObj = new ClickedObj(arrow, 10, 20, 25, 25);

      this.onStreet = false;
      this.onHome = false;
      this.onMuseum = false;
    } else if (this.onMuseum) {
      image(museum, 0, 0, 500, 500);
      SoundWaves.stop();
      SoundMall.stop();
      SoundMuseum.play();
      arrowMuseumObj = new ClickedObj(arrow, 10, 20, 25, 25);
      this.onHome = false;
      this.onMall = false;
      this.onStreet = false;
    }
  }
}

I also created a class for clickable objects like the fish, and arrows that go to the previous layer, the mall, the museum, the bags, and artworks. This class has a lot of conditionals in it. For some, I made clickable images but for the bags and artwork, I felt it’s better to have curser values that refer to a specific bag of artwork and then display an image for that. Then I created a function for the home screen instructions and passed the text through an array of strings. And added a rectangle behind it. Finally, I added the title of the interaction set a color, and a font in the title function.

// this class helps because it removes alot of hard coding so when I change the coordinates of an inage the program will recognise and so i dont need to change it everywhere.
class ClickedObj {
  constructor(imgFileName, x, y, imgWidth, imgHeight) {
    this.imgFileName = imgFileName;
    this.x = x;
    this.y = y;
    this.imgWidth = imgWidth;
    this.imgHeight = imgHeight;
    this.drawObjct();
  }
  drawObjct() {
    if (this.imgFileName) {
      image(this.imgFileName, this.x, this.y, this.imgWidth, this.imgHeight);
      // print("image draw sucessfull");
    }
  }
  isSelected() {
    if (
      mouseX > this.x &&
      mouseX < this.x + this.imgWidth &&
      mouseY > this.y &&
      mouseY < this.y + this.imgHeight
    ) {
      return true;
    } else return false;
  }
}

// to go to the next layer of the street so all clickable objects are here.
function mouseClicked() {
  //  to go  back to the home layer and instructions and click other objects like the fish etc.
  if (expMgr.onHome) {
    if (fishObj.isSelected()) {
      // print("fish 1 is clicked");
      expMgr.onHome = false;
      expMgr.onStreet = true;
      expMgr.onMall = false;
      expMgr.onMuseum = false;
      expMgr.display();
      //print("done")
    }
  } else if (expMgr.onStreet) {
    if (mallObj.isSelected()) {
      // print("mall is clicked");
      expMgr.onHome = false;
      expMgr.onStreet = false;
      expMgr.onMall = true;
      expMgr.onMuseum = false;
      expMgr.display();
    } else if (museumObj.isSelected()) {
      // print("museum is clicked");
      expMgr.onHome = false;
      expMgr.onStreet = false;
      expMgr.onMall = false;
      expMgr.onMuseum = true;
      expMgr.display();
    } else if (arrowStObj.isSelected()) {
      // print("arrow is clicked");
      expMgr.onHome = true;
      expMgr.onStreet = false;
      expMgr.onMall = false;
      expMgr.onMuseum = false;
      expMgr.display();
    }
  } else if (expMgr.onMall) {
    if (arrowMallObj.isSelected()) {
      // print("arrow is clicked");
      expMgr.onHome = false;
      expMgr.onStreet = true;
      expMgr.onMall = false;
      expMgr.onMuseum = false;
      expMgr.display();
    } else if (mouseX >= 83 && mouseX <= 124 && mouseY >= 90 && mouseY <= 135) {
      image(rdBag, width / 4, height / 4, 210, 210);
    } else if (
      mouseX >= 83 &&
      mouseX <= 120 &&
      mouseY >= 200 &&
      mouseY <= 236
    ) {
      image(LneBag, width / 4, height / 4, 210, 210);
    } else if (
      mouseX >= 83 &&
      mouseX <= 121 &&
      mouseY >= 220 &&
      mouseY <= 331
    ) {
      image(BrwnBag, width / 4, height / 4, 210, 210);
    } else if (
      mouseX >= 353 &&
      mouseX <= 379 &&
      mouseY >= 91 &&
      mouseY <= 140
    ) {
      image(YlwBag, width / 4, height / 4, 210, 210);
    } else if (
      mouseX >= 391 &&
      mouseX <= 422 &&
      mouseY >= 96 &&
      mouseY <= 141
    ) {
      image(OrngBag, width / 4, height / 4, 210, 210);
    } else if (
      mouseX >= 345 &&
      mouseX <= 381 &&
      mouseY >= 192 &&
      mouseY <= 238
    ) {
      image(bluBag, width / 4, height / 4, 210, 210);
    } else if (
      mouseX >= 397 &&
      mouseX <= 423 &&
      mouseY >= 202 &&
      mouseY <= 235
    ) {
      image(GrnBg, width / 4, height / 4, 210, 210);
    } else if (
      mouseX >= 355 &&
      mouseX <= 381 &&
      mouseY >= 297 &&
      mouseY <= 336
    ) {
      image(pnkBag, width / 4, height / 4, 210, 210);
    } else if (
      mouseX >= 391 &&
      mouseX <= 427 &&
      mouseY >= 312 &&
      mouseY <= 332
    ) {
      image(whtBag, width / 4, height / 4, 210, 210);
    }
  } else if (expMgr.onMuseum) {
    if (arrowMuseumObj.isSelected()) {
      // print("arrow is clicked");
      expMgr.onHome = false;
      expMgr.onStreet = true;
      expMgr.onMall = false;
      expMgr.onMuseum = false;
      expMgr.display();
    } else if (
      mouseX >= 126 &&
      mouseX <= 177 &&
      mouseY >= 96 &&
      mouseY <= 199
    ) {
      image(art1, width / 3, height / 3, 250, 300);
    } else if (
      mouseX >= 212 &&
      mouseX <= 293 &&
      mouseY >= 102 &&
      mouseY <= 179
    ) {
      image(art3, width / 3, height / 3, 250, 300);
    } else if (
      mouseX >= 330 &&
      mouseX <= 384 &&
      mouseY >= 97 &&
      mouseY <= 191
    ) {
      image(art2, width / 3, height / 3, 250, 300);
    }
  }
}

To be honest the hardest part was the clickable objects class because at the beginning the objects would layer on one another and would still be clickable even if they were not visible. However, I fixed it by passing the clicks to the specific experience they fit in. I also faced a lot of bugs because P5js is case-sensitive, and it would take me hours to realize that but now I know, and it is the first thing I look for if I have a bug.


Reflection and ideas for future work or improvements:

I am satisfied with the overall result of the project. For the future, I would add more places to visit and add some motion to the website. Maybe a fish moving, some submarine. I would also want to add a music icon where users can pick a song and pause it if they want. I also want the home page to be more interactive, maybe create graphics with text or water bubbles that move around the canvas.

Resources:

https://itch.io/games/made-with-p5js

https://www.youtube.com/watch?v=MzD7W6Vt6LA

https://www.youtube.com/results?search_query=p5js+object+orianted+

https://p5js.org/reference/#/p5/REMOVE

https://p5js.org/examples/sound-load-and-play-sound.html

https://www.rapidtables.com/web/color/blue-color.html

https://p5js.org/examples/interaction-snake-game.html

https://stackoverflow.com/questions/58477636/transitioning-from-one-scene-to-the-next-with-p5-js


Mid-Term Project 3: What A Waste


https://editor.p5js.org/Minjae0216/sketches/hPYFgGfht

Concept of The Game:

“What A Waste” operates as an engaging educational game with a clear mission: to educate students about the crucial importance of proper waste segregation. It addresses a pressing issue in the United Arab Emirates (UAE) where recycling rates have fallen below 10%, primarily due to a lack of awareness and insufficient segregation infrastructure. The government’s sustainability goals for 2030 aim to divert 75% of waste from landfills, making proper waste segregation imperative. The game simulates real-life scenarios, such as students mistakenly placing non-recyclable items in recycling bins. Players must correctly sort recyclable items to prevent contamination in the recycling stream. By doing so, they learn the adverse consequences of unsorted waste, which not only hinder recycling but also increase the workload for recycling centers and waste management companies. “What A Waste” fosters a sense of responsibility and equips students with the knowledge and habits needed to contribute to recycling efforts, supporting the UAE’s sustainability goals and promoting a cleaner environment.

How the game works:

The game’s design incorporates a simple yet effective concept. Players click the start button, and trash items begin to fall from the screen. The challenge lies in catching and correctly placing plastic waste into the plastic recycling bin, earning 2 points for each correct placement. Catching the wrong trash, like dirty plastic plates or paper boxes, leads to a loss of life. This format tests players’ knowledge of proper recycling while making waste sorting and segregation engaging and interactive. The game’s mechanics align with its educational purpose, reinforcing the importance of correct waste management practices. It’s a game where entertainment meets education, allowing players to win by accumulating 15 points and, in turn, contributing to a more sustainable future.

Codes I am proud of:

class Basket {
  constructor() {
    this.x = width / 2; // Initialize the basket's x-position at the center of the canvas.
    this.y = height - 100; // Initialize the basket's y-position near the bottom of the canvas.
    this.width = 110; // Set the width of the basket.
    this.height = 110; // Set the height of the basket.
  }

  // Renders the basket on the canvas.
  display() {
    // Use the image() function to display the basket image at the specified position and dimensions.
    image(basketImage, this.x - this.width / 2, this.y - this.height / 2, this.width, this.height);
  }

  //control the horizontal movement of the basket using arrow keys.
  move() {
    if (keyIsDown(LEFT_ARROW) && this.x > this.width / 2) {
      this.x -= basketSpeed;
    }
    if (keyIsDown(RIGHT_ARROW) && this.x < width - this.width / 2) {
      this.x += basketSpeed;
    }
  }
}

/// objects that fall from the top of the screen in the game.
class FallingObject {
  constructor() {
    this.x = random(width); // Initialize a random horizontal position for the falling object.
    this.y = 0; // Set the initial vertical position at the top of the canvas.
    this.radius = random(50, 70); // Set the size (radius) of the falling object.
    this.speed = random(objectSpeedMin, objectSpeedMax); // Set the falling speed.
    this.image = random(trashImages); // Randomly select an image for the falling object
    
    // Check if the selected trash image is recyclable (true) or not (false).
    this.isRecyclable = this.image === trashImages[0] || this.image === trashImages[1] || this.image === trashImages[2]; // Check if the trash is recyclable
  }


  display() {
    // Use the image() function to display the object's image at its current position and size.
    image(this.image, this.x - this.radius / 5, this.y - this.radius / 5, this.radius, this.radius);
  }

  
 // updates the vertical position, causing the object to fall down the screen.
  fall() {
    this.y += this.speed;
  }

“FallingObject” is my favorite part of the code because it is the heart of the game’s dynamic and unpredictable nature. The FallingObject class is responsible for creating the diverse objects that rain down on the player. Its uncertainty lies in the use of randomization, ensuring that no two objects are alike in terms of position, size, and speed. This randomness adds an element of excitement and surprise to the game, making it more engaging for players.

What’s truly remarkable is how this part of my code logically manages the recyclability aspect. By checking and categorizing the objects as recyclable or not, it directly ties into the game’s core mechanics. Thus, this coding structure effectively integrates both fun and educational elements. Furthermore, the smooth movement of these falling objects enhances the gameplay’s fluidity, which is another reason I take pride in this code section. In essence, the FallingObject class is one of the standout features in my project.

Areas for Improvement:

During the development process, some challenges were encountered, such as refining the game’s difficulty curve and maintaining a balance between fun and education. I can implement adaptive difficulty levels that adjust based on the player’s performance for the next project. If a player consistently performs well, increase the challenge. If they struggle, offer easier levels or hints. Developing adaptive difficulty will make the game remain engaging for players of different skill levels. Moreover, the accessibility of the game, especially for younger players, was one of the considerations. Ensuring that the game is both fun and easy to understand for its target audience presented a significant design challenge. Despite these challenges, I believe my project successfully aligns entertainment with educational objectives, creating a promising tool for waste segregation awareness and fostering eco-conscious habits among students.

Final Midterm Project

Midterm Project Link: https://editor.p5js.org/jiho.choi/full/Iz4oCo4Lf

I wanted to make my Midterm project personal and the first thing that naturally popped into my mind was music. Music is such a big part of my life and I can confidently say that I probably will never be seen anywhere without my earphones. The original plan was to incorporate illustrations to use as music backgrounds, but I was experiencing an art block after my comlab webcomic assignment. I physically couldn’t get myself to draw again so instead I decided to code and make use of my knowledge thus far. Essentially, different songs would show different illustrated backgrounds that corresponded to my most profoundly remaining memory of that music. Whilst the backgrounds came off a bit cliche, it was still an honest memory so I was somewhat fine with it. Because my past assignments lacked a clear focus on aesthetic appearance I tried my best to achieve that particular quality. I thought a vintage radio graphic would look more visually pleasing and doable to code so that was the path I stuck with.

The way it works:
1) press play ==> music plays.
2) pause music ==> background changes to default.
3) skip button + play button ==> plays next song.

This process wasn’t at all a fond memory but instead was incredibly taxing, stressful and frustrating. Up until coding the vintage radio, things were going very smoothly and I was having so much fun… but once it got to coding the backgrounds, there was rapidly building friction. I was unfortunate enough to experience first-hand the importance of manually saving your code every 10secs. I had spent 6 hours coding my bg#1 and I thought it was autosaving as I went. Clearly I was wrong and the webpage malfunctioned and gave me the: “something went wrong” page…
But overall I’m proud that I was able to pull off what I would consider in my books a complex piece. Again, I used assignment#3 as a a guiding reference to creating my own version of this piece.

Parts I am most proud of:

function mouseClicked() { 
  let x = 337; // x-coordinate of the second ellipse
  let x2 = 387; // x-coordinate of the third ellipse

  if (mouseX >= x - 20 && mouseX <= x + 20 && mouseY >= 471 && mouseY <= 511) {
    if (song.isPlaying()) {
      song.pause();
    } else {
      song.play();
    }
  } else if (mouseX >= x2 - 20 && mouseX <= x2 + 20 && mouseY >= 471 && mouseY <= 511) {
    if (playButtonCount === 0 || playButtonCount === 2) {
      currentSongIndex = (currentSongIndex + 1) % songs.length;
      song.stop();
      song = loadSound(songs[currentSongIndex]);
      if (playButtonCount === 0) {
        song.play();
        playState = 1;
        playButtonCount = 1;
      }
    }
  }
}

1) mouse click function to control when the music plays and pauses and skips to the next song. This I really had to sit down and think and for some parts, especially those requiring maths (marking down the boundaries of buttons) it was more trial and error and once again hardcore searching on google.

class Wave {
  constructor(xIncrement, yIncrement, xoff, yoff, color) {
    this.xoff = xoff;
    this.yoff = yoff;
    this.xIncrement = xIncrement;
    this.yIncrement = yIncrement;
    this.color = color;
  }
  displayWave(yOffset) {
    fill(this.color);
    stroke(255);
    strokeWeight(3);
    beginShape(); //creating wave shapes in variation 
    for (let x = 0; x <= width; x += 3) {
      let y = map(noise(this.xoff, this.yoff), 0, 1, 600 + yOffset, 700 + yOffset); //determining minimum/ maximum height of waves
      vertex(x, y);
      this.xoff += this.xIncrement; //increments this.xoff by this.xIncrement 
    }
    this.yoff += this.yIncrement; //increments this.yoff by this.yIncrement 
    vertex(width, height + yOffset);
    vertex(0, height + yOffset);
    endShape(CLOSE); //
  }
}

2) I had been googling different ways people had used p5.js to embody beach art and I spontaneously came across the noise function used by someone with really high qualifications. Of course the code was way too complicated for me to understand fully let alone use so I continued browsing but found another more helpful link, by p5.js. I used the code provided and tweaked around with numbers to understand what each line of code did and what role of the numbers were, since there were a lot… Similar to the one above this also required a lot, A LOT  of trial and error, especially with creating multiple wave layers(?) which took up half my day.

IMPROVEMENTS: There is a lot I’d like to mention for improvements…
1) firstly, I didn’t realise the space in the radio handle was opaque. I was on a race against time and so couldn’t afford to really observe the drawing. This is especially such a shame since it really cuts back on the aesthetics.

2) Another thing I’d like to mention is the fact that the details of the background aren’t quite clear because the radio size is too big. Of course I already went through a prior episode and so didn’t think it wise to change all the numbers relating to class: radio. Instead I opted to make the canvas bigger, originally it had been 800, 800. (prior episode==>) This too was an incredibly onerous process because every positioning detail relies on coordinates. So I had to go through each line of code to adjust the numbers, of course I’d like to believe that there is a much better solution but again, with my current knowledge on coding, this was the best I could come up with.

3) the requirement for this project was that a loop is required, a way to reset the experience. That was what my on/ off button was for. My plan was that when the on/off button was pressed when music was playing, music would pause. But if button was pressed when no music was playing, song would restart and automatically play. This for the life of me would not work. Somehow I got the last 2 buttons to work yet the first one was refusing to cooperate. If I tried to implement some code targeting the first button, then the interaction for the last button would not work. Of course I still have not been able to conquer this specific part of the code…

4) music backgrounds… This gave me such a headache I spent almost 5-6 hours trying to look for a solution but came up with zilch. When I tried to integrate the codes from e.g., sunset.js to sketch.js (my main sketch file), for some reason which to this day I still don’t know, the positioning, stroke weight and order of shapes went haywire. I really cannot think of a reason why since the backgrounds were created on a same-sized canvas. Because I couldn’t present a blank, half finished project, I had to compromise by uploading the png form of these javascript files, which didn’t look too bad. It just looked a bit dull since everything was static.

5) another thing relating to background, I felt like there was a big quality difference in bg#1 and bg#2 which still really irks me and leaves me feeling dubious about the quality of my project. For next time, I’d like to really delve into and experiment with the cool p5.js effects before contemplating a design because that’s how I discovered the noise function. Through serendipitous search!

6) finally along the way a part of my code ceased to work: click radio = radio change colour. There was too much to keep track of and if one thing worked, another didn’t, so I don’t even know at what point it stopped working. I ran out of time at the end and I am planning to go through to try and solve the issue.

Links and images to separate relating javascript files:


background#1 – “rises_the_moon”:
https://editor.p5js.org/jiho.choi/full/G8s6Rfgxn

background#2 “in_my_room”:
https://editor.p5js.org/jiho.choi/full/koRh51OvD


Midterm Project

Full Link to the Project: https://editor.p5js.org/MayaLeeeeee/sketches/-N67RBhJJ

Project: Hey, Breathe

*** The project is shown cut-off due to the layout of the Intro to IM page.

Concept)
The overall concept was to create an interactive game, where the movement of the player would depend on the voice of them. I initially planned to use both pitch and volume for the movement. (Higher pitch would move the character up, lower pitch would move the character down; higher volume would make the character move faster,  lower volume would make the character move slower).

However, as I continued with my work, I had to change that. Although playing with the pitch of sound was interesting (the playing of the game was really funny), it was absolutely impossible to play the game. The pitch changed so much that the character couldn’t stay still and it continuously spiked up and came down. I tried to manipulate it, but there was not much I can do to lower the sensitivity etc.

So, I changed the up and down movement to arrow keys. However, I did keep the idea of the input sound’s volume deciding how fast the character is moving. I wanted the character’s x position to stay still, so this eventually became the speed of the map moving.

Methods)
Basically, I have 3 elements in my game: character, obstacles, and collectibles. The red circle is the player, the black box the obstacles, and the green circles the collectibles. For the obstacles and the collectibles, I had to find a way to keep track of their locations, so that I can check if the player has hit the obstacle or has collected the collectible. I do so by using an array.

for (let i = obstacles.length - 1; i >= 0; i--) {
    obstacles[i].move(characterSpeed);
    obstacles[i].show();
    if (gameStart && character.hits(obstacles[i])) { //check if it hits obstacles
      console.log("Game Over");
      isGameOver = true;
      song.play(); //sound effect for when game over
    }
    if (obstacles[i] && obstacles[i].offscreen()) { //if offscreen, delete the obstacle from array
      obstacles.splice(i, 1);
    }
  }

I push a new obstacle/collectible into the corresponding array. I also use splice when I check if there’s anything off screen. I check the locations of obstacles and collectibles, see if they’re off screen, and if so, delete them from the array by using splice.

Future Improvements)
There is a bug where if the volume of the input sound is too big, the player passes right through the obstacles and doesn’t end the game. I am guessing that the speed of movement is quicker than the speed of checking (or something like that), and the program is not perfectly checking all the obstacles etc.

*** sound used: https://freesound.org/people/MATRIXXX_/sounds/345666/

Midterm Project

Fullscreen link: https://editor.p5js.org/fhgggtyf/full/_GaqN8_Sa

Overall Concepts

The concepts didn’t change much compared to what I thought of when planning. However, instead of staring with randomly generated maps, I chose to use the original map for the first few levels so that the difficulty won’t get too insane at the beginning. Then, after the user is familiar with the game, they will encounter randomly generated maps which are insanely difficult. The main gameplay is the same with the original Pac-Man version, but the success condition for finishing a level no longer is to eat all pellets but also reaching the portals to get to the next level. Each level has a theme which is rotated in a pool of three: fire, wood, and water. Each theme has its own sets of environment and music. This is because I do not want this game to only feel like a game to the user, but feel like a real adventure in various landscapes. The player also gets a record of their final score after their 3 health is depleted. The four ghosts each have a different logic system of pursuing the player, and the mode changes of the ghosts are coherent with the original game. As levels increase, scatter mode and chase mode ratios will change to make difficulties higher.

Implementation

The game is mostly separated into 3 modules: Game, Player, Ghosts. It could be divided to make the structure clearer but since its not such a big project I decided to keep it simple.

The game module is responsible for controlling how the game progresses. There are 3 game states, which are start, in game, and game over. In the in game state, it is responsible for the game interactions, level states, and sending signals to the ghosts making them go to different modes. There should be a game effect controller to do this but I integrated the elements into the game module instead. Basically, this module controls all in-game state changes and the program state changes.

the player module is responsible for taking in inputs and converting it into actions of the player object. it also contains stats of the player.

The ghosts module is used for calculating the actions of the ghosts. each ghost have its own rules in pursuit of the player. Also the ghosts have different states, which would effect their destination points. Overall, All ghosts have the same rules pursuing a certain destination point. However, different ghosts usually have different destination points due to their unique behaviors. Therefore I have subclasses inheriting the Ghosts class so they can determine their own destinations. These squares refers to their different destination points based on their behaviors. The squares in the following image stands for the destinations of each of the ghosts.

The code is shown below.

class Ghosts{
  constructor(){
    this.position=[1,1];
    this.img=blinkyImage;
    this.vulnerable=false;
    this.addPointFlag=false;
    this.absPos=[round(this.position[0]),round(this.position[1])];
    this.prevAbsPos=this.absPos;
    this.state=0;//prepare state
    this.dir=[1,0];//no direction
    this.speed=ghostSpeed[game.gameLevel];
    this.dest=[0,0];
    this.next=[0,0];
    this.sur=[[this.absPos[0],this.absPos[1]-1],
              [this.absPos[0]+1,this.absPos[1]],
              [this.absPos[0],this.absPos[1]+1],
              [this.absPos[0]-1,this.absPos[1]]];
    this.choices=[];
  }
  
  checkState(){ // Check ghost's state to determin action
    if(this.state==0&&this.absPos[1]>11){
      this.resetMode();
    }
    else if(this.state==9){
      if(this.absPos[0]==13&&this.absPos[1]==15){
        this.state=0;
        this.addPointFlag=false;
      }
    }
    else{
      if(game.frightened && game.frightenedTimer<=7){
        this.frightenedMode();
      }
      else{
        this.vulnerable=false;
        game.frightened=false;
        game.frightenedTimer=0;
        if(game.cycleTimer/(int(chaseTime[game.gameLevel])+int(scatterTime[game.gameLevel]))<=5 && game.cycleTimer%(int(chaseTime[game.gameLevel])+int(scatterTime[game.gameLevel]))<scatterTime[game.gameLevel]){
          this.scatterMode();
        }
        else{
          this.chaseMode();
        }
      }
    }

    
  }
   
  defeatedMode(){
    this.state=9;
    this.img=eyesImage;
    this.dest=[13,15];
  }
  
  resetMode(){
    this.dest=[13,11];
  }
  
  checkMoved(){ // check if the ghost moved a whole block, if moved calculate new destination
    this.absPos=[round(this.position[0]),round(this.position[1])];
    this.sur=[[this.absPos[0],this.absPos[1]-1],
              [this.absPos[0]+1,this.absPos[1]],
              [this.absPos[0],this.absPos[1]+1],
              [this.absPos[0]-1,this.absPos[1]]];
    if(this.absPos[0]!=this.prevAbsPos[0] || this.absPos[1]!=this.prevAbsPos[1]){
      this.calcMovement();
      this.prevAbsPos=this.absPos;
    }
  }
  
  calcMovement(){ // calculate new destination and how to get there
    this.choices=[];
    this.sur.forEach(element => {
      if((element[0]!=this.prevAbsPos[0] || element[1]!=this.prevAbsPos[1]) && mapData[game.mapNum][element[1]][element[0]]!=1){
        if((this.state != 0 && this.state != 9)&& mapData[game.mapNum][element[1]][element[0]]==3){
        }
        else{
          this.choices.push(element);
        }

      } 
    });
    
    if(this.choices.length==0){
      if(this.absPos[0]==1 && this.absPos[1]==14){
        this.position=[26,14];
        this.absPos=[round(this.position[0]),round(this.position[1])];
        this.choices.push([25,14]);
      }
      else if(this.absPos[0]==26 && this.absPos[1]==14){
        this.position=[1,14];
        this.absPos=[round(this.position[0]),round(this.position[1])];
        this.choices.push([2,14]);
      }
    }
    
    let closest = Infinity;
    
    this.choices.forEach(element => {
      
      let difference = sq(element[0]-this.dest[0])+sq(element[1]-this.dest[1]);

      // Check if the current element is closer than the previous closest element
      if (difference < closest) {
        closest = difference;
        this.next = element;
      }
    });
    
    this.dir=[this.next[0]-this.absPos[0],this.next[1]-this.absPos[1]];
  }
  
  moveToNext(){ // move
    if(this.dir[0]!=0){
      this.position[0]+=this.dir[0]*this.speed*deltaTime/1000;
      this.position[1]=this.absPos[1];
    }
    else{
      this.position[1]+=this.dir[1]*this.speed*deltaTime/1000;
      this.position[0]=this.absPos[0];
    }
  }
  
  frightenedMode(){
    this.vulnerable=true;
    this.img=vulImage;
    if(this.choices.length>1){
      this.dest=this.choices[floor(random(this.choices.length))];
    }

  }
  
}

class Blinky extends Ghosts{
  constructor(state,dest,position,img){
    super(state,dest,position,img);
    this.position=[13.5,11]
    this.img=blinkyImage;
  }
  
  scatterMode(){ // Scatter mode determine destination
    if(this.state!=2){
      this.dir[0]=-this.dir[0];
      this.dir[1]=-this.dir[1];
      this.state=2;
    }
    this.dest=[27,0];
  }
  
  chaseMode(){ // Chase mode determine destination
    if(this.state!=1){
      this.dir[0]=-this.dir[0];
      this.dir[1]=-this.dir[1];
      this.state=1;
    }
    this.dest=player.position;
  }
  
  display(){
    if(this.state!=9 && this.vulnerable==false){
      this.img=blinkyImage;
    }
    fill("red");
    // rect(this.dest[0]*40,this.dest[1]*40,40,40);
    image(this.img,this.position[0]*40,this.position[1]*40,40,40);
    fill(0); // Set the text fill color to black  
  }

}

In the code above I only shown one subclass so that it won’t be too long. The basic concept of the subclasses are similar. I am pretty proud of this part because the structure is clear and it made the development progress so much easier.

Areas for Improvement

Some areas of improvements could be the aesthetics of the different scenes. I planned to do a pixelated low-poly tile-map styled map design but it turned out to look very unnatural and dirty. If I have more knowledge in graphic design I might be able to do better. Another thing is that the program has a few minor rule bugs that may allow the user to gain points incredibly fast (with a great risk). Maybe I’ll fix them in the future. Also, the random maps may cause the ghosts to behave abnormally because of the limitations of a 43-year-old algorithm. It could also be refined. Also a user login system could be applied to store people’s personal bests online. Apart of random maps, I could also add one way areas or blockages that would slow the player down, etc. But that would require refines in the ghosts’ AI, which I didn’t have time to do in this project.

Midterm Project: Soundscapes//Landscapes

Concept

Initially, I had planned on making a project with gravity manipulation as a core mechanic. However, I did not particularly like the ideas that I came up with. One particular idea was to create a voxel-based game where players could create objects that would fall to the ground. Upon impact, the land would be destroyed based on the momentum of impact. However, this proved to be difficult. I might attempt this for a future project, but the idea I settled on took its roots in this idea of a voxel-based landscape, where a voxel is a 3-dimensional pixel.

My idea was to implement a landscape constructed with voxels, and the player could play around with. For ease of computation and aesthetic preferences, I decided to make the voxels change height instead of stacking voxels to create the terrain. Additionally, I gave the players the ability to change from 3D to 2D and vice versa.

Lastly, to complete the experience, I added sounds that vary based on the nature of the landscape. The user can control different attributes of the landscape, and experience what it sounds like.

Note: Please enter Fullscreen mode to view the controls.

P.S: Headphones are recommended!

Design

I really enjoy pixel art, which is why I wanted my landscape to be pixel-based instead of being a continuous plane. Some of my previous projects have had the same style, so I wanted to stick to something that I knew design-wise.

To move from 3D to 2D and vice versa, I decided to implement the landscape to be comprised of boxes whose height varies according to Perlin noise. The noise depends on the spatial coordinates of each box in the space, as well as their height in the previous frame. The noise also depends on time, so the landscape evolves right in front of your eyes.

I particularly like the way I transition from the 2D view to the 3D view. The plane rotates as it grows and morphs into a landscape, which is a sleek effect and adds to the experience in my opinion.

The above video is an early sample from the project, where the project was supposed to be a landscape editor with physical interactions.

Code Highlights

Although I’m proud of many parts of the code, there are a few pieces that add a functionality that ties the entire project together.

For example, the following code changes the soundscape by calculating the percentage of each type of terrain on the current landscape and sets the volume of each corresponding sound based on how much of that terrain is present.

//set soundstage according to the composition of the landscape
 if (timeEvolution) {
   playSounds();
   //set audio volume based on the number of tiles of each type
   waterSound.setVolume(
     map(landscape.waterCount, 0, landscape.totalGridPoints, 0, 0.2)
   );
   sandSound.setVolume(
     map(landscape.sandCount, 0, landscape.totalGridPoints, 0, 0.2)
   );
   landSound.setVolume(
     map(landscape.landCount, 0, landscape.totalGridPoints, 0, 0.2)
   );
   mountainSound.setVolume(
     map(landscape.mountainDirtCount, 0, landscape.totalGridPoints, 0, 0.6)
   );
   mountainRockSound.setVolume(
     map(landscape.mountainRockCount, 0, landscape.totalGridPoints, 0, 0.1)
   );
   snowSound.setVolume(
     map(landscape.snowCount, 0, landscape.totalGridPoints, 0, 0.2)
   );
 } else {
   stopSounds();
 }

Despite it being a very simple case of using the map() function, the depth this code snipped creates for the overall piece is amazing, giving the whole experience a much-needed atmospheric vibe.

Project Design — The Good

The way the land is created is by creating a Landscape object, which is a container that manages multiple Tile objects. Each Tile is represented as a box with a particular height. The way the height is determined is using Perlin Noise, which takes in the spatial coordinates of each tile as well as the point in time and spits out a number between 0 and 1. This number is then mapped between a minimum and maximum height-scale, and so we get a landscape comprised of multiple tiles that vary in height.

Perlin noise was the perfect tool to use for generating landscape. Landscapes are typically very smooth, with areas close to each other having similar elevation. Conveniently, Perlin noise outputs similar values for similar input values, giving us areas of higher elevation and other areas of lower ones.

The last part that makes this project come together is using the calculated noise value for different things. With some thresholds, you can specify what heights should be water and which should be grass, so on and so forth. With this, one can color the landscape differently based on the elevation, which really produced a natural looking landscape.

Also, I feel like having sliders being the only controls was a good idea. Sliders are very intuitive to use, and one can figure out how they integrate with the project in no time. I wanted to have other controls in the beginning — like a brush that allows you to morph the canvas — but realized that those controls were just muddying the experience. Instead, I decided to focus on the aesthetic choices like the sound design, which I believe added way more than the brush tool would have.

Project Design — The Not So Good

Working on this project was frustrating. Funnily enough, creating the landscape and everything related to that took no time. However, what I did not realize at that time was how difficult it would be to integrate 2D portions, like the menu and buttons, back into the project.

Firstly, I decided to use a library called EasyCam. This allowed me to easily create a camera object that could be programmed with animations so that it shifted from one perspective to another with a smooth transition, with the click of a button. However, as I started working on the 2D elements, I realized what I had gotten myself into.

Turns out, you cannot really create 2D portions when using the WEBGL renderer. My first thought was to create multiple canvases and swap them when switching to the menu, but that does not work as the renderer is still WEBGL which is 3D.

Then I tried to experiment with something known as Instance mode. Basically, everything that we run in a P5js sketch is part of a larger P5js object. What you can do is create multiple p5js objects to be able to use namespaces, which is just a larger scope that you can specify when declaring object. I did try that, and everything ran, but I was still confused on how to create the menu using instance mode. Thinking back, I realize that I should have stuck to that route, as it would have been much more elegant compared to the solution I came up with.

In the end, I decided to use an idea that I learnt from one of Daniel Schiffman’s videos of turning the menu into a texture and applying it to a plane. Here is where the use of EasyCam proved to be a bad choice. I basically had two states: a game state and a menu state, which would show either the instructions menu or the main game menu. Since the plane lives in a 3D world, the camera being at a different position when going into the menu means the menu plane will be viewed from a different angle. To top this off, the mouse coordinates are skewed when compared to the world coordinated because the world is seen through the lens of the camera. All of this made it hard to implement a menu that was in the right orientation, and buttons that were clickable.

However, I was able to make a crude solution by resetting the camera every time the game state changes. This way, the camera returns to the neutral position when in the menu, and goes back to being movable in the game state.

Overall, I’m proud of the end result, but looking at the guts of the project I see that there are many aspects that can be improved. Still, it was a project that I spent many hours working on, and I’m glad I had fun along the way.

Resources

How to set up JavaScript namespace and classes properly? — Stack Overflow

createGraphics() p5.js Tutorial — The Coding Train

createGraphics() as WebGL Texture — The Coding Train

3D Terrain Generation with Perlin Noise in Processing — The Coding Train

How to Code Procedural Terrain with Perlin Noise (JavaScript & p5.js) — RachelfTech

Font Used

Overbyte


Midterm Presentation: The Designer Chair Plunge

Sketch:

Link to full screen: https://editor.p5js.org/llluka/full/EZEndFCFm

https://editor.p5js.org/llluka/sketches/EZEndFCFm

Concept:

The game, titled “Designer Chair Plunge,” is a fun and interactive experience that puts players’ reflexes and decision-making skills to the test while exploring the world of designer chairs. The goal is for the player to save a designer from a risky fall, guided by a humorous story in which the chairs are personified as fighters. As the player, you select your “fighter” from a range of well-known designer chairs including Barcelona, Eames, Panton and Wassily chairs, and the classic white plastic chair is added for the humorous effect. When the game begins, you must manipulate your chosen chair in order to capture a falling designer.  Your score rises with each successful rescue. However, be careful not to let a designer plunge to the ground, as this will result in an offensive game over. “Designer Chair Plunge” combines design appreciation and gaming components, creating a novel and enjoyable way to interact with the world of furniture design.

Technical Implementation:

The game is built on the p5.js framework utilizing object-oriented programming. There are various screens in the game for the introduction, chair selection, gaming, and ending. PNG images and sounds are used in the technological implementation to create an immersive experience. Chairs and designers are represented by images, and interactions are managed through mouse input, where the player selects their chair and attempts to catch designers falling from the top of the screen. The game keeps track of the player’s score and ends the game if a designer hits the ground. The “restart” function not only resets the game state but also ensures the music restarts from the beginning, creating a consistent and enjoyable audio experience for the players. Here is the code for the restart function:

function restart() {
  screen = 0; // switch to intro screen
  score = 0;
  designer.reset();
  designer.speed = 2; // reset the speed of the fall
  mozart.stop(); // stop currently playing sound
  mozart.play(); // start the sound from the beggining
}

Moreover, the falling designer figures are randomized from 3 distinct images. Here is a function inside my Designer class that handles that:

display() {
    if (this.r < 0.3) {
      image(subject_1, this.x, this.y, this.width, this.height);
    } else if (this.r < 0.6) {
      image(subject_2, this.x, this.y, this.width, this.height);
    } else {
      image(subject_3, this.x, this.y, this.width, this.height);
    }
  }

Nevertheless, an important part of the game’s look and feel is not in the code. At first, I experimented with different images of the chairs found online, however, nothing really seemed to match my vision for the game. Therefore, I decided to draw the chairs myself to give the experience a unified aesthetic. Here are my PNG images (I used Adobe Fresco on my iPad to produce them):


Reflection:

I am very happy about the final look and feel of the project. It turned out  exactly as I imagined it to be (refer back to the moodboard in Midterm Progress #1). I am especially satisfied with the concept and design of the game, and how I managed to create and maintain a unified feel of the mid-century modern aesthetic with the tiny details such as my own drawings, sounds, and the two graphic images. I also applaud myself for the humorous aspect of the game – there is no way to “win” the game, and thus the designer is never going to be satisfied, just like in the real life.

Mid-Term project

Link to the sketch: https://editor.p5js.org/nafiha/full/215NRUgea

Concept : From the beginning of my mid-term project, I was inspired to create a cooking game, a passion that has been with me since my childhood. Initially torn between the realms of cooking and baking, I eventually decided to choose baking, given my fondness for it. However, as I started on the journey to develop the game, I soon realized that simulating baking was a far more complex task than actually baking in the real world.

Over the past few weeks, I hunt through into the mechanics of enabling users to click on various ingredients and watch them smoothly move towards a designated destination, such as a mixing bowl or even autonomously. I began with simple shapes like circles to grasp the fundamentals of this interaction. I focused on the feature of clicking on ingredients rather than implementing a drag-and-drop functionality, mastering these concepts before delving into the coding aspects.

What particularly piqued my interest was a class where our professor taught us how to create a dynamic, moving background. I decided to incorporate this element into my game, kickstarting my coding journey. The concept is intentionally straightforward and minimalist to ensure a hassle-free user experience. Upon starting the game, the required ingredients will be presented. Users need to simply click on each ingredient to successfully complete the game. Once the game is won, a cupcake will appear and they have the option to restart and play again. A picture of the sketch which was initially done to practice the method has been attached.


Part of the code that I am proud of  : This is the picture that I drew as a screen for instructions. The part of the code that I am especially proud of is when I learned to add the moving background as I mentioned earlier and to click on images from the computer to add on. And learning the function of lerp, was also exciting.

if (img.moving) {
// Move the image towards the center of the screen
let targetX = width / 2 - img.size / 2;
let targetY = height / 2 - img.size / 2;
let speed = 0.5; // Adjust the speed as needed
img.x = lerp(img.x, targetX, speed);
img.y = lerp(img.y, targetY, speed);
}
image(img.image, img.x, img.y, img.size, img.size);
}
}

Areas for improvement: Throughout the development process, I encountered numerous challenges, some of which I successfully resolved, while others remained elusive. Initially, I struggled with the issue of smoothly transitioning from one screen to the next, a task that seemed quite discouraging. After acquiring the necessary skills to address this, I then faced the problem of the background image overlapping with the added objects, which required a significant amount of time and effort to pinpoint and rectify.

In addition to these hurdles, I had originally intended to implement a time limit for the ingredient addition phase, which I, unfortunately, still couldn’t figure out. Nevertheless, apart from the time limit issue, I managed to overcome every other challenge that came my way.